Ski hairstyles for long hair can make or break your day on the slopes. Honestly, I’ve spent countless hours battling tangled tresses and uncomfortable helmet pressure before discovering what actually works.
Finding cute hairstyles for skiing isn’t just about looking good in those mountain selfies. The right style helps minimize tangles and knots while protecting your hair from cold temperatures that can cause damage. After all, nobody wants to end up with strands covered in ice and snow particles when trying to enjoy their ski adventure!
Fortunately, the best skiing hairstyles for long hair are designed to keep everything secure, comfortable, and stylish, even after hours in the cold. Braids are particularly effective because they stay in place and prevent knots, while options like a sleek low bun can tuck nicely under a helmet without adding bulk.
That’s why I’ve put together this collection of 15 helmet-friendly hairstyles that actually stay put. Whether you’re worried about helmet hair (a common concern for many of us) or just want to avoid the mess and tangles that often come with a day of skiing, these styles will keep you looking great from first chair to après-ski. Let’s dive into these game-changing looks that work with your helmet rather than against it!
Boxer Braids

Boxer braids have quickly become my number one go-to style for hitting the slopes. I discovered these versatile braids years ago and haven’t looked back since — they’re the perfect blend of function and style for those long days on the mountain.
What it is
Boxer braids are essentially two tight Dutch braids that run parallel from your hairline to the nape of your neck. Unlike traditional French braids where you cross strands over the middle, Dutch braids involve crossing the outside strands under the middle strand, creating that distinctive raised look that sits close to the scalp. The style originated with female athletes (hence the name “boxer braids”) who needed their hair secure and out of the way during intense activities.
Why Boxer Braids work for skiing
I’ve tested countless hairstyles on the slopes, and boxer braids consistently outperform others for several reasons. First, they create a remarkably flat updo that provides almost the same comfort as wearing your hair loose under a helmet. Additionally, they excel at staying put through jumps, falls, and windy conditions without needing adjustments.
What truly makes boxer braids ideal ski hairstyles for long hair is their ability to:
- Prevent tangling from helmets, goggles, and moisture
- Stay secure through wind, sweat, and multiple days of skiing
- Keep your neck and ears warmer than shorter styles
- Eliminate the dreaded frizzy, tangled aftermath
Furthermore, this style works wonderfully for second (or even third) day hair, making it perfect for multi-day ski trips.
How to style Boxer Braids
To create perfect boxer braids for skiing, I follow these steps:
- Apply texture mousse to slightly damp hair for better grip
- Part hair down the middle (make this precise for a clean look)
- Divide one section into three equal strands
- Begin braiding by crossing outside strands under the middle strand
- After a few crosses, start incorporating hair from the outside
- Continue adding hair until reaching the nape
- Secure with an elastic and repeat on the other side
- Finish with light hairspray to hold everything in place
Belle Hathaway’s tip for Boxer Braids
My secret weapon for making boxer braids last through an entire ski vacation? I apply a tiny amount of water-resistant pomade or braiding wax to the ends which significantly minimizes frizz from snow and humidity. Moreover, if I’m planning multiple days on the slopes, I sleep with a silk scarf wrapped around my braids – this preserves the style and reduces friction so I can spend less time on hair maintenance and more time enjoying the mountain.
Long Fulani Braids

Looking for a stylish alternative to traditional braids? Long Fulani braids have become one of my favorite ski hairstyles for long hair that perfectly combines eye-catching design with serious functionality.
What it is
Long Fulani braids are a trendy, modern alternative to regular ponytails where your hair is divided into multiple sections or “Braids”. These distinctive segments are created by placing hair elastics at intervals down the length of your ponytail, then gently pulling each section outward between the secured points to create that fun, dimensional bubble effect. The style sits comfortably at the base of your neck, making it ideal for wearing under helmets and other winter gear.
Why Long Fulani Braids work for skiing
I’ve discovered numerous reasons why Long fulani braids excel on the slopes. First, they’re completely helmet-friendly as they sit Braids on the head without creating awkward pressure points. The segmented nature prevents long hair from tangling during intense riding sessions.
What truly sets Fulani braids apart for skiing is:
- They effectively control long hair without causing breakage
- The bubbles create small air pockets that help insulate your neck against cold winds
- They work brilliantly for those with layered hair (unlike many braided styles)
- The multiple elastics leave no room for flyaways or static from ski coats
How to style Long Fulani Braids
Creating perfect long Fulani braids requires minimal effort:
- Prep hair by scrunching in a styling cream to tame frizzy hairs
- Gather hair into a low ponytail at the base of your neck (or try two low pigtails for more even distribution)
- Add another elastic a few inches down from the first one
- Gently pull the section between elastics outward to create your first “bubble” effect
- Continue adding elastics and creating bubbles down the length of your ponytail
- Finish with a quick spritz of hairspray
Belle Hathaway’s tip for Long Fulani Braids
Throughout my winter adventures, I’ve learned that keeping the Braids slightly smaller and tighter than you might for everyday wear creates the most durable style for skiing. Pulling out a few face-framing strands before starting creates the most comfortable fit with both helmets and balaclavas. For maximum protection on windy days, try positioning your ponytail at the very base of your neck or consider creating two low bubble pigtails to distribute hair more evenly under your helmet.
Dutch Braids
Dutch braids saved my ski vacation last winter when my usual styles failed me during a blizzard. This reliable hairstyle has become an essential part of my slope routine for both style and practicality.
What it is
Dutch braids are essentially inside-out French braids where you cross the strands under the middle section instead of over it. This technique creates those distinctive raised braids that sit close to your scalp with a beautiful 3D appearance. Although sometimes confused with boxer braids, traditional Dutch braids can be styled in various ways—as a crown, single braid, or double braids running down the back of your head. I typically opt for a Dutch braid into a ponytail for maximum versatility.
Why Dutch Braids work for skiing
Dutch braids have earned their reputation as one of the most reliable ski hairstyles for good reason. These braids are exceptionally long-lasting and can withstand even the most intense days on the slopes without problems. Consequently, they distribute hair evenly, reducing tangling and friction that typically occurs from contact with your gear.
What makes Dutch braids especially effective:
- They completely eliminate frizzy hair after a day on the slopes
- The tight weave prevents tangles from forming
- They work beautifully for both straight and curly hair textures
- The style transitions seamlessly from skiing to après-ski activities
How to style Dutch Braids
Despite looking intricate, creating perfect Dutch braids is straightforward with practice:
- Start at the crown of your head
- Divide your hair in two parts from the center (for double Dutch braids)
- Split each section into three equal strands
- Begin braiding by crossing the outside strands under rather than over
- Add a little more hair from the sides each time you cross
- Continue this pattern until you reach the nape of your neck
- Either secure with an elastic or transition into a low ponytail
- Use a scrunchie or soft elastic to avoid breakage
Belle Hathaway’s tip for Dutch Braids
I’ve discovered that Dutch braids actually look better after wearing a helmet all day—they develop a naturally lived-in texture that’s perfect for après-ski. Obviously, applying a small amount of lightweight texturizing spray before braiding enhances grip without causing stiffness. Instead of creating perfectly symmetrical sections, try slightly uneven partings for a more modern, effortless appearance that still functions perfectly on the mountain.
Low Ponytail

Sometimes the simplest solutions are truly the best. As someone who spends countless hours on the slopes, I’ve found the low ponytail to be a go-to style that never disappoints, primarily for its ease and reliability.
What it is
A low ponytail is exactly what it sounds like – a ponytail positioned at the nape of your neck rather than higher on the head. This minimalist hairstyle keeps hair neatly gathered without creating bulk or awkward bumps under your helmet. The positioning is key – sitting just outside the helmet where it can be easily tucked into your neck buff or inside your ski jacket.
Why Low Ponytail works for skiing
The low ponytail excels on the slopes for several practical reasons. First, it’s incredibly helmet-compatible thanks to its low positioning that prevents uncomfortable pressure points between your head and helmet. The style works wonderfully for any hair type and requires minimal maintenance while skiing.
This hairstyle offers notable advantages:
- Keeps hair securely contained and protected from harsh winter conditions
- Prevents tangling from wind and movement
- Transitions beautifully from slopes to après-ski gatherings
- Works perfectly for mid-length hair as well as longer locks
One practical consideration: I typically avoid this style during heavy snowfall as it can leave your hair vulnerable to becoming wet and frozen.
How to style a Low Ponytail
Creating the perfect low ponytail for skiing is straightforward:
- Begin with thoroughly brushed hair to prevent painful tangles later
- Apply a lightweight styling cream or serum to smooth flyaways
- Secure your ponytail at the nape of your neck with a strong, damage-free hair tie
- For extra security, take plenty of thick hair elastics to keep your ponytail in place all day
- Consider tucking ends into your jacket for added warmth and protection
Belle Hathaway’s tip for Low Ponytail
From my experience, the secret to making this style work all day is using the right hair accessories. I swear by invisibobble-style hair ties or silk scrunchies that secure hair without causing breakage or leaving kinks. Frequently, I find that slightly moisturizing my hair before styling helps prevent static and flyaways caused by dry mountain air. For added protection on particularly cold days, I tuck the ponytail portion under my neck gaiter, which keeps everything secure throughout the day.
Sleek Low Bun

For elegant simplicity on the slopes, the sleek low bun has become my trusted companion throughout countless winter adventures. This timeless hairstyle offers that rare combination of sophistication and practicality that works beautifully even during intense skiing sessions.
What it is
The sleek low bun is exactly what its name suggests—a smooth, polished bun positioned at the nape of your neck. Unlike messier variations, this style focuses on keeping everything sleek and contained with minimal flyaways. The positioning is intentionally low, creating a flat profile that works wonderfully beneath helmets without creating that uncomfortable bulky bump many other styles cause.
Why Sleek Low Bun works for skiing
The sleek low bun truly excels as one of the most effective ski hairstyles for long hair for several compelling reasons. First, it sits perfectly under helmets without creating awkward pressure points or that dreaded helmet tilt that can compromise safety. Equally important, this style keeps every strand completely contained throughout your skiing session.
What makes this style particularly valuable:
- Transitions effortlessly from helmet-on to helmet-off situations
- Works exceptionally well for curly hair seeking a sleek look
- Offers a chic silhouette that moves seamlessly from slopes to après-ski
- Provides exceptional staying power against wind, sweat, and movement
How to style a Sleek Low Bun
Creating this helmet-friendly look requires minimal effort:
- Gather your hair into a low ponytail positioned at the nape of your neck
- Apply lightweight styling cream or serum to smooth any flyaways
- Twist the ponytail into a loose bun formation
- Secure with bobby pins or a scrunchie for all-day hold
- Finish with a touch more styling cream if needed
Belle Hathaway’s tip for Sleek Low Bun
Ultimately, the secret to making this style last through multiple runs lies in preparation. I always apply a small amount of silicone-free leave-in conditioner before styling. This keeps hair moisturized against harsh winter conditions without creating buildup. Indeed, for multi-day ski trips, I simply tuck loose ends back each morning—this style easily lasts 2-3 days with minor touch-ups.
Braided Low Bun

The versatility of the braided low bun made it my lifesaver during a week-long ski trip last season. This elegant yet practical style kept my hair perfectly protected through multiple runs and après-ski gatherings.
What it is
The braided low bun combines two wonderful elements—braids and a bun—positioned at the nape of your neck. First, you create braids with your hair, primarily two sections, then secure them into a knot-like bun formation. It’s perfect for shoulder-length or longer hair, offering both elegance and functionality throughout even the most active days on the slopes.
Why Braided Low Bun works for skiing
First of all, the braided low bun creates a flat profile that fits comfortably under helmets without creating pressure points. Given that it sits at your nape, it avoids any uncomfortable helmet fit issues. Not to mention, this style offers complete protection from snow and wind while keeping every strand contained and secure.
The benefits are notable:
- Maintains its appearance even after intense physical activity
- Protects hair from damaging winter elements
- Works beautifully for medium to long hair
- Transitions perfectly from slopes to social gatherings
How to style a Braided Low Bun
To create this style:
- Brush your hair and optionally tease slightly on top
- Divide your hair into two equal sections
- Braid each section and temporarily secure with elastics
- Pull strands within the braids for fuller appearance
- Cross-fold the two braids, tying them in a knot-like formation
- Pin braids securely near the elastic
- Remove elastics and tuck remaining ends underneath
Belle Hathaway’s tip for Braided Low Bun
After trying countless variations, I’ve found that adding a decorative hairpin or elegant headband elevates this style from purely functional to absolutely stunning. Even more, slightly teasing your hair before braiding creates that extra volume that prevents helmet hair at day’s end.
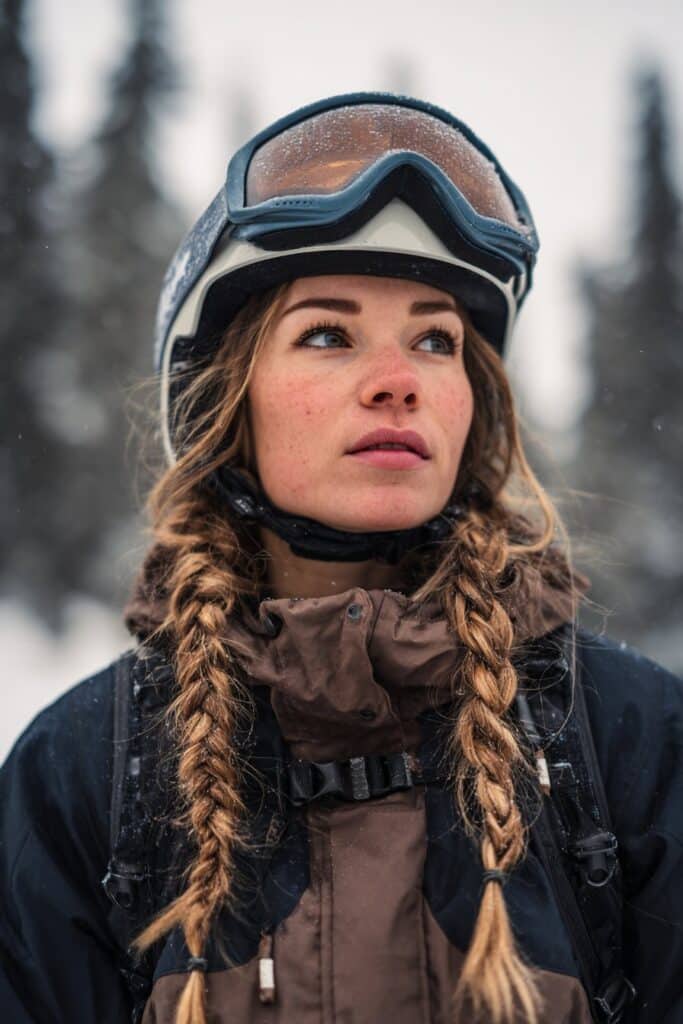
French Braid Pigtails

French braid pigtails remain one of the most timeless ski hairstyles I’ve ever tried. Whenever friends ask about reliable styles for the mountain, these classic braids top my recommendation list.
What it is
French braid pigtails consist of two even braids that start at the crown and extend downward. This classic style involves parting your hair down the middle and creating French braids on each side. Unlike regular braids, French braids incorporate additional hair as you move down the scalp, securing every strand in place.
Why French Braid Pigtails work for skiing
French braid pigtails excel as ski hairstyles for long hair primarily because they distribute hair evenly, thereby reducing tangling and friction. Firstly, they keep hair well-attached throughout jumps and tricks. Additionally, these braids fit comfortably under helmets and prevent the frustration of frizzy hair after hours on the slopes.
How to style French Braid Pigtails
To create perfect French braid pigtails:
- Part hair down the middle of your entire head
- Secure one side with a hair tie
- Take a small section at the crown and divide into three equal parts
- Begin braiding, adding small chunks from both sides as you go down
- Once you reach the nape, continue with a regular braid
- Secure with an elastic and repeat on the other side
Belle Hathaway’s tip for French Braid Pigtails
Ultimately, French braiding takes practice – the more you do it, the better you’ll become. On balance, you can personalize this style by adjusting the chunk sizes – larger sections create looser, chunkier braids for a more relaxed look. For protection, tuck your finished braids into your jacket during intense sessions.
Fishtail Braid

I’ve made fishtail braid my signature ski style for several seasons now. This striking hairstyle offers that perfect mix of intricate design and practical function that keeps hair secure through even the most challenging runs.
What it is
The fishtail braid combines two popular styles – starting with a secure ponytail that transitions into a distinctive fishtail braid. Unlike traditional three-strand braids, fishtail braids use just two sections, with small pieces crossed from the outer edges to create that recognizable herringbone pattern. The finished look mimics a fish’s skeleton (hence the name) while providing remarkable hold throughout active sports.
Why Fishtail Braid works for skiing
This style keeps hair completely contained yet offers more visual interest than a standard ponytail. The intricate weaving pattern prevents tangles even during high-speed runs or tumbles in powder. The tight braid structure minimizes friction between your hair and neck gaiter, subsequently reducing that annoying static electricity buildup common with looser styles.
How to style a Fishtail Braid
- Begin by gathering your hair into a secure at your desired height
- Split the ponytail into two equal sections
- Take a small strand from the outer edge of one section
- Cross this strand over and add it to the inner edge of the opposite section
- Repeat on the other side, continuing this pattern down the length
- Secure the end with a small elastic
Belle Hathaway’s tip for Fishtail Braid
I always apply a lightweight texturizing spray beforehand – it gives enough grip without stiffness. For extra security throughout multiple runs, gently tug each crossed section tight as you go, then slightly loosen afterward for that effortlessly chic appearance. Plus, this style works wonderfully for second-day hair, helping extend time between washes during multi-day ski trips.
Double Dutch Buns

Playful yet practical, Double Dutch Buns have saved me from countless bad hair days during winter sports adventures.
What it is
Double Dutch Buns are essentially two buns positioned on either side of your head, created using Dutch braiding techniques. Unlike regular space buns, these incorporate the under-crossing Dutch braid method first, creating a secure foundation before wrapping the ends into buns. This combination gives you the best of both worlds—the security of braids with the contained style of buns.
Why Double Dutch Buns work for skiing
This style distributes hair weight evenly across your head, preventing that uncomfortable one-sided pressure under helmets. The braided foundation prevents slippage even during high-impact landings, so you won’t need constant touch-ups between runs. For those with shorter layers, the Dutch technique captures those problematic pieces that typically escape during activities.
How to style Double Dutch Buns
- Part hair evenly down the center
- Create a Dutch braid on each side, starting from the front
- Braid until you reach the ends
- Wrap each braid into a bun
- Secure with bobby pins in an X formation
Belle Hathaway’s tip for Double Dutch Buns
Position your buns slightly lower than your ears for optimal helmet comfort. Adding a tiny bit of hairspray to your brush before beginning helps capture flyaways without creating stiffness. This style works wonderfully even with layered hair!
Twisted One Sided Low Braid

The twisted One sided low braid quickly became my go-to hairstyle after discovering it during a particularly windy ski weekend at Aspen. This unique style offers superior hold while maintaining a sleek, stylish appearance.
What it is
The twisted one sided low braid elegantly combines elements of standard braiding with fishtail techniques, creating a rope-like texture that’s both functional and fashionable. This style features twisted sections of hair gathered into a low ponytail positioned at the nape of your neck, forming a look that’s simultaneously sophisticated yet practical.
Why Twisted One Sided Low Braid works for skiing
Primarily, this braid excels on the slopes because the twisting technique locks your hair in place, preventing the gradual loosening that plagues regular ponytails. The low positioning works perfectly with helmets without creating uncomfortable pressure points. Honestly, I’ve found this style remains intact even throughout jumps and quick carves.
How to style a Twisted One Sided Low Braid
Creating this secure style requires these steps:
- Brush hair thoroughly to remove tangles
- Divide the top section into two equal parts
- Twist both sections away from your face
- Continue adding hair to each twisted section while moving downward
- Secure everything together in a low ponytail
Belle Hathaway’s tip for Twisted One Sided Low Braid
Initially, I struggled with this style until discovering that slightly dirty hair provides better grip. Throughout my years skiing, I’ve found that a light spritz of dry shampoo beforehand helps maintain hold all day! This style transitions perfectly from slopes to après-ski gatherings, maintaining its elegant appearance even after removing your helmet.
Two Sided Braids With Headband

Headband braids offer that perfect facial-framing effect while keeping hair secure throughout intense ski sessions. After trying numerous styles over the years, I’ve found this versatile option works remarkably well for varying conditions on the mountain.
What it is
Headband two sided braids create a beautiful woven pattern that frames your face, starting from behind one ear and continuing around your head. This versatile style can be worn with your hair fully collected, half collected, or loose. Nonetheless, for skiing specifically, I recommend the fully collected version as it prevents weather damage and keeps everything secure under your helmet. Furthermore, this quick style takes only about 5 minutes to complete, making it perfect for those early morning slope sessions.
Why Headband Two Sided Braids best for Skiing
Headband braids work magnificently for all facial shapes and hair types—including curly, wavy, straight, or layered hair. Primarily, this style shines on the slopes because it keeps hair completely out of your face while simultaneously absorbing sweat. When worn fully collected, it effectively prevents the frizz and tangling that typically plague skiers throughout a long day. Additionally, the secure nature of these braids means no mid-run adjustments or flyaway strands.
Belle Hathaway’s tips for Headband Two Sided braids
Starting with second-day hair provides much better grip for lasting hold. To create perfect headband braids, I first choose which area to start from, separate that section into three parts, and begin braiding toward the back of my ear while staying close to the scalp. Presently, I use pomade for added control and employ scrunchies instead of regular elastics to prevent breakage. Typically, I secure the finished braid with pins at the neck to ensure it doesn’t budge through jumps and falls.
High Ponytail

Among all my go-to ski hairstyles, the High ponytail offers that perfect blend of fun and functionality. This trendy style has saved me from countless hair disasters on windy mountain days.
What it is
The high ponytail combines a traditional ponytail with distinctive “high” segments created by placing hair elastics at intervals down your hair. It features a ponytail divided into multiple sections that, when gently pulled outward between secured points, create a dimensional. This style works wonderfully for medium to long hair, with wavy or curly hair providing natural volume that enhances the look.
How It works for Skiing
Prior to discovering this style, I struggled with hair tangling during intense riding. Thankfully, the segmented nature of High Ponytail prevents long hair from tangling while adding a fun, sporty look. The style sits comfortably at the base of your neck without creating pressure points under your helmet. Primarily, what makes it perfect for skiing is how the multiple elastics leave absolutely no room for those frustrating flyaways or static from ski coats.
Belle Hathaway’s Tips
For optimal results, I recommend keeping bubbles slightly smaller for skiing than you would for everyday wear. Pulling out face-framing strands beforehand creates the most comfortable helmet fit. Certainly, applying a small amount of anti-frizz serum before styling maintains this look through multiple runs.
The Wrapped In Hairs

The wrapped in hairs has completely transformed my winter sports experience with its deceptive simplicity yet remarkable effectiveness under harsh mountain conditions.
What it is
The wrapped in hairs involves elegantly concealing your hair tie by wrapping a section of your own hair around the base of the ponytail. This classic hair trick creates a much neater, more polished appearance without requiring bobby pins, extra elastics, or specialized tools. Fortunately, there’s an easy technique that makes this style surprisingly accessible for everyone. In fact, it’s the hidden elastic that elevates this from a basic ponytail to a fancy hairstyle that looks intentional even after hours on the slopes.
How it best for Skiing
What makes the wrapped in hairs ideal for skiing is its streamlined profile that fits perfectly under helmets without creating uncomfortable pressure points. The wrapped section secures everything in place, preventing the gradual loosening that typically happens with regular ponytails during active movement. Altogether, this style keeps your hair contained in a sleek way that prevents tangles from wind and cold, ultimately saving hours of painful detangling after your ski session. The wrapped base also provides additional protection against the friction caused by helmet movement.
Belle Hathaway’s Tips
From years of trial and error, I’ve discovered that slightly damp hair works best for creating this style. Start with a secure low ponytail, then separate a thin section from underneath. Wrap this section around the elastic, creating even loops about one inch apart. Secure the end with the “tuck-under” technique by pulling it beneath the elastic rather than using pins that could create pressure points under your helmet. For extra security, use a second elastic at the base.
Rope Braid Ponytail

The versatility of a rope braid ponytail saved my hair repeatedly on the mountain this season. This twisted style offers both protection and panache when I’m carving through fresh powder.
What it is
The rope braid ponytail consists of two twisted sections crossed together, creating a rope-like appearance that’s both secure and stylish. Unlike traditional three-strand braids, this style uses just two sections twisted away from your face, then crossed over each other repeatedly. The finished look resembles a twisted rope, adding wonderful texture while keeping everything neatly contained. Typically taking only five minutes to complete, it works beautifully for medium to long hair lengths.
How it Works
Throughout a full day of skiing, this style maintains its integrity where others fail. The twisting technique locks each strand securely, preventing the painful tangles that often result from wind and moisture. The finished style lies flat against your neck, fitting comfortably beneath helmets without creating pressure points. Overall, it provides that perfect balance between function and style – keeping hair protected while looking intentionally chic for après-ski festivities.
Belle Hathaway’s Tips
My secret for the perfect rope braid? Apply a small amount of argan oil beforehand as a protective treatment. This not only guards against winter dryness but also reduces friction between strands. Meanwhile, choosing a soft fabric hair tie prevents breakage at the base. Accordingly, I suggest twisting counterclockwise for the most secure hold. For maximum longevity, twist each section tightly before crossing them together.
Viking Braids with Twisted Crown

I discovered Viking Braids with Twisted Crown during a three-day powder expedition, where traditional styles simply couldn’t hold up against the intense conditions.
What it is
Viking braids with twisted crown combine two distinct elements that work harmoniously together. This eye-catching style features side braids (typically rope braids) along with a French braid or twisted section forming a crown across your head. Unlike perfectly polished styles, Viking braids embrace a slightly undone, tousled appearance that’s intentionally relaxed yet secure. The Nordic-inspired design typically uses long natural hair woven into a structure meant to appear somewhat loose while remaining functional. Many variations incorporate mohawks, undercuts, or additional braiding techniques for personalized flair.
How it Best
For skiing specifically, this style offers remarkable advantages. The twisted crown section secures flyaway hairs at the front, eliminating that annoying forehead itch inside helmets. Furthermore, the side braids distribute hair evenly, preventing uncomfortable pressure points. Most importantly, this style remains functional throughout vigorous activity without requiring constant adjustment. The slightly messy nature of Viking braids actually works to your advantage – after a day under your helmet, the style looks even better with that lived-in texture.
Belle Hathaway’s Tips
From personal experience, I recommend starting with slightly textured hair for optimal grip. Typically, I create loose Viking braids rather than ultra-tight versions, as the looser structure provides better helmet compatibility. For additional security, I gather my finished braids into a low ponytail at the nape of my neck, creating a fashion-forward yet practical solution. Finally, don’t stress about perfection – this style thrives on that carefree, slightly undone appearance!
Conclusion
Finding the perfect hairstyle for skiing has completely changed my mountain experiences over the years. Certainly, the right style does more than just look cute in photos—it protects your hair from harsh winter elements, prevents painful tangles, and ensures your helmet fits properly for maximum safety.
Throughout my countless ski trips, I’ve learned that braided styles generally offer the best combination of security and comfort under helmets. Boxer braids, Dutch braids, and French braid pigtails have consistently proven their worth during intense runs, jumps, and inevitable tumbles in fresh powder. These styles distribute hair evenly, thus eliminating uncomfortable pressure points while keeping every strand contained.
Low-positioned styles like sleek buns, bubble braids, and wrapped ponytails work wonderfully for those who prefer minimal styling time before hitting the slopes. Their placement at the nape of your neck allows for helmet compatibility without sacrificing security or comfort.
My personal favorite remains the twisted low braid—this versatile style has never failed me, regardless of weather conditions or activity level. The combination of twist-locking technique with low positioning creates that perfect balance between function and style.
Hair preparation matters almost as much as the style itself. Slightly dirty hair often holds better than freshly washed locks, while lightweight products like texturizing spray or leave-in conditioner can dramatically improve longevity without causing buildup under your helmet.
Your perfect ski hairstyle might take some experimentation. Weather conditions, hair texture, and personal comfort preferences all play significant roles in determining which styles work best for you. Try different options during your next mountain adventure and discover what keeps your hair protected without distracting from your skiing experience.
Remember—the best ski hairstyle allows you to focus entirely on carving those perfect turns rather than worrying about flyaways, tangles, or uncomfortable helmet pressure. Whether you choose elaborate Viking braids or a simple low ponytail, the goal remains the same: hair that stays put so you can enjoy every moment on the mountain!