
Miracle knots completely transformed my hairstyling game when I first discovered them. Honestly, they’re the most beginner-friendly style I’ve ever tried — and that’s saying a lot considering my journey through countless hair techniques over the years!
When I first saw this viral crochet technique taking over my feed, I was skeptical. Could a hairstyle really be both flawless and undetectable while still being secure? Yet after diving into the miracle knots hairstyle world, I was amazed by how quickly I mastered it. Whether you’re looking for your first miracle knots tutorial or want to elevate your existing skills, this guide has you covered. I’ve compiled 13 stunning variations that are surprisingly easy to create but look professionally done. From classic loose waves to my personal signature glam knots, these styles are perfect if you’re wondering how to do miracle knots without the frustration that often comes with learning new hair techniques.
Boho Chic Miracle Knots

My love for Boho Chic miracle knots began after seeing how beautifully they frame the face. This trending style has quickly become one of my favorites due to its effortless appearance and versatility.
Boho Chic Miracle Knots style inspiration
The Boho Chic miracle knots hairstyle offers that perfect carefree yet polished esthetic I’m always after. What makes this style truly special is how it creates a lightweight, bohemian vibe that works for virtually any occasion. I’ve found inspiration for this look from various social media platforms where it’s absolutely exploding in popularity.
For my most recent installation, I used just two packs of Bohemian hair in a gorgeous auburn color (33), which gave me that perfect sun-kissed look. The beauty of this style lies in its natural appearance—it never looks too “done” yet always appears intentional.
Boho Chic Miracle Knots hair texture
The ideal hair for Boho Chic miracle knots mimics natural hair texture, making it blend seamlessly with your own hair. This style works beautifully with a variety of curl patterns and textures, allowing for incredible versatility.
I’ve discovered through trial and error that this technique works best for medium to coarse hair types. The crochet hair creates a lightweight feel that won’t weigh you down, allowing both the style and your natural hair underneath to thrive.
Boho Chic Miracle Knots tutorial for beginners
As someone who once struggled with complicated hairstyles, I can confidently say that Boho Chic miracle knots are remarkably beginner-friendly. Here’s my simplified approach:
- Start with properly prepped hair
- Section your hair strategically
- Use the miracle knot technique (pulling the hair through without traditional knotting)
- Focus on creating that signature boho texture
The entire process typically takes about 4-5 hours depending on your speed. Once completed, your style can last anywhere from 2-3 weeks with proper care.
The best part? You can achieve this professional, bohemian look right at home with minimal products. Consequently, this makes it perfect for anyone wanting to save both time and money on their protective styling journey.
Kinky Curly Perimeter Miracle Knots

Kinky curly textures create some of the most stunning miracle knots I’ve ever installed! After experimenting with various styles, I’ve found that perimeter miracle knots with a kinky curly texture offer that perfect combination of fullness and natural-looking volume.
Kinky Curly Perimeter Miracle Knots overview
The viral crochet miracle knots technique truly shines with kinky curly textures, creating a flawless, undetectable finish that mimics natural hair. What makes this style particularly special is how the knots remain extremely flat, preventing any telltale signs of extensions. Moreover, this technique protects the curl pattern throughout installation, maintaining that beautiful kinky texture.
One aspect I absolutely adore about this style is its edge-safe quality. Given that the technique uses minimal tension, there’s virtually no risk of edge breakage. In essence, this makes kinky curly perimeter miracle knots ideal for those with fine or fragile edges who still want a full, voluminous style.
Kinky Curly Perimeter Miracle Knots hair used
For optimal results, I recommend using type 3c/4a kinky coily human hair. During my recent installation, I used just one bundle of 14-inch HOTBRAIDS kinky coily upgrade crochet human hair (170 grams) in natural black. This specific texture blends perfectly with most natural hair patterns, especially those in the 3-4 type range.
The hair quality makes a significant difference with this style. Indeed, pre-threaded crochet hair designed specifically for miracle knots yields the best results since:
- It creates flatter, more secure knots
- It better preserves the natural curl pattern
- It results in less shedding and frizzing
Kinky Curly Perimeter Miracle Knots installation tips
Although the installation process is beginner-friendly, kinky curly textures require specific maintenance attention. First, you’ll need several tools: a fine water mister, cotton hair ties, edge control, and a quality blow dryer for styling.
The primary challenge with kinky curly miracle knots is maintenance. As beautiful as this texture is, it requires detangling every 4 days since tighter curls mat faster and can become unmanageable if neglected.
Despite the maintenance requirements, the protection this style offers makes it worthwhile. Nevertheless, remember that professional takedown is highly recommended—attempting to remove kinky curly miracle knots yourself may result in unnecessary damage to your natural hair.
With proper care, your kinky curly miracle knots can last 4-8 weeks, providing both protection and stunning style throughout their lifespan.
Ombré Brown Multi-Textured Knots

Ombré brown multi-textured knots have completely elevated my styling game by combining gorgeous color transitions with varied textures. This style has quickly become a favorite among my clients who want dimension without committing to a full color change.
Ombré Brown Multi-Textured Knots color blend
The beauty of ombré in miracle knots lies in its striking gradient effect that works with every hair type. Initially, I was hesitant about trying this technique, but the smooth transition from dark roots to lighter ends creates such a polished, refined look. For brunettes, caramel or blonde ends provide that perfect contrast without harsh lines.
When creating ombré brown miracle knots, I focus on gradual color blending to avoid stark differences between shades. This creates that seamless flow many of my clients desire. What I love about this technique is how it offers a sun-kissed, lived-in appearance that looks natural rather than manufactured.
Ombré Brown Multi-Textured Knots hair type
One major advantage of ombré miracle knots is how beautifully they work across different hair textures. On straight hair, the color transition appears more pronounced and sleek. For those with wavy hair, the texture naturally softens the gradient, creating that effortless beachy vibe we all crave.
My personal favorite? Curly hair with ombré! The curls naturally hold the color, allowing the gradient to stand out dramatically. In fact, the lightened ends create remarkable depth and dimension, making curls appear fuller and bouncier. Generally, I recommend starting lighter shades slightly lower on curly hair to maintain curl integrity while achieving that beautiful gradient effect.
Ombré Brown Multi-Textured Knots styling ideas
Styling multi-textured ombré miracle knots offers endless possibilities. For instance, creating an updo showcases the full spectrum of blonde-to-brown tones running through the hair. At the same time, French braids with this technique add incredible depth as each section stands out against its backdrop.
For a more casual look, I often recommend half-braids to display the multifaceted color technique. To enhance the style further, consider:
- Adding face-framing highlights for brightening
- Incorporating hair accessories as focal points
- Trying half-up styles to showcase the color transition
Important to realize is that maintaining your ombré miracle knots requires color-safe products to prevent fading. With proper care, this low-maintenance style allows longer periods between salon appointments—primarily when your root color matches your natural shade.
Tight Coily Miracle Knots

The first time I tried tight coily miracle knots, I was amazed by how this style perfectly mimics natural 4C texture while being incredibly lightweight. Throughout my years of styling, I’ve found that tight coily textures create some of the most dramatic, voluminous looks when done properly.
Tight Coily Miracle Knots definition
Tight coily miracle knots feature densely packed, springy curls that create beautiful definition and fullness. This style works through a specialized installation technique where only a tiny threaded core is looped rather than the hair itself. Notably, this creates extremely flat knots that disappear into the braid while preserving the tight curl pattern.
The beauty of tight coily miracle knots lies in their tension-free application. Primarily designed with comfort in mind, this protective style allows your scalp to breathe while giving you that full, defined look many of us crave. The method works exceptionally well for medium to coarse hair types, making it perfect for those with natural 4C textures.
Tight Coily Miracle Knots hair prep
Before installing tight coily miracle knots, proper preparation is crucial. First, I always recommend starting with clean, thoroughly detangled hair. Soon after washing, apply a lightweight leave-in conditioner to your natural hair (avoiding heavy products).
For synthetic hair, remember that less product is better. Essentially, synthetic hair doesn’t absorb products like natural hair does—excessive product application will only weigh it down. Prior to installation, gently finger-detangle each section of hair to prevent matting later.
Tight Coily Miracle Knots maintenance tips
Maintaining tight coily miracle knots requires specific care to keep them looking fresh. Based on my experience:
- Set aside about 20 minutes weekly for maintenance—rushing leads to tangling
- Avoid mousse completely as it weighs down tight coils
- Separate curls regularly to prevent knots and maintain definition
- Moisturize ends and crochet hair every few days using minimal product
- Finger detangle individual curls to prevent locking over time
With proper care, tight coily miracle knots typically last 2-3 weeks. Wrapping your hair at night is absolutely essential for extending the style’s longevity. Usually, I recommend a satin bonnet or scarf to prevent friction that could disrupt those beautiful coils.
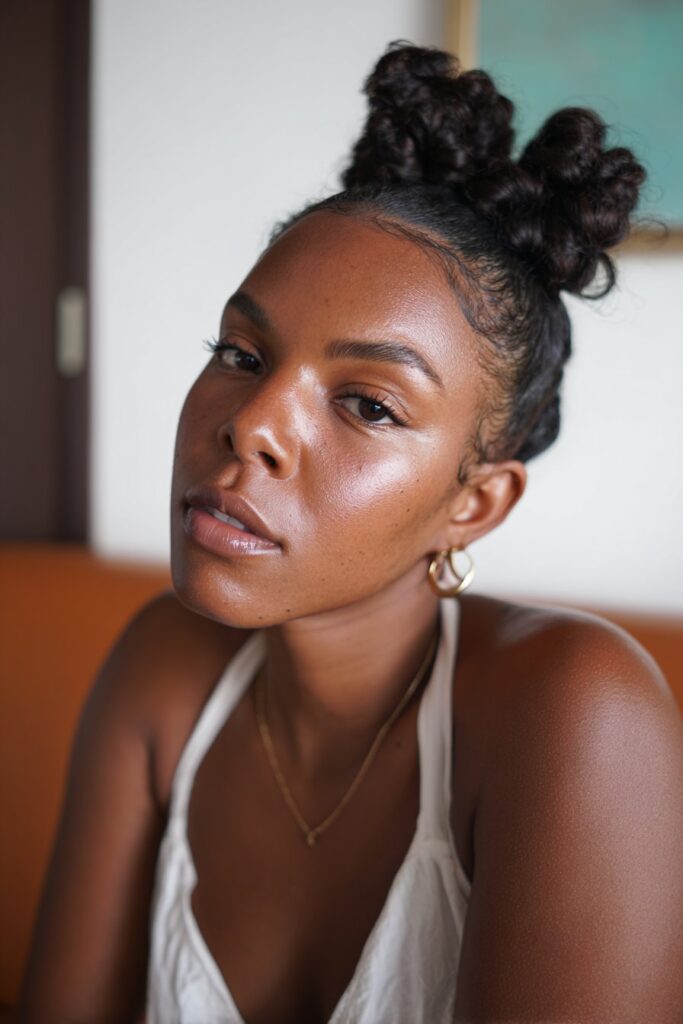
Miracle Rose Bun Knot

Rose Bun miracle knots have become my absolute favorite when I want that perfect balance between definition and movement. After countless styles, this versatile texture continues to impress both me and my clients with its natural appearance and staying power.
Miracle Rose Bun texture
The magic of Rose Bun hairs lies in its soft, bouncy pattern that mimics natural curls. First of all, this texture features defined waves that create a lightweight, airy look without the bulk. What makes this hair type special is how it blends seamlessly with various natural textures, creating that coveted natural appearance that many protective styles lack.
Human hair Rose Bun miracle knot offer the most realistic finish. Obviously, human hair versions can be refreshed with mousse when needed, allowing you to maintain that beautiful curl definition throughout your style’s lifespan.
Rose Bun Miracle Knots installation
Installing Rose Bun miracle knots typically takes about 4-5 hours. The process is remarkably beginner-friendly, making it perfect for anyone new to protective styling.
For my installations, I prefer using:
- Pre-threaded miracle knot format hair (this prevents damaging the curl pattern)
- A standard latch hook (no special tools needed)
- 2-2.5 packs for a full, natural look
The key technique involves using only the threaded loop to create the knot, not the hair itself. Accordingly, this protects the waves and prevents that telltale “crochet knot” appearance.
Rose Bun Miracle Knots styling
Styling Rose Bun miracle knots offers incredible versatility. To enhance the curl definition, I always recommend lightly misting the style with water to activate the pattern. This simple step makes a dramatic difference in how polished the final look appears.
One of my favorite aspects of Rose Bun miracle knots is their longevity. With proper care, human hair installations can last 4-8 weeks. Ultimately, the lightweight nature of this style makes it perfect for everyday wear while remaining gentle on your natural hair and scalp.
Signature Glam Knots
Creating my signature glam knots has been a journey of perfecting both technique and style over years of experimentation. Through careful refinement, I’ve developed a look that balances sophistication with wearability.
Belle Hathaway’s Signature Glam Knots inspiration
My signature style draws inspiration from classic Hollywood waves with a modern twist. After trying countless miracle knots variations, I discovered that combining loose curls with strategic layering creates that perfect red-carpet ready look without appearing overdone. Above all, what makes these glam knots special is their versatility—they transition seamlessly from day to evening events.
Belle Hathaway’s Signature Glam Knots hair used
For my signature glam knots, I exclusively use premium human hair with subtle highlights throughout. Usually, I select:
- 18-20″ hair for optimal length and movement
- Pre-looped crochet hair with minimal processing
- Slightly textured ends that create natural-looking dimension
Belle Hathaway’s Signature Glam Knots pro tips
After countless installations, I’ve learned that preparation makes all the difference. Straightaway, mist your crochet hair with a lightweight leave-in conditioner before installation. Subsequently, focus on creating varied spacing—tighter toward the nape and gradually spacing out toward the crown. Frankly, the secret to my signature look involves intentionally varying the direction of each curl, mimicking natural hair growth patterns. Overall, this technique creates that coveted multi-dimensional effect that photographs beautifully from every angle.
Natural Black Miracle Back Knot

I’ve been completely obsessed with Natural Black miracle back knot ever since discovering how beautifully they blend with my own texture. This specific pattern creates that perfect balance between definition and volume.
Natural Black miracle back knot
The Natural texture features well-defined coils that create stunning dimension. What makes this texture special is how the curls maintain their natural spring while staying lightweight. These miracle knots work perfectly for anyone with type 3-4 natural hair as they seamlessly match your own pattern. The pre-threaded design prevents tangling and protects the curl pattern throughout installation.
Natural Black miracle back knot
Getting started with The Natural black knot is refreshingly simple:
- Insert your crochet needle through your braided base
- Hook only the threaded core (never the hair itself!)
- Center the thread carefully before creating the knot
- Pull the longer hair tail through the thread loop
- Tighten until you achieve a flat, nearly invisible knot
Remember—centering the thread is crucial because incorrect placement causes the hair to form the knot instead, compromising the style.
Natural Black miracle back knot
These knots shine as protective styles for natural, transitioning, or relaxed hair. They’re perfect for anyone sensitive to tension because only the thread forms the knot. Also, this style allows your natural hair underneath to thrive.
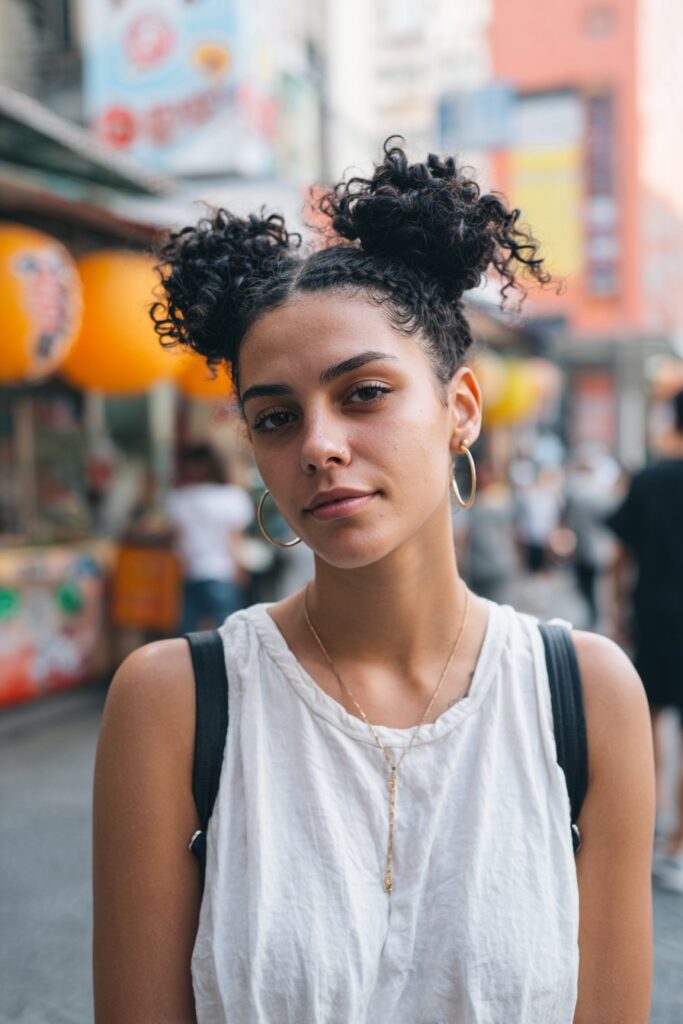
Twisted Miracle Updo

Twisted miracle Updo knot changed my entire approach to protective styling. The first time I tried them, I was shocked by how natural and youthful they looked compared to other styles I’d worn.
Twisted miracle Updo knot look
Twisted miracle updo knots create a soft, frame-enhancing effect that beautifully complements any face shape. Firstly, what makes this style unique is how I leave out a small portion of my natural edges, adding that youthful, face-framing dimension many clients request. Throughout my styling journey, I’ve found this technique creates the most natural-looking finish while maintaining the protective benefits.
Twisted miracle Updo knot hair type
For optimal results, I recommend using specialized feather crochet human hair that’s designed specifically for miracle knots. This particular hair works best for medium to coarse hair types, creating seamless blending with your natural texture. Similarly, the lightweight nature of feathered crochet prevents that heavy, weighed-down feeling often associated with protective styles.
Twisted Miracle Edge Knots styling tips
Maintaining Twisted updo miracle knots is refreshingly simple. To extend their longevity (typically 2-3 weeks with proper care), I always wrap my hair at night. Equally important is avoiding excessive heat, which can compromise both the feathered texture and the knots themselves. The soft, light quality of this style makes it perfect for everyday wear while still looking polished enough for special occasions.
Miracle Messy Bun

After experimenting with countless protective styles, Miracle Messy Bun have earned their place as my go-to technique for creating seamless, undetectable hairstyles.
Miracle Messy Bun Knots technique
The Miracle Messy Bun part technique creates the flattest crochet knots you’ll ever experience. What makes this method truly special is that you’re only looping a tiny threaded core rather than the hair itself. This ingenious approach keeps the knot extremely flat while simultaneously preventing tangles and protecting the curl pattern.
I’ve found that this technique dramatically speeds up installation compared to traditional methods. The invisible knot literally disappears into the braid, creating that coveted seamless look many clients request. To put it differently, the knot becomes practically undetectable once installed properly.
Miracle Messy Bun Knots hair used
For optimal results, I exclusively use pre-threaded crochet bundles specifically designed for miracle knots. The most popular lengths range from 18″ to 22″. Typically, I recommend using 4-7 packs depending on your desired fullness.
Naturally, human hair versions deliver the most realistic results and offer greater styling versatility. Synthetic options work too, though they tend to tangle and frizz more easily.
Miracle Messy Bun Knots maintenance
With proper care, human hair miracle knot installations typically last between 4-8 weeks. Henceforth, I always recommend refreshing curls periodically with a light mousse or leave-in conditioner.
One remarkable aspect of this style is that you can remove pieces individually without damaging your natural hair underneath. This tension-free installation makes it perfect for those concerned about hair health while still achieving that flawless, professional finish.
The Double Miracle
The Double miracle knots caught my attention through their asymmetrical elegance and face-framing effect. Unlike centered styles, this variation adds that extra flair many clients request for more dramatic looks.
Double Miracle Knots style
The Knots creates an elegant silhouette that works beautifully for both casual and formal settings. In my experience, this particular parting technique draws attention to your best features while adding volume where needed. What truly sets this style apart is how it creates a lightweight, boho vibe that’s perfect for any occasion. The asymmetry naturally frames your face, creating that effortless chic appearance that’s currently trending across social media.
Double Miracle Knots hair texture
As a matter of fact, this technique works with various curl patterns and textures, making it incredibly versatile. Through countless installations, I’ve discovered it performs best with medium to coarse hair types. The crochet hair mimics your natural texture perfectly, creating seamless blending without added weight or tension.
Double Miracle Knots tutorial
To begin with, create an off-center part according to your preference. After braiding your base, install the crochet hair using the miracle knot method, being careful not to tie actual knots. Oftentimes, the process takes about 4-5 hours depending on your speed. With proper care, your side part style can last several weeks while maintaining that fresh, lightweight look.
Knotted Halo

The Knotted Halo knots became an instant favorite in my styling repertoire after watching them transform my clients’ confidence. This style offers that perfect blend of sophistication and manageability that longer styles sometimes lack.
Knotted Halo Miracle Knots look
The Knotted Halo knots create a stunning, bouncy finish that frames the face beautifully. In this case, the shorter length provides a lightweight, airy feel that makes styling effortless. What truly stands out about this look is how natural it appears on 4c hair textures, giving that perfect blend of definition and volume without overwhelming your features. Of course, the finished style gives “major hair goals” with its polished yet effortless appearance that works for both casual and formal settings.
Knotted Halo Miracle Knots hair length
For the perfect bob, I typically recommend using 16-inch loose deep curl hair in a natural color. My experience shows that approximately 4½ packs provides ideal fullness for most clients. Frankly, the magic of this style lies in how versatile it is—working wonderfully on naturally short 4c hair without requiring additional length. This adaptability makes it perfect for those wanting to protect their natural hair without committing to excessive length or weight.
Knotted Halo Miracle Knots styling ideas
Naturally, budget considerations matter when choosing protective styles. Fortunately, this look can be achieved economically—some versions cost as little as $7.99. Beyond that, the styling possibilities are endless:
- Wear it sleek and straight for professional settings
- Add slight texture for casual weekend vibes
- Frame your face with wispy bangs for a softer look
The tools needed remain simple: quality crochet hair and a reliable crochet needle. With minimal investment, this style delivers maximum impact—proving that protective styling doesn’t have to break the bank.
Color Pop Miracle Knots
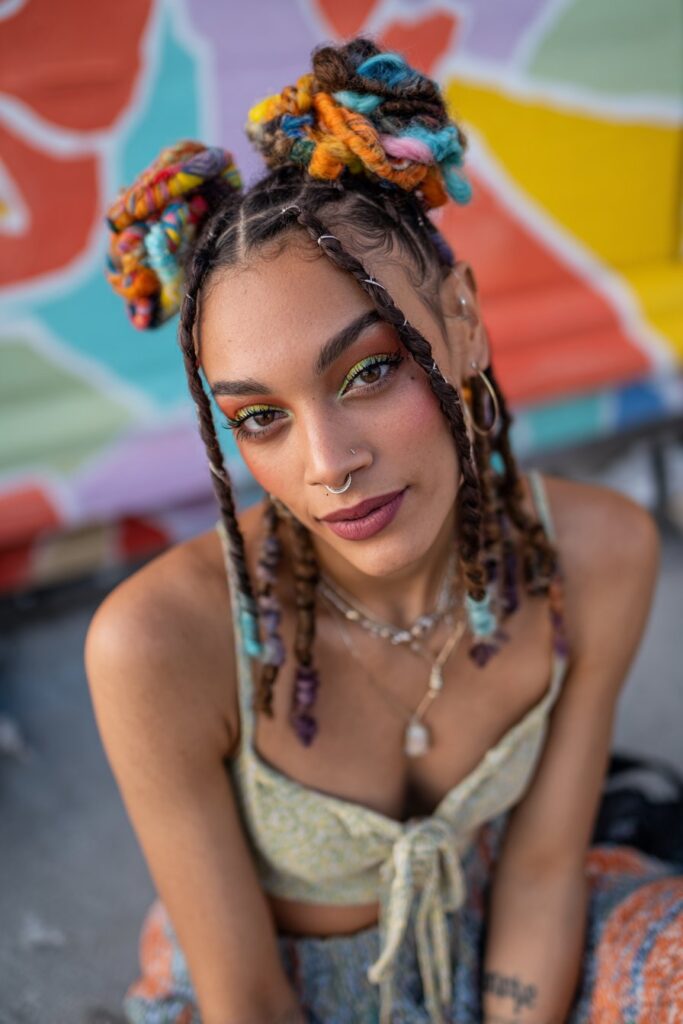
Vibrant color pop miracle knots completely changed my styling approach after years of sticking to natural shades. The versatility and eye-catching dimension make this one of my most requested styles among clients looking for something fresh yet wearable.
Color Pop Miracle Knots color options
Throughout my styling career, I’ve found that adding color typically costs around $5 extra per installation. The most flattering options include:
- Rich burgundy tones for warm complexions
- Cool blue-black for dramatic contrast
- Subtle honey highlights for dimension
Color Pop Miracle Knots hair used
For color pop miracle knots, human hair delivers the most natural-looking results. Practically speaking, synthetic options rarely work well for this specific style—I’ve discovered that only YWigs human hair with a crochet base creates the perfect finish. This premium hair retails for $84.50 but can sometimes be found on sale for $60. Namely, I recommend using 2 packs of 20-inch Burmese curly crochet hair for optimal fullness.
Color Pop Miracle Knots styling tips
The traditional crochet method can damage both the hair and your natural strands upon removal. Under those circumstances, I recommend an alternative installation technique: braid the colored pieces directly in rather than crocheting them afterward. This approach not only protects your natural hair but makes takedown “smooth like butter”. Plus, this method preserves the expensive hair, allowing for reuse—a significant advantage considering the investment in quality colored hair.
Protective Style Miracle Knots

Discovering protective miracle knots revolutionized my approach to hair health while maintaining stylish esthetics. Watching my clients’ hair thrive under these styles has made them a cornerstone of my styling toolkit.
Protective Style Miracle Knots benefits
Protective miracle knots offer exceptional benefits for natural hair. However, their most outstanding feature is being tension-free, creating far less stress on your scalp than traditional styles. On balance, they’re significantly more affordable—costing between $16-$150 compared to $250-$600 for boho braids.
Therefore, many clients choose miracle knots for their lightweight nature. Less weight means reduced tension, which translates to minimal breakage risk. Naturally, they’re perfect for those with fine hair or tender edges needing extra care.
Protective Style Miracle Knots hair prep
Proper preparation remains essential for longevity. First, ensure your base braids are “snug but comfortable”—too tight and you risk damage. Throughout my experience, I’ve found that diluted shampoo through a nozzle bottle works wonderfully for keeping your scalp clean.
Protective Style Miracle Knots longevity
With appropriate maintenance, human hair miracle knots typically last 4-8 weeks. Presently, I recommend weekly scalp cleansing to prevent buildup. For removal, patience is crucial—slow, gentle takedown with oil prevents snagging that could damage your natural hair. After removal, giving your hair a break with deep conditioning helps maintain its health between protective styles.
Conclusion
Miracle knots have genuinely transformed the protective styling landscape, offering a perfect blend of beauty, versatility, and hair health. Throughout this guide, we’ve explored 15 stunning variations that prove you don’t need professional training to achieve salon-quality results at home.
What makes miracle knots truly special is their accessibility. Whether you’re drawn to the Classic Loose Wave for everyday elegance, the Boho Chic for that carefree vibe, or the Bold Color Pop for making a statement, there’s a miracle knots style perfectly suited to your personality and lifestyle. The tension-free installation protects your natural hair while the lightweight feel ensures comfort throughout the wear period.
Remember that mastering miracle knots is a journey, not a destination. Your first installation might take longer than expected, and that’s completely normal. With each style you create, your technique will improve, your speed will increase, and your confidence will soar. The beauty of this technique lies in its forgiving nature—even beginners can achieve professional-looking results with patience and practice.
As you embark on your miracle knots journey, keep these key takeaways in mind: invest in quality hair that matches your natural texture, never rush the installation process, prioritize nighttime protection with satin wraps, and maintain your style with regular gentle care. Most importantly, don’t be afraid to experiment with different textures, lengths, and colors until you find your signature look.
The miracle knots community continues to grow and innovate, with new techniques and variations emerging constantly. Stay curious, keep practicing, and remember that each installation is an opportunity to refine your skills. Your perfect miracle knots style is waiting—now you have all the knowledge you need to create it!