Growing up in Savannah, I remember spending hours in front of the mirror, trying to figure out how to style my hair for school. Back then, I didn’t have many resources, and I often felt frustrated with my 4C hair texture. But over the years, I’ve learned that 4C hair is absolutely beautiful and incredibly versatile. Now, as a beauty educator working with clients in Los Angeles, I’ve perfected techniques that make styling 4C hair not just manageable, but genuinely enjoyable.
Today, I want to share my favorite 4C hairstyles for school that are practical, protective, and absolutely stunning. Whether you’re rushing to make it to first period or want to look polished for a presentation, these styles will have you covered. Trust me, I’ve tried them all, and I know exactly what works for busy school mornings.
The Classic Twist-Out

Let me start with one of my absolute favorites—the twist-out. This style has saved me countless times, and I’ve recommended it to so many of my younger clients who are navigating their natural hair journey.
What Is a Twist-Out?
A twist-out is a styling technique where you twist sections of damp or moisturized hair, allow them to dry completely, and then unravel the twists to reveal beautifully defined curls and waves. The result is a textured, voluminous look that shows off your hair’s natural pattern while giving it more definition than it might have on its own.
Best For
This style works wonderfully for 4C hair because it provides definition without requiring heat. It’s perfect for school because it lasts several days with proper maintenance, and it’s versatile enough to wear casually or dress up for special school events. I love recommending this to students because it’s low-manipulation, which means you’re protecting your hair while looking fabulous.
How to Create It
Start with freshly washed and conditioned hair. I always tell my clients that moisture is everything with 4C hair, so don’t skip the deep conditioning step. Apply a leave-in conditioner, followed by a twisting cream or butter. Section your hair into medium-sized chunks, about one to two inches wide. Take each section and divide it into two strands, then twist them around each other from root to tip.
Let your twists dry completely overnight or use a hooded dryer if you’re in a hurry. Once fully dry, carefully unravel each twist, starting from the bottom and working your way up. Separate the curls gently with your fingers to add volume, and finish with a light oil to seal in moisture. Sleep with a satin bonnet to maintain your twist-out throughout the week. You can refresh it each morning by lightly misting with water and applying a small amount of styling cream.
High Puff with Headband

The high puff is my go-to when I’m running late, and I’ve worn this style countless times during my own school years in New York. It’s quick, cute, and keeps your hair completely off your face during long school days.
What Is a High Puff?
A high puff is exactly what it sounds like—you gather all your hair into a high ponytail position, creating a rounded, voluminous puff at the crown of your head. When paired with a colorful or decorative headband, it becomes an instant style statement.
Best For
This is the ultimate style for gym days, science labs, or any time you need your hair secured and out of the way. It’s also fantastic for showcasing your hair’s natural volume and texture. I love this style because it takes literally five minutes but looks like you put in so much more effort.
How to Create It
Start with stretched hair—you can achieve this through banding, braiding overnight, or doing a blow-out on cool setting. Flip your head upside down and brush or smooth your hair upward toward your crown. Use a fabric hair tie to secure your hair into a high ponytail. Once secured, fluff out your puff with your fingers or a pick, creating that rounded, cloud-like shape.
Add a wide headband about two inches back from your hairline. This not only looks adorable but also helps smooth down any edges that might be acting rebellious. I like to use gel or edge control on a soft brush to lay down my edges before adding the headband. The beauty of this style is its versatility—you can change your look daily just by switching headbands.
Bantu Knot-Out

I discovered Bantu knots during my time studying at the makeup school in New York, and they quickly became one of my favorite protective styling techniques. The knot-out gives you gorgeous, spiral curls that are absolutely perfect for school.
What Is a Bantu Knot-Out?
Bantu knots are small, coiled buns created by twisting sections of hair until they wrap around themselves. When you unravel them after they’ve set, you get beautiful, defined spiral curls. It’s like getting a curly style without any heat or harsh chemicals.
Best For
This style is ideal for students who want defined curls that last. It’s perfect for picture day, school dances, or presentations when you want to look extra polished. The knot-out also works as a protective style when you keep the knots in.
How to Create It
Work with freshly washed, conditioned, and moisturized hair. Apply your leave-in conditioner and a styling cream with good hold. Section your hair into squares or rectangles—smaller sections create tighter curls, while larger sections give you looser waves. Take one section and apply additional product from root to tip. Twist the section tightly, then continue twisting until the hair begins to coil around itself, forming a small bun at the base.
Sleep with your knots in, wearing a satin bonnet to protect them. In the morning, carefully unravel each knot, starting from the ends and working toward the roots. Use a light oil on your fingers to minimize frizz as you separate the curls. Here’s my secret: don’t over-separate the curls. The more you separate, the bigger and frizzier your hair becomes. Instead, gently pull apart each spiral into two or three sections maximum.
Flat Twist Updo

When I need to look absolutely polished and professional, whether for client meetings or special events, I reach for the flat twist updo. This style has gotten me through important school presentations and always makes me feel put-together and confident.
What Is a Flat Twist Updo?
Flat twists are similar to cornrows but created with a two-strand twisting method instead of braiding. When you arrange these flat twists into an updo pattern, you create an elegant, sculptural style that’s both beautiful and practical.
Best For
This style is perfect for keeping hair completely secured during athletic activities, long school days, or formal school events. It’s also an excellent protective style that can last up to two weeks with proper care, making it ideal for busy students who don’t have time for daily styling.
How to Create It
Start with damp, detangled, and well-moisturized hair. Part your hair into the pattern you want—I usually create flat twists that curve upward and back, meeting at the crown or nape of the neck. Apply a twisting cream or gel to each section before you begin.
To create a flat twist, take a small section of hair at the front and divide it into two strands. Twist them around each other once, then pick up a small amount of hair from the scalp and add it to one strand before twisting again. Continue this pattern, adding hair as you go, keeping the twist flat against your scalp.
Once all your flat twists meet at the designated point, you can tuck and pin the ends underneath for a clean look, twist them together into one large twist that curves into a bun, or coil them into small Bantu knots. Secure everything with bobby pins that match your hair color. Sleep with a silk or satin scarf tied around your hairline to keep everything smooth and neat.
Wash-and-Go

I’ll be honest—I was terrified of the wash-and-go for years. I thought my 4C hair wouldn’t cooperate, that it would shrink too much, or that I’d end up with a frizzy mess. But once I learned the right technique and products, it became one of my favorite looks for its simplicity.
What Is a Wash-and-Go?
A wash-and-go is the most natural styling method where you wash your hair, apply styling products, and let it air dry or diffuse without manipulating it into a specific pattern. The result showcases your hair’s natural curl pattern—or in the case of 4C hair, its beautiful coily texture.
Best For
This style works best for students who want minimal manipulation and maximum hair health. It’s perfect for warmer months, casual school days, or when you want to give your hair a break from more structured styles.
How to Create It
The key to a successful wash-and-go on 4C hair is moisture and the right product combination. After washing and conditioning, leave your hair soaking wet. Apply your leave-in conditioner by smoothing it through in sections. Then, take a generous amount of curl-defining gel or custard and apply it using the shingling method—smooth the product down each small section from root to tip, encouraging your coils to clump together.
I like to use a combination of techniques: rake the product through with your fingers, then smooth each section between your palms, and finally use praying hands to really seal everything in. Let your hair air dry completely, or use a diffuser attachment on low heat if you’re short on time. Don’t touch your hair while it’s drying—this causes frizz. The wash-and-go typically lasts three to five days. Refresh it each morning by lightly misting with water and applying a small amount of gel.
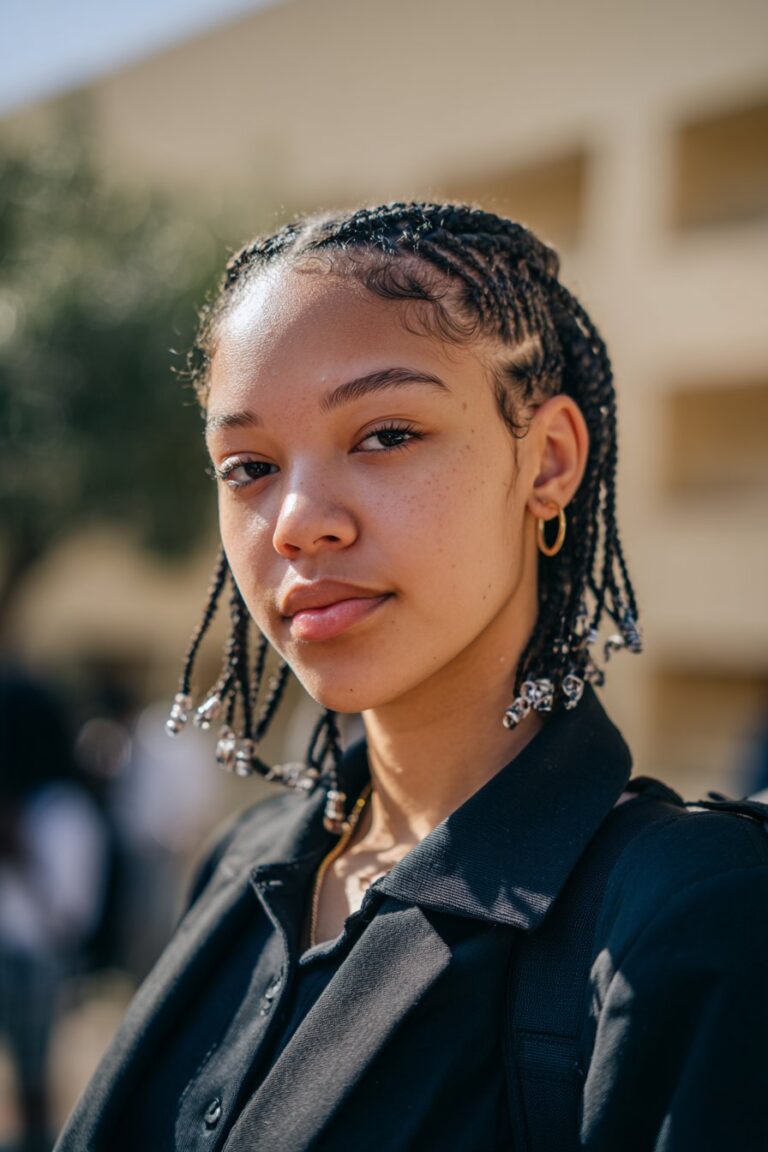
Mini Braids with Beads

This style takes me back to my childhood in Savannah, where I’d spend summer afternoons getting my hair braided while chatting with family. Mini braids are timeless, protective, and when you add beads, they become a fun expression of personality that’s perfect for school.
What Are Mini Braids?
Mini braids are small, individual braids created throughout your hair using just your natural hair, without extensions. They’re similar in size to box braids but use only your own hair. Adding beads at the ends or throughout the braids adds color, personality, and a gentle weight that helps the braids hang nicely.
Best For
These braids are ideal for students who want a long-lasting protective style that requires minimal daily maintenance. They’re perfect for athletes, busy students involved in multiple activities, or anyone who wants to give their hair a break from daily manipulation while still looking stylish.
How to Create It
Start with clean, deep-conditioned hair. Detangle thoroughly—this step is crucial because you won’t be able to detangle once the braids are in. Apply a light leave-in conditioner and a small amount of oil to each section before braiding.
Part your hair into small, even sections using a rat-tail comb. The smaller the sections, the more braids you’ll have and the longer the process will take. Take each section and divide it into three strands, then braid all the way down to the ends. To add beads, thread them onto the braid before you secure the end, or slide them on after and secure them in place with small elastics. I love mixing different colors and sizes of beads to create patterns or match school colors.
The entire process takes several hours, so I usually do this on a weekend while watching movies. But once they’re in, mini braids can last four to six weeks with proper care. Wash your scalp weekly using a diluted shampoo in an applicator bottle. Keep your scalp moisturized with a light oil or braid spray, and always sleep with a satin bonnet or scarf.
Side-Swept Twist

The side-swept twist is my secret weapon for looking effortlessly chic during school days. It’s romantic, elegant, and works for everything from regular classes to school formals. I love how this style frames the face beautifully while keeping hair secured and protected.
What Is a Side-Swept Twist?
This style involves creating flat twists or two-strand twists that sweep across your head from one side to the other, creating an asymmetrical, glamorous look. All your hair is directed to one side, creating beautiful lines and patterns.
Best For
The side-swept twist is perfect for students who want an elegant look that’s still practical. It’s ideal for school photos, presentations, performances, or any day when you want to feel extra special.
How to Create It
Begin with stretched, moisturized hair—I usually stretch mine by doing large braids overnight. Create a deep side part on one side of your head. Starting at the part, begin creating flat twists that curve toward the opposite side, following the natural curve of your head.
You can create two large flat twists, three medium ones, or several small ones depending on the look you want. Keep the twists close to your scalp and relatively flat. As you work, direct all the twists toward one side, letting them meet just behind your ear on the opposite side from your part.
Once all your twists reach the side, you can leave the ends twisted and pin them into a low side bun, create additional two-strand twists that hang down over one shoulder, or twist everything together. Secure with bobby pins that match your hair color. Add a decorative hair accessory at the point where all your twists meet—a flower clip, jeweled pin, or elegant barrette makes this style even more special.
Halo Braid

The halo braid makes me feel like royalty every single time I wear it. It’s a stunning protective style that looks incredibly intricate but is actually quite manageable once you get the hang of it.
What Is a Halo Braid?
A halo braid is created by braiding or twisting your hair in a circular pattern around the perimeter of your head, creating a crown-like effect. It can be done with a single braid that wraps around, multiple braids that meet in the back, or a combination of techniques.
Best For
This style is absolutely perfect for formal school events, performances, or days when you want to make a statement. It’s also practical for keeping hair completely off your face and neck, making it ideal for warm weather or athletic activities.
How to Create It
Start with detangled, moisturized, and stretched hair. Create a circular part around your head, about two to three inches from your hairline, separating the outer section from the inner section. Starting at one side, take a small section of hair and begin a Dutch braid or flat twist, working around the perimeter of your head. For a Dutch braid, cross sections under rather than over, which makes the braid sit on top of your hair like a crown.
Keep adding hair as you work your way around your head, maintaining even tension. When you complete the circle and reach your starting point, continue braiding the remaining hair without adding more sections, then tuck and pin the end underneath the beginning of your braid.
For the inner section of hair, you can create a simple bun, additional small braids, twist it into a low bun at the nape, or create pin curls that you tuck under the halo braid. This style can last up to a week with proper care. Sleep with a satin bonnet, and refresh the style by applying a small amount of edge control or gel to any sections that become fuzzy.
Pineapple with Twist-Out Ends

The pineapple is a lifesaver for second-day or third-day hair, and I use this technique constantly to preserve my styles overnight and refresh them for school the next day.
What Is a Pineapple with Twist-Out Ends?
The pineapple technique involves gathering your hair into a very high, loose ponytail at the crown of your head—like the top of a pineapple—which preserves your curl pattern while you sleep. When you add twist-out ends to the ponytail, you create defined, bouncy texture.
Best For
This style is ideal for maintaining other styles between wash days and for students who want a quick, cute look in the morning. It’s perfect for casual school days, weekend events, or any time you want your hair up and off your shoulders.
How to Create It
In the evening before bed, gather all your hair to the very top of your head, flipping your head upside down if that helps. Use a fabric scrunchie or silk hair tie to secure your hair very loosely—the key is not to create tension or a crease. Sleep with a satin bonnet or scarf.
In the morning, carefully remove the hair tie and flip your head forward, then back up. Your hair should have maintained most of its volume and definition. To create the twist-out ends, separate your hair into four to eight sections depending on thickness, and create two-strand twists from about mid-length down to the ends. Apply a small amount of styling cream or gel before twisting.
You can leave these twists in for your first few classes and unravel them during lunch for a fresh, defined look. Alternatively, you can do the twists the night before, leaving your hair in a pineapple with twisted ends, then unravel them in the morning for instant definition.
Two-Strand Twisted Braids

The two-strand twist braids has become one of my signature looks because it’s versatile, elegant, and celebrates the beauty of natural hair texture. I’ve worn this style to professional events, casual outings, and everything in between.
What Is a Two-Strand Twist Braids?
This style features two-strand twists that are arranged in a circular or curved pattern around the head, creating a braided effect. Unlike the halo braid, this style uses twisting instead of braiding, which can be easier on some hair textures.
Best For
The twist braid works beautifully for school events, presentations, or regular school days when you want to look put-together. It’s also an excellent protective style that can last several days to a week.
How to Create It
Work with damp, detangled, and well-moisturized hair. Apply your favorite twisting cream or butter, working in sections. Create a circular part around your head, similar to the halo braid, separating the outer perimeter from the inner section.
Starting at one side near your temple, take a small section of hair and create a two-strand twist that follows the curve of your head. Pick up additional hair as you go, incorporating it into your twist to keep it flat against your scalp. Continue working around the perimeter of your head.
The key is maintaining even-sized sections and consistent tension—not too tight, which can cause breakage, but firm enough that the twists stay flat and neat. When you complete the circle, twist the remaining length of hair and tuck it under the beginning of your crown, securing with bobby pins.
For the inner section, create a bun, additional twists that you pin in place, or leave that section loose and twist it into several medium-sized two-strand twists. I often create a twisted bun in the center, which adds dimension and interest to the style.
Space Buns with Twist-Out Texture
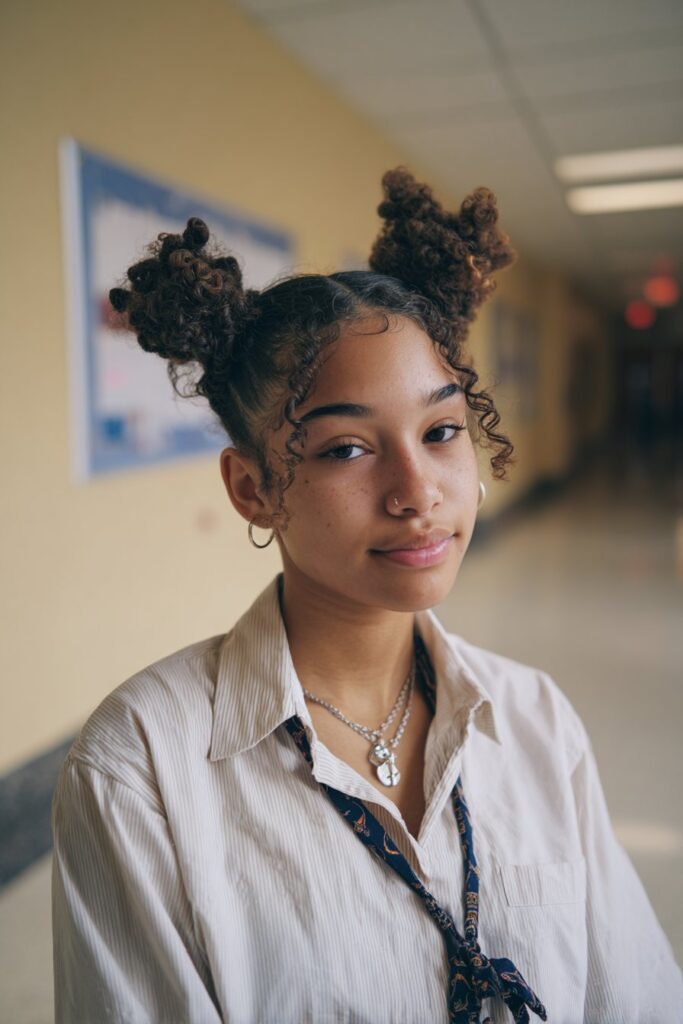
Space buns are fun, youthful, and absolutely perfect for school. They remind me of the creative freedom I felt when I first moved to New York and started experimenting with different styles.
What Are Space Buns with Twist-Out Texture?
Space buns are two buns positioned high on either side of your head, creating a fun, symmetrical style. When you add twist-out texture to the buns and any hair left loose, you get added dimension and definition.
Best For
This style is ideal for spirit days, casual Fridays, art classes, or any time you want to express your creative side. It’s also practical for keeping hair secured during gym class or lab work while still looking adorable.
How to Create It
Start with twist-out hair—you can do your twists the night before and unravel them in the morning. Part your hair down the middle from front to back, creating two equal sections. Take one section and gather it high on the side of your head, positioned where you want your bun to sit. Create a high ponytail, securing it with a fabric hair tie.
Twist the entire ponytail loosely, then wrap it around the base to create a bun. Secure with bobby pins or another hair tie. You can leave some ends sticking out for a more casual look, or tuck everything in for a neater finish. Repeat on the other side, making sure both buns are positioned at approximately the same height.
For added style, leave some hair out at the front to frame your face. You can also wrap small sections of hair around the base of each bun before pinning them to add detail. Use a pick to add volume to the buns, making them fuller and rounder. This style is super quick once you have twist-out hair—it literally takes five minutes.
Low Bun with Cornrow Detail

The low bun with cornrow detail is sophisticated, professional, and one of my favorite styles for when I need to look absolutely polished. I’ve worn this to important meetings, and I always recommend it to students who have presentations or formal school events.
What Is a Low Bun with Cornrow Detail?
This style features cornrows or flat twists that create patterns or lines leading into a sleek low bun at the nape of the neck. The cornrows add visual interest and artistry to what might otherwise be a simple bun.
Best For
This style is perfect for school dances, award ceremonies, performances, debates, or any formal school event. It’s also excellent for everyday wear when you want to look polished and professional.
How to Create It
Begin with clean, stretched, and moisturized hair. Decide on your cornrow pattern—you can create two cornrows on each side that curve back toward the center, several small cornrows that run straight back, or a more intricate pattern with curved lines.
Section your hair according to your chosen pattern, leaving the back section free for the bun. Apply gel or edge control to each section before creating your cornrows. For each cornrow, divide the starting section into three strands and begin braiding, picking up additional hair as you go to keep the braid flat against your scalp.
Work all your cornrows back toward the nape of your neck. Once you reach the point where you want your bun to start, gather all the loose hair including the ends of your cornrows. Smooth everything together with a brush and some gel or styling cream.
Create your low bun by either twisting all the hair together and wrapping it into a coil, or by separating the hair into several sections, twisting each one, and pinning them together in a clustered bun shape. Secure everything with bobby pins. For an extra polished look, take one small section of hair and wrap it around the base of your bun to hide the hair tie.
Faux Hawk with Flat Twists

The faux hawk is bold, confident, and makes a serious statement—and I absolutely love it. This style helped me feel empowered during my early days in Los Angeles when I was building my career and wanted to express my creative personality.
What Is a Faux Hawk with Flat Twists?
A faux hawk creates the illusion of a mohawk hairstyle without shaving the sides. Instead, you create flat twists on the sides of your head that direct hair upward toward the center, where you leave a strip of hair standing tall in textured curls or a puff.
Best For
This style is perfect for students who want to express their bold, creative side while keeping their hair in a protective style. It works well for spirit week, themed school events, performances, or any time you want to stand out from the crowd.
How to Create It
Start with moisturized, detangled hair. Create a center section running from your forehead to the nape of your neck—this section should be about three to four inches wide and will form the hawk part of your style. Secure this center section with clips so you can work on the sides.
Working on one side, create flat twists that angle upward toward the center section. Start at your hairline near your ear and create two or three flat twists that curve upward as they move back. These twists should be relatively flat and close to your scalp. Repeat on the other side, making sure your twists mirror each other.
Once both sides are complete, unclip your center section. You have several options for styling this section: create a twist-out for defined curls, leave it in a large puff by gathering it loosely upward, create several small buns along the center line, or form small twists that stand upright. The key is creating height and volume in the center that contrasts with the flat sides.
I like to use a strong-hold gel or styling cream on the center section, then manipulate it into shape using my fingers or a pick to add volume. You can also add decorative bobby pins, clips, or hair jewelry along the flat twists for extra style.
Chunky Flat Twists with Curly Ends

Chunky flat twists offer a beautiful compromise between intricate styling and quick execution. They’re one of my go-to styles when I want something that looks detailed and polished but doesn’t take hours to complete.
What Are Chunky Flat Twists with Curly Ends?
This style features larger, chunkier flat twists than traditional styles, which means fewer twists overall and faster installation time. The twists are created from the hairline toward the back, and instead of twisting all the way to the ends, you leave the ends loose and define them into curls.
Best For
These twists are ideal for students who want a protective style with personality but don’t have hours to spend installing it. They’re perfect for busy weeks with lots of activities.
How to Create It
Work with freshly washed and deep-conditioned hair. While your hair is still damp, apply a generous amount of leave-in conditioner followed by a twisting cream or gel. Part your hair into larger sections than you would for traditional flat twists—think one to two inches wide.
Create flat twists using the same technique as smaller versions but with bigger sections of hair. Start at your hairline and work backward, picking up hair as you go to keep the twist flat against your scalp. When you reach about the crown or mid-head, stop adding hair and continue with a regular two-strand twist for a few inches.
Leave the last two to three inches of hair untwisted. To create curly ends, take each untwisted section and divide it into smaller pieces. Twist each small piece tightly around your finger, creating coils or ringlets. You can also use perm rods or flexi-rods on the ends if you want more uniform curls.
Let everything dry completely overnight or under a hooded dryer. Once dry, you can gently separate the curly ends to make them fuller and bouncier. The contrast between the sleek flat twists and the bouncy, curly ends creates a dynamic, eye-catching style.
Twisted Mohawk Ponytail

The twisted mohawk ponytail combines edge with elegance in a way that always makes me feel both powerful and polished. It’s a style that translates beautifully from the fashion runway to the school hallway.
What Is a Twisted Mohawk Ponytail?
This style features flat twists or two-strand twists that create lines running from the front of your head toward the back, all gathering into a high ponytail. The twists create a mohawk-like pattern through the center while the sides are sleek and smooth.
Best For
This style is perfect for students who want an athletic, sleek look that’s still stylish and feminine. It’s ideal for athletes who need hair completely secured for games and practice, students with active lifestyles, or anyone who wants a polished style that lasts.
How to Create It
Start with stretched, moisturized hair. Create a rectangular section down the center of your head, from your hairline to the crown. This section should be about three inches wide. Using gel or edge control, smooth the sides of your hair toward the back.
Within the center section, create flat twists or two-strand twists that run straight back. You can do one large twist down the center, two parallel twists, or several smaller twists depending on the look you want. Keep these twists close to your scalp and relatively flat, using a strong-hold gel.
When your twists reach the crown, gather all your hair—including the twisted section and the sleek sides—into a high ponytail. Secure with a fabric hair tie, making sure the ponytail is positioned exactly where you want it.
Now style your ponytail: you can leave it as a textured puff, create a twist-out by twisting the ponytail hair and letting it set, wrap the ponytail into a high bun, or create several braids or twists that hang from the ponytail. I love doing a high puff and then wrapping one small section of hair around the base to hide the hair tie.
Use a soft brush to smooth your edges, apply edge control, and tie a silk scarf around your hairline for about twenty minutes to set everything in place. This creates that polished, clean finish that makes the style look professional.
Conclusion
As I reflect on these fifteen beautiful 4C hairstyles, I’m reminded of my own journey with natural hair—from those uncertain days in Savannah when I didn’t understand how to work with my texture, to now, where I celebrate and embrace every coil and kink. Learning to style 4C hair has been transformative, not just for my appearance but for my confidence and self-expression.
What I want you to understand is that your 4C hair is not something to be managed or tamed—it’s something to be celebrated. Each of these styles I’ve shared with you represents an opportunity to showcase your natural beauty while protecting your hair’s health. Whether you’re rushing to make it to first period or preparing for a special school event, there’s a style here that will work for you.
Remember, the key to all successful 4C styling is moisture, patience, and gentleness. Your hair thrives when you treat it with care, using quality products and protective techniques. Don’t be discouraged if a style doesn’t work perfectly the first time—I’ve definitely had my share of styling mishaps over the years. Practice makes perfect, and each attempt teaches you something new about your unique hair.
Throughout my career as a beauty educator, I’ve watched countless young women transform not just their hair, but their entire relationship with themselves through embracing their natural texture. I’ve seen girls walk into school with their heads held higher, smile more confidently in photos, and feel empowered to express themselves authentically. That’s what these hairstyles can do—they’re not just about looking good, they’re about feeling good from the inside out.
I encourage you to experiment with different styles and find what makes you feel most confident and comfortable. Don’t be afraid to add your own creative touches. Change your bead colors, try different parts, add accessories that express your personality. Your hair is your crown, and these styles are simply ways to showcase it beautifully.
Most importantly, embrace the versatility of your 4C hair. On days when you want to feel bold and edgy, try the faux hawk. When you need something quick and practical, reach for the high puff. For formal events, the low bun with cornrow detail has you covered. And on weekends when you have time to invest in your hair, treat yourself to a twist-out or Bantu knot-out that you’ll enjoy all week long.
I also want to remind you that hair is just one part of your beauty. While these styles can help you look and feel amazing, true beauty radiates from confidence, kindness, and authenticity. When I work with my clients, whether they’re sitting in my chair for a red carpet event or video chatting with me for beauty advice, I always emphasize that makeup and hair are tools for self-expression, not masks to hide behind.
Your 4C hair tells a story—it’s part of your heritage, your identity, and your journey. In a world that hasn’t always celebrated our natural textures, wearing your 4C hair proudly is an act of self-love and empowerment. These fifteen styles honor that texture while giving you practical options for your busy school life.
As you try these styles, be patient with yourself. Some will come naturally, others might take a few attempts to master. That’s perfectly okay. I remember spending an entire evening trying to perfect my first halo braid, unraveling it and starting over multiple times. But when I finally got it right, the sense of accomplishment was incredible. Those learning moments are part of your hair journey, and they’re valuable.
Don’t forget to prioritize hair health above all else. Protective styling is wonderful, but make sure you’re not keeping styles in too long, you’re moisturizing regularly, you’re being gentle when detangling, and you’re giving your hair breaks between styles. Healthy hair is beautiful hair, regardless of the style you choose.
I also encourage you to build a community around your natural hair journey. Share tips with friends, watch tutorials together, help each other with styles that are hard to do alone, and celebrate each other’s hair wins. Some of my favorite memories from my school days involve sitting with friends, braiding each other’s hair, and talking about everything and nothing. Those moments of connection are precious.
As Belle Hathaway, I’ve been fortunate to work with incredible people, create stunning looks, and help others feel confident in their own skin. But honestly, some of my most rewarding moments come from helping young women embrace their natural hair. When I see a student rock her twist-out with confidence, or watch someone master a style they thought was too complicated, it fills my heart with joy.
Your school years are a time for exploration, creativity, and self-discovery. Your hair can be part of that journey. Try new styles, express different moods, and have fun with it. There’s no single “right” way to wear your 4C hair—there are fifteen ways I’ve shared here, and countless more variations you’ll discover on your own.