
I’ve spent years standing behind the chair, in front of mirrors on film sets, and under the bright lights of fashion shows, and if there’s one thing I know for certain, it’s that a bun updo can completely change the way a person feels about themselves. There’s something magical about gathering your hair, twisting it, pinning it, and suddenly seeing a version of yourself that feels polished, powerful, and undeniably beautiful. I grew up watching my mother transform her everyday look into something elegant with nothing more than a few pins and a little patience, and that image never left me. Over the years, I’ve worked with so many different hair types, textures, and face shapes, and I can honestly say that bun updos are among the most versatile and rewarding styles you can master. Whether you’re heading to a formal event, a casual brunch, or just want to get your hair out of your face in the most stylish way possible, there’s a bun updo waiting for you. I’m excited to walk you through fourteen of my absolute favorite styles, breaking down what they are, who they work best for, and exactly how to recreate them at home.
Classic Low Bun

What is it
The classic low bun is exactly what it sounds like — a timeless, refined hairstyle where the hair is gathered at the nape of the neck and twisted or coiled into a smooth, neat bun. This style has been around for centuries, and it continues to be one of the most requested looks I get asked to create. There’s an elegance to it that feels both vintage and completely modern at the same time. I personally love this style for its simplicity and the way it elongates the neck, giving the wearer an almost regal presence. When done well, the classic low bun communicates that you have your life together — and honestly, sometimes that’s exactly the energy we need to channel.
How it works best for every face shape and occasion
What I love most about the classic low bun is how universally flattering it is. I’ve done this style on clients with round faces, heart-shaped faces, square jawlines, and long faces, and with a few small adjustments — like softening the sides with face-framing pieces or keeping the top tighter — it works beautifully for everyone. In terms of occasions, this is genuinely one of the most versatile styles in the book. I’ve created classic low buns for weddings, business presentations, formal galas, and even elevated everyday looks. It works just as well with a sharp blazer as it does with a flowy evening gown.
How to make it
Start by brushing your hair completely smooth and gathering it low at the nape of your neck as if you were making a low ponytail. Secure it loosely with an elastic, then twist the tail downward and begin coiling it around the base. As you coil, tuck the ends under and use bobby pins to secure everything in place. For a sleeker version, use a fine-tooth comb and some smoothing serum before you begin. For a softer take, pull a few face-framing strands loose before you pin. Finish with a light mist of flexible hold hairspray to keep things tidy without making the style feel stiff.
Messy Bun Updo

What is it
The messy bun updo is the style I reach for when I want to look effortlessly put-together without spending an hour in front of the mirror. It’s intentionally undone, full of texture and movement, and has a carefree charm that I genuinely adore. The beauty of the messy bun is that perfection is not the goal — personality is. The loose pieces, the slightly uneven shape, the little wisps around the face — all of that is what makes this style feel alive and authentic. I’ve seen this look go from lazy morning hair to a legitimate red carpet moment depending on how you accessorize it.
How it works best for textured and medium-length hair
The messy bun thrives on texture, which makes it absolutely perfect for wavy, curly, or naturally voluminous hair. If your hair tends to be fine and smooth, a little texturizing spray before you start will be your best friend. I’ve worked with clients who have medium to long hair and find this style the easiest to execute. Shorter layers might need a few extra pins to keep everything in place, but even then it’s very achievable. This style is ideal for casual days, weekend outings, creative work environments, and any situation where you want to look stylish without appearing like you tried too hard.
How to make it
Flip your head upside down and gather your hair into a high ponytail at the crown of your head. Don’t pull the elastic all the way through on the last loop — leave a looped bun shape instead. Fan out the looped ends and pin them loosely around the base. Pull gently on sections of the bun to loosen and expand it, creating volume and that beautiful undone shape. Let a few strands fall around your face naturally. Scrunch some texturizing spray into those loose pieces and you’re done. The less you fuss with it, the better it looks — trust me on that.
Braided Bun Updo

What is it
The braided bun updo is one of those styles that always makes people stop and say, “How did you do that?” It combines the romance of a braid with the practicality of a bun, resulting in a look that feels intricate and beautiful even when it’s relatively simple to execute. I fell in love with this style early in my career when I started incorporating braids into editorial looks and realized how much visual interest they added. There are countless variations — you can braid the tail and wrap it into a bun, start with a crown braid that leads into a bun, or incorporate a side braid that feeds into the overall style. Each variation tells a slightly different story.
How it works best for long, thick hair
Long and thick hair is the dream canvas for a braided bun updo because the braid itself becomes more visible and defined with more hair to work with. That said, I’ve done gorgeous versions of this style on medium-length hair using extensions to add extra length for the braid wrap. Fine hair can also pull this off beautifully — just go for a more delicate, loose braid rather than a chunky one, and the result will look equally stunning. This style is absolutely perfect for weddings, outdoor celebrations, bohemian-themed events, and any occasion where you want your hair to feel like a work of art.
How to make it
Gather your hair into a low ponytail and divide it into three sections. Braid it all the way to the ends and secure with a small elastic. Then coil the braid around the base of the ponytail, tucking the ends underneath and securing with bobby pins as you go. For extra dimension, gently pull at the edges of the braid before you wrap it — this creates a fuller, more romantic look. You can also do a Dutch braid down the back before gathering everything into the bun, which creates a gorgeous textured effect on top. Finish with hairspray and a few decorative pins if you’re feeling fancy.
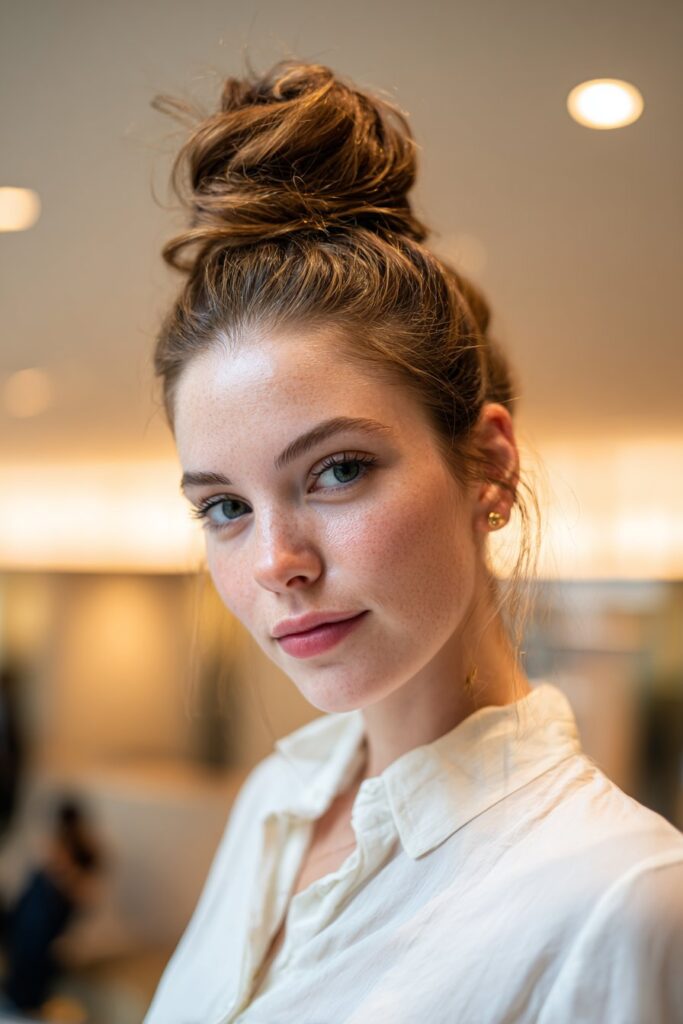
Top Knot Bun

What is it
The top knot bun sits high on the crown of the head and has a bold, confident energy that I absolutely love. It’s the kind of hairstyle that says you’re in charge without saying a word. I wore a top knot during a particularly long and exhausting shoot once, and by the end of the day I had three people ask me where I got my hair done — it really does make an impression. The top knot works as both a casual everyday style and a sleek, dramatic evening look depending on how you finish it. It lifts the face, creates instant visual height, and has an effortlessly cool quality that never feels dated.
How it works best for oval and heart-shaped faces
Because the top knot adds height to the top of the head, it works especially well for oval and heart-shaped faces, where the added verticality creates beautiful proportions. For round faces, I recommend keeping the bun compact and centered rather than wide, which helps elongate the face visually. People with long faces might prefer a slightly looser, wider knot to balance things out. In terms of occasions, the top knot transitions seamlessly from a gym session to a night out with the right accessories — a sleek version pairs beautifully with bold earrings for an elevated evening look.
How to make it
Pull all of your hair up to the highest point of your crown and hold it firmly. Twist the ponytail tightly until it begins to coil on itself, then wrap it around the base and secure with bobby pins in a crossing pattern for the strongest hold. For a sleek version, apply smoothing serum before you start and use a fine-tooth comb to eliminate any bumps. For a more relaxed look, allow a little texture to remain and pull a few strands loose at the temples. A strong-hold hairspray will help the knot maintain its shape throughout the day.
French Twist Bun
What is it
The French twist bun is perhaps the most sophisticated style on this list, and I say that as someone who has genuinely had the privilege of seeing it worn in some very glamorous settings. It’s a vertical roll of hair that runs up the back of the head, with the ends folded into the top and secured to create a seamless, elegant finish. It has a sculptural quality that I find endlessly captivating. What makes the French twist bun special is the way it sits against the head — smooth, architectural, and refined. It feels like a style that has traveled through decades of fashion and emerged more beautiful every time.
How it works best for formal and professional settings
The French twist bun is the gold standard for formal settings. I’ve created this look for black-tie events, high-stakes professional moments, and elegant evening occasions, and it never fails to deliver. It’s particularly flattering on longer necks, as it draws attention beautifully to that area. For shorter necks, keep the twist slightly higher to create the illusion of length. This style works best with straight to slightly wavy hair that has been smoothed with serum or a light pomade. It requires some practice to master at home, but once you get the hang of it, it becomes one of the most powerful tools in your hairstyle repertoire.
How to make it
Gather all of your hair to one side at the nape of your neck and hold it with one hand. Use your other hand to roll the hair upward along the back of your head in a vertical motion, tucking it toward the center as you go. Once all the hair is rolled up, tuck the ends into the top of the roll and secure everything with bobby pins inserted vertically into the fold. The key is to insert the pins deep enough that they grip the roll firmly. Use a tail comb to smooth any surface bumps and finish with a mist of shine spray to give the style that polished, luminous finish it deserves.
Fishtail Braid Bun

What is it
The fishtail braid bun is one of those styles that looks incredibly complex but is actually very approachable once you understand the technique. A fishtail braid is made by crossing small sections of hair from each side, creating a woven, herringbone pattern that is absolutely stunning to look at. When that braid is then coiled and pinned into a bun, the result is breathtaking. I remember the first time I incorporated a fishtail braid bun into an editorial shoot — the photographer actually paused and asked me to explain how I’d done it. That moment told me everything I needed to know about the power of this style.
How it works best for fine and silky hair
Interestingly, fishtail braids actually show up more defined and detailed on fine or silky hair because each individual strand becomes more visible in the pattern. For thick or coarser hair, the braid will be bolder and chunkier, which is equally gorgeous — just a different aesthetic. I recommend lightly texturizing fine hair before braiding so it grips itself better. This style is perfect for creative events, outdoor celebrations, and any occasion where you want to make a visual statement without going over the top. It has a bohemian elegance that I find irresistible.
How to make it
Divide your hair into two equal sections. Take a small piece from the outer edge of the left section and cross it over to join the right section. Then take a small piece from the outer edge of the right section and cross it over to join the left. Continue this pattern all the way down until you reach the ends. The smaller the pieces you take, the more intricate the pattern will be. Secure the braid with a small elastic, then gently tug at the edges of the braid to loosen and expand it for a fuller look. Coil the braid around the base and pin securely. Finish with a light-hold spray to maintain the texture without losing the beautiful detail.
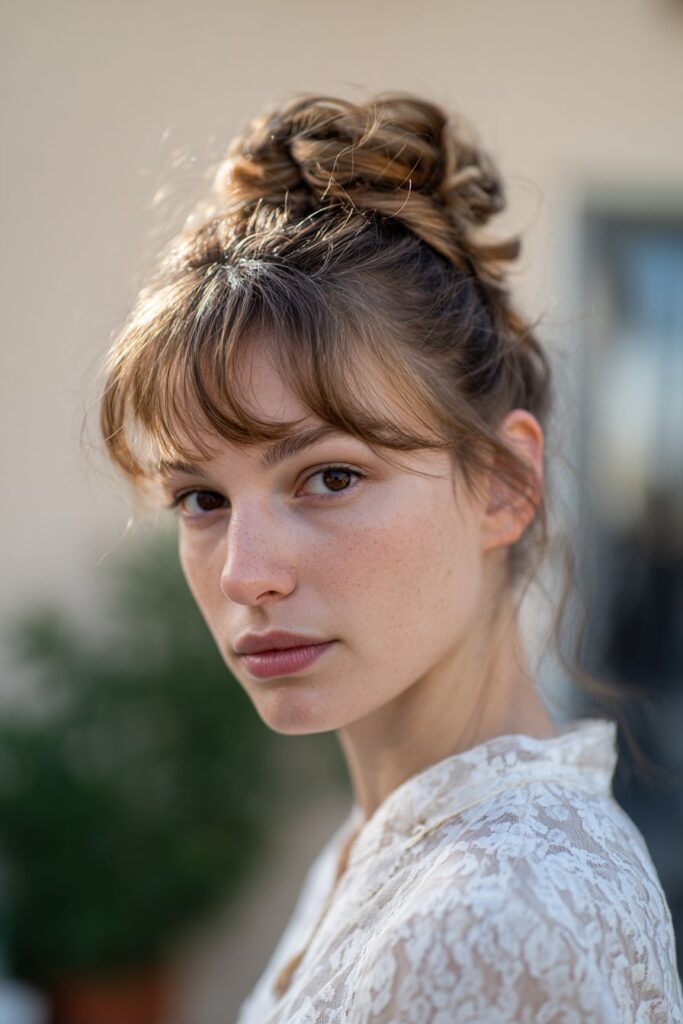
Twisted Crown Bun With Bangs
What is it
The twisted crown bun with baby bangs is one of my personal favorites, and I’ll tell you exactly why — it frames the face in the most beautiful, natural way. This style involves taking two sections of hair from the front, twisting them back toward the crown, and combining them into a bun that sits at the top or back of the head. The twists create a crown-like effect that circles the head romantically, giving the whole look a goddess-inspired quality. I’ve done this style on so many clients for outdoor weddings and garden parties, and it always photographs beautifully because the light catches those twists in the most magical way.
How it works best for romantic and outdoor occasions
The twisted crown bun with baby bangs has an inherently romantic energy, making it ideal for weddings, engagement celebrations, garden parties, and any event with a soft, dreamy aesthetic. It’s also wonderful for everyday wear when you want to feel a little more special without going too formal. This style suits all hair types, but those with medium to long hair will find it easiest to execute. Curly and wavy hair creates especially stunning twisted crowns because the natural texture adds dimension to the twists. Adding flowers or delicate pins to the bun elevates this style into something truly extraordinary.
How to make it
Take a section of hair from just above your left ear and divide it into two pieces. Twist them around each other, picking up small sections of hair from the scalp as you go, moving toward the back of your head — similar to a rope braid. Secure temporarily with a clip. Repeat on the right side. Bring both twisted sections together at the back or top of your head and combine them into a bun, pinning securely. Release any remaining loose hair and tuck it into or around the bun. Pull gently on the twisted sections to loosen them slightly for a softer, more romantic look, and finish with a gentle mist of flexible hold spray.
Half-Up Bun With Loose Tendrils

What is it
The half-up bun with loose tendrils is the style I recommend when someone tells me they want to wear their hair down but also want it out of their face — because this style gives you the best of both worlds. The top half of the hair is gathered and twisted into a bun at the crown, while the bottom half flows freely below. It’s playful, youthful, and incredibly versatile. I’ve been doing half-up buns since my earliest days working in salons, and it remains one of the most consistently requested styles I create because it works for so many different hair types and occasions without requiring a huge time commitment.
How it works best for casual and everyday wear
The half-up bun with loose tendrils is at its most charming in casual and semi-casual settings. It’s the perfect hairstyle for a brunch date, a creative workspace, a day of errands when you still want to look put-together, or a casual event where you want effortless style. It works beautifully on curly and wavy hair because the loose bottom section shows off natural texture in the most gorgeous way. For straight hair, adding some waves to the lower section before styling creates a beautiful contrast between the neat bun on top and the flowing waves below. It also looks stunning with a simple sundress or a relaxed blazer.
How to make it
Section off the top half of your hair from ear to ear and clip the bottom half out of the way temporarily. Gather the top section into a high ponytail and twist or loop it into a bun, securing with an elastic and pins. Release the bottom half and style it however you like — add some waves, smooth it straight, or let your natural texture do its thing. For a slightly messier, more relaxed version, pull a few strands loose from the bun and let them frame your face. Finish with whatever product suits your hair type and you’re ready to go. Simple, beautiful, done.
Sleek High Bun

What is it
The sleek high bun is power dressing for your hair. It’s clean, it’s sharp, and it communicates a level of intentionality that I find deeply satisfying both to create and to wear. Everything in this style is smooth — not a flyaway, not a bump, not a single strand out of place. The hair is gathered at the very top of the head and coiled into a tight, polished bun that sits like a crown. I’ve worked with clients in fashion, business, and entertainment who rely on this style as their signature look because it photographs beautifully from every angle and holds up perfectly under any lighting.
How it works best for straight and naturally smooth hair
Straight and naturally smooth hair is the ideal canvas for a sleek high bun, though any hair type can achieve this look with the right products. For wavy or curly hair, a smoothing cream or straightening serum applied before blow-drying will help achieve that glass-smooth finish. For fine hair, a strong-hold gel at the roots will help the style maintain its structure throughout the day. This look is absolutely ideal for professional settings, high-fashion events, and any moment where you want to look completely polished and intentional. Pair it with architectural earrings and a clean, minimal outfit for maximum impact.
How to make it
Apply smoothing serum or gel throughout damp hair and blow-dry completely smooth using a round brush. Gather all hair to the very top of the crown and secure with a strong elastic. Apply a small amount of gel or pomade to the surface of the bun and use a soft brush or toothbrush to smooth everything into place. Coil the tail tightly around the base and pin with bobby pins, making sure the surface remains completely smooth. Wrap a small section of hair around the elastic to cover it and secure with a pin. Mist generously with strong-hold hairspray and use a fine-tooth comb to press down any remaining flyaways. Flawless.
Boho Loose Bun

What is it
The boho loose bun is the hairstyle equivalent of a long, carefree afternoon in an open field — and I mean that as the highest possible compliment. It’s relaxed, romantic, and deliberately imperfect in the most beautiful way. Where the sleek high bun is about precision, the boho loose bun is about freedom. Hair is gathered loosely, twisted gently, and pinned without much fuss, leaving plenty of pieces to fall naturally around the face and neck. Flowers, ribbons, or decorative pins tucked into the bun take this style into full bohemian territory. I’ve styled this look for outdoor festivals, beach weddings, and countless editorial shoots, and it never loses its appeal.
How it works best for wavy and curly natural textures
Wavy and curly hair types are the natural champions of the boho loose bun because the texture does all the work for you. The natural movement of waves and curls gives the style that effortless, undone quality without any extra effort. For straight hair, adding some loose waves with a large-barrel curling iron before styling makes a world of difference. This style is perfect for outdoor events, casual celebrations, creative and artistic environments, and any occasion where you want to embody a free-spirited, feminine energy. It’s also wonderfully forgiving — there’s no such thing as doing this style wrong.
How to make it
Start with second-day hair or add some texturizing spray to freshly washed hair to give it some grip. Gather your hair loosely at the nape or mid-back of the head — don’t pull it too tight. Twist it loosely once or twice and fold it into a rough bun shape, securing with an elastic looped once or twice but not pulled fully through. Let the ends stick out in different directions — this adds to the bohemian charm. Pin loosely with a few bobby pins and pull several strands loose around your face. Tuck a flower or two into the bun if you’re feeling creative. Scrunch a bit of curl-enhancing cream into the loose pieces and you’re done. Beautifully imperfect.
Knotted Chignon

What is it
The knotted chignon is one of those styles that feels like a secret — it looks impressively complex but is built on a surprisingly simple technique. A chignon is a low bun, typically placed at the nape of the neck, but the knotted version involves tying the hair in a loose knot before tucking and pinning it into place. The result is a low updo with beautiful, organic-looking structure that has depth and visual interest without looking overdone. I adore this style for its quiet sophistication. It’s the kind of hairstyle that people notice and appreciate without necessarily being able to explain why — it just looks undeniably polished and chic.
How it works best for medium to long hair and elegant events
The knotted chignon is most effortlessly achieved with medium to long hair, as the knot requires enough length to form and tuck properly. For shoulder-length hair, a little backcombing at the roots adds volume that makes the knot feel fuller and more substantial. This style is perfectly suited for evening events, gallery openings, dinner parties, and any occasion where you want to look like you’ve put in effort without looking overly formal or stiff. It pairs beautifully with statement earrings and an elegant neckline, drawing the eye upward and elongating the neck in the most flattering way.
How to make it
Gather all of your hair at the nape of your neck as if making a low ponytail, but instead of securing with an elastic, divide the gathered hair into two sections and tie them into a loose knot. Tuck the ends of the knot upward and into themselves, pressing the knot flat against the back of your head. Secure generously with bobby pins inserted from multiple directions to ensure stability. Smooth the surface gently and adjust any loose pieces to create the shape you want. For a more polished look, spray lightly before and after with flexible hold spray. For a softer, more romantic version, allow a few pieces to fall loosely around the face and neck.
Rope Braid Bun

What is it
The rope braid bun is a style that I started incorporating into my work after discovering how dramatically it transforms a simple bun into something that looks truly crafted and intentional. A rope braid is created by twisting two sections of hair tightly in the same direction and then twisting them around each other in the opposite direction — the tension creates a tight, rope-like pattern that is visually striking and incredibly durable. When that rope braid is then coiled and pinned into a bun, the texture and depth it creates are absolutely gorgeous. It’s the kind of detail that makes the whole look feel custom and elevated.
How it works best for all hair types with added texture
One of the things I love about the rope braid bun is that it works beautifully on virtually all hair types. Fine hair benefits from the structure the twisting technique provides, while thick hair creates a bold, dramatic rope that becomes the visual centerpiece of the style. Curly hair adds a gorgeous organic quality to the twist. For any hair type, adding a little texturizing product before you begin will help the braid grip and hold its shape. This style is versatile across occasions — it’s beautiful enough for weddings and celebrations but structured enough for professional settings and formal events.
How to make it
Gather your hair into a low or mid ponytail and divide it into two equal sections. Twist both sections tightly in the same direction — let’s say clockwise. Then wrap both twisted sections around each other in the counter-clockwise direction. The counter-tension is what creates the rope effect. Secure the end with a small elastic. Coil the finished rope braid around the base of the ponytail in a circular motion and pin securely with bobby pins as you go. Tuck the tail end underneath and pin it flat. Gently pull at the edges of the rope if you want a slightly looser, more textured look. Finish with hairspray and admire your work.
Floral Bun Updo

What is it
The floral bun updo is one of the most joyful and expressive styles I know, and creating it always puts me in the best mood. At its core, it’s any bun style — low, high, or mid — decorated with flowers, either real or fabric, woven throughout or tucked strategically into the style. The flowers can be clustered together for a dramatic statement, scattered throughout for a garden-inspired look, or placed as a single, focused accent for something more understated. I’ve done floral bun updos for garden weddings, outdoor celebrations, spring and summer editorial shoots, and countless events where the brief was “effortlessly romantic.” It delivers every single time.
How it works best for outdoor and celebratory occasions
As you might imagine, the floral bun updo thrives in outdoor and celebratory settings. Weddings, engagement parties, outdoor festivals, graduation celebrations, and any spring or summer occasion are the natural home for this style. It works best with a slightly looser bun base — something with a little texture and movement rather than a sleek, tight coil — because the relaxed bun provides more natural nooks and crannies for flowers to nestle into. All hair types and lengths can wear a floral bun beautifully, and the flowers themselves can be chosen to match or contrast with any outfit or color palette.
How to make it
Begin by creating your chosen base bun style — I recommend a loose, romantic bun for this look, but work with what you love. Once the bun is secured, begin placing flowers one at a time, inserting the stem or a bobby pin threaded through the flower into the bun at strategic points. Build the arrangement by clustering a few flowers together or spreading them evenly around the bun depending on the effect you want. For real flowers, mist lightly with water before placing to keep them fresh throughout the day. For fabric or dried flowers, they can be secured with a tiny dab of clear hair gel on the base to prevent shifting. The final result should feel like your hair grew flowers — natural, beautiful, and unmistakably you.
Pinwheel Bun

What is it
The pinwheel bun is the most architecturally interesting style on this list, and I say that with genuine enthusiasm as someone who finds the intersection of art and hair deeply fascinating. In a pinwheel bun, the hair is divided into multiple sections that are each twisted and pinned in a radiating pattern around a central point at the crown, creating the visual effect of a pinwheel or sunburst. From behind, it looks like a piece of geometric art sitting on top of your head. I discovered this style during a particularly experimental phase of my career, and it has remained one of my favorite ways to demonstrate that hair can be just as creative and expressive as any other art form.
How it works best for thick and voluminous hair
The pinwheel bun truly shines with thick, voluminous hair because the fullness of each twisted section creates a more dramatic and defined pinwheel pattern. For fine hair, adding a volumizing mousse before styling and backcombing each section before twisting it will add the body needed to make the pattern visible and impactful. Medium to long hair is required for this style, as the sections need enough length to twist and reach the central pinning point. This style is ideal for fashion-forward events, creative industry gatherings, photo shoots, and any moment where you want your hair to be a genuine conversation starter and a work of art in its own right.
How to make it
Begin by dividing your hair into five or six equal sections and clip each one separately. Starting with the back sections, take each one, twist it tightly from the ends up toward the root, and coil it into a flat circle against the head, pinning it flat to the scalp in a spoke-like position radiating outward from the center of the crown. Work section by section, coiling and pinning each twisted piece so that it radiates out from that central point like a spoke on a wheel. Make sure each section is pinned flat and close to the scalp so the geometry reads clearly. Once all sections are pinned, tuck any loose ends under the nearest coil and secure. Mist generously with strong-hold spray and smooth with your fingertips to refine the shape.
Conclusion
I’ve always believed that hair is one of the most personal forms of self-expression we have, and bun updos are the perfect example of how one category of style can hold an entire universe of possibility within it. From the quiet sophistication of a classic low bun to the artistic drama of a pinwheel bun, each of these fourteen styles tells a different story and celebrates a different facet of the person wearing it. When I was starting out in this industry, I learned quickly that technique matters, but confidence matters more. You can have the most perfectly executed style in the room, but it’s the way you carry it — the way you walk in knowing your hair is beautiful and that you chose something that reflects who you are — that truly makes the look sing.
I grew up watching my mother turn an ordinary evening into something special simply by putting her hair up. She didn’t have access to professional products or tutorials — she had intuition, creativity, and a genuine love of beauty. That’s the spirit I try to bring to everything I do, whether I’m working on a set with a team of professionals or teaching someone at home how to do their first bun. Beauty doesn’t require perfection. It requires presence.
My hope is that you take these styles and make them yours. Try a rope braid bun on a Tuesday afternoon just because you feel like it. Tuck a flower into your boho bun for a dinner with people you love. Wear your sleek high bun to a meeting and notice how differently you carry yourself when your hair feels intentional. These styles are tools, and the most important thing you can do with them is experiment, play, and let yourself be seen.
As I always say — makeup and hair are not about hiding anything. They’re about amplifying exactly who you already are. So go ahead, gather that hair, twist it, pin it, and step into whatever version of yourself you want to be today. I’ll be cheering you on every single step of the way.