My experience as a professional makeup artist and beauty expert has led me to discover some of the classiest Christmas nail designs that ever spread. These sophisticated designs will add the perfect festive touch to your holiday season. The designs work beautifully for both corporate holiday parties and family gatherings.
The collection brings together simple yet elegant Christmas nails with French manicure accents and metallic combinations that capture holiday magic. Traditional holiday elements blend with modern styling techniques to create a timeless appeal. These versatile options range from subtle shimmer to bold festive statements that will keep you looking polished throughout the celebrations. Let me show you these beautiful designs.
Classic Red and Gold French Tips

The classic red and gold French tips design remains my top recommendation for holiday manicures. My experience as a professional makeup artist has shown that this sophisticated combination captivates people at festive gatherings consistently.
Design description
A rich burgundy base creates the foundation for this elegant French manicure with gold-tipped styling. The design stands out with its shimmer effect from fine gold glitter at the tips. The sparkle catches light beautifully and makes this look perfect for the holiday season.
How to achieve the look
This elegant look requires these essential items:
- Base coat
- Burgundy red polish (I recommend China Glaze Ruby Pumps)
- Gold glitter polish or stickers
- Top coat for lasting shine
Clean your nails thoroughly and apply your favorite base coat. The burgundy polish needs two layers, and each layer must dry completely. Gold stickers work best for French tips, but you can also apply gold polish carefully in an arc at each tip. Pro tip: Use an orange stick or tweezers for precise placement of gold accents. A double layer of top coat seals your design and ensures extended wear.
Occasions to wear
This design has served countless clients at corporate holiday parties and intimate family gatherings. The sophisticated combination shines at Christmas Eve dinners, New Year’s celebrations, and winter weddings. I love how versatile this design is – it works perfectly in the office and transforms beautifully into an evening statement piece.
Elegant Snowflake Accent Nails
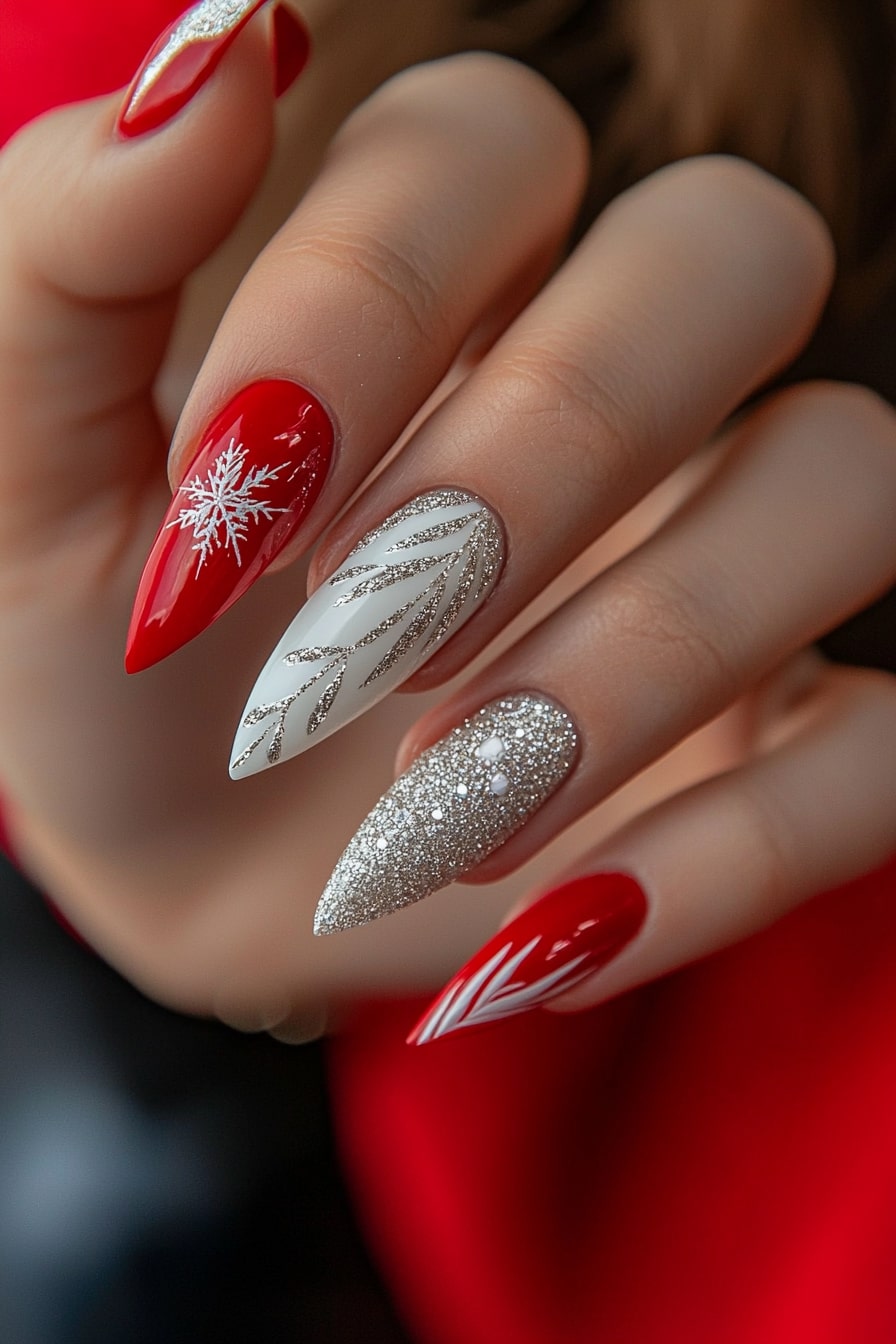
My Los Angeles studio has seen countless holiday manicures, and snowflake accent nails stand out as winter’s most elegant choice. This festive design tops my clients’ request list each season.
Design description
Delicate white or silver snowflakes adorn one or two accent nails. The remaining nails feature a complementary solid color or subtle shimmer. The design looks magical with an iridescent base coat that creates a frost-like effect, and the snowflakes seem to rest softly on ice.
How to achieve the look
This elegant design requires:
- Clear base coat
- White or silver nail polish
- Dotting tool or toothpick
- Rhinestones (optional)
- Top coat
Begin with a clear base and apply your chosen background color. Pro tip: A nude pink or pale blue base creates a sophisticated look. Make snowflakes with a dotting tool or toothpick by drawing six small lines from the center. The design becomes more authentic when you add smaller details between these lines. Small rhinestones at the snowflake’s center can add extra sparkle to your design.
Occasions to wear
This design works beautifully at winter weddings and upscale holiday parties. You can wear it to Christmas celebrations and throughout the winter season. Its subtle elements make it suitable for professional environments while adding a festive touch.
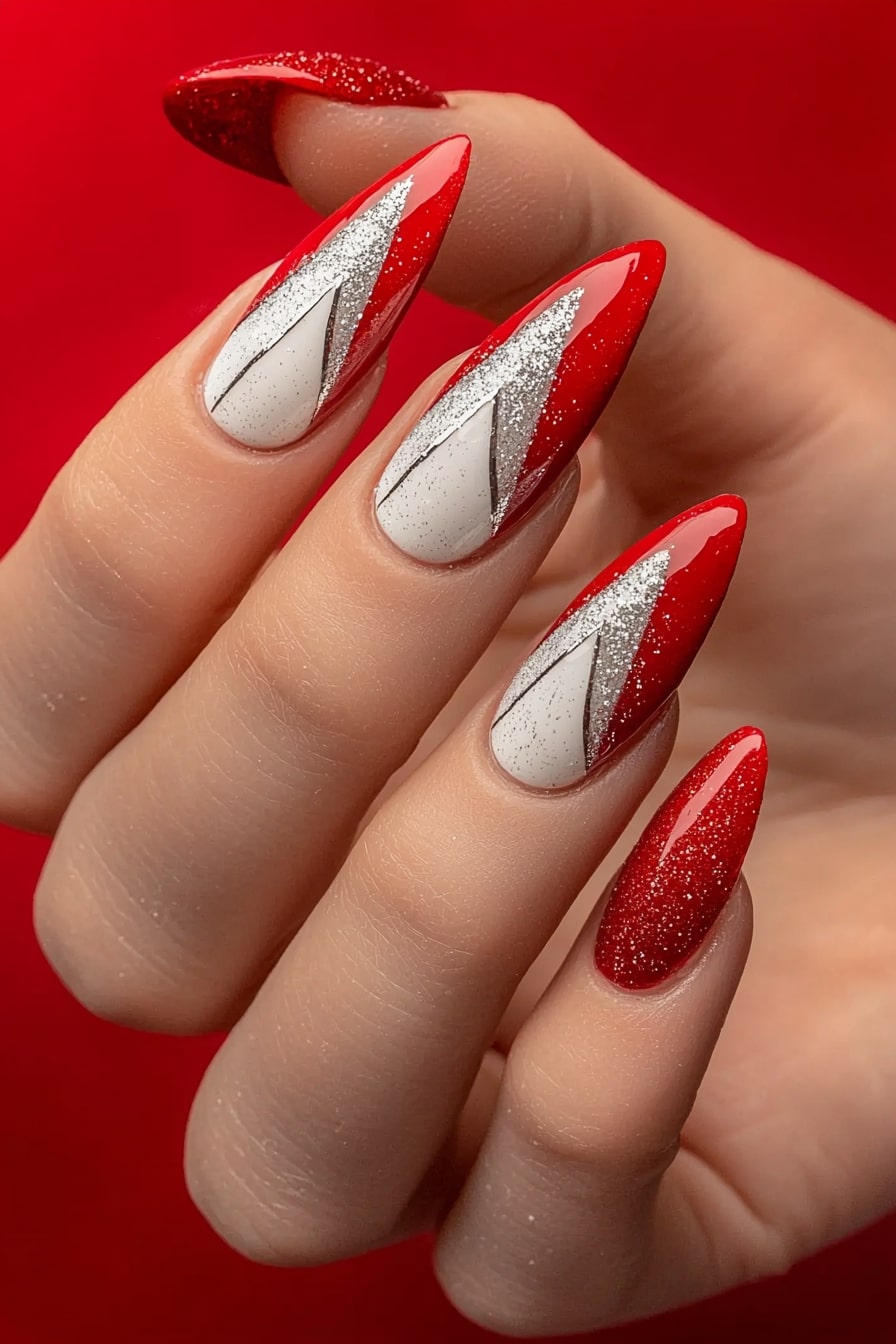
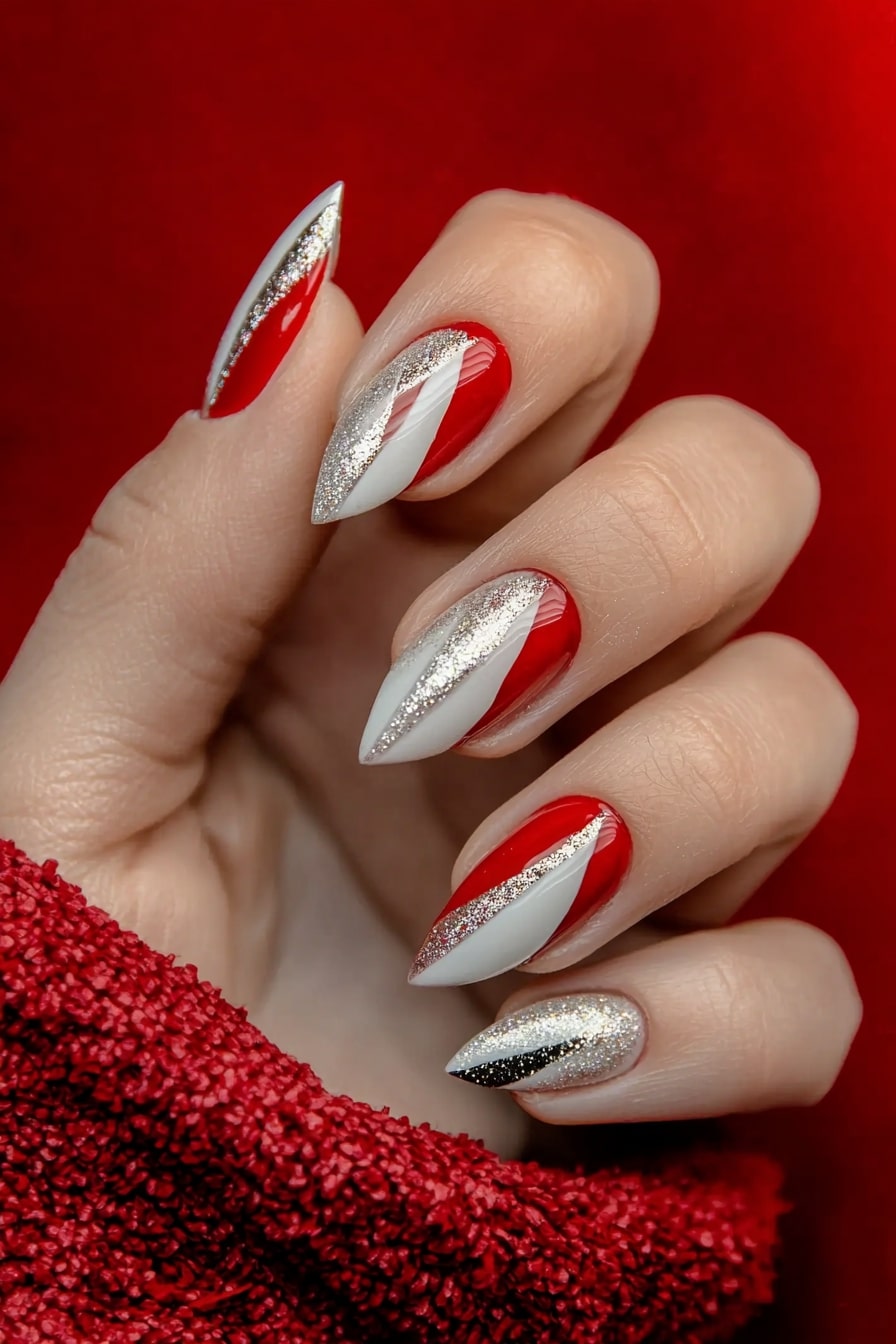
Minimalist Candy Cane Stripes
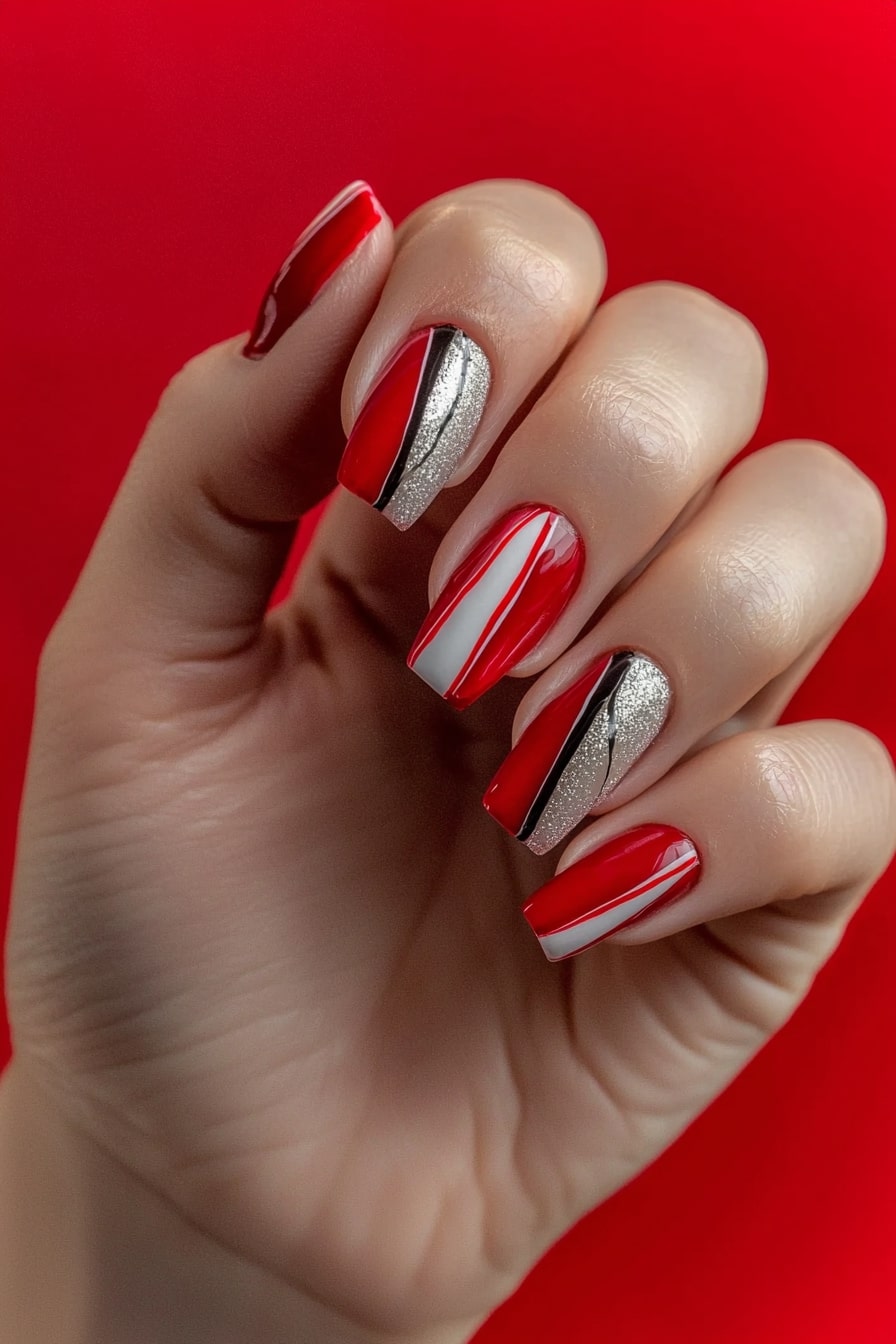
My experience as a celebrity makeup artist shows a clear shift toward subtle holiday manicures. Minimalist candy cane stripes have become my signature design that perfectly suits clients who want to celebrate the festive season with elegance.
Design description
Classic red and white diagonal stripes define this modern interpretation. Mint green serves as an exciting alternative base color. The design’s beauty emerges from its simplicity. Thin, precise lines create a sophisticated reference to traditional candy canes without being overly literal. What I love most about this pattern is its elegant capture of the holiday spirit.
How to achieve the look
You’ll need:
- Base coat
- White or mint green polish
- Red polish (A cream finish works best)
- Striping tape
- Top coat
Apply two coats of your chosen base color. Pro tip: A quick-dry top coat before using the tape prevents peeling. Create diagonal stripes by placing the tape across each nail with different spacing between lines. The red polish should go over the exposed sections. Clean lines will appear when you remove the tape while the polish remains slightly wet.
Occasions to wear
Many clients have chosen this look for their office holiday parties – it strikes the perfect balance between professional and festive. The style works great at casual Christmas get-togethers and winter dates. Its versatility makes it special because you can wear it confidently to December business meetings and it still stands out at evening events.
Glittery Holiday Ombre
My experience with celebrities at my Los Angeles studio shows that glitter gradient nails strike the perfect balance between sophistication and holiday sparkle, and this design has become my signature look for the festive season.
Design description
This design showcases a beautiful transition from a neutral base to glitter-tipped nails. The magical ombre effect comes alive with different sizes of silver or gold glitter that add depth. What makes this look special is the natural cascade of sparkles that catch light and shimmer with every move.
How to achieve the look
To create this enchanting design, these items are essential:
- Clear base coat
- Neutral polish (nude or pale pink)
- Fine and medium glitter polish
- No-wipe top coat
- Orange stick for precise placement
Apply your base color first and add the glitter polish from the tips downward. Pro tip: The dry brush technique works best with loose glitter. Press it into wet polish to create the most precise gradient effect. The design gains extra dimension through layered glitter sizes.
Occasions to wear
My clients have worn this versatile design at Hollywood holiday galas and cozy Christmas dinners. The sparkle makes it perfect for New Year’s Eve celebrations and comes alive under evening lights. The subtle gradient works beautifully at upscale holiday office parties while you retain that festive charm.
Matte Green with Gold Accents

My recent holiday nail art masterclass in Los Angeles revealed an unexpected trend. I found that there was a clear favorite among my celebrity clients – matte green with gold accents. This sophisticated combination captures the essence of modern holiday glamor perfectly.
Design description
A matte hunter green base evokes fresh pine needles with elegant gold accents. The design stands out beautifully. What makes this look unique comes from the interplay between the velvety matte surface and metallic gold elements that creates depth and sophistication.
How to achieve the look
You’ll need these items to create this elegant design:
- Dark olive green matte polish
- Gold metallic polish or foil
- Matte top coat
- Liner brush for detailed work
- Builder gel (optional)
Start with a clean base and apply two coats of dark green polish. Pro tip: Each layer should dry completely before the matte top coat application to avoid streaking. A fine liner brush helps create delicate swirls or geometric patterns with gold accents. The design’s sophistication comes from minimal gold elements.
Occasions to wear
This design has graced many high-profile holiday events, from red carpet appearances to intimate Christmas soirées. The understated elegance of matte green with gold works beautifully for corporate holiday parties and feels special enough for New Year’s Eve celebrations. What I love most about this combination is how naturally it shifts from day to evening events.
Subtle Holly Berry Design
My experience with holiday manicures has shown that sophisticated clients prefer the subtle holly berry design. They love how it adds a refined festive touch to their nails.
Design description
Holly leaves in varying shades of green stand out against a sheer backdrop. The design’s uniqueness comes from three distinct green finishes that add depth to the leaves. Red berries shimmer across the design, and small white dots create the effect of falling snow that brings winter magic to life.
How to achieve the look
You’ll need:
- Base coat and sheer white polish
- Three different green polishes (matte, shimmer, and cream)
- Shimmering red polish
- Fine detail brush
- White polish for snow effect
A sheer white base creates that soft, ethereal look you want. Pro tip: The design works best when you paint thin stems first as guides for leaf placement. The magic happens when you layer different green polishes to build varied leaf shapes. Add shimmering red dots to create berries. The design comes alive when you sprinkle random white dots that look like falling snow.
Occasions to wear
This design works perfectly at many holiday events – from cozy family gatherings to elegant Christmas parties. You can wear it confidently in conservative office settings while keeping the holiday spirit alive. The best part? It adapts smoothly from daytime functions to evening celebrations throughout the festive season.
Chic Plaid Accent Nail
My Beverly Hills salon clients love plaid designs for their holiday manicures. These classic patterns blend with festive colors and create a sophisticated look that my clients adore.
Design description
The design showcases a beautiful blend of intersecting lines with holiday-inspired colors that create a cozy yet elegant plaid pattern. What makes this unique is a shimmery red base stripe with darker accent colors that bring depth and dimension to the overall look. The pattern works perfectly as an accent nail and stands out beautifully next to solid-colored nails.
How to achieve the look
You’ll need:
- Shimmery red polish
- Dark green creme polish
- Red creme polish
- Striping brush
- Top coat
Your base color goes on first, followed by the largest stripe using shimmery red polish. Pro tip: I always apply darker colors next, using the striping brush for precise lines. Each stripe needs time to dry completely before layering the next pattern. Remember, perfection isn’t necessary – small variations will make your design look more authentic.
Occasions to wear
This design shines at many holiday events, from relaxed family gatherings to upscale Christmas parties. The plaid pattern serves perfectly as an accent nail at corporate holiday events, and a full set creates a bold statement at festive celebrations. The design captures the season’s warmth while staying sophisticated.
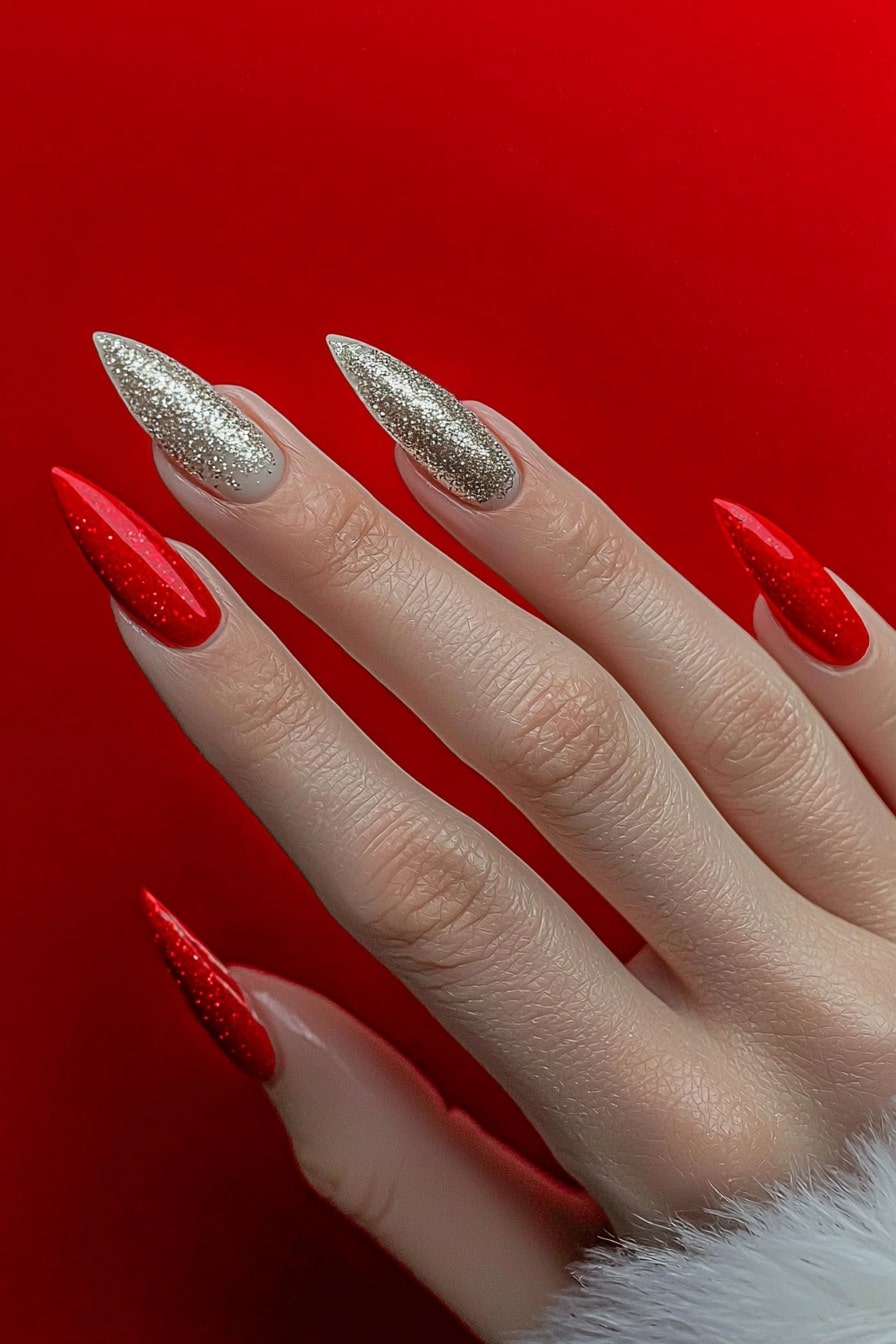
Silver and White Winter Wonderland
My work at celebrity events in Beverly Hills has shown that a silver and white winter wonderland design remains the top choice for elegant holiday celebrations.
Design description
The design showcases a pearlescent white base that blends with shimmering silver accents to create a magical, frost-like effect. What makes it special lies in its depth created by multiple layers of different silver glitter. The result captures light beautifully and maintains an elegant appearance.
How to achieve the look
Create this winter wonderland design with these essentials:
- Pearlescent white base polish
- Fine silver glitter polish
- Chunky silver glitter for accent nails
- Crystal-clear top coat
- White chrome powder (optional)
Start by applying two thin coats of pearlescent white base. Pro tip: The accent nails feature a gradient effect with fine silver glitter that concentrates at the tips, creating a magical snow-kissed appearance. The design becomes stunning when you add a layer of chunky silver glitter to one accent nail and seal everything with a generous layer of top coat.
Occasions to wear
This design stands out at high-profile winter galas and holiday premieres. It works well for New Year’s Eve celebrations, winter weddings, and upscale Christmas parties. The best feature of this look is how naturally it transforms from daytime elegance to evening glamor.
Festive Red Velvet Nails
The luxurious red velvet nail trend has captured my attention recently as a celebrity makeup artist in Beverly Hills. This sophisticated design has become my signature recommendation that perfectly suits clients looking for a seasonally appropriate style.
Design description
The red velvet nail design showcases a plush finish that resembles actual velvet on your nails. What makes it extraordinary is the dimensional shimmer effect that changes with light movement, creating a rich, deep red appearance. The design appears almost three-dimensional when your hands catch the light.
How to achieve the look
These items will help you create this stunning design:
- Magnetic nail polish in deep red
- Strong magnet tool
- Base coat
- Top coat
- Black base (optional to add depth)
Apply your base coat first. A thin layer of black polish will give extra depth if desired. Pro tip: I found that the velvet effect creates unique patterns when you hold the magnet at different angles. The magnetic polish should be applied and the magnet held over each nail for about three seconds. Move it slightly to create that signature velvet texture.
Occasions to wear
This look has graced many celebrity clients at holiday galas and red-carpet events. The sophisticated finish makes it perfect for upscale Christmas parties, New Year’s Eve celebrations, and winter weddings. What I love most about this design is how it moves naturally from day to evening events and keeps its luxurious appeal.
Gold Foil Christmas Trees
Gold foil artistry stands as my distinctive trademark at the Los Angeles studio. I create elegant Christmas tree designs that truly reflect the season’s enchantment.
Design description
Gold foil Christmas trees adorn this design and catch the light. The design stands out with its unique texture from the fine gold leaf that creates an illusion of dimensional metallic artwork while remaining flat against the surface.
How to achieve the look
You’ll need:
- Clear base coat
- Gold foil gel
- Loose-leaf gold foil
- Clean tweezers
- No-wipe top coat
Your nails should be clean and buffed before starting. Pro tip: I apply the foil gel in a triangle shape, cure it, then carefully press the gold foil into the sticky layer. Clean edges around the cuticle area must be perfect before sealing. The design becomes more dynamic when I create multiple trees of different sizes on various nails.
Occasions to wear
This design shines at many high-profile holiday events, from charity galas to intimate Christmas dinners. The sophisticated gold trees work beautifully at corporate holiday parties and keep that festive spirit alive. The versatile design moves naturally between day and evening events throughout December.
Cozy Sweater Texture Nails
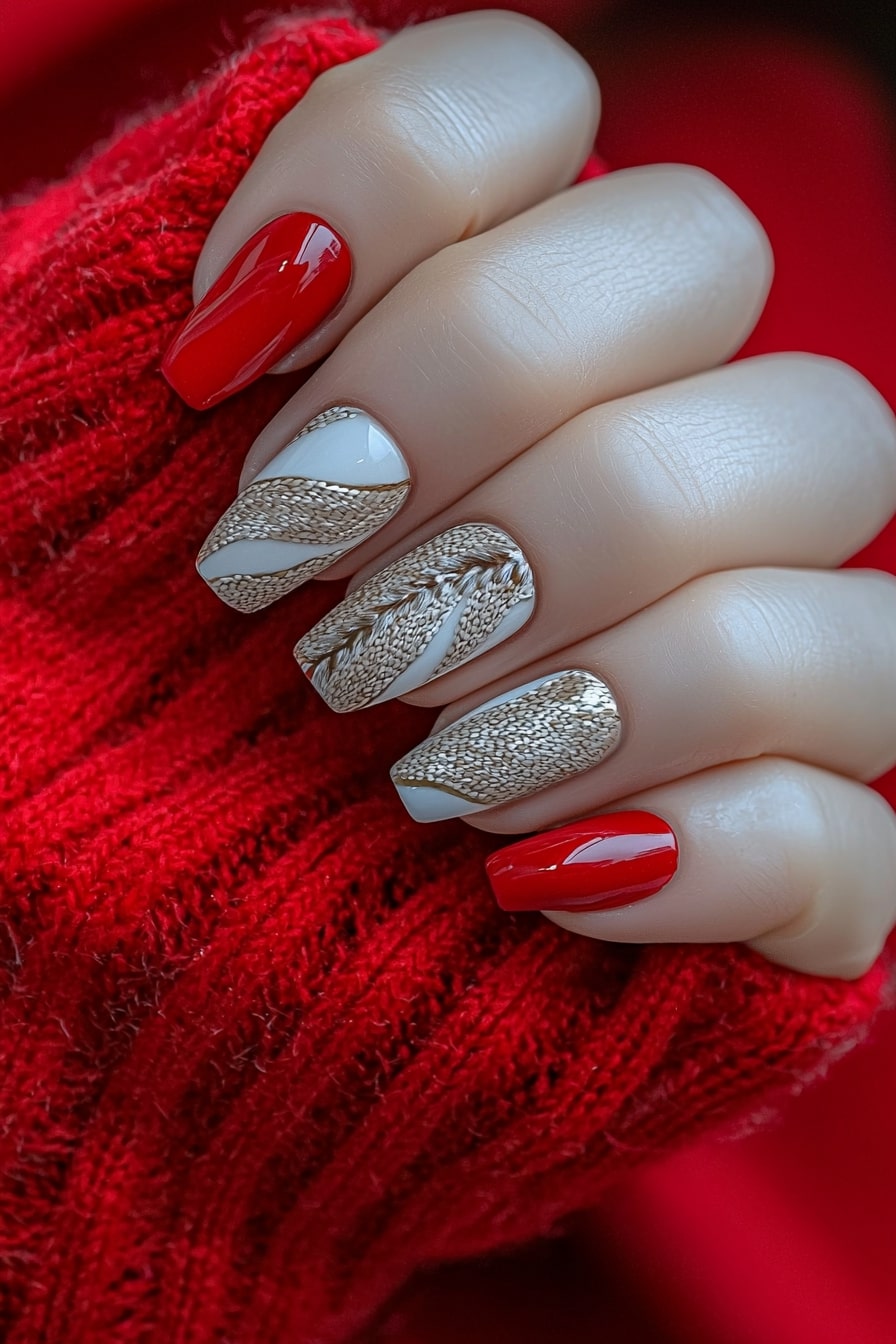
My nail studio buzzes with excitement this winter thanks to the cozy sweater texture nail design. This innovative technique brings your favorite winter knit’s comfort right to your fingertips. I can’t wait to share how we create this stunning look.
Design description
This nail design showcases a raised, three-dimensional texture that captures the intricate patterns of cable-knit sweaters. What makes this truly special lies in its soft, matte finish that creates a fabric-like appearance. I love adding subtle shimmer to improve the dimensional effect that makes it catch light beautifully.
How to achieve the look
These items will help you create this cozy design:
- Gel nail polish in your chosen winter shade
- Fine nail art brush
- Clear acrylic powder
- Matte top coat
- UV lamp
Pro tip: A smooth, prepped nail surface works best as your canvas. The magic happens when you apply your base color and create raised patterns with the fine brush using gel polish. The clear acrylic powder should be dusted on the design before it cures under the UV lamp. This simple technique creates that perfect sweater-like texture you desire.
Occasions to wear
This design fits perfectly with many winter events. You can wear it to cozy holiday brunches and elegant Christmas parties. The sophisticated texture makes it ideal for winter weddings and New Year celebrations. I love how versatile this design is – it looks professional enough for the office while being distinctive enough to get people talking at holiday gatherings.
Frosted Glitter Tips
My latest holiday nail art workshop in Los Angeles brought something special to my clients. I introduced them to frosted glitter tips – a design that captures winter’s magical beauty with pure sophistication.
Design description
The design showcases a beautiful gradient that flows from a soft neutral base to sparkling crystal tips. What makes it extraordinary lies in the glitter’s snow-like floating effect that creates frosted fingertips. The design catches light beautifully and changes its appearance throughout the day. Subtle sparkles dance in natural daylight while glamorous shine takes over under evening illumination.
How to achieve the look
This winter-inspired design requires:
- Base coat and neutral polish (white, beige, or pale pink)
- Fine glitter polish
- Nail sponge or makeup sponge
- Small liner brush
- No-wipe top coat
Start with your chosen neutral base color. Pro tip: A nail sponge helps dab the glitter polish at the tips and blend it downward to create that perfect hazy ombré effect. The best results come from building up the glitter in thin layers instead of applying it all at once.
Occasions to wear
My top clients have worn this look at various events – from relaxed holiday brunches to dazzling New Year’s Eve celebrations. This design’s versatility amazes me. It works perfectly at corporate hol
iday gatherings and shines bright at festive parties. The sophisticated gradient effect makes it an excellent choice for winter weddings.
Classy Reindeer Silhouette

My Beverly Hills studio has been experimenting with a reindeer silhouette design recently, and it has captured my A-list clientele’s hearts. This holiday nail art interpretation combines classic sophistication with a touch of whimsy.
Design description
A striking black reindeer silhouette stands out against a neutral background with a delicate dusting of fine white glitter. What makes this design unique lies in the antler’s intricate details that create a graceful, hand-drawn appearance. The glitter’s interaction with light creates a magical effect that resembles freshly fallen snow.
How to achieve the look
You’ll need:
- Artisan gel paints in black
- Super fine white glitter
- Fine detail brush
- Clear top coat
- UV lamp
The process begins with a rough outline of the reindeer’s head. Pro tip: The antlers should be painted first because they serve as guides for ear placement. The silhouette needs careful building layer by layer with wet gel paint. A beautiful frosted effect that raises the whole look emerges after dusting the still-wet design with fine white glitter.
Occasions to wear
This design has graced many high-profile holiday events, from intimate Christmas dinners to glamorous winter galas. The look’s versatility makes it stand out especially when you have corporate holiday parties and festive celebrations. A monochromatic palette will give a timeless elegance that captures the season’s magic perfectly.
White Christmas Tree on Nude Base
My exclusive holiday nail art masterclass in Beverly Hills revealed a growing trend. I found that clients prefer the white Christmas tree on nude base design. This elegant combination strikes a perfect balance between festive charm and sophisticated simplicity.
Design description
A white Christmas tree silhouette stands out beautifully against a soft nude base and creates an ethereal winter effect. What makes this look magical is the tree’s floating appearance on the nail, boosted by white dots that mimic falling snow. I love adding sparkles that create dimension without overwhelming the clean design.
How to achieve the look
Everything in items you need:
- White and nude gel polish
- Fine detail brush
- Dotting tool
- Sparkles or fine glitter
- Quick-dry top coat
Start by applying a clean nude base coat. Pro tip: The tree design comes together with three graduated dots of white polish. Connect these dots with fine lines using your detail brush. The snowy effect emerges when you add tiny white dots around the tree. Your design gains depth when you dust fine glitter on selected branches.
Occasions to wear
This design works beautifully for winter weddings and upscale holiday events. The subtle white on nude combination fits perfectly in conservative office settings while keeping that festive spirit alive. I love how this look naturally flows from professional daytime settings to evening celebrations.
Velvet Snowflake Accent
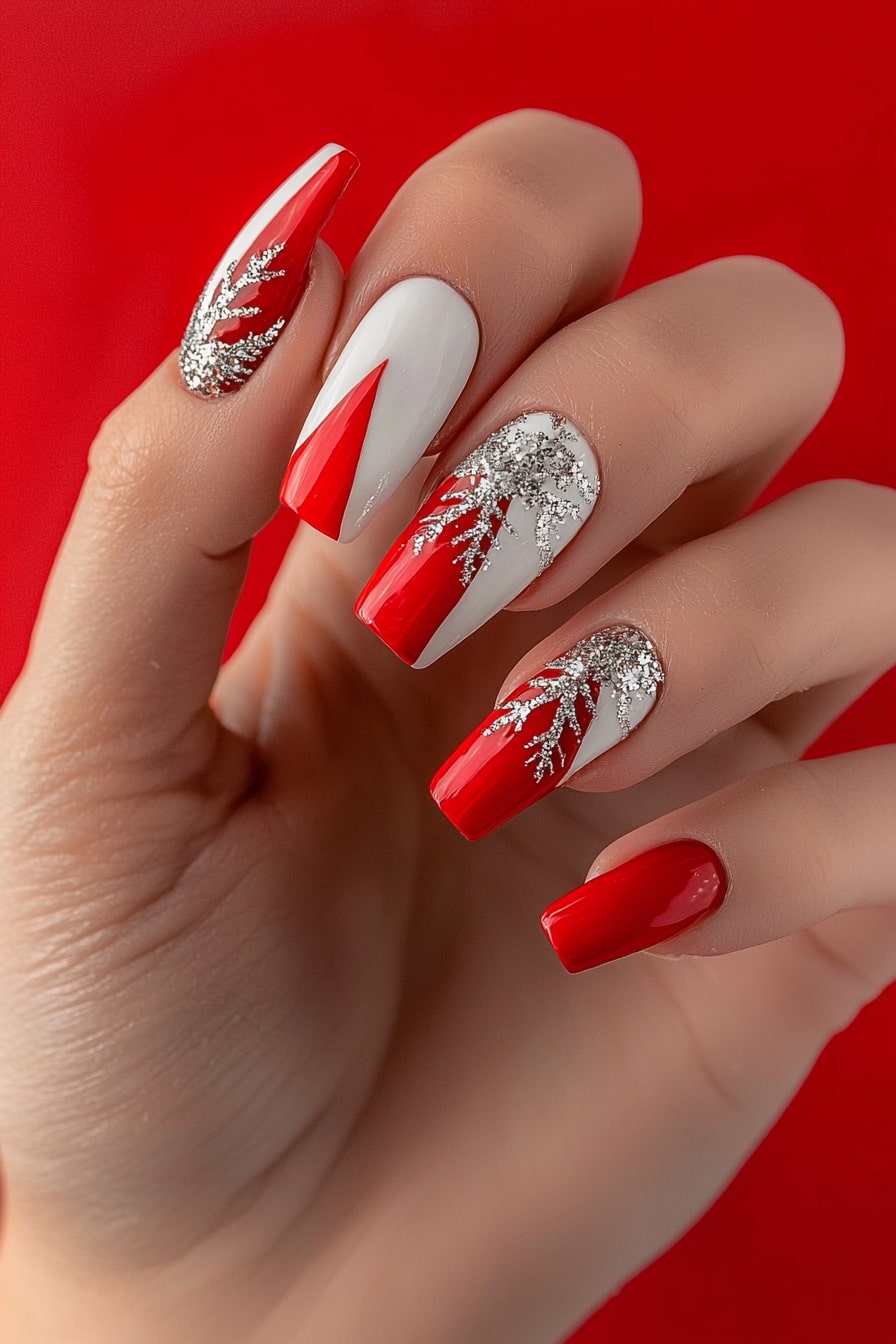
My Beverly Hills salon specializes in the velvet snowflake accent design that perfectly blends this season’s hottest trends. A-list clients consistently choose this innovative technique for their holiday appearances because it delivers unique elegance.
Design description
A mesmerizing velvet-textured base dominates the design and produces an almost 3D effect with delicate snowflake accents. What makes this design extraordinary lies in the velvet powder’s interaction with light that creates a subtle shimmer and transforms with hand movements. Delicate snowflakes appear to drift across this luxurious surface and add an ethereal winter element to the overall esthetic.
How to achieve the look
Everything you need:
- Velvet powder in your chosen shade
- White gel polish for snowflakes
- Magnetic tool
- Fine detail brush
- No-wipe top coat
Pro tip: The velvet powder works best when applied to a tacky base coat. Press it gently to create that perfect velvet texture. Your snowflakes will look stunning when you draw six small lines from a center point. Add delicate details between these lines with a fine brush.
Occasions to wear
This sophisticated design works perfectly at many winter galas and upscale holiday events. The velvet’s texture blends with delicate snowflakes and creates magic at daytime celebrations and evening soirées. The design knows how to draw attention naturally. It makes a subtle yet memorable statement throughout the festive season.
Red and Gold Ornament Inspired
My Los Angeles studio’s vintage Christmas baubles inspired a unique ornament-based nail design that captures holiday elegance. The design blends nostalgia with sophistication and has quickly become a hit with my celebrity clients.
Design description
Dimensional ornament shapes appear to float magically across the nail surface through holographic elements and mutually beneficial placement. What makes this unique lies in its stunning 3D effect. The design combines multiple textures – a deep red foundation elegantly layered with brilliant gold accents that reflect light brilliantly from every direction.
How to achieve the look
You’ll need these items to create this festive design:
- Gelprisa “Rockin’It Red” polish
- Gold holographic glitter
- Dazzle Rocks “Rock Me Red”
- Detailer brush
- Top coat with extra shine
The perfect red base sets the stage for your ornament shapes, which you can create with your detailer brush. Pro tip: The perfect deep red shade comes from mixing Gelprisa with Nail Gelz gel paint. Your ornaments will come alive when you add delicate gold strings at the top using striping paint. A light dusting of holographic glitter creates that magical dimensional effect you’re looking for.
Occasions to wear
This design has graced many high-profile holiday events. It shines at red-carpet premieres and Christmas galas. The red and gold combination with ornament details creates a perfect balance that works wonderfully at formal celebrations and intimate gatherings. This piece brings me joy and still keeps its refined elegance.
Shimmering Icicle French Tips
Winter’s magical moments inspired my latest creation – a shimmering icicle French tip design. My Los Angeles clients love this innovative spin on the classic French manicure that perfectly captures frost-kissed morning scenes.
Design description
This sophisticated design reimagines traditional French tips with pearlescent sparkles that create an ethereal, ice-like effect. What makes this design magical lies in the shimmer that transforms with each movement and resembles sunlight reflecting off icicles. The design’s crystalline appearance becomes more striking with delicate pearl accents.
How to achieve the look
Everything in this look:
- Pearlescent white polish
- Crystal-clear base coat
- Iridescent shimmer powder
- Fine detail brush
- Quick-dry top coat
Start by applying a crystal-clear base coat. Create your French tips with pearlescent white polish. Pro tip: My special technique involves adding shimmer powder while your polish remains tacky. A quick-dry top coat seals the look. My clients love the ice-like sparkle this creates.
Occasions to wear
This enchanting design shines at winter weddings and holiday galas. The sophisticated shimmer makes it perfect for New Year’s Eve celebrations, and its elegant simplicity works beautifully at upscale Christmas parties. The design naturally adapts from day to evening events and catches light differently as hours pass.
Pine Tree Green with Gold Stars
Last week’s design experiments in my studio led to an amazing discovery. A deep forest green base with delicate gold stars caught everyone’s attention. My celebrity clients love this sophisticated yet festive combination that perfectly captures the holiday spirit.
Design description
The emerald green chrome finish changes and gleams like silk. What makes this look extraordinary comes from the metallic gold stars that seem to float on the surface. The chrome effect creates depth and the stars add that perfect touch of holiday magic.
How to achieve the look
Everything in this celestial design includes:
- Chrome powder in emerald green
- Gold star decals or paint
- Base and top coat
- Fine detail brush
- UV lamp for curing
A dark base coat creates the perfect depth. Pro tip: The chrome powder needs gentle buffing motions to create that perfect silk-like finish. The gold stars look best when placed naturally across the nail. A scattered pattern creates a more sophisticated look than uniform placement.
Occasions to wear
I’ve designed this look for many A-list events that range from holiday movie premieres to intimate Christmas gatherings. The sophisticated combination works beautifully at daytime meetings and evening soirées. This look’s versatility amazes me – it fits perfectly in corporate settings and shines at New Year’s celebrations.
Metallic Christmas Baubles
My latest holiday nail art collection features a stunning metallic Christmas bauble design that has become the most photographed look at my Los Angeles studio. The dimensional effect makes these ornaments look so realistic that clients often do a double-take!
Design description
Chrome-finish baubles create a floating illusion on the nail surface with a stunning 3D effect. What makes this design spectacular is the metallic finish that reflects light brilliantly from every angle. The baubles resemble real glass ornaments, and the subtle background dots add depth and dimension perfectly.
How to achieve the look
You need these items to create this festive design:
- Base color (nude or clear)
- Chrome powder in gold or silver
- Contrasting metallic polish
- Fine detail brush
- High-shine top coat
The design starts with two baubles placed at the vanguard of your nail. Pro tip: Your design will have more dimension if you add smaller baubles behind the main ones and link them with thin hanging strings. The design comes alive when you add special details to your main baubles with contrasting colors.
Occasions to wear
This design has graced many high-profile holiday events. Red carpet premieres and intimate Christmas gatherings showcase it beautifully. The sophisticated metallic finish adapts perfectly to formal celebrations and casual festivities. The design brings joy and keeps its refinement – making it ideal for those Instagram-worthy holiday moments.
Neutral Winter Landscape
Winter mornings in my hometown Savannah sparked the idea for a neutral landscape design. My minimalist clients at the Los Angeles studio love this winter-inspired approach that captures nature’s calm essence.
Design description
A pale periwinkle blue base anchors this design while delicate gray trees add depth and dimension. What makes this design unique lies in its layered technique that produces a misty, ethereal atmosphere. The shimmering formula captures light in different ways as the day progresses, much like winter’s ever-changing skies.
How to achieve the look
You’ll need these items to create this peaceful design:
- Julep “Joanna” periwinkle blue polish
- Born Pretty Stamping Polish #444 (Gray)
- Fine detail brush
- Matte top coat
- Black and white acrylic paint for mixing
Apply two coats of periwinkle blue polish as your base. Pro tip: The design gains depth when you stamp trees in sheer purple first. Layer gray trees slightly lower afterward. The final step brings the design together – mix black and white acrylic paint to create gray shades of different intensities. Paint the foreground trees with this mixture and add a light dusting of “snow” using the palest gray shade.
Occasions to wear
This design suits many winter events that call for subtle elegance. The neutral palette works beautifully for winter weddings and professional settings. Its artistic elements make it perfect for gallery openings and holiday soirées. The design moves naturally from day to evening events throughout the winter season.
Conclusion
My curated collection of Christmas nail designs strikes a perfect balance between festive charm and sophisticated elegance. These twenty designs showcase versatility that works for every holiday occasion, from corporate parties to intimate family gatherings. Over the last several years of working with celebrity clients in Los Angeles, I’ve refined these looks. You can now create salon-quality results at home.
Client interactions have taught me that holiday nail art should bring joy while staying refined. Each design reflects my steadfast dedication to help you express your festive spirit with elegance. Note that beautiful holiday nails don’t require perfection – they celebrate the season with style and confidence. My studio’s doors remain open to anyone who needs customized guidance to create these magical holiday looks.