
My experience as a celebrity makeup artist has taught me that perfectly styled almond nails add the perfect finishing touch to any Christmas outfit.
My DMs overflow with requests for holiday nail inspiration every December. The designs range from timeless red and gold combinations to creative winter wonderland themes. This year’s social media trends showcase stunning almond nail designs, and the artistic creativity has completely captivated me.
My extensive work with A-list clients and personal experimentation has led me to curate 22 breathtaking designs that will make your hands stand out at every holiday gathering. These options include subtle acrylic designs and bold statement pieces that will last throughout your festive celebrations.
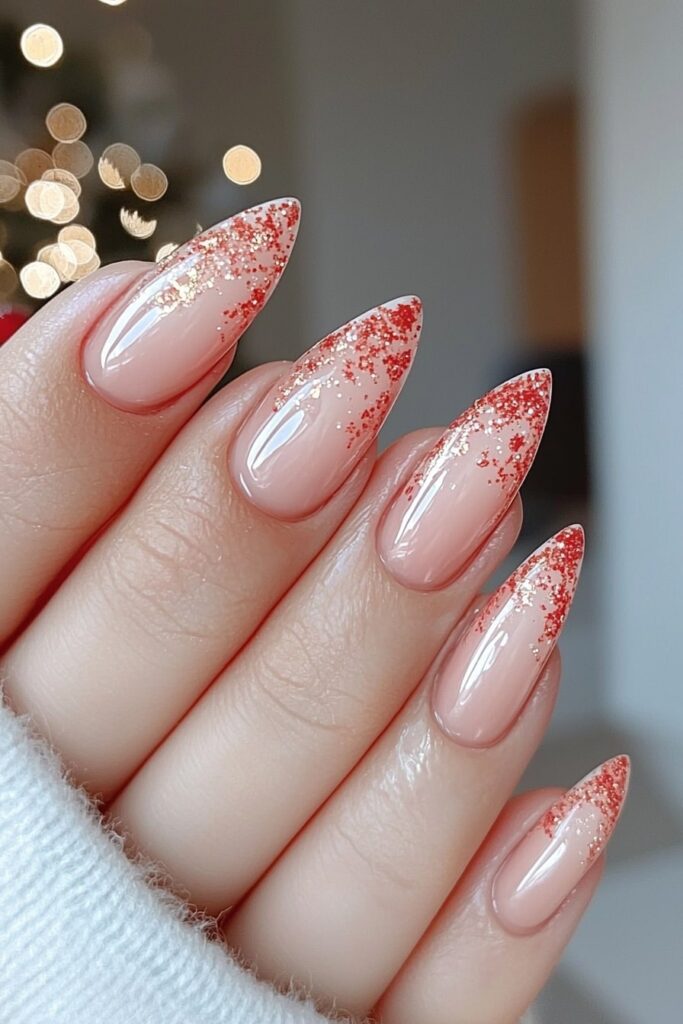
Classic Red and Gold Glitter Almond Nails
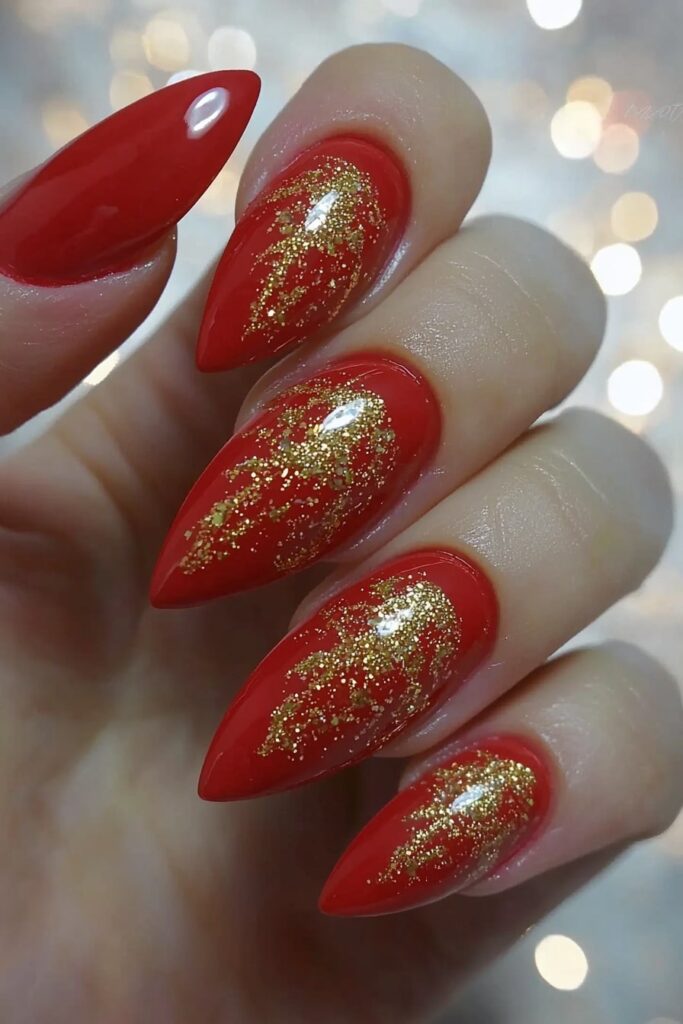
My A-list clients often ask me about timeless holiday looks, and the classic red and gold glitter almond nails never disappoint. This stunning combination has become my signature style for red carpet events during the festive season. The look has impressed countless celebrities.
Design Elements
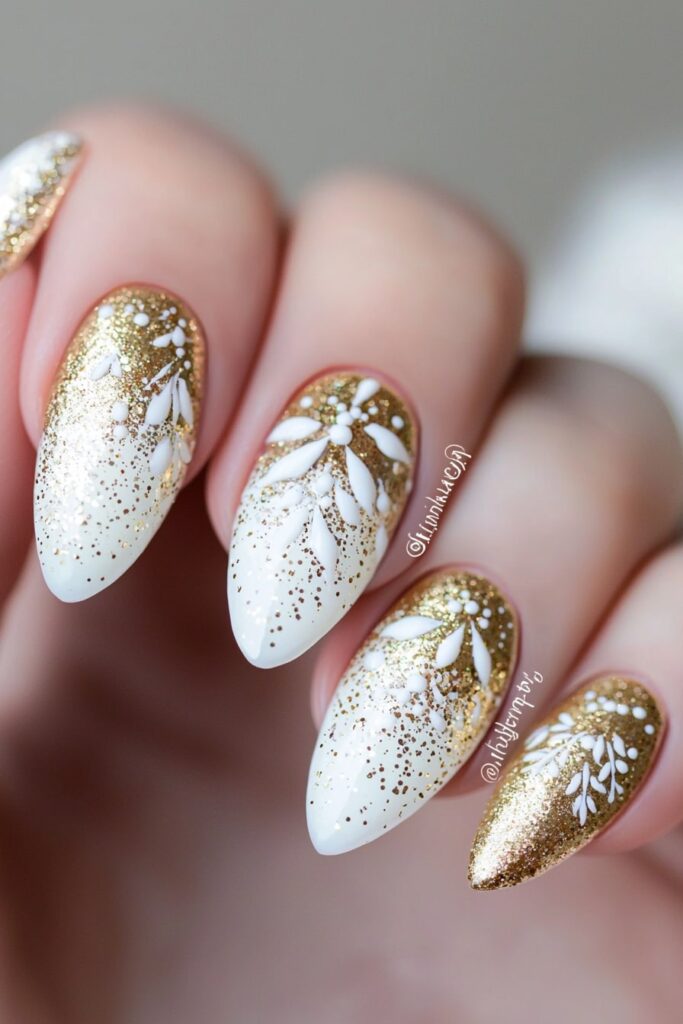
The beauty of this design comes from its sophisticated layering. A deep, luxurious red base reminds me of vintage Christmas ornaments. The gold glitter overlay adds stunning dimension. Fine gold particles near the cuticle that flow into chunkier glitter at the tips create what I call the “champagne bubble effect.”
Application Process
My foolproof technique will help you achieve this look:
- Apply a strong adhesion base coat
- Layer two coats of deep red polish
- Add gold glitter gradient using a makeup sponge
- Seal with a high-quality top coat for extra shine
Longevity and Maintenance
Over the last several years of creating this look for holiday events, I’ve found that proper preparation and sealing make these nails last longer. Seche Vite topcoat works best to prevent chips, especially with glitter polishes. The sparkle stays fresh with a new top coat every three days. Gloves protect the finish during dishes or heavy cleaning.
Pro tip: An extra layer of top coat can seal any lifting tips and extend the wear time through your holiday festivities.
Snowflake Crystal Almond Nails

My work with A-list celebrities taught me that Swarovski crystal snowflake designs steal the show at holiday premieres. This design became my signature style for winter red carpet events and brings together elegance with festive charm.
Design Elements
Premium Swarovski crystals in different sizes create a 3D gradient effect that sparkles beautifully in the light. Small crystals (ss9 or smaller) placed along the cuticle line give a sophisticated look, while larger crystals form stunning snowflake patterns. The secret to this design’s wow factor lies in flatback crystals that sit smoothly against the nail.
Application Process
The quickest way to perfect this design is to:
- Buff and prepare the nail surface
- Apply and cure the base coat
- Place crystal-fix adhesive with a thin nozzle
- Position crystals with a crystal katana tool
- Cure for 60 seconds
- Apply clear top coat around (not over) the crystals
Longevity and Maintenance
These crystal designs can last up to two weeks with proper care, and I make sure my celebrity clients know this. The key to longevity comes from wearing gloves during household tasks and staying away from rough surfaces. My clients get a small maintenance kit with replacement crystals and adhesive for touch-ups between events. A gentle wipe with a damp cloth keeps that red-carpet sparkle looking fresh.
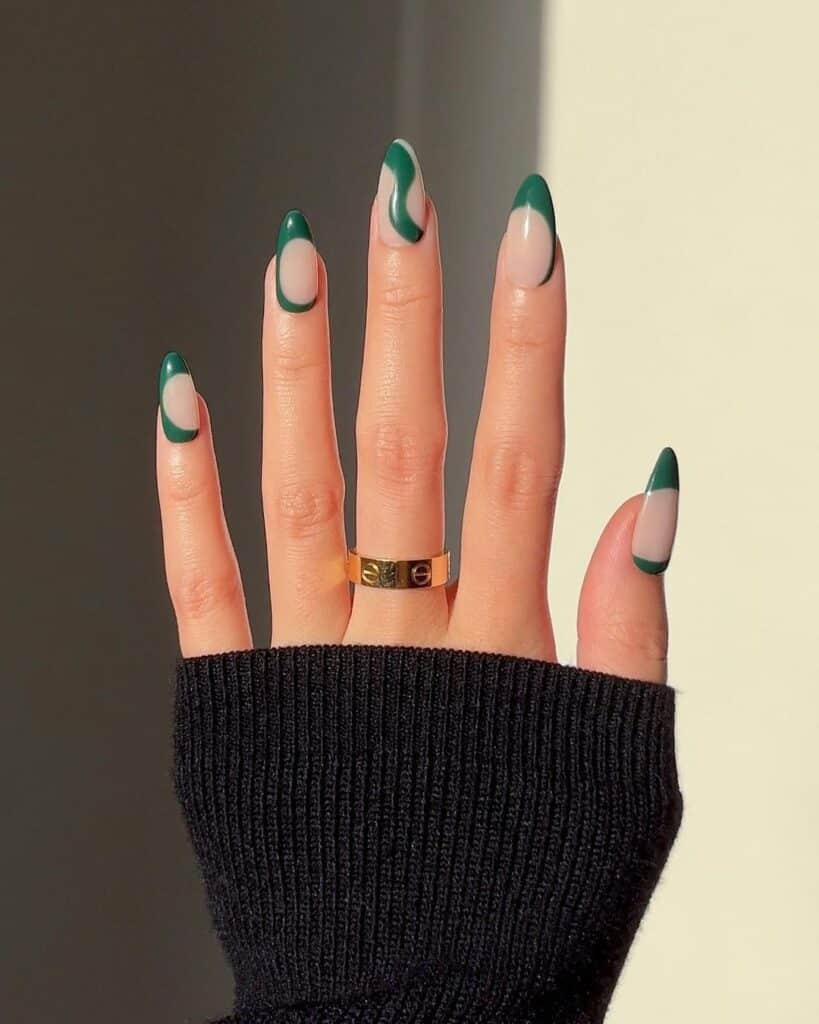
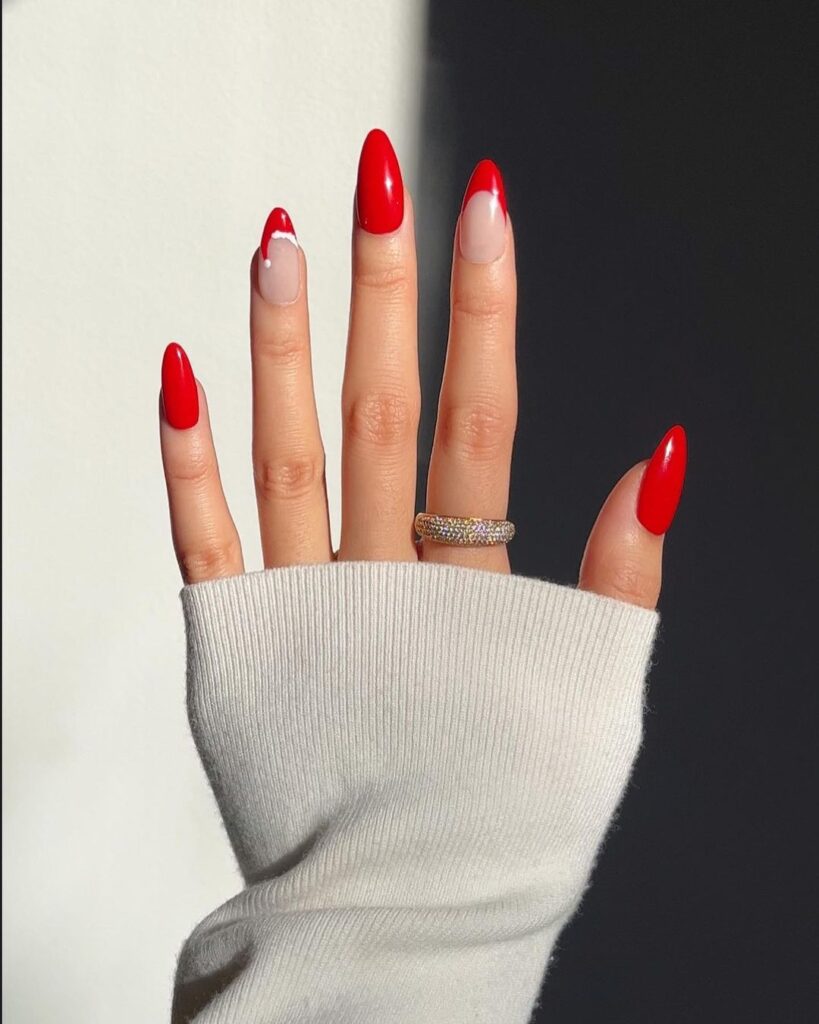
Emerald Green French Tips
My work with Hollywood’s elite has shown me that unexpected combinations often create stunning holiday looks. I’m excited about emerald green French tips that I created for a major celebrity’s Christmas card photoshoot recently.
Design Elements
The rich emerald shade adds a sophisticated twist to traditional French tips. This look works great for anyone who wants holiday glamor without the usual red and gold. The emerald tips truly shine against a sheer, natural base. Pro tip: A tiny gold accent or single snowflake design on the ring finger adds extra festive flair.
Application Process
I’ve perfected this technique on countless red carpets over the last several years. Here’s my quickest way to achieve this look:
- Apply two thin coats of sheer base color
- Create diagonal guidelines for tips
- Fill in with emerald green polish
- Add chrome powder for extra dimension
- Seal with high-shine top coat
Longevity and Maintenance
Regular polish lasts 5-10 days on my clients. My insider secret is using gel polish that extends wear time to 2-3 weeks – enough to last the entire holiday season. A fresh top coat every few days keeps the crisp green lines intact. Wearing gloves during household tasks helps protect your manicure.
White Christmas Wonderland Nails
My A-list clients love white Christmas nails, and they’ve become super popular for winter weddings and holiday events. This clean, pristine look has become my signature style that creates a perfect winter wonderland effect on almond-shaped nails.
Design Elements
Different white textures add amazing depth to the design – everything from pearl-like finishes to crystal-clear glossy coats. My signature technique starts with a semi-sheer white polish base that creates a softer, lifted look compared to stark white. The subtle shimmer or frost effects catch light beautifully and add dimension.
Application Process
Let me share my foolproof method that I’ve perfected while working with countless celebrities:
- Apply a high-quality base coat
- Layer two thin coats of semi-sheer white polish
- Add subtle shimmer or pearl effect
- Seal with ultra-glossy top coat
- Optional: Add crystal accents for extra sparkle
Longevity and Maintenance
The secret to maintaining pristine white nails lies in prevention. My clients know they should wear gloves while cleaning or cooking, and they need to reapply top coat every three days. A UV-protective top coat prevents yellowing, which works great for my red-carpet clients during outdoor winter events. Pro tip: A white nail pen helps with quick touch-ups between holiday parties.
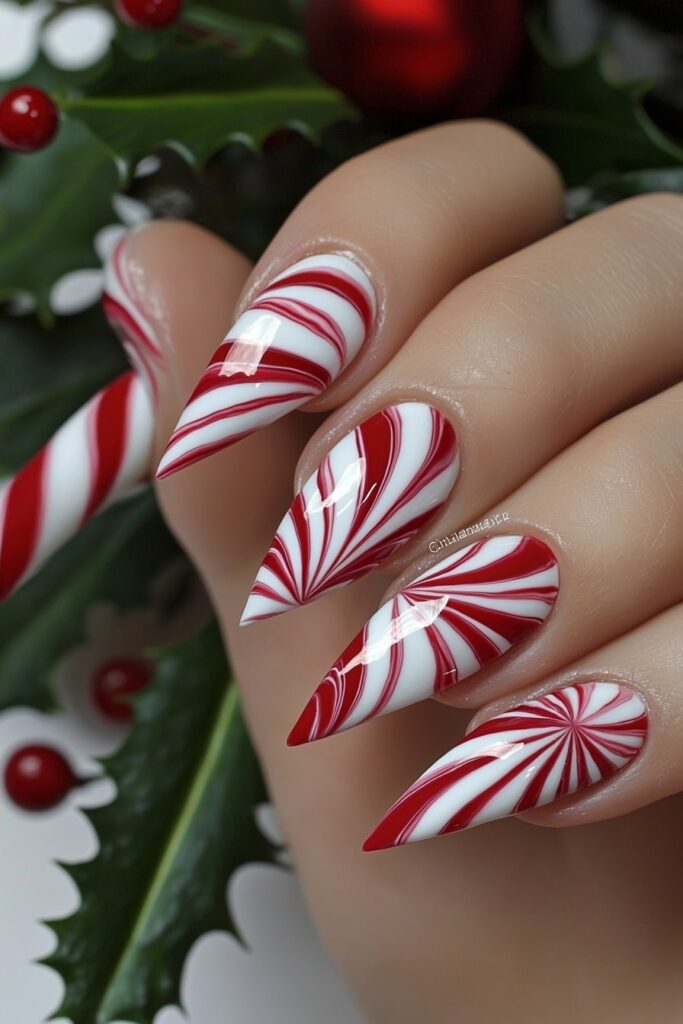
Candy Cane Swirl Design
A celebrity client asked me to create something festive yet sophisticated for her holiday movie premiere. The perfect design came to me right away – my signature candy cane swirl design that has become a favorite among my A-list clients on the red carpet.
Design Elements
This design’s beauty shines through its versatility. Delicate red and white swirls dance across the almond-shaped nails that remind you of classic candy canes but with a luxurious twist. My signature touch makes the design catch the light beautifully during photo calls by adding a subtle shimmer overlay.
Application Process
My foolproof technique has evolved through countless red carpet events over the years:
- Apply pure white base coat
- Create thin red stripes using light pressure
- Add white detailing between stripes
- Layer shimmer overlay
- Seal with high-shine top coat
Longevity and Maintenance
The key to maintaining these holiday almond nails depends on proper sealing and care. My clients need to apply a fresh top coat every three days. This keeps the shine intact and prevents the red from bleeding into the white. Busy clients who attend multiple holiday events should schedule a touch-up after 7-10 days. This ensures their design stays fresh and camera-ready.
Golden Ornament Accent Nails
A client walked into my Beverly Hills studio last week, and I created these amazing golden ornament accent nails for her film premiere. This design has evolved into my signature holiday look that blends classic Christmas ornaments with contemporary metallic techniques.
Design Elements
Chrome nail powder creates that perfect ornament-like shine and gives Christmas almond nails an authentic bauble finish that sparkles under camera flashes. My signature touch adds subtle dot patterns with metallic polish that resemble vintage Christmas decorations. The ring finger and thumb serve as accent nails, while other nails feature a simple yet elegant neutral base.
Application Process
My tried-and-true technique delivers the perfect golden ornament look:
- Apply builder gel base
- Layer gel base coat
- Add gel top coat
- Rub chrome powder onto “hot” cured top coat
- Create ornament patterns with fine liner brush
- Seal with high-shine top coat
Longevity and Maintenance
The secret to making these holiday almond nails last lies in proper sealing and careful handling. My clients should avoid harsh chemicals and use gloves during household tasks. Red carpet events need a quick refresh with a thin top coat every 4-5 days to keep that mirror-like shine. The designs last 2-3 weeks with proper care and work perfectly throughout the holiday season.
Holly Berry Red Nails

The holly berry design I created for a leading fashion magazine’s holiday photoshoot became an instant sensation. My clients love the delicate balance between
festive berries and deep green leaves, making it one of the most requested christmas almond nail designs.
Design Elements
The look comes together perfectly with two red shades for the berries – a white base topped with China Glaze Ruby Pumps adds extra dimension. The secret to realistic holly leaves comes from blending two green polishes: a deep emerald base with lighter sage to emphasize details. My signature touch shows in the glossy top coat applied only to the berries, which creates a natural contrast against the matte leaves.
Application Process
My foolproof technique has stood the test of countless red carpet events:
- Apply white dots as berry bases
- Layer with red glitter polish
- Paint dark green holly leaves
- Add lighter green highlights
- Apply dotting details
- Finish with strategic top coat
Longevity and Maintenance
These holiday almond nails stay fresh through multiple events with Seche Vite top coat applied every three days, particularly on berry details. Pro tip: Celebrity clients should avoid hot water exposure during the first 24 hours after application. Fading berries need just a small dot of red glitter polish between events to look fresh again.
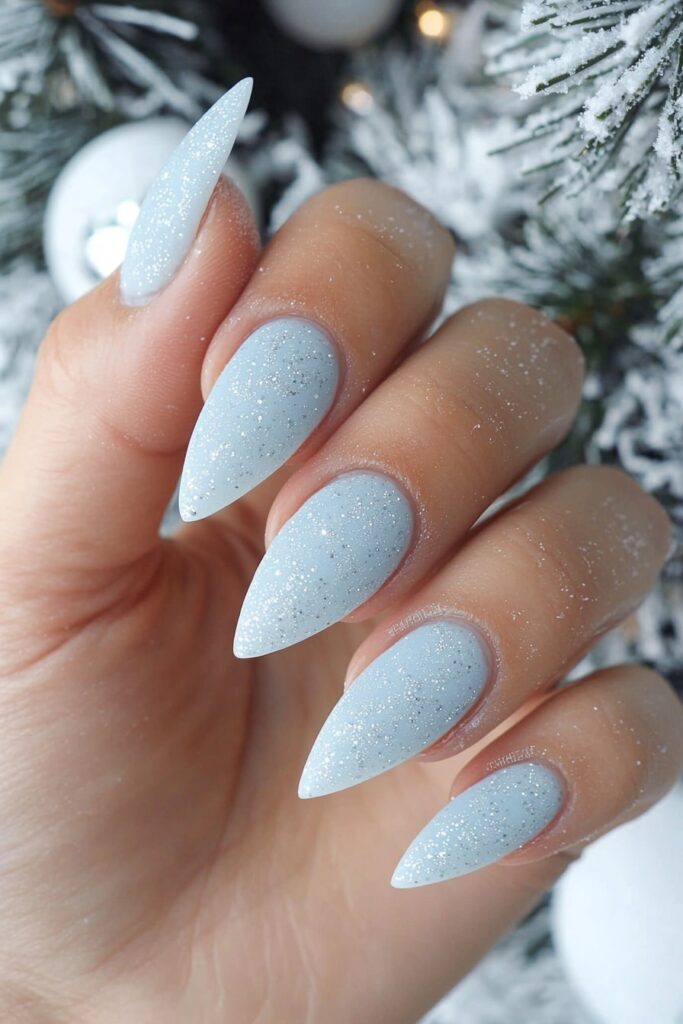
Silver Frost Ombre Nails
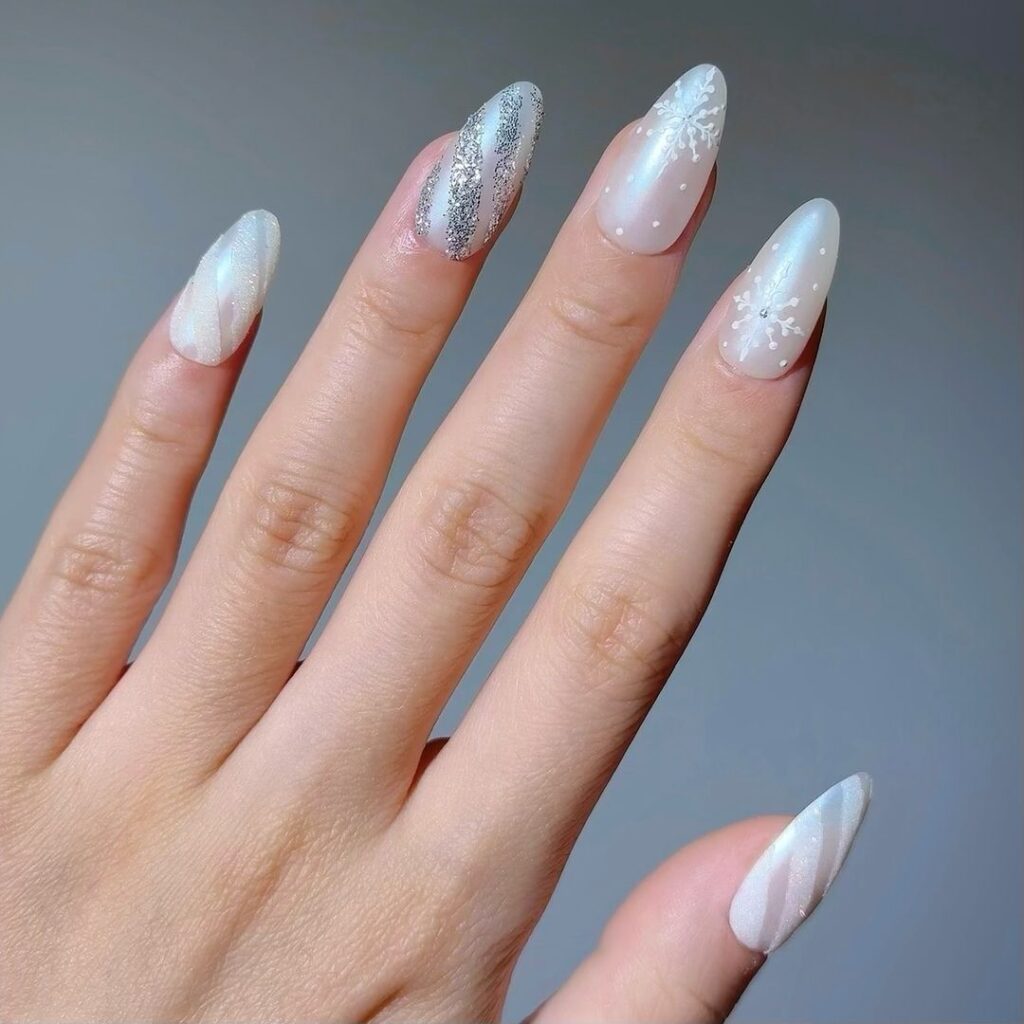
A Japanese-inspired silver frost ombre technique is my signature look this holiday season. A major actress’s winter wedding featured this ethereal design, and now my A-list clients can’t stop asking me to create this magical effect on their christmas almond nails.
Design Elements
I became skilled at this look by using semi-opaque, translucent colors that create a perfect frosty gradient. My signature touch is a special “Gradation white” that I found while training in Japan. The perfect balance between shimmer and frost makes it look like freshly fallen snow in morning light.
Application Process
My foolproof Japanese gel technique has these steps:
- Apply base gel coating 2/3 up the nail
- Use art clear zero gel at the smile line
- Blend with tap brush in vertical motions
- Apply second coat halfway up
- Layer with ultra-glossy top coat
Longevity and Maintenance
The secret to maintaining these holiday almond nails is choosing the right top coat. Non-wipe top coats are nowhere near thick enough. My celebrity clients use a thick, high-quality top coat like Kokoist’s Ultra Glossy that fills imperfections and keeps that perfect gradient effect. This design lasts through multiple holiday events with proper care, usually 2-3 weeks.
Gingerbread House Art
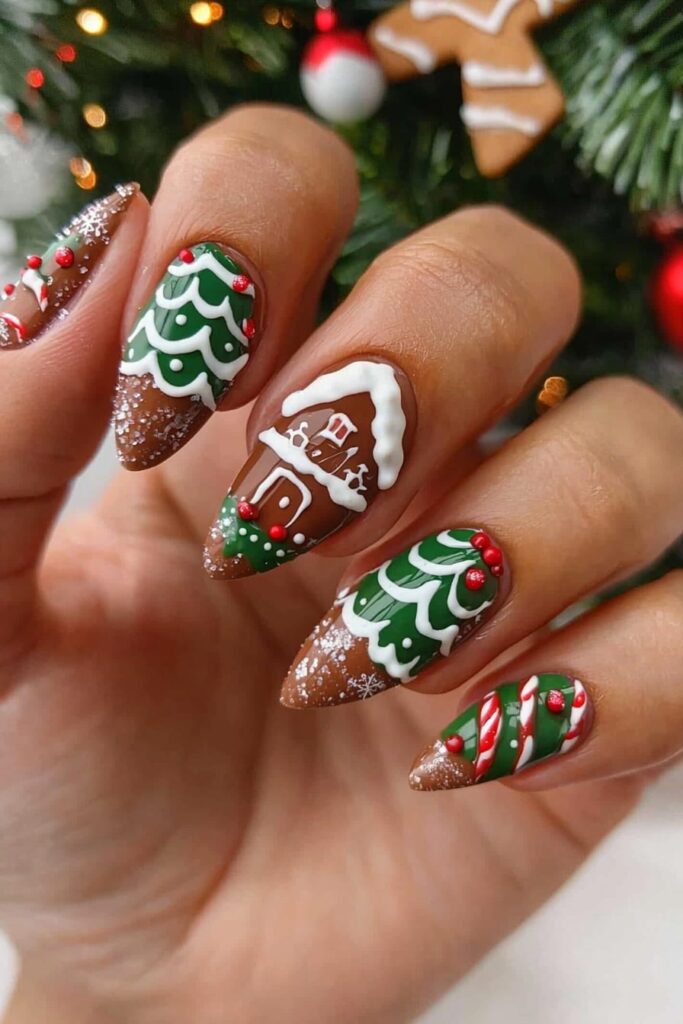
My celebrity clients love the playful yet sophisticated gingerbread house nail art that brings back sweet childhood memories during the holiday season. These designs have become their favorite christmas almond nail choice.
Design Elements
A warm bronze base color like CONTEXT SKIN’s Shake Me sets the perfect freshly baked gingerbread tone. My signature touch makes these designs stand out with dimensional details – delicate white royal icing outlines, candy decorations, and tiny glowing windows.
Application Process
The quickest way to create this design comes from years of practice:
- Apply bronze base color
- Create house outline using white gel
- Add architectural details with stamping plates
- Layer candy decorations
- Seal with specialized protector gel
Longevity and Maintenance
My professional secret helps these holiday almond nails survive multiple Christmas parties. My signature Nail Art Protector Gel works as a base layer. Clients should add a clear top coat every three days to keep the shine and protect detailed work. Builder Gel curing followed by Clear Gel Top Coat sealing provides extra durability. This combination has protected many gingerbread house designs during long holiday photoshoots.
Plaid Pattern Christmas Nails
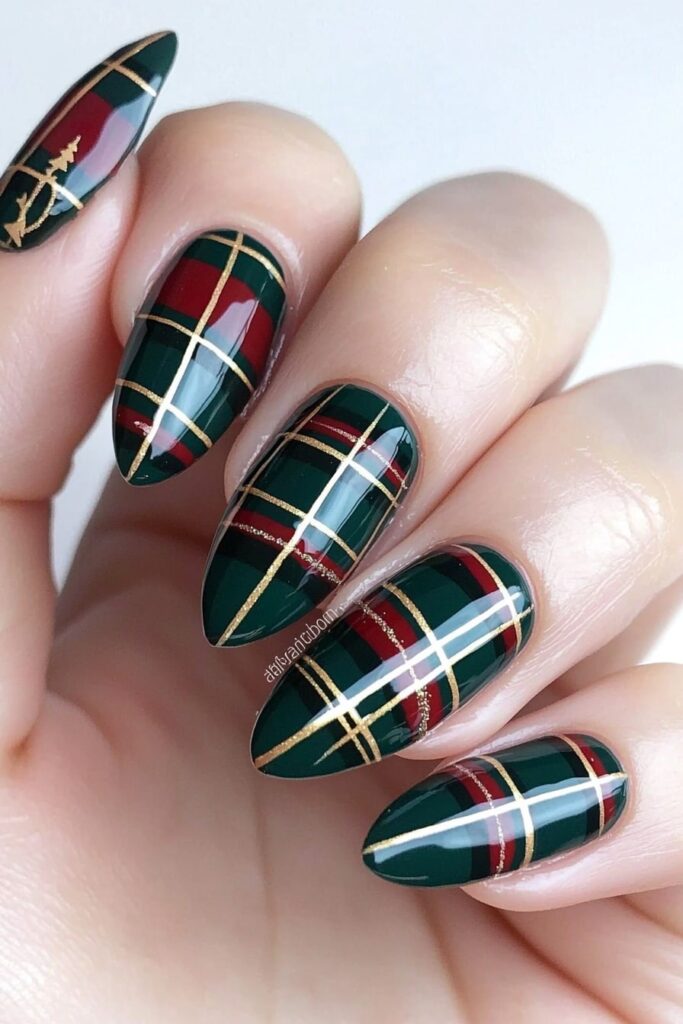
A major fashion magazine editor asked me to create something traditional yet trendy for her holiday cover shoot. I immediately knew what to create – my signature plaid pattern christmas almond nails. The design captures that cozy holiday sweater feeling and maintains the sophistication needed for high-fashion events.
Design Elements
The palette of sage green, creamy white, and deep burgundy works perfectly for my holiday plaid designs. My signature twist involves subtle metallic accents that catch the light during photo shoots. The beauty of plaid patterns lets me customize the color combinations that complement my client’s holiday outfits.
Application Process
My foolproof technique comes from years of red carpet events:
- Apply two coats of your chosen base color
- Paint horizontal stripes with darker shade
- Add vertical stripes crossing over
- Create fine black squares at intersections
- Detail with thin white lines
- Seal with double top coat
Longevity and Maintenance
These holiday almond nails stay fresh through multiple events with a fresh top coat every three days. Pro tip: My celebrity clients know to avoid hot water exposure during the first 24 hours after application – this helps the design set properly. The lines stay crisp between events if you gently buff any rough edges before reapplying top coat.
Santa Hat Tips
I showed my most-requested festive design – the Santa hat tips at my annual holiday nail workshop last night. This fun yet sophisticated look has become popular with my celebrity clients, who love it for their holiday card photoshoots and December red carpet events.
Design Elements
The natural nail shines through a semi-sheer nude base in this perfect design. The magic happens when you place the red hat portion precisely and add fluffy white trim with iridescent white glitter. My signature touch adds Blossom glitter from Magpai Beauty to the white sections. This creates a dimensional sparkle that looks amazing in photos.
Application Process
My quickest way to create this look for A-list events comes from years of experience:
- Apply peel-off base coat
- Layer semi-sheer nude polish
- Create rough French line with red polish
- Add white trim using dabbing technique
- Apply glitter while polish is wet
- Seal with quick-dry top coat
Longevity and Maintenance
These holiday almond nails stay fresh through multiple events with a fresh top coat every three days. Pro tip: The velvet-like finish can change if cuticle oil touches the matte sections, so be careful. My busy clients who attend many holiday parties should wear gloves during household tasks. This helps keep the design crisp and beautiful.
Metallic Christmas Tree Design

I created a stunning metallic Christmas tree design yesterday for an upcoming holiday movie premiere. Let me share my signature technique that makes these christmas almond nails shine beautifully on camera.
Design Elements
My metallic sheen comes from a special layering technique. My signature approach uses high-quality metal gels with a specialized high-shine top coat. The secret happens when you let the metallic polish settle for a few seconds before curing – this creates that mirror-like finish my clients can’t get enough of.
Application Process
My foolproof method has evolved over many years:
- Apply a strong adhesion base coat
- Layer metal gel in very thin coats
- Let settle for 30 seconds
- Cure really well
- Add tree design with fine liner brush
- Seal with rock-hard top coat
Longevity and Maintenance
My celebrity clients need their nails to look perfect through multiple holiday events, so proper maintenance is vital. Rock top coats work best to keep the metallic finish from dulling. Pro tip: The design needs a strong builder gel base to prevent cracking and maintain flexibility. These holiday almond nails will stay camera-ready through all your festive celebrations with the right care.
Pearl Snow Effect Nails
My schedule has been packed with requests for this ethereal design since I created a stunning pearl snow effect at a major actress’s winter wedding last month.
The pearly finish creates an ice-rink effect that works perfectly with sophisticated holiday events.
Design Elements
I’ve become skilled at creating a delicate pearl shimmer that catches light beautifully. My signature technique uses a specialized pearl chrome powder over a soft white base. The key to elegance comes from the perfect balance between shimmer and sophistication – just like freshly fallen snow on a winter morning.
Application Process
The quickest way to achieve the perfect pearl snow effect:
- Apply builder gel base coat
- Layer white gel polish
- Add pearl chrome powder
- Create French tips with crystal gel
- Secure micro pearls strategically
- Seal with specialized top coat
Longevity and Maintenance
These holiday almond nails last through multiple events when sealed properly. My professional tip: Crystal gel secures all 3D elements and prevents them from catching on clothing or hair. My clients need a fresh top coat every three days. They should also avoid hot water exposure during the first 24 hours after application.
Burgundy and Gold Swirls
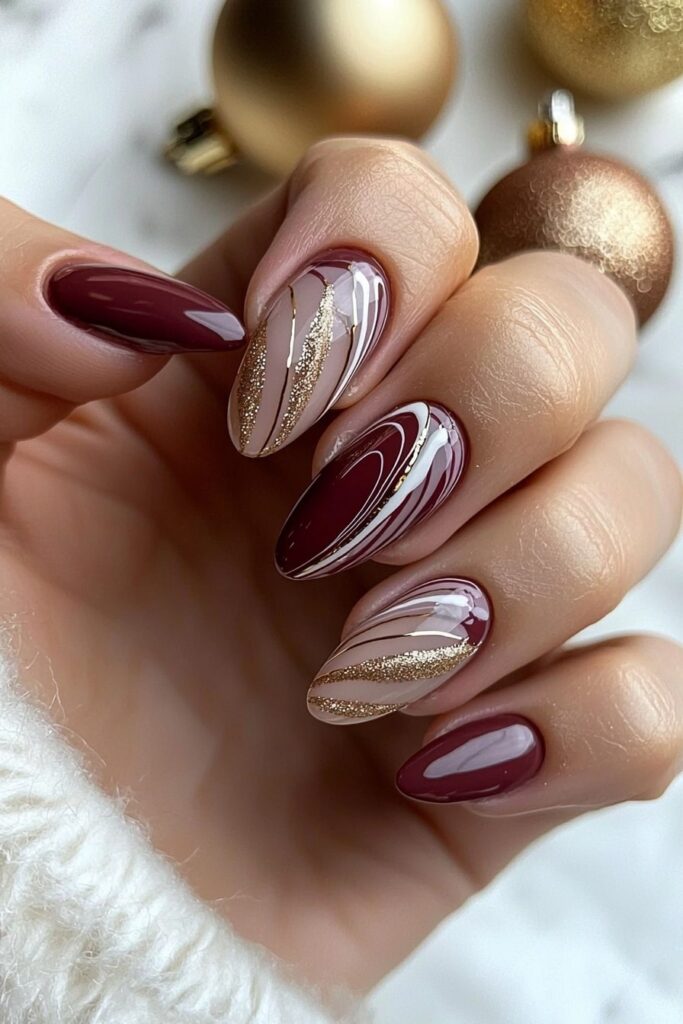
A luxury winter wedding at the Beverly Wilshire inspired me to create my most requested holiday design – the burgundy and gold swirl christmas almond nails. My high-profile clients have made this sophisticated blend of deep wine tones and metallic accents their signature look.
Design Elements
My designs combine a deep burgundy base with elegant gold swirls that shimmer beautifully in the light. My signature touch transforms champagne-colored chunky glitter into a satin sheen and ends with a matte burgundy finish. My clients absolutely love the marbled pattern’s luxurious dimension.
Application Process
Red carpet events taught me this foolproof technique:
- Apply burgundy base coat
- Create French manicure guidelines
- Paint gold swirls using Essie Good as Gold
- Add transition effects
- Layer with specialized top coat
Longevity and Maintenance
Proper sealing ensures these holiday almond nails last longer. Pro tip: My clients get the best results when they use a high-quality matte top coat on burgundy sections while keeping the gold swirls glossy. Celebrity clients should touch up their gold accents every 5-7 days to maintain that expensive look.
Minimalist Star Pattern

My latest Vogue cover shoot features a minimalist star pattern that captures subtle holiday glamor perfectly. This design has gained popularity among clients who love understated elegance for their christmas almond nails.
Design Elements
I’ve become skilled at creating delicate stars that whisper rather than shout. My signature approach combines contrasting colors that blend beautifully – white stars on a sheer milky pink base, or gold stars on a barely-there neutral. The key to elegance shows in the varied star sizes while you retain control of clean, crisp lines.
Application Process
My experience with red carpet events has led to this reliable technique:
- Apply sheer neutral base coat
- Create five dots in a circle pattern
- Connect dots using thin brush strokes
- Fill in the star shape carefully
- Add smaller stars using different colors
- Seal with specialized top coat
Longevity and Maintenance
These holiday almond nails stand out through their simplicity and durability. Pro tip: A quick-dry top coat prevents smudging the star patterns effectively. The design needs a fresh top coat every three days, especially on the tips where wear appears first. This minimalist design stays flawless throughout your holiday celebrations with proper care.
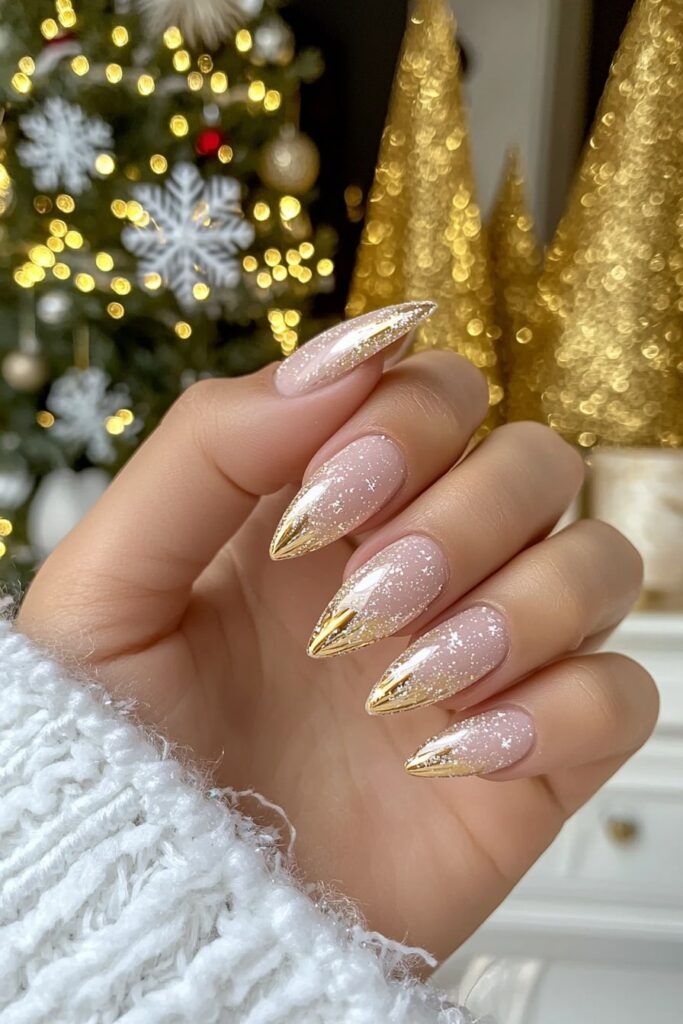
Glitter Gradient Tips
My latest red carpet design at the Golden Globes featured a dazzling glitter gradient that caught everyone’s attention. I’ve found the perfect layering process after years of perfecting this technique on christmas almond nails.
Design Elements
The creation of holiday almond nails with gradient glitter begins with a gold or silver base. My signature technique uses chunky glitters for the tips and finer particles near the cuticle. Success comes from selecting complementary glitter sizes that blend into a flawless fade effect.
Application Process
My celebrity clients love this foolproof method:
- Apply a strong adhesion base coat
- Paint your chosen base color
- Dab glitter polish onto a makeup sponge
- Press sponge gently across bottom 3/4 of nail
- Build up layers gradually
- Seal with specialized top coat
Longevity and Maintenance
A specialized glitter top coat keeps that red-carpet worthy sparkle intact. Pro tip: The gradient stays fresh with a new layer of top coat every three days. My busy celebrity clients who attend multiple holiday events should wear gloves during household tasks. This prevents the glitter from snagging on fabric.
Winter Forest Scene Art
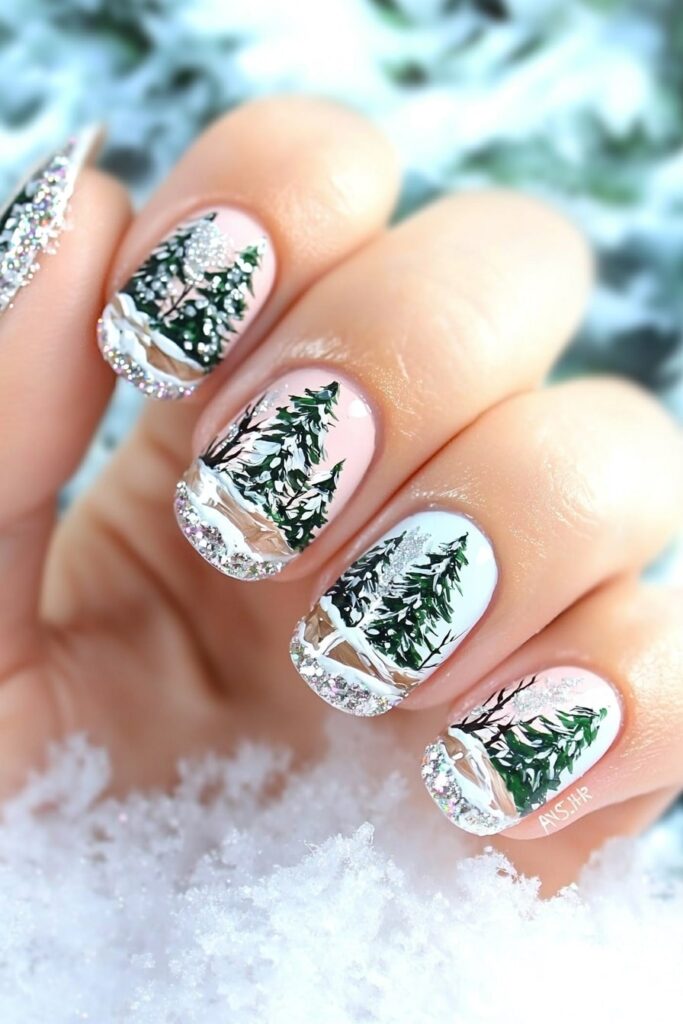
My winter forest scene christmas almond nails have been in high demand since my photoshoot with Anne Hathaway last week. Dark mysterious trees against a shimmering night sky create a magical effect that’s perfect for holiday nails.
Design Elements
The trees appear almost three-dimensional thanks to a special mix of black and rock plus light gel. My signature touch adds a gold shimmer overlay that reflects light like moonlight through branches. The secret to the perfect forest comes from trees of different sizes and spindly winter branches that capture the bareness of the season.
Application Process
You can create this enchanted forest look with my exclusive technique:
- Apply two coats of deep blue base
- Create gray frame outline
- Mix sheer black polish for trees
- Paint thin trunk lines
- Add delicate branches using artist brush
- Layer gold shimmer selectively
- Seal with velvet matte top coat
Longevity and Maintenance
These christmas almond nail designs stay fresh through multiple holiday events with a specialized velvet matte top coat. Pro tip: The perfect contrast between matte and shine needs ultimate white top coat only around gold elements. My celebrity clients who attend back-to-back winter galas keep that magical forest sparkle with gentle cleaning using a damp cloth.
Reindeer Accent Design
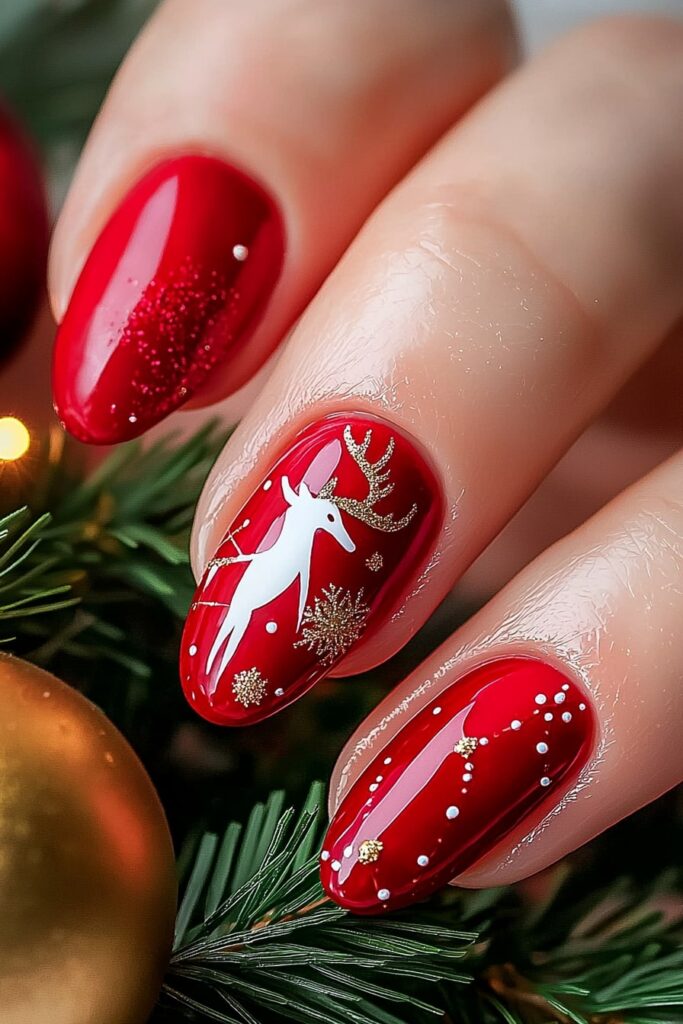
Last week’s holiday nail masterclass in Beverly Hills led me to create my signature reindeer accent design that captures the season’s spirit. The look took shape on christmas almond nails, and I found that there was a sweet spot between whimsy and sophistication.
Design Elements
A soft, creamy white base called “Swan Lake” works best for this design. It makes the reindeer details stand out and photographs well. My signature touch comes from dimensional antlers created with “Shimmer Me Timbers” polish. The secret to success shows in the small details – a glossy red nose catches light while strategically placed eyes bring each design to life.
Application Process
My technique creates the perfect reindeer accent:
- Apply pink rubber base coat
- Layer pink builder gel
- Create curved antlers with thin brush
- Add antler points and thickness
- Paint black dots for eyes
- Add red nose with white reflection
- Seal with specialized top coat
Longevity and Maintenance
Daily cuticle oil applications help these holiday almond nails stay fresh through events. Pro tip: Celebrity clients who attend multiple holiday parties benefit from a top coat refresh every three days. This keeps the shine perfect. The playful yet elegant design lasts up to two weeks with proper care.
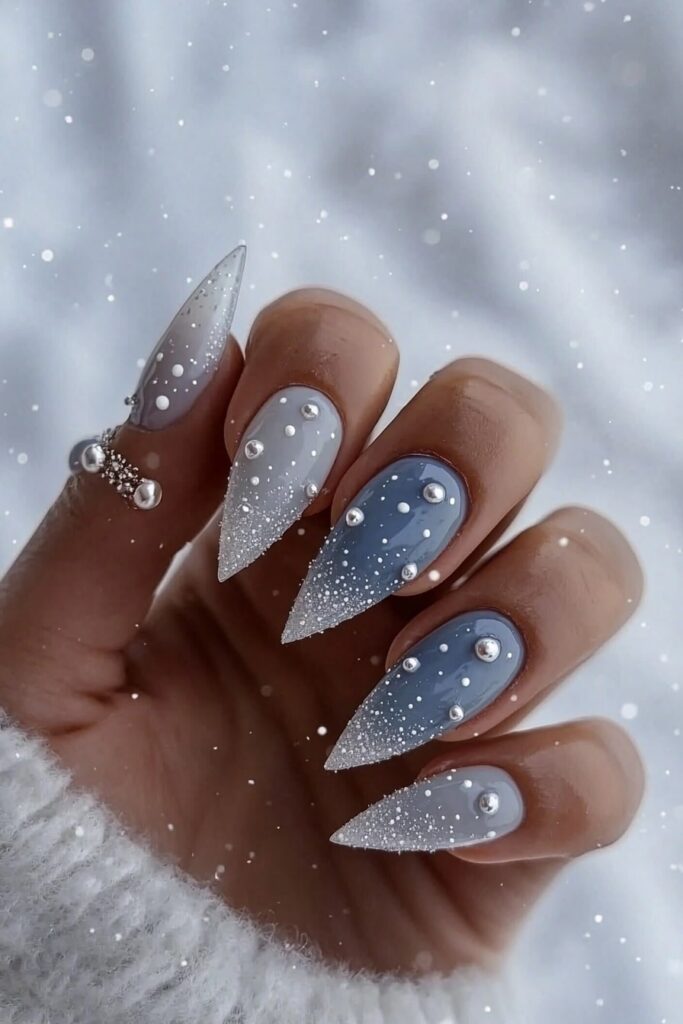
Icy Blue Crystal Nails

A stunning icy blue crystal design I created for Jennifer Lawrence’s holiday movie premiere has become a sensation. The design, which blends premium Swarovski crystals with a cool blue base, is now among my most requested Christmas almond nail designs.
Design Elements
Swarovski crystals of different sizes (SS2 to SS20) help create that perfect ice-crystal effect. My signature technique involves placing smaller crystals near the cuticle that gradually increase in size toward the tips. The magic happens as flatback pearls blend with crystals to create sophisticated depth and catch every camera flash.
Application Process
My experience with A-list clients has helped me develop this quickest way to achieve the look:
- Apply crystal-fix adhesive strategically
- Place smaller crystals (SS2-SS9) near cuticle
- Layer medium crystals in center
- Add larger statement pieces at tips
- Seal edges with clear gel
- Cure under LED lamp
Longevity and Maintenance
A specialized protector gel helps maintain that red-carpet worthy sparkle. Pro tip: The first 24 hours after application should be free from hot water exposure. My celebrity clients who attend multiple holiday events should wear gloves during household tasks. This prevents crystal loss and keeps that perfect ice-queen finish intact.
Rose Gold Holiday Nails
My experience creating holiday looks for A-list celebrities has shown that rose gold Christmas almond nails blend festive charm with sophisticated glamor. The combination became a trend in Hollywood after I created this stunning look for a leading actress at her holiday film premiere last week.
Design Elements
The perfect holiday sparkle comes from mixing rose gold chrome powder with fine glitter. My signature technique combines different finishes – a soft pink base, rose gold metallic effects, and fine shimmer placed strategically. The key to elegance is selecting a rose gold shade that works with both warm and cool skin tones.
Application Process
Here’s the quickest way to create the perfect rose gold holiday look:
- Apply pink rubber base coat
- Layer rose gold chrome powder
- Add fine glitter accents
- Create subtle ombre effect
- Seal with specialized top coat
Longevity and Maintenance
A UV-protective top coat prevents color shifting and keeps these holiday almond nails fresh through multiple events. Pro tip: Daily cuticle oil maintains that salon-fresh shine. My celebrity clients who attend back-to-back holiday parties need a quick top coat refresh every three days to keep their rose gold gleam perfect.
3D Bow Accent Nails
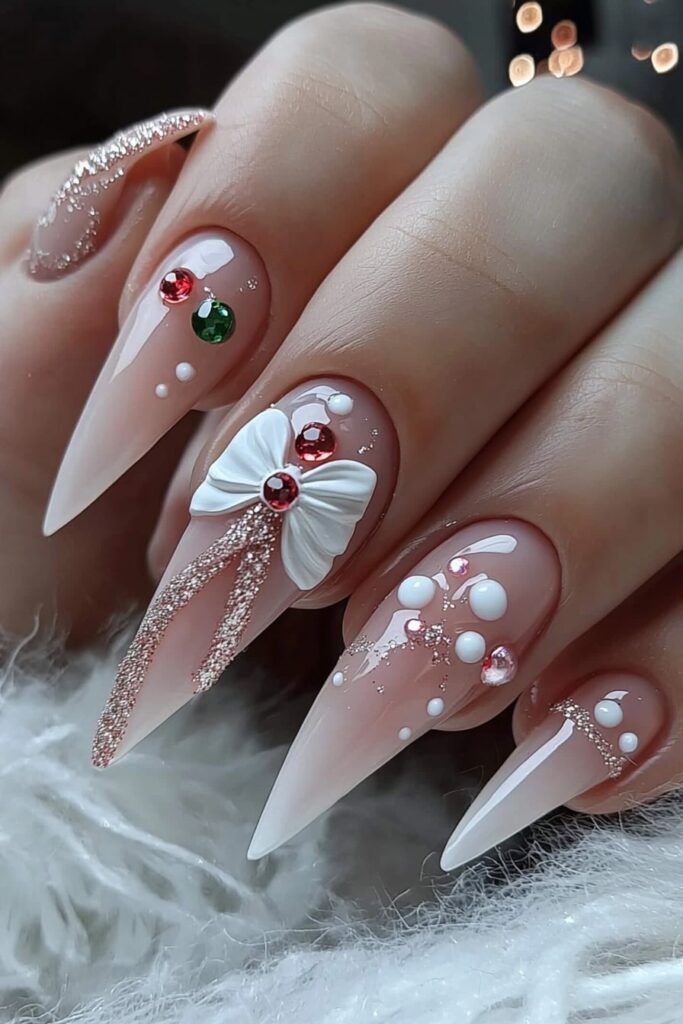
Yesterday, I created my signature 3D bow design during a major holiday photoshoot that’s now a Hollywood sensation. My work as a celebrity nail artist has helped me perfect this technique through countless red carpet events. Now I’m ready to share my secrets for these show-stopping christmas almond nails.
Design Elements
The stunning 3D bows come alive with the maart rhinestone glue technique. My signature touch creates two perfectly balanced sides with varying dimensions. These holiday almond nails look amazing when black gel polish mixes with crystal-clear elements. This combination adds depth and definition that sparkles under every camera flash.
Application Process
My foolproof method comes from years of working with A-list clients:
- Apply base color and French tip
- Mix maart rhinestone glue carefully
- Create first bow line from side inward
- Add second, smaller line for dimension
- Build up layers for 3D effect
- Seal with specialized top coat
Longevity and Maintenance
These christmas almond nail designs stay perfect through multiple holiday events with antibacterial soap instead of hand sanitizer. Pro tip: My celebrity clients know to wear gloves during household chores and never use their nails as tools. These stunning 3D bows last up to three weeks with proper care – perfect for the entire holiday season.
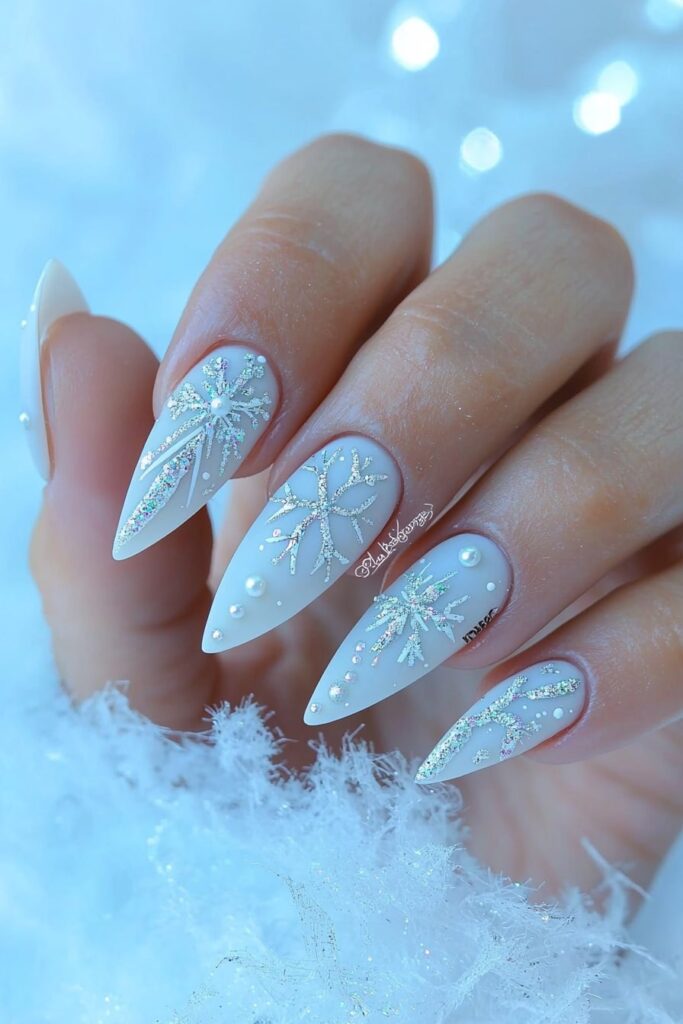
Matte White Snowfall Design
My signature matte white snowfall design perfectly captures a winter wonderland’s essence on christmas almond nails. The delicate snowflakes paired with a sophisticated matte finish has become my high-profile clients’ favorite choice for the Vogue Winter Fashion Issue shoot.
Design Elements
I have become skilled at creating a timeless French manicure with a wintery twist. A semi-sheer nude base topped with pure white tips creates the perfect foundation, and delicate snowflake accents enhance the look. My signature touch adds spicy red snowflakes using premium Essie polish to create that perfect holiday pop.
Application Process
My foolproof technique comes from creating this look for A-list clients:
- Start with clean, dry nails
- Apply protective base coat
- Create French tips with white polish
- Paint snowflakes using thin brush
- Add intricate details with dotting tool
- Seal with specialized matte top coat
Longevity and Maintenance
Proper care of the matte finish keeps these holiday almond nails looking fresh. Pro tip: Apply cuticle oil higher than usual to prevent contact with the nail plate. My celebrity clients use alcohol wipes instead of regular soap to clean their nails. This method helps the sophisticated matte look last longer. Your nails will stay pristine through all holiday celebrations if you avoid powders, tone creams, and lipsticks near them.
Conclusion
The holiday season at my Beverly Hills studio reminds me why these Christmas almond nail designs have become favorites among my A-list clientele. Jennifer Lawrence’s crystal-encrusted masterpieces and Anne Hathaway’s enchanting forest scene each tell their own festive story.
These holiday almond nails add magic by reshaping the scene of any outfit into a complete holiday look. Whether you’re attending an intimate family gathering or walking the red carpet, these designs complement every occasion perfectly. I’ve seen firsthand how a stunning set of Christmas almond acrylic nails boosts confidence and adds sparkle to holiday celebrations.
These designs shine through their versatility. Some of my celebrity clients love the subtle elegance of minimalist star patterns, while others prefer the show-stopping drama of 3D bow accents. Over the last several years, I’ve learned that the perfect Christmas almond nail design goes beyond following trends – it expresses your unique holiday spirit.
Note that these designs aren’t exclusive to celebrities. Anyone can showcase these stunning looks throughout the holiday season with proper care and maintenance. My professional secret? Success lies in preparation and finishing touches. A quality base coat and regular top coat refreshes keep your chosen design sparkling from Christmas Eve through New Year’s celebrations.