
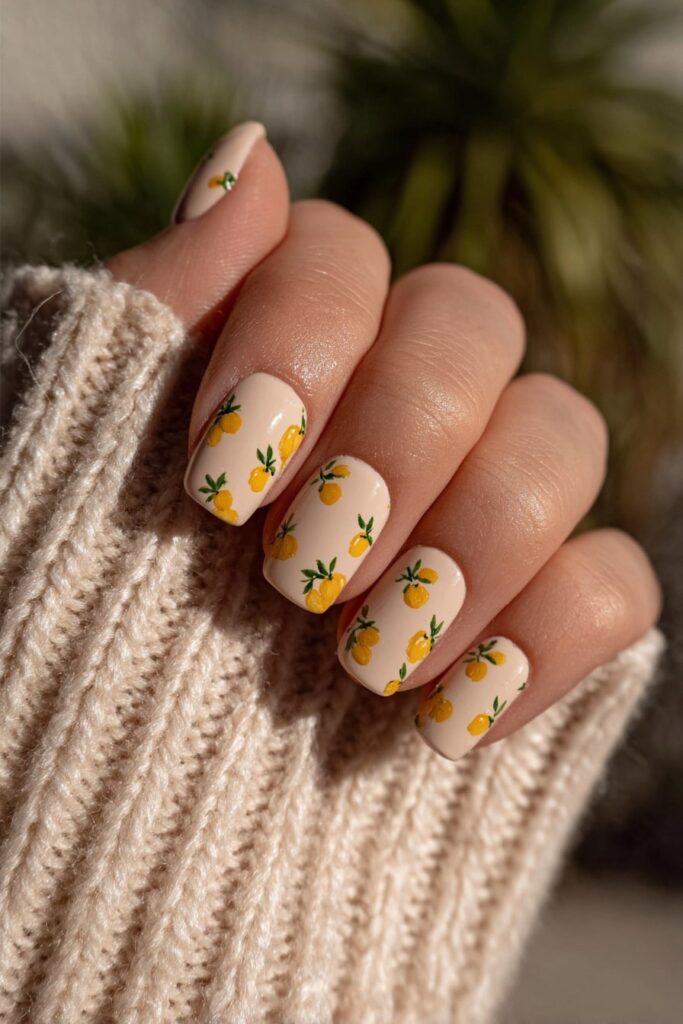
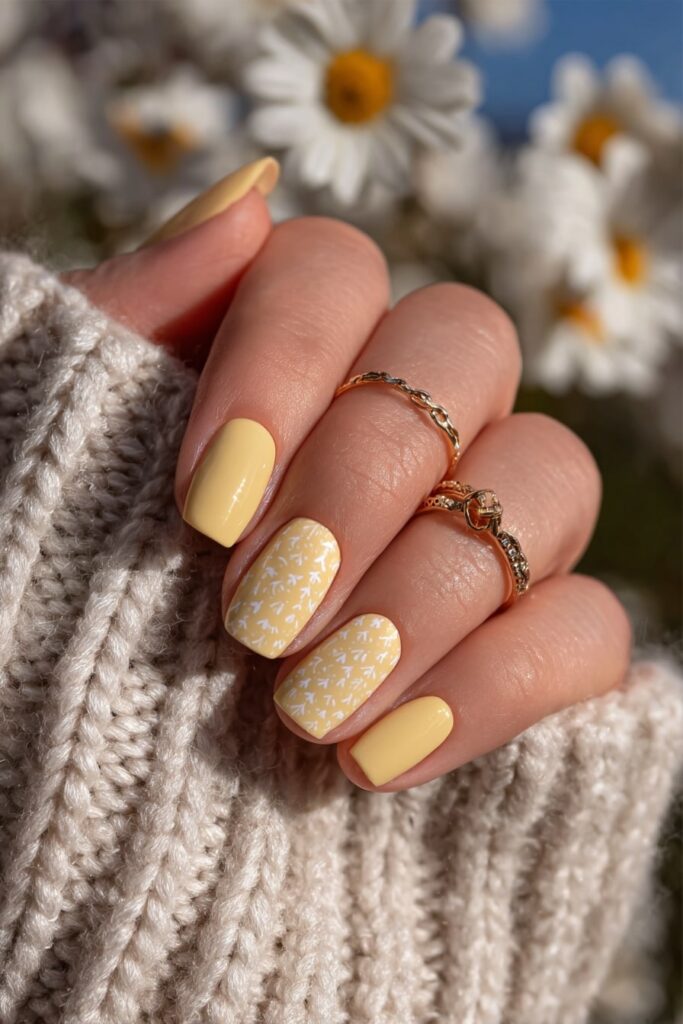
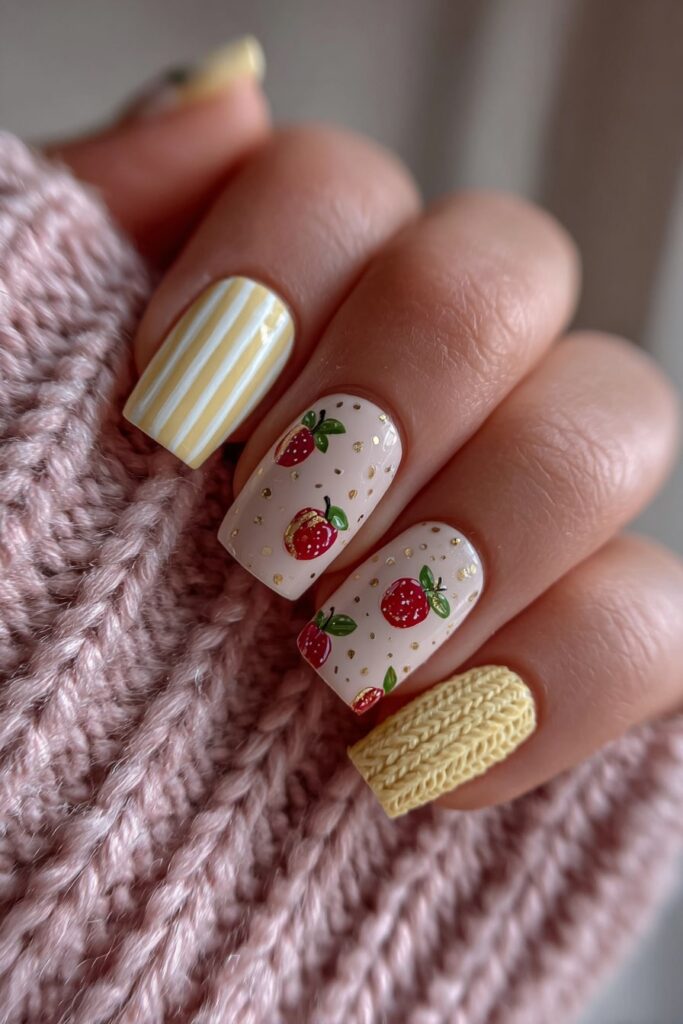
Back to school nails are my absolute favorite way to kick off a new school year with some personality! I’ve always loved expressing myself through creative nail art, especially when that first day excitement (and let’s be honest, a little nervousness) starts to kick in.
With the new school year starting, it’s the perfect time to show some playful yet appropriate nail art that highlights your school spirit or favorite subjects. Whether you’re into cute nail designs for back to school that feature your favorite school supplies or school themed nails inspired by subjects like math and chemistry, these ideas can help you make a statement. I’ve found that first day of school nails are one of those little confidence boosters that make saying goodbye to summer just a bit easier. In fact, planning your back-to-school nails is one of the perks of saying goodbye to summer. From Crayola-inspired designs that bring back childhood memories to chalkboard-themed manicures, I’ve gathered 14 cute back to school nails that are sure to get you an A+ in style.
Lisa Frank Swirl Nails
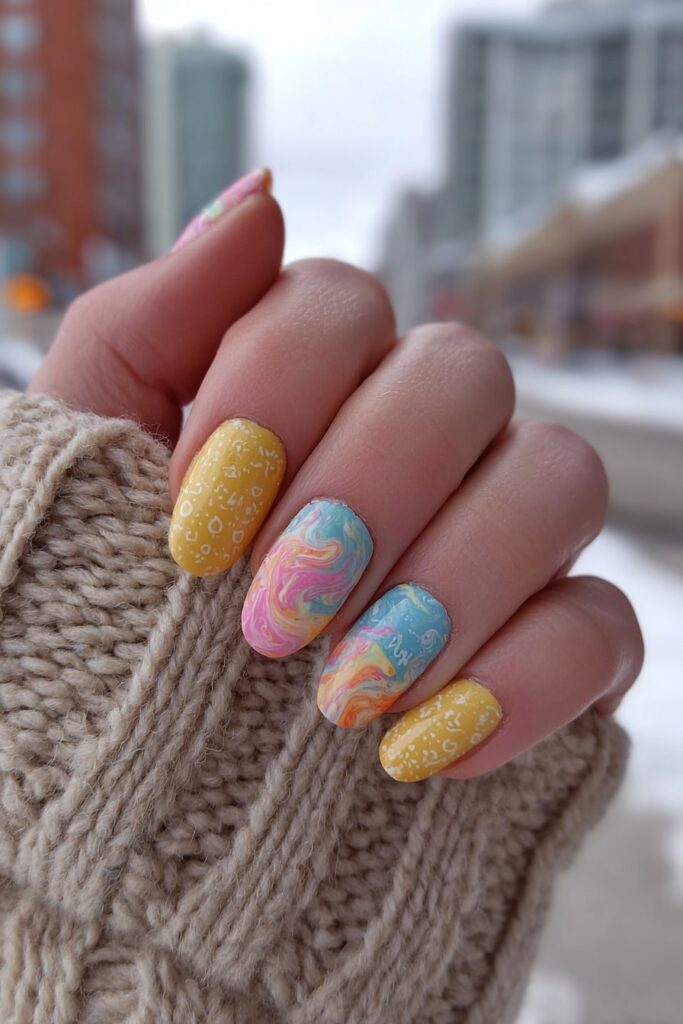
Nothing transports me back to my childhood quite like the vibrant swirls and patterns of Lisa Frank designs! For a nostalgic yet trendy back-to-school statement, Lisa Frank-inspired swirl nails offer that perfect blend of playfulness and self-expression.
Lisa Frank Swirl Nails inspiration
Remember those colorful tiger stripe designs and rainbow patterns that dominated school supplies in the 90s? Lisa Frank’s iconic esthetic has made a major comeback for first day of school nails. I’ve noticed this nostalgic style trending again, particularly with bright neon rainbow tiger stripes that capture that signature Lisa Frank vibe.
The inspiration behind these nails comes from those beloved folders, stickers, and backpacks we treasured as kids. Additionally, many nail artists draw from specific Lisa Frank motifs like tie-dye stars, rainbow leopard prints, and rainbow unicorns to create these vibrant manicures. What makes these designs so perfect for back to school nail ideas is their ability to showcase personality while celebrating that back-to-school excitement.
Lisa Frank Swirl Nails color palette
The magic of Lisa Frank nails lies in their bold color selection. For authentic Lisa Frank swirls, you’ll need a collection of neon shades. Based on professional nail artists’ recommendations, the ideal color palette includes:
- Bright pink (like Color Club’s “Warhol”)
- Vibrant orange (such as “One Love”)
- Sunshine yellow (“Yellow and Yellow”)
- Electric green (“We Liming”)
- Vivid blue (“Chelsea Girl”)
- Rich purple (“Mrs Robinson”)
Furthermore, some artists enhance their designs with cat eye gel in purple, pink, blue, and green to add dimension and that signature Lisa Frank sparkle. Starting with a white base coat helps these colors pop even more brilliantly against your nail.
Lisa Frank Swirl Nails DIY tips
Creating Lisa Frank swirls might look complex, but with the right approach, even beginners can achieve this look. Initially, I recommend applying a clear or peely base coat for easier removal when you’re ready to change your design. Subsequently, apply a white base color – this crucial step ensures your neon colors appear bright and vibrant.
For stamping techniques, use a tiger stripe design stamping plate (like the m69 Conan plate) and apply colors at an angle. To create more dimension, many professional nail artists suggest mixing colors to create lighter shades for highlighting, since Lisa Frank art features significant dimension through strategic shading and highlighting.
Silicone tools work wonderfully for sculpting and carving out intricate designs. After completing your design, seal everything with a quality top coat to protect your artwork and add shine to your cute back to school nails.
Crayon-Inspired Nails
Crayons aren’t just for coloring books anymore! I’ve discovered that these childhood staples make for absolutely adorable back to school nail designs that capture that perfect blend of nostalgia and creativity.
Crayon-Inspired Nails design idea
The basic concept of crayon nails involves painting each nail a different bright color to represent a crayon set. What makes this design truly special is the attention to detail—the tips can be painted in a jagged pattern to mimic actual crayon tips, with a label band in the middle stating the color name.
Creating this look requires some planning, yet it’s surprisingly doable. First, I recommend applying a clear base coat. Then, paint each nail a different vibrant color—I prefer going in rainbow order for that classic crayon box feel. For the crayon wrapper effect, use a striping brush to outline the area where your squiggle will appear. The trickiest part is creating that wavy line that separates the wrapper from the crayon tip. My approach? Draw hills along one line with a detail brush, then repeat the process along the opposite line.
Crayon-Inspired Nails color choices
For authentic crayon nails, vibrant colors are absolutely essential. Generally, lighter shades work better as they show details more clearly. I typically select a lighter version of the crayon color for the paper wrapping portion, as crayon wrappers are usually lighter than the actual crayon.
Consider these color combinations for maximum impact:
- Bright primary colors (red, yellow, blue)
- Bold secondary colors (green, orange, purple)
- Fun pastel variations for a softer look
The contrast between the matte wrapper and glossy crayon tip creates that authentic crayon look—I use matte top coat over the bottom half of the nail and regular top coat on the tip.
Crayon-Inspired Nails for school spirit
Nothing says “back to school” quite like a box of crayons. These vibrant designs are perfect for showing school spirit, moreover, they’re conversation starters that showcase your creative personality. Throughout my experience, I’ve found these nails particularly popular among teachers and education students.
The design is colorful and eye-catching, making it ideal for those who love expressive nail art. Actually, I’ve noticed that this style makes people nostalgic for their youth, creating instant connections with classmates or students.
Whether you’re a student heading back to classes or an educator preparing to welcome new students, crayon-inspired nails are that perfect blend of professional and playful that suits the back-to-school season. They’re undoubtedly cute first day of school nails that bring cheerful vibes to any classroom.
Looseleaf Paper Nails
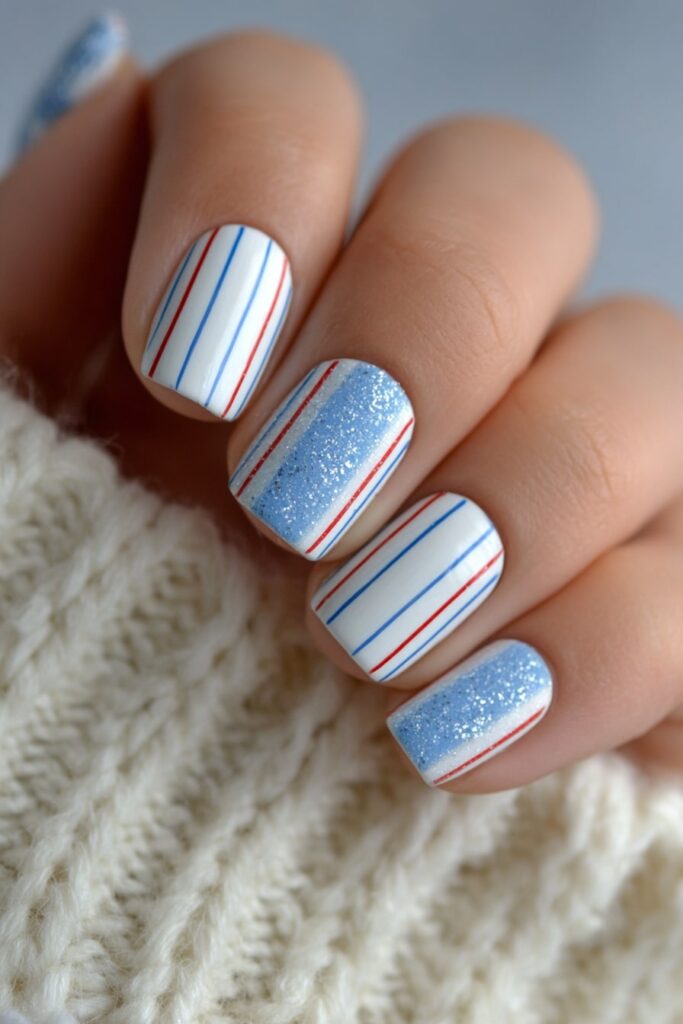
Looseleaf paper nails capture the essence of back-to-school season in the most charming way possible. This design transforms your fingertips into miniature sheets of notebook paper—complete with those familiar blue lines and pink margins we all remember from our school days.
Looseleaf Paper Nails base design
The foundation of this cute back to school nail design begins with a clean white base. I’ve discovered that achieving the perfect paper look requires patience and attention to detail. First, apply a quality base coat to protect your natural nails. Next, paint all your nails with a solid white polish—this represents the notebook paper itself.
For the best results, ensure your white base has full coverage over the entire nail. Often, this requires multiple coats to achieve that even, solid white color. Above all, the most critical step is allowing your base to dry completely before moving to the next step. If your nails remain sticky at all, the markers or polish used for detailing won’t work properly.
Looseleaf Paper Nails line detailing
The magic of these school themed nails comes alive with the precise line work. For authentic looseleaf paper detailing, you’ll need:
- Light blue polish or marker for horizontal lines
- Pink or red polish/marker for the vertical margin line
- Thin detail brush or striping tool
Begin by adding the blue horizontal lines across your white nails. The easiest technique involves keeping your brush completely still while rotating your nail to create straight, even lines. Space them evenly for that classic notebook paper appearance. Once the blue lines are complete, add a pink or red vertical line down one side of each nail to create the margin. Consequently, this simple detail instantly transforms your design into recognizable looseleaf paper.
Looseleaf Paper Nails creative add-ons
Although the basic lined paper design looks clean and crisp on its own, adding creative doodles takes these first day of school nails to another level. Using a black marker or thin brush, you can add playful sketches like hearts, stars, flowers, or even math equations.
The matte finish truly elevates this design! Originally, I tried the design with a glossy finish, yet discovered the matte topcoat makes it look significantly more like actual paper. Hence, finishing with a matte top coat creates the perfect paper texture.
Despite its detailed appearance, this design doesn’t require nail art expertise or knowledge of the hottest nail trends. Instead, it simply needs patience and a steady hand. These nails consistently receive compliments whenever I wear them for back-to-school events—fellow teachers and students alike appreciate the creative nod to classroom essentials!
Pencil Tip Nails
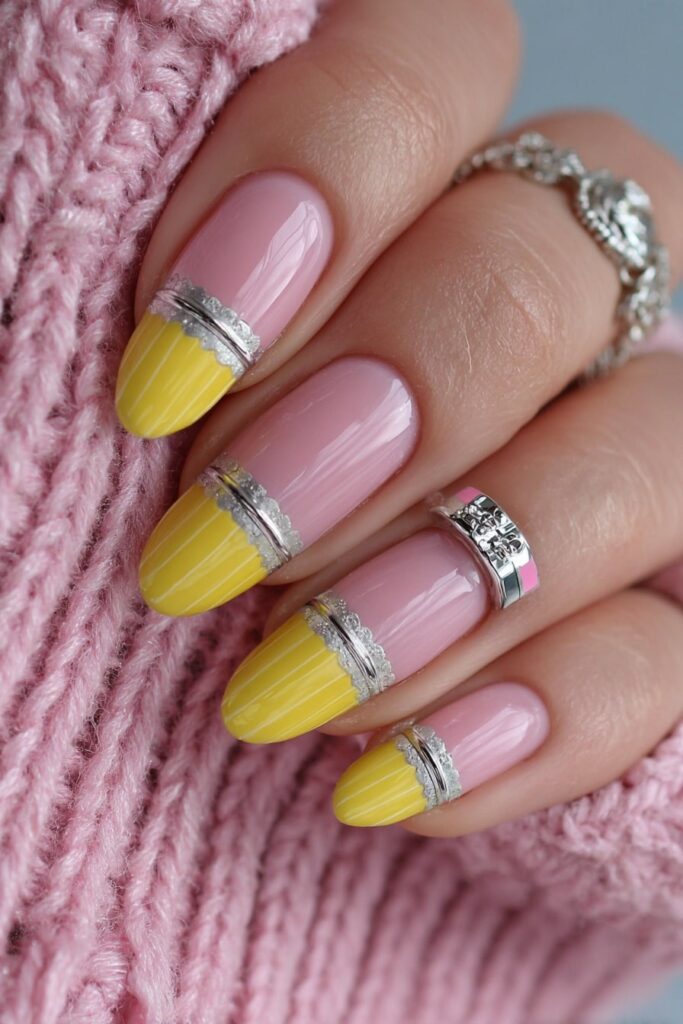
I’ve always thought pencils make for the most iconic school supply nail art! These pencil tip nails perfectly capture that back-to-school spirit while showcasing your creativity in a subtle yet recognizable way.
Pencil Tip Nails shape and color
For authentic pencil tip nails, the color combination is everything. The classic design features three distinct sections that mimic a real pencil:
- A yellow base representing the pencil body
- A pink or reddish tip mimicking the eraser
- A black pointed tip resembling the graphite
Naturally, the yellow portion should cover most of the nail—typically a little more than half the nail length. The pink “eraser” section comes next, followed by the small black “graphite” triangle at the very tip. For the yellow base, many nail artists recommend using a shimmery yellow polish to capture that authentic pencil sheen.
Pencil Tip Nails DIY tools
Creating pencil tip nails effectively requires some specific tools. For beginners, tape is incredibly helpful—crossing two pieces to create a triangle shape for the graphite tip. Meanwhile, a toothpick dipped in black polish works perfectly for creating the pointed graphite detail.
To achieve that distinctive metal band separating the eraser from the pencil body, a thin silver stripe is essential. Certainly, a striping brush or a bobby pin can help create this thin metallic line. Alternatively, you can use a regular pencil as a dotting tool to add details—how fitting for this design!
Regarding difficulty level, these nails rate about a 3 out of 10—somewhat time-consuming yet surprisingly simple once you understand the technique.
Pencil Tip Nails for first day of school
These nails truly make your fingers look like little pencils, creating a fun conversation starter for that first day back. Notably, you can customize this design to suit your personality—create all nails as pencil tips or mix it up by making each nail represent a different school supply.
The design offers versatility too! You can create either the top of the pencil (with the eraser and graphite) or the bottom yellow portion with orange lines. Likewise, adding texture to mimic the ridge between colors creates that extra realistic touch.
Overall, pencil tip nails strike that perfect balance of showing school spirit without being too flashy—ideal for students and teachers alike looking for cute back to school nails that celebrate learning!
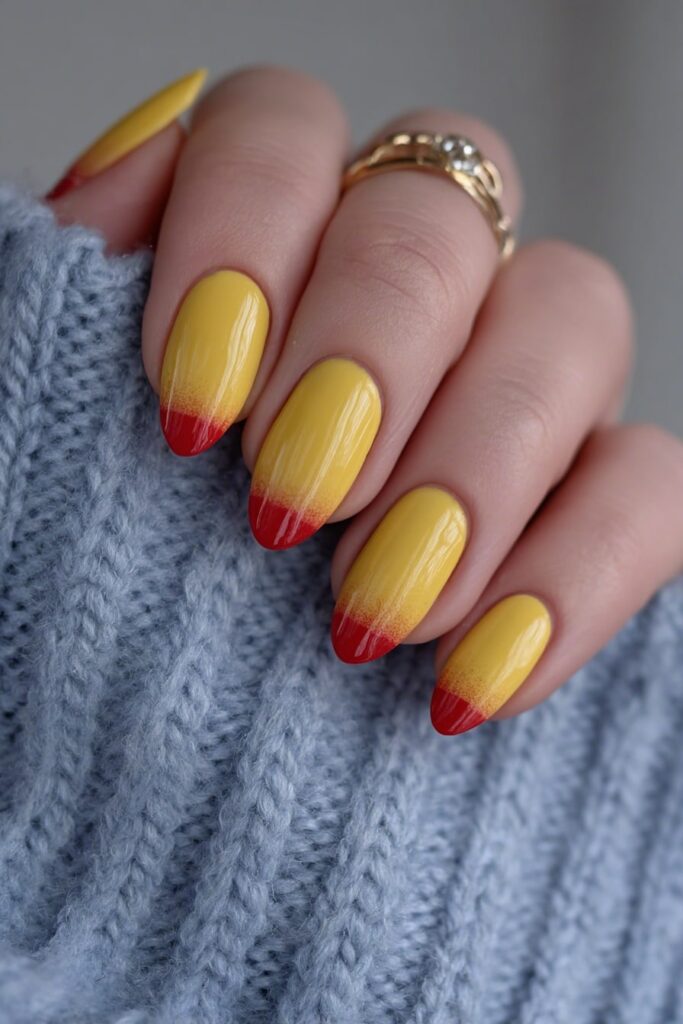
Apple Red Nails
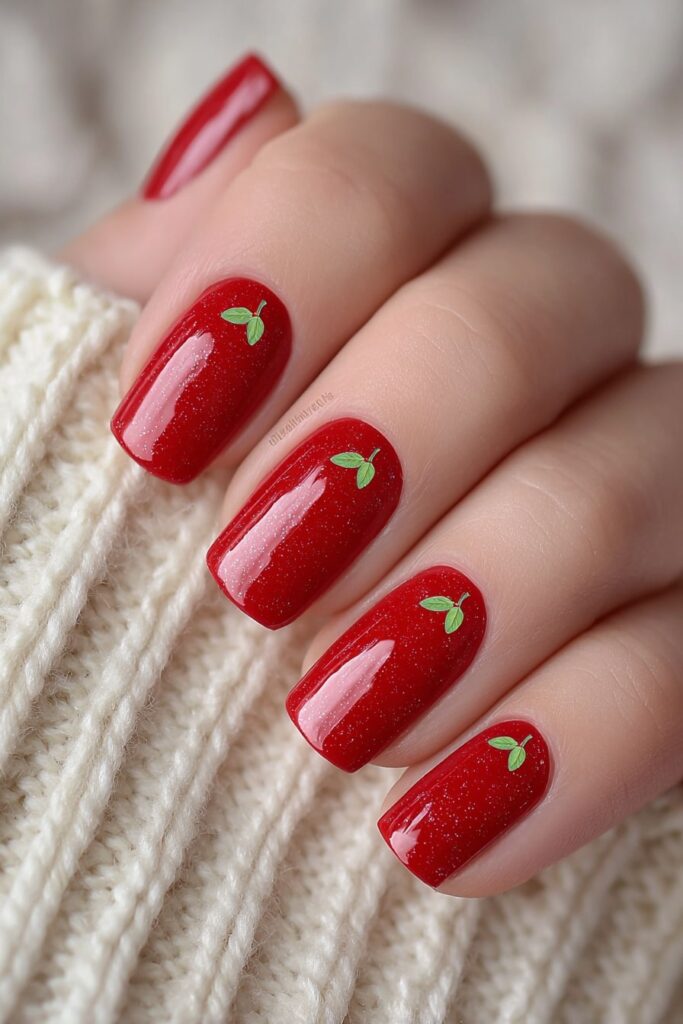
There’s something uniquely powerful about sporting apple red nails on the first day of school. Beyond just a pretty color, this classic shade offers both sophistication and that perfect nod to education traditions.
Apple Red Nails symbolism
Red nails have long been considered a universal shade that complements every skin tone while instilling confidence. Effectively, the vibrant red color represents both boldness and traditional school symbolism. Throughout my years experimenting with back to school nail ideas, I’ve noticed how red consistently creates that perfect balance of professionalism and personality.
The apple connection naturally ties into education—traditionally being the gift students would bring teachers. This symbolic connection makes apple red nails a particularly fitting choice for first day of school nails. Plus, the brightness of a true apple red adds a cheerful pop of color that stands out against typical fall wardrobe choices.
Apple Red Nails polish options
Finding the perfect red can feel overwhelming given countless shades to choose from. Based on my experience, OPI’s Big Apple Red is the quintessential choice—a luscious, bright red that speaks to confidence. This shade offers that perfect vibrant red with a creamy, refined finish that complements many skin tones.
Other excellent apple red options include:
- Essie Jelly Apple: Instantly makes you feel sophisticated yet playful
- OPI Got The Blues For Red: A deeper red option
- OPI I’m Not Really A Waitress: Another classic with slight shimmer
For best application results, properly prep your natural nail first, apply one coat of base, then two thin coats of your chosen red, capping the free edge to prevent chipping.
Apple Red Nails for teachers
Red apple nails are essentially the perfect teacher manicure! I’ve found that educators often gravitate toward this classic shade as it subtly references the traditional apple symbol. For a creative twist, some teachers opt for apple-themed nail art—miniature apples hand-painted onto select nails or apple tips instead of French tips.
This shade ultimately provides that polished, professional look while still showing personality. Even with a simple solid red manicure, the color itself carries enough symbolic weight to make it appropriate for classroom settings.
Chalkboard Scribble Nails
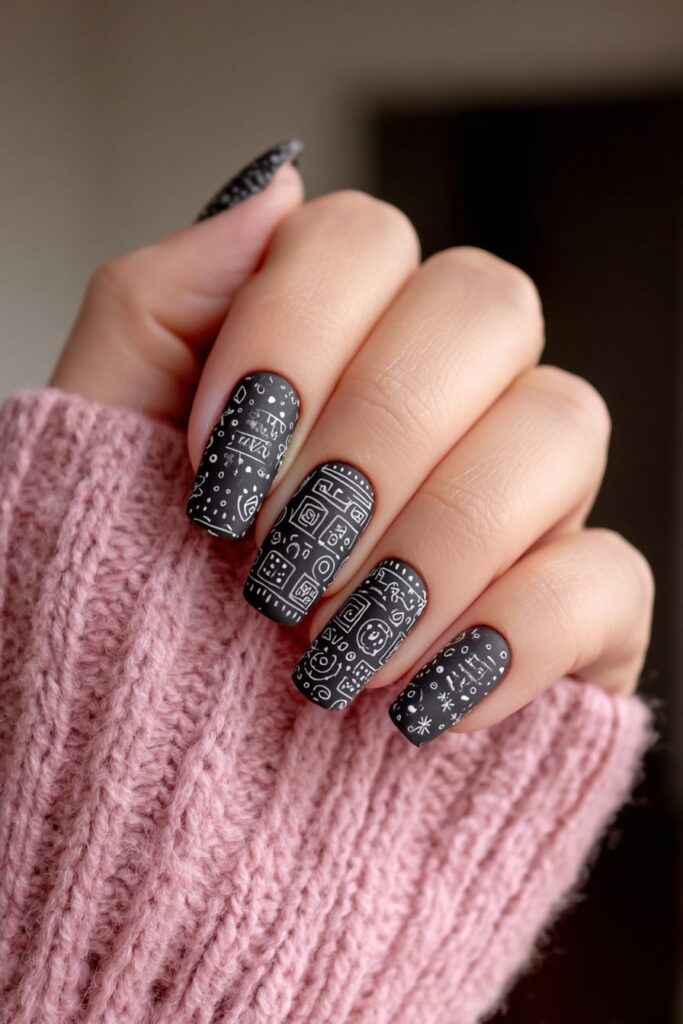
Chalkboard nails remind me of those first-day classroom vibes with their uniquely matte surface that’s both playful and sophisticated. These school themed nails perfectly capture that back-to-school energy while letting your creativity shine.
Chalkboard Scribble Nails base coat
First and foremost, the perfect chalkboard nail starts with the right base. I always begin with a protective base coat before applying a rich black polish. For optimal results, Picture Polish Black creates that perfect depth. The key is applying thin, even coats to prevent wrinkling or peeling.
Practically speaking, you’ll need two coats of black for full coverage. I’ve learned through trial and error that patience between coats is crucial—rushing leads to bubbling and uneven surfaces. Remember that your black base serves as your “chalkboard” canvas, so the smoother it is, the better your designs will show up.
Chalkboard Scribble Nails matte finish
The magic truly happens when you add a matte top coat! I use OPI matte top coat, which instantly transforms shiny black nails into realistic-looking chalkboards. Remarkably, this transformation is fascinating to watch—going from glossy to completely matte in seconds.
This matte finish isn’t just esthetic—it’s functional too. Just as real chalk adheres better to a matte chalkboard surface, your nail art will appear more authentic on a non-shiny base. Make sure your black polish is completely dry before applying the matte coat to avoid smudging.
Chalkboard Scribble Nails doodle ideas
Once your matte chalkboard base is ready, it’s time for the fun part—creating chalk-like doodles! For authentic-looking designs, try:
- ABC letters on an accent nail
- Simple geometric shapes (circles, triangles, squares)
- Math equations or chemistry formulas for subject-specific back to school nail ideas
- Doodle hearts, stars, or fun school-themed icons
As for tools, I’ve had success with white jelly pens, actual chalk (though it doesn’t last long), and acrylic paint for more permanent designs. The beauty of these cute back to school nails is that mistakes are easily fixed—simply “erase” errors with black polish and try again!
Classic French Tips with a Twist
French manicures have long been elegant classics, yet they’re anything but outdated for back to school season. As someone who adores nail art, I’ve found French tips offer that perfect balance of sophistication and personalization.
Classic French Tips with a Twist design
Traditional French manicures featured nude nails with white tips, however, modern versions have transformed into nail art statements. Today’s French tips can incorporate geometric patterns, micro-thin lines, or angled designs rather than the standard curved shape. For those seeking a more subtle look, minimalist French tip designs focus on small yet impactful details, such as a single line or thin strip of color.
Classic French Tips with a Twist color variations
Beyond white tips, colorful alternatives have become increasingly popular. I often opt for bright-colored tips in neon pinks or deep blues that express personality while maintaining the classic French structure. Chrome French tips provide that cool, edgy look while remaining within most comfort zones. Additionally, metallic gold or silver tips function like jewelry for your nails!
Classic French Tips with a Twist for school outfits
These versatile nails complement virtually any school outfit. Compared to other designs, they appear expensive yet remain affordable. The best part? As your nails grow, the natural-matching base makes outgrowth less noticeable—perfect for busy school schedules requiring low maintenance options.
Rainbow Flame Nails
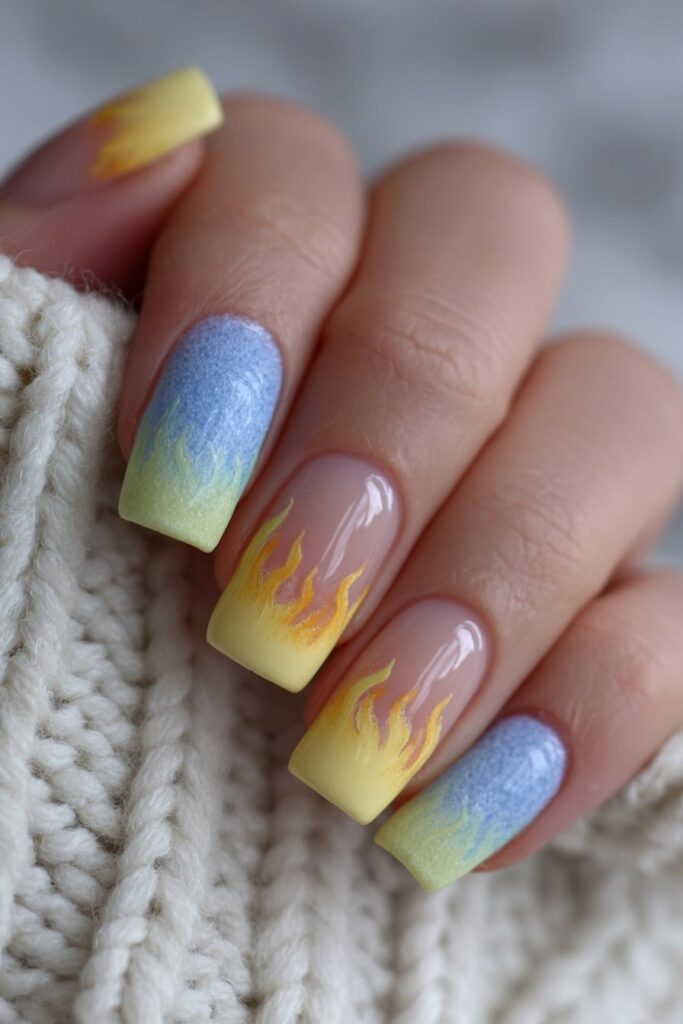
Flame designs have totally upgraded my back-to-school nail game this year! Rainbow flame nails bring that perfect mix of edgy style and artistic flair that’s ideal for making a bold statement on your first day.
Rainbow Flame Nails color blending
Creating that perfect gradient effect requires starting with your lightest color first. From my experience, the ideal order begins with yellow at the tip, followed by orange, red, purple, blue, and finally green at the base. For a smooth transition between colors, an ombre brush works wonders—just lightly brush where colors meet and clean your brush between shades to avoid muddiness.
Rainbow Flame Nails tools needed
You’ll need several specific items for flawless execution:
- Fine liner brush for outlining the flame shape
- Ombre brush with thin bristles for blending
- Neon pigments or gel paints in rainbow colors
- Matte top coat to help pigments stick
- Clean makeup brush for final blending
Rainbow Flame Nails for bold personalities
These fiery designs truly become conversation starters during those first school days. Naturally, they’re perfect for anyone wanting to showcase their creative spirit or vibrant personality. Each time I’ve worn these, classmates immediately notice—making them ideal for students looking to express individuality through cute back to school nails. These eye-catching designs symbolize confidence, plus they pair beautifully with both casual and dressy school outfits.
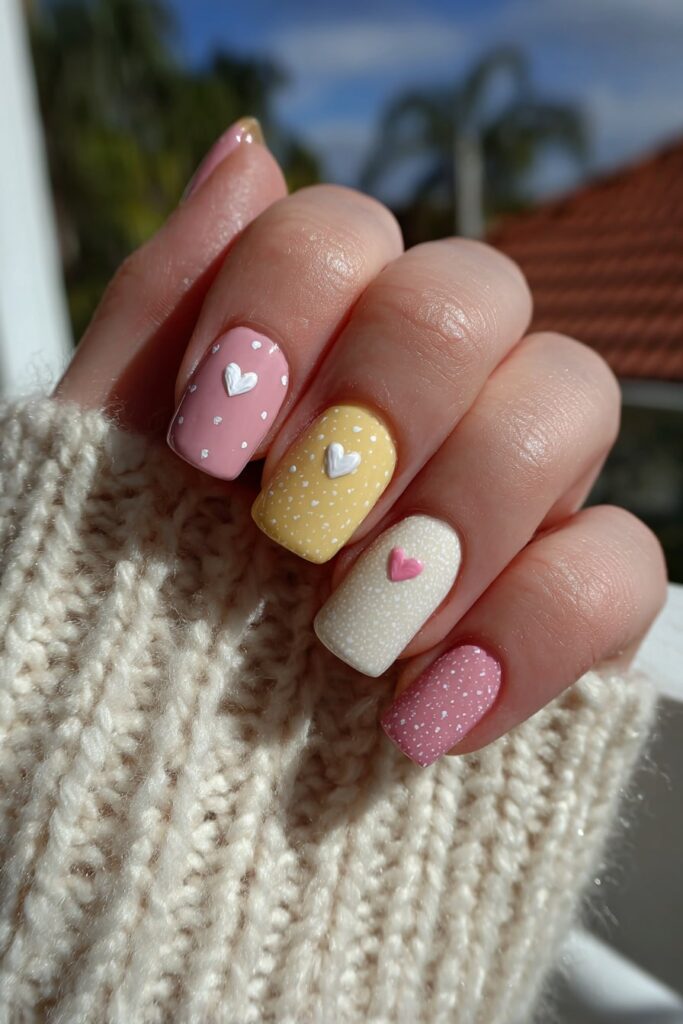
Subtle Heart Nails
For those who prefer understated elegance, subtle heart nails offer a perfect back-to-school option that speaks volumes without shouting.
Subtle Heart Nails color pairing
Minimalist heart designs typically start with a neutral base—creamy cashmere, milky nude, or clear polish provide that perfect canvas for tiny heart accents. Many nail artists recommend contrasting colors for maximum impact—red hearts on nude bases remain a classic choice, whereas black hearts on white create sophisticated drama. For a fresh take, try silver-white glitter hearts on clear polish or neon green with black for unexpected pop.
Subtle Heart Nails application method
Creating these dainty designs is surprisingly straightforward. Begin with a neutral base coat, allowing it to dry completely. For the heart itself, a dotting tool or bobby pin works perfectly—place two small blobs side by side, then drag downward with a toothpick to form the heart’s point. Alternatively, tiny heart-shaped nail stickers offer fuss-free application for beginners. Once dry, seal everything with clear top coat to ensure longevity throughout your school days.
Subtle Heart Nails for minimalists
These designs excel at expressing personality without overwhelming your overall look. A single accent nail with a tiny heart offers that perfect touch of whimsy while maintaining professionalism. Indeed, the simplicity makes these first day of school nails ideal for anyone navigating dress codes or seeking versatile options that transition effortlessly from classroom to after-school activities.
Mini Pumpkin Nails
Pumpkin nail designs have become my absolute favorite transition style between summer break and the new school year! These tiny gourds on your fingertips offer that perfect seasonal nod without going full Halloween.
Mini Pumpkin Nails seasonal appeal
Mini pumpkin nails bring that autumn atmosphere right to your fingertips as summer fades. These designs work beautifully for both fall celebrations and school beginnings. In my experience, pumpkin nail art creates excitement among classmates, simultaneously establishing your style credentials on day one. Unlike jack-o’-lanterns, these pumpkins remain seasonally appropriate well beyond Halloween.
Mini Pumpkin Nails color alternatives
Traditional orange isn’t your only option! White pumpkins against silver layouts create stunning contrast, particularly when paired with blue glitter polish. For something unconventional, try light orange pumpkins on plum glittered nails—this combination looks surprisingly elegant. I’ve also experimented with gold glitter inside pumpkin outlines, which adds dimension and sparkle to otherwise simple designs.
Mini Pumpkin Nails for fall vibes
Creating these adorable designs requires minimal tools yet delivers maximum impact. Start by applying your base color, necessarily letting it dry completely. Next, use a dotting tool with orange polish to create your pumpkin shape. Add definition with thin brown lines—one in the middle and one on each side—using a small pointed brush. Finish with a green stem and tiny leaf at the top. These simple additions transform basic nails into perfect back to school nail ideas that celebrate the season!
White Doodle Nails
White base nail designs offer that pristine canvas for endless creativity! After trying numerous nail art styles, I’ve found white doodle nails particularly perfect for expressing personality on those first school days.
White Doodle Nails base polish
Quality white polish forms the foundation of this look. I recommend OPI Alpine Snow because it provides excellent coverage in just one coat. Furthermore, achieving that crisp appearance requires applying your base evenly across the entire nail surface. In essence, patience becomes your best friend here—allow your white base to dry completely before adding any designs. This step cannot be rushed; otherwise, the markers or detail tools won’t work properly.
White Doodle Nails drawing tools
Once your base is perfectly dry, the fun begins! Permanent markers like Bic Mark-It work surprisingly well for creating designs. As an alternative, consider repurposing everyday items into nail art tools—bobby pins create perfect dots, toothpicks work for fine lines, even old styluses or pencil erasers can produce unique patterns. For those seeking precision, a thin paintbrush offers the most control over your doodles.
White Doodle Nails creative freedom
The beauty of white doodle nails lies in their limitless customization. From mathematical equations to favorite characters, virtually anything can be sketched onto your back to school nails. Ultimately, seal your artwork with a fast-drying top coat—this crucial final step prevents fading and extends the life of your school themed designs.
Simple Dot Nails

Polka dot designs rank among my all-time favorites for back to school nails! These playful yet sophisticated patterns add personality without requiring professional-level skills.
Simple Dot Nails tools needed
Creating perfect dots doesn’t require fancy equipment. Professional dotting tools offer precision with different-sized tips—typically around 1.4mm for small dots and 2mm for larger ones. Nevertheless, plenty of household items work beautifully as alternatives! Try toothpicks for tiny dots, bobby pins for medium ones, or even pin heads of varying sizes. Given that application technique matters more than fancy tools, I often recommend beginners start with what they already have.
Simple Dot Nails color combos
The magic of dot nails comes from creative color pairings. For first day of school nails, try:
- Nude base with burgundy and black dots for fall vibes
- White base with bright blue or yellow dots for contrast
- Ombré dots using gradients of one color family
As a result of their versatility, dot designs complement virtually any outfit or style preference.
Simple Dot Nails for quick DIY
What makes dot nails perfect for school? Their simplicity! Just dip your tool into polish, gently press onto your nail, and lift straight up. Clean your tool between color changes to maintain precision. These cute back to school nails require minimal time yet receive maximum compliments—ideal for busy schedules!
Accent Nail Mix
Gone are the days when manicures had to follow a single pattern or color! Accent nail mixes have become my secret weapon for expressing creativity without committing to just one back-to-school design.
Accent Nail Mix design ideas
Accent nails work perfectly as cheery highlights that show school spirit without covering all ten fingertips. For a simple approach, I’ll paint just one ring finger with a paper and pencil design while keeping other nails neutral. Occasionally, I’ll mix French tips with abstract shapes or combine dots and lines for visual interest. These mismatched mani ideas make statements without requiring perfection—perfect for DIY enthusiasts like me!
Accent Nail Mix color coordination
The magic happens when choosing colors that somehow just work together. Primarily, I focus on creating harmony by selecting complementary shades—like peachy pinks with subtle glitters. Neutral bases with bright accents create perfect balance. Even unexpected color pairings can function beautifully together with this nail trend!
Accent Nail Mix for indecisive moods
Whenever I can’t choose between favorite designs, accent nails become my solution. Forthwith, I can satisfy multiple style cravings in one manicure! Correspondingly, these versatile designs allow me to be creative yet cohesive. Regardless of mood changes, my accent nail mix can showcase different themes or colors all at once—ideal for those first-day jitters when decisions feel overwhelming.
Coffee Tone Nails
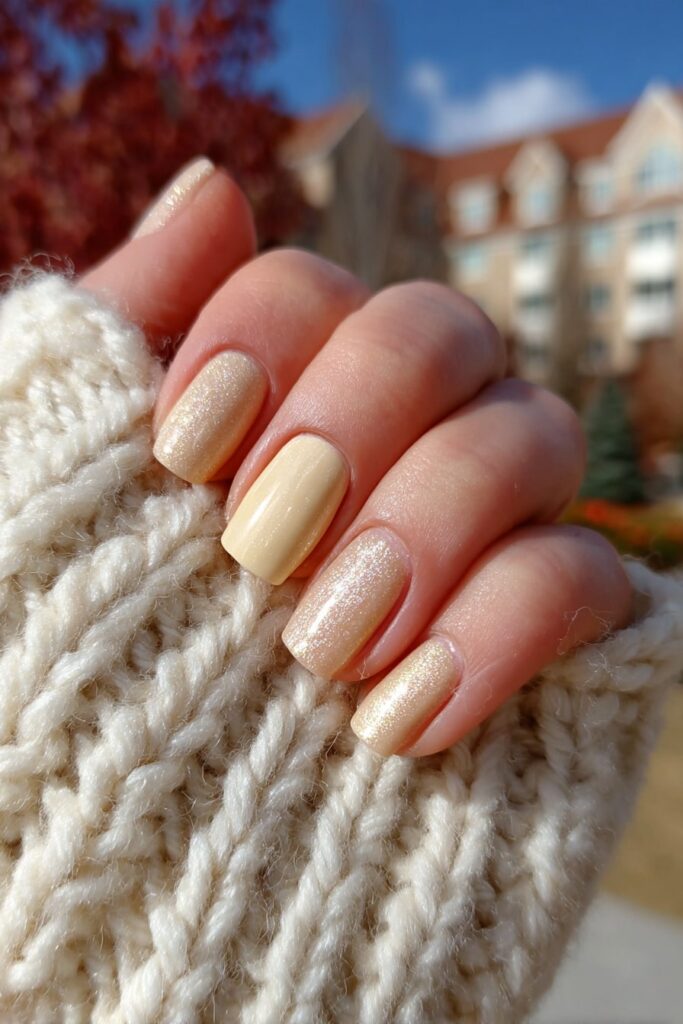
Coffee-inspired nail shades have captured my heart this season! Storming social media as one of the biggest autumn trends, these warm hues offer that perfect sophisticated option for heading back to class.
Coffee Tone Nails shade range
The beauty of coffee nails lies in their versatility, ranging from light beige cappuccinos to rich espresso browns. My favorites include creamy latte shades, warm hazelnut tones, and deep mocha colors that transition seamlessly between casual and formal school settings. At times, I’ll select caramel-inspired polishes that add a hint of sweetness without overwhelming my overall look.
Coffee Tone Nails for fall
These coffee-inspired colors perfectly complement chunky sweaters and leather boots, making them ideal first day of school nails. Mainly, I appreciate how they evoke cozy fall vibes—like walking through a park with a sweater and Uggs. Plus, these timeless shades have always been part of the beauty world, yet they’re experiencing a resurgence in popularity from social media.
Coffee Tone Nails for neutral lovers
For those seeking understated elegance, coffee tone nails deliver sophistication without flashiness. Obviously, browns remain underutilized despite their gorgeous appearance. Therefore, I find these shades perfect for school environments—chic yet classic, evoking your favorite coffee drink while maintaining that professional vibe necessary for classroom settings.
Conclusion
Back-to-school season definitely brings a mix of excitement and jitters! Thankfully, expressing yourself through cute nail art can make those first days feel less intimidating. Whether you prefer the nostalgic vibes of Lisa Frank swirls and crayon designs or the subtle elegance of coffee tones and French tips, these nail ideas offer something for every personality and style comfort level.
School-themed nails have always been my favorite way to showcase creativity while still maintaining that put-together look for class. Actually, my friends often ask me for nail inspiration before the semester starts because they know how much joy these little artistic expressions bring me!
Remember that your nail design choices can reflect your mood, personality, or even your favorite subjects. Last year, I sported looseleaf paper nails during the first week and received countless compliments from both teachers and classmates. The confidence boost was real!
First day outfits might change year after year, but cute back-to-school nails remain that perfect finishing touch that ties everything together. Though some designs might seem complex at first glance, most require just basic tools and a bit of patience. Anyone can achieve these looks with practice!
The beauty of these nail ideas lies in their versatility – you can go all-out with vibrant rainbow flames or keep things understated with subtle heart accents. Your nails tell your story before you even speak a word.
Finally, nail art serves as that perfect transition from carefree summer days to structured school schedules. My personal nail journey has taught me that sometimes the smallest details bring the biggest smiles. After all, glancing down at your creative masterpieces during that tough math class might just be the encouragement you need to power through the day!