
Feeling the pressure to find perfect homecoming hair styles without spending hours in the salon chair? I’ve been there! The clock is ticking, your dress is ready, but your hair is still a big question mark.
Let’s be real – homecoming prep can be overwhelming. Fortunately, there are plenty of easy homecoming hair options that don’t require professional help or endless hours. From stylish updos to effortlessly chic downdos, we’ve curated homecoming hair ideas that work beautifully for short, medium, and long hair. In fact, the ’90s-inspired looks have made a comeback, bringing back glossy strands, wispy bangs, and elegant slicked-back hairdos. Whether you’re looking for homecoming hairstyles down or up, these styles will definitely make everyone stop and stare.
I’ve hand-picked 15 stunning homecoming hair styles easy enough to create in 20 minutes or less. No more stress, no more complicated tutorials – just simple, gorgeous looks that’ll have you out the door and turning heads at your special event. Trust me, these quick styles don’t compromise on glamor!
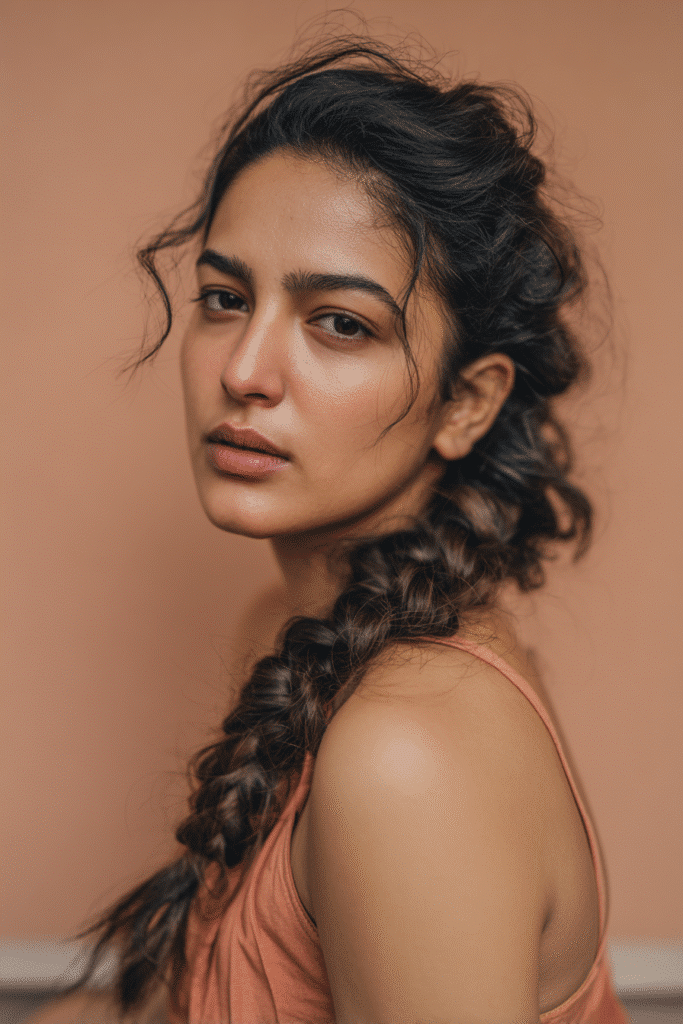
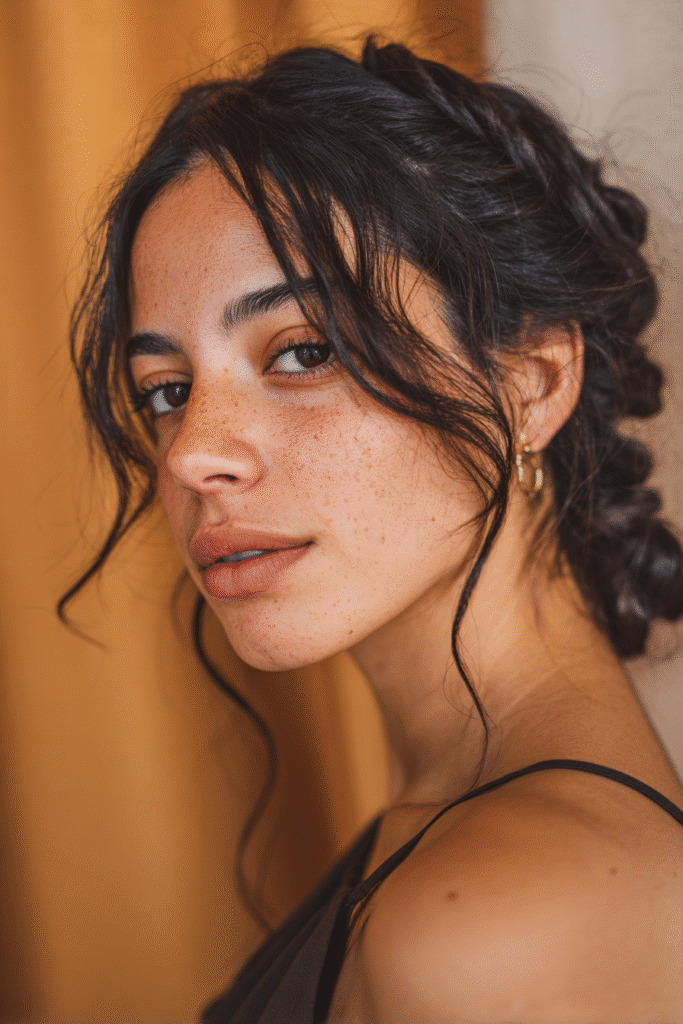
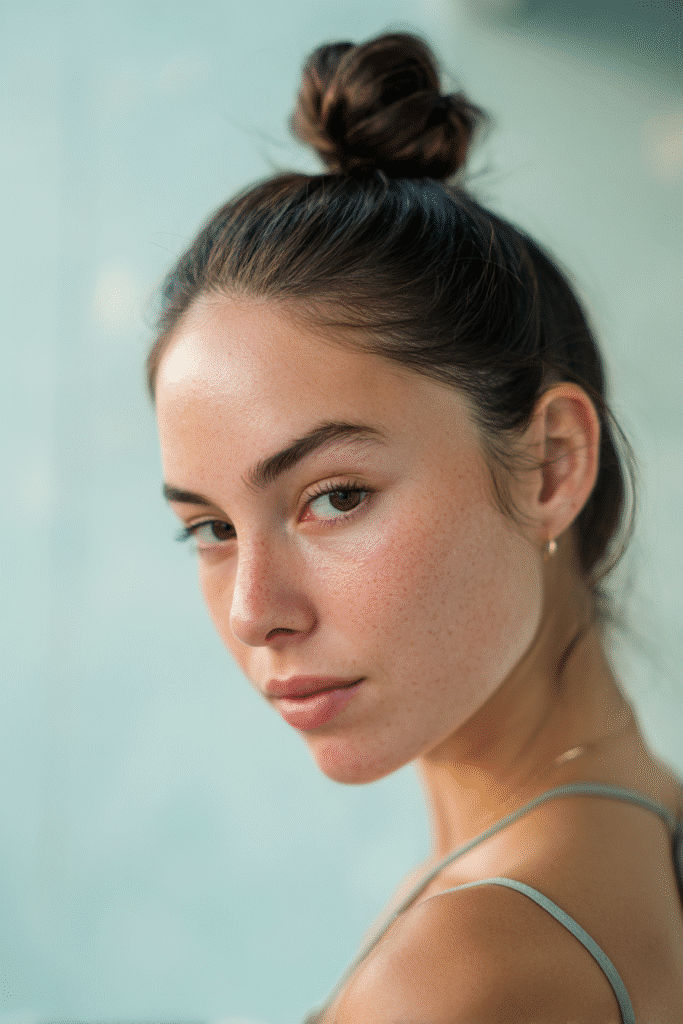
Low Braided Ponytail

The low braided ponytail has become my secret weapon for formal events like homecoming. This versatile style combines the classic elegance of a traditional ponytail with the intricate detail of a braid – creating that perfect balance between sophisticated and effortlessly cool.
Low Braided Ponytail style overview
The low braided ponytail sits at the nape of your neck, giving you that polished, red-carpet-ready look. What makes this style particularly special is how it transitions from sleek at the top to textured in the braid. Additionally, you can customize it to be either ultra-sleek and formal or slightly tousled for a more bohemian vibe. I’ve found this style works beautifully across different hair textures and lengths – though those with shorter hair might want to consider clip-in extensions for added drama.
Why Low Braided Ponytail works for homecoming
The braided ponytail is perfect for homecoming because it truly gives you “two looks in one” – you can even transform it into a bun for part of the evening if you want variety. Furthermore, once braided, this style stays securely in place throughout hours of dancing and photos, requiring virtually no touch-ups.
For homecoming specifically, the low braided ponytail offers several advantages:
- Keeps hair off your face and neck while dancing
- Prevents tangling in humid environments
- Protects your hair from damage while looking elegant
- Creates instant volume for thinner hair types
Perhaps most importantly, it photographs beautifully from every angle – essential for those countless homecoming pictures!
How to create a Low Braided Ponytail
Creating this style takes just minutes yet lasts all day. Here’s my simple approach:
- Start with a side part for extra elegance
- Smooth hair back with a brush, working in sections
- Secure a low ponytail at about ear height using a clear elastic
- Optional: Add volume by gently pulling small sections around your crown
- Create a standard three-strand braid with your ponytail
- Secure the end with another clear elastic
- For added fullness, gently pull the edges of your braid outward
- Finish with hairspray and a toothbrush to tame any baby hairs
The final result is a sophisticated yet practical style that looks like you spent hours at a salon – while actually taking 20 minutes or less!
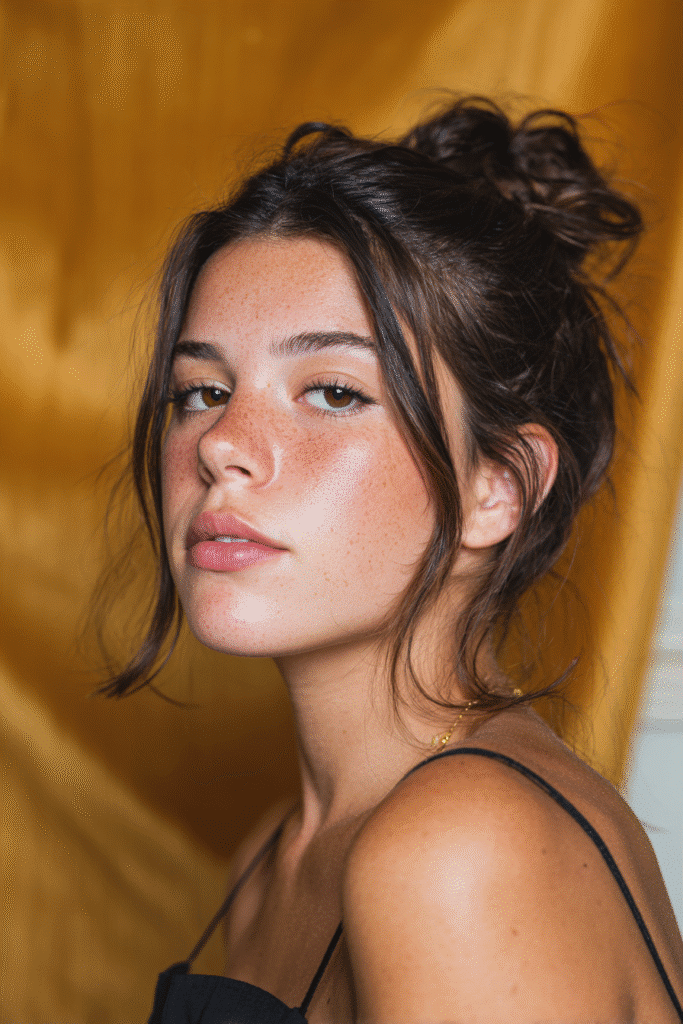
Messy Bun
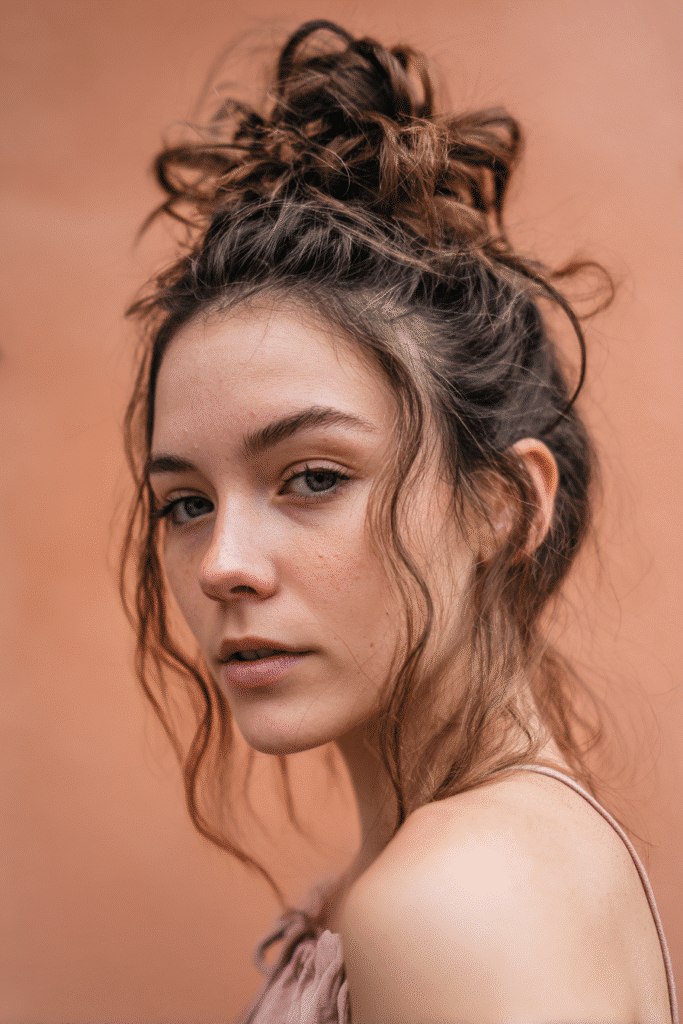
Nothing says “effortless elegance” like a messy bun for homecoming. I’ve mastered this style over countless formal events and can confirm it’s the ultimate savior when you’re running late or need a dependable updo that won’t fall flat during hours of dancing.
Messy Bun style overview
The messy bun is exactly what it sounds like—a deliberately tousled updo that looks casually perfect. It’s characterized by loosely gathered hair twisted into a bun with strategically placed “messiness” that gives it dimension and texture. Despite its name, a good messy bun is actually a balance between chaos and control—it’s “strategically messy” rather than truly disheveled. The beauty lies in its versatility, working wonderfully with all hair types and lengths (provided your hair can be tied up). Moreover, this style can transition seamlessly between casual everyday wear and formal occasions with minimal adjustments.
Why Messy Bun is a go-to for quick glam
For homecoming, the messy bun offers undeniable advantages. First, it’s incredibly time-efficient—even the most elaborate versions take just minutes to create. Since this style actually benefits from a bit of texture, you can skip extensive prep work. The messy bun also offers versatility few other homecoming hair styles can match; it works equally well with strapless dresses, high necklines, or embellished bodices.
What makes this style especially perfect for formal events is how it creates volume and dimension without requiring heat tools or complex techniques. Additionally, this updo stays secure throughout hours of dancing and photos, requiring minimal touch-ups.
Benefits for homecoming:
- Can be both casual and elegant, suitable for any occasion
- Works with minimal styling and the right accessories
- Photographs beautifully from multiple angles
- Keeps hair off your face and neck while dancing
How to achieve a Messy Bun in under 20 minutes
Creating the perfect messy bun is surprisingly simple:
- Start by brushing your hair to remove tangles
- Add texture with dry shampoo for better hold
- Gather hair into a mid-height ponytail
- Secure with an elastic, pulling hair halfway through on the final wrap to create a loop
- Pull the loop outward on both sides for volume
- Twist the elastic once more
- Fold loose ends upward and secure with the elastic
- Pinch and pull sections for desired messiness
- Secure any loose pieces with bobby pins
- Finish with a light mist of hairspray
For homecoming specifically, consider adding a pearl headband or decorative pins to elevate this already stunning homecoming hair style.
Glam Ponytail
For elegant homecoming hair styles that command attention, the glam ponytail reigns supreme. This elevated take on a classic hairstyle offers sophistication without sacrificing comfort—a perfect balance for your special night.
Glam Ponytail style overview
The glam ponytail transcends the everyday basic pony by incorporating volume, sleekness, and intentional styling. Unlike its casual counterpart, this version features smoothed roots, wrapped elastic bands, and either sleek straight lengths or bouncy curls. What makes this style truly “glam” is the intentional contrast between the polished base and the textured tail. The position matters too—whether high for a youthful, dramatic look or low for understated elegance. This versatile style works wonderfully across different hair textures, though curly-haired beauties may want to decide between embracing natural texture or smoothing it out for contrast.
Best features of the Glam Ponytail
The glam ponytail offers numerous advantages for homecoming:
- Provides a face-slimming effect, particularly helpful for round face shapes
- Creates an elegant lifting effect without appearing too constructed or unnatural
- Offers incredible staying power throughout hours of dancing
- Serves as the perfect foundation for hair accessories like decorative clips or ribbons
- Works beautifully with any dress neckline, from strapless to high-neck
Consequently, this style photographs exceptionally well from all angles—essential for homecoming pictures! The height and positioning can be customized according to your face shape; higher placement generally creates a more dramatic statement, hence its popularity among those wanting to make an impression.
Steps to create a Glam Ponytail quickly
Creating this statement style takes less than 20 minutes:
- Start with second-day hair—it holds better than freshly washed locks
- Apply heat protectant throughout your hair
- Section hair and straighten or curl depending on your desired finish
- Brush hair back with hairspray on the brush for smoothness
- Secure with a hair bungee at your desired height
- Take a small section from underneath the ponytail and wrap it around the elastic
- Secure the wrapped section with a bobby pin
- For added volume, gently pull at the crown or add texturizing powder at the base
- Finish with a light mist of hairspray
For homecoming, consider adding sparkle with rhinestones along the part or a decorative hair accessory for extra glamor and personality!
Twisted Half-Up Style
I’ve always turned to the twisted half-up style when I need that perfect balance of sophistication and casual charm for homecoming. This timeless look offers the best of both worlds – some hair elegantly styled away from your face, with the rest flowing freely down your back.
Twisted Half-Up Style explained
The twisted half-up hairstyle features sections of hair from each side of your head, twisted back and secured at the crown or back of your head. This classic style has recently gained renewed popularity, with many opting to wear part of their hair pinned up while the rest cascades down their backs. The look translates beautifully to all hair types and lengths, allowing for personal customization. What makes this style truly special is its versatility – it can be worn sleek and polished or loose and romantic, depending on how much you pull and loosen the twists afterward.
Why Twisted Half-Up is perfect for homecoming
Initially, I was drawn to this style for homecoming because it stays securely in place throughout hours of dancing while still looking effortlessly elegant. Unlike fully-up homecoming hair styles, the half-up approach gives you that romantic, flowing look in photos without constantly having hair in your face.
The twisted half-up works wonderfully with any dress neckline and offers the perfect foundation for adding accessories like pearl hairpins or small flowers. Additionally, this style photographs beautifully from multiple angles – essential for those countless homecoming pictures! Most importantly, it’s a style that feels both special yet comfortable, allowing you to focus on enjoying your night instead of fixing your hair.
How to do a Twisted Half-Up Style
Creating this look takes less than 15 minutes with these simple steps:
- Start with loose waves or curls for texture and grip
- Take a 1-inch section of hair above your ear on one side
- Split it into two strands and twist them around each other
- Continue twisting until you reach the back of your head
- Secure temporarily with a pin
- Repeat on the opposite side, bringing that twist to meet the first
- Connect both twists at the back with bobby pins or a decorative clip
- Gently pull at the edges of your twists to create fullness
- Secure with hairspray for lasting hold
Ultimately, this homecoming hair style shines in its simplicity – it’s elegant yet effortless, making it perfect for your special night.
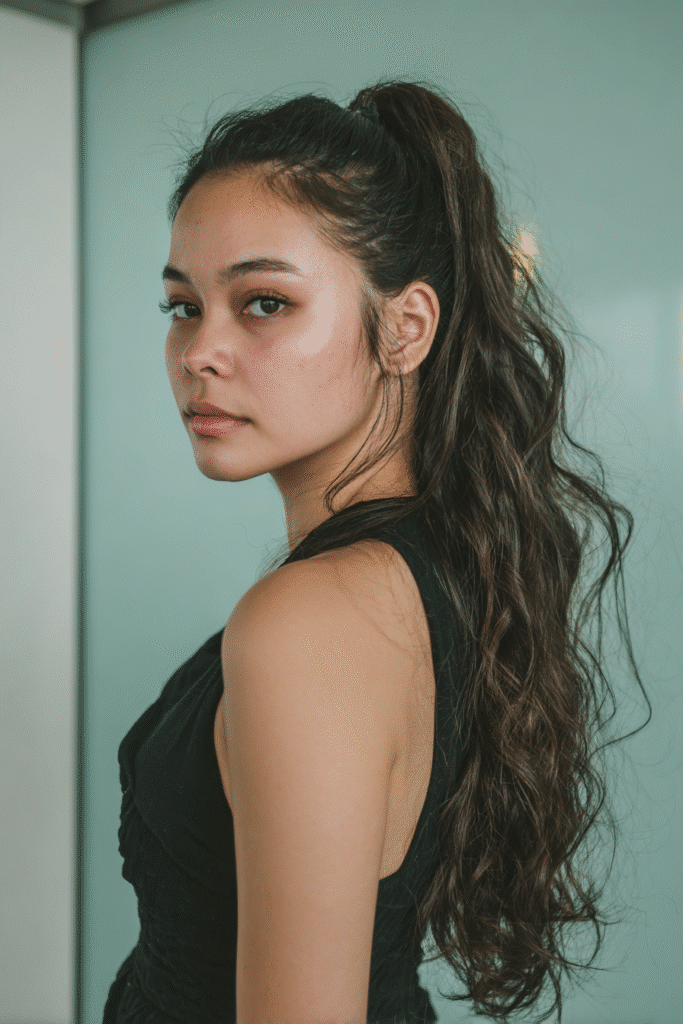
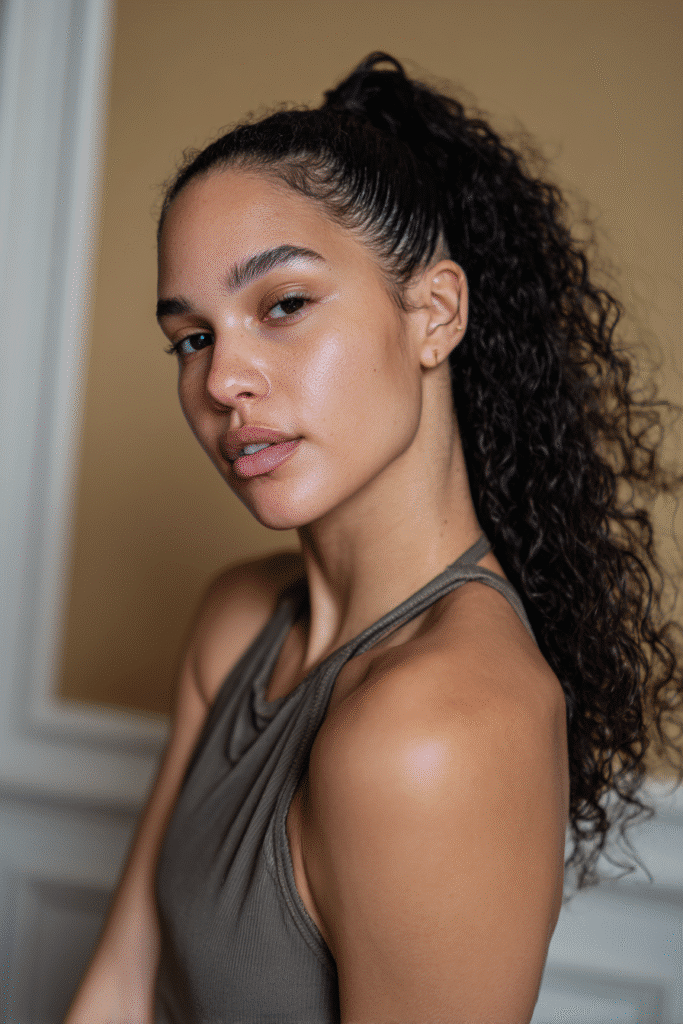
High Ponytail
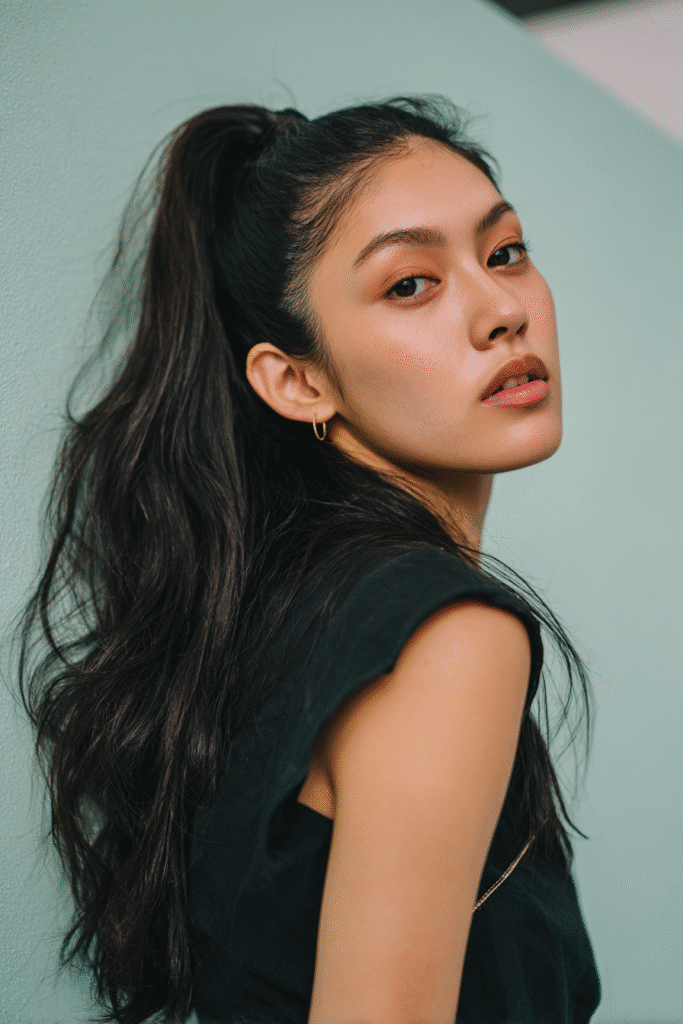
The high ponytail stands tall as my ultimate go-to homecoming hair style whenever I need that perfect combination of youthful energy and sophisticated polish. This elevated classic never disappoints on the dance floor!
High Ponytail style overview
The high ponytail sits near the top or crown of your head, creating a dressier and more youthful appearance than its lower counterpart. What makes this style truly special is how it combines the sporty practicality of a traditional ponytail with the elegance of an updo. I’ve found this classic hairstyle works remarkably well for all textures, making it perfect for curly, straight, and wavy hair alike.
For a homecoming-worthy high ponytail, the key difference lies in the intentional styling—it’s not just pulled back hair, but a deliberately crafted look. The finished style should appear bouncy and full of attitude, transforming a basic ponytail into a statement piece. You can even customize it with accessories like ribbons, bows, or scrunchies to complement your outfit.
Benefits of a High Ponytail for dancing
The high position of this ponytail offers numerous advantages primarily for active events like homecoming dances:
- Creates a lifting effect for your facial features
- Keeps hair completely off your face and neck while dancing
- Offers exceptional staying power throughout the evening
- Provides natural volume and bounce that moves with you
- Works beautifully with any dress neckline
I particularly love how a high ponytail photographs from multiple angles—essential for all those homecoming pictures! Plus, this style has a magical way of making you look effortlessly chic without appearing like you tried too hard.
How to style a High Ponytail fast
Creating a high ponytail takes less than 20 minutes with these simple steps:
- Start with brushed hair free of tangles (second-day hair often works better)
- Flip your head upside down and brush all hair toward the crown
- While still upside down, gather hair at the crown and secure with a snag-free hair tie (never use rubber bands as they can damage hair)
- Lift up straight and check for even distribution around the ponytail
- For extra volume, gently tease a small section of hair at the crown before securing
- Take a small strand from underneath the ponytail and wrap it around the elastic to hide it
- Secure with a bobby pin underneath
- Finish with light hairspray for flyaway control
For added texture and dimension, consider using a 2-in-1 contouring iron to add waves or a teasing comb to backcomb the underside of your high pony. The final result? A bouncy, fun style that’s perfect for dancing the night away!
Romantic Side Braid
Seeking a romantic homecoming hair style that looks impressive yet requires minimal effort? The side braid creates that perfect dreamy, wind-swept look that’s absolutely stunning for thick hair.
Romantic Side Braid look
The side braid combines effortlessly elegant styling with practical function. It features hair swept to one side and braided with a loose, textured finish. This style keeps your locks beautifully controlled while maintaining that soft, romantic esthetic perfect for formal occasions. Naturally, it photographs wonderfully from all angles—ideal for those countless homecoming pictures!
Why Romantic Side Braid suits homecoming
A side braid excels as a homecoming option primarily because it keeps hair out of your face and off your neck while dancing. This practical yet beautiful style works excellently with most dress necklines and allows for easy accessorizing with pearl pins or delicate flowers. Ultimately, the romantic side braid offers that perfect balance of sophistication and carefree style that homecoming demands.
Quick steps to braid a Romantic Side Braid
- Create a deep side part
- Apply smoothing paste to a small section toward the front
- Begin French braiding, incorporating hair as you go
- Braid toward the back, keeping it low and tight
- Secure with a clear elastic
- Gently pull braid edges outward for fullness
- Finish with texture spray for lasting hold
For extra romance, leave a few wispy pieces around your face and curl them gently with a curling wand.
Soft French Twist
The classic French twist has been my elegant secret weapon for formal events for years. This sophisticated updo offers timeless appeal yet can be created quickly enough for last-minute homecoming preparations.
Soft French Twist style breakdown
The French twist is essentially an updo where hair is smoothed, gathered, and then twisted against the head before being secured with pins. Whereas the traditional version appears sleek and polished, today’s soft French twist incorporates deliberately loose sections and textured finishes. This versatility allows it to work beautifully as both a casual everyday look or an elevated formal style.
Why Soft French Twist is timeless
The French twist earned its iconic status after Audrey Hepburn famously wore it in Breakfast at Tiffany’s, instantly becoming a symbol of refined taste. Fashion psychologists note this style naturally creates a subtle facelift effect, drawing attention to cheekbones and eyes. Brides frequently choose this elegant updo for weddings, with approximately 34% selecting French twists or similar styles for their big day.
How to do a Soft French Twist in 20 minutes
- Tease hair at the crown for volume
- Gather hair as if creating a low ponytail
- Twist hair upward against your head
- Secure with U-shape pins (they hold better than regular bobby pins)
- For a softer look, gently pull strands around the face
- Finish with medium-hold hairspray
For homecoming, consider adding pearl pins or rhinestones for extra sparkle!
Sleek Part with Curly Ponytail
Looking for a striking contrast in your homecoming hair styles? The sleek part with curly ponytail offers that perfect balance between polished sophistication and playful bounce—a combination that photographs beautifully from every angle.
Sleek Curly Ponytail explained
The sleek curly ponytail features a smooth, slicked-back top section with a textured, voluminous ponytail. This style creates visual interest through its contrasting elements: the sleek, controlled crown paired with bouncy, free-flowing curls. What makes this style stand out is the precise middle part that adds depth and symmetry, framing your face beautifully. Comparatively, this style works wonderfully on various hair types, with the slicked portion keeping everything neat while the curly ponytail lets your natural texture (or added extensions) shine.
Why this style is both sleek and fun
For homecoming, this hairstyle delivers dual benefits—it keeps hair securely away from your face while dancing yet maintains that glamorous, dressed-up feel. The sleek part creates a sophisticated foundation, simultaneously allowing the curly ponytail to add movement and dimension when you’re on the dance floor. Furthermore, this style remains one of the most versatile options, complementing virtually all dress necklines and face shapes. The middle part adds a face-lifting effect, creating that perfect frame for your features in photos.
How to create a Sleek Curly Ponytail
Creating this stunning look requires minimal time:
- Section your hair horizontally, separating the crown from lower sections
- Create a precise middle part using a fine-tooth comb
- Apply a dime-sized amount of hair gel evenly to your roots
- Brush strands toward the back of your head
- Secure into a ponytail at your desired height
- Wrap a small piece of hair around the elastic for a polished finish
- Add curls to the ponytail using a curling wand or extensions
This eye-catching style truly delivers that perfect homecoming statement!
Bubble Braid
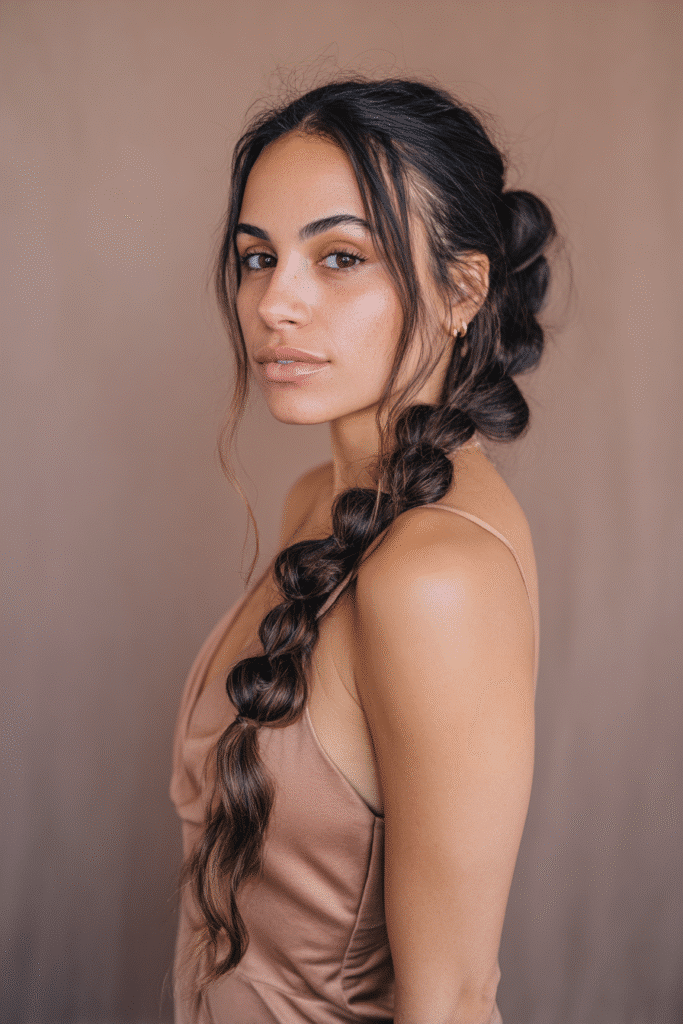
Bubble braids have completely transformed my homecoming hair game with their playful, artistic flair that stands out from traditional styles. This fun technique creates whimsical yet chic “bubbles” down the length of your hair using just elastic bands!
Bubble Braid style overview
Bubble braids take simple sections of hair and transform them into voluminous, playful “bubbles” along the length. They offer a chic twist on traditional braids without requiring intricate braiding techniques. Indeed, these eye-catching styles use multiple hair ties spaced evenly to create that distinctive bubble effect. Significantly, they work beautifully for all hair types and lengths – even shorter styles can rock a bubble braid with proper spacing between elastics.
Why Bubble Braids are trending
From Euphoria-inspired looks to red carpet appearances by style icons, bubble braids have secured their place as a fashion statement. Naturally, their rise in popularity stems from their versatility – they transition effortlessly from casual school days to formal events like homecoming. Furthermore, these playful puffs make life easier while keeping you looking effortlessly cute. The style allows for endless creativity through colorful bands, added embellishments, or varying bubble sizes.
How to make a Bubble Braid quickly
Creating bubble braids takes minimal time with maximum impact:
- Start with sleek, brushed hair and create a ponytail where you want your braid to begin
- Secure with a clear elastic (use dark elastics for darker hair)
- Place additional elastics evenly down the length (1-2 inches apart)
- Gently pull each section outward to create those distinctive “bubbles”
- Finish with lightweight oil or sheen spray to keep everything looking fresh
For homecoming, consider adding pearls or gold clips between bubbles for extra sophistication!
Half-Up Fishtail Braid
The half-up fishtail braid combines elegance with practicality, becoming my favorite compromise between wearing hair completely up or down for homecoming events.
Half-Up Fishtail Braid explained
A fishtail braid mimics overlapped fish scales, creating a delicate pattern that looks complex yet remains surprisingly achievable. The half-up version keeps some hair secured away from your face while letting the rest flow freely. What makes this style particularly appealing is how it works beautifully on both straight and curly hair, even popping more visibly if you have highlights or naturally sun-lightened strands. Beyond its versatility, this romantic bohemian half-do transitions effortlessly between casual and formal occasions.
Why this braid is a romantic choice
Whenever I’m seeking that dreamy, bohemian vibe for homecoming, I turn to this braid. The fishtail technique creates intricate texture that photographs magnificently from every angle. Plus, the half-up element perfectly frames your face while keeping strands securely out of your eyes throughout hours of dancing. Overall, this hairstyle balances elegance with comfort, making it ideal for wearing with backless dresses or statement earrings.
Steps to create a Half-Up Fishtail Braid
- Begin with loose waves for added grip
- Section off half your hair at the crown
- Divide this section into two equal halves
- Start fishtailing: cross small pieces from each outer edge over to the opposite side
- Continue this crossing pattern until you reach the end
- Secure with a clear elastic
- Gently tug at the edges to create fullness
- Finish with light hairspray
Side-Swept Bun
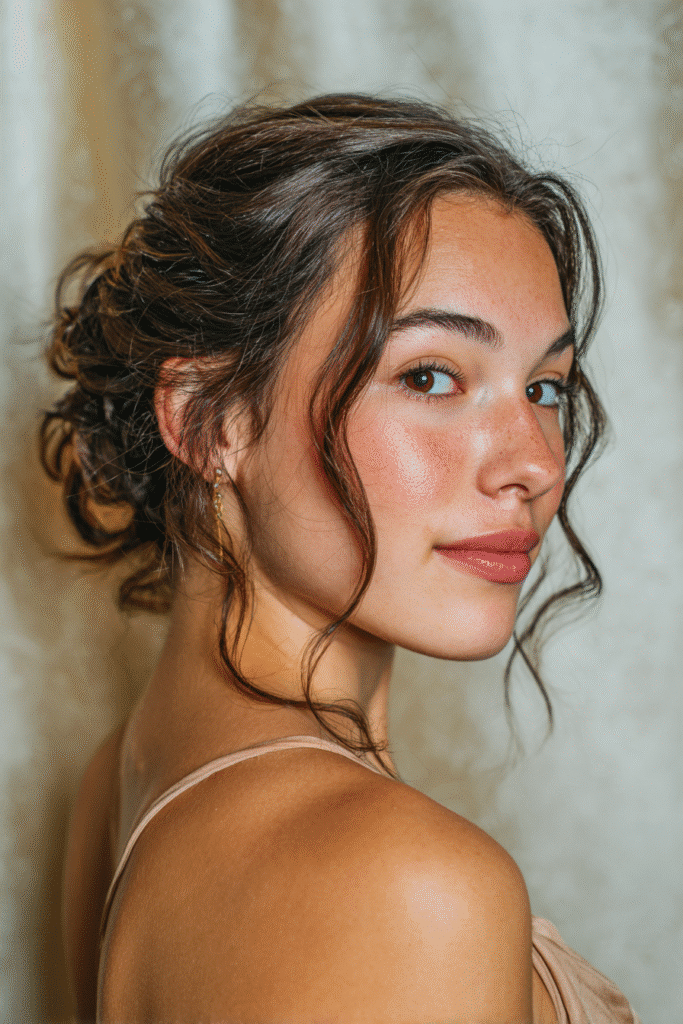
When I need an updo that exudes timeless elegance without hours of styling, the side-swept bun becomes my homecoming lifesaver.
Side-Swept Bun style overview
The side-swept bun is that perfect put-together look that takes mere minutes to create. Simply twisted from a low side ponytail into a ballerina bun and secured with pins, this asymmetrical style flatters nearly every face shape. What makes it so special? It’s fun yet flirty, allowing you to feel polished without appearing overly fussy. This versatile updo works beautifully for both sleek formal looks or intentionally messy styles – as lightness and spontaneity currently dominate fashion trends.
Why Side-Swept Buns are elegant
Side hairstyles possess an ever-elegant quality, with their popularity spanning across decades. Ideally suited for pairing with one-shoulder dresses, this classic style caters perfectly to your “good side” in photos. Most impressive is how this updo transitions effortlessly from a day at the office to evening celebrations. Often positioned near the nape of the neck, these buns create a timeless silhouette that works wonderfully for formal occasions like homecoming, yet feels approachable enough for any special event.
How to do a Side-Swept Bun in 15 minutes
- Create a side part, taking the fuller side down behind your ear
- Secure a small ponytail with a clear elastic at your hairline
- Twist remaining hair toward your head while bringing it to the ponytail
- Secure everything with another elastic
- Split the ponytail in half and twist sections together
- Wrap this twist around itself to form your bun
- Secure with bobby pins, then add texture spray
- Gently pull loops for volume
Twisted Crown Braid
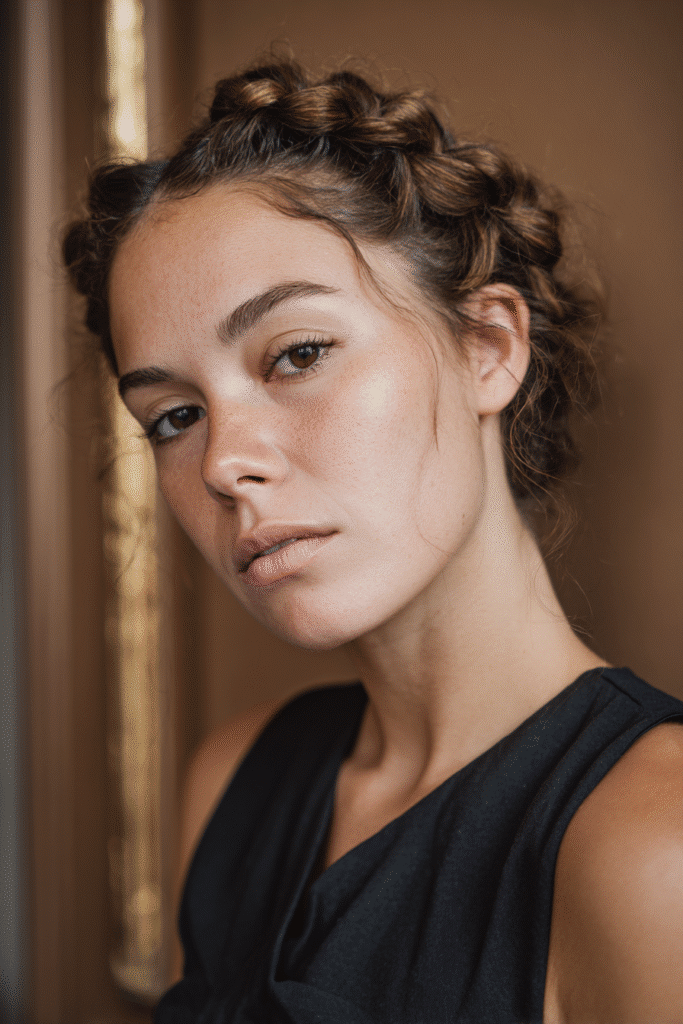
For a truly regal homecoming look, twisted crown braids have become my secret obsession. This gorgeous halo-style braid frames your face while adding ethereal elegance that works even with hair in those awkward growing-out phases.
Twisted Crown Braid look
The twisted crown braid creates a beautiful circular frame around your head, resembling a delicate crown or halo. This half-up style features two twisted sections that wrap around your head, providing dimension and texture. What makes this style particularly appealing is its boho-chic appearance paired with practical functionality. Alongside looking elegant, it keeps hair securely away from your face—perfect for dancing at homecoming!
Why Twisted Crown Braid is regal
Twisted crown braids exude a naturally royal vibe without appearing overly formal. Throughout my experiences with homecoming preparation, I’ve noticed this style photographs beautifully from every angle, creating that fairy-tale princess effect everyone adores. Undeniably, its regal appearance stems from its circular positioning that mimics actual crowns. This versatile style effortlessly transitions between casual and formal events, making it ideal for both classic and boho homecoming themes.
How to create a Twisted Crown Braid
Believe it or not, this impressive style takes less than five minutes once mastered:
- Take a triangle section near your part and divide into two strands
- Add hair to each section as you twist them together (front piece over back)
- Continue twisting until reaching the back of your head
- Create an identical twist on the opposite side
- At the back, push your thumb through one twist and pull the other through this gap
- Secure with bobby pins, removing any elastics
For extra volume, gently pull edges outward after securing!
Curls Pinned Behind Ears
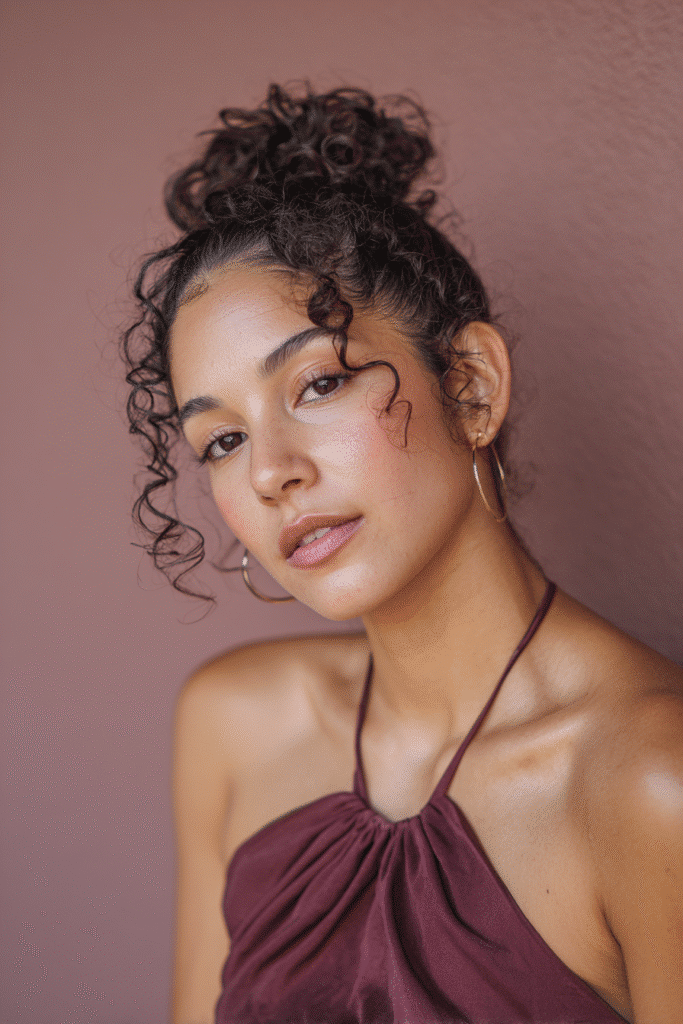
Elegant simplicity defines my go-to homecoming style when I want to showcase statement earrings and keep my hair looking polished yet effortless. Pinned curls behind the ears create that perfect balance of sophistication and practicality that works for any formal event.
Pinned Curls style overview
Pin curls originated in the 1930s through 1950s when most women utilized this technique as their main hair curling method. Effectively, this vintage-inspired style keeps curls beautifully visible while remaining off your face. The technique involves curling sections of hair, then strategically pinning them to create elegant formations. For homecoming specifically, curls pinned behind the ears allow your hair to fall gracefully while ensuring nothing blocks your vision on the dance floor.
Why this style is great for accessories
The primary advantage of this style lies in its ability to showcase statement jewelry. Of course, soft curls pinned back create the perfect backdrop for earrings to shine. Furthermore, you can personalize this look with various hairclips – mixing materials for a playful feel or matching metals for sophistication. This versatility makes pinned curls ideal for homecoming when you want your accessories to complement your outfit without competing with your hairstyle.
How to pin curls behind ears
Creating this elegant look takes just 3-5 minutes:
- Begin by determining placement for your pinned sections
- Take a 1-inch section of hair and twist it around your fingers
- Gently slide the coil off and lay it flat against your head
- Secure with bobby pins that match your hair color
- Add hairspray for lasting hold
This timeless style remains remarkably versatile – perfect for any homecoming theme while keeping your look polished throughout the evening.
Sleek and Smooth Bun
The sleek and smooth bun represents the epitome of polished elegance for homecoming—perfect for those seeking a sophisticated style that photographs beautifully from every angle.
Sleek Bun explained
A sleek bun features hair smoothed tightly against the head with a polished, glossy finish before being twisted into a neat knot. Unlike its messier counterparts, this style prioritizes precision and shine. The position varies—high for drama, low for understated elegance—yet the defining characteristic remains that sleek, almost wet-look finish. This versatile style works wonderfully for both short and long hair, making it accessible regardless of your current length.
Why Sleek Buns are red carpet ready
The sleek bun has earned its status as a red carpet classic through its minimal yet powerful impact. From celebrities to brides, this hairstyle creates an instant facelift effect, drawing attention to your cheekbones and eyes. For homecoming specifically, the sleek bun offers several advantages: it stays securely in place throughout hours of dancing, creates the perfect canvas for statement jewelry, and photographs flawlessly from every angle. Furthermore, this timeless style complements virtually any dress neckline or fabric.
How to do a Sleek Bun in 20 minutes
- Start with dry hair (second-day hair works best)
- Apply moisturizing gel to roots for control
- Brush hair tightly back, focusing on smoothing the hairline
- Secure into a ponytail at your desired height
- Twist the ponytail, wrapping it around the base
- Secure with bobby pins, tucking ends underneath
- Finish with strong-hold hairspray for lasting shine
For homecoming perfection, try adding decorative pins or a statement hair accessory for extra sparkle!
Add a Pearl Headband
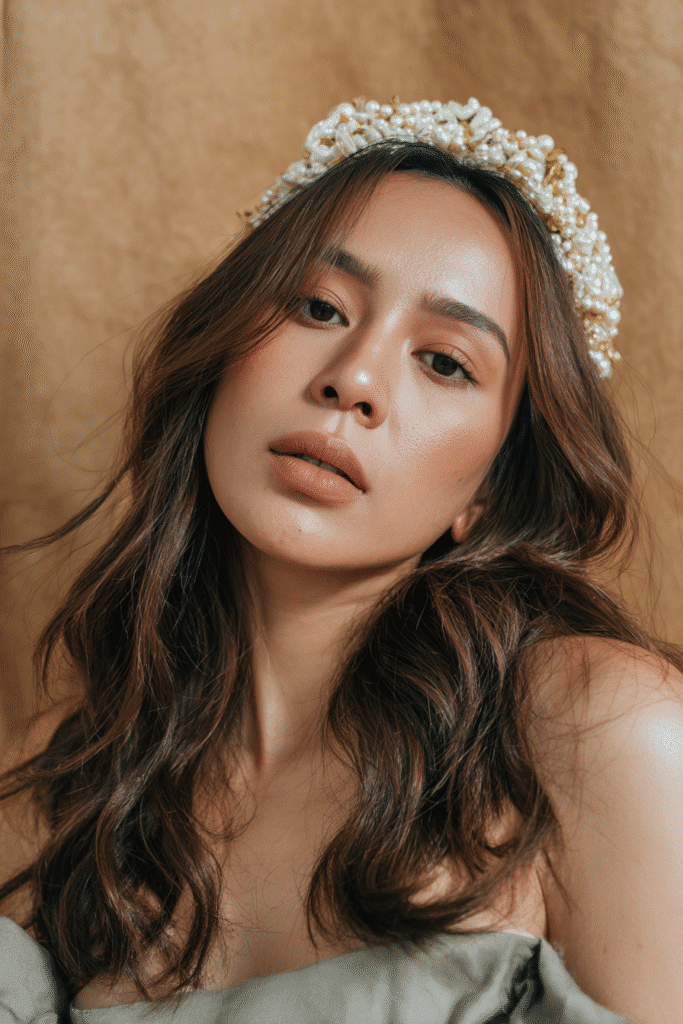
Pearl headbands have become my ultimate secret weapon for elevating any homecoming look in seconds. This timeless accessory instantly transforms even the most basic hairstyle into something special.
Pearl Headband style overview
Pearl headbands come in countless varieties—from minimalist beaded designs to ornate pearl-encrusted statement pieces. These versatile accessories work beautifully with loose waves, sleek buns, or even simple straight styles. The magic lies in how they frame your face while adding a touch of elegance to your overall look. Notably, pearl headbands have graced everything from runways to royal occasions, proving their timeless appeal.
Why accessories elevate simple styles
Adding a pearl headband to any basic hairstyle creates an instant “done” look without extensive styling. Even with your hair simply down in loose waves, a pearl headband positioned slightly back from your hairline adds sophistication and polish. This accessory works perfectly for:
- Covering up second-day hair
- Adding dimension to otherwise flat styles
- Creating a focal point that complements your dress
- Framing your face for photos
How to style with a Pearl Headband
For homecoming, try these placement techniques:
- Position the headband behind your front section of hair for a soft look
- Place it on top of sleek, pulled-back hair for drama
- Wear it with a low ponytail or bun, pulling out face-framing pieces
- Pair with half-up styles, using the headband to secure the top section
Conclusion
After exploring these quick homecoming hairstyles, you’ll never need to stress about your hair again! These 15 stunning styles prove that beautiful hair doesn’t require endless hours or professional help. My personal favorites—the twisted half-up style and messy bun—have saved me countless times when rushing to get ready.
Remember, homecoming should be about making memories rather than spending hours in front of a mirror. Therefore, these 20-minute styles give you that perfect balance of looking amazing while having time to enjoy getting ready with friends.
Accessories also make a huge difference! Accordingly, something as simple as adding pearl pins or a sparkly headband instantly elevates even the most basic styles. This explains why I always keep a small collection of hair accessories specifically for special events.
You might wonder which style works best for your specific dress or face shape. Generally, updos like the French twist or sleek bun complement high necklines beautifully, while half-up styles or romantic braids pair wonderfully with strapless or sweetheart necklines.
The best part? These styles stay secure throughout hours of dancing and photos. Throughout my own homecoming experiences, nothing ruins the night faster than constantly fixing fallen hair instead of enjoying the moment!
Try practicing your favorite style once before the big night—though honestly, these are so simple you’ll likely nail it on the first try. Undoubtedly, your friends will be asking how you managed such a gorgeous hairstyle in so little time.
Homecoming only happens a few times in your life. Now you can spend less time worrying about your hair and more time creating those unforgettable memories that will last long after the dance ends!