
Medium-length hair typically falls between the shoulders and collarbone, usually around 12 to 16 inches in length. It’s that perfect sweet spot between short and long that offers incredible versatility. However, let’s be honest – even with this ideal length, we don’t always have time for elaborate styling. Fortunately, there are plenty of easy hairstyles for medium length hair that don’t require professional skills or hours in front of the mirror.
I’ve spent years experimenting with simple hairstyles for medium hair that can be mastered with minimal effort. From beautiful updos created by simply twisting messy hair and securing with bobby pins to styles that can be worn loose or pulled up, these options are perfect for busy mornings when you’re rushing out the door.
In this , I’m sharing 15 everyday easy hairstyles for medium hair that you can do yourself in 5 minutes or less. These styles are not only quick but also stylish enough to take you from work meetings to dinner plans without missing a beat. No more hair frustrations – just effortless chic looks that work for real life!
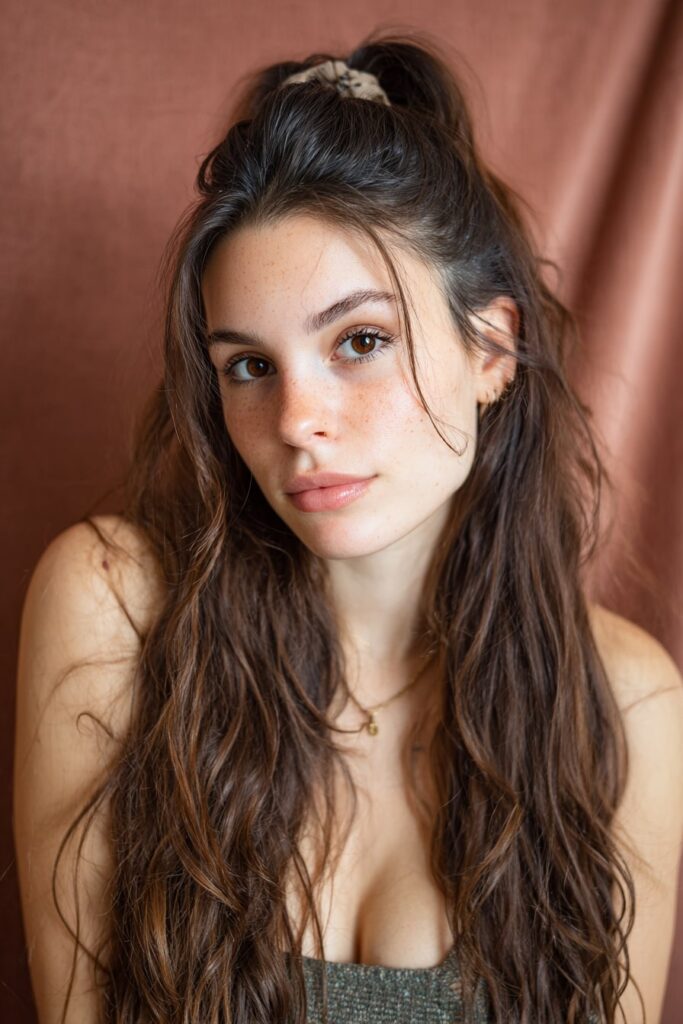
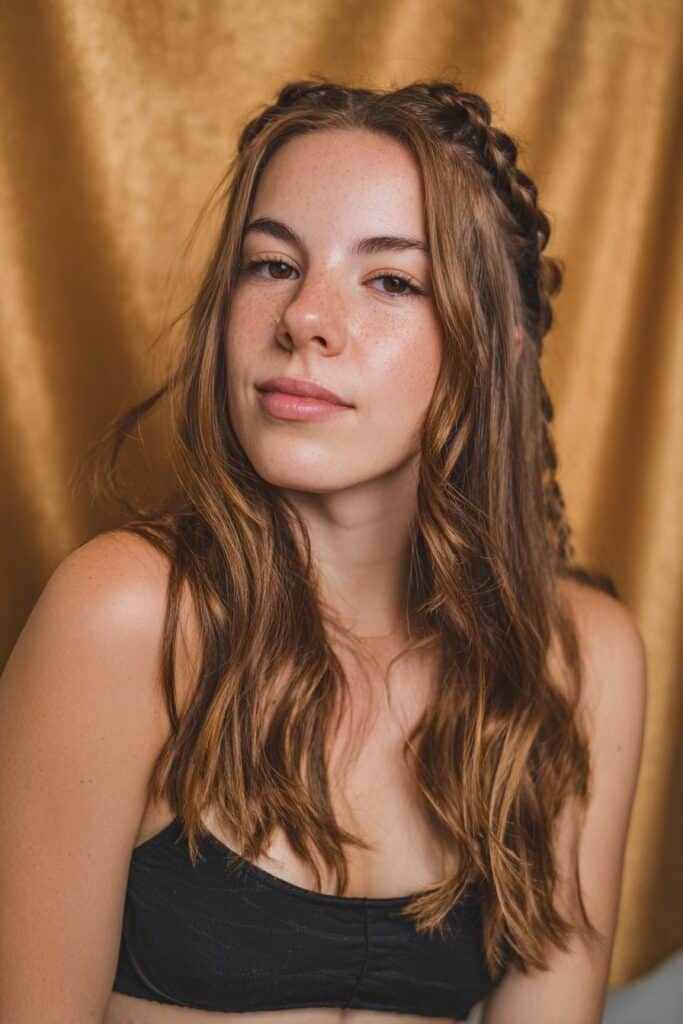
Twisted Half-Updo

The twisted half-updo has become my go-to style whenever I’m rushing but still want to look put together. This elegant yet effortless look perfectly balances sophistication with a touch of whimsy. What makes this hairstyle truly special is its deceptive simplicity—it appears fancy and intricate yet remains surprisingly easy to achieve once you get the hang of it.
Twisted Half-Updo styling steps
Creating this beautiful style takes just minutes with these simple steps:
- Start with the right foundation – I prefer working with slightly textured hair for better grip. If your hair is freshly washed, add a bit of texturizing spray for hold.
- Section your hair properly – Take a triangular section on top of your head. The point of your triangle should be at the center top of your head, with the outer points near the top of each ear.
- Create the twist – Take a section from the right side above your ear, divide it into two parts, and twist them around each other. Secure at the back of your head with bobby pins.
- Repeat on the other side – Take a similar section from the left side, divide and twist, then secure it where the first twist ends.
- Add volume – Gently pull on the edges of your twists to create fullness and that effortlessly undone look.
Twisted Half-Updo best occasions
This versatile style truly shines in numerous settings. I’ve worn it for everything from casual coffee runs to formal events. It’s particularly perfect during summer when taking ages to blow dry seems wasteful. Moreover, this style works wonderfully for those awkward hair-growing stages or when you need to keep hair off your face while still looking polished.
The twisted half-updo is suitable for all ages and events – I’ve seen it look fantastic on everyone from young girls to elegant mature women at weddings.
Belle Hathaway’s tip for Twisted Half-Updo
My foolproof trick for this style is working with slightly damp hair for better grip. For additional hold, I use a moisturizing cream to smooth frizz before starting. Remember, one of the joys of this style is its playful texture—slightly undone works perfectly!
If your hair is on the finer side, try curling it beforehand or sleeping in a braid the night before to add volume. Additionally, leaving a few face-framing pieces out creates a softer, more romantic look that opens up your face beautifully for photos.
Messy Low Bun
Looking for a style that works from gym to gala? The messy low bun has saved me countless times with its remarkable versatility. Unlike more structured styles, this intentionally undone updo delivers that perfect balance of chic and casual while keeping hair off your neck during warmer days.
Messy Low Bun styling steps
Creating this effortlessly disheveled look takes just minutes:
- Create your foundation: Gather your hair at the nape of your neck and secure with a clear elastic to form a low ponytail.
- Build texture: Apply texturizing spray or powder to your crown area, then gently pinch and pull sections for added volume.
- Form your bun: Twist your ponytail around the elastic, either wrapping it completely or leaving some ends out for that perfectly undone finish.
- Secure in place: Use bobby pins around the bun to anchor it firmly. For thicker hair, try dividing your ponytail into three sections first, creating small knots before pinning[101].
- Perfect the mess: Gently tug on sections of your bun to loosen and create that intentionally undone look. Pull out a few face-framing tendrils for softness.
Messy Low Bun best occasions
This style truly shines across countless settings. I frequently wear mine for:
- Casual everyday wear and errands
- Office settings where I need to look put-together yet approachable
- Weekend brunches and informal gatherings
- Even formal occasions with the addition of a decorative pin
The messy low bun works equally well with freshly washed hair or second-day locks—in fact, slightly dirty hair often holds better thanks to natural oils providing extra grip.
Belle Hathaway’s tip for Messy Low Bun
My game-changing discovery for the perfect messy bun is what I call the “triangle technique.” After securing your basic bun, try pulling it slightly wider at the sides rather than perfectly round. This creates a more flattering shape that frames your face beautifully. Furthermore, I’ve found that sleeping with your bun overnight (secured with fabric-covered elastics) creates fantastic texture for the next day. For extra hold without stiffness, apply hairspray before styling rather than after—this provides grip without sacrificing that coveted effortless movement.
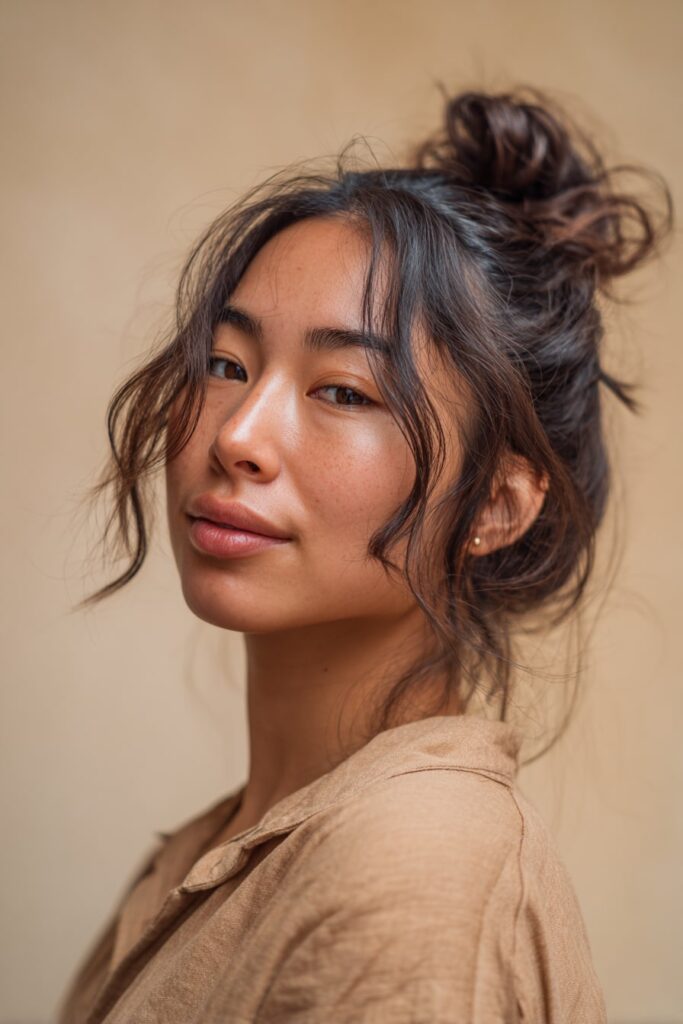
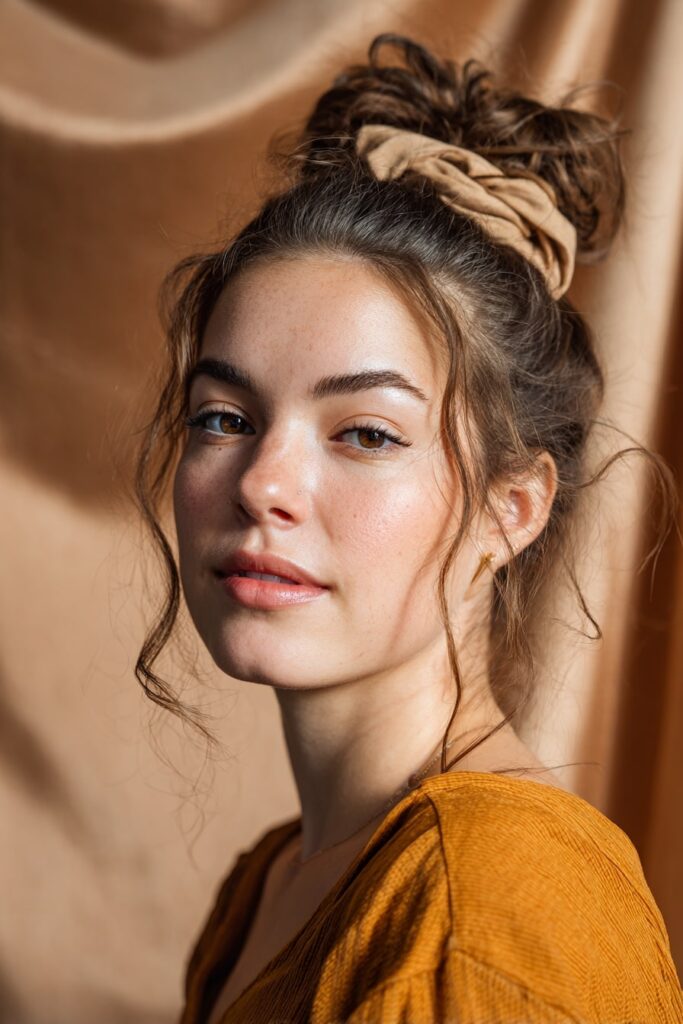
Mini Top Knot
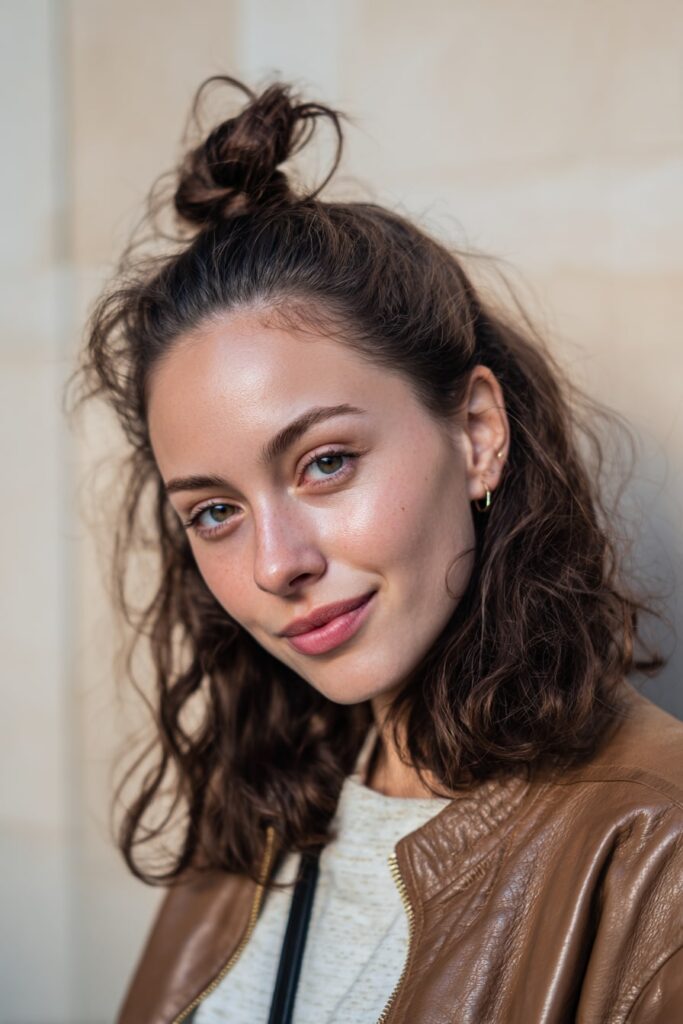
For those mornings when you need style without sacrificing time, the mini top knot has become my secret weapon. As someone with medium-length hair, I love this look because it adds a playful yet put-together vibe without requiring professional skills. Plus, it’s one of those everyday easy hairstyles for medium hair that keeps my face framed nicely while adding height and dimension.
Mini Top Knot styling steps
Creating this quick style couldn’t be simpler:
- Start with texture – This style works best with slightly “lived in” hair that has some grip. For extra volume, try adding dry shampoo even if your hair isn’t greasy.
- Section properly – Take the top section of your hair (roughly from your forehead to the crown of your head) without going too far back. Think of it as grabbing a big square top section.
- Create your base – Pull this section into a half ponytail and secure with a clear elastic for a no-show look.
- Form the knot – Twist the ponytail and wrap it around the elastic, pulling it through only 2/3 of the way on the final loop to create that perfectly undone look.
- Perfect the look – Gently tug at the bun to create more volume and that intentionally messy finish. Pull out a few face-framing pieces if desired.
Mini Top Knot best occasions
I find this style incredibly versatile – perfect for:
- Keeping hair away from curious little hands (fellow moms understand!)
- Running errands or grocery shopping
- Work days when you need to look polished yet approachable
- Warm summer months when you want hair off your neck and shoulders
The mini top knot transitions beautifully from casual to dressy, making it ideal for those days that start with coffee and end with dinner plans.
Belle Hathaway’s tip for Mini Top Knot
My essential tip: don’t aim for perfection! I’ve found the messier, more undone look actually appears more stylish. For added dimension, after securing your knot, gently pull on both the crown area and the bun itself to create fullness. Sometimes I spray hairspray on bobby pins before placing them for extra hold when my fine hair won’t cooperate. Remember that this style should take less than 5 minutes – if you’re spending longer, you’re overthinking it!
Side Braid with Texture
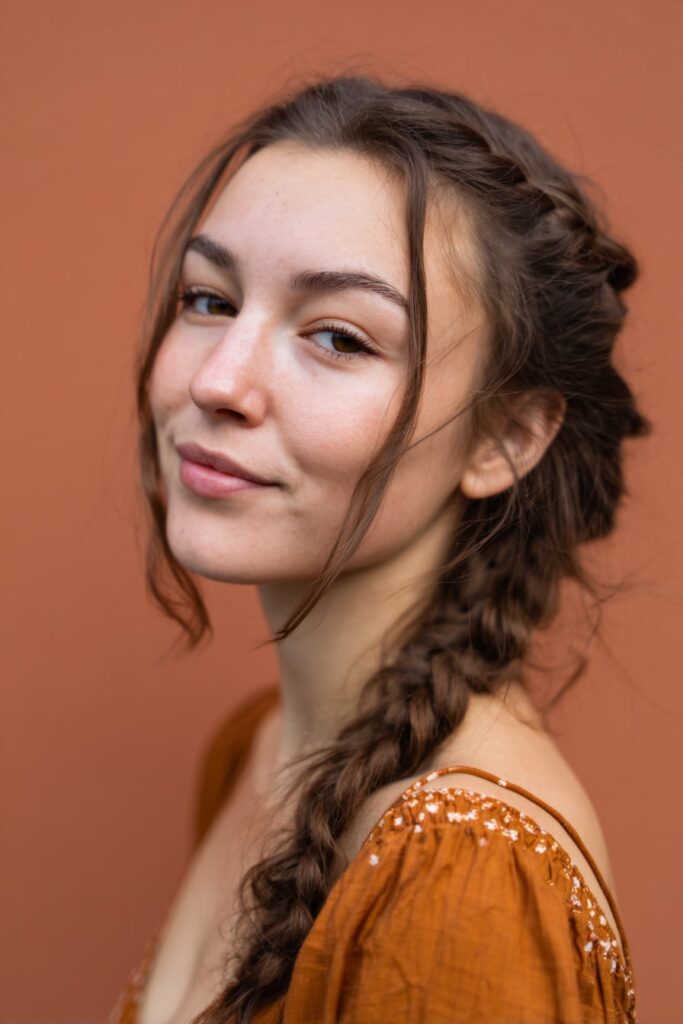
I’ve always treasured hairstyles that combine simplicity with style, which is exactly what makes the side braid with texture one of my favorite looks. As someone who works with clients daily, I’ve seen firsthand how this effortlessly chic style strikes that perfect balance between “I tried” and “I didn’t try too hard”. It’s that go-to style that keeps looking fresh season after season.
Side Braid with Texture styling steps
Creating this perfectly imperfect look takes just minutes:
- Start with the right foundation – Second or third-day hair works perfectly for this style. The natural oils provide grip that freshly washed hair lacks.
- Add texture if needed – If your hair feels too slippery, spritz some sea salt spray and scrunch to create that beachy texture.
- Part your hair – Create a center part first, afterward taking three strands from one side.
- Begin braiding – Gather your hair loosely to one side over your shoulder and start a standard three-strand braid.
- Create fullness – Once finished, secure with a clear elastic, subsequently pulling at the “elbows” of the braid to loosen it—what stylists call “pancaking”.
- Perfect the look – Use your fingers to gently pluck out sections of the braid to make it appear fuller. For additional texture, leave a few face-framing pieces loose.
Side Braid with Texture best occasions
This versatile style truly shines in numerous settings. I recommend it for:
- Lazy Sunday errands and casual outings
- Brunches with friends
- Beach trips where you want that relaxed bohemian vibe
- Bike rides through the city or park picnics
The side braid with texture works exceptionally well for second-day hair since the natural oils give it better grip and hold. Plus, it’s perfect for those days when washing your hair simply isn’t in the cards.
Belle Hathaway’s tip for Side Braid with Texture
My studio experience reveals that naturally curly or wavy hair creates the ideal foundation for this style. The texture makes those intentional flyaways look deliberate rather than messy. For clients with straight hair, I recommend adding waves with a curling wand before braiding.
Remember—this style should look unfinished! The magic happens in the imperfection. Creating a deep side part (positioned directly above your eyebrow’s arch) beforehand can add dramatic flair without extra effort. Lastly, don’t be afraid to really tug and loosen the braid; the bigger and messier it looks, the better!
Knotted Ponytail
Knots might remind you of tangled messes, yet in the hair world, they’re actually a fresh approach to styling! The knotted ponytail remains one of my favorite easy hairstyles for medium hair that delivers maximum impact with minimal effort. This style offers that perfect blend of sophistication and playfulness that works amazingly well for medium length locks.
Knotted Ponytail styling steps
There are several approaches to creating this look, depending on your preference:
Method 1: Three-Section Technique
- Part your hair into three sections – two smaller ones on the sides and a larger middle section
- Gather the middle section into a ponytail and secure it tightly
- Take the two outside sections, bring them to the center over your ponytail, and simply tie them in a knot
- Lift your ponytail and secure the two ends together underneath with a clear elastic
- Fluff and pull gently to add volume to both the knot and ponytail base
Method 2: Two-Section Approach
- Roughly split your hair in two equal sections down the center
- Tie these two sections into a knot and tighten by pulling them away from each other
- Continue knotting until you reach the ends (longer hair) or secure with a clear elastic
- Gently tug on sections to create volume and texture
Knotted Ponytail best occasions
This versatile style truly shines across numerous settings. I’ve worn mine for:
- Casual everyday wear when I want something beyond a basic ponytail
- Office meetings where I need to appear polished yet approachable
- Special occasions like weddings and formal events (with added volume)
- Summer activities when I need hair off my neck yet still look put-together
What makes this style exceptionally practical is how it works wonderfully with second-day hair. In fact, the natural oils provide better grip for the knots!
Belle Hathaway’s tip for Knotted Ponytail
My game-changing discovery for perfecting this style involves texturizing powder. I dust a little at the crown and base of the ponytail before knotting to create remarkable hold and volume. For a more boho look, I recommend gently pulling small sections of hair from the knot after securing everything.
Essentially, this hairstyle serves as an excellent holiday option as well. Try it right after swimming – once your hair dries, you’ll have gorgeous beachy waves for evening outings. Remember that this style should feel somewhat undone – perfection isn’t the goal! The beauty lies in its slightly messy, effortless appearance that somehow looks intentionally styled.
Half-Up Bow
Creating a hair bow might seem complex, yet this charming style offers a delightful twist on ordinary half-up hairstyles. As a stylist working with medium-length hair daily, I’ve found this adorable look consistently impresses clients with its playful elegance.
Half-Up Bow styling steps
This sweet style comes together in minutes:
- Brush your hair and create a half-up ponytail at the crown
- Secure with an elastic, leaving a loop on the final pull-through
- Split this loop into two sections—these become your bow “loops”
- Take a small section from the remaining ponytail and wrap it over the middle of your loops
- Pull this section through the back and secure with bobby pins
- Gently tug the loops outward to create fullness and adjust your bow shape
Half-Up Bow best occasions
Consequently, this versatile style adapts beautifully to numerous settings. It’s perfect for:
- Everyday wear when you want something beyond basic styling
- Holiday celebrations and festive gatherings
- Summer outings when you need a polished yet playful look
- Professional environments where subtle creativity is appreciated
Belle Hathaway’s tip for Half-Up Bow
My secret? Working with second-day hair provides better grip for this style. Nonetheless, if using freshly washed hair, apply texturizing spray first. For thinner hair, try slightly backcombing the crown before creating your bow. Additionally, don’t obsess over perfection—this style looks most charming with that slightly undone quality that makes it appear effortless yet intentional.
Loose Braid with Volume
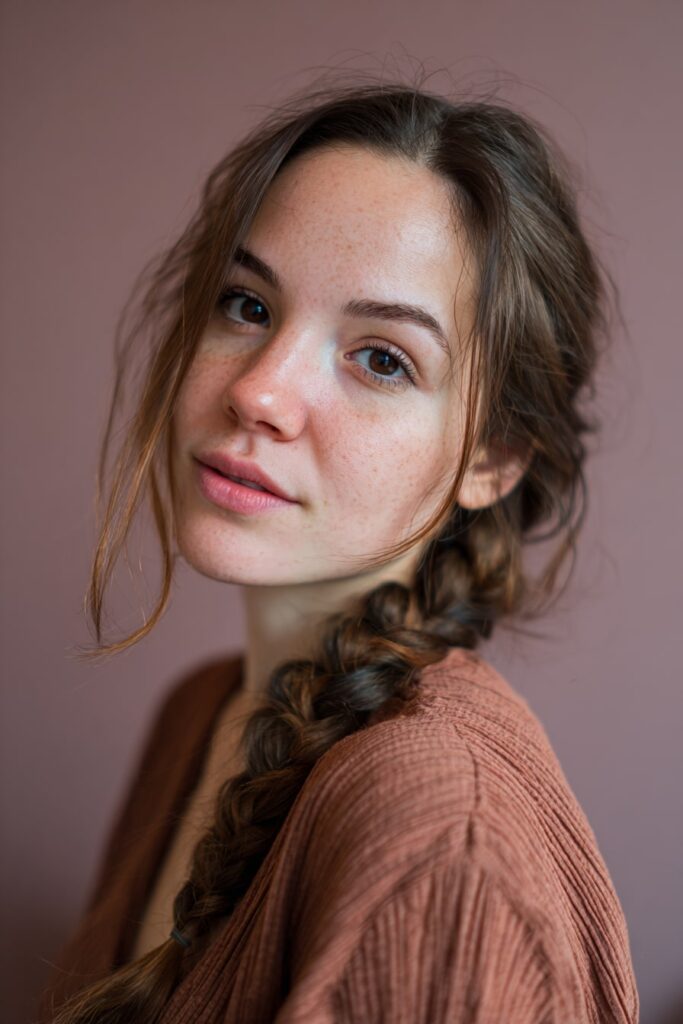
Among all the easy hairstyles for medium length hair, the loose braid with volume remains my signature technique for clients seeking that perfect balance between elegant and effortless. This style embraces natural texture while creating an illusion of thicker, fuller hair—ideal for those with finer strands.
Loose Braid with Volume styling steps
Creating this voluminous style requires just a few steps:
- Begin with slightly textured hair—second-day locks work wonderfully as natural oils provide better grip
- Apply texturizing spray or dry shampoo for additional hold
- Gather hair to one side and create a standard three-strand braid
- Once braided, secure with a clear elastic
- “Pancake” your braid by gently pulling the outer edges of each section to create fullness
- Pull apart sections starting from the top, working downward, leaving the bottom few inches intact
Loose Braid with Volume best occasions
This versatile style truly shines across various settings, including:
- Romantic occasions where a bohemian touch feels appropriate
- Casual gatherings and weekend outings
- Office environments when you need a polished yet approachable look
- Garden parties and outdoor events
Belle Hathaway’s tip for Loose Braid with Volume
My secret technique involves using volumizing powder specifically at the crown and along each section before braiding. For clients with silky hair that typically slips out of styles, braiding on second-day hair provides remarkable staying power. Remember—the beauty lies in its imperfection! The messier and fuller it looks, the more stylish the result.
Twist and Pin
The classic French twist gets a modern update with this simplified “twist and pin” technique. Throughout my years of styling, I’ve found this approach offers elegance without complicated steps—making it perfect for those mornings when time is limited yet style is non-negotiable.
Twist and Pin styling steps
Initially, this style works best on second-day hair for better grip:
- Gather your hair into a low ponytail position with your hands (no elastic needed)
- Begin twisting upward against your head, similar to starting a French twist
- Once twisted, approach from the voluminous side with a French pin, curve facing outward
- Grab a section of the twist, rotate the pin, then slide it in so the curve cups your head
- For short hair, secure falling side pieces with bobby pins
Twist and Pin best occasions
This versatile updo shines across different settings:
- Formal events and weddings
- Professional environments
- Date nights
- Whenever you need a quick style upgrade
Belle Hathaway’s tip for Twist and Pin
My game-changing discovery was learning to properly anchor the twist. Upon inserting your French pin, ensure you’re connecting the twist to the base of your head. Otherwise, your pin will slide out throughout the day. Following this technique means your style stays secure whether you’re dancing at a wedding or rushing through a busy workday.
Double Buns
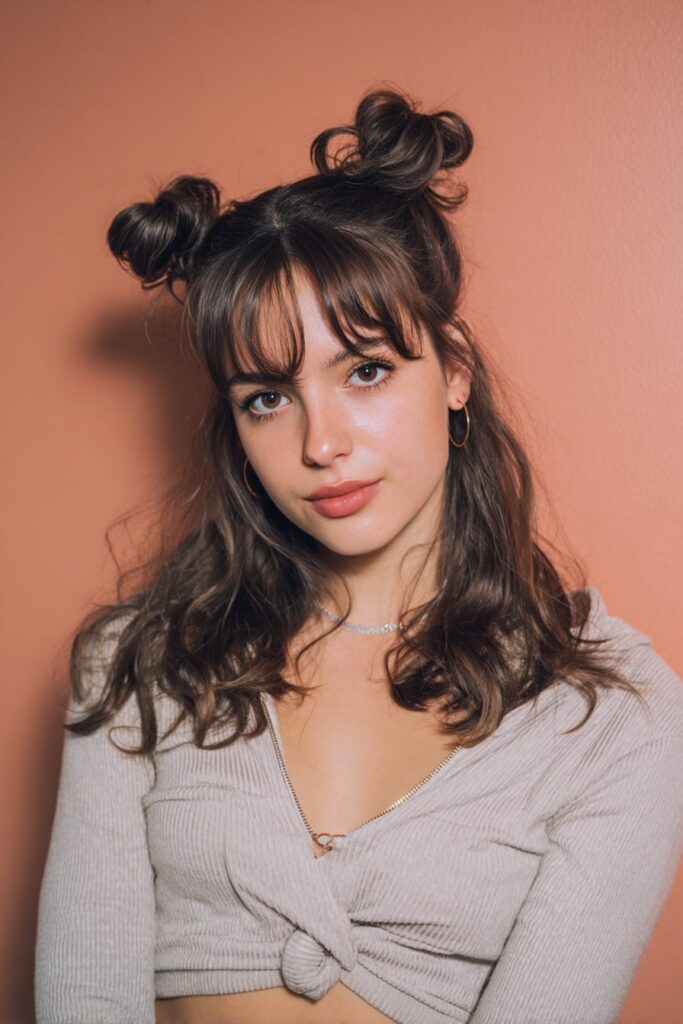
When one bun isn’t enough, try two! Double buns offer twice the fun while keeping hair securely out of your face. This playful style has become increasingly popular as both a practical and stylish option for medium-length hair.
Double Buns styling steps
Creating this charming look requires minimal effort:
- Start by creating a clean center part from hairline to nape
- Secure each side into ponytails at your desired height—higher for a more playful look, lower for sophistication
- For extra volume, lightly tease each ponytail before styling
- Twist each ponytail and wrap it around the base, creating round shapes
- Pin each bun securely, fluffing outward for fullness
- Gently pull sections apart for a more voluminous finish
Double Buns best occasions
This versatile style works perfectly for:
- Active days when hair needs to stay put
- Festival settings where you want to stand out
- Casual outings with friends
- Second-day hair refreshes
Double buns appear more voluminous than single buns, making them ideal for those with finer hair seeking added dimension.
Belle Hathaway’s tip for Double Buns
My secret for perfect double buns? Position them close together at the crown rather than wide apart—this creates a more flattering silhouette. Likewise, apply texturizing spray before styling for added grip. Finally, don’t obsess over symmetry; slightly uneven buns often look more natural and lived-in. This style truly shines with slightly undone edges that frame your face beautifully!
Half-Up Hair Wrap
Half-up styles have always captivated me with their versatility, yet the half-up hair wrap truly elevates this classic look to something special. This technique beautifully balances sophistication with practicality, making it perfect for those days when you need something beyond basic styling.
Half-Up Hair Wrap styling steps
Creating this wrapped look takes barely three minutes:
- Begin by sectioning your hair horizontally from the top of your ears to the crown
- Divide the top section into left and right sides
- Take the left section, wrap it around the back, and bring it underneath your elastic
- Secure with bobby pins, hiding them underneath the hair
- Repeat with the right section, wrapping it under the previously wrapped piece
- Pin securely and mist with light hairspray
Half-Up Hair Wrap best occasions
This style shines across various settings, obviously suited for:
- Casual weekend outings
- Office environments requiring polished looks
- Date nights or dinner gatherings
- Second-day hair refreshes
Belle Hathaway’s tip for Half-Up Hair Wrap
My game-changing discovery involves starting with slightly textured hair. Accordingly, I often apply a small amount of texturizing powder before wrapping to create better grip. Meanwhile, don’t fear adjusting as needed—gently pulling sections for volume after securing creates that perfect balance between polished and lived-in that makes this style so universally flattering.
Side Sweep with Clip
Simple elegance never goes out of style! The side sweep with clip remains my secret weapon for those times when I need a sophisticated look without complicated styling. This timeless hairstyle creates that glamorous red carpet vibe yet requires minimal effort.
Side Sweep with Clip styling steps
Creating this stunning look takes just minutes:
- Begin by brushing all your hair smoothly to one side
- Insert several strong bobby pins to secure your hair, placing each pin in the middle section of the previous one as you move upward
- Section some hair from above the pins (typically from the top left side) and brush it smooth
- Bring this section down to cover your bobby pins completely
- Take another front section, smooth it with a teasing brush, then wrap it around the remaining hair
- Secure this final section underneath, ensuring all pins remain hidden
Three bobby pins typically suffice for most hair types, though thicker hair may require additional support.
Side Sweep with Clip best occasions
This versatile style truly excels for:
- Special events like weddings, proms, or formal gatherings
- Holiday celebrations such as Christmas or New Year’s Eve
- Situations where you want to keep hair down yet elegantly styled
- Professional photoshoots where you need a naturally glamorous look
Belle Hathaway’s tip for Side Sweep with Clip
My game-changing discovery involves using decorative clips rather than just practical ones. Hence, I often select pearl or floral-adorned clips that serve both functional and esthetic purposes. Additionally, creating a deep side part positioned directly above your eyebrow’s arch adds dramatic flair without extra effort.
Quick Twist for Shorter Hair

Short hair poses unique styling challenges! Thankfully, the quick twist technique offers a fast solution that creates beautiful dimension despite limited length. This elegant yet practical style works wonders when you’re between haircuts or growing out shorter layers.
Quick Twist for Shorter Hair styling steps
Creating this twisted style takes minimal effort:
- Begin with textured hair – loose waves provide grip and make the final look more attractive
- Take one section near your temple and twist it upward and back toward the crown
- Secure this section with bobby pins
- Grab another section from the opposite temple and twist similarly toward the crown
- Before securing, tuck the ends of this second twist under the first twist
- Pin everything in place, additionally tucking the first twist’s ends under the second for balance
- Pull a few face-framing pieces out front for softness
Quick Twist for Shorter Hair best occasions
This versatile style generally excels for:
- Morning coffee runs and casual outings
- Office days requiring polished yet effortless looks
- Growing-out phases when you need stylish solutions
- Warm days when you want hair off your face yet still styled
Belle Hathaway’s tip for Quick Twist for Shorter Hair
My favorite technique involves curling the pulled-out front pieces with a curling iron after completing the twist. This adds beautiful movement to frame your face. For an alternative approach, try dividing your hair into multiple small sections. Taking one-inch portions, twist each back sequentially, creating a multi-dimensional look that appears more intricate than its simple execution.
Barely There Wave
Indeed, the barely there wave has become my signature look when time is short yet style remains essential. This subtle, effortless texture creates that perfect “I woke up like this” vibe while adding dimension to medium-length hair.
Barely There Wave styling steps
Creating these subtle waves requires a gentle approach:
- Begin with straight, dry hair (blow-dried works perfectly)
- Take 1-inch sections and wrap around a curling iron, leaving the bottom quarter-inch straight
- Key technique: Curl from roots to midshaft only, deliberately leaving ends out for that effortless look
- Alternate directions, curling some sections away from your face and others toward it
- Hold each section for just 3-4 seconds—you want a bend, not a defined curl
- Once finished, gently run fingers through to break up the pattern
Barely There Wave best occasions
Throughout my years styling clients, I’ve found this versatile look shines:
- Alongside glamorous outfits where the contrast creates unexpected sophistication
- For everyday wear when you want that “undone” yet intentional texture
- During transitional seasons when you need adaptable styling
- As a result of growing out shorter styles
Belle Hathaway’s tip for Barely There Wave
My game-changing discovery was turning down the heat on my styling tools! Lower temperatures create softer, more natural-looking waves. In contrast to tight curls, these “ghost waves” should undulate in gentle S-shapes. Apply texturizing spray before styling for grip and finish with a light dusting of volumizing powder at the roots for lasting lift without stiffness.
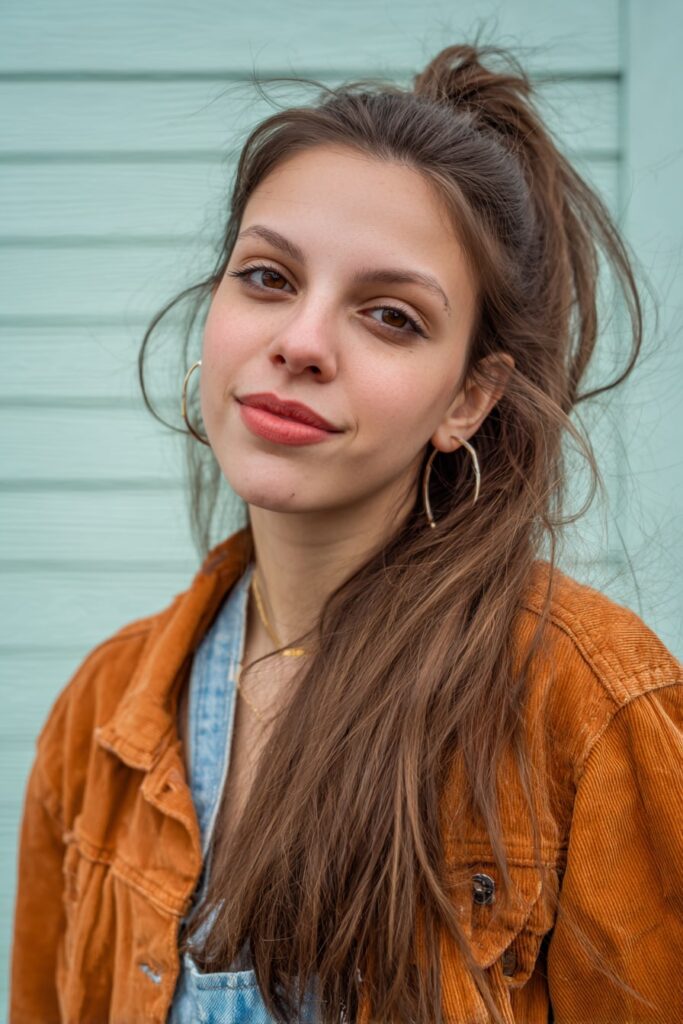
Effortless Low Pony
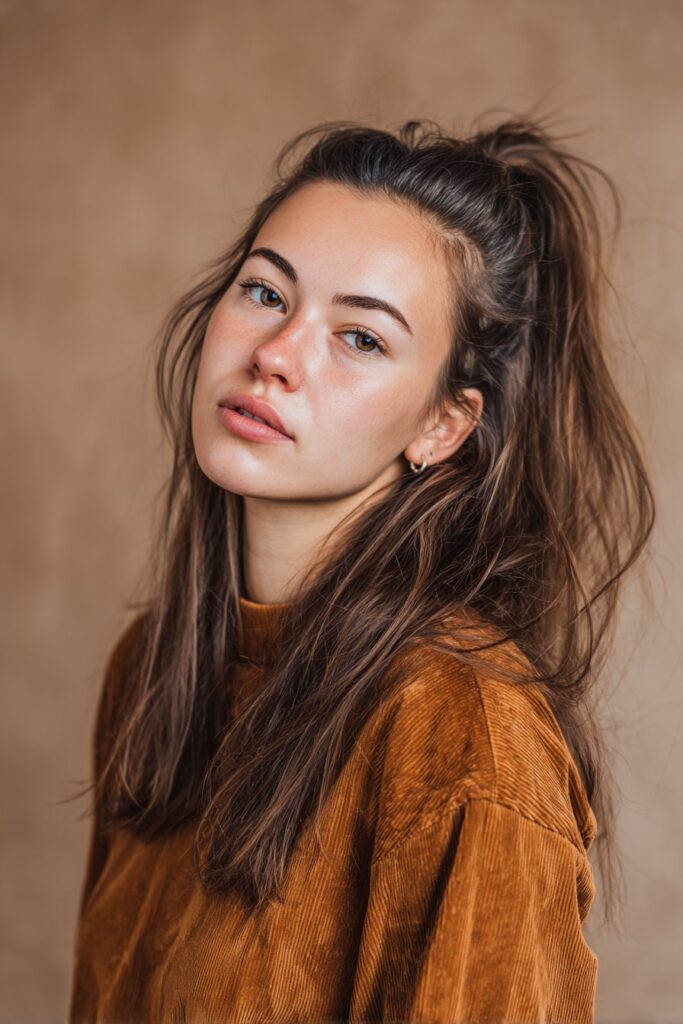
The low ponytail might seem basic at first glance, yet this timeless style symbolizes power, strength, and feminism. As someone who styles hair daily, I’ve found few looks match its versatility across both casual errands and formal events.
Effortless Low Pony styling steps
Creating this sleek style requires minimal effort:
- Start with second-day hair for better grip or add texturizing spray for freshly washed locks
- Brush hair smoothly toward the nape of your neck
- Secure with a clear elastic, pulling firmly for a tight hold
- Take a small section from underneath the ponytail
- Wrap this section around the elastic to hide it
- Secure with a bobby pin tucked underneath
- Gently pull sections at your crown for added height and volume
Effortless Low Pony best occasions
Primarily, this style shines across various settings:
- Running errands and street-style looks
- Weddings and formal events (add curls for romantic flair)
- Office settings requiring polished appearance
- Warm days when you need hair off your neck
Belle Hathaway’s tip for Effortless Low Pony
For that perfectly polished finish, I recommend backcombing your crown slightly before gathering hair. Additionally, try using silk or satin scrunchies instead of elastics to prevent breakage. Alternatively, elevate the look with decorative clips or ribbons for special occasions. Remember—ponytails don’t have to be plain!
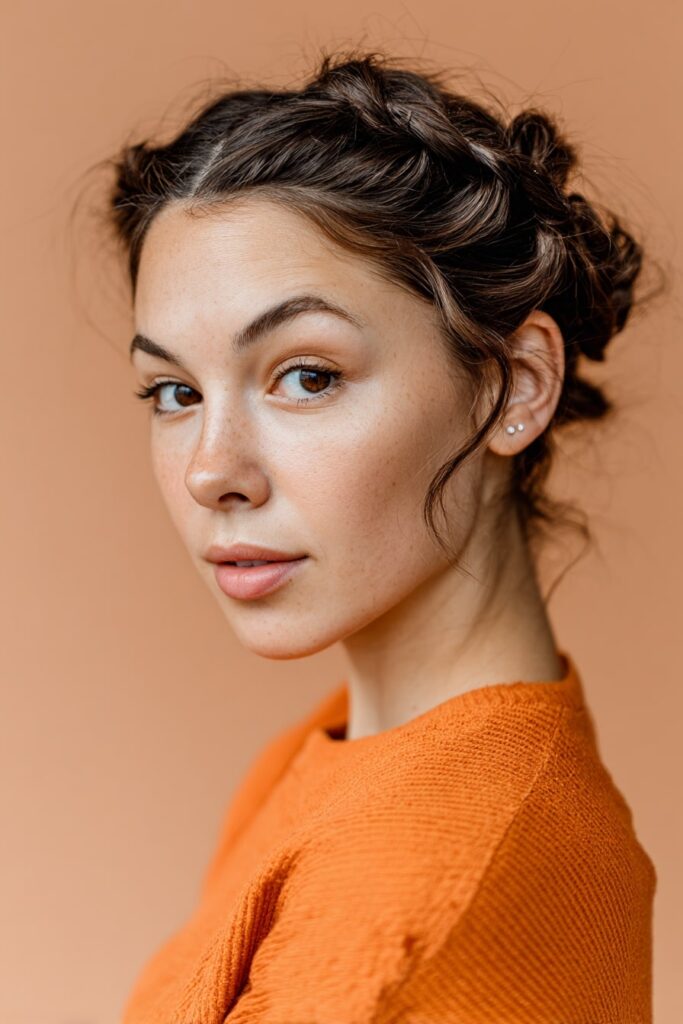
Braided Crown Accent
Wearing a crown doesn’t require royal lineage! The braided crown accent offers that regal elegance with minimal effort, perfect for those days when you want medium-length hair to look polished yet effortlessly styled.
Braided Crown Accent styling steps
Creating this royal-inspired look requires patience but pays off beautifully:
- Start with a deep side part (never center) to frame your face properly
- Begin at the nape of your neck, gathering a small section of hair
- Create what I call an “upside-down French braid” – crossing strands under the middle instead of over
- Braid upward over one ear, continuing across your forehead
- Complete the circuit by braiding down past your other ear
- Secure with small elastic, then tuck the tail under nearby sections
- Pin everything in place with bobby pins
Braided Crown Accent best occasions
This versatile style shines appropriately for:
- Formal events and weddings where photos will be taken from all angles
- Casual dinner gatherings requiring effortless sophistication
- Outdoor summer activities when you need hair fully secured
- Professional settings where polished appearance matters
Belle Hathaway’s tip for Braided Crown Accent
My secret technique involves what stylists call “pancaking” – gently tugging the braid’s edges outward after securing it. This creates that gorgeous, fuller look that makes your crown appear more substantial. Plus, don’t hesitate to add small flowers for weddings or metallic pins for evening events – the braid provides a perfect foundation for accessories.
Conclusion
Life moves quickly, yet your hairstyle doesn’t have to suffer because of a packed schedule. These 15 quick hairstyles prove that medium-length hair offers incredible versatility without demanding hours of your precious morning time. My years working with various hair textures have taught me that sometimes the simplest styles create the most striking impact.
Remember, second-day hair actually works better for most of these looks, therefore saving you even more time! The natural oils provide that perfect grip and texture that freshly washed hair often lacks. Additionally, don’t forget that bobby pins remain your best friends – I always keep a stash in my purse for unexpected styling emergencies.
Many clients tell me they feel intimidated by elaborate hairstyles seen online, but honestly, the beauty of these quick styles lies in their imperfection. Those slightly messy edges and intentionally undone sections often create the most natural, lived-in look that appears effortlessly chic.
My personal favorites change depending on my mood and the occasion. Some mornings call for a messy low bun when rushing to appointments, while other days might warrant a twisted half-updo for client meetings. The knotted ponytail has saved me countless times during summer heat waves!
Most importantly, these styles should work for your lifestyle – not the other way around. Experiment with different variations until you find what feels right for your unique hair texture and face shape. Before long, you’ll develop muscle memory that makes these 5-minute styles feel like second nature.
Bad hair days no longer need to ruin your confidence or your schedule. Armed with these quick techniques, you can transform your medium-length locks into something special without sacrificing precious morning minutes. Now, who’s ready to try something new tomorrow morning?