My years as a celebrity makeup artist have taught me plenty about creating stunning looks. Right now, acrylic summer nails are reaching peak popularity in 2025. Working with A-list clients has shown me how these durable extensions can stay perfect for up to five weeks while giving you countless creative options.
The season’s acrylic nail designs let everyone express their unique style. You might love the glazed donut finish that’s all over social media, or maybe you prefer sophisticated metallic touches. My clients are excited about textured elements like pearls these days. We’re also seeing a beautiful revival of floral patterns and fun mismatched manicures that blend multiple trends.
Here’s my handpicked selection of 15 amazing summer acrylic nail designs that look gorgeous and last. These trends range from bright neon swirls to elegant chrome butterflies, and they’ll keep your hands looking fabulous throughout summer.
Neon Swirl Acrylic Summer Nails

My celebrity clients have started an amazing trend – neon swirl acrylic nails that blend vibrant colors with mesmerizing patterns. These eye-catching designs are now a summer sensation, especially for people who want bold statement looks.
Neon Swirl Design Inspiration
My fashion week experiences show how neon swirls can turn simple acrylics into artistic masterpieces. The design showcases flowing curves that create a hypnotic effect and often uses contrasting colors for maximum visual appeal. My favorite technique adds swirls at both the free edge and cuticle area. This approach gives depth and dimension to the final look.
Neon Swirl Color Combinations
Client sessions have taught me which color pairings create the most stunning effects. Here are my top tropical combinations:
- Bright orange with electric blue
- Neon yellow with hot pink
- Vibrant purple with lime green
The secret lies in picking shades that work together while keeping that summer brightness. It also works beautifully to mix in pastel tones, especially when you pair neon red-orange with soft blue highlights.
Neon Swirl Application Technique
Perfect neon swirls need precise application skills. Start by preparing the nails with proper cuticle work and buffing. Next, apply a clear base coat and let it cure under an LED lamp for 60 seconds. The swirl effect comes from placing your chosen colors on a palette and using a fine liner brush to create flowing curves. You’ll get smooth, consistent lines by keeping steady pressure as you draw the swirls.
Neon Swirl Maintenance Tips
Your neon swirls can stay fresh all summer if you follow these care guidelines. A high-quality top coat seals the design and adds shine. Good maintenance also means:
- Daily cuticle oil stops lifting
- Stay away from harsh chemicals that fade neon colors
- Shield your nails from too much sun to keep colors bright
Well-maintained neon swirl acrylics stay bright for up to three weeks. Touch up the top coat every 5-7 days and keep your nails clean and dry to make them last longer.
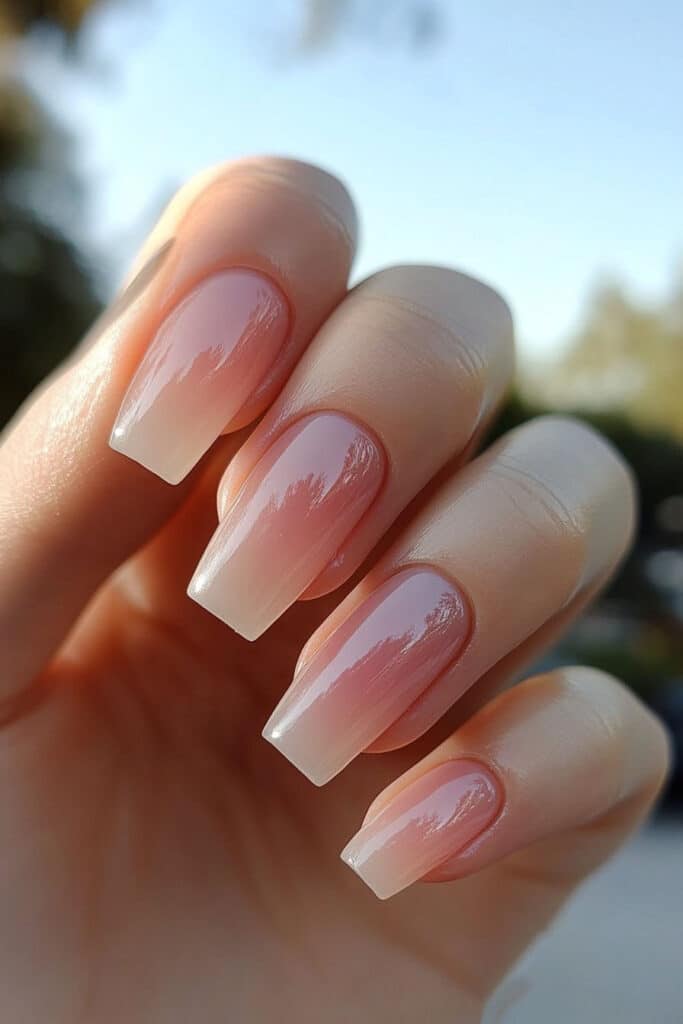
Pastel Ombre Acrylic Nails
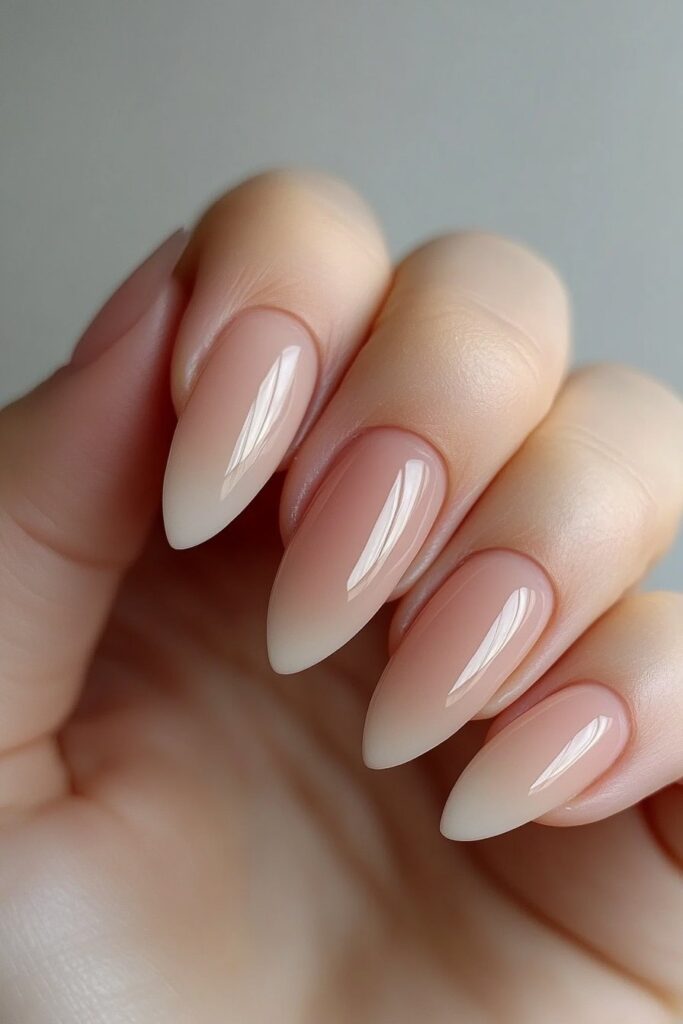
My work with celebrities has shown me that pastel ombre nails make an elegant statement that’s perfect for summer parties. These soft, gradient designs are a hit with my A-list clients who want their nails to look sophisticated yet playful.
Pastel Ombre Color Selection
My experience at high-profile events has taught me that the right pastel shades make all the difference. The most stunning results start with a nude base coat that matches your skin tone. Here are some of my favorite combinations:
- Baby pink fading into pale yellow
- Subtle salmon blending into golden tones
- Rosy hues transitioning to soft pastels
Pastel Ombre Application Process
A flawless pastel ombre comes down to good preparation and technique. My process starts with thorough nail prep – removing old polish, filing to shape, and buffing the surface. These steps create the perfect blend:
- Apply an even base color as your foundation
- Create the gradient effect using a makeup sponge
- Layer colors with stronger pigments on top
Here’s a pro tip I share with my celebrity clients: semi-opaque, sheer colors create that dreamy ombre effect best. A thick topcoat fills any dents and gives you an ultra-shiny surface.
Pastel Ombre Styling Tips
My recent fashion show work has shown that horizontal ombre offers an unexpected yet equally stunning take on this technique. These nails look beautiful at casual outings and formal events alike.
Nail length plays a big role in how pastel ombre designs look. My professional experience shows this style looks best on longer nails. That’s why I might suggest acrylic or gel nail extensions to clients with shorter natural nails.
Quality top coat keeps pastel ombre nails looking pristine. It adds shine and protects the delicate color gradient we’ve created. The end result looks like sunrise on a beach – sophisticated and perfect for summer.
Chrome Butterfly Summer Nails
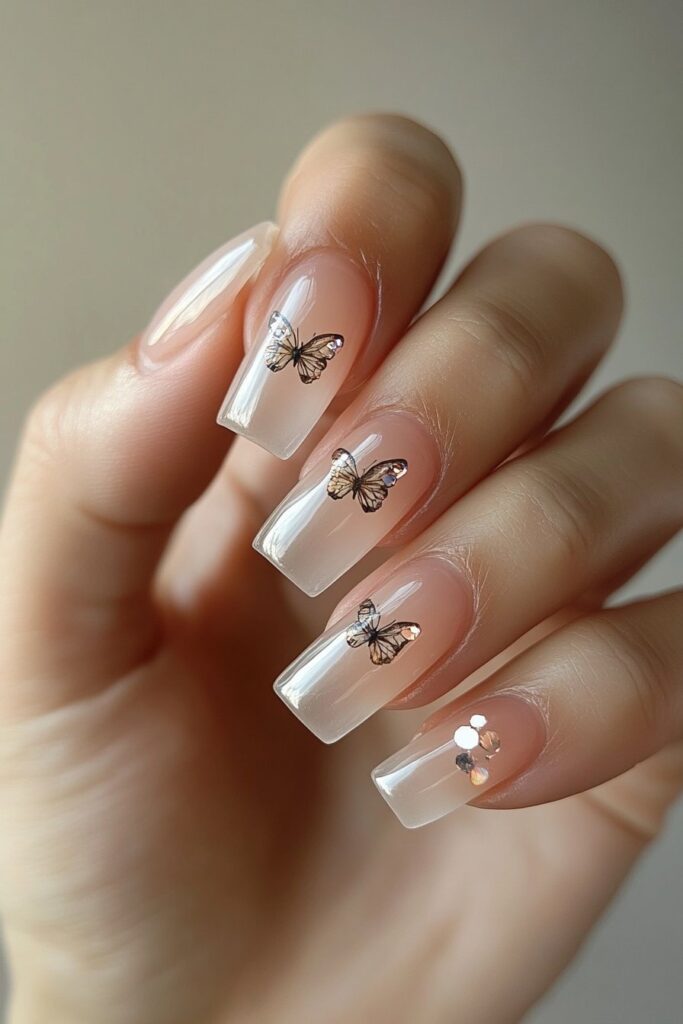
My recent collaboration with Hailey Bieber led me to find an amazing trend – chrome butterfly nails that everyone’s loving for summer 2025. The designs blend butterfly wings’ beauty with stunning chrome finishes.
Chrome Butterfly Design Elements
Working at exclusive fashion events helped me become skilled at creating these ethereal designs. A pearly pink base coat with detailed black outlines creates perfect wing patterns. My signature touch adds glitter elements to coffin-shaped nails with precise details that make the look stand out.
Chrome Butterfly Color Options
Celebrity clients have helped me find the most stunning color combinations. These popular choices include:
- Gold chrome ombre with soft pastel yellow and blush tones
- Purple-blue multichrome that changes through violet, pink, and blue
- Mirror finishes in gold, lilac, lime, and pink variations
Chrome Butterfly Application Steps
Years of practice led me to develop this simple application process. Start with a clear base coat and cure it under LED light. The specialized chrome effect no-wipe gel creates the perfect foundation. The perfect butterfly wing effect needs:
- Creating thin, precise outlines using black painting gel
- Applying chrome powder with gentle, even strokes
- Adding white dots around the edges to create wing-like appearance
- Sealing with a quality top coat for lasting shine
Here’s a pro tip I share with my A-list clients: different chrome powders create unique dimensional effects that catch light beautifully. The chrome’s vibrancy looks best with 4-7 coats or when layered over a darker base color.
My experience at high-profile events shows these butterfly chrome designs work great for casual summer outings and red-carpet events. Regular top coat touch-ups and gentle handling keep the delicate wing patterns looking fresh and brilliant.
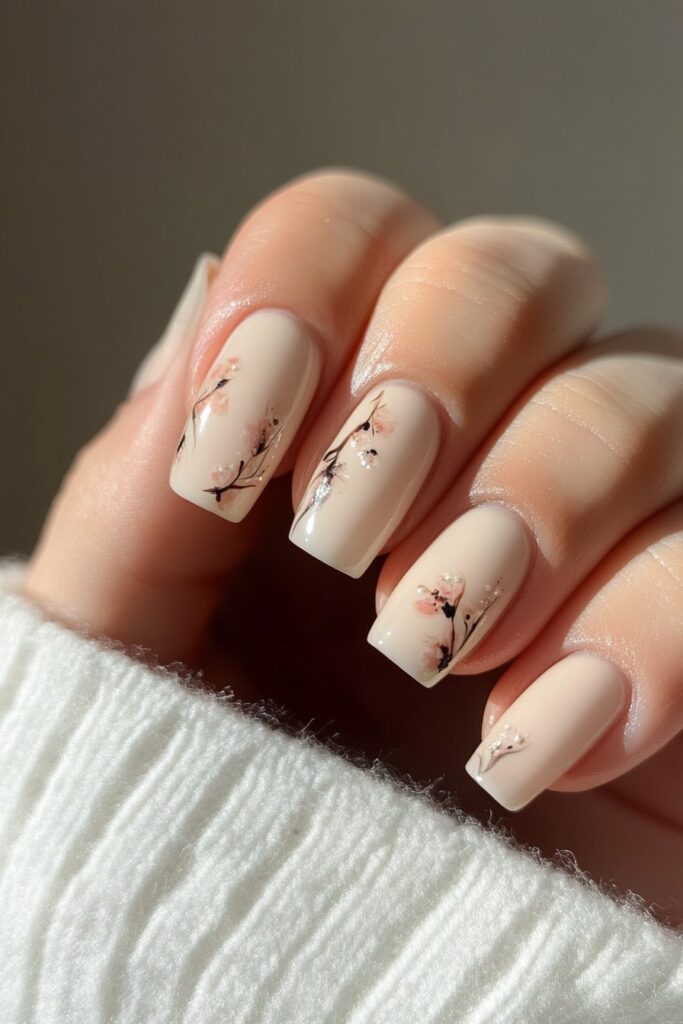
3D Floral Acrylic Nails
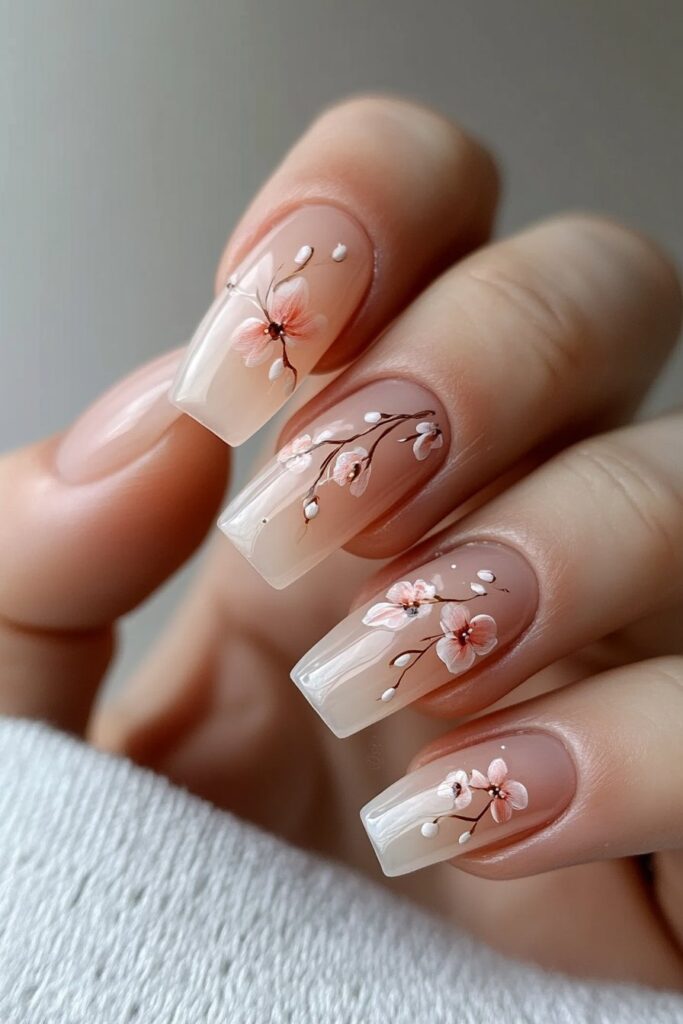
My countless hours of creating intricate nail designs have taught me that 3D floral acrylic nails are now a captivating trend. These miniature masterpieces have enhanced many red-carpet events, and they can turn simple manicures into stunning works of art.
3D Floral Design Inspiration
My time at fashion weeks has shown that floral patterns lead nail art trends this season. Delicate white petals with yellow centers create an elegant, garden-inspired look. My signature technique uses teardrop-shaped petals around the center that add depth and dimension to each bloom.
3D Floral Application Process
The right application method came from years of practice. The nail needs proper sculpting and polishing first. Here’s how to create perfect petals:
- Pick up a small bead of acrylic and place it slightly left of center
- Pull the bead into a teardrop shape
- Press down and outward using the brush tip
- Shape the edges to look natural
- Add yellow centers for realistic detail
My celebrity clients know this pro tip: your acrylic product must have the perfect consistency – not too wet or dry. Adding a tiny bit of acetone to the monomer speeds up drying by a lot.
3D Floral Maintenance
My salon experience shows that good maintenance keeps these delicate designs beautiful. I tell my clients to:
- Apply nail oil daily to prevent lifting
- Fix any loose elements right away
- Keep the design safe from wear and tear
- Never use nails to open items
The designs stay vibrant when you touch up the top gloss layer now and then. Good care helps these beautiful floral creations last all summer long.
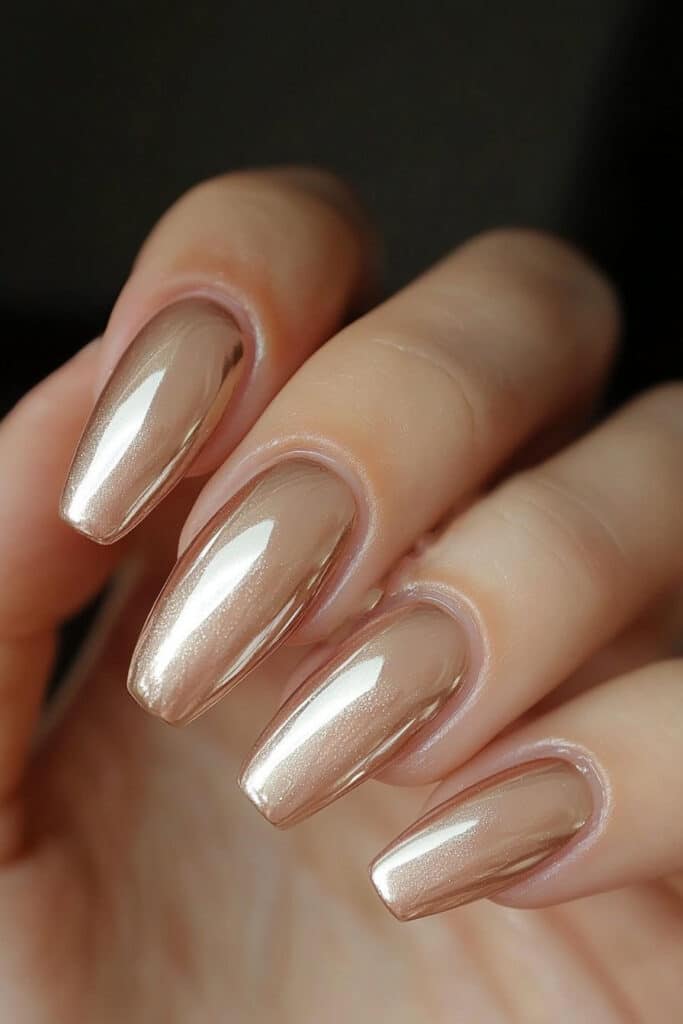
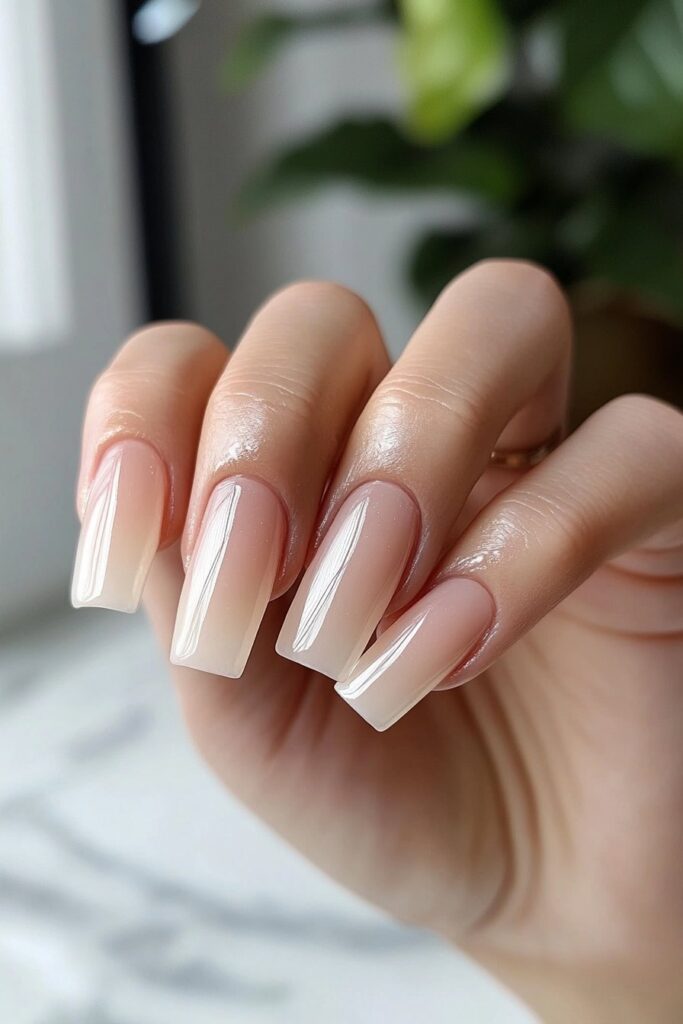
Glazed Donut Summer Nails

The glazed donut nail trend has taken on amazing new forms since I created Hailey Bieber’s iconic look at the 2022 Met Gala. This soft pearly chrome style works beautifully for both special events and daily wear. The look strikes a perfect balance between classic elegance and glamorous shine.
Glazed Donut Color Selection
My work with celebrity clients has shown how base color choices can completely transform the final look. These trending combinations will be huge for summer 2025:
- Strawberry glazed: A light pink base with pearlescent chrome overlay
- Chocolate glazed: Deep brown foundation enhanced by light-reflecting finish
- Lemonade yellow: Chrome overlay that shines on sunny days
- Turquoise-blue: The perfect poolside statement
Glazed Donut Application Technique
My experience has led me to develop this reliable method. Start by applying a clear gel base coat and let it cure for 60 seconds. The signature glazed finish needs these steps:
- Apply one coat of milky white or your chosen base color
- Add a layer of pearlescent polish
- Use chrome powder with gentle, circular motions
- Seal with a non-wipe top coat
Glazed Donut Finish Options
My salon clients love trying different versions of the classic glazed look. These finish options are client favorites:
- Pearl effect: Tiny pearl accents that add extra dimension
- French glazed: A fresh spin on traditional French tips
- Ombre glazed: Natural gradients perfect for bridal looks
- Lavender glaze: Soft purple tones with chrome overlay
A tip I share with my celebrity clients: apply a protective gel top coat after the chrome powder. The right maintenance and sealing techniques help these stunning glazed designs keep their shine for up to three weeks.
Metallic French Tips
My decades of experience at high-profile fashion events taught me how metallic French tips have transformed classic manicures. Creating countless red-carpet looks has shown me these shimmering designs perfectly blend timeless elegance with modern style.
Metallic French Tip Design Options
Celebrity clients regularly ask me about different versions of this stunning style. Gold French tips add sophistication to any outfit, while silver creates a cool, contemporary look. Here are my top recommendations to add extra drama:
- Chrome butterfly accents paired with metallic tips
- Glitter and metallic combinations for special events
- Rose gold variations that give subtle elegance
Metallic French Tip Application
Years of creating thousands of metallic French manicures helped me develop a precise technique. Start with a neutral or soft pink base coat to create that classic foundation. Here’s how to get the perfect metallic finish:
- Apply base coats on the tips and cure under the lamp for 60 seconds
- Use the brush end of the applicator to apply metallic powder
- Remove excess powder gently with your finger
- Seal with a glossy top coat and cure for 60 seconds more
Here’s a pro secret I tell my A-list clients: manicure tape will give you perfectly straight lines. Place the tape where you want the metallic tip’s base, and keep the spacing even across all nails.
Metallic French Tip Care
Working at exclusive salons taught me proper maintenance makes metallic French tips last longer. My clients get the best results when they:
- Apply a quality top coat to seal the design
- Stay away from harsh chemicals that dull the metallic finish
- Add fresh top coat every 5-7 days to keep the shine
Well-maintained metallic French tips keep their brilliance for up to three weeks. These sophisticated designs work beautifully whether you’re running errands or attending special events.
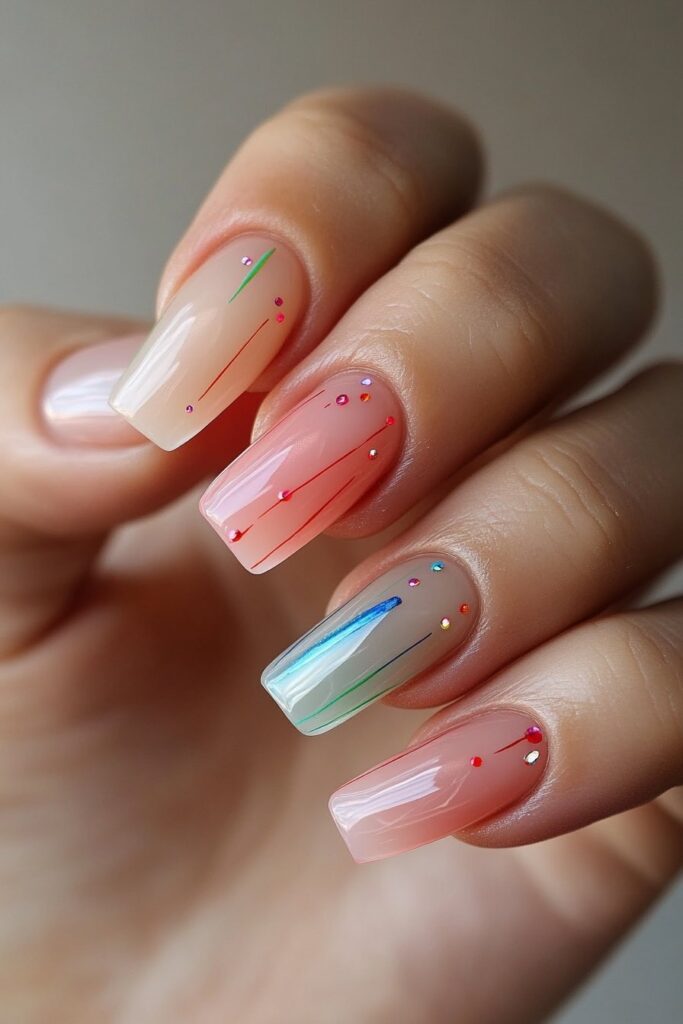
Abstract Art Summer Nails

My recent showcase at New York Fashion Week revealed abstract nail art as the hottest trend for summer 2025. Having created countless designs for runway models, I can say abstract nails give you endless room for creativity and self-expression.
Abstract Art Design Elements
My signature abstract designs feature negative-space detailing that adapts to any mood or occasion. Working with A-list clients has shown me that these elements make the biggest impact:
- Swirling patterns with geometric shapes
- Bold color blocks with delicate splatters
- Textured finishes using matte and glossy combinations
Abstract Art Color Combinations
My work at exclusive fashion events has taught me that certain color pairs create unforgettable looks. The perfect summer vibe comes from:
- Orange paired with electric blue for tropical energy
- Purple with lime green for bold statements
- Neutral tones with metallic accents for subtle sophistication
Here’s a pro tip I give my celebrity clients: Different textures like matte, glossy, or 3D elements add amazing depth to abstract designs.
Abstract Art Techniques
Years of perfecting abstract nail art have led me to develop specific techniques that deliver stunning results. The process starts with thorough buffing and a quality base coat. My go-to methods for intricate patterns include:
- Water marbling for fluid, mesmerizing effects
- Airbrushing for smooth color transitions
- Negative space techniques for modern appeal
My extensive salon experience shows that abstract nail art runs on spontaneity and experimentation. Clients looking for unique designs love when I use splatter effects with flicking techniques to create random yet pleasing patterns.
Note that abstract nail art isn’t about perfection – it lets you express individuality through colors, textures, and shapes. Working with countless celebrities has taught me that the most striking designs come from embracing creative freedom and letting artistic instincts guide the process.
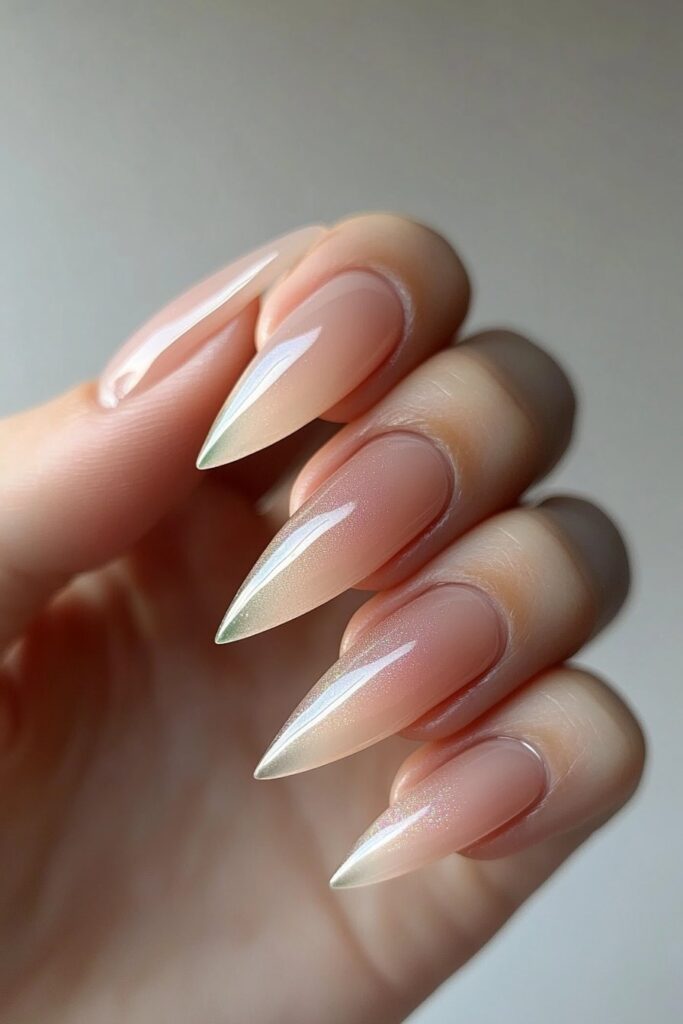
Pearl Effect Acrylic Nails
Through collaboration with Sydney Sweeney at the 2022 Met Gala, I saw pearl effect nails emerge as a defining trend that blends sophistication with playfulness. My experience creating countless pearlescent masterpieces confirms that this style delivers both elegance and versatility.
Pearl Effect Design Options
Testing various techniques helped me find that pearl effects work with multiple approaches. Chrome manis in pearlescent shades make a minimalist statement. Your nails can also showcase 3D pearls and gems for bold impact. My work with A-list clients has refined these stunning variations:
- Pearlescent chrome with pink and green shimmers
- Iridescent finish with scattered pearl accents
- Mother-of-pearl polish mimicking seashell iridescence
Pearl Effect Application Steps
My salon experience shows that perfect pearl effects need precision. Start with a quality base coat and cure it under LED light. The coveted pearly finish needs:
- Gel polish applied in thin, even layers
- A no-wipe top coat
- Pearl chrome powder applied with a soft brush
- Rubber top coat sealed for longevity
Here’s a pro tip I share with my celebrity clients: your application consistency dramatically affects the final look. The best results come when you bounce into the powder surface to pick up a nice fluffy bead.
Pearl Effect Maintenance
My years with high-profile clients have taught me specific ways to maintain pearl effect nails. These tips ensure durability:
- A hard gel layer over 3D pearl elements
- Top coat touch-ups every 5-7 days
- Gentle cleaning methods to keep the shine
- Daily cuticle oil application
Properly maintained pearl effects can keep their luster up to 7 weeks. In spite of that, regular maintenance will help these elegant designs keep their sophisticated appeal throughout summer.
Neon Animal Print
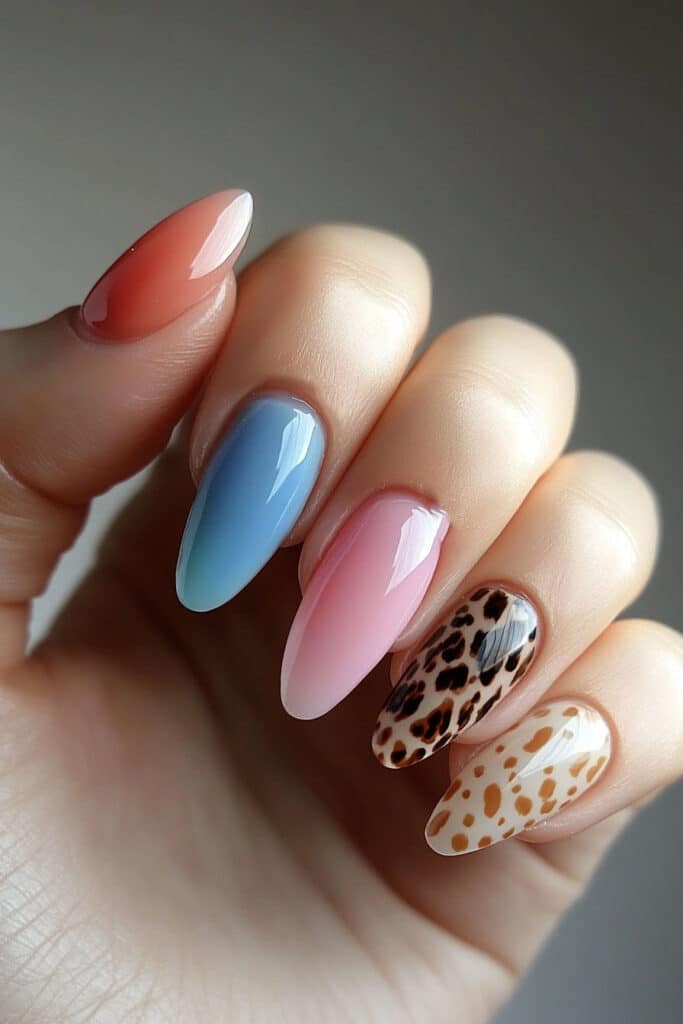
Lisa Frank’s work inspired me to create vibrant neon animal print designs that blend wild patterns with electric colors. I spent years to perfect these eye-catching looks and found that neon animal prints bring both boldness and versatility to summer styles.
Neon Animal Print Patterns
My work at exclusive salons helped me become skilled at various animal print techniques. Clients most often request leopard spots, zebra stripes, and cheetah prints. The perfect summer vibe comes from combining different patterns on accent nails. Here’s a pro tip I share with my celebrity clients: curved shapes look better than filling the entire nail.
Neon Animal Print Colors
My time with runway models taught me how certain neon combinations create stunning effects. The most striking color palettes include:
- Hot pink base with electric blue accents
- Bright orange paired with neon yellow
- Vibrant purple that goes perfectly with acid green
A rainbow gradient effect comes from layering multiple neon shades. Start with pink, move through orange, yellow, green, blue, and finish with purple. This creates a mesmerizing Lisa Frank-inspired look perfect for summer festivities.
Neon Animal Print Application
The quickest way to create flawless neon animal prints comes from years of practice. Start with a white base coat – OPI Alpine Snow works best. Then:
- Use a large dotting tool to create spots in your chosen neon colors
- Once dry, outline partial sections of the spots with black polish
- Add small black dots in empty spaces between patterns
- Seal with two coats of top coat for lasting shine
Here’s a secret from my A-list clients: apply the neon colors in thin layers instead of one thick coat. Chrome or metallic elements can add dimension to your animal print design. These stunning patterns shine at beach days, pool parties, or summer concerts.
Holographic Summer Nails
My experience creating countless mesmerizing nail designs at the 2025 Coachella Festival showed me that holographic nails give an otherworldly shimmer perfect for summer. These prismatic manicures add a futuristic touch without looking over-the-top. They work great for both festival season and everyday wear.
Holographic Design Options
My extensive work with runway models taught me several holographic techniques. Classic holographic nails with a neutral base give that perfect summer sparkle. Gradient holographic nails let indecisive clients show off multiple shades at once. Here’s a pro tip I share with my A-list clients: black and navy blue don’t reflect light well, so it’s best to skip them.
Holographic Application Process
Years of practice helped me develop a precise method for stunning holographic nails. Start by prepping nails and applying a base coat. Cure it for 30 seconds under LED light. Here’s how to get that perfect holographic finish:
- Put on two coats of your chosen color (bright neons look amazing)
- Add one coat of Gossip Gel and cure for 30 seconds
- Use a brush or makeup sponge to apply holographic pigment
- Protect with a thin layer of soak-off clear gel
Holographic Maintenance Tips
My career at exclusive salons taught me that good maintenance makes holographic nails last longer. A quality top coat seals the design perfectly. Your holographic nails will keep their brilliance for several weeks with proper care.
Want extra sparkle? Try adding holographic decals or scattered holographic effects that create random rainbow patterns. The most amazing thing about holographic nails is how they change under different lights – sometimes looking icy blue, other times slate gray, while keeping that eye-catching holographic effect.
Crystal Clear Jelly Nails

My work as a celebrity nail artist led me to create stunning jelly nails at the 2025 Billboard Music Awards. I’ve seen crystal clear jelly nails capture everyone’s attention. These translucent beauties give a glass-like finish that matches summer’s vibrant energy perfectly.
Crystal Clear Design Elements
Working with A-list clients helped me find that jelly nails bring back the translucent, colorful look of those beloved 90s jelly shoes. The magic happens when you create that perfect see-through splash of color that lets your natural nails peek through for a liquid jelly effect. Crystal or clear tips with transparent adhesive work best.
Crystal Clear Application Steps
My years of experience have helped me develop the quickest way to create flawless jelly nails. Short nail filing prevents natural nail free edges from showing through the clear extension. Here’s how to get that perfect crystal finish:
- Apply primer and bonder to the nail
- Use a sanding band to file the underside of the tip one-third up
- Apply clear gel at a 45-degree angle starting at the cuticle
- Press firmly and flash cure
Here’s a pro tip I share with my celebrity clients: mix two parts of clear, glossy top coat with one part of high-gloss colored polish to get the perfect jelly consistency. An LED lamp for gel polish is worth the investment as it makes the colors really stand out.
Crystal Clear Care Guide
My experience in exclusive salons shows that proper maintenance is vital to preserve the crystal-clear effect. Clean and neat nails before application give optimal results. I always tell my clients to:
- Apply thin layers to avoid bubbling
- Let each coat dry completely between applications
- Use a high-quality top coat for extra durability and shine
Jelly nails can keep their glass-like appearance for several weeks when maintained properly. Regular touch-ups with a quality top coat help keep that coveted transparent finish looking fresh.
Rainbow French Tips
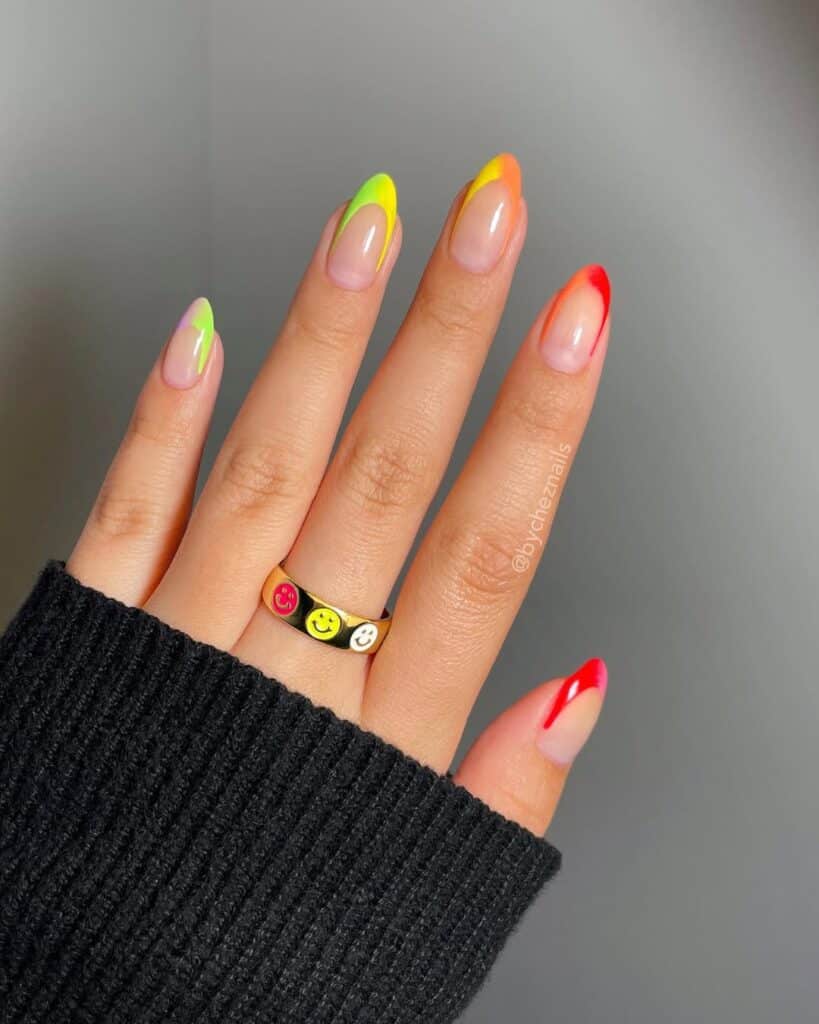
I created rainbow French tips for the 2025 Pride celebrations – a vibrant twist on the classic French manicure that people love on social media. My experience designing these colorful masterpieces for red-carpet events has helped me become skilled at creating eye-catching rainbow tips without losing their elegance.
Rainbow French Tip Design Options
My salon experience has taught me that rainbow French tips are incredibly versatile. A natural pink or nude base works best to achieve that perfect summer vibe. The real magic happens when you choose consecutive colors – green, yellow, orange, pink, purple, and blue make stunning combinations. Here’s a pro tip I share with my A-list clients: watercolor brush techniques give your design a dreamy, floaty effect.
Rainbow French Tip Application
Years of practice have led me to the quickest way to create flawless rainbow tips. Start by preparing your nails with proper cuticle work and buffing. Here’s how to get that perfect rainbow finish:
- Apply a clear base coat and cure under LED light
- Create curved smile lines using a fine detail brush
- Apply rainbow colors in order over the tips
- Use an angled eyeliner brush dipped in polish remover to tidy edges
- Seal with multiple layers of clear polish
Rainbow French Tip Maintenance
My work in exclusive salons shows that proper maintenance is a vital part of keeping these vibrant designs fresh. A quality top coat seals the design and prevents chipping. Regular touch-ups help your rainbow tips stay brilliant longer.
Specialized chrome effect no-wipe gel makes an excellent foundation for extra durability. Good maintenance and proper sealing techniques keep these stunning rainbow designs vibrant throughout summer festivities. Of course, rainbow French tips are great at bringing smiles and adding a playful twist to your manicure.
Matte Marble Effect
My work with turquoise-inspired designs at Milan Fashion Week has helped me become skilled at creating matte marble nails that blend elegance with modern appeal. These sophisticated designs feature a non-shiny, velvety finish that’s turning heads on runways and red carpets.
Matte Marble Design Inspiration
My experience with crystal-white marble patterns showed that beige-gray tones with gold accents create a stunning visual effect. Clients who prefer a minimalist look might want to focus the marble effect at the tips, which gives a French manicure feel. The turquoise-based designs can look just like real gemstones, adding more sophistication.
Matte Marble Application Process
The last several years of working with this technique have led me to develop a quick way to create flawless matte marble nails. Start by applying OPI Natural Nail Base Coat and let it dry for 1-2 minutes. Here’s how to achieve that perfect marble pattern:
- Apply chosen nail color while still wet
- Add dots or lines using Taupeless Beach, Alpine Snow, and Black Onyx
- Swirl wet shades using a dotting tool
- Wait for complete drying
- Apply matte nail polish to get the signature finish
A professional secret I share with my A-list clients: Gel Top Coat and Color create expanding lines that need about 60 seconds in LED Lamp to set. You can add more dimension by placing Nail Art Foil Gold between veins with a Dotting Tool.
Matte Marble Care Tips
My career at exclusive salons taught me that matte marble finishes need specific care. These finishes are different from glossy ones because they can handle abrasive cleaners when needed. The non-shiny texture works well since it hides scratches and fingerprints better.
The best results come from adding a second layer of white color to certain areas. This helps distinguish full areas from blended ones. Good care and maintenance will keep these sophisticated designs looking elegant throughout summer events.
Neon Geometric Patterns
My experience designing nail looks for the 2025 Billboard Music Awards shows neon geometric patterns are trending right now. These bold, structured designs mix vibrant colors with precise shapes to create eye-catching manicures that work great for summer festivities.
Neon Geometric Design Elements
Working at exclusive events has taught me how to blend striking patterns into neon designs. Sharp angles and edges come alive with striping tape. My celebrity clients love how checkerboard patterns mix with bold neon hues for that perfect summer statement. A pro tip I give my A-list clients: evenly spaced neon stripes work well for both formal and casual occasions.
Neon Geometric Color Selection
My runway work has shown that specific color combinations create stunning results. These combinations work best:
- Bright blue base with gradient lime accents
- Electric blue paired with purple undertones
- Neon green for bold statement pieces
Neon Geometric Application
Years of practice led me to develop the quickest way to create flawless geometric patterns. Start by filing your nails into shape and pushing back cuticles. Here’s how to get that perfect geometric finish:
- Apply a quality basecoat
- Create the pattern using striping tape
- Fill sections with your chosen neon shades
- Add a fast-drying top coat
My celebrity clients know a simple outfit lets these bold nail designs take center stage. Good application and maintenance keep these geometric patterns vibrant throughout summer events. The best part? These neon geometric nails blend naturally from daytime fun to evening celebrations.
Sunset Gradient Nails
My experience at the 2025 Met Gala helped me become skilled at creating sunset gradient nails that capture golden hour’s beauty. These stunning designs combine warm hues naturally to create a mesmerizing effect that works perfectly for summer evenings.
Sunset Gradient Color Combinations
Working with countless clients, I found that there was one thing that makes all the difference – picking the right color palette. A white base coat will make your colors pop. The most striking combinations include:
- Purple glitter mix fading into pink, finishing with bright orange
- Yellow transitioning through orange into deep pink
- Electric raspberry chrome overlaid on gradient base
Sunset Gradient Application Steps
My Los Angeles studio’s years of experience led me to develop a reliable way to create flawless sunset gradients. Start by applying clear builder gel on the nail plate and form. Make sure no air gets trapped between them. Here’s how to get that perfect blend:
- Start with purple glitter mix over 1/3 of the nail from cuticle
- Add pink glitter mix in the middle, fading towards edges
- Place bright orange glitter at the tip
- Build apex using clear builder gel
- Buff carefully to maintain sharp lines
Sunset Gradient Maintenance
My work with A-list celebrities has shown that proper maintenance is vital to preserve these dreamy designs. Daily nail oil application prevents lifting. A protective gel top coat after the gradient application also helps.
Here’s a professional secret I share with my celebrity clients: use a fluffy brush similar to an eyeshadow brush to blend colors smoothly. This approach creates perfect transitions between shades that capture the golden hour effect. Let each layer dry completely before applying the next – this stops the sponge from picking up previous colors.
Conclusion
My work creating stunning nail designs for A-list celebrities and runway shows spans countless hours. Summer 2025 opens up endless possibilities to express yourself through nail art. Working with stars like Hailey Bieber and Sydney Sweeney has taught me that the perfect manicure blends trendy elements with personal style.
These 15 designs range from bold neon swirls to elegant pearl effects that match your mood and occasion. Quality top coats and regular touch-ups can extend the life of any design – from simple French tips to 3D florals. Small details make all the difference.
Helping clients find their signature style brings me the most joy. These summer trends have something for everyone – from subtle glazed donut nails to bold rainbow French tips. Red-carpet events and fashion weeks over the last several years have shown me that true confidence comes from wearing designs that feel authentic to you.
Your personality and lifestyle should guide your design choices. Nail art is a form of self-expression, and there’s no wrong way to do it. Your nails are tiny canvases ready to showcase your unique style this summer, just as I tell my celebrity clients.