
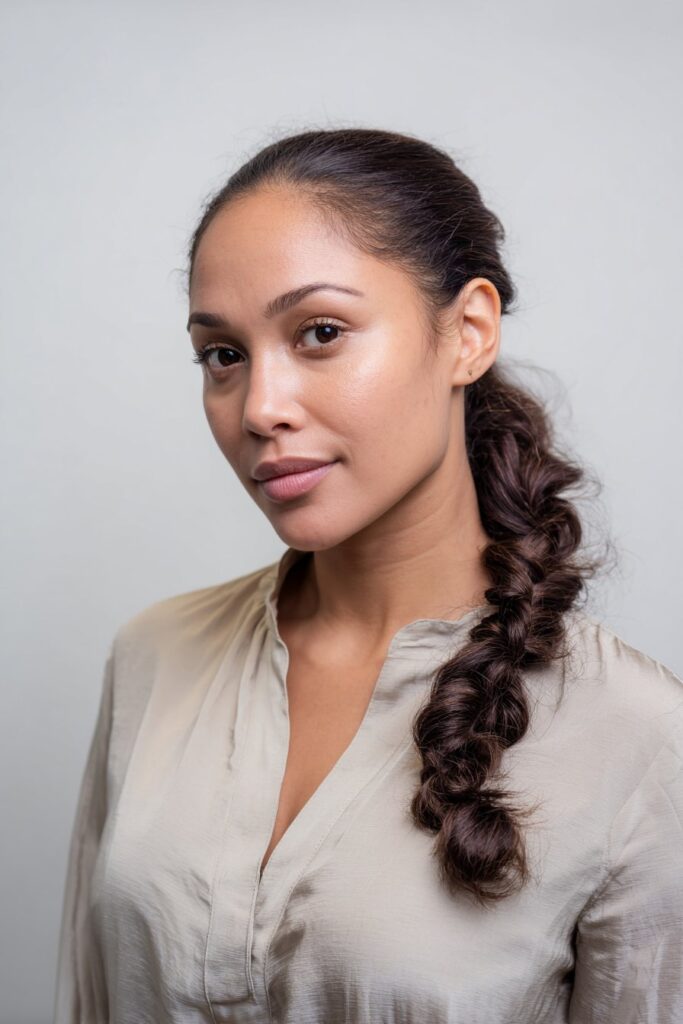
Braided ponytail hairstyles have saved me countless mornings when I needed to look put-together but had zero time to spare. If you’re constantly racing against the clock but refuse to compromise on style, I’ve got great news—these versatile looks can be styled in under 10 minutes!
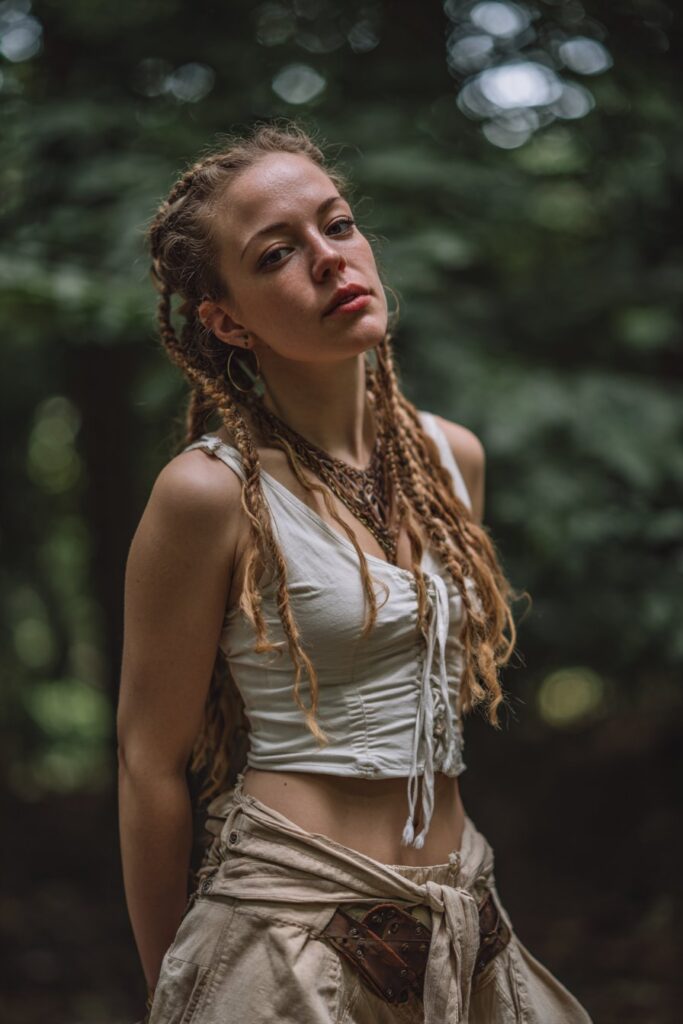
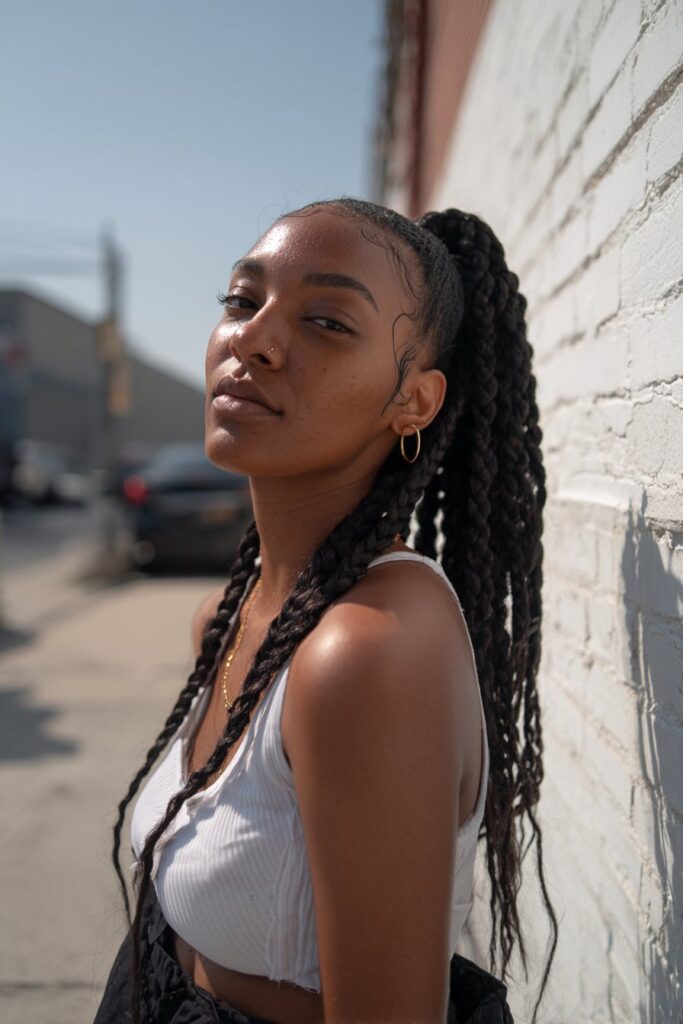
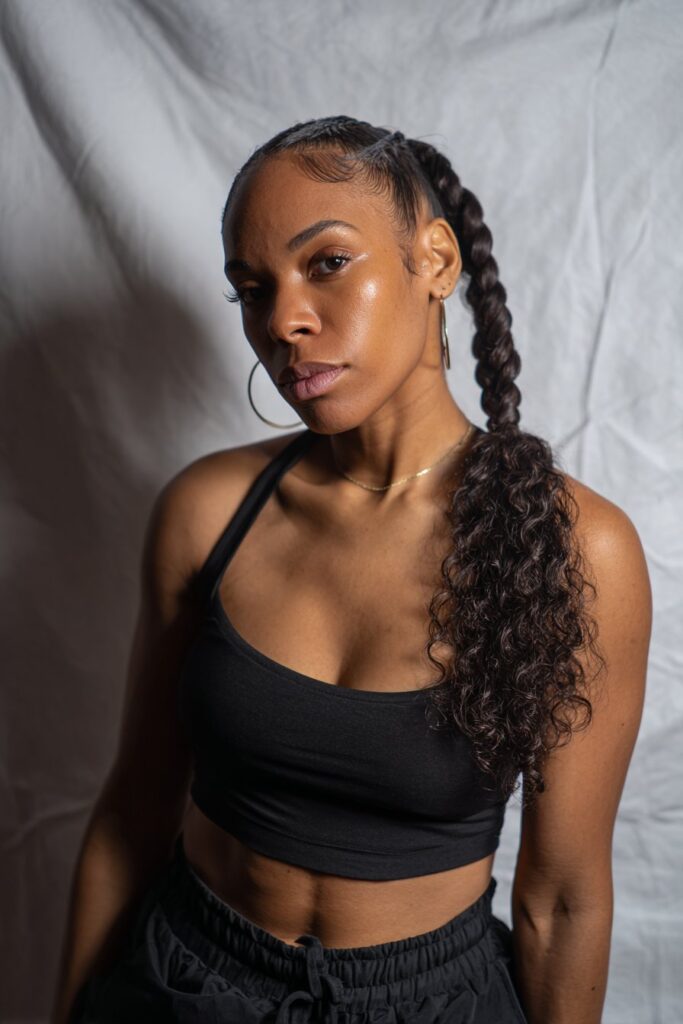
I’ve always loved how braided ponytails blend tradition with modern flair, especially the intricate African-inspired designs that showcase amazing artistry. Whether you’re heading to a formal event or just running errands, these easy braided ponytail hairstyles offer endless possibilities. From classic cornrows to Dutch braided ponytails that add amazing texture, there’s something for everyone. I’ve experimented with various braiding techniques like fishtails, feed-in braids, and side French braids to create cute braided ponytail hairstyles that work for any occasion. But what I appreciate most about braided up ponytail hairstyles is how they’re both protective and stunning—perfect for those of us who want to look good while keeping our hair healthy.
Let me walk you through 17 braid ponytail hairstyles that actually deliver on the promise of being quick, stylish, and surprisingly simple to create. Trust me, even if you’re not a braiding expert, these looks are totally achievable!
Textured Bubble Ponytail

The Textured Bubble Ponytail quickly became my go-to style when I need something fun yet polished in minutes. Unlike traditional braided styles, this ponytail creates visual interest through a series of rounded “bubbles” that cascade down your hair length.
What is Textured Bubble Ponytail
A Textured Bubble Ponytail is essentially a playful twist on the classic ponytail where you create a series of rounded sections that form a whimsical, almost ethereal effect. This style features sections of hair gathered into puffs or bubbles along the length of your ponytail, creating a unique design that stands out from regular braided ponytail hairstyles. The bubbles can be tight and small or loose and voluminous, depending on your preference and hair length.
Why Textured Bubble Ponytail works
For starters, this style actually performs best on second-day hair, making it perfect for those mornings when washing isn’t an option. The natural oils and texture give your bubbles better hold and definition. Additionally, the bubble ponytail offers remarkable versatility – I’ve worn mine for everything from casual coffee dates to formal events with just a few styling tweaks.
Furthermore, this style works across various hair textures and lengths. Whether you have straight, wavy, or curly hair, the bubble effect creates dimension that flatters everyone. As a bonus, it takes significantly less time than intricate braided ponytail hairstyles while still delivering that “I put effort in” look.
How to do Textured Bubble Ponytail
- Prep your hair: If you have freshly washed hair, add texture using dry shampoo. This adds grit and helps your bubbles stay in place.
- Create your base: Gather your hair into a high ponytail on the crown of your head. Secure tightly with a clear elastic.
- Section and bubble: Place another elastic about 2-3 inches down from your base elastic. Gently tug at the sides of this section to create your first bubble shape.
- Repeat the process: Continue adding elastics every 2-3 inches down the ponytail, creating and fluffing each bubble as you go.
- Add texture: For more defined bubbles, lightly tease each section before adding the next elastic. A texturizing spray helps add volume and hold.
- Set the style: Finish with a light mist of hairspray to keep everything in place without stiffness.
What I love most about this cute braided ponytail alternative is how it elevates a simple ponytail into something special with minimal effort – perfect for those mornings when time is precious but I still want to look put-together.
Curly Cornrow Ponytail

For those seeking both protection and style for curly hair, the Curly Cornrow Ponytail offers a perfect solution. I discovered this versatile braided ponytail hairstyle last summer when I needed something that would last through both workouts and social events.
What is Curly Cornrow Ponytail
A Curly Cornrow Ponytail combines neatly braided cornrows with voluminous curls in a ponytail. The style features cornrows braided upward toward the crown of your head, gathered into a high ponytail, then adorned with natural or extension curls for added volume and bounce. This protective style shields your natural hair while still showcasing beautiful texture and movement.
Why Curly Cornrow Ponytail works
Primarily, this style excels as a protective option for curly-textured hair. The cornrows minimize daily manipulation, consequently reducing breakage and promoting growth. Moreover, the style offers remarkable versatility—I’ve worn mine for everything from intense gym sessions to formal gatherings.
This braided ponytail hairstyle works particularly well for active people who want to look polished without constantly restyling. Despite being somewhat time-consuming to create initially, it can last 2-3 weeks (sometimes up to a month) with proper care, making it worth the investment.
The combination of neat cornrows with bouncy curls creates a beautiful contrast that flatters virtually all face shapes and personal styles.
How to do Curly Cornrow Ponytail
- Start with freshly washed, moisturized hair
- Gather necessary supplies: rat-tail comb, hair ties, gel or edge control, and curly hair extensions (optional)
- Section your hair and begin creating cornrows from the front, braiding upward toward where you want your ponytail positioned
- Continue braiding all sections toward that central point
- Secure all braids together with a ponytail holder
- For added volume, attach curly hair extensions by wrapping the weft around your ponytail base
- Secure with thread (for a glueless option) or appropriate attachment method
- Conceal the attachment point by wrapping a small section of hair around the base
- Define and separate curls as desired
From my experience, this cute braided ponytail hairstyle typically takes about 1.5-2 hours to complete, depending on your hair length and thickness. The effort is worthwhile given how long the style lasts and how many compliments you’ll receive!
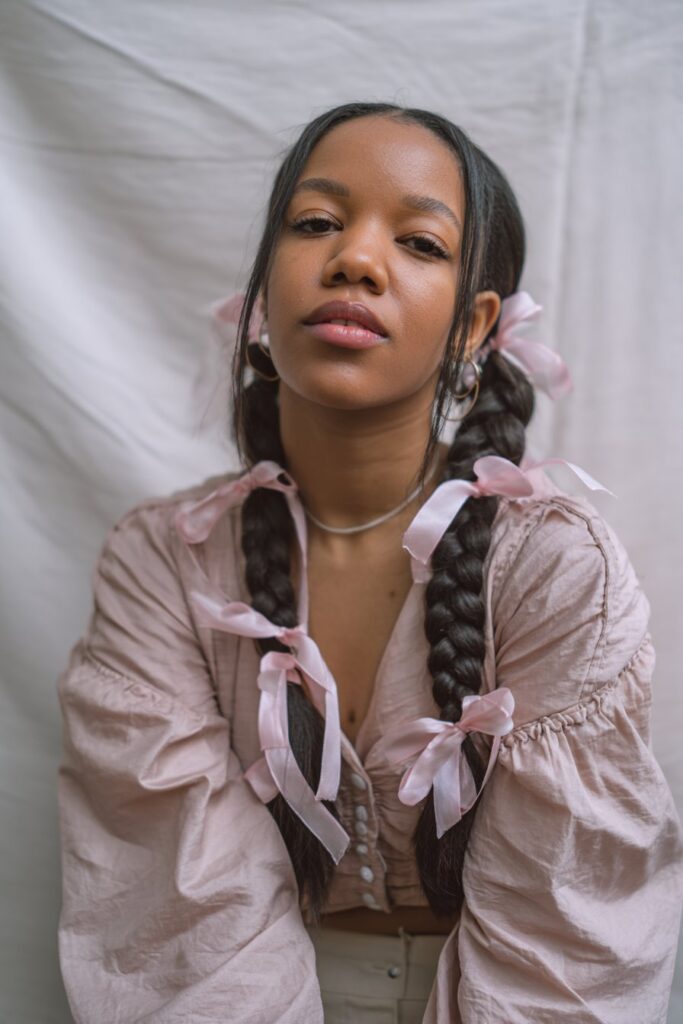
Rope Twist Pigtails
I fell in love with Rope Twist Pigtails during a camping trip when I needed a style that could withstand outdoor activities yet still look cute in photos. This versatile hairstyle quickly became my reliable go-to for busy mornings.
What is Rope Twist Pigtails
Rope Twist Pigtails aren’t traditional braids but rather a series of twists that create a rope-like pattern. The style features two pigtails with twisted strands wrapped around each other, creating a defined, twisted rope effect. Unlike standard braided ponytail hairstyles, rope twists rely on a specific twisting technique rather than weaving. Commonly known as “Senegalese twists” in some circles, this hairstyle can be created with your natural hair or enhanced with extensions for added length and volume.
Why Rope Twist Pigtails work
Primarily, I adore how rope twists look more complex than they actually are. They create an elegant look without much hassle! Furthermore, this protective style helps shield your natural hair from environmental damage while reducing daily manipulation.
During summer months, I’ve found rope twists particularly beneficial as they keep my hair neatly secured while allowing me to stay active. Naturally, another advantage is the beautiful heatless curls you get after taking them out – resembling the effect of a three-barrel curling iron without heat damage.
To clarify, these twists also work across various hair textures and lengths, making them wonderfully inclusive among braided ponytail hairstyles.
How to do Rope Twist Pigtails
- Start by dividing your hair into two equal sections
- For each section, split the hair into two equal parts
- Twist each part individually toward your face (clockwise)
- Next, wrap these twisted sections around each other in the opposite direction (counterclockwise)
- Secure with an elastic at the end
- Optional: Gently pull at the twists for added volume and a more tussled look
First thing to remember: twist tightly for lasting results that won’t unravel throughout the day.
Double Dutch Braid Ponytail

My Dutch braid obsession began after desperately seeking a gym-friendly style that wouldn’t budge during yoga headstands. The Double Dutch Braid Ponytail became my ultimate solution for both workout sessions and casual brunches with friends.
What is Double Dutch Braid Ponytail
A Double Dutch Braid Ponytail features two braids created by crossing hair strands under the middle section (unlike French braids where strands cross over). These braids start at your hairline and work toward the nape, where they combine into a single ponytail. The distinctive under-crossing technique makes the braids appear to sit on top of your head, creating more dimension and texture than traditional braids.
Why Double Dutch Braid Ponytail works
This style has become my favorite primarily because it works on virtually all hair types regardless of length. The architectural design brings depth and versatility while making hairlines appear fuller and more interesting.
Beyond esthetics, Dutch braids provide remarkable stability, holding hair securely without requiring touch-ups throughout the day. Naturally, this reduces exposure to damaging elements like wind and rain, minimizing breakage over time.
For active lifestyles, I’ve found this style invaluable—it keeps me balanced during intense yoga sessions yet transitions perfectly to evening plans without requiring a complete restyle. The versatility extends to occasions too; this style can be dressed up for parties or kept casual for everyday wear.
How to do Double Dutch Braid Ponytail
- Gather supplies: rattail comb, bobby pins, hair band, medium-hold hairspray
- Part hair slightly off-center
- Take a section on one side and divide into three pieces
- Cross right strand under middle, then left strand under middle
- Continue pattern while adding new hair to each section before crossing under
- Once reaching the back of head, continue braiding without adding hair
- Secure with bobby pin temporarily
- Repeat steps on other side of head
- Combine both braids into high ponytail with hair band
- Pull gently on braid edges for fullness
- Wrap a small section around the hair band, securing underneath with bobby pin
- Set with light hairspray
This style performs beautifully on second or third-day hair—perfect for those not-quite-clean, not-quite-dirty days!
Sleek High Fishtail Ponytail

The elegant Sleek High Fishtail Ponytail caught my eye at a formal event where I needed something sophisticated yet relatively simple to create. After mastering this technique, it’s become my secret weapon for those occasions demanding both polish and intrigue.
What is Sleek High Fishtail Ponytail
A Sleek High Fishtail Ponytail combines the sophistication of a sleek, high ponytail with the intricate detailing of a fishtail braid. This style features a smooth, polished base that pulls hair tightly away from the face into a high ponytail, which is then braided using the fishtail technique. The contrast between the sleek beginning and textured end creates a chic, polished look that’s both elegant and edgy. The high placement elongates the neck while the fishtail braid adds visual interest and dimension to an otherwise simple ponytail.
Why Sleek High Fishtail Ponytail works
The beauty of this style lies in its versatility—it’s equally appropriate for formal events and everyday glam. The sleek beginning creates a flattering silhouette that works with virtually any face shape, while the high positioning naturally lifts facial features.
Throughout my years experimenting with braided ponytail hairstyles, I’ve noticed how this style offers the perfect balance between sophistication and trendy detailing. The fishtail technique adds texture and visual interest without appearing messy or undone.
Obviously, another benefit is the style’s staying power. Once secured properly, this look holds beautifully throughout a long day or evening event with minimal touchups required.
How to do Sleek High Fishtail Ponytail
- Start by smoothing your hair back into a high ponytail using a brush and hair gel for that ultra-sleek finish
- Secure your ponytail with a strong hair tie (I double up for extra security)
- For added length and volume, consider wrapping clip-ins or hair extensions around the base of your ponytail
- Divide your ponytail into two equal sections
- Create the fishtail by taking small strands from the outer edge of one section and crossing them over to join the opposite section
- Continue this pattern, alternating sides until you reach the end
- Secure with a clear elastic band
- Gently pull on the edges of your braid to create fullness and texture
- Finish with hairspray for extra hold and shine
Hence, what makes this cute braided ponytail hairstyle truly special is how it elevates your entire look with relatively simple techniques.
Butterfly Braid Ponytail

After searching for a unique braided style that would stand out at special events, I discovered the Butterfly Braid Ponytail—a game-changer in my hairstyling routine. This trendy look has become my signature style whenever I want something that appears complex yet takes minimal time to create.
What is Butterfly Braid Ponytail
The butterfly braid ponytail combines the classic ponytail with the intricate beauty of butterfly-inspired braiding. This eye-catching style features a high ponytail wrapped with a braid that’s been strategically pulled and loosened to create a wing-like appearance. The distinctive feature is how the sides of each braid are gently tugged outward, creating a textured, dimensional effect resembling butterfly wings. In fact, unlike traditional tight braids, butterfly braids are deliberately distressed and expanded for that signature look.
Why Butterfly Braid Ponytail works
What makes this style so appealing is its remarkable versatility. The butterfly braid ponytail works beautifully for both everyday wear and special occasions, transitioning effortlessly between casual and formal settings. Not only is it lightweight, but it also looks more natural than typical faux locs or box braids.
Simultaneously, this style offers wonderful customization options. You can adjust the size, color, and length to match your preferences and personal style. I’ve found it particularly flattering as the texture adds volume and dimension to my hair without requiring extensions or additional products.
How to do Butterfly Braid Ponytail
- Start by gathering your hair into a high ponytail and secure it with an elastic band
- Create a traditional three-strand braid down the length of your ponytail
- Once your braid is complete, begin gently pulling at the sides of the braid
- Work from the bottom up, carefully tugging the edges outward to create the butterfly wing effect
- For added security, use bobby pins to anchor any loose sections
- Optional: Wrap a small section of hair around your elastic band for a polished finish
For extra definition, spray a small amount of hairspray on your fingers before pulling at the braid sections.
Four Butterfly Braids
While experimenting with different protective styles last year, I stumbled upon the Four Butterfly Braids—a refreshingly simple yet striking alternative among braided ponytail hairstyles. This style quickly became my favorite for busy weekdays when I need something that lasts.
What is Four Butterfly Braids
Four Butterfly Braids is a distinctive protective style featuring exactly four braids that cover the entire head. This eye-catching design typically consists of straight-back feed-in braids, often with two main feed-in braids ending with beautiful curls at the bottom. Unlike more intricate styles with numerous smaller braids, this approach uses fewer, thicker braids to create a bold statement look. The magic happens when you gently pull the braids outward to create that signature butterfly wing-like appearance that gives the style its name.
Why Four Butterfly Braids work
Primarily, I love this style for its simplicity and efficiency. For anyone seeking a quick protective option, Four Butterfly Braids are ideal since they use fewer, thicker braids while still delivering maximum impact. Subsequently, this makes them perfect for beginners or those short on time.
Naturally, the versatility is another major advantage. I’ve worn this style both casually and for special occasions by simply changing my accessories or adjusting how defined I make the “butterfly” effect.
Ultimately, what makes this style truly practical is its longevity—with proper care, these braids typically last 1-3 weeks. Immediately after styling, they look polished and neat, yet still maintain their appeal as they age.
How to do Four Butterfly Braids
- Start by flat ironing your hair for a sleeker, more wispy look (optional but recommended)
- Part your hair into four equal sections, using your nose as a guide for the middle part
- Apply pomade or wax stick around the perimeter instead of gel to avoid reverting straight hair
- Create feed-in braids, starting with smaller sections and gradually increasing
- Secure each braid with a rubber band once complete
- Beginning at the bottom of each braid, gently pull outward to create the butterfly effect
- Style the ends as desired—either leave straight, add curls, or form into buns
- Set with light hairspray for lasting hold
Fortunately, once you’ve mastered this technique, you’ll have a go-to style that delivers both protection and flair in minimal time.
Braided Ponytail with Curls
My love affair with combining textures led me to discover the Braided Ponytail with Curls—a style that perfectly balances structure with movement. After trying countless braided styles, this one quickly earned its place as my favorite for events requiring that extra touch of glamor.
What is Braided Ponytail with Curls
A Braided Ponytail with Curls combines the sleekness of a high ponytail with the intricate detail of a braid and the softness of curls. This versatile style features a ponytail that’s braided partially or fully, leaving curls to cascade from the end or strategically throughout the braid. The combination creates a beautiful balance between structure and movement. Variations include Dutch braid low ponytails with loose curls or faux three-strand braided ponytails with extensions for added volume.
Why Braided Ponytail with Curls works
Certainly, the primary appeal of this style lies in its perfect balance between elegance and playfulness. The braid adds structure and holds hair securely in place, whereas the curls add volume, texture, and movement for a glamorous finish.
Generally, this style works wonderfully for both casual and formal occasions. I’ve worn mine for everything from office meetings to weekend brunches, simply adjusting the neatness of the braid or volume of curls accordingly.
According to hair experts, braided styles help protect your scalp by limiting friction, often leading to healthier hair growth. Meanwhile, the curls add that eye-catching dimension that elevates the entire look.
How to do Braided Ponytail with Curls
- Start by gathering your hair into a sleek high ponytail and securing it with a hair tie
- Apply a small amount of serum to smooth any flyaways
- Begin braiding the ponytail, leaving out small strands every few inches for the curly effect
- Alternatively, braid completely then create curls at the end
- For added volume, consider incorporating clip-in extensions
- Secure the braid with a clear elastic
- Gently pull at the braid edges for fullness
- Finish with light hairspray for hold without stiffness
Ultimately, what makes this style truly special is how it combines the best elements of different techniques into one polished, yet not overly done look.
Faux Fishtail Pigtails

Struggling with complicated fishtail braids led me to discover Faux Fishtail Pigtails—a clever style that delivers the intricate look of fishtail braids without the frustration. This game-changing technique has saved me on countless mornings when I wanted an impressive style but lacked time or patience.
What is Faux Fishtail Pigtails
Faux Fishtail Pigtails create the appearance of fishtail braids without any actual braiding involved—a brilliant styling hack for those of us who find traditional fishtails challenging. In essence, this style uses a series of “topsy tails” (where you flip your ponytail through a hole above the elastic) to create texture that remarkably resembles a fishtail braid. The loops formed by this technique create the same beautiful, intricate pattern as a traditional fishtail, yet require “a thousand times less effort,” as one stylist puts it. Typically done as pigtails, this versatile technique can also be adapted for side braids or single ponytails.
Why Faux Fishtail Pigtails work
Primarily, these pigtails shine for their accessibility—”nearly anyone can do it” without special braiding skills. Notably, the style works for various hair lengths; those with longer hair can create more loops, while shorter-haired folks simply do fewer. Furthermore, faux fishtails hold remarkably well throughout the day since they’re secured with multiple elastics.
Another major advantage is how customizable they are—you can “messy them up and make them as full as you like,” creating everything from polished, sleek looks to deliberately tousled styles. As a bonus, these pigtails make for perfect “hat hair days” in both summer and winter, looking adorable peeking out from under beanies or baseball caps.
How to do Faux Fishtail Pigtails
- Divide your hair into two equal sections for pigtails
- Secure each section with clear elastic bands
- Create a “topsy tail” by making a gap above the first elastic and flipping the tail up through that gap
- Gently loosen the hair to hide the elastic
- Move down about an inch and secure with another elastic
- Repeat the flip-through process, alternating which side you create the hole on
- Continue this pattern down the length of each pigtail
- For a finished look, wrap a small section around the final elastic
- Spray lightly with hairspray to set
To maintain this style, avoid simply pulling out the elastics—use a proper elastic cutter tool to prevent damage and pain.
Spice Braids Ponytail
When my usual styling routine needed refreshing, I discovered the Spice Braids Ponytail—a stunning yet practical hairstyle that changed my entire approach to quick styling. This eye-catching look has become my reliable option for those days when I need something special without spending hours in front of the mirror.
What is Spice Braids Ponytail
A Spice Braids Ponytail is a sleek, heatless braided ponytail style that features individual braids coming together in a polished ponytail formation. This versatile style combines the security of a traditional ponytail with the intricate detailing of braids. What sets it apart is how it incorporates pre-stretched braiding hair to create a thick, elongated braid that makes a bold statement. Unlike conventional braided styles, the Spice Braids technique allows for customization through thickness variation and optional ribbon embellishments for added flair.
Why Spice Braids Ponytail works
Ultimately, this style excels as both a protective and decorative option. The braided structure minimizes daily manipulation of your natural hair, therefore reducing breakage while promoting growth. Plus, its sleek appearance works for everything from professional settings to casual outings.
Naturally, another advantage is its remarkable durability. With proper installation and care, this style can last for weeks, making it perfect for busy schedules or travel. The pre-stretched braiding hair creates a polished finish that maintains its appearance throughout multiple wears.
Furthermore, the style offers excellent versatility—you can personalize it with different braid thicknesses, lengths, and even color accents to match your mood or outfit.
How to do Spice Braids Ponytail
- Section your hair, working with the back and middle first, then the top portion
- Use a denim brush and waxing stick on dry hair to smooth everything flat
- Secure your natural hair into a ponytail using two elastic bands for stability
- Apply edge booster and a bit of hairspray at the top, smoothing with your hands
- Use a medium-to-soft brush to sleek everything down
- Take pre-stretched expressions braiding hair (typically two sections) and wrap around your ponytail base
- Begin braiding, ensuring the braid is tight to prevent loosening
- Add more braiding hair toward the ends to elongate the style if desired
- Apply hairspray within the braid to keep it tamed and prevent unraveling
- Finish by wrapping a small section around the base and setting with styling gel
Long Fishtail Pigtails with Ribbons
At a music festival last summer, I stumbled upon Long Fishtail Pigtails with Ribbons—a hairstyle that perfectly captured the free-spirited atmosphere while staying put through hours of dancing. This enchanting style has since become my festival season signature.
What is Long Fishtail Pigtails
Long Fishtail Pigtails with Ribbons blend intricate braiding with playful esthetics. This bohemian-inspired style features two fishtail braids positioned on either side of your head, often adorned with colorful ribbons woven throughout or tied at the ends. The fishtail technique involves crossing small strands of hair over each other to create an intricate herringbone pattern that looks complex yet feels lightweight. Ultimately, these pigtails offer a free-spirited appearance that’s both sophisticated and carefree—perfect for showing off your creative side without spending hours styling.
Why Long Fishtail Pigtails work
The magic of fishtail pigtails lies in their impressive versatility. They’re ideal for outdoor gatherings, music festivals, or anytime you wish to exhibit your free-spirited nature. Although they appear elaborate, fishtail braids are surprisingly easier to execute than regular braids once you master the basic technique.
Beyond their esthetic appeal, these pigtails adapt beautifully to different hair textures and lengths. For those with fine hair, the overlapping pattern creates an illusion of thickness and volume. Plus, the ribbons aren’t merely decorative—they provide extra security while adding a personalized touch.
Practically speaking, this style offers remarkable durability through various activities. I’ve worn mine hiking, dancing, and even swimming with minimal maintenance required throughout the day.
How to do Long Fishtail Pigtails
- Start with a clean part down the middle, dividing your hair into two equal sections
- Secure one side temporarily while working on the other
- For each fishtail, divide the section into two parts
- Take a small strand from the outer edge of one part and cross it over to join the opposite part
- Continue alternating sides, always crossing over (never under)
- Tighten the braid as you go for better structure
- Once you reach the end, secure with a clear elastic
- For added volume, gently “pancake” the braid by carefully pulling at the edges
- Weave ribbons through by threading them under and over sections of the braid
- Apply texturizing powder beforehand if your hair is slippery for better grip
Finally, don’t worry about perfection—this style looks best with a slightly undone, bohemian feel.
High Rope Twist Ponytail
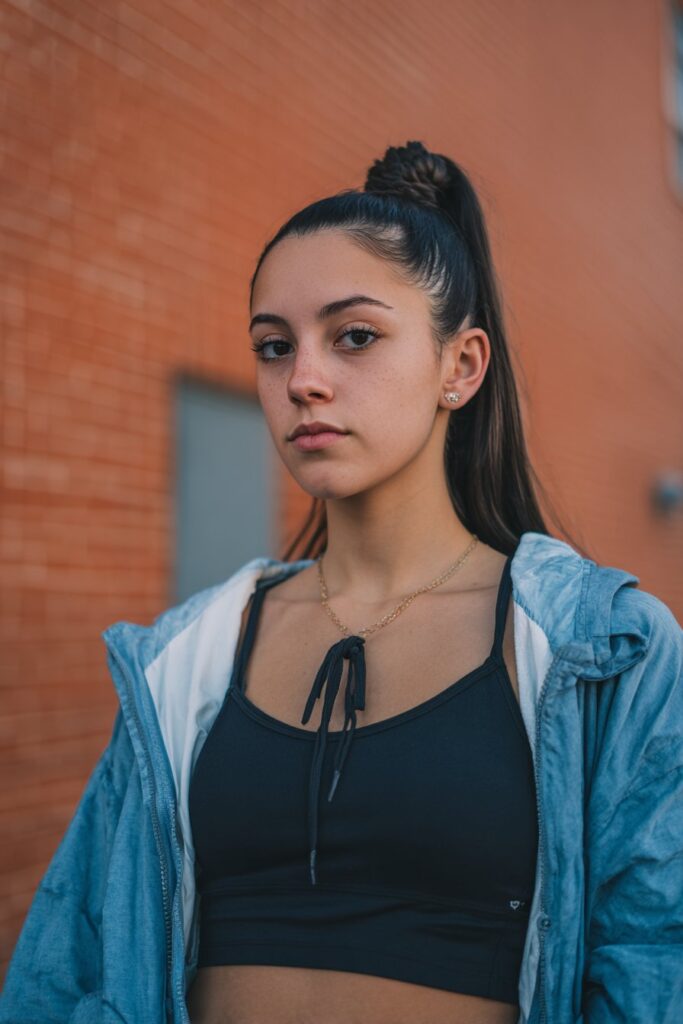
After a professional photoshoot where flat hairstyles left me uninspired, I turned to the High Rope Twist Ponytail—a hairstyle that elevates ordinary ponytails with striking texture and dimension. This elegant yet simple technique has become my reliable choice for everything from corporate meetings to casual weekend outings.
What is High Rope Twist Ponytail
A High Rope Twist Ponytail combines the sleek positioning of a high ponytail with the distinctive texture of rope twists. Unlike traditional braided ponytail hairstyles, rope twists involve twisting strands of hair together to create a defined, rope-like effect. Sometimes called Senegalese twists in certain contexts, this style features two sections twisted individually first, then wrapped around each other in the opposite direction. The result is a sophisticated, twisted rope appearance that sits high on the head, elongating your profile while providing both structure and visual interest.
Why High Rope Twist Ponytail works
Primarily, this style creates an elegant look without much hassle—it appears far more complex than it actually is! The twisted structure forms a protective barrier around your natural hair, shielding it from environmental damage throughout the day.
Given proper care, rope twists can maintain their appearance for weeks, minimizing daily styling needs. As someone with limited morning time, I value how this style transitions seamlessly between professional settings and casual occasions without requiring adjustments.
Another benefit is its adaptability to various hair textures and lengths. Throughout my styling experiments, I’ve found the high positioning naturally lifts facial features while the rope texture adds dimension even to fine hair.
How to do High Rope Twist Ponytail
- Create a sleek high ponytail using a strong elastic band
- Gently brush the ponytail to remove tangles
- Split the ponytail into two equal sections
- Twist one section clockwise along its entire length
- Twist the second section clockwise as well
- Wrap these twisted sections around each other counterclockwise
- Secure the end with a small elastic band
- Optional: Wrap a small section of hair around the base elastic for a polished finish
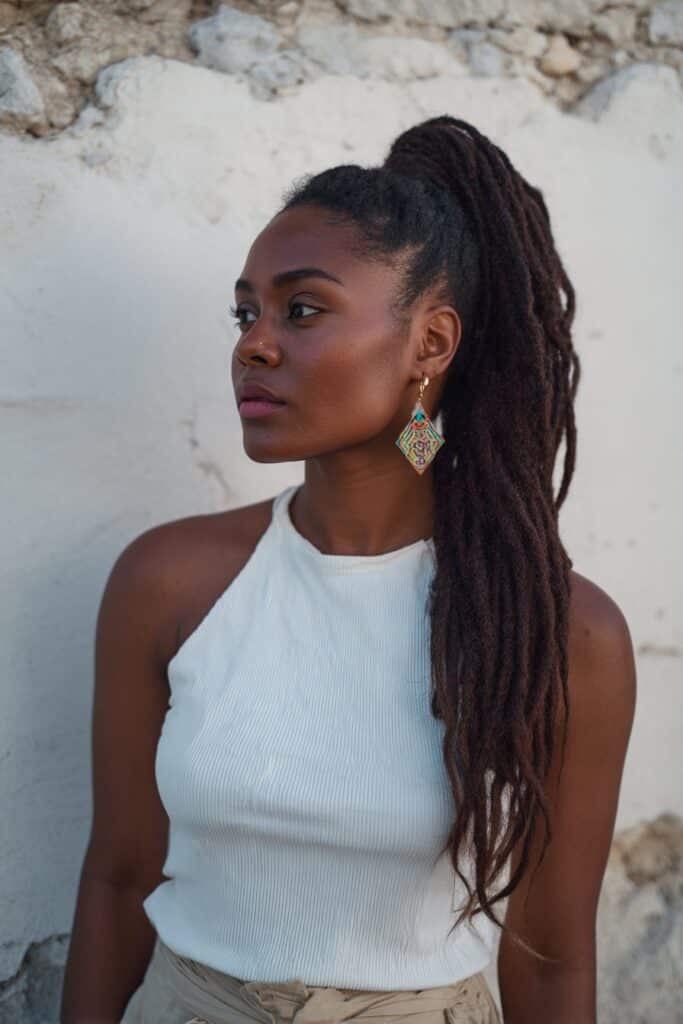
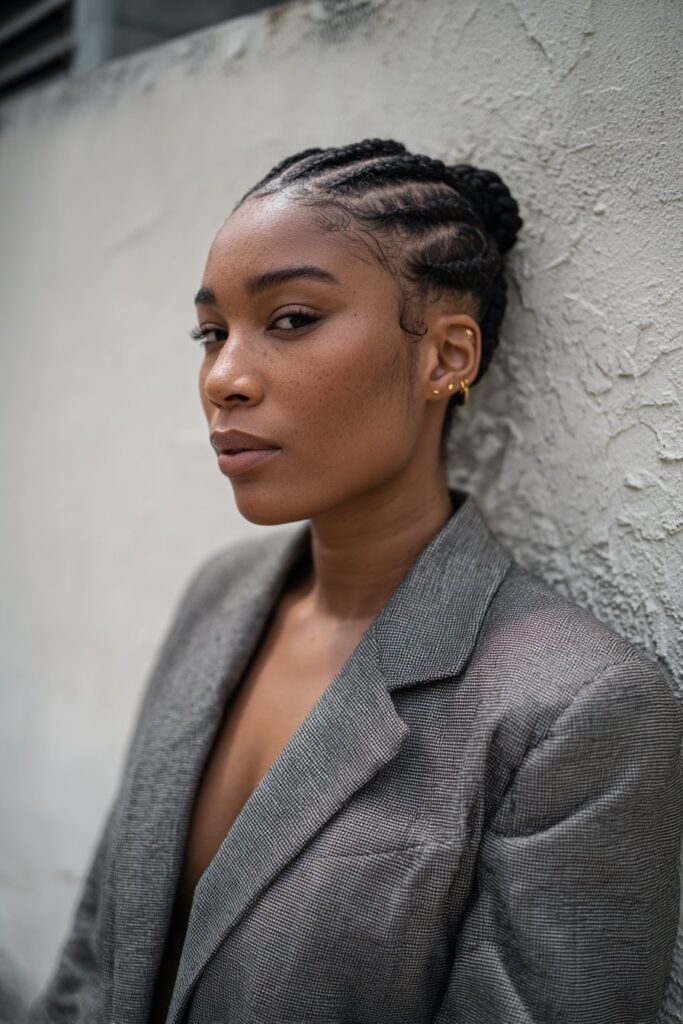
Feed-In Braided Ponytail
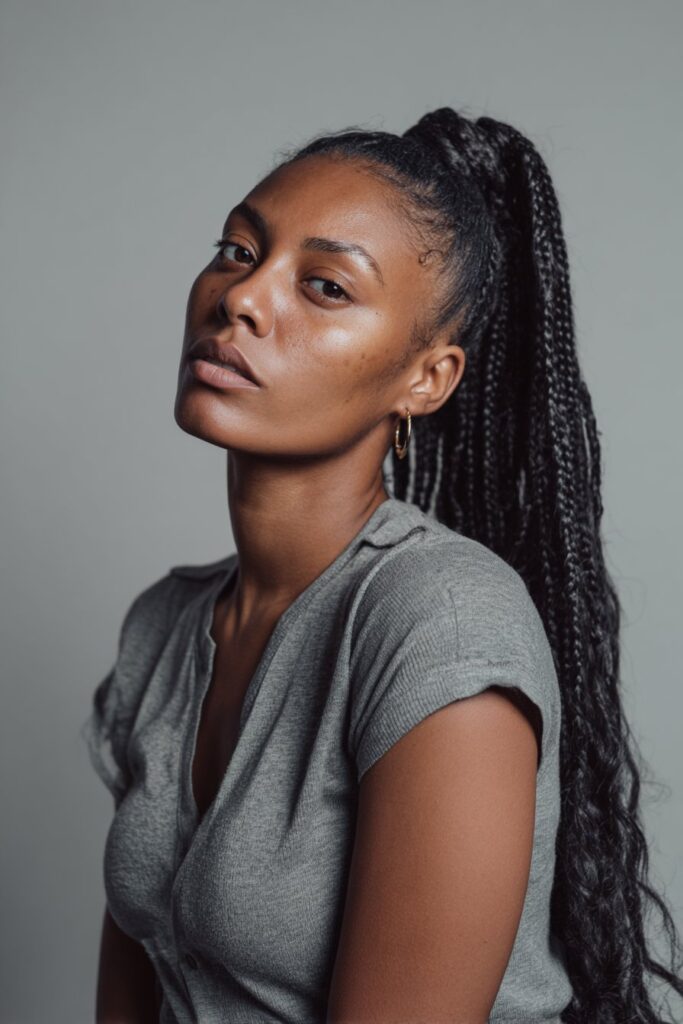
Looking for a protective style that wouldn’t sacrifice style points led me to the feed-in braided ponytail. This traditional African hairstyle has become my reliable go-to whenever I need a polished look that requires minimal daily maintenance.
What is Feed-In Braided Ponytail
A feed-in braided ponytail creates the illusion of naturally long cornrow braids growing directly from the scalp, gathered into a stunning ponytail formation. The technique involves gradually adding braiding hair extensions to your natural hair, strand by strand. You begin with a starter braid using just your natural hair, then systematically incorporate synthetic or natural extensions throughout the braiding process. Unlike regular braided styles, feed-in braids appear more seamless and natural, without the bulky knots at the roots.
Why Feed-In Braided Ponytail works
Primarily, I love this style because it offers extended time away from daily styling. With proper care, feed-in braids typically last between 2-6 weeks, giving my natural hair time to grow while protected.
Throughout my styling experiments, I’ve found feed-in braided ponytails offer remarkable versatility. They can be customized with various patterns, thicknesses, and lengths to match any occasion or personal style. The neat appearance works perfectly for professional settings yet transitions beautifully to casual outings.
Given its cultural significance, this style also connects me to centuries of African hair tradition. Beyond esthetics, feed-in braids provide several practical benefits – they’re low maintenance, budget-friendly, and remarkably comfortable without excessive tension on the scalp.
How to do Feed-In Braided Ponytail
- Start with freshly washed, blow-dried hair for easier manipulation
- Section your hair based on desired pattern (center part works well)
- Begin cornrowing with your natural hair for 3-4 stitches
- Take your smallest extension section, fold it in half, and combine with your natural hair
- Continue cornrowing, adding hair from your scalp as you braid
- Add progressively larger extension sections every few stitches
- Continue this pattern until reaching your desired ponytail position
- Secure with an elastic and wrap a small section around the base for a polished finish
Box Braids Ponytail
After years of experimenting with protective styles, box braids in a ponytail became my trusted solution for both gym workouts and professional meetings. The versatility and low maintenance nature of this style has made it a permanent fixture in my hair rotation.
What is Box Braids Ponytail
A box braids ponytail combines the protection of traditional box braids with the practicality of a ponytail. This style features individual braids created in square-shaped sections (hence “box” braids) gathered into a ponytail at various heights on the head. Unlike regular ponytails, box braids ponytails offer remarkable versatility—they can be styled high for a statement look or low for elegant sophistication. The braids shield your natural hair while the ponytail keeps everything neatly secured away from your face.
Why Box Braids Ponytail works
As a result of wearing this style, I’ve noticed significant benefits for my natural hair. Primarily, box braids create a protective barrier that shields hair from environmental damage, UV rays, and daily manipulation. This protection stimulates hair growth by minimizing breakage and allowing follicles to thrive undisturbed.
Apart from that, the ponytail variation adds incredible versatility. By simply gathering my braids up, I can transition between professional settings and casual outings without needing a complete restyle. Plus, in summer months, the elevated ponytail keeps my neck cool while maintaining the protective benefits.
Undoubtedly, the most significant advantage is the time-saving aspect—box braids typically last 4-6 weeks with proper care, dramatically reducing daily styling time.
How to do Box Braids Ponytail
- Start with freshly washed, moisturized hair
- Create your box braids (or have them professionally installed)
- Once braided, gather all braids into your desired ponytail position
- Secure with a strong elastic band suited for thick hair
- For a polished finish, take 2-3 braids and wrap them around the elastic base
- Instead of using regular hair ties which can snap, use fabric hair ties or specialized bands
- To preserve edges, ensure the ponytail isn’t pulled too tightly
For maximum hold when active, try splitting your hair into two sections before creating your ponytail—this creates better balance and stability.
French Braid Ponytail
I discovered the classic French braid ponytail on a rainy morning before an important presentation when my hair wouldn’t cooperate with any other style. This timeless look has remained my reliable fallback whenever I need something elegant yet practical.
What is French Braid Ponytail
A French braid ponytail combines the sophistication of a French braid with the practicality of a ponytail. Unlike regular three-strand braids, French braids incorporate hair from the sides as you braid, creating a raised pattern that sits directly on the scalp. Typically, you start with a section at the crown, then gradually add hair from both sides while crossing strands over the middle (unlike Dutch braids which cross under). The braid continues until it reaches your desired ponytail position—usually ear level—where remaining hair is gathered into a ponytail.
Why French Braid Ponytail works
Interestingly, this versatile style adapts beautifully to both formal events and casual outings. The French braid component keeps hair securely in place while adding visual interest to what would otherwise be a simple ponytail.
Primarily, this style offers remarkable protection for your hair. By braiding your locks before bedtime, you create a protective barrier that prevents unnecessary pulling or friction that can cause breakage. The braided structure also helps retain moisture and preserve your hair’s natural shape overnight.
Furthermore, French braid ponytails save considerable morning preparation time. Rather than spending precious minutes detangling and styling, you can simply undo your braid for beautiful waves or leave it intact for continued protection.
How to do French Braid Ponytail
- Begin by separating a section of hair from your forehead back toward the crown
- Divide this section into three equal parts
- Cross the side strands over the middle, alternating left then right
- With each cross, incorporate small sections of hair from along your hairline
- Continue braiding until you reach ear level
- Gather remaining hair into a ponytail and secure with a clear elastic
- For a polished finish, wrap a small strand around the elastic and pin underneath
For beginners, practice is essential—your first attempts might not look perfect, but consistency leads to mastery!
Twist Braids Ponytail
On a busy morning preparing for a week-long business trip, I stumbled upon the Twist Braids Ponytail—a protective style that’s both simple and stunning. This versatile look has become my go-to whenever I need a style that stays put for weeks without daily maintenance.
What is Twist Braids Ponytail
A Twist Braids Ponytail is created by twisting two sections of hair around one another from root to ends, then gathering these twists into a ponytail. Unlike traditional braided styles, twist braids involve wrapping hair sections around each other rather than weaving them. The technique creates a rope-like pattern that can range from small to large sections. In fact, twists come in numerous variations including Havana, Marley, Senegalese, passion, and spring twists—each offering a distinct look while maintaining the same basic technique.
Why Twist Braids Ponytail works
Primarily, twist braids excel as a protective style, giving your natural hair a break from daily manipulation. The twisted structure minimizes knots and tangles while promoting healthy hair growth.
Interestingly, twist braids ponytails work wonderfully for those who find tight braiding uncomfortable, as they typically apply less tension on the scalp. Furthermore, they’re incredibly versatile—I’ve styled mine in everything from simple ponytails to elaborate updos without disturbing the twists.
Naturally, their low-maintenance nature makes them perfect for busy schedules. In addition, they create gorgeous defined curls when taken out, giving you a beautiful twist-out style with minimal effort.
How to do Twist Braids Ponytail
- Start with freshly washed, deep-conditioned hair
- Divide your hair into your desired section sizes
- For each section, split into two equal parts
- Twist each part individually clockwise
- Wrap these twisted sections around each other in the counterclockwise direction
- Continue until reaching the ends, then secure with a clear elastic
- Gather all twists into a ponytail at your preferred height
- Secure with a fabric-covered elastic to prevent breakage
For twists that won’t unravel, ensure you twist tightly, especially near the roots.
Center Part Braided Ponytail
During a fashion week event, I became captivated by the Center Part Braided Ponytail—a hairstyle that achieves remarkable symmetry while framing the face perfectly. This refined yet straightforward style has become my signature look for presentations and date nights alike.
What is Center Part Braided Ponytail
A Center Part Braided Ponytail features a precise middle part that divides the hair equally down the center of the head, with the hair gathered into a ponytail that’s then braided. Distinctively, this style uses your nose as a guide to create that perfect symmetrical part. The front sections frame the face while the sleek ponytail at the back provides structure and elegance. Many variations exist—from sleek, polished looks to more textured, relaxed versions—but the defining characteristic remains that clean center division that brings balance to your features.
Why Center Part Braided Ponytail works
Foremost, center parts create facial symmetry that draws attention to your eyes and cheekbones. The style works remarkably well for oval and heart-shaped faces, though anyone can rock it with the right styling.
Presently, this hairstyle has become increasingly popular as it offers that coveted “model off duty” appearance while remaining practical for everyday wear. The braided element adds texture and interest to what might otherwise be a simple ponytail, elevating the entire look.
Underneath its stylish appearance, this hairstyle is also practical—it keeps hair secured away from your face while the braid prevents tangling throughout the day.
How to do Center Part Braided Ponytail
- Begin by creating a part from ear to ear, sectioning out the hair and working with the back portion first
- Comb the back section thoroughly and secure it with an elastic
- Create your center part using your nose as a guide for perfect symmetry
- Apply got2b spray or similar product to smooth each section, using a blow dryer to set it in place
- Once all sections are sleek, remove any temporary bands and combine everything into one ponytail
- Optional: Leave out small sections for sideburns to frame your face
- Apply beeswax to help your natural hair blend with the ponytail before braiding
- Braid the ponytail using your preferred technique—standard three-strand, fishtail, or rope twist
Remember not to keep this style for more than 5 days to prevent hair dryness and breakage.
Conclusion
Throughout my hair journey, these braided ponytail hairstyles have absolutely saved me countless times when caught between wanting to look put-together and having minimal time to spare. Above all, what makes these styles truly special is their remarkable versatility – they transition seamlessly from professional settings to casual outings without missing a beat.
Undoubtedly, the beauty of these braided ponytails lies in their accessibility. Whether you prefer the intricate detail of fishtail braids or the protective benefits of feed-in styles, there’s something for every skill level and hair type. Even as a beginner, you can master simpler options like the Rope Twist Ponytail before gradually working your way up to more elaborate designs.
Another key point to remember is how these styles offer both protection and style. Many options shield your natural hair from environmental damage while still looking absolutely stunning. This dual benefit makes braided ponytails perfect for active lifestyles or busy schedules when hair health can’t be compromised.
After trying all these styles myself, I’ve found they provide that perfect balance between effort and impact. They create that “I spent hours on my hair” illusion while actually taking just minutes to execute. Additionally, most require minimal tools and products – perfect for traveling or mornings when you’re rushing out the door.
Finally, don’t be afraid to make these styles your own! Experiment with different heights, textures, and embellishments to discover which braided ponytail best complements your face shape and personal style. The techniques shared here serve as foundations that you can certainly customize to suit your unique preferences.
Now that you have these quick braided ponytail options in your styling arsenal, those hectic mornings no longer mean sacrificing great hair. Which style will you try first?