
Hey beautiful! I’m so excited to share this comprehensive guide with you today. If you’ve been following my work, you know how much I adore protective hairstyles that not only look stunning but also keep your natural hair healthy and thriving. Cassie braids, inspired by those gorgeous, sleek, and versatile box braids that have taken the beauty world by storm, are absolutely one of my favorites to recommend to clients and friends alike.
Let me take you back to a moment that really solidified my love for these styles. I was working with a client who’d been struggling with heat damage and was feeling pretty discouraged about her hair journey. We sat down, had a heart-to-heart, and I suggested trying Cassie braids. The transformation wasn’t just physical—watching her confidence bloom as we completed her style was one of those moments that reminded me why I fell in love with beauty in the first place. That’s the power of a great protective style, and that’s exactly what we’re diving into today.
Classic Box Braids with Middle Part
Let’s start with the foundation, the classic that never goes out of style. The middle part box braid is like that little black dress in your closet—it works for absolutely everything and makes you feel put together no matter what.
What Are Classic Box Braids with Middle Part?
This style features individual braids that are sectioned into neat, box-like squares all over your head, with a clean part running straight down the middle. The beauty of this look is in its symmetry and versatility. Each braid is typically medium-sized, though you can adjust the thickness based on your preference and hair density. I’ve created this style countless times, and what I love most is how it frames the face so beautifully while giving you that polished, sophisticated vibe.
The middle part has this amazing way of balancing your features, and I always tell my clients that it’s universally flattering. Whether you’re heading to a business meeting or a weekend brunch, this style transitions seamlessly.
How It Works Best for Different Face Shapes and Occasions
This style is incredibly forgiving and works beautifully for most face shapes. If you have a round face, the middle part actually helps elongate your features, creating a slimming effect that’s super flattering. For those with oval faces, this style enhances your natural symmetry.
I’ve styled this look for everything from events to casual photoshoots, and it never disappoints. The clean lines make it perfect for professional settings, while the length and fullness give you that glamorous edge for evening occasions.
How to Create and Maintain This Timeless Style
Creating this look requires patience and precision, but trust me, it’s so worth it. Start with freshly washed and deeply conditioned hair. I always apply a leave-in conditioner and light oil to keep the hair moisturized throughout the braiding process.
Section your hair down the middle first, making sure that part is razor-sharp and clean. Then, begin creating your box sections, working from front to back. The key is consistency in size. When braiding, maintain even tension throughout. Too tight, and you risk traction alopecia; too loose, and your braids won’t last.
For maintenance, wrap your braids in a silk or satin scarf every night. This is non-negotiable! Apply a light oil to your scalp weekly, and don’t neglect the edges. I recommend keeping this style for no more than six to eight weeks to maintain hair health.
Jumbo Cassie Braids

If you’re looking to make a statement while cutting down on installation time, jumbo braids are calling your name!
What Makes Jumbo Braids Stand Out?
Jumbo braids are essentially box braids on a larger scale—think thick, chunky plaits that create major visual impact. Each braid is significantly thicker than traditional box braids, which means fewer braids overall and a completely different aesthetic. What I love about jumbo braids is their modern, edgy vibe. They’re perfect for the woman who wants to stand out and isn’t afraid to take up space.
Perfect Styling for Bold Personalities and Busy Lifestyles
These braids are absolute gold for my busy clients who don’t have eight hours to spend in a salon chair. Installation typically takes three to four hours, compared to six to eight for smaller braids. If you’re a busy professional, a mom juggling multiple responsibilities, or just someone who values their time, this is your style.
Jumbo braids work beautifully for active lifestyles too. They’re secure, easy to manage, and you don’t have to worry about them getting frizzy as quickly as smaller braids might.
Tips for Installation and Styling Your Jumbo Braids
The key to gorgeous jumbo braids is using the right amount of hair. You want them full and beautiful, but not so heavy that they cause tension on your scalp. Start with clean, stretched hair, and create larger square sections—about two to three inches each.
For styling, these braids look amazing in a high ponytail or bun. You can also wear them down and add a side part for versatility. Accessorize with large hair cuffs or colorful beads for extra personality.
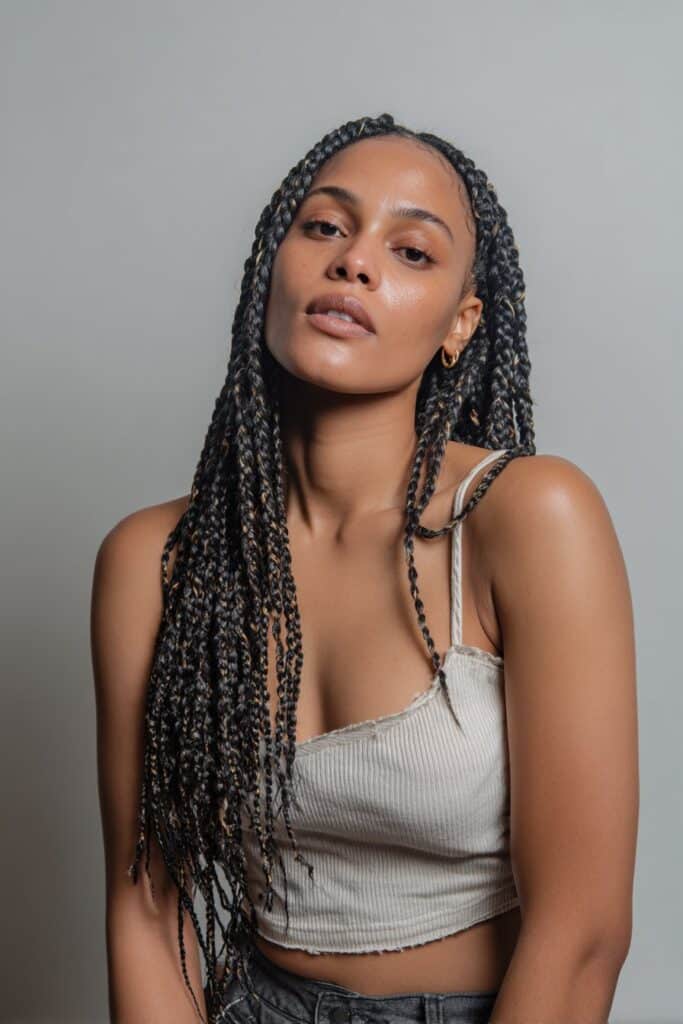
Waist-Length Cassie Braids

Let me tell you about the drama and elegance of waist-length braids. There’s something absolutely magical about hair that cascades down your back.
Understanding the Beauty of Extra-Long Braids
Waist-length braids are the ultimate statement piece in protective styling. These braids typically fall anywhere from mid-back to your natural waistline, creating that gorgeous, mermaid-like effect that turns heads everywhere you go. The length creates movement and flow that shorter styles can’t replicate.
Best Occasions and Face Shapes for Long Braids
These braids are phenomenal for special events where you want to make an unforgettable impression. They’re also perfect for vacations—imagine yourself on a beach with waist-length braids blowing in the breeze. That said, they do require confidence to pull off. The length draws the eye up and down your entire silhouette.
How to Manage and Care for Extra-Long Braids
I won’t sugarcoat it—waist-length braids require commitment and care. The weight can be significant, so make sure your natural hair is healthy and strong before installation. Use lighter braiding hair if possible, and consider doing slightly smaller sections to distribute weight better.
You’ll need to wrap these carefully at night—I recommend braiding them into one or two large plaits before wrapping. This prevents tangling and keeps them looking neat.
Shoulder-Length Cassie Braids

Now let’s talk about my personal favorite length—shoulder-length braids. They’re the perfect middle ground between dramatic and practical.
The Versatility of Medium-Length Braids
Shoulder-length braids hit right at or just below your shoulders, creating a balanced, manageable style that works for virtually everyone. This length gives you plenty of styling options without the weight and maintenance demands of longer braids. What makes this length so special is its adaptability.
Ideal for Professional Settings and Daily Wear
I recommend this length to so many of my clients who work in corporate environments or need a polished appearance for their careers. For daily wear, you can’t beat the convenience. They’re easy to manage in the morning, they don’t get caught in car doors or bags, and they stay looking fresh with minimal effort.
Creating the Perfect Shoulder-Length Style
Installation is relatively quick compared to longer styles—usually around four to six hours. I recommend using high-quality braiding hair cut to the appropriate length rather than folding longer hair multiple times. For styling, invest in some beautiful accessories—this length shows them off perfectly.
Bob-Length Cassie Braids

Can we talk about how chic and modern bob-length braids are? This style has been having a major moment!
What Defines the Bob-Length Braid Style?
Bob-length braids typically fall somewhere between your chin and shoulders, creating that trendy, fashion-forward look. This style takes inspiration from classic bob haircuts but with the benefits and beauty of braided texture. The beauty of this length is in its boldness and modernity.
Best Face Shapes and Style Personalities for This Look
This length is particularly stunning on those with oval, heart-shaped, or diamond-shaped faces. The shorter length draws attention to your facial features, cheekbones, and jawline. Personality-wise, this is for the trendsetter, the fashionista, the woman who isn’t afraid to take risks.
Installation Tips and Styling Ideas for Bob Braids
The installation process is wonderfully quick—usually completed in three to four hours. Use shorter braiding hair to avoid bulk at the ends, and pay careful attention to creating a clean, even line all around. Styling options are surprisingly diverse, and this length really allows your jewelry to shine.
Cassie Braids with Color Accents

Let’s add some color to your life! Incorporating colored extensions into your braids is one of my favorite ways to express creativity and personality.
Adding Dimension with Colored Extension Hair
Color accents involve weaving colored braiding hair throughout your braids. You can go subtle with just a few colored pieces or go bold with color throughout the entire style. The dimension that color adds is stunning. Even natural colors like caramel or honey blonde can create depth and movement.
Choosing Colors That Complement Your Skin Tone
For warmer skin tones with golden undertones, I recommend colors like honey blonde, copper, auburn, or warm burgundy. If you have cooler undertones, consider ash blonde, platinum, cool browns, or jewel tones like sapphire blue or emerald green. Don’t be afraid to experiment!
How to Incorporate and Maintain Colored Braids
When adding color, I strategically place the colored pieces to create the most flattering effect. Quality matters tremendously with colored braiding hair. Invest in good synthetic hair that won’t fade quickly. At night, protect your colored braids with silk or satin.
Feed-In Cassie Braids

Feed-in braids are a game-changer in the protective styling world, and once you try them, you’ll understand why they’ve become so popular.
Understanding the Feed-In Braiding Technique
Unlike traditional braids where you add all the extension hair at once, feed-in braids gradually add hair as you braid, creating a seamless, natural-looking result. The technique starts with your natural hair at the root and progressively incorporates small amounts of extension hair.
Benefits for Hairline Health and Natural Appearance
This is the style I recommend most often to clients concerned about their edges. The gradual addition of hair means less weight and tension at the root, which is crucial for maintaining healthy edges and preventing breakage. The aesthetic benefit is equally impressive—they photograph beautifully with no visible bumps.
Step-by-Step Tips for Perfect Feed-In Braids
Begin each braid with only your natural hair, or with a very small amount of extension hair. As you braid down about an inch or two, begin feeding in small pieces of extension hair. The key is using tiny amounts consistently. Maintain even tension throughout for a neat appearance and comfortable wear.
Triangle-Part Cassie Braids

Ready to get creative with your parting pattern? Triangle parts add an artistic element that elevates the entire style.
The Artistic Appeal of Geometric Parting
Instead of traditional square sections, triangle-part braids use triangular sections throughout the head, creating a distinctive geometric pattern. The triangular sections catch light differently and create visual interest even when the braids are worn down.
Creating Dimension and Visual Interest
What makes this parting pattern so special is the dimension it adds. The angles create natural movement and prevent that “too perfect” look. Each triangle point becomes a natural focal point, drawing the eye across the scalp in an interesting way.
Technique and Tips for Triangle Parting
Creating triangle parts requires precision and a good eye for spacing. Within each row, create alternating triangles with the points facing opposite directions. Use a rat-tail comb to create clean, sharp angles. The size of your triangles should remain consistent throughout for a cohesive look.
Knotless Cassie Braids

If there’s one technique I’ve been asked about more than any other recently, it’s knotless braids!
What Makes Knotless Braids Different and Better?
Knotless braids eliminate the initial knot at the base, instead beginning with your natural hair and gradually feeding in extension hair. The difference in comfort is remarkable. Without that initial knot, there’s significantly less tension on your scalp right from the start.
Perfect for Sensitive Scalps and Natural Styling
For clients with sensitive scalps or anyone who’s experienced discomfort with traditional braids, knotless is the way to go. The movement these braids have is another major benefit. They swing and move more naturally, mimicking the behavior of natural hair.
Installation Process and Maintenance Tips
Installing knotless braids requires skill and patience. Start with a small section of your natural hair, braid it down for about half an inch, then begin gradually adding tiny amounts of extension hair. These braids often last longer than traditional braids because the reduced tension means less stress on your hair.
Side-Swept Cassie Braids

There’s something undeniably romantic and elegant about braids swept dramatically to one side.
Creating Asymmetry and Elegance
Side-swept styling involves parting your braids deeply to one side and allowing them to cascade over your shoulder. This asymmetrical look creates instant glamour and sophistication. The beauty of this style is in how it frames the face, showcasing your features, jewelry, and makeup.
Best Occasions and Styling Combinations
This style is my go-to recommendation for formal events, date nights, and any occasion where you want to feel particularly feminine. Pair side-swept braids with statement earrings on the exposed side—the asymmetry allows your jewelry to really shine.
How to Achieve and Maintain This Look
Creating a side-swept style starts with a deep side part. Brush or smooth all your braids toward one side using a light gel or edge control to keep everything sleek and in place. The weight of the braids themselves will usually keep them in position once you’ve established the part.
High Ponytail Cassie Braids

Let’s talk about one of the most versatile and flattering ways to style your braids—the high ponytail!
Elevating Your Look with Height and Drama
A high ponytail takes your braids and gathers them at the crown of your head, creating height, drama, and showcasing your facial features beautifully. I love how this style emphasizes your neck and shoulders while drawing attention to your face.
Perfect for Active Lifestyles and Face-Framing
For my active clients—gym-goers, athletes, dancers—this is the ultimate functional yet beautiful style. It keeps all your braids securely out of your face and off your neck while you move. With your braids pulled up and back, your features are completely visible and highlighted.
Techniques for a Secure and Stylish High Ponytail
Start by brushing all your braids upward toward your crown, smoothing any bumps. Use a strong, thick elastic band to secure your braids. For added polish, take one braid from your ponytail and wrap it around the elastic to conceal it, securing the end with a bobby pin.
Cassie Braids with Curly Ends

Adding curled ends to your braids creates a playful, romantic vibe that I absolutely adore.
Combining Structure and Softness
Braids with curly ends involve leaving several inches of your extension hair unbraided at the ends, then curling those loose sections. The result is a style that’s structured and neat from root to mid-length, then transitions into soft, flowing curls.
Achieving the Perfect Curl Pattern
For synthetic hair, I recommend using the hot water dipping method. Braid your hair to the desired length, leaving four to six inches unbraided. Prepare a pot of hot water, carefully dip the ends into the water for a few seconds, then wrap them around rollers while still damp.
Maintenance and Refresh Tips for Curly Ends
At night, either pineapple your braids or carefully wrap them so the curls aren’t crushed. To refresh your curls, you can lightly mist them with water and reshape individual curls around your finger, allowing them to air dry.
Braided Crown with Cassie Braids

Let’s finish with one of the most ethereal, romantic styles you can create with your braids—the braided crown.
Creating a Halo Effect with Your Braids
A braided crown involves taking braids from each side of your head and wrapping them around your crown area, securing them to create a continuous halo effect. This style has such a timeless, almost medieval quality that feels both romantic and regal.
Perfect for Special Occasions and Romantic Events
This is my go-to recommendation for weddings—whether you’re the bride, a bridesmaid, or a guest. The braided crown is inherently romantic and photographs beautifully from every angle. The style also works beautifully for outdoor events like garden parties or festivals.
Step-by-Step Instructions for Crown Styling
Start by parting your braids down the middle. Take a section of braids from one side—usually three to five braids—and wrap them across your hairline like a headband, securing them behind the opposite ear with bobby pins. Repeat on the other side. Use multiple bobby pins to ensure everything is secure.
Conclusion
As I reflect on all these beautiful styles we’ve explored together, I’m reminded of why I fell in love with hair and beauty in the first place. It’s not just about the styles themselves—it’s about how they make you feel. Every time I help someone discover a new protective style that works for their lifestyle, their face shape, their personality, I’m reminded that beauty isn’t one-size-fits-all.
Throughout my journey from that small-town girl who was mesmerized by her mother’s beauty routine to working with incredible clients, I’ve learned that confidence is the most important accessory you can wear. These thirteen Cassie braid styles aren’t just hairstyles—they’re tools for self-expression, confidence-building, and yes, hair protection too.
What I love most about protective styles like these is how they honor both practicality and beauty. You’re protecting your natural hair, giving it time to rest and grow, while still looking absolutely stunning. Whether you choose the classic middle part, go bold with jumbo braids, experiment with color, or try the romantic braided crown, you’re making a choice to care for your hair while expressing who you are.
Remember what I always say—beauty isn’t about perfection. It’s about confidence, creativity, and feeling empowered to express yourself however you choose. Some days you might want the drama of waist-length braids, other days the sleek sophistication of a bob length. That’s the beauty of having options.
As you embark on your own braiding journey, be patient with yourself. Finding the right length, thickness, and style might take some experimentation. Listen to your hair, pay attention to your scalp, and don’t be afraid to try something new.
Take care of your braids, take care of your natural hair underneath, and most importantly, take care of yourself. Drink your water, moisturize your scalp, protect your edges, and wear that silk scarf at night. These seemingly small acts of care add up to healthy hair and gorgeous styles that last.
Whether you’re getting braids for the first time or you’re a protective style veteran looking for fresh inspiration, I hope this guide has given you the knowledge and confidence to try something new. Remember, your hair journey is uniquely yours. Embrace it, enjoy it, and let your beauty shine through in whatever style makes you feel most like yourself.