Hey beautiful! I’m so excited to share this with you today. If you’ve been looking for hairstyle inspiration that’s both edgy and effortlessly chic, you’re in the right place. Throughout my years as a makeup artist in Los Angeles, I’ve worked with countless clients who want to capture that perfect blend of boldness and femininity, and let me tell you—these styles never disappoint.
I remember when I first started experimenting with different hair looks during my early days in New York. I’d just finished a long day at a fashion show, and I was sitting backstage watching the models get their hair done. That’s when I realized something powerful: hair isn’t just about looking good. It’s about expressing who you are, feeling confident, and sometimes, being brave enough to try something completely new. That moment changed everything for me.
Today, I want to walk you through fourteen stunning hairstyles that embody confidence, creativity, and that fearless spirit we all have inside us. Whether you’re getting ready for a special event, heading to work, or just want to feel amazing on a regular Tuesday, these looks have got you covered.
Sleek Center Part with Straight Hair

There’s something timelessly elegant about a perfectly sleek, center-parted hairstyle. This look has been a staple in my styling repertoire for years, and honestly, it never gets old.
What It Is
This hairstyle is all about sophistication and simplicity. The center part creates perfect symmetry, framing your face beautifully while the sleek, straight texture adds a polished, professional vibe. What I love most about this look is how it allows your natural bone structure to shine. There’s nowhere to hide, which might sound scary, but trust me—that’s exactly what makes it so powerful.
I’ve created this look on clients before red carpet events, business meetings, and even casual brunches. The versatility is unmatched. It works beautifully with any face shape, though I’ve noticed it particularly flatters those with oval or heart-shaped faces.
Best For
This style works wonderfully for formal events where you want to look put-together and elegant. I’ve also found it perfect for job interviews or important meetings because it conveys confidence and professionalism. If you’re someone with strong facial features, this hairstyle will absolutely highlight them in the best way possible.
For face shapes, while it’s universally flattering, those with balanced features really shine with this look. If you have a round face, the straight lines can actually help elongate your appearance. The key is ensuring the part is perfectly centered—even a slight deviation can throw off the entire symmetry.
How to Create This Look
Let me share my technique with you. First, you’ll want to start with freshly washed hair. I always recommend using a smoothing shampoo and conditioner to prepare your hair for that sleek finish. Apply a heat protectant spray—never skip this step, please! Your hair will thank you later.
Using a fine-toothed comb, create a precise center part from your forehead to the crown of your head. Take your time with this; precision matters. Then, section your hair and use a flat iron to straighten small sections at a time. I usually work with one-inch sections for the best results.
Here’s a trick I learned during a shoot in New York: after straightening, run the flat iron over each section one more time with a light touch. This creates that extra sleekness that makes the style look professional rather than just straight. Finish with a lightweight serum or shine spray, focusing on the mid-lengths and ends. Use a boar bristle brush to smooth everything down, and you’re done!
Voluminous Curls with Deep Side Part

Now let’s talk about drama, glamour, and pure elegance. Voluminous curls with a deep side part are my absolute go-to when I want to create a look that commands attention.
What It Is
This hairstyle is all about creating movement and dimension. The deep side part adds an element of asymmetry that’s incredibly flattering, while the voluminous curls bring life, bounce, and a touch of old Hollywood glamour to your overall look.
I created this style for a client once before a gala event, and when she looked in the mirror, she literally teared up. That’s the power of the right hairstyle—it doesn’t just change how you look; it changes how you feel. The cascading curls create this beautiful, romantic effect that makes you feel like you’re walking the red carpet, even if you’re just going to dinner.
Best For
This look is perfect for formal events, date nights, weddings, or any occasion where you want to feel absolutely stunning. It photographs beautifully, which is why I often recommend it for clients who know they’ll be taking lots of pictures. The curls catch the light in the most gorgeous way, creating dimension and depth that flat styles simply can’t achieve.
This style works wonderfully for most face shapes, but I particularly love it on square or angular faces because the soft curls provide a beautiful contrast to strong jawlines. If you have fine hair, this style can actually make your hair appear much fuller and thicker than it is.
How to Create This Look
Here’s how I create this look in my studio. Start with damp hair and apply a volumizing mousse from roots to ends. Blow-dry your hair using a round brush, focusing on lifting at the roots to create that base volume we’re looking for.
Once your hair is completely dry, create a deep side part—I usually place mine about two inches from the center. Section your hair and begin curling with a large barrel curling iron. The key here is to curl away from your face on the front sections. This creates that gorgeous sweeping effect that’s so flattering.
Here’s my secret weapon: after curling each section, don’t let the curl drop immediately. Instead, pin it in place and let it cool completely. This sets the curl and makes it last so much longer. Once all your curls have cooled, remove the pins and gently separate them with your fingers. Never use a brush—it’ll destroy all that beautiful texture. Finish with a light hairspray, and you’ll have curls that last all night.
Sleek Low Bun with Slicked Back Front

Elegance and sophistication come together beautifully in this timeless style. The sleek low bun has been a favorite of mine since my early days working backstage at fashion shows.
What It Is
This hairstyle speaks volumes through its simplicity. The slicked-back front creates a clean, modern look while the low bun adds a touch of classic elegance. What I absolutely love about this style is how it puts all the attention on your face, your makeup, and your features.
I remember creating this look for a client before her wedding. She wanted something timeless that would look just as beautiful in photographs fifty years from now. This style delivered exactly that. There’s something incredibly confident about pulling your hair completely back—it says you’re comfortable in your own skin and you’re not hiding behind anything.
Best For
This is my go-to recommendation for formal events, professional settings, or any occasion where you want to look polished and put-together. It’s particularly stunning for weddings—whether you’re the bride, bridesmaid, or guest. I’ve also created this look for clients heading to important business presentations or black-tie events.
The beauty of this style is that it works with any face shape. However, if you have a longer face, I recommend leaving a few soft pieces around the hairline to add some width. For round faces, the slicked-back effect can actually help elongate your appearance.
How to Create This Look
Let me walk you through my technique. Begin with either freshly washed hair or second-day hair that’s been refreshed with dry shampoo. Apply a smoothing cream or gel to damp hair, distributing it evenly from roots to ends.
Using a fine-toothed comb and a blow-dryer, smooth your hair back away from your face. I like to direct all the hair toward the nape of the neck, creating one smooth surface. Don’t worry if you see some flyaways at this stage—we’ll tame those later.
Gather all your hair at the nape of your neck and secure it with a hair elastic. Then, twist the ponytail and wrap it around the base to create your bun. Secure with bobby pins, making sure to hide the elastic completely. Here’s my trick for a flawless finish: use a small amount of gel on a clean toothbrush to smooth down any flyaways along your hairline and throughout the style. Finish with a strong-hold hairspray, and you’ve got a bun that will last all day and night.
Textured Half-Up Half-Down Style

Let me tell you about one of my absolute favorite versatile styles. The textured half-up half-down look is perfect for those days when you can’t decide between wearing your hair up or down—so why not both?
What It Is
This style combines the practicality of having hair off your face with the beauty and femininity of flowing locks. The textured element adds dimension and interest, preventing the style from looking too simple or basic. I love how this look can be dressed up or down depending on how you accessorize it.
During my time working with various clients, I’ve noticed that this style makes people feel both comfortable and beautiful. It’s not trying too hard, but it still looks intentional and styled. There’s something effortlessly chic about it that I absolutely adore.
Best For
This is such a versatile style that you can wear it almost anywhere. I’ve created this look for clients heading to brunch with friends, attending outdoor weddings, going to music festivals, and even for casual date nights. It’s particularly perfect for those in-between occasions where you want to look nice but not overdressed.
The beauty of this style is its universal appeal. It works with virtually every face shape and hair type. If you have a round face, the height from the half-up section can help elongate your appearance. For those with angular features, the soft texture provides a beautiful contrast.
How to Create This Look
Here’s my approach to this style. Start by adding texture to your hair—this is crucial. If you have naturally straight hair, use a curling wand or flat iron to create loose waves throughout. If your hair is already wavy or curly, you might just need to enhance what you’ve got with a texturizing spray.
Once you have your texture, section off the top half of your hair, from about ear level upward. Gently tease this section at the crown to create some volume—don’t go crazy, just enough to add some height. Pull this section back and secure it with a clear elastic or decorative clip.
Here’s where the magic happens: gently pull at the hair around your face to release some pieces and create a softer frame. Also, carefully pull at the hair in the crown area to add more volume and create that perfectly imperfect texture. I like to use my fingers to slightly mess up the section that’s pulled back, making it look more natural and less rigid. Finish with a light texturizing spray, and you’re done. The whole process takes maybe ten minutes, tops.
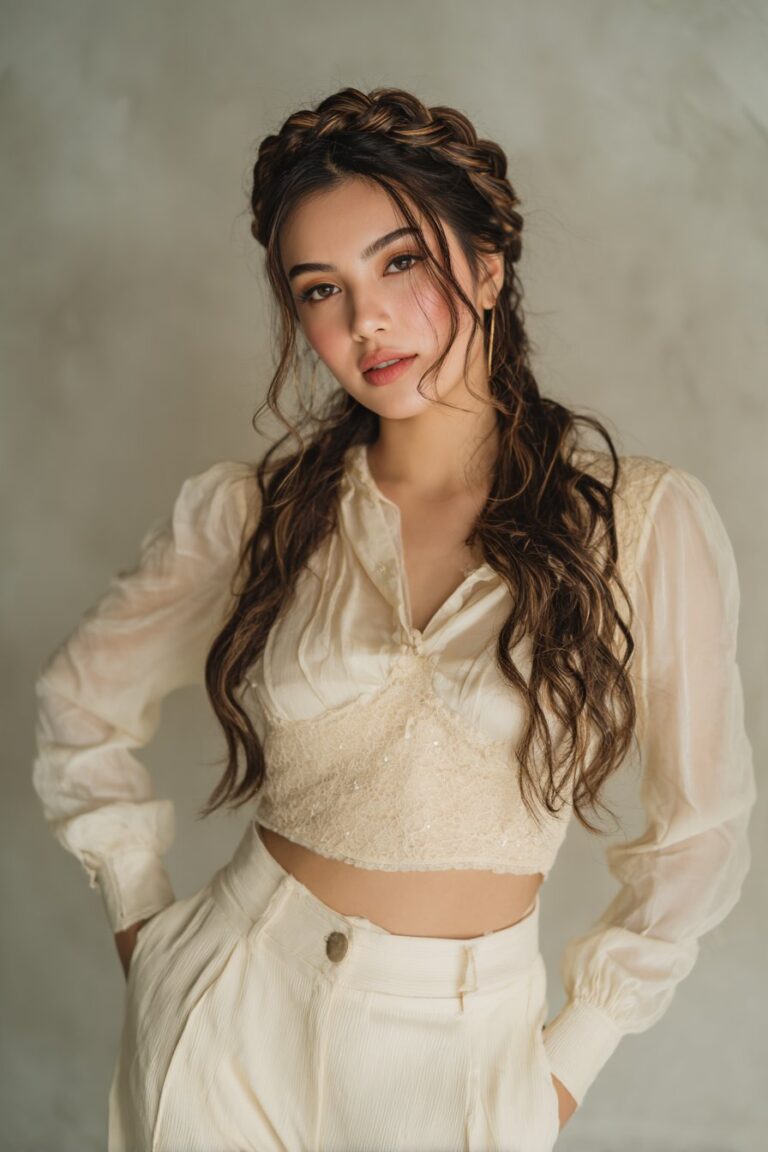
Braided Crown with Loose Waves

There’s something absolutely enchanting about a braided crown. This style never fails to make my clients feel like modern-day princesses, and honestly, who doesn’t want that?
What It Is
This hairstyle combines the intricate beauty of braiding with the soft, romantic feel of loose waves. The crown braid creates a stunning focal point while the flowing waves add movement and femininity. What I love most about this look is how it manages to be both bohemian and elegant at the same time.
I created this style for a client attending an outdoor garden wedding, and it was absolutely perfect. The braided detail looked stunning in photographs, and the loose waves moved beautifully in the breeze. She told me later that she felt like the most beautiful version of herself, and that’s exactly what I aim for with every style I create.
Best For
This style is perfect for romantic occasions—think weddings, garden parties, outdoor concerts, or special date nights. It has a whimsical quality that works beautifully for spring and summer events. I’ve also created this look for clients attending music festivals who wanted something pretty but practical.
The braided crown style is particularly flattering for those with oval or heart-shaped faces, as it adds width at the crown and creates beautiful balance. If you have fine hair, the braiding can actually make your hair appear fuller and more voluminous. For those with thick hair, this style helps manage your volume while still looking gorgeous.
How to Create This Look
Let me share my step-by-step process. Begin by creating loose waves throughout your hair using a curling wand. I prefer larger sections for this—about one and a half inches—to create those soft, romantic waves rather than tight curls.
Once your hair is waved, create a deep side part. Take a section of hair from the heavier side of your part, right at the hairline, and divide it into three strands. Begin braiding along your hairline, working toward the opposite ear. As you braid, pick up small sections of hair to incorporate into your braid—this is basically a Dutch or French braid technique.
Continue braiding along your hairline until you reach the opposite side. Here’s my trick: don’t make the braid too tight or perfect. Gently pull at the edges of the braid to loosen it and create more volume and texture. Secure the end with a small elastic that matches your hair color, then tuck and pin the end behind your ear, hiding it within your waves. Use bobby pins to secure the braid in place, and finish with a flexible-hold hairspray to keep everything in place while still allowing natural movement.
High Ponytail with Sleek Finish

Let’s talk about power, confidence, and that effortlessly chic vibe. The high ponytail with a sleek finish is a style that never goes out of fashion, and for good reason.
What It Is
This hairstyle is all about creating length and elegance while keeping things practical and polished. The high placement of the ponytail lifts your features and creates a youthful, energetic vibe. The sleek finish adds sophistication, transforming what could be a casual gym style into something red-carpet worthy.
I love creating this look because it’s so transformative. I’ve had clients come in feeling tired and stressed, and after I create this style, they literally stand taller. There’s something about pulling your hair up high that makes you feel more confident and ready to take on the world.
Best For
This is my go-to recommendation for clients who have long days ahead of them and need their hair to stay perfect from morning to night. It’s ideal for professional settings, active days when you need your hair out of your face, evening events, or even just running errands when you want to look put-together.
The high ponytail is universally flattering, but it particularly suits those with longer faces as it adds balance. If you have a round face, the height can help elongate your appearance. The key is ensuring the ponytail is positioned at the crown of your head, not too far back.
How to Create This Look
Here’s my professional technique. Start with hair that has some grip to it—either freshly washed with some texturizing product or second-day hair works great. If your hair is very slippery and fine, a bit of dry shampoo at the roots will help everything stay in place.
Brush all your hair up toward the crown of your head, using a boar bristle brush for the smoothest finish. Tilt your head back as you do this—it helps get the ponytail positioned at the highest point. Secure with a strong elastic that matches your hair color.
Now here’s the trick that makes all the difference: take a small section of hair from the underside of your ponytail and wrap it around the elastic to hide it. Secure the end with a bobby pin underneath the ponytail where it won’t be visible. This small detail makes the style look so much more polished and professional.
For extra sleekness, apply a small amount of smoothing serum to your hands and smooth over the entire style. Use a clean toothbrush with a bit of hairspray to tame any flyaways at the hairline. If you want extra volume in your ponytail, gently tease it with a comb, or curl the lengths for a more glamorous finish.
Messy Low Bun with Face-Framing Pieces

Let me share one of my absolute favorite undone-but-still-gorgeous styles. The messy low bun with face-framing pieces is the epitome of effortless beauty.
What It Is
This style embraces texture, movement, and that perfectly imperfect aesthetic that’s so popular right now. The messy element makes it approachable and relaxed, while the face-framing pieces add softness and romance. What I love about this look is that it appears effortless, even though there’s actually quite a bit of technique involved in making it look naturally messy.
I remember creating this style for a client who was nervous about her hair looking too done. She wanted to look beautiful but not like she’d tried too hard. This style was absolutely perfect for her, and she ended up loving how relaxed and pretty it made her feel.
Best For
This is ideal for casual events, brunch dates, outdoor activities, beach weddings, or really any occasion where you want to look put-together but relaxed. I’ve created this look for clients heading to art gallery openings, casual dinner parties, and even for everyday wear when they want to feel a bit special.
The messy low bun works beautifully with all face shapes because the face-framing pieces can be customized to flatter your specific features. For square faces, I leave softer, wispier pieces around the jawline. For round faces, longer, more angular pieces work wonderfully.
How to Create This Look
Let me walk you through my technique. Start with hair that has some texture—if your hair is very straight, add some waves with a curling iron or let your hair air-dry with some texturizing spray. The key to this style is starting with texture rather than sleek, straight hair.
Leave out some face-framing pieces before you gather your hair—I usually pull out sections from about mid-ear forward on both sides. Gather the rest of your hair at the nape of your neck into a low ponytail, but don’t make it too tight or smooth. The messier the better at this stage.
Twist the ponytail loosely and wrap it around the base to create a bun. As you wrap, leave some pieces sticking out and don’t worry about making it perfect. Secure with bobby pins, but again, don’t overdo it—you want the bun to look soft and touchable, not rigid.
Here’s my secret: once the bun is secured, gently pull at different sections to loosen it and create more volume and texture. Pull out a few random pieces to add to that undone effect. For the face-framing pieces, I like to use a curling wand to add some soft bends and curves. Finish with a light texturizing spray, and whatever you do, resist the urge to perfect it too much. The beauty is in the imperfection.
Side-Swept Curls with Volume

Let’s dive into one of the most glamorous styles I’ve ever had the pleasure of creating. Side-swept curls with volume are pure Hollywood elegance.
What It Is
This hairstyle is all about drama, sophistication, and making a statement. The side-swept element adds asymmetry and interest, while the voluminous curls create movement and dimension. When I create this look, I’m always channeling those glamorous icons who knew how to make an entrance.
I created this style for a client before a major gala event, and the transformation was incredible. The way the curls cascaded over her shoulder, catching the light with every movement, was absolutely stunning. She told me she’d never felt more beautiful or confident, and that’s exactly the effect this style has.
Best For
This is my top recommendation for formal events where you want to make a lasting impression—think galas, award ceremonies, upscale weddings, or milestone celebrations. It photographs beautifully, making it perfect for events where you know you’ll be taking lots of pictures.
This style is particularly flattering for those with oval or heart-shaped faces, as the asymmetry adds balance and interest. If you have a long face, the volume adds width and creates better proportions. The sweeping curls also beautifully frame and highlight your features.
How to Create This Look
Here’s my professional approach. Start with freshly washed and completely dry hair. Apply a volumizing mousse to your roots and work it through to your ends. Using a large round brush, blow-dry your hair while lifting at the roots to create that base volume.
Create a deep side part, placing it where you naturally have the most volume. Section your hair and begin curling with a large barrel curling iron—I prefer one and a half inch barrels for this look. Curl all your hair away from your face, holding each curl for about ten seconds before releasing.
Here’s the crucial step: after releasing each curl, immediately pin it to your head in its curled shape and let it cool completely. This sets the curl pattern and creates curls that will last all night. Once all curls have cooled, remove the pins and gently brush through the curls with a paddle brush to create those gorgeous, flowing waves.
Sweep all your hair to one side, securing it with bobby pins behind your opposite ear. Gently tease the crown area for extra volume, then smooth the top layer over the teasing to hide it. Finish with a flexible-hold hairspray, focusing on the roots for lasting volume. The result is pure glamour.
Braided Ponytail with Textured Ends

This style is one of my favorites when I want to add a unique twist to a classic look. The braided ponytail with textured ends is edgy, interesting, and surprisingly versatile.
What It Is
This hairstyle combines the neat, structured element of braiding with the fun, playful texture of the ponytail ends. The contrast between the smooth braid and the textured ends creates visual interest and dimension. I love how this style can be both sporty and elegant, depending on how you accessorize it.
What makes this look special is how it elevates a simple ponytail into something much more interesting and intentional. I’ve created this for clients who want something different but not too complicated, and it always delivers that perfect balance.
Best For
This style works wonderfully for active days when you need your hair completely secured but still want to look stylish. Think gym sessions, yoga classes, running errands, or casual outings with friends. I’ve also created more polished versions of this style for semi-formal events.
The braided ponytail suits most face shapes, but it’s particularly great for those with round or square faces as the vertical line of the braid can help elongate the appearance of your face. If you have fine hair, the braid can make your ponytail appear fuller and more substantial.
How to Create This Look
Let me share my technique. Start by creating a high or mid-height ponytail, securing it with a strong elastic. The height is up to you—higher for a more energetic look, mid-height for something more sophisticated.
Take your ponytail and divide it into three equal sections. Create a simple three-strand braid all the way down to the ends, securing with a small elastic. Here’s my trick for making it look more interesting: gently pull at the edges of the braid to loosen it and create more width and texture. This prevents it from looking too tight or severe.
For the textured ends, leave about two to three inches unbraided. Use a curling wand or flat iron to add some bends and waves to these loose ends. You can also use a texturizing spray and scrunch the ends with your fingers for a more undone effect.
If you want to hide the elastic at the base of your ponytail, take a small section of hair from underneath and wrap it around the elastic, securing with a bobby pin. This small detail really elevates the entire look. Finish with a light hairspray to keep the braid in place while still allowing the textured ends to move naturally.
Loose Natural Waves with Middle Part

Sometimes the most beautiful styles are the ones that look like you just woke up with perfect hair. Loose, natural waves with a middle part embody this effortless aesthetic perfectly.
What It Is
This hairstyle is all about embracing texture, movement, and that beachy, relaxed vibe that never goes out of style. The middle part creates symmetry and balance, while the loose waves add softness and dimension. What I absolutely love about this look is how it enhances your natural beauty without looking overdone or trying too hard.
I’ve created this style countless times for clients who want to look beautiful but natural. There’s something so appealing about hair that moves and flows naturally, catching the light and creating that lived-in, effortless beauty.
Best For
This is perfect for everyday wear, casual outings, beach days, outdoor events, or really any occasion where you want to look pretty without looking like you spent hours on your hair. It’s also ideal for those who are growing out their hair or transitioning between styles.
The middle part with loose waves is incredibly flattering for most face shapes, but it particularly suits those with oval faces as it highlights natural symmetry. If you have a diamond-shaped face, this style beautifully balances your features.
How to Create This Look
Here’s how I achieve this look in my studio. Start with damp hair and apply a sea salt spray or texturizing mousse from roots to ends. This is crucial for creating that natural, piecey texture.
Create a precise middle part while your hair is still damp. Then, twist sections of your hair and blow-dry them in the twisted position. This creates natural-looking bends and waves without using any heat styling tools. Alternatively, you can braid damp hair and let it air dry for softer waves.
If you prefer using heat, take random sections of hair and wrap them around a curling wand, alternating the direction of the curls. Don’t curl every section—leave some straight for a more natural, varied texture. The key is inconsistency. Perfect uniformity doesn’t look natural.
Once your waves are created, flip your head upside down and shake everything out with your fingers. Spray with a texturizing spray and scrunch your hair to enhance the waves and add definition. The goal is hair that looks like it naturally dried this way, so resist the urge to brush or comb it. The more you leave it alone, the better it looks.
Twisted Half-Updo with Soft Waves

Let me introduce you to one of the most romantic and feminine styles in my repertoire. The twisted half-updo with soft waves is delicate, pretty, and incredibly versatile.
What It Is
This hairstyle combines the elegant detail of twisted sections with the soft, romantic quality of flowing waves. The twists add visual interest and keep hair off your face, while the waves create movement and dimension. I love how this style manages to be both intricate and effortless at the same time.
When I create this look for clients, they always comment on how special it makes them feel. There’s something about the delicate twists that feels very intentional and thoughtful, yet the overall effect is soft and approachable.
Best For
This style is ideal for weddings, bridal showers, garden parties, romantic dates, or any occasion where you want to look feminine and elegant. It photographs beautifully from every angle, making it perfect for events where pictures will be taken.
The twisted half-updo works wonderfully with all face shapes because you can adjust the placement and size of the twists to flatter your specific features. For round faces, I create height at the crown with the twists. For longer faces, I keep the twists more horizontal to add width.
How to Create This Look
Let me walk you through this beautiful style. Start by creating soft waves throughout your hair using your preferred method—curling iron, wand, or even braiding damp hair and letting it dry. The waves should be loose and romantic, not tight or springy.
Take a section of hair from one side of your head, starting about two inches back from your hairline. Divide this section into two parts and twist them around each other, working toward the back of your head. As you twist, pick up small sections of hair to incorporate into your twist—similar to the technique used in a French braid, but with only two sections instead of three.
Secure the twist with bobby pins at the back of your head, roughly at the crown area. Repeat this process on the opposite side, twisting toward the back and securing at the same point as the first twist. Here’s my trick: gently pull at the twists to loosen them and create more volume and texture. This prevents them from looking too tight or severe.
You can either let the two twists meet at the center back and secure them together, or cross them over each other for a more intricate look. Hide the bobby pins with loose pieces of hair from your waves. Finish with a light hairspray, and you’ve got a style that’s both elegant and romantic.
Slicked Back Wet Look

Now let’s talk about a style that’s bold, modern, and absolutely striking. The slicked back wet look is for those days when you want to make a statement and show off your confidence.
What It Is
This hairstyle is all about embracing a sleek, modern aesthetic. The wet look creates shine and dimension while the slicked-back style puts all the focus on your face and features. I love how this look is unapologetically bold—it’s not trying to be soft or romantic; it’s powerful and confident.
I created this style for a client attending a contemporary art opening, and it was absolutely perfect for the setting. The modern, edgy vibe of the hairstyle complemented her outfit and the event perfectly. She told me she felt like a completely different person—more confident and daring than usual.
Best For
This style is perfect for fashion-forward events, contemporary parties, music concerts, or nights out when you want to try something different and edgy. It’s also great for hot summer days when you want your hair completely off your face but still want to look intentional and styled.
The slicked-back wet look particularly suits those with strong, defined features as it puts them on full display. If you have an oval or diamond-shaped face, this style will beautifully highlight your bone structure. It’s also perfect for those with shorter hair who want to create a sleek, polished look.
How to Create This Look
Here’s my technique for achieving the perfect wet look. Start with either freshly washed, damp hair or dry hair that’s been spritzed with water to make it workable. Apply a generous amount of strong-hold gel to your hair, working it through from roots to ends.
Using a fine-toothed comb, slick all your hair straight back from your hairline. Take your time with this step, ensuring everything is smooth and sleek with no bumps or sections sticking out. The key is creating one smooth surface.
Here’s my secret for that authentic wet look: apply more gel than you think you need. The shine and defined texture come from the product, so don’t be shy about using enough. Once everything is slicked back, you can either leave it down, tuck it behind your ears, or secure it into a low ponytail or bun.
For extra hold and shine, finish with a high-shine finishing spray or serum. The beauty of this style is that it looks better as it dries, maintaining that wet appearance while actually being dry to the touch. It’s a style that definitely makes a statement, so wear it with confidence.
Voluminous Blowout with Flipped Ends

Let me share one of the most classic, timeless styles that never fails to make my clients feel absolutely gorgeous. The voluminous blowout with flipped ends is pure elegance and sophistication.
What It Is
This hairstyle combines the bouncy, voluminous quality of a professional blowout with the playful, retro charm of flipped ends. The volume creates lift and movement, while the flipped ends add a touch of vintage-inspired glamour. I love how this style manages to be both classic and fresh at the same time.
Creating this look always reminds me of those iconic beauty moments from past decades, but with a modern twist that makes it relevant and wearable today. There’s something so special about that perfect flip at the ends—it’s feminine, fun, and incredibly flattering.
Best For
This style is perfect for special occasions, professional events, lunch dates, milestone celebrations, or really any time you want to feel polished and put-together. It’s the kind of style that makes you feel like you just stepped out of a salon, which is exactly the confidence boost we all need sometimes.
The voluminous blowout works beautifully with most face shapes, but it’s particularly flattering for those with round or square faces as the volume and flipped ends create a nice elongating effect. If you have fine hair, this style can make your hair appear much fuller and more luxurious.
How to Create This Look
Here’s my professional technique. Start with freshly washed hair and apply a volumizing mousse to your roots and a heat protectant throughout your lengths. Rough-dry your hair until it’s about eighty percent dry, then section it for the blowout.
Here’s the trick for the flipped ends: when you get to the ends of each section, roll the round brush under and hold it there with heat for a few seconds. This creates that perfect flip. Make sure you’re consistent with the direction—all flips should go in the same direction for a polished look.
Once your entire head is blown out, gently brush through with a paddle brush to smooth everything together. For extra volume at the crown, gently tease that area with a fine-toothed comb, then smooth the top layer over the teasing. Finish with a light, flexible-hold hairspray that won’t weigh down your volume. The result is bouncy, voluminous hair with those perfect flipped ends that never go out of style.
Asymmetrical Style with One Side Tucked

Let’s talk about a style that’s edgy, modern, and perfect for those who want to try something a little different. The asymmetrical style with one side tucked is all about creating interesting visual balance.
What It Is
This hairstyle plays with proportion and balance in the most interesting way. By tucking one side behind your ear and letting the other side flow freely, you create an asymmetrical look that’s both edgy and elegant. I love how this style allows you to show off earrings on one side while still having the romance of flowing hair on the other.
I created this style for a client who wanted something unique for a contemporary event, and it was absolutely perfect. The asymmetry added visual interest to every angle, and she loved how it made her feel both sophisticated and a little bit daring.
Best For
This is ideal for fashion-forward events, cocktail parties, date nights, or any occasion where you want to stand out in a subtle but interesting way. It’s also perfect for showing off statement earrings on one side while keeping the overall look balanced and intentional.
The asymmetrical style works particularly well for those with heart-shaped or oval faces, as it creates interesting angles and highlights your features. If you have beautiful cheekbones or a strong jawline, this style will absolutely showcase them.
How to Create This Look
Here’s how I create this style. Start with hair that has some texture and volume—either add waves with a curling iron or enhance your natural texture with styling products. The key is having hair that has body and movement.
Create a deep side part, placing it where you have the most natural volume. Take all the hair on the lighter side of your part and smooth it back behind your ear. Here’s my trick: use several bobby pins to secure this section, placing them horizontally along the curve of your ear. This keeps everything sleek and in place.
The other side should flow freely with all your waves and volume. You can add extra curl or texture to this side if you want to emphasize the contrast even more. Finish with a strong-hold hairspray to keep the tucked side in place throughout the day or night. The beauty of this style is in the contrast between the two sides, so really play that up.
Conclusion
Beautiful, we’ve just explored fourteen stunning hairstyles together, and I hope you’re feeling inspired and excited to try something new. Throughout my years creating looks for countless clients, I’ve learned that the right hairstyle isn’t just about looking good—it’s about feeling confident, expressing yourself, and embracing who you are.
I remember when I first started my journey in the beauty industry. I was intimidated by all the different techniques and styles. But here’s what I’ve learned: hair styling isn’t about perfection. It’s about expression. It’s about trying new things, making mistakes, learning what works for you, and most importantly, having fun with it.
These fourteen styles are just a starting point. Take them as inspiration and make them your own. Add your personal twist. Adjust them to suit your unique features, your hair type, your lifestyle. Maybe you’ll combine elements from different styles to create something completely unique. That’s the beauty of hair—it’s your canvas, and you’re the artist.
Remember that your hair should evolve with you, reflecting your mood, your growth, and your journey. Some days you might want sleek and professional. Other days, you might crave something romantic and soft. And sometimes, you just want to be bold and try something completely different. All of that is not only okay—it’s wonderful.
I’ve shared my techniques, my tricks, and my professional secrets with you today. But the truth is, you don’t need to be a professional to create beautiful hair. You just need patience, practice, and a willingness to experiment. Don’t be afraid to try something new. Don’t be discouraged if it doesn’t work perfectly the first time.
I encourage you to be brave with your hair. Try that bold wet look even if it’s outside your comfort zone. Create those romantic braided crowns even if you think your braiding skills aren’t perfect yet. Pull your hair back into that sleek bun and show the world your beautiful face. Each style is an opportunity to discover something new about yourself.
Throughout my journey in this industry, from my early days in New York to my work in Los Angeles, I’ve learned that beauty truly comes from within. But there’s absolutely nothing wrong with enhancing that inner beauty with a gorgeous hairstyle that makes you feel amazing. In fact, I believe it’s one of the most wonderful forms of self-care.
So go ahead, beautiful. Grab your styling tools, stand in front of that mirror, and create something amazing. Whether you’re getting ready for the most important event of your life or just another Tuesday, you deserve to feel gorgeous. You deserve to look in the mirror and love what you see. And with these fourteen styles in your arsenal, you have endless possibilities to do exactly that.