
Your child’s First Communion hairstyle can transform one of the most important moments in their religious experience. Parents often feel overwhelmed when they try to find that perfect look for this special day. I’ve seen this countless times as a professional hairstylist.
Classic updos never go out of style. We’ve found that braided styles and half-up half-down arrangements look just as beautiful. Your daughter might love a traditional bun with a delicate veil or an elegant crown braid. I’ve put together 15 stunning options that blend beauty with practicality. These hairstyles look gorgeous and stay perfectly in place throughout the celebration. My years of styling young girls for First Communion ceremonies have taught me this.
These carefully chosen hairstyles will help your daughter feel like an angel on her special day.
Classic French Twist with Veil
The Classic French Twist remains one of my favorite communion hairstyles that I create as a professional stylist. This elegant style perfectly combines sophistication with youthful charm.
Styling Steps
The perfect French twist needs careful attention to detail. Start by brushing the hair and making a side part based on what your daughter likes. Pull all the hair to the center of the head at the time you reach the top of the ears – the position shouldn’t be too high or low. Hold the hair in your left hand and use a smoothing brush with nylon tuft bristles to get rid of any bumps or flyaways.
Take the gathered hair and twist it up over your index and middle fingers. Make a half-turn to the right and pull it upward. The twist needs 8-10 hairpins to stay in place. Work from right to left along the edge. The style needs extra security, so comb the right side hair over to the left and tuck it into the vertical part of the twist with pins placed perpendicular.
Veil Placement Tips
The veil sits best between the face-framing style and the beginning of the twist. This creates a natural pocket that holds the veil securely. The style will last through the ceremony if you:
- Create a strong foundation with gentle teasing
- Use the right styling products for grip
- Place additional bobby pins in key spots
Best Hair Types
My years of experience show that the French twist works beautifully with hair of all types. This adaptable style suits:
- Straight, wavy, or curly textures
- Fine to thick hair densities
- Short to long lengths
Fine, slippery hair needs dry shampoo or thickening spray before styling. Curly hair looks best when you work with its natural texture instead of trying to change it. Straight hair that tends to slip stays better with specially coated bobby pins or pins sprayed beforehand.
A light mist of hairspray keeps the style in place during the celebration. Focus on securing small flyaways. This classic look matches both traditional and modern communion dresses and creates timeless photos.
Elegant Crown Braid
My years of styling hair for special occasions have taught me that the elegant crown braid makes a perfect choice for First Communion celebrations. This timeless style combines sophistication with youthful charm and creates a natural crown that works beautifully with a communion veil.
Braiding Technique
The crown braid uses the Dutch braiding technique, where you cross strands under instead of over. The best results come when you start behind the right ear with a 2-inch section of hair. Split the hair into three parts and keep the middle section slightly thinner than the outer pieces.
As you braid, focus on:
- Adding hair from the front only to maintain a clean, simple look
- Crossing sections under rather than over
- Curving the braid around the head naturally
Adding the Crown
The perfect crown depends on proper placement and securing techniques. Place the braid high enough to create a natural crown effect, but not too close to the forehead. You can gently pull on the outer edges of the braid – a technique called “pancaking” – to create a fuller, more sophisticated look.
To boost stability:
- Secure with small, clear elastics that match the hair color
- Use bobby pins strategically underneath the braid
- Tuck ends carefully beneath the crown
Styling Duration
This elegant style usually takes 5-7 minutes to complete. You should set aside extra time for your first attempts. The process might feel awkward at first since your shoulders and neck need time to adjust to the position.
The hair needs proper prep for lasting hold throughout the ceremony. Day-old hair works best because freshly washed hair can be too slippery. A bit of dry shampoo at the roots helps create extra grip and volume.
This style works great for all hair types and really shines during special occasions like First Communion ceremonies. The style gives excellent hold for active children and stays put throughout the celebration.
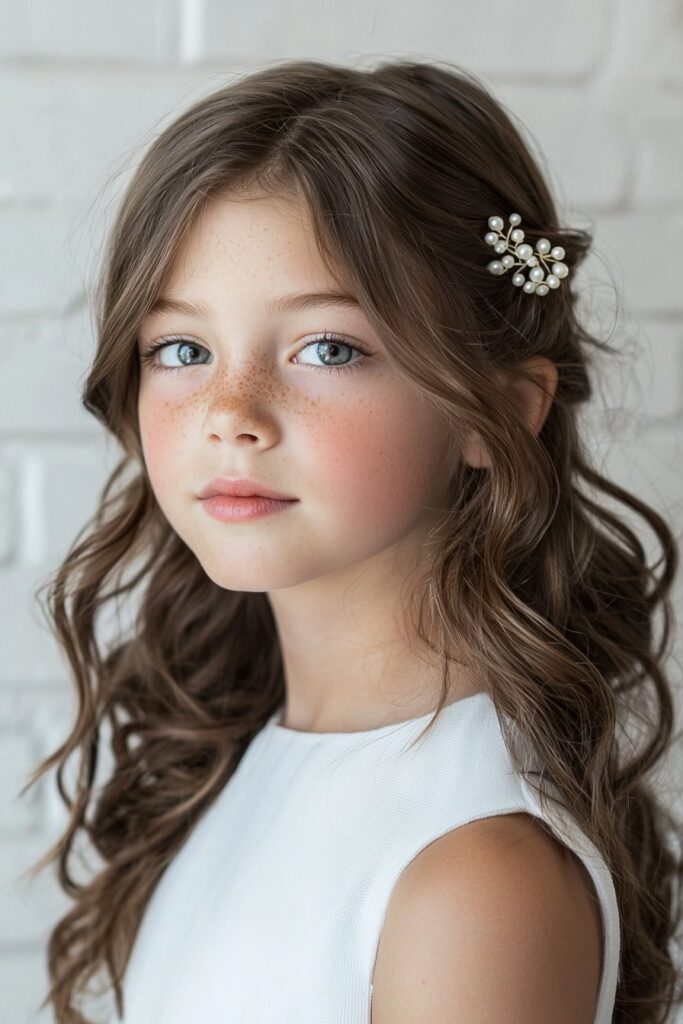
Princess-Style Half-Up Curls
My experience styling countless young girls for their special day shows that Princess-Style Half-Up Curls never fails to light up their faces. This charming hairstyle strikes the perfect balance between elegance and youthful charm that makes it a fantastic choice for First Communion celebrations.
Curling Methods
A 1-inch curling iron works best to create perfect curls. I wrap sections of hair around it as if it were clipless. The secret is to direct all curls toward the face which creates a more youthful look. I gently finger-comb the hair backward after curling to keep the curl pattern while letting it flow naturally.
Securing Techniques
Start by parting the hair just above the ears. The top section should be gathered smoothly to create a flawless half-up style. A small section of hair wrapped around the hair tie conceals it perfectly, and bobby pins ensure it stays in place.
Active children need extra stability, so I suggest:
- Clear elastic bands matching the hair color
- Bobby pins placed strategically underneath the style
- Light finishing cream to control flyaways
Accessory Options
This versatile style welcomes many accessory choices. My communion hairstyling experience has shown these options work wonderfully:
Pearl and crystal headbands cost between $7.49 and $19.99, fitting most budgets. Silver wedding headbands with delicate crystal and pearl details create the perfect angelic look. Traditional floral accessories or preserved flower headpieces frame this hairstyle beautifully.
Girls with naturally curly or wavy hair rock this style effortlessly. Straight-haired girls should sleep in rollers for curls that last longer, though a curling iron with heat protectant creates beautiful results too. Note that simple, natural styling brings out your daughter’s charm without overshadowing the ceremony’s importance.
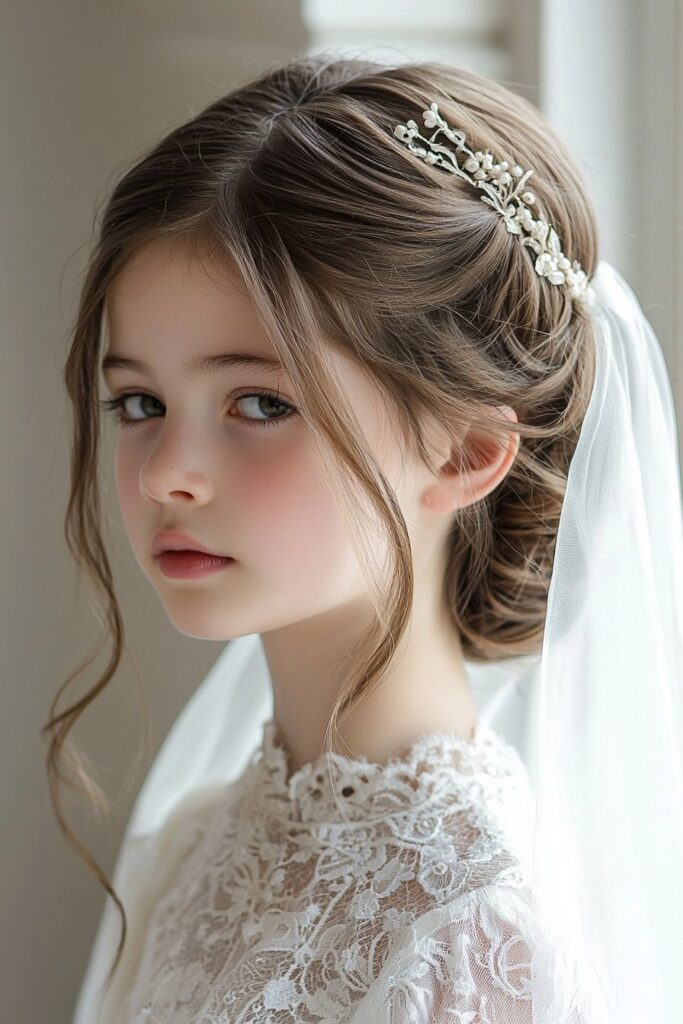
Traditional Communion Bun

My experience as a celebrity makeup artist and beauty expert has taught me that the Traditional Communion Bun stands out as a beautiful hairstyle for this sacred occasion. This timeless updo blends elegance with practicality and makes your daughter look angelic throughout the ceremony.
Bun Placement
A perfect communion bun depends on its position. The best results come from creating a high ponytail at the head’s center. The placement should balance between high and low positions to affect both the look and veil attachment. The ponytail needs a clockwise or counterclockwise twist until it forms a tight bun.
Securing Methods
The ceremony demands a lasting hold that requires these steps:
- The twisted ponytail wraps in a circular motion around the base
- Ends tuck underneath the bottom of the bun
- Strategic placement of 8-10 bobby pins around the bun
Girls with fine or slippery hair might need a hair net or extra bobby pins to keep the style intact. Your hands can shape the bun gently to create a rounded, symmetrical look.
Veil Integration
Modern bun wrap veils need careful attention during attachment. They come with special features:
- Inside loops with combs or bobby pin options
- Satin bow accents in the back
- Pearl or crystal details that add elegance
The bun wrap should center perfectly around the updo. Most veils come with a loop that helps with storage. Some styles feature delicate pearls or rhinestones that add just the right amount of sparkle to complete the look.
My years of experience have shown that this classic style works beautifully with any communion dress design. The traditional bun creates an ideal base for both simple and ornate veil styles. This versatility allows personal touches while keeping the ceremony’s sacred nature intact.
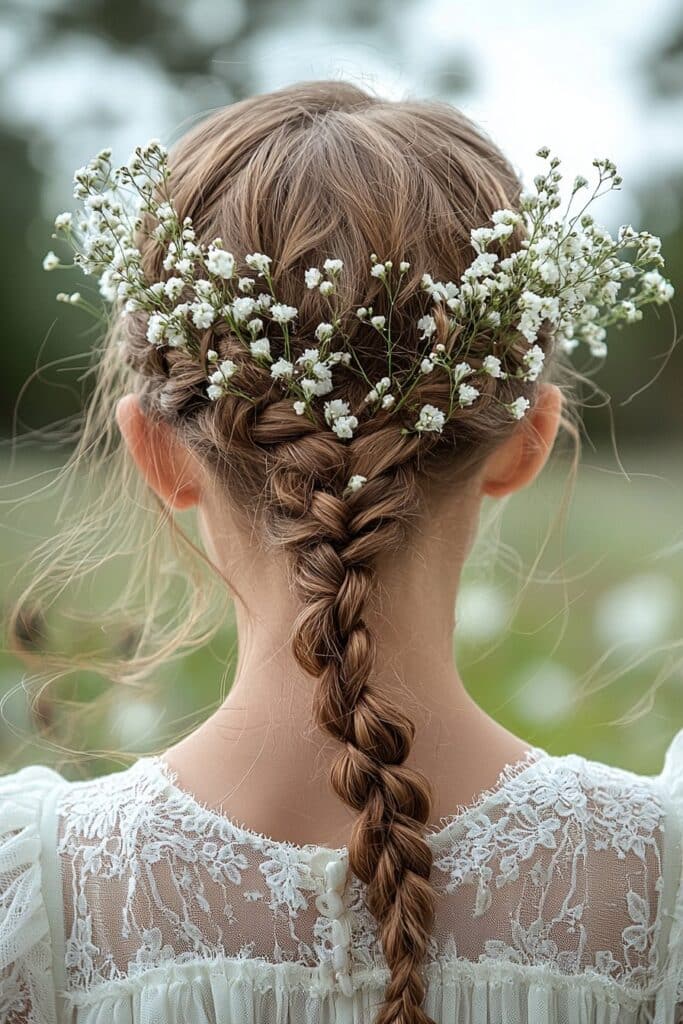
Waterfall Braid with Flowers
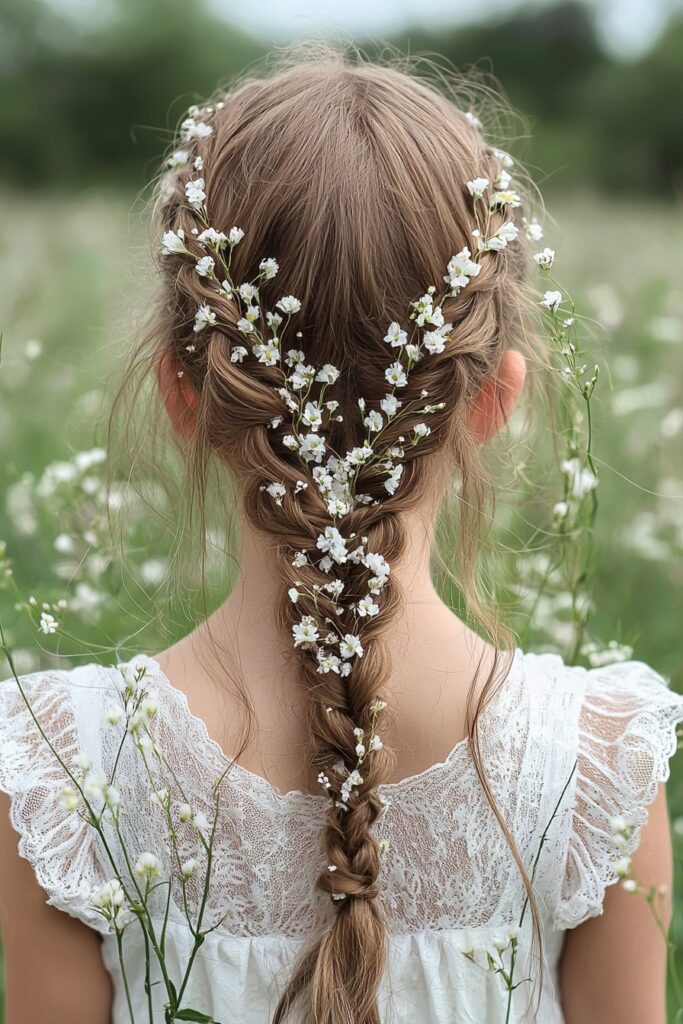
The Waterfall Braid with Flowers has been my signature style for First Communion ceremonies. My years of creating hairstyles for special occasions have taught me that this look perfectly blends elegance with youthful charm.
Braiding Pattern
A perfect waterfall braid depends on the right technique. The hair needs to be divided into three sections near the crown. My advice to beginners is to start with dry hair, though some people work better with slightly damp strands. This style differs from a traditional French braid because you drop one section and add a new strand of hair that creates the cascading effect.
The perfect flow comes from these steps:
- Start a classic French braid at the crown
- Cross the top section over and drop the bottom section
- Add new hair strands as you move forward
- Keep the tension loose for a soft, flowing look
Flower Placement
The braid completion leads to the next crucial step – strategic flower placement. I have found that small blooms secured where the waterfall strands fall create an angelic look. The best results come when you:
Place flowers along the braid’s path in a way that enhances the style without overpowering it. Each bloom needs specially coated bobby pins to stay secure throughout the ceremony.
Maintenance Tips
My experience has taught me several tricks that help this style last through the celebration.
The hair needs proper styling products for grip and control. Fine or silky hair types benefit from spray wax. The style stays put with 4-5 small bobby pins placed along the braid pattern.
Active children’s hairstyles need clear elastic bands at the braid’s end. A light mist of medium-hold hairspray keeps everything in place without making it stiff.
This style takes about 2-3 minutes to complete, which works well for busy morning preparations. Notwithstanding that, practice before the special day ensures flawless execution.
Side-Swept Elegance
I’m a celebrity makeup artist who styles hair for special occasions, and I’ve become skilled at creating perfect side-swept looks for First Communion celebrations. My young clients love this sophisticated yet age-appropriate style.
Styling Steps
The refined look starts with a deep side part. The best results come when you split the hair into two parts – one to make it sleek and another for texture. A high-hold hairspray will give lasting control throughout the ceremony.
To get the perfect balance:
- Split thicker hair into 3-4 sections for better control
- Press each section flat with palm pressure
- Use specially coated pins underneath to secure
The magic happens when you create contrast between smooth and textured sides. Once you secure the sleek portion, boost the opposite side’s texture with sea salt spray and gently scrunch it for natural movement.
Hair Accessories
Beautiful First Communion accessories will lift this style. You might want to add:
Pearl-adorned headbands ($18.84-$50.29) that bring timeless elegance. Crystal-embellished pieces match the style’s sophistication, while floral accessories ($7.92-$28.00) add youthful charm.
Best Face Shapes
My years of experience show this style works beautifully with different face shapes. Here’s what I’ve found:
Heart-shaped faces look balanced with inward-facing layers. Round faces get an elongating effect from side-swept bangs. The style’s soft edges naturally soften angular features on square faces.
Oblong faces need volume at the sides instead of height. Oval faces can rock this style with minimal changes since it naturally fits their balanced proportions.
A light mist of strong-hold hairspray keeps the look intact throughout the ceremony. Your daughter’s hairstyle will stay picture-perfect from the first prayer to the final blessing.
Double Dutch Braids
Double Dutch braids have become a popular choice for First Communion celebrations. My years of styling young girls’ hair have taught me that this style looks beautiful and stays put throughout the special day.
Braiding Technique
You’ll become skilled at Double Dutch braids by getting your hand positions right. Put the far right strand between your left hand’s pointer finger and thumb for the best control. This grip will help you make smoother transitions while braiding.
The perfect Dutch braid needs these steps:
- Split the hair into three equal sections
- Cross strands under instead of over
- Add hair from both sides bit by bit
- Keep your hands close to the head as you work
The cleanest result comes from dividing the hair from ear to crown where you want the ponytail. This creates two distinct sections and gives you better control with matching braids on both sides.
Ribbon Integration
Ribbons can make Dutch braids look extra special. Start with three hair sections and put one ribbon piece in the middle and another on the side. The ribbon will combine smoothly into the pattern as you braid, creating a beautiful mix of hair and accent piece.
Pick ribbons that go well with the dress and veil. The ribbon should boost the overall look without stealing attention from your daughter’s natural beauty.
Duration Tips
Your original Double Dutch braids might take about 30 minutes. With practice, you can finish both braids in 15-20 minutes. Here’s what works best:
Start with slightly damp hair, not wet. Wet hair can shrink up to 30% while drying and might break. A good detangling session before you start will cut down styling time substantially.
These braids usually look neat for 2-3 weeks. This makes them great for practice runs before the ceremony. Working with smaller sections creates tighter, more detailed braids that stay in place during the celebration.
For braids that last, use:
- A light water mist before braiding
- The right styling products for grip
- Clear elastic bands matching hair color
- Bobby pins in key spots
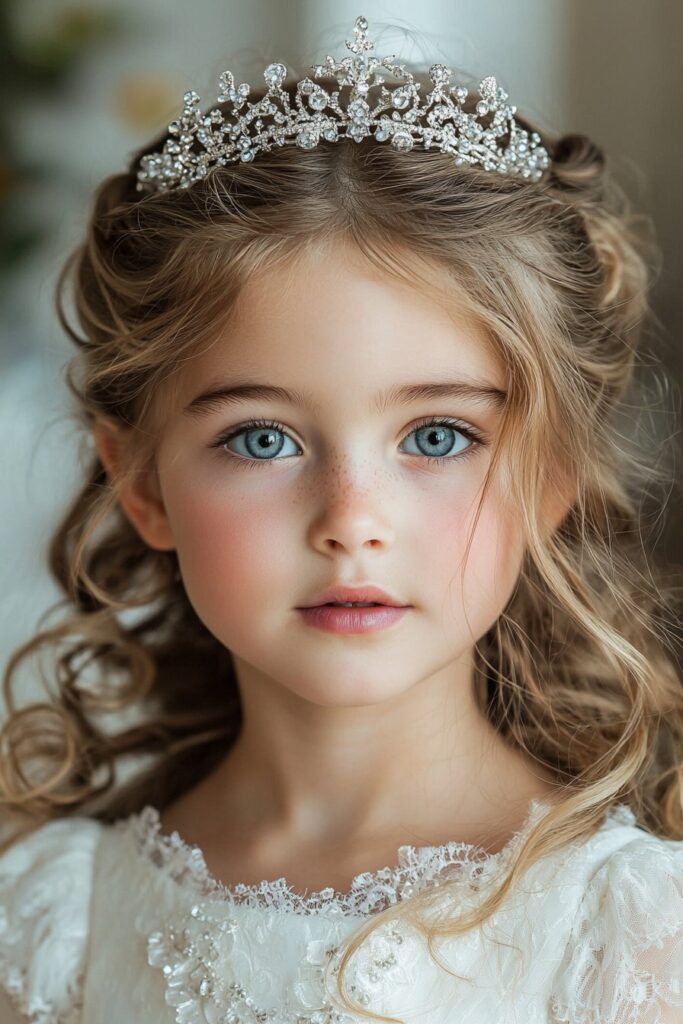
Angelic Waves with Tiara
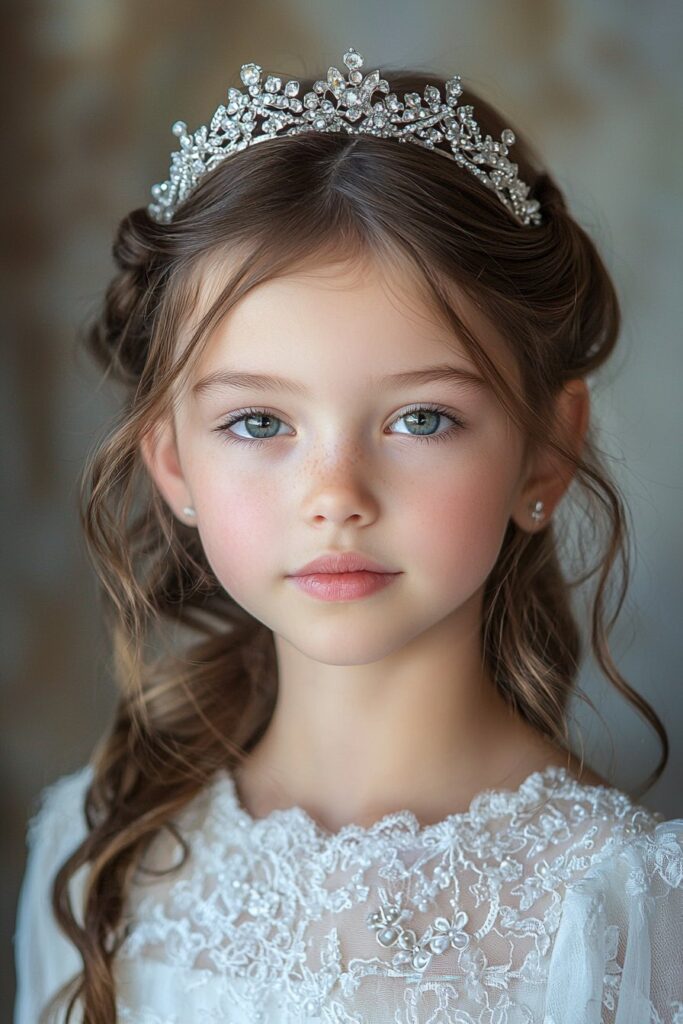
The perfect image of innocence shines through in loose, flowing waves topped with a delicate tiara. My experience as a beauty expert has led me to style countless First Communion ceremonies, and I’ve refined this angelic look that makes every young girl’s sacred day extra special.
Wave Creation
Perfect waves demand attention to detail. Your best results come from working with day-old hair since fresh-washed strands tend to slip and slide too much. Girls with naturally curly or wavy hair look especially enchanting with this style, and they need minimal heat styling.
These steps create perfect ringlets:
- Lightly mist hair with heat protectant
- Break hair into manageable sections
- Form loose curls with focus on the ends
- Let curls cool completely before styling
Success lies in balancing volume without overdoing the look. My years of experience show that overnight roller sets hold better than direct heat, especially with children’s delicate hair.
Tiara Placement
The right tiara position creates that magical look you want. The best angle sits at 45 degrees. You’ll get a secure fit by carefully shaping the tiara band to match the head’s curve, which eliminates gaps between the accessory and hair.
The market offers First Communion tiaras of all styles, with prices ranging from $14.95 to $59.90. Some showcase elegant pearl details, while others feature crystal accents that sparkle beautifully in the light.
Styling Products
These products ensure the style lasts through the ceremony:
- Medium-hold hairspray that allows natural movement
- Light styling cream to control flyaways
- Gentle hair gel to smooth the sides
The style stays secure by sliding hair grips through the tiara’s pin loops. Hair should cover any exposed band ends to create that flawless look.
This classic style pairs beautifully with traditional and modern communion dresses alike. It strikes the perfect balance between sophistication and youthful charm. Your daughter will feel confident and comfortable as her loose waves move gracefully throughout this special day.
Twisted Side Updo
My years as a beauty expert have shown that the Twisted Side Updo makes a beautiful choice for First Communion celebrations. This style brings together a sophisticated look with easy maintenance that works perfectly for young girls on their special day.
Creating the Twist
The style starts with the right sectioning technique. Make a side parting and split the hair into three clear sections from the parting line down to the ears. The best results come when you tie the center section into a low ponytail.
The twisting technique needs:
- Each section split into two parts
- Individual clockwise twists
- Sections crossed anti-clockwise
- Light tension to keep fullness
Securing Method
The style will last through the ceremony with proper securing techniques. Create small buns from each twisted section and pin them gently without too much tension. Bobby pins should go in with a hook-up-and-over motion and push back against themselves for a strong hold.
Success depends on where you place the pins:
- Put pins at natural meeting points of twists
- Keep pins hidden under twisted sections
- Thick hair might need extra pins
Accessorizing Options
The right accessories will improve this elegant style. A flower string with crocodile clips adds versatility and charm. You also have these choices:
Pearl headbands cost between $18.84 and $50.29, with many elegant options. Crystal pieces add a sophisticated touch, while floral accessories priced from $7.92 to $28.00 create a softer look.
This updo works great with both thick and fine hair types. Fine hair needs gentle teasing before twisting to add volume. The whole style takes just minutes to complete, which helps during busy morning preparations.
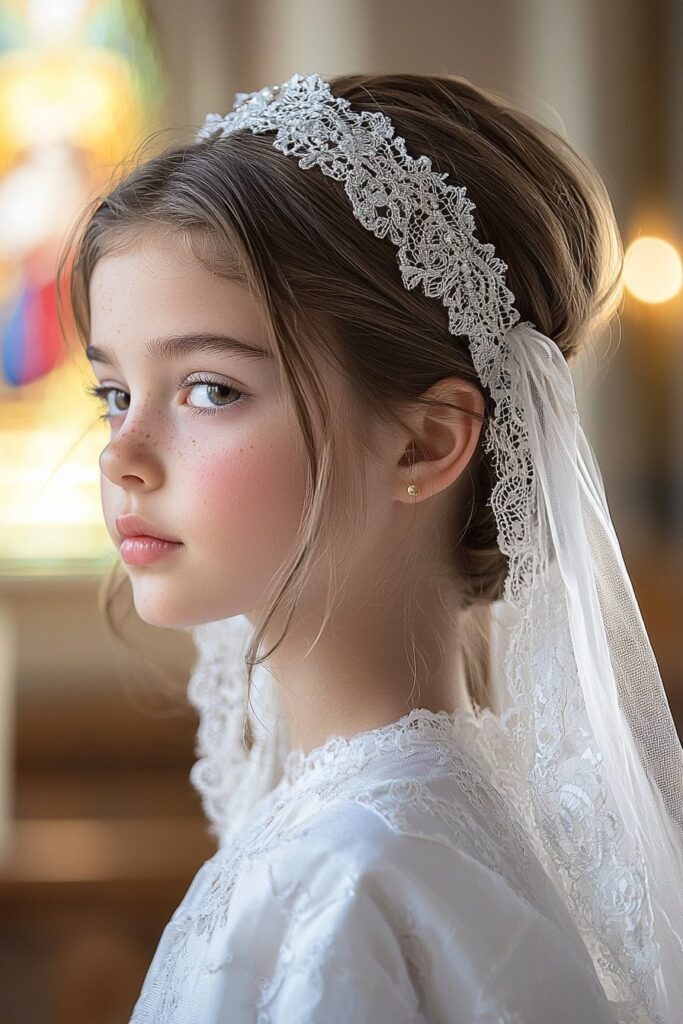
Braided Crown with Veil
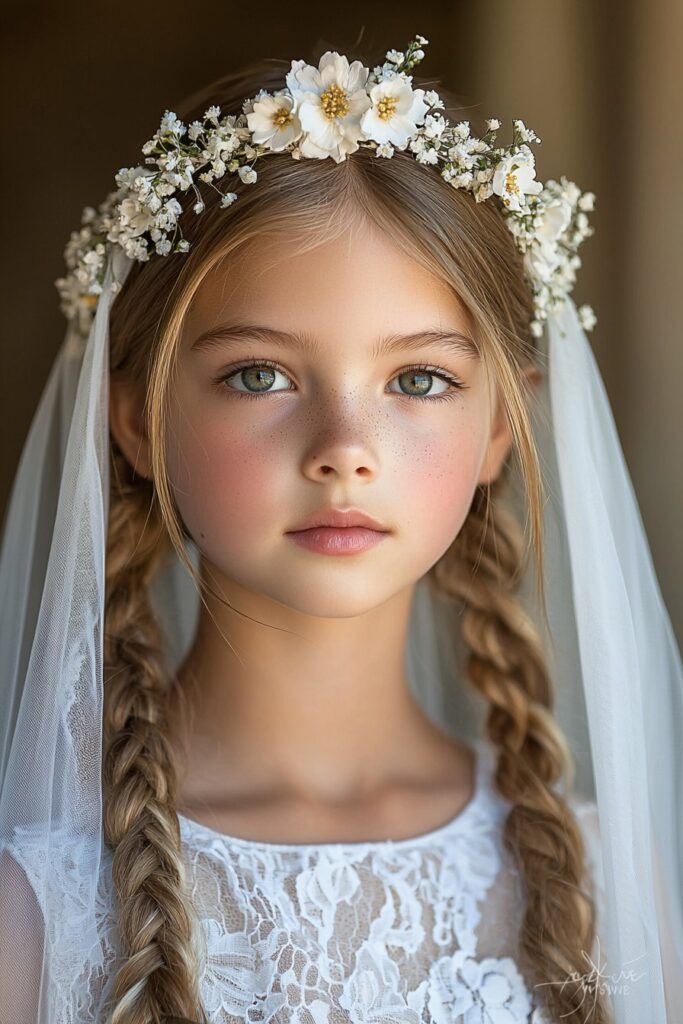
The Braided Crown with Veil stands out as one of my most requested styles. My years of experience in bridal and communion hairstyling have shown me how this Dutch-inspired design creates a beautiful halo effect. It frames young faces perfectly and gives a secure base for the communion veil.
Crown Creation
The Dutch braiding technique holds the secret to a perfect braided crown. Start with clean, detangled hair and use a rat-tail comb to divide it into manageable sections. You’ll get the best results when you start the braid behind the right ear. Pull hair from the front only – this keeps everything looking clean and polished.
You’ll need these basics:
- Medium-hold hairspray that gives grip
- 1 small hair elastic
- 2-4 bobby pins to secure everything
My favorite trick is pancaking – where you gently tug the braid’s outer edges. This simple technique turns a basic braid into a gorgeous crown that looks natural on the head.
Veil Attachment
The best spot to attach the veil is where your braids meet. Today’s communion veils come with:
- Inside loops that hold bobby pins
- A double-layer design for fullness
- Elegant satin bow accents
Place the veil slightly back from the forehead, right where a headband would sit naturally. Your little one will stay comfortable during the ceremony and look absolutely angelic.
Maintenance Tips
This beautiful style takes just 5-7 minutes to create and stays put all day. Here’s how to make it last through the celebration:
Start by lightly misting the hair with water. Secure any flyaways with coated bobby pins that match the hair color. The style works great for active kids because the tight braiding keeps everything secure during the ceremony.
The crown braid works beautifully on hair of all types and textures. Whether your child has straight or curly hair, this style creates a strong foundation for traditional communion veils and keeps its shape throughout the celebration.
Soft Romantic Curls

Romantic curls hold a special place in my heart when I style young girls’ hair for their First Communion. My career as a beauty expert has taught me that this timeless look captures the innocence and grace of this sacred occasion perfectly.
Curling Technique
These angelic curls need precision and patience to create. Start with damp hair and add volume spray before blow-drying to create a strong foundation. A 1-inch curling iron works best – wrap hair sections toward the face to achieve a more youthful look.
The magic happens when you keep the curl sizes consistent. Cup each curl in your palm and let it cool completely. This simple step will give you longer-lasting results. Next, finger-comb the curls backward with a light touch to keep their natural pattern intact.
Product Recommendations
My years of experience point to these must-have products that create the perfect base:
- Living Proof Flex Shaping Hairspray gives flexible hold
- Bumble and Bumble Hairdressers Invisible Oil adds shine and controls frizz
- Ways Volume Spray creates body and fullness
Girls with naturally curly hair should work with their texture instead of fighting it. A light mist of setting spray helps the style stay put during the ceremony.
Securing Methods
The right securing technique makes these romantic curls last through every special moment. Section the hair with professional-grade clips. A bungee band adds stability – just wrap a small section of hair around it to hide the elastic.
Place bobby pins under the curls where they naturally fall. This hidden support keeps the hairstyle’s soft, flowing appearance. A light finishing spray on frizz-prone areas completes the look.
My experience shows this adaptable style works beautifully with traditional and modern communion dresses. The secret is creating soft, touchable curls that move naturally, so your daughter feels comfortable and confident on her special day.
Classic Chignon
My years of working with brides and young girls getting ready for First Communion has shown that the Classic Chignon stands out as an elegant choice. This graceful updo brings a timeless beauty that perfectly matches the occasion’s significance. The style strikes just the right balance between formal and youthful charm.
Styling Steps
A perfect chignon needs careful attention. Start by smoothing the hair with a moisturizing spray to get rid of any knots. The next step creates a high ponytail right at the center of your head. Make sure it’s secured tightly – this forms your foundation.
The key steps include:
- Twist the ponytail clockwise until it forms a tight bun
- Wrap the twisted part around the base
- Tuck any loose ends under
- Place bobby pins at strategic points
A hair net over the entire bun adds extra hold. Pin it carefully to keep everything neat. The final touch involves gentle adjustments to create a rounded, even shape.
Accessory Options
The right First Communion accessories make this classic style shine. You might want to add:
- Pearl headbands that range from $18.84 to $50.29
- Crystal pieces that add sparkle
- Floral touches priced between $7.92 and $28.00
Bun wrap veils made specifically for communion ceremonies blend perfectly with this hairstyle. These veils often come with delicate pearl details and sparkling rhinestones that catch light beautifully.
Best Hair Types
The classic chignon works great with different hair textures. Fine hair looks better with a bun enhancer from beauty supply stores. Curly or wavy hair creates beautiful texture in the style. Straight hair gives you a smooth, polished look.
The right styling products help keep everything in place during the ceremony. This versatile updo pairs beautifully with both modern and traditional communion dresses. It creates a perfect base for veils or other hair accessories.
Ribbon-Woven Braid
My experience with countless young girls preparing for their First Communion shows the Ribbon-Woven Braid gives a delightful blend of tradition and charm. This enchanting style became a favorite among my clients after I learned it during my early days in Savannah.
Weaving Technique
A perfect ribbon-woven braid depends on placing materials precisely. You’ll need two different colors of 3/8-inch wide ribbon. Start by making parallel loops that don’t cross at first. My experience shows dry hair gives better control, especially with younger clients.
To get the best results:
- Place opposite ribbons inside each hole
- Keep tension even throughout
- Make your loops uniform as you go
Ribbon Selection
The right ribbons make a big difference in how the final style looks. My expertise tells me ribbons should match both the dress and veil. Quality ribbons cost between $7.49 and $19.99, so you’ll find options that fit any budget.
Securing Tips
This intricate style needs careful attention to detail. E6000 craft glue or a hot glue gun works great for attaching ribbons. The style should last through the ceremony if you follow these tips from my experience:
Leave extra ribbon length before cutting because adding loops later becomes tricky. Plastic headbands work best when they’re 5/8-inch wide for better stability.
The style takes about 2-3 minutes to complete once you’re skilled at it. Of course, practice runs help ensure everything goes smoothly on the special day. The style’s versatility lets you create endless color combinations, which makes it perfect for your daughter’s First Communion look.
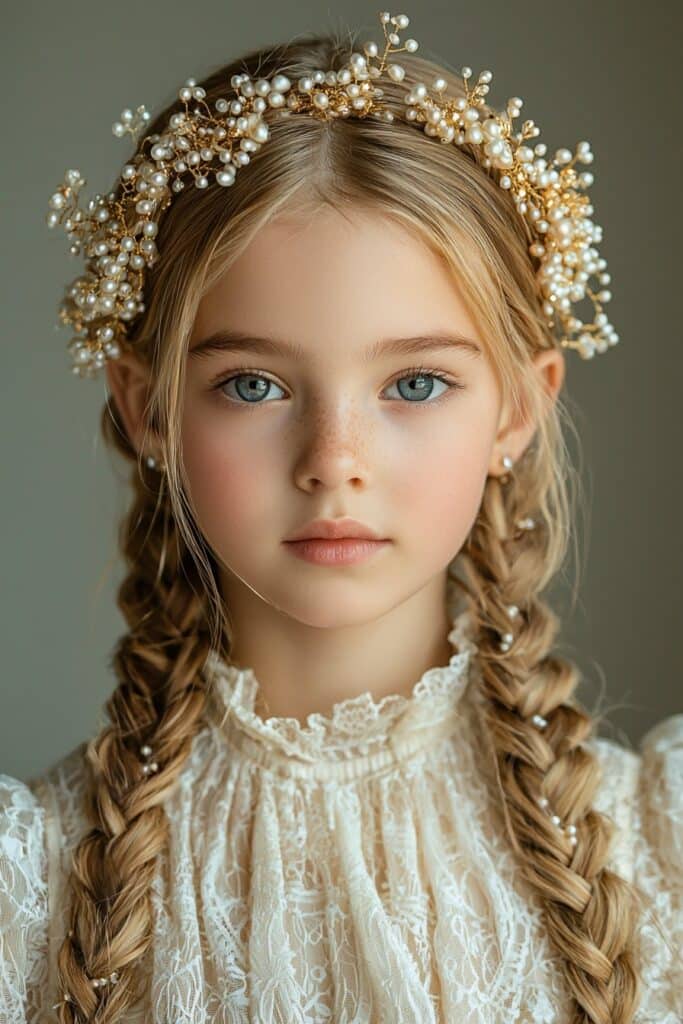
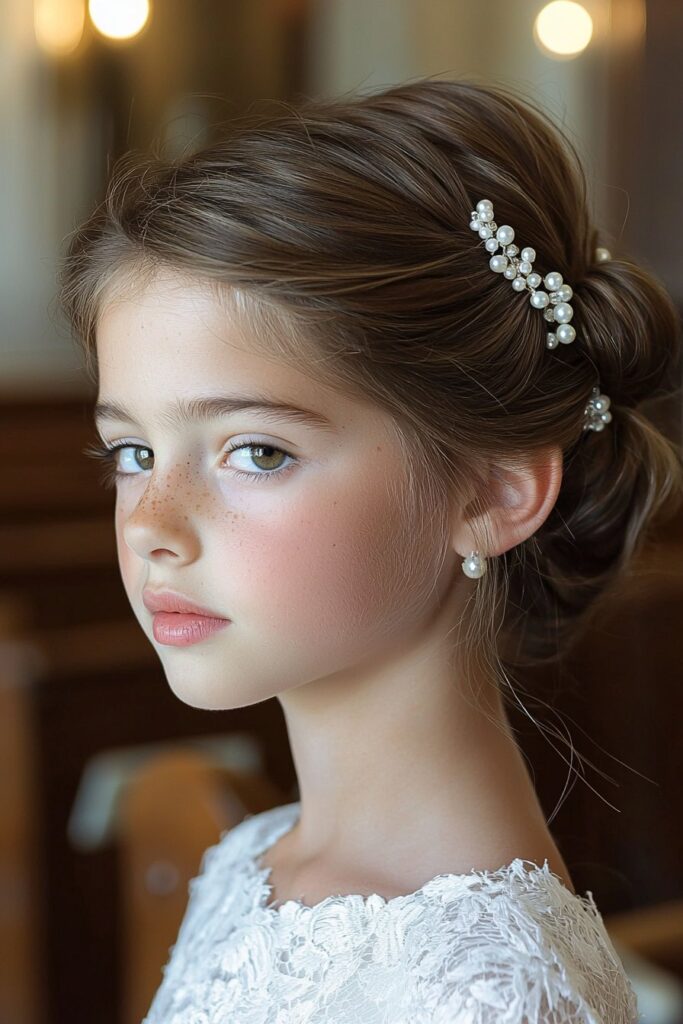
Pearl-Adorned Updo
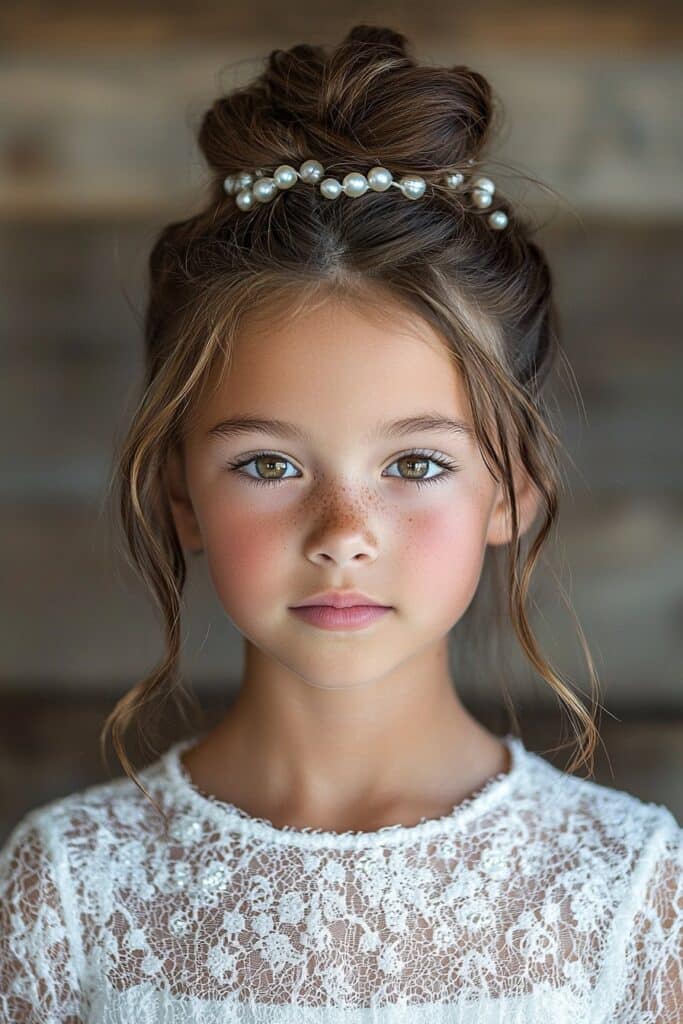
My childhood in Savannah sparked my love for creating elegant hairstyles with delicate pearls. These days, I work as a professional makeup artist and beauty expert. The Pearl-Adorned Updo remains my favorite choice for First Communion celebrations because it perfectly blends sophistication with innocent charm.
Pearl Placement
A stunning pearl-adorned updo comes to life through smart placement. My years of experience have taught me that pearls scattered throughout the style create an ethereal look. Small pearl clusters work best when secured where waterfall strands naturally fall. You’ll get amazing results with a double row of pearls highlighted by crystal beads.
Here’s how to position your pearls perfectly:
- Choose flat-backed pearls for smooth attachment
- Keep even spaces between pearls throughout
- Place them where natural light hits best
Styling Steps
The right preparation makes all the difference with this intricate style. Hair needs to be split into clear sections to create that polished yet youthful look. Each section should be secured underneath with specially coated pins that hold everything in place.
Here’s what you need to do:
- Build a full base with soft curls
- Secure each section with gentle tension
- Add pearl details one by one
- Finish with a satin bow at the back
Maintenance Tips
Years of working with this style have taught me what keeps it looking perfect throughout the ceremony. The headpiece works best with a simple band about 3/4″ wide. Here’s how to make it last:
Start by attaching it firmly with both the included comb and pin loops. Double pearl streamers that flow down 15 inches at the back make a beautiful alternative to traditional veils.
This versatile style adapts well to all hair types. Fine hair needs extra securing methods, while thick hair works with fewer pins. This pearl-adorned updo truly creates an angelic look that’s perfect for such a special day.
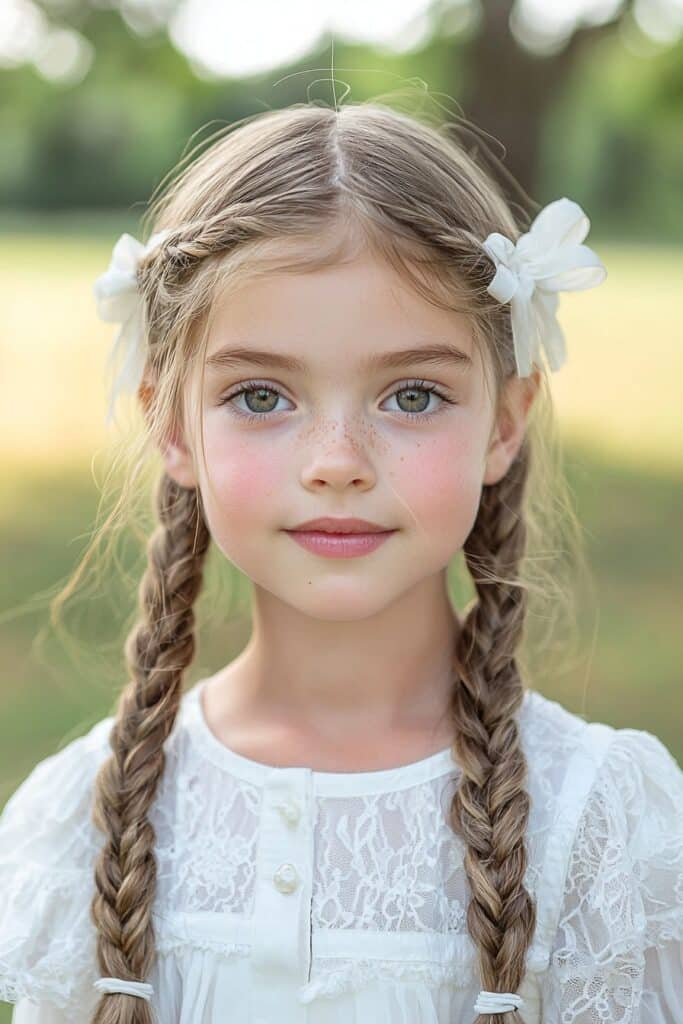
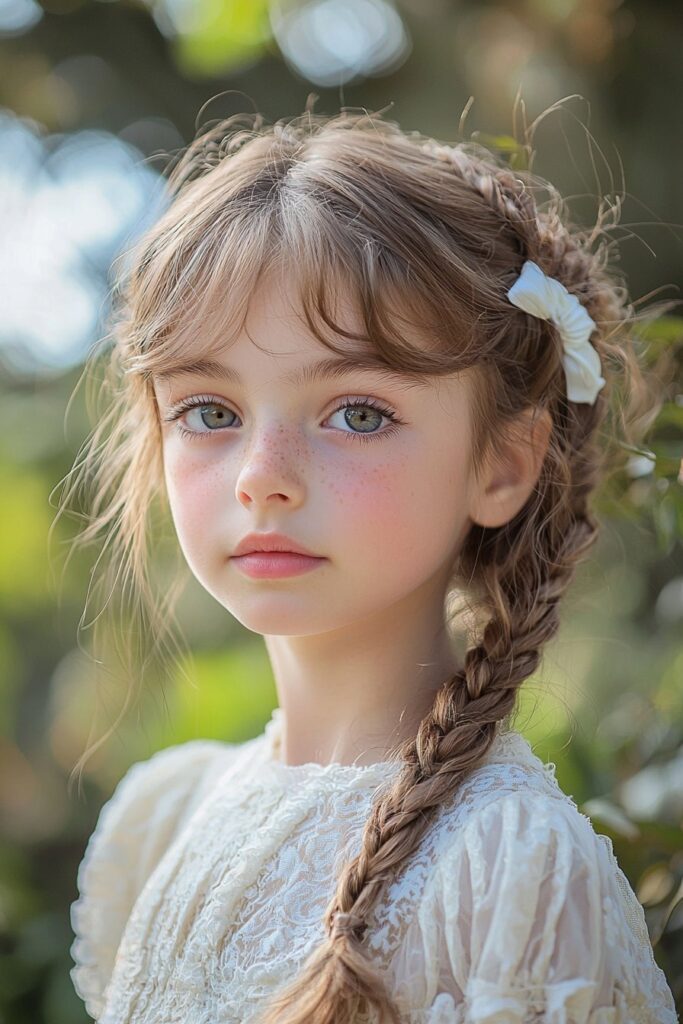
Sweet Heart Braid
My love affair with the Sweet Heart Braid began when I started styling hair in Savannah. This delightful hairstyle adds a romantic touch to First Communion celebrations. The heart-shaped lace braid pattern captures the pure innocence of this sacred occasion beautifully.
Braiding Pattern
The beauty of this style comes from its unique lace braiding technique. Start by making a middle part to divide the hair into two equal sections. Unlike traditional braiding, you’ll pick up strands from just one side to create that curved heart shape.
Here’s how to make the perfect heart:
- Start an outer braid close to the part line
- Pick up strands only from the right side
- Keep tension even throughout
- Make both sides curve symmetrically
You’ll need to mirror the part line on the opposite side to get balanced proportions. The curved pattern gives this style its distinctive heart shape, so focus on getting that right.
Accessorizing
My years of working with young girls have taught me that simple accessories work best with this romantic style. Small preserved flower headpieces or dainty fabric flowers from specialty stores look stunning. Root braids also work as natural headbands that frame the face elegantly.
Duration Tips
Once you’ve mastered this enchanting style, it takes just 2-3 minutes to create. You should practice a few times before the big day though. Here’s what works best:
Start with completely detangled hair. Section the hair carefully – this step substantially affects the final shape. Removable extensions or hairpieces can add fullness, especially when you have fine hair.
The secure braiding pattern helps this style hold its shape amazingly well. This heart-shaped masterpiece not only turns heads but stays picture-perfect throughout the celebration.
Conclusion
My journey as a professional makeup artist began in Savannah, and First Communion hairstyles have always touched my heart deeply. I’ve spent years working with young girls and their families during this sacred celebration, and each style I share comes from that experience.
Young girls can choose from our carefully selected hairstyles that work beautifully with every hair type. A classic French twist adds timeless elegance to the occasion. Crown braids give that perfect angelic look we all love. Simple styles become unforgettable with pearl accents, delicate ribbons, and the right veil placement that will reshape the scene throughout the ceremony.
My styling experience has taught me that success comes from good preparation and careful attention to detail. The right products, proper securing techniques, and advance practice will give a picture-perfect result. You can create most styles in minutes once you’re skilled at them. Just make sure to set aside extra practice time to get the best results.
Note that these hairstyles mean so much more than just looking pretty – they become precious memories in photos and hearts forever. I’ve seen countless ceremonies where the perfect hairstyle brings such confidence and joy to girls celebrating this special milestone.
Pick a style that makes your daughter feel special but keeps her comfortable during her celebration. The moment you see her radiant smile in those First Communion photos, you’ll know you picked the perfect look.