
Grunge eye makeup has stormed back onto runways and red carpets, showing us that rebellion stands the test of time. The esthetic spans from subtle smudges to dramatic smoky eyes. Its versatility makes this trend particularly appealing.
The 90s grunge makeup revival has evolved beyond mere nostalgia into a contemporary statement. My experience as a makeup artist has shown me the beauty of this style’s range. It welcomes both muted tones and bold contrasts. You can opt for light coverage with mauve undertones or create dramatic black liner looks blended perfectly. Skinny brows and smudged kohl pencils capture that sweet spot between relaxed and edgy that made the original era iconic.
We’ve put together 17 bold takes on grunge eye makeup that suit both daily wear and statement looks. These tutorials will help you become skilled at everything from glossy smoky eyes to abstract liner art, whether you’re just starting with the grunge esthetic or want to expand your makeup skills.
Subtle Smudged Liner Look
Creating subtle smudged liner looks means becoming skilled at balancing precision with controlled chaos. As Belle Hathaway often reminds her clients, “The key to perfect imperfection lies in the tools you choose and how you wield them.”
Essential Products
The original step is to pick a that stays workable for about 30 seconds before setting. Water-resistant kohl liners provide the perfect balance of blendability and staying power. A dedicated smudging brush or built-in smudger is a great way to get that perfectly imperfect edge.soft kohl eyeliner or gel-based pencil
Step-by-Step Tutorial
- Prime your eyelids with a transparent or skin-toned primer
- Draw a thin line along your upper lash line, staying as close as possible to the lashes
- Create small dashes along the lower lash line, extending just two-thirds of the way
- Using your smudging tool, blend the liner upward on the top lid and downward on the bottom
- Set the look with matching eyeshadow powder
Styling Tips
You should avoid applying liner to your inner corners to maintain a more open-eyed appearance. On top of that, it helps to concentrate the darkness on the outer corners to improve eye definition. Belle emphasizes working quickly, as most formulas set within seconds to last 12 hours.
Your smudged liner looks best with natural-looking makeup. This creates a perfect balance between edgy and everyday wear. A cotton swab with makeup remover quickly fixes any accidental smudges beyond your intended area.
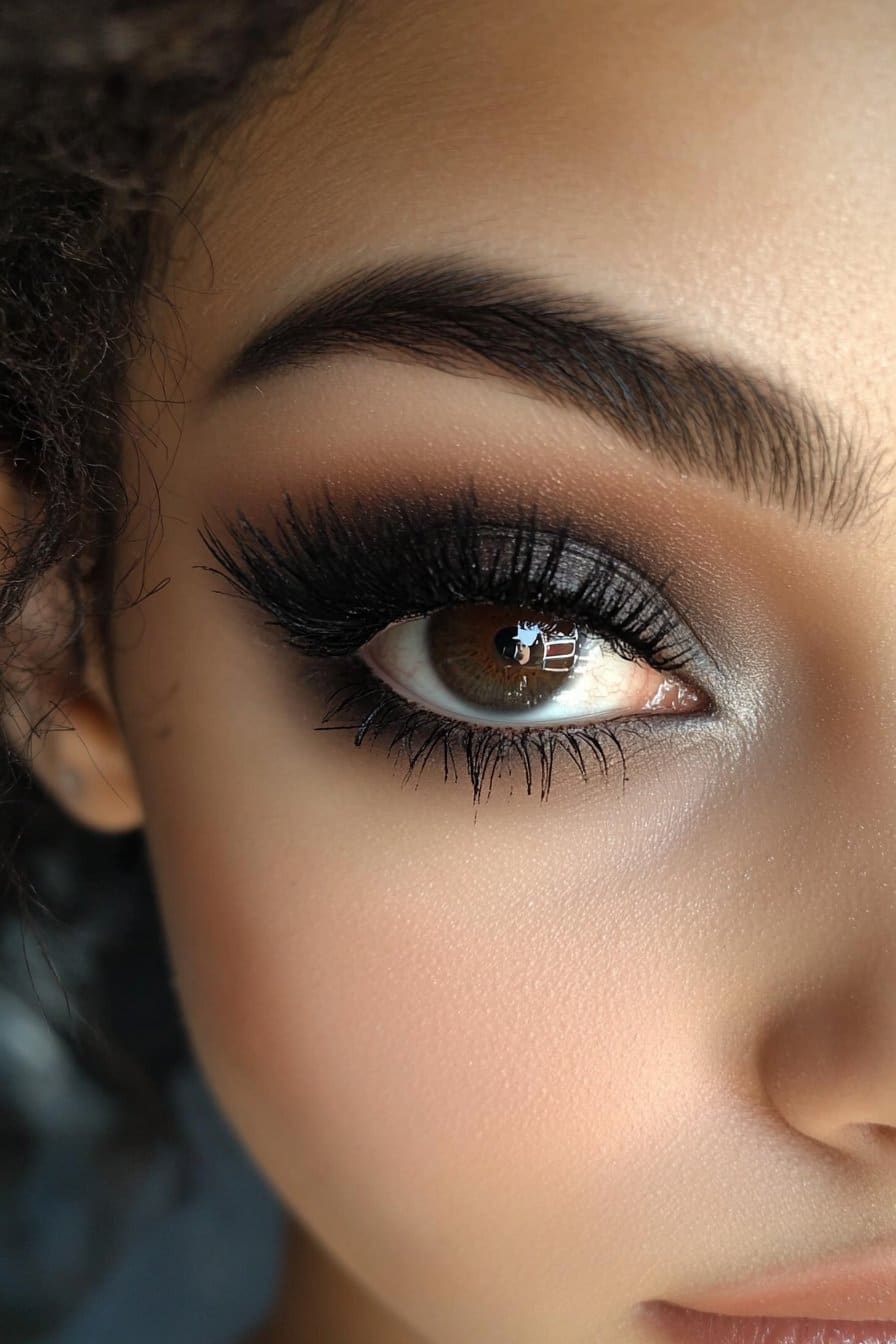
Matte Brown Smoky Eye

A matte brown smoky eye never goes out of style because it works for everyone. Belle Hathaway tells her clients that this look suits them all, whatever their age or priorities.
Product Selection
The right shades are vital to create depth. You’ll need at least two brown eyeshadows – a lighter transition shade and a deeper tone. Matte formulations create the most authentic 90s eye makeup effect for this grunge-inspired look. My makeup sessions have shown that neutral, brownish eyeshadows combined with a brown or black eye pencil build the perfect base.
Application Technique
- Prime your eyelids with a concealer or dedicated eye primer
- Apply a mid-toned brown shadow from lashline to crease
- Define the outer corner with a deeper chocolate shade
- Blend the colors upward to create a soft gradient
- Line both upper and lower lashlines with brown eyeliner
The magic happens in the transition between shades. Start with deeper browns at your lash line and blend outward with softer tones for a diffused finish. This technique balances definition and softness that makes grunge eye makeup unique.
Complementary Elements
Add two coats of glossy black mascara to frame your smoky eye. The intensity can be boosted by applying eyeliner to your waterline. Belle guides her clients to keep the rest of the face neutral, which makes the eyes stand out. This approach stays true to the grunge esthetic and makes the look perfect for any occasion.
Glossy Grunge Lids
The glossy lid trend stands out as a striking element in grunge eye makeup looks that brings an editorial edge to everyday wear. I’ve seen this trend grow from runway experiments to street-style statements. As Belle Hathaway, I’m thrilled to share my expertise to help you become skilled at this rebellious yet refined look.
Product Recommendations
You need a to achieve the perfect glossy grunge effect. A gloss made specifically for eyes works better than lip products. A shimmer shadow beneath the gloss creates a texture that catches light beautifully. The complete look needs a dark base shadow, waterproof eyeliner, and volumizing mascara.clear eyelid gloss that offers extended wear
Application Process
Your success with glossy grunge depends on the layering technique. The process starts with eyeshadow application to inner and outer corners and blends outward. Here’s my professional process:
- Apply a single color or concealer as base
- Layer shimmer shadow for dimensional effect
- Add dark shadow to outer corners
- Apply gloss with a dedicated brush
- Blend edges carefully for smooth finish
Maintenance Tips
My experience with countless clients has taught me that glossy lids need specific maintenance strategies. The texture becomes more noticeable after about 15 minutes. Simple colors underneath make touch-ups easier throughout the evening – a quick smooth with a brush or fingertip does the job. Waterproof formulas for liner and mascara are great ways to get better staying power.
Metallic Gray Statement
Silver metallic eyeshadow makes a bold statement in the ever-changing world of grunge eye makeup looks. My work as a makeup artist has shown me how this striking shade can turn an everyday look into something extraordinary.
Choosing the Right Shade
The perfect metallic gray selection depends on understanding undertones. Cool-toned silvers create authentic 90s eye makeup vibes. The secret lies in picking a shade with smooth shimmer rather than chunky glitter particles. Brown eyes benefit from metallic gray’s stunning contrast that amplifies their natural color.
Application Method
A successful metallic gray application needs proper technique and tools. Here’s my tried method:
- Prime lids with a dedicated eye primer
- Pack metallic shadow onto the mobile lid using a flat brush
- Use fingertips to maximize reflective finish
- Build intensity gradually with damp brush
- Define crease with matte gray shadow
Your fingertip’s warmth helps flatten the pigment and creates a more intense metallic finish than brush application alone.
Pairing Suggestions
Deep eyeliner anchors the metallic effect – black or navy work best. The contrast between matte and metallic textures adds dimension and prevents washed-out eyes. A complete look pairs well with:
- Matte complexion products
- Deep merlot or neutral lip color
- Black mascara to define lashes
My years of experience have taught me that metallic gray suits both elegant events and grunge-inspired looks. This shade’s versatility makes it essential in my professional kit.
Lived-in Liner Effect
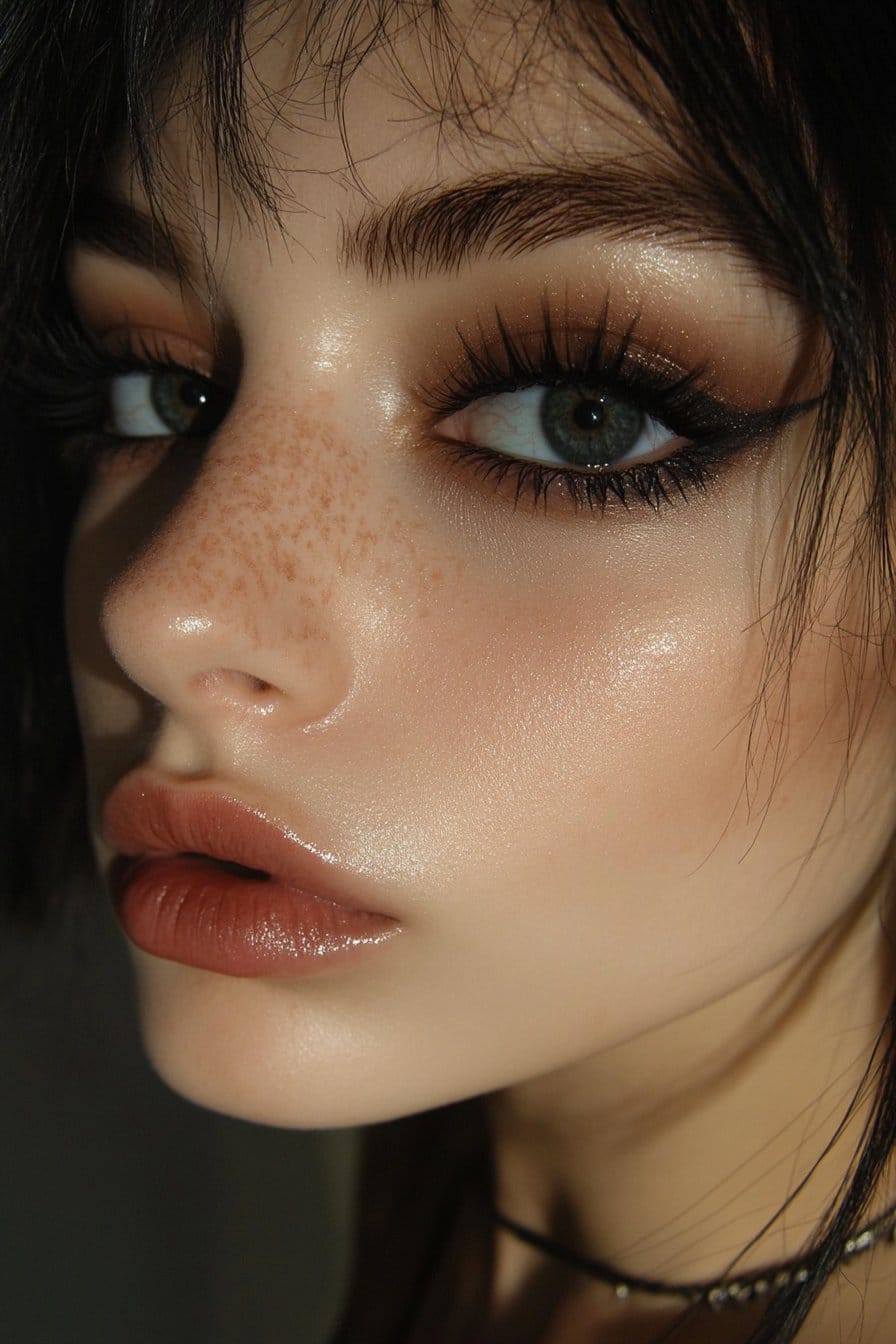
The lived-in liner look perfectly captures the essence of 90s eye makeup with its effortless appeal. My work as a celebrity makeup artist has helped me become skilled at this technique. I’ve spent years creating runway-ready looks that appear naturally undone.
Required Tools
We need a soft, creamy eyeliner that gives you enough time to blend. Starting with a high-quality eye primer helps prevent unwanted smudging beyond your desired area. Waterproof formulas last longer but they’re too rigid to create that perfect lived-in effect.
Creating the Look
This technique’s beauty comes from its intentional messiness. Here’s the quickest way to achieve it:
- Apply primer to prevent creasing
- Line both upper and lower waterlines
- Fill spaces between lashes completely
- Blend using fingertips or a smudge brush
- Set with matching eyeshadow powder
Pro Tips
My clients get better results when they avoid applying liner too close to their inner corners – it helps keep their eyes looking open. Your fingertip’s warmth creates the most natural smudge effect. The rest of your face should stay neutral to get maximum results.
This technique works great if you have unsteady hands since precision isn’t what we’re after. My time at New York Fashion Week taught me that layering different textures creates that perfect ‘slept-in’ quality without actually sleeping in your makeup.
90s-Inspired Black Smoke
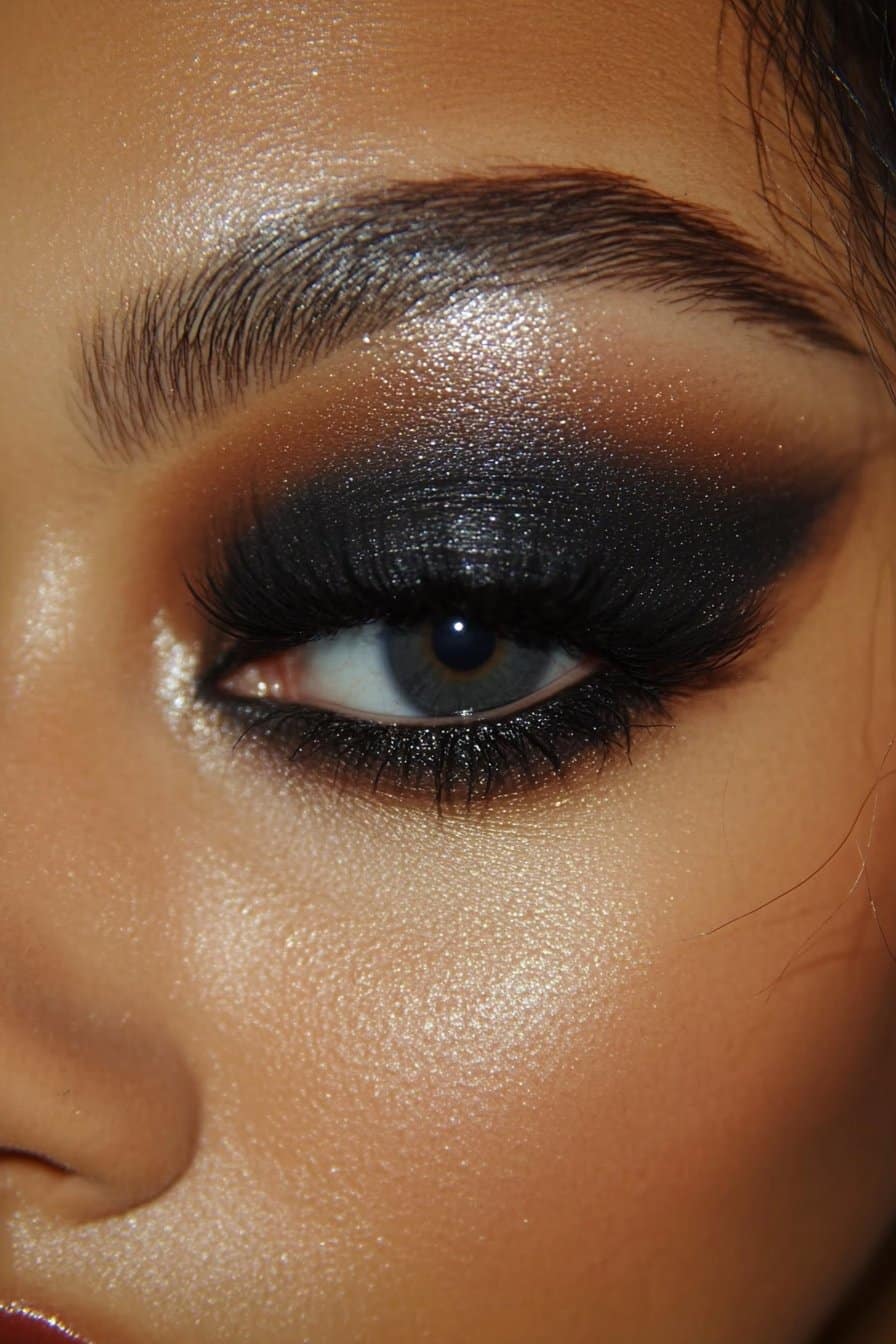
My years at New York Fashion Week taught me that the classic 90s black smokey eye is still one of the most requested grunge eye makeup looks. I’m Belle Hathaway, and I’ve watched this iconic style evolve from runway to everyday wear. The look is now more available while keeping its rebellious spirit.
Product List
A dark eye pencil with smooth application creates an authentic 90s black smokey eye. We used three shades of eye products – dark, medium, and a skin-tone shade. My professional kit has:
- Black kohl or cream eyeliner
- Matte black eyeshadow
- Translucent setting powder
- Fluffy blending brush
Application Steps
The layering technique helps you become skilled at this look. Here’s my quickest way:
- Apply the dark shade along your lash line
- Work the product up toward the crease
- Blend the edges with a fluffy brush
- Add the medium shade to soften transitions
- Use your lighter tone from socket to brow
- Set with translucent powder for airbrushed finish
Style Variations
You can customize this look in several ways. A dash of frost to the center of your lid adds a modern twist. You could pair it with a bold lip for extra drama, or keep the rest of your makeup minimal for an authentic 90s feel. The beauty of this look lies in its versatility – it works equally well for dramatic evening wear and subtle daytime styles.
The key to nailing this iconic look is embracing its imperfect nature. Working with countless celebrities taught me that the most authentic 90s smokey eye should look slightly lived-in rather than precisely applied.
Burgundy Grunge Blend

Burgundy has become the new black in grunge eye makeup. My work at Fashion Week shows how this shade evolved from a seasonal trend into a year-round favorite.
Color Selection
The right burgundy shade depends on your skin’s undertones. Matte formulations with buildable coverage create authentic grunge looks. My experience with countless clients shows that burgundy creates a stunning contrast with hazel and green eyes.
Blending Technique
Layering is the secret to beautiful burgundy eye makeup. You need to start with a wash of color on the lid and build the intensity step by step. These steps will give you the best results:
- Apply a neutral base shade
- Layer burgundy shadow in the crease
- Intensify outer corners
- Blend edges with a fluffy brush
- Set with setting spray
Finishing Touches
The details make your burgundy grunge look stand out. A matching blush tone creates a cohesive appearance with the eye makeup. My runway experience taught me that pinky-brown blush and caramel shadows balance burgundy eyes beautifully. A touch of black liner along the lash line adds dimension and creates that perfect grunge effect without overpowering the burgundy base.
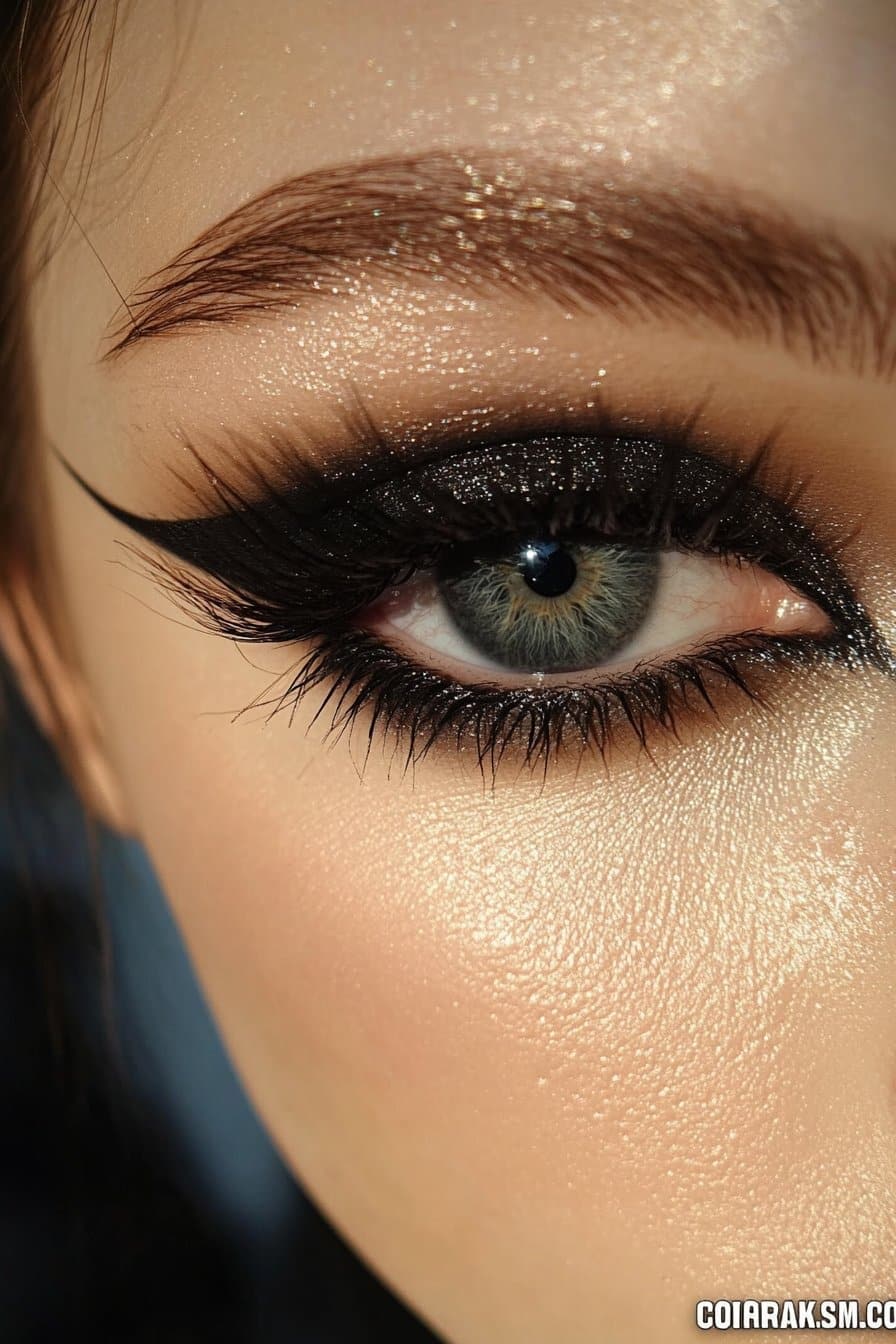
Edgy Wing Definition
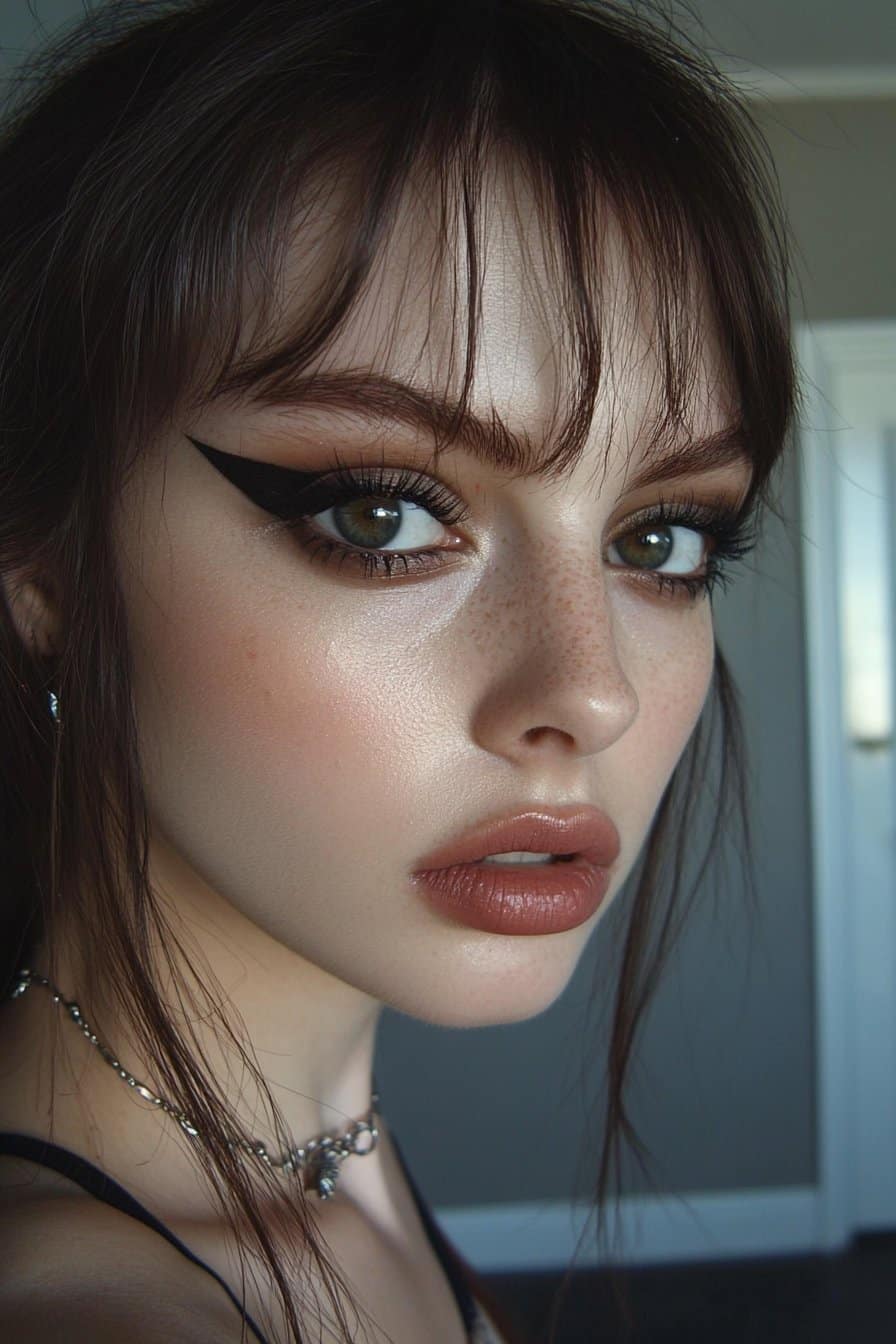
Sharp wings are one of the most coveted skills in 90s eye makeup. My work as a celebrity makeup artist has given me countless hours at New York Fashion Week to become skilled at techniques that make this iconic look achievable for everyone.
Tool Selection
We focused on selecting the right formula because it makes all the difference. Beginners should start with felt-tip liquid liners that give pen-like control. Gel-based formulas work exceptionally well when creating creative, double-winged looks. My experience with A-list clients shows that having both options in your kit allows versatile styling.
Creating Sharp Wings
The secret to flawless wings comes down to technique. Here’s my quickest way that I’ve refined over years of runway work:
- Start with a light outline using nude liner
- Position tape diagonally from outer corner to brow
- Draw small strokes to build wing shape
- Alternate between eyes for symmetry
- Fill in gaps gradually
Your elbow should rest on a flat surface and use your pinky finger as an anchor to boost precision. Most people believe pulling your eyelid helps, but it creates texture and creasing once released.
Common Mistakes
Notwithstanding that, all but one of these artists face challenges. My studio work has revealed the biggest problems to avoid. Skipping primer causes smudging and decreased longevity. On top of that, it’s tempting to create one continuous line, but this often results in uneven application – build your wing with small, controlled strokes instead. People with hooded eyes should follow their lower lash line’s natural angle toward their eyebrow tail to create a lifted effect.
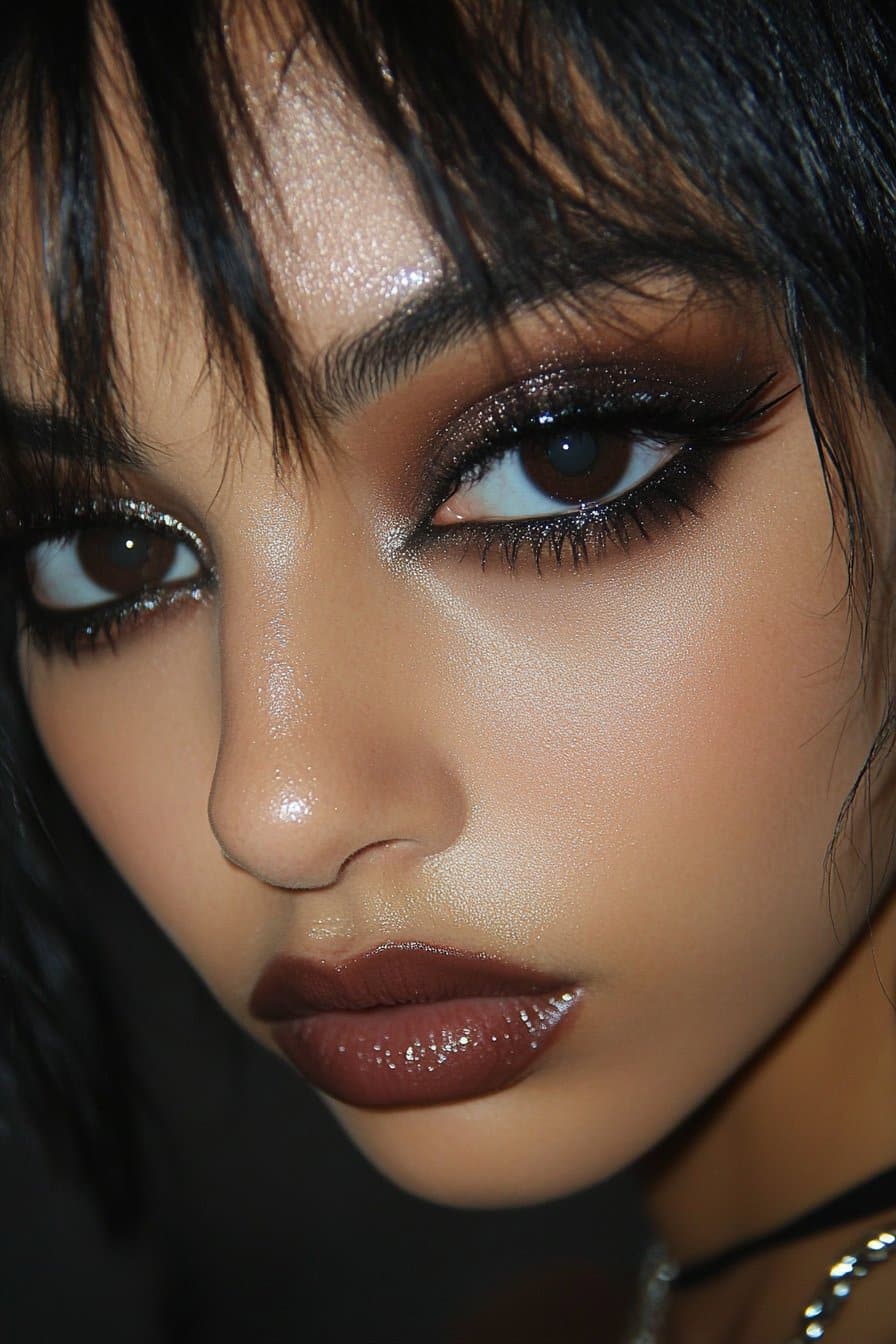
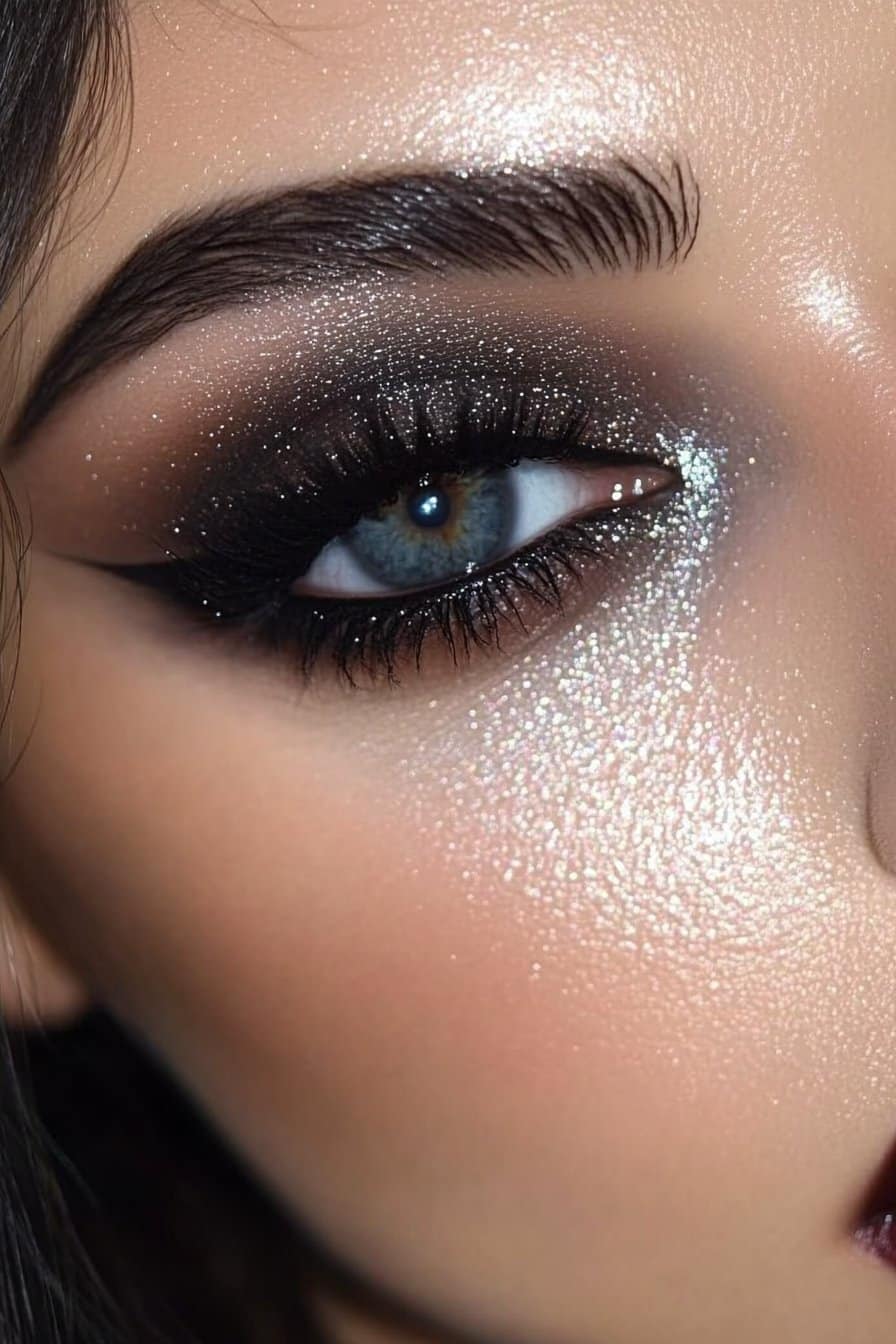
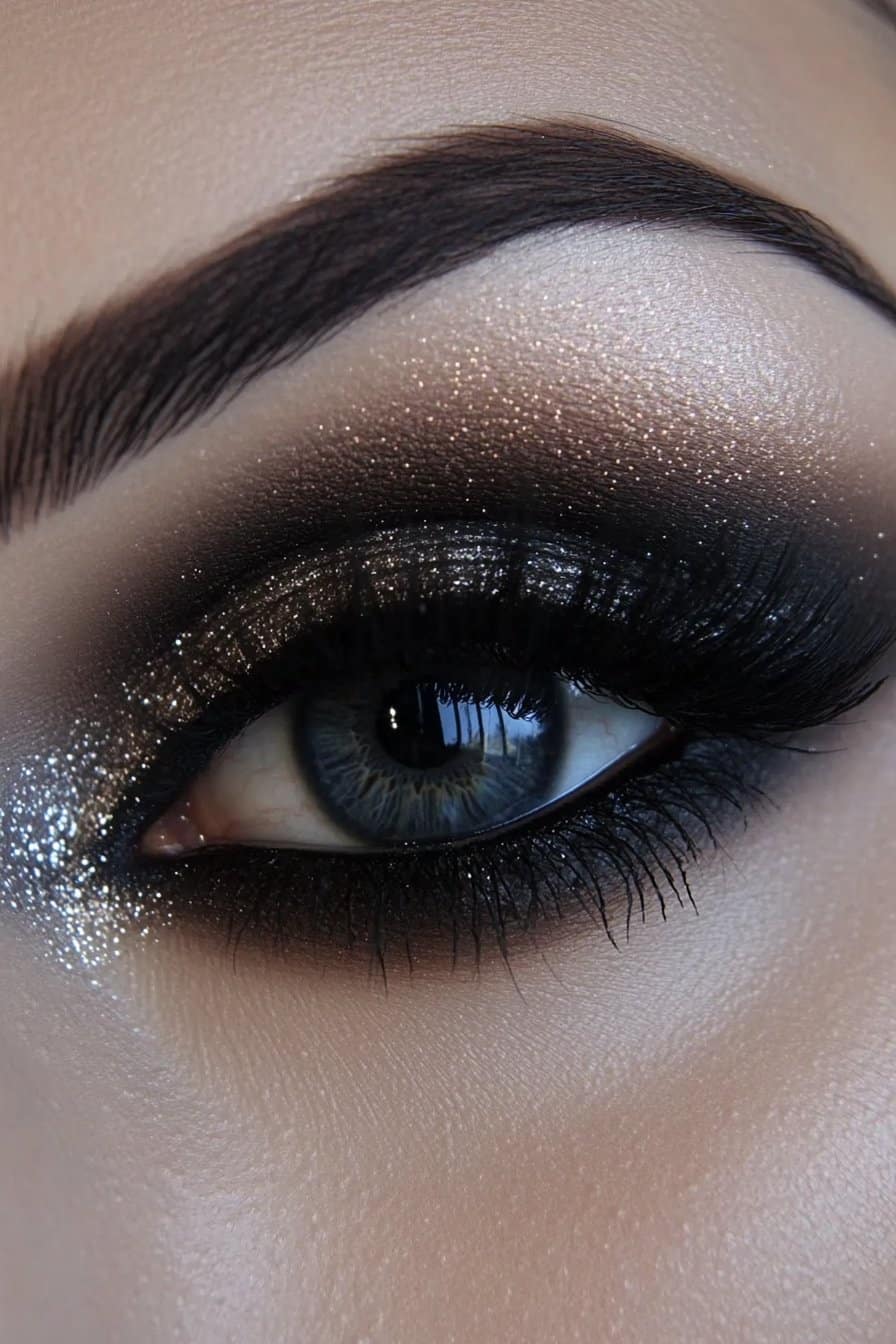
Grungy Glitter Accent
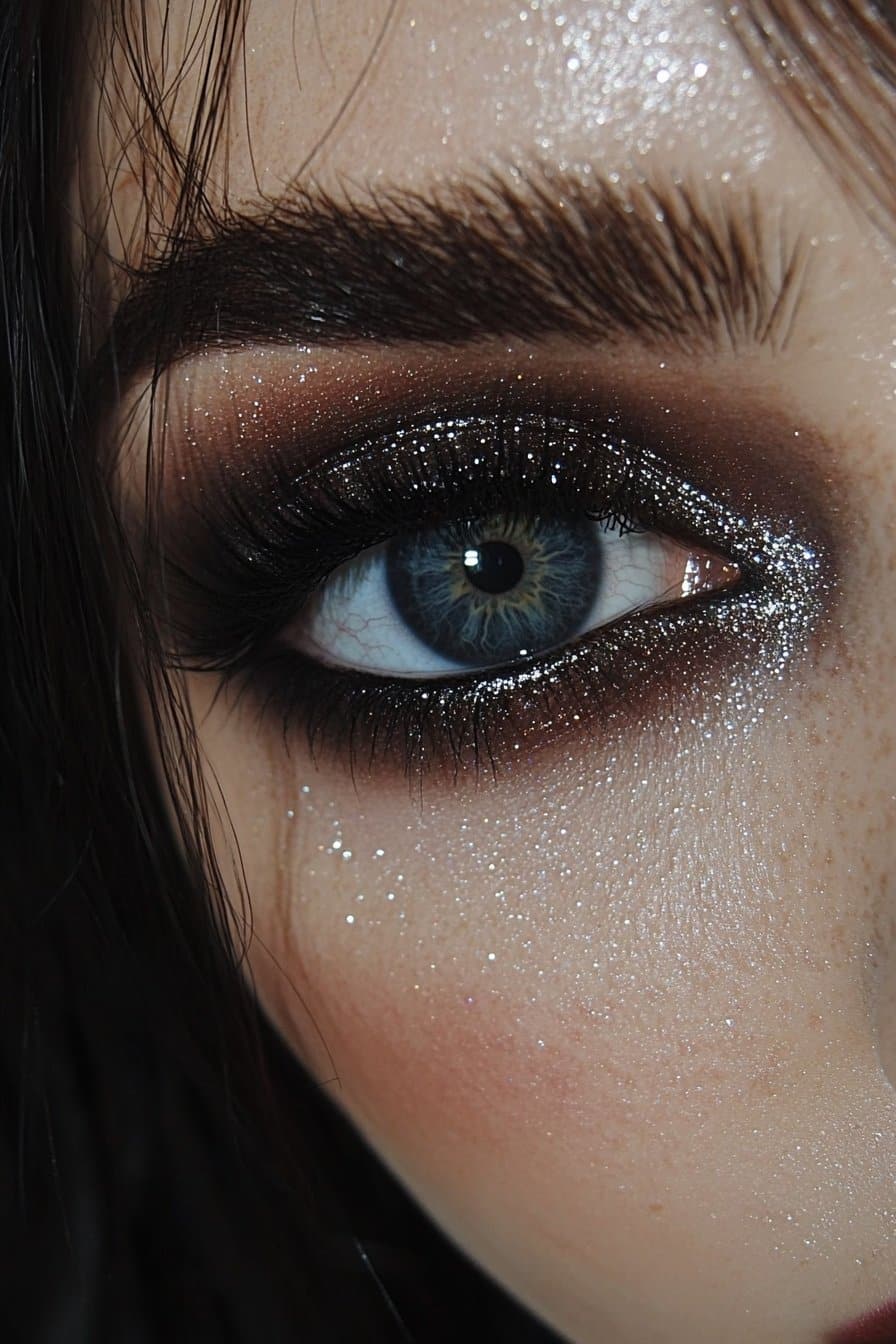
Glitter adds an unexpected twist to grunge eye makeup’s rebellious esthetic. My work at Fashion Week taught me that strategic glitter placement can lift any grunge look from simple to extraordinary.
Product Choices
We tested that work best for grunge looks: loose glitter, glitter eyeshadow, and liquid glitter. Liquid glitter gives beginners better control with less mess. Advanced looks benefit from loose glitter mixed with a dedicated glitter primer to create the most intense sparkle.three types of glitter formulations
Application Method
Your glitter application’s success depends on proper preparation and technique. Here’s my quickest way to apply:
- Start with clean, primed eyelids
- Apply a cream or powder eyeshadow base
- Use glitter primer or adhesive
- Pat glitter with flat brush or fingertips
- Set with setting spray
A subtle effect works best when you apply glitter just to your eye’s outer edge, which creates a delicate accent. Brush-on glue makes removal substantially easier than traditional lash adhesive.
Look Duration
Runway experience taught me that proper preparation determines your glitter look’s staying power. A dedicated glitter primer prevents fallout effectively. Setting spray helps, but you should avoid excessive mascara layers with false lashes to maintain a natural blend between real and artificial lashes. To name just one example, keep a cotton swab handy during long events for quick touch-ups that won’t disturb your makeup.
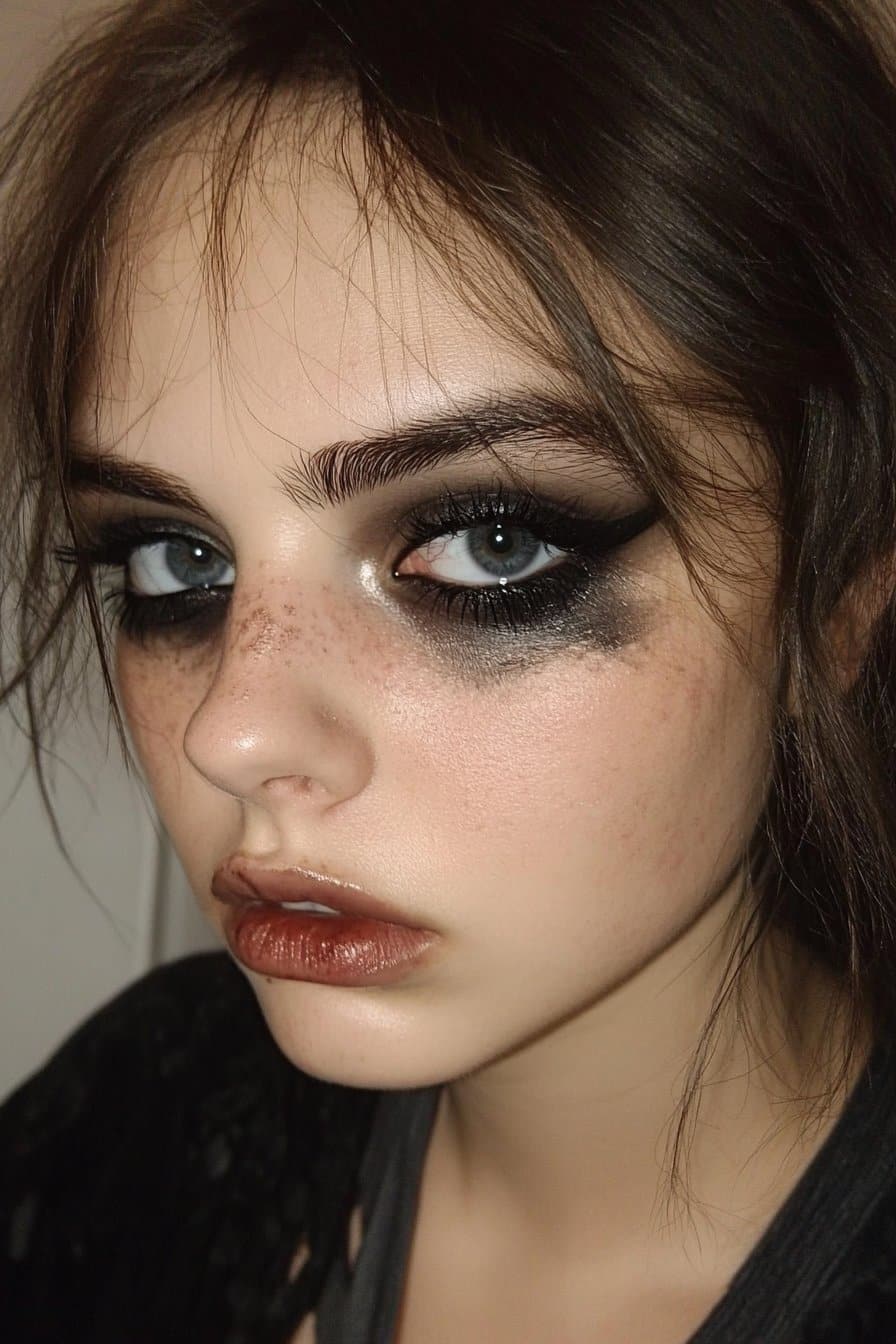
Smoked-Out Lower Lash
The difference between professional and amateur looks comes down to mastering lower lash line makeup. My work at New York Fashion Week helped me develop techniques that make this tricky part of grunge eye makeup easier for everyone.
Essential Products
We found that success comes from picking the right tools. A small pencil brush is crucial for precise application, and a flat smudger brush creates that perfect diffused edge. My runway experience shows that a buttery gel eyeliner with a built-in smudger works best. Waterproof formulas improve your look’s staying power and won’t transfer during the day.
Step-by-Step Guide
Backstage experience taught me the quickest way to perfect this look. Set your under-eye area first to keep shadow from sticking to concealer. Apply your chosen liner close to the lash line and take the outer corner slightly upward for a subtle flick. You’ll end up blending a dark brown eyeshadow over the liner to create that smoky effect.
Expert Tips
My career taught me that detail brushes work better than larger, fluffier ones for lower lash line work. Press your shadow instead of swiping when you’re close to the lash line. The best results come from layering different textures – start with liner, then shadow – to create lasting effects. Note that some movement during the day is normal, especially if you wear makeup over 8 hours.
Dark Plum Drama

Plum eyeshadow has turned into my signature element when I create dramatic grunge eye makeup looks. My time at Fashion Week helped me find that this rich shade can revolutionize simple smokey eyes into statement-making artistry.
Color Selection
We started with a light matte lavender as the transition shade. A deep drama needs an eggplant or dark plum tone that builds up gradually. My countless client sessions taught me that purples work exceptionally well with brown eyes and create natural depth and dimension.
Blending Technique
Becoming skilled at plum eye makeup depends on strategic layering. Apply your chosen plum shade directly onto the lid with patting motions instead of sweeping to get maximum color payoff. I use windshield wiper motions in the crease to create a gradient effect. A lighter lavender shade blends where the colors meet to avoid harsh lines.
Complementary Elements
I pair plum eyes with berry-toned lips to create a cohesive look. My runway experience shows that adding brown shadow at the edges warms up the look and keeps it from appearing too cool-toned. The grunge esthetic needs your waterline lined with deep brown shadow using an angled brush – this creates definition without black liner’s harshness. The look ended up perfect with three coats of volumizing mascara to frame your plum masterpiece.
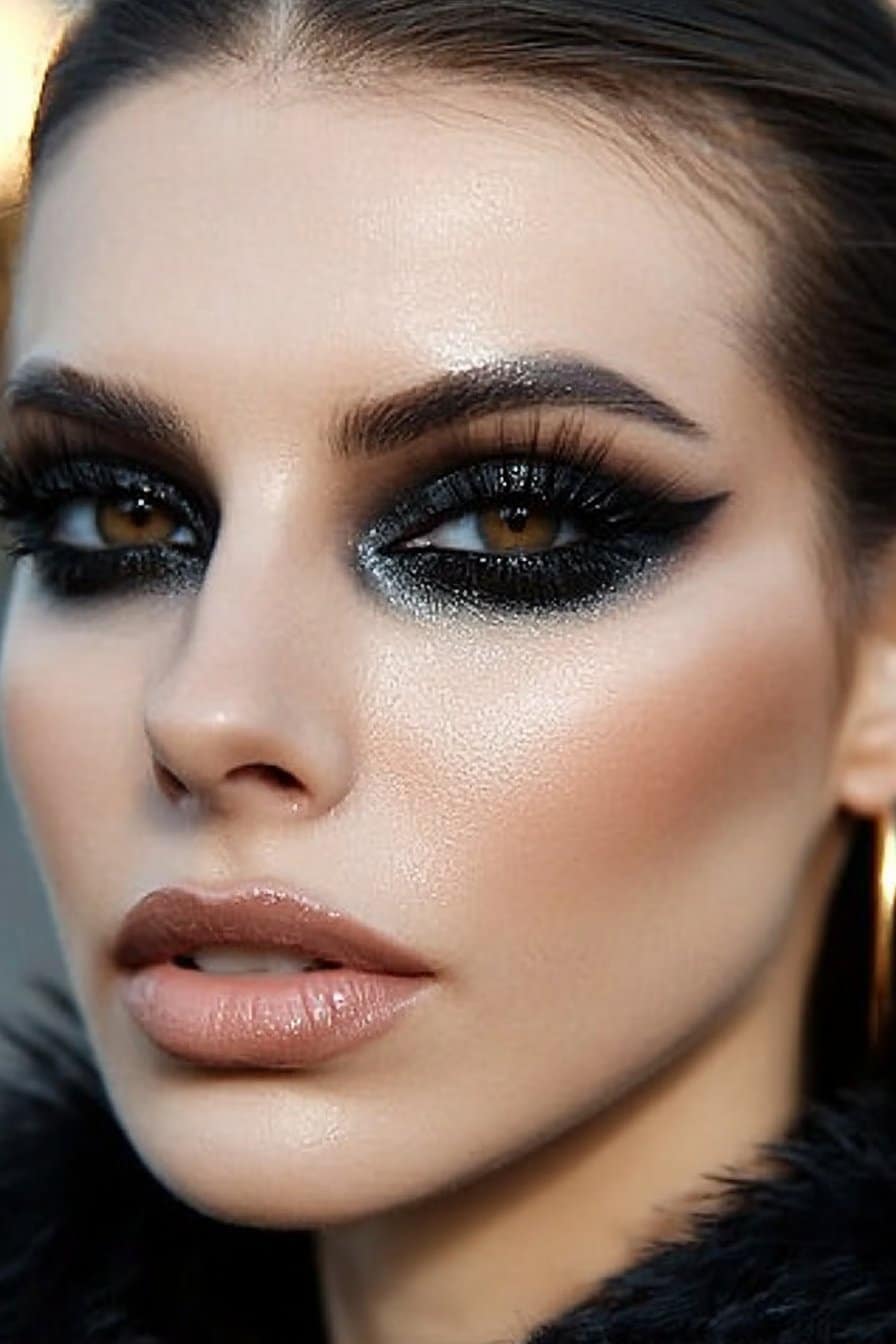
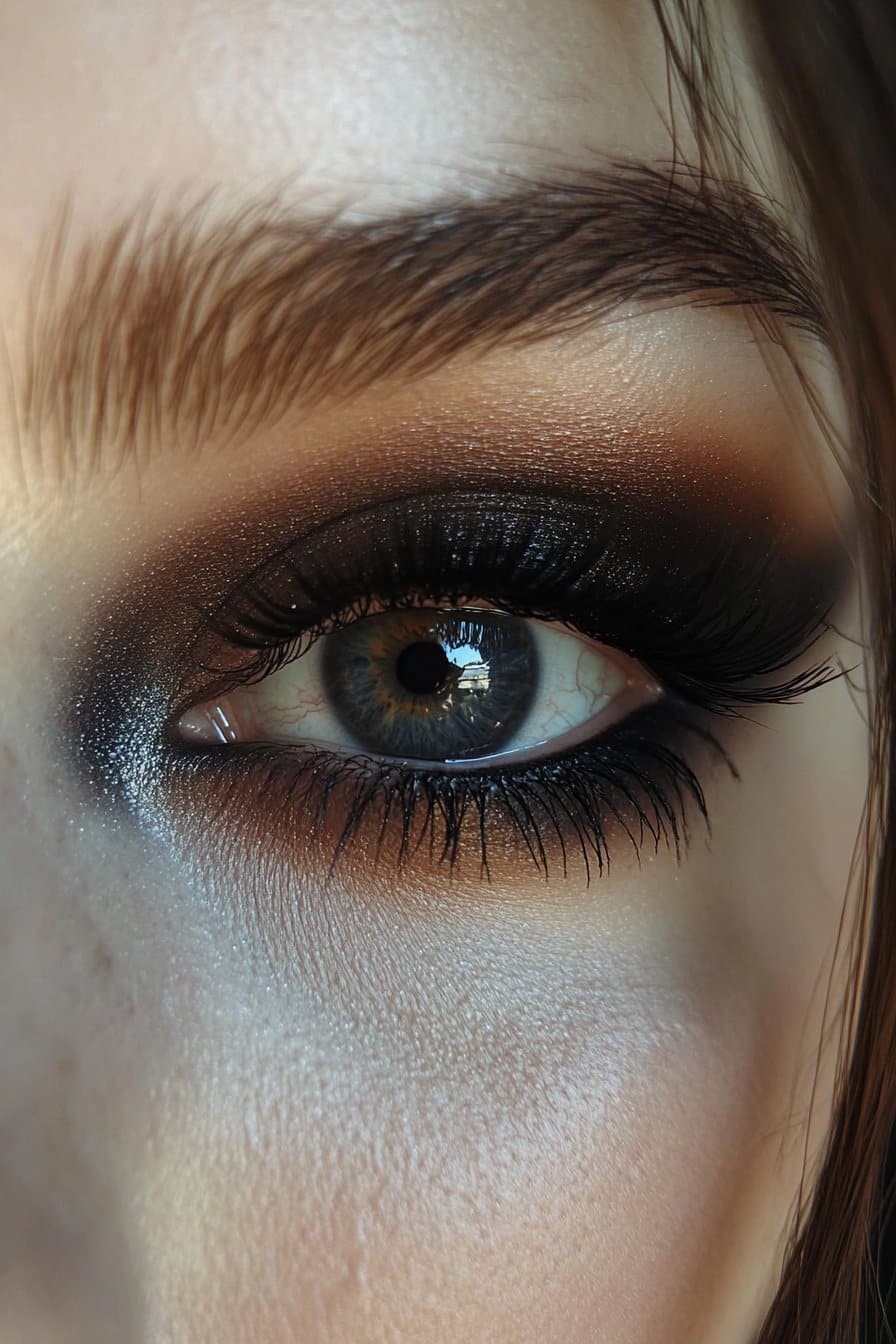
Charcoal Diffused Edge
My work with A-list celebrities has taught me that becoming skilled at charcoal diffused edges creates the most striking grunge eye makeup looks. This technique needs precise tool selection and careful application.
Product Requirements
The right artistry-level brushes make all the difference in achieving soft gradients. You need a dedicated smudge brush to blur color inwards, and a quality blending brush ensures smooth transitions. My runway experience shows that High-Pigment Longwear Eyeliner makes the perfect base for diffused edges.
Application Steps
- Prime eyelids well for extended wear
- Apply dark liner at lash line base
- Blur color inward using smudge brush
- Layer deep matte shadow over liner
- Blend through crease with dedicated brush
- Build intensity step by step for boldness
Style Tips
The darkest part should start at your lash line and fade outward gradually. My countless Fashion Week sessions have taught me to leave the center lid bare to create dimension. To boost sophistication, tap the lightest shimmer along your brow bone as a highlighter. A fluffy brush helps sweep shadow through the crease to avoid harsh lines. This technique works exceptionally well to create that perfect cloud-like effect that defines authentic grunge looks.
Grunge Glam Fusion
My signature style emerged from blending grunge with glamor after my breakthrough at New York Fashion Week. I’ve become skilled at combining rebellious edge with polished sophistication through countless runway shows and celebrity clients.
Product Mix
We selected products that bridge both esthetics to succeed. A matte foundation creates that classic grunge base. My latest find shows how beautifully cool-toned shadows with metallic accents work on everyone. A silky setting powder gives that perfect balance between shine and skin-like finish.
Technique
This fusion comes alive through strategic layering. Here’s my runway-tested method:
- Apply base shadow in cool tones
- Build intensity gradually at outer corners
- Add metallic elements for dimension
- Blend edges really well
- Set with translucent powder
Success comes from building products with a light hand. The perfect grunge-glam balance needs contrast between matte and shimmer textures.
Balancing Elements
Fashion Week taught me that successful fusion needs thoughtful contrast. The base makeup should stay super easy without heavy layers. Modern looks stand apart from authentic 90s styles because they don’t use much bronzer either. The goal is to lift everything while keeping that coveted lived-in quality. A fine mist of setting spray ensures your artistry lasts throughout any event and boosts longevity.
Abstract Liner Art
My experiments with abstract liner art opened up exciting new possibilities for my grunge eye makeup portfolio. Fashion Week taught me how negative space and creative line placement can reshape traditional looks into modern masterpieces.
Tool Selection
Your success depends on picking tools that give you precise control. A helps create those perfect abstract shapes. I suggest keeping both liquid and gel formulations in your kit to get more versatility. My backstage work shows that flat brushes create sharp lines best, and smudge brushes give you those perfectly imperfect edges.creamy eyeliner with a built-in smudger
Creating Patterns
You need to embrace imperfection to draw abstract patterns. Create lines in your crease’s center and work on the outer and inner rims. New artists should start with simple shapes before trying complex designs. You’ll build confidence with each stroke and let your creativity guide you naturally.
Styling Options
The runway taught me that abstract liner looks work best with neutral colors. Create negative space on your eyelid to emphasize your features while keeping that grunge esthetic. Skip the glitter when you start and stick to matte browns and blacks to get the basics right. Each client session shows me how different shapes can boost your natural features and make every abstract look unique to you.
Midnight Blue Smoke
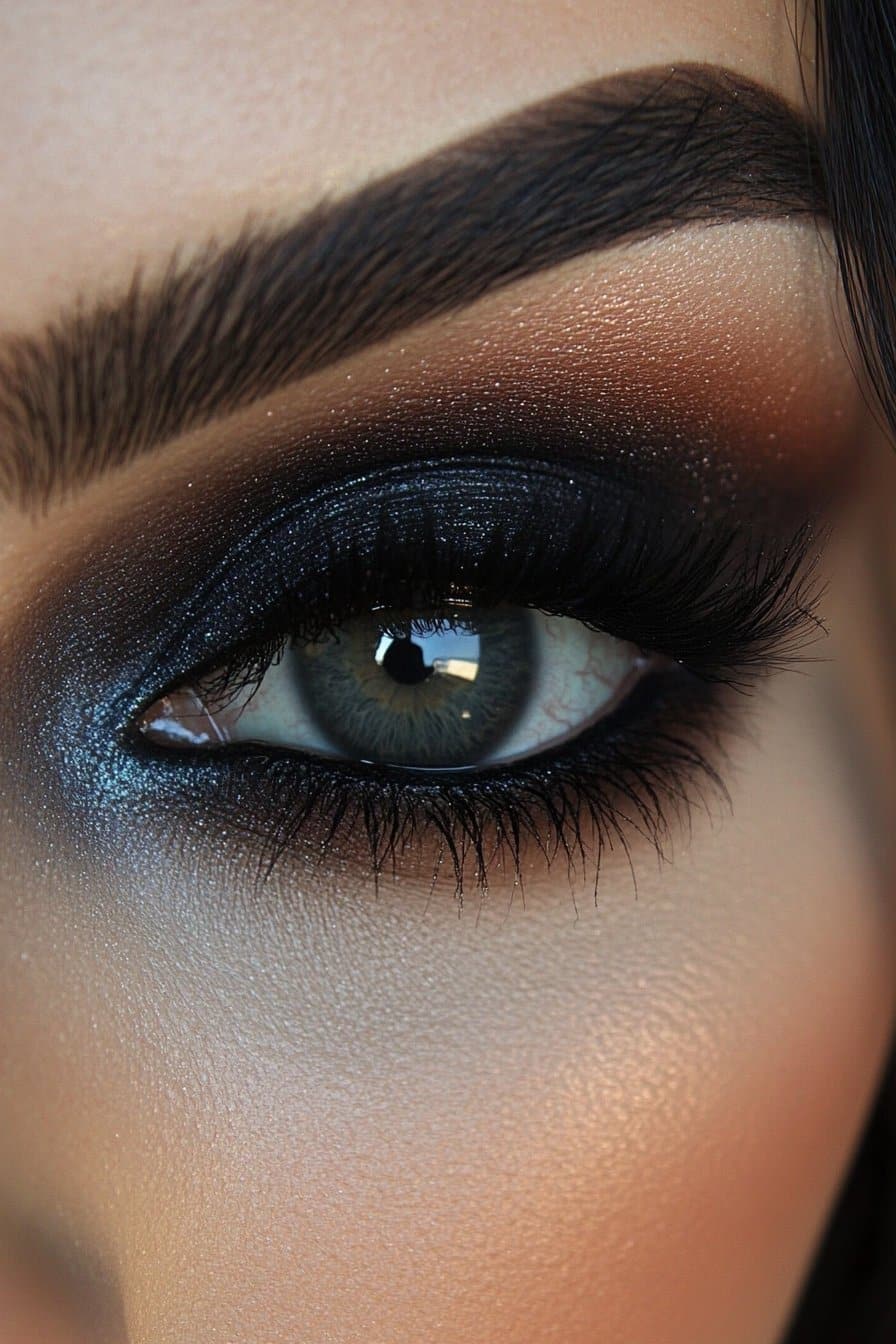
Navy blue eyeshadow has become my go-to choice instead of traditional black smokey eyes. My recent work at Fashion Week showed me how this shade adds sophistication to grunge eye makeup looks without losing its edge.
Color Choice
The right navy shade makes all the difference in your final look. Start with a matte navy blue on the inner two-thirds of your eyelid. You can add depth by layering a shimmery navy shadow on the rest of the lid. After working countless runway shows, I found that cream textures work best and stop any fallout during application.
Application Process
You need patience and precision to create the perfect navy smoke. Here’s my tested method from the runway:
- Prime eyes really well so makeup lasts longer
- Apply dark blue pencil along waterline
- Pat navy shadow onto outer corners
- Blend into crease using circular motions
- Layer shimmery navy on inner corners
- Set with finishing spray to make it last
Look Variations
Backstage experience taught me that navy smokey eyes work with many styles. Pair it with fresh skin and light blush for daytime. Want more drama? Add black mascara to your top and bottom lashes. Client sessions showed me that your lip color choice matters – go for satin-finish neutrals to keep the focus on your eyes.
Double-Wing Rebellion
My recent runway shows have shown double-winged eyeliner becoming a bold statement in grunge eye makeup looks. I first became skilled at this technique backstage at Dior’s spring show. It creates striking definition and keeps that rebellious edge we all love.
Required Products
The right tools make all the difference. You’ll need a smudge-proof eyeliner – start with a longwear liquid formula to get crisp lines. My backstage experience shows that having both gel and pencil options gives you more styling flexibility. A good eye primer is crucial to stop any transfer during the day.
Creation Steps
After doing countless Fashion Week sessions, I’ve got a foolproof way to nail this look:
- Prime eyelids with concealer or dedicated primer
- Create your first wing along upper lash line
- Draw second wing parallel to first, leaving negative space
- Extend bottom wing slightly past top line
- Define inner corners with triangular shape
Style Guide
Double wings are incredibly versatile. A modern twist I love is using contrasting shades – maybe even cobalt blue with classic black. My work with celebrities has shown that neutral makeup elsewhere lets your eye artistry pop. Practice builds confidence naturally – even the pros spend time getting this technique just right. Add a touch of highlighter between the wings to boost sophistication.
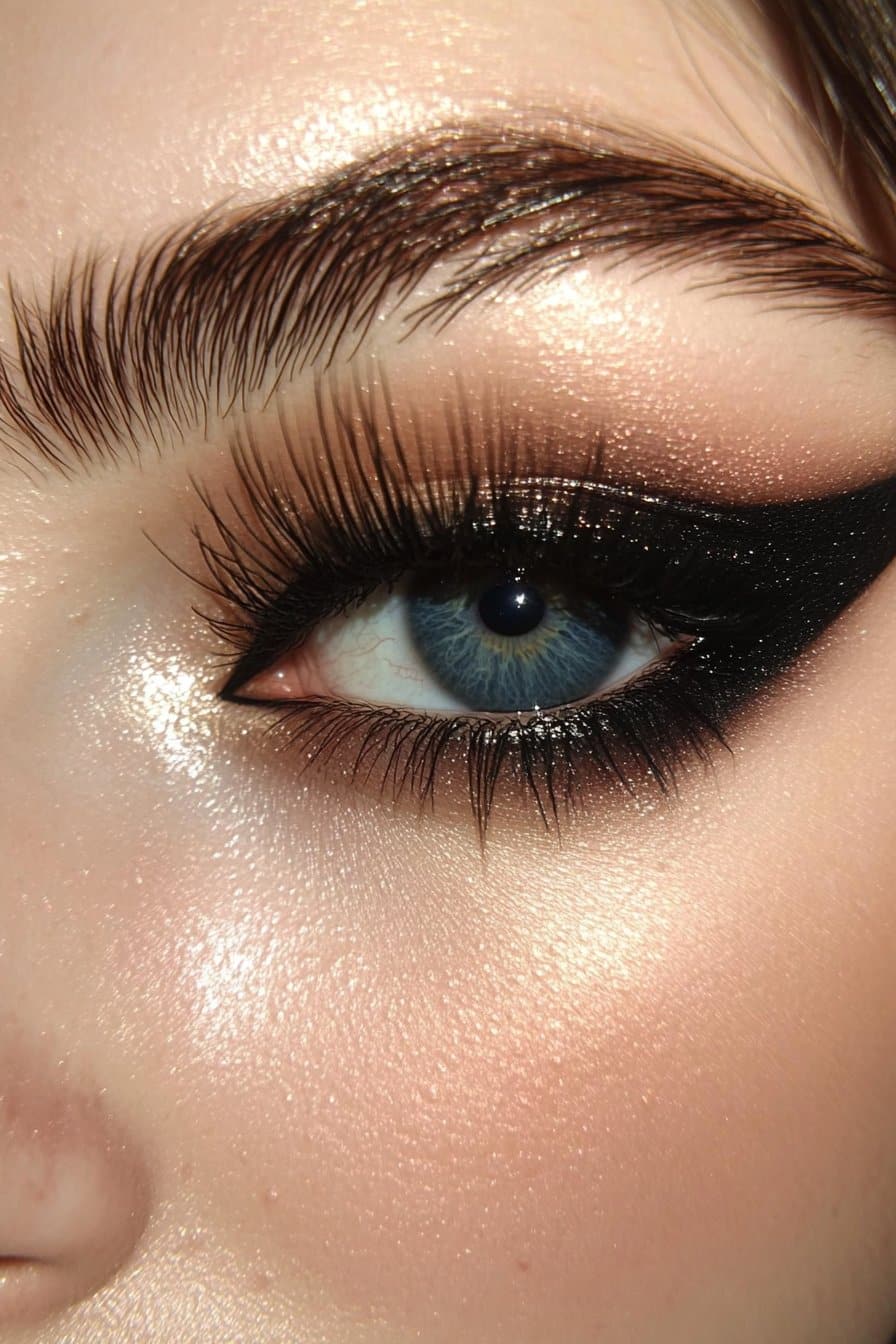
Dramatic Black Void
My signature black void eye look came to life after it made waves at Paris Fashion Week. Years of working as a makeup artist helped me perfect this technique. Now I can create maximum drama while keeping the look wearable.
Product Selection
You need specific tools to achieve this intense look. A creamy black base that gives enough time to blend works best. My runway experience shows that waterproof gel liners last longer than other products. The best results come from three essential items: a neutral primer, matte black eyeshadow, and a precision smudger brush.
Intensity Building
The depth comes from careful layering. Here’s how I do it on the runway:
- Apply neutral shade across lid for mattification
- Paint black shadow on inner and outer thirds
- Keep center area clear for dimension
- Blend edges using circular motions
- Layer additional black for intensity
We focused on building color step by step instead of applying too much at once. My celebrity client sessions taught me that patience gives the most dramatic results.
Final Touches
Small details make this look special. The inner and outer corners of the lower lash line need darker shades. Your look gets extra drama when you tight-line both upper and lower waterlines with waterproof formula. The look comes together when you add multiple coats of volumizing mascara. Put extra product on outer corners to create that perfect fanned effect.
A fine mist of setting spray locks everything in place. My backstage experience shows this technique will give your black void creation staying power through any event. The intensity stays strong for up to 24 hours.
Conclusion
My work at Fashion Week and with countless celebrity clients has shown me how grunge eye makeup evolved from a rebellious statement to versatile artistry. These 17 looks demonstrate the amazing range of grunge-inspired techniques that work for both subtle everyday wear and bold evening statements.
Moving from Savannah to New York’s bustling streets taught me that grunge makeup doesn’t aim for perfection – it celebrates personal expression and creativity. The soft smudged liner works great for daily wear, while the dramatic black void makes a statement for special occasions. Each look lets you add your own creative touch.
These techniques might look challenging at first. I started just like you, practicing in my tiny apartment before I made it to Fashion Week stages. The simple smoky eye or subtle smudged liner make great starting points. Once you become skilled at these basics, you can try more complex styles like the double-wing rebellion or abstract liner art.
The beauty of grunge makeup lies in its forgiving nature. Those slightly imperfect edges and lived-in textures create the most authentic looks. Makeup should make you feel strong and confident, not bound by perfection’s rules.
Note that true artistry develops through practice and patience. Choose one look that resonates with you, perfect it, then explore another. Your makeup experience is unique – own it with confidence and creativity.