
Honestly, my patience when it comes to hairstyles for going out is practically non-existent. I prefer to be out the door in five minutes flat, yet still want my hair to make that perfect statement. Sound familiar?
In our busy lives, time is truly the ultimate commodity. I’ve tried countless quick hairstyles and easy going out hairstyles when rushing from my desk to dinner plans. The good news? You can actually create gorgeous going out hair in just 15 minutes without calling in professionals. Whether you’re heading to casual outings with friends or evening events, these quick and easy hairstyles will have you looking polished without the time investment.
I’ve consulted with professional hairstylists like to bring you 15 stunning but simple looks that take just 10 minutes or less. From messy high ponytails to Dutch braids and bubble ponytails, these styles are designed for those of us who value both time and appearance. The best part? Many of these styles aim to look intentionally undone, so perfection isn’t necessary!
Messy High Ponytail
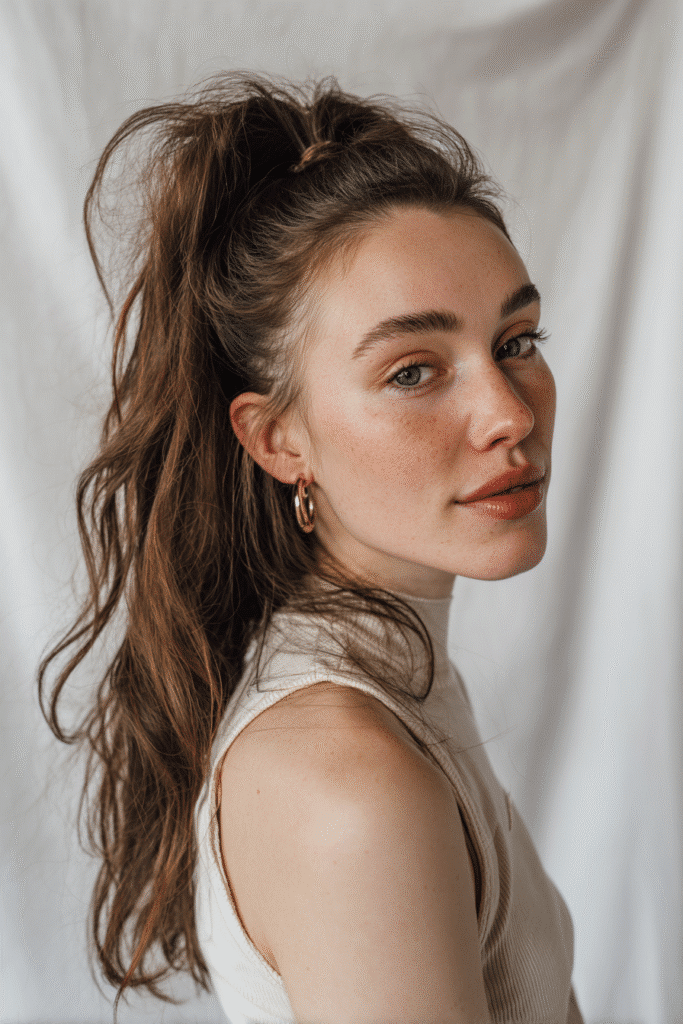
The messy high ponytail has become my absolute go-to for those nights when I’m rushing from work to evening plans. Unlike those perfectly sleek styles that require precision, this deliberately disheveled look actually gets better with a bit of imperfection.
What is the Messy High Ponytail
The messy high ponytail is exactly what it sounds like—a ponytail positioned high on the crown of your head with intentional volume and texture. This style embraces a carefree, tousled appearance while maintaining an undeniably chic vibe. The key difference from a regular ponytail? It’s all about that artful messiness and strategic volume. Furthermore, this style works beautifully for both medium and long hair lengths, though those with shorter cuts can achieve it with extensions.
Why Messy High Ponytail works
There’s a reason this hairstyle has become increasingly popular—it strikes the perfect balance between effortless and polished. Moreover, it’s incredibly versatile:
- Creates an instant face-lifting effect when positioned correctly
- Frames your face beautifully when you pull out a few strategic strands
- Works exceptionally well with turtlenecks and evening outfits
- Looks even better with day-old hair (making it perfect for those no-wash days)
- Gives the impression you’ve put in more effort than you actually have
Additionally, it flatters almost every face shape when customized properly. The high placement elongates your neck while the softness around your face creates a flattering frame.
How to style Messy High Ponytail quickly
Here’s my foolproof method that takes less than 10 minutes:
- Prep your hair with texture spray or powder for grip—this is essential for hold and volume.
- Flip your head upside down (gravity helps you place it higher) and brush your hair toward the crown of your head.
- Secure with a hair tie at the height you want—typically in line with your cheekbones for the most flattering look.
- Pull out face-framing pieces to soften the look and create that effortless vibe.
- For extra volume, gently tug at sections of hair at the crown to create lift.
- Wrap a small section of hair around the elastic to hide it and secure with a pin.
- Finish with a light spritz of hairspray to lock everything in place without sacrificing movement.
The magic truly happens in that final step of loosening and pulling out strategic pieces—that’s what gives it that perfectly undone finish that looks so effortlessly chic.
Bubble Braids
I’m always on the lookout for hairstyles that create maximum impact with minimum effort, which is exactly why bubble braids have become one of my favorite quick hairstyles for going out.
What is the Bubble Braids style
Despite their name, bubble braids aren’t actually braids at all! Instead, they’re ponytails with sections of hair separated by hair ties at regular intervals, creating a series of “bubbles” along the length. This playful style adds volume and texture to your hair without the complexity of traditional braiding techniques. Essentially, if you can make a basic ponytail, you can create this eye-catching look.
Why Bubble Braids work for quick outings
Bubble braids have become increasingly popular because they’re practically foolproof and take just minutes to create. Firstly, they work on various hair lengths and textures, making them universally flattering. Additionally, they cause less tension on the scalp compared to tighter braiding styles, offering more comfort for extended wear.
What I particularly love about this style:
- Takes less than 10 minutes to complete
- Requires no heat styling (unless you want to curl face-framing pieces)
- Offers a creative look that appears more complex than it actually is
- Works beautifully for both casual outings and special events
How to style Bubble Braids quickly
Here’s my simple approach to creating bubble braids in minutes:
- Start by brushing your hair thoroughly to remove tangles
- Create a ponytail in your preferred position—high, low, or side placement all work wonderfully
- Secure your first ponytail with an elastic—I often use a scrunchie for the base
- Place another elastic a few centimeters down from the first
- Gently pinch and pull the hair between elastics outward to create your first “bubble”
- Continue placing elastics and creating bubbles down the length of your ponytail
- For added volume, lightly tease each section before pulling it out
For extra flair, try double bubble braids by dividing your hair into two sections before starting.
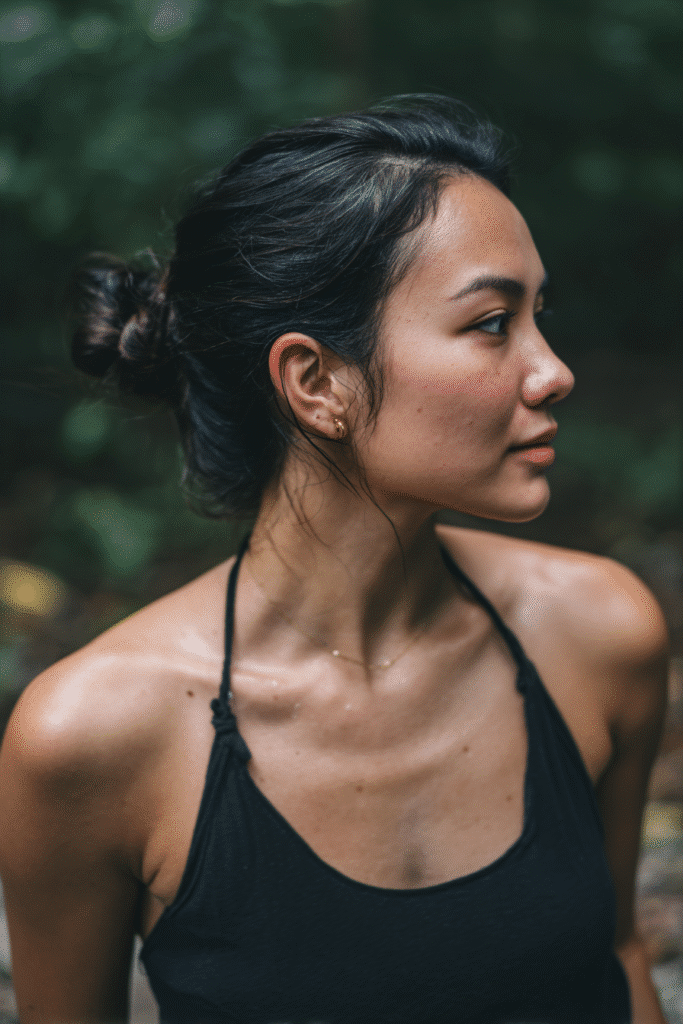
Sleek Low Bun
The sleek low bun has been my faithful companion for five years now, and I’m convinced it’s the ultimate elegant hairstyle for any occasion. Whenever I need to look polished yet effortless, this style never disappoints.
What is the Sleek Low Bun
A sleek low bun is exactly what it sounds like—a smooth, polished bun positioned at the nape of your neck. This classic updo features hair pulled back tightly against the head and twisted into a neat bun. Unlike messy styles, the sleek low bun embraces a controlled, refined appearance with minimal flyaways. Consequently, it creates a clean silhouette that draws attention to your facial features and neckline.
Why Sleek Low Bun is a go-to
The sleek low bun has earned its reputation as a timeless hairstyle that never goes out of style. Accordingly, many consider it the perfect balance between sophistication and simplicity. Here’s why it remains a favorite:
- It complements statement outfits, allowing your clothes to take center stage
- Works beautifully with statement accessories like headbands and bold earrings
- Takes just minutes to create yet looks professionally styled
- Appropriate for virtually any setting—from casual outings to formal events
- Promotes healthier hair by reducing heat styling damage
- Creates an instant polished appearance even on bad hair days
Plus, as noted in recent years, the low bun has been reclaimed as a symbol of modern womanhood—elegant without being stuffy, commanding without trying too hard.
How to style Sleek Low Bun quickly
Creating this sophisticated style in under 10 minutes is entirely possible. Here’s my foolproof method:
- Start with slightly damp hair or second/third-day hair for better grip
- Apply a small amount of hair cream or oil to smooth flyaways
- Use a boar bristle brush (game-changer!) to smooth hair back
- Secure hair into a low ponytail at the nape of your neck
- Twist the ponytail and wrap it around the base to form your bun
- Secure with bobby pins or a second elastic with hooks
- Apply a light mist of hairspray or shine spray for extra polish
For those with shorter hair, don’t worry—you can still achieve this look by focusing on securing those flyaways with extra pins. Second-day hair often works best for this style, providing the perfect balance of grip without excessive oil.
Half-Up Claw Clip
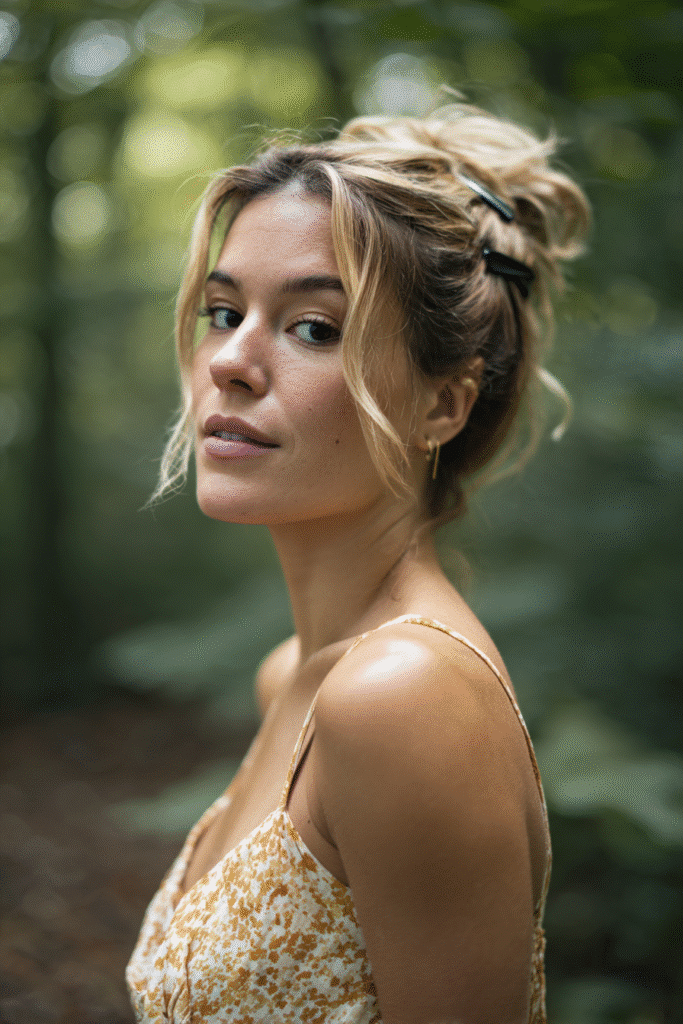
Recently, claw clips have gone from purely functional to genuinely fashionable accessories in my style arsenal. The half-up claw clip has saved me countless times when running late yet needing to look put-together for evenings out.
What is the Half-Up Claw Clip style
The half-up claw clip style involves gathering the top section of your hair—typically from the temples to the crown—and securing it with a medium-sized claw clip while allowing the rest to fall naturally. This versatile style showcases your hair’s texture beautifully without hiding it completely. Beyond the basic version, variations include twisted half-ups, half-up buns, and voluminous versions that add dimension to your look.
Why Half-Up Claw Clip is a quick fix
Among all my favorite quick hairstyles for going out, this one genuinely takes minimal effort:
- Requires just 1-2 minutes to complete
- Works for virtually any hair type and texture
- Creates an effortless yet sophisticated appearance
- Allows for customization based on the occasion
- Prevents hair damage from heat styling
Simply put, the half-up claw clip has evolved into a sophisticated accessory beloved by fashion trendsetters. For those evenings when I’m rushing between work and social plans, this style offers that perfect balance of polished yet relaxed.
How to style Half-Up Claw Clip quickly
Here’s my foolproof method that never fails:
- Place your thumbs in front of your ears and trace upward to the crown of your head
- Section off this top portion of hair, keeping it smooth
- For a basic style: simply secure this section with your clip
- For an elevated look: twist the section before clipping
- Add extra security by pinning where you want the clip to sit
To create even more volume, try dividing the top section in half, crossing the right section over the left, then securing where they meet. Subsequently, flip the ponytail down and fan it over the clip for a polished finish that looks deliberately styled rather than hastily assembled.
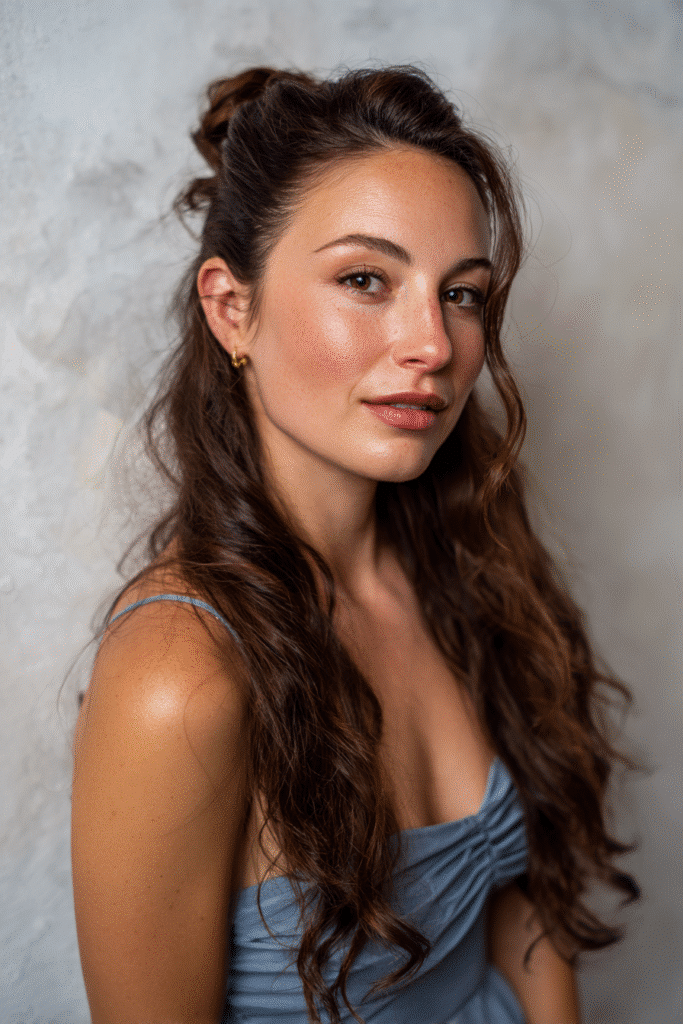
Loose Waves with a Twist
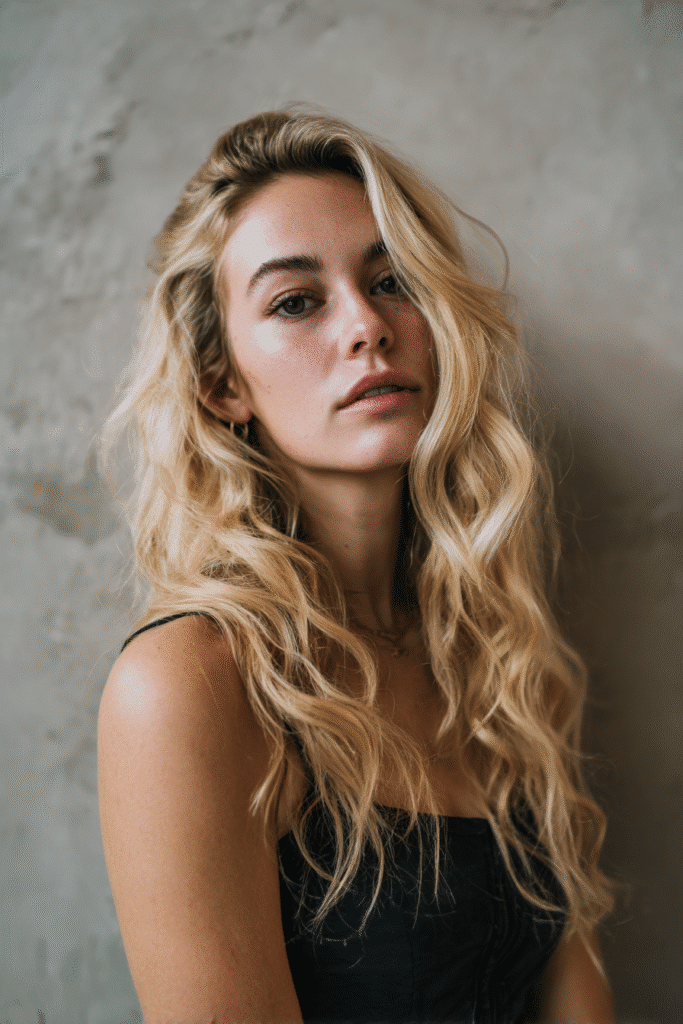
From casual brunches to glamorous evenings, loose waves have saved me countless times! This effortlessly chic style has become my signature look whenever I need that perfect balance of polished yet relaxed.
What is Loose Waves with a Twist
Loose waves with a twist combines gently undulating waves with a twisting technique that creates natural-looking movement throughout your hair. Unlike standard curls, this style features a softer, more relaxed pattern that mimics the waves formed after a day at the beach. The “twist” element refers to both the technique used to create the waves and the subtle variation that makes them look more natural than traditional curled hair.
Why Loose Waves are perfect for going out
In my experience, loose waves offer unmatched versatility for evening occasions. First thing to remember, this style adds dimension to your hair, making it look fuller and more voluminous without excessive product application. Similarly, the waves enhance texture, giving your hair a soft and silky appearance that looks effortlessly glamorous.
What makes this style truly special:
- Creates movement that catches the light beautifully
- Works for every hair length from bob to waist-length
- Transitions perfectly from day to evening events
- Looks intentionally styled yet not overly done
In fact, loose waves blend well with every type, texture, and color of hair to create a fuller, more glamorous look.
How to style Loose Waves quickly
Here’s my 10-minute method that never fails:
- Start with day-old hair or apply texturizing spray for grip
- Divide your hair into manageable sections (4-6 total)
- For each section, twist the hair tightly before wrapping around your curling iron
- Hold for 5-8 seconds depending on your hair type, then release
- Alternate the direction of your twists for a more natural effect
- Allow curls to cool completely before touching
- Gently run fingers through to separate waves
- Finish with a light mist of flexible-hold hairspray
The magic happens in those alternating directions – this prevents waves from blending into one big curl. In addition, brushing out the curls transforms them from tight spirals into those perfect loose, lived-in waves we’re after!
Twisted Ponytail

As someone perpetually running behind schedule, I’ve fallen in love with the twisted ponytail—a hairstyle that has rescued me countless times throughout my last-minute prep sessions!
What is the Twisted Ponytail
The twisted ponytail elevates your standard ponytail by incorporating twisted rope-like sections that create visual interest and texture. This versatile style features sections of hair twisted together before being gathered into a ponytail, giving it a more sophisticated appearance than a basic ponytail. Depending on the technique, it can range from bohemian to polished, making it ideal for various occasions.
Why Twisted Ponytail is a quick hairstyle
This hairstyle has become my secret weapon primarily because it takes just 5 minutes to create yet transitions beautifully from day to night activities. What makes this style particularly practical:
- Works exceptionally well on unwashed, second-day hair (or fifth-day—no judgment here!)
- Suitable for both long and medium-length hair
- Looks intentionally styled yet requires minimal effort
- Creates a secure style that stays put during activities
- Can be dressed up with accessories for more formal occasions
Generally, I’ve found it perfect for those nights when I need to look put-together without spending precious time in front of the mirror.
How to style Twisted Ponytail quickly
My go-to method for creating a twisted ponytail in minutes:
- Section off a small triangle of hair near your part
- Divide this section in two and twist the sections upward
- Continue adding new sections of hair to both the top and bottom sections as you twist
- Secure with a clip once you reach the back of your head
- Repeat on the other side
- Gather all remaining hair with the twisted sections into a ponytail
- Optional: Cover the elastic with a small section of hair or an accessory
For extra volume and a more relaxed look, gently tug on the twisted sections to loosen them slightly. This creates that perfect “done but not too done” appearance that’s ideal for spontaneous outings!
Dutch Braids
For years, Dutch braids have been my reliable secret weapon whenever I need an impressive yet simple hairstyle for special nights out.
What are Dutch Braids
Dutch braids are essentially inside-out French braids where you cross hair sections under the middle strand rather than over it, creating that distinctive raised, textured look. Historically, these braids originated with South African women who used them as protection against the harsh sun before Dutch culture adopted the style. The result is a three-strand plaited hairstyle that sits prominently on top of your hair rather than flat against your head.
Why Dutch Braids are easy going out hairstyles
Dutch braids offer practical benefits that make them ideal for evenings out:
- Only require about 10 minutes to complete
- Create volume while keeping hair securely out of your face
- Work perfectly for creating overnight waves without heat damage
- Can be dressed up or down depending on the occasion
- Last for hours without needing adjustment
Beyond practicality, these braids give any outfit that polished, put-together appearance without looking like you’ve tried too hard.
How to style Dutch Braids quickly
To create quick Dutch braids:
- Begin with detangled hair (slightly textured hair provides better grip)
- Take a small section at the front and divide into three equal parts
- Cross the right section under the middle, then the left section under the middle
- Continue this pattern, adding small sections of hair each time you cross under
- Once you’ve incorporated all hair, finish with a regular three-strand braid
- Secure with an elastic and gently pull sections to create fullness
Specifically for beginners, practice makes perfect—you’ll master this technique within 2-3 attempts.
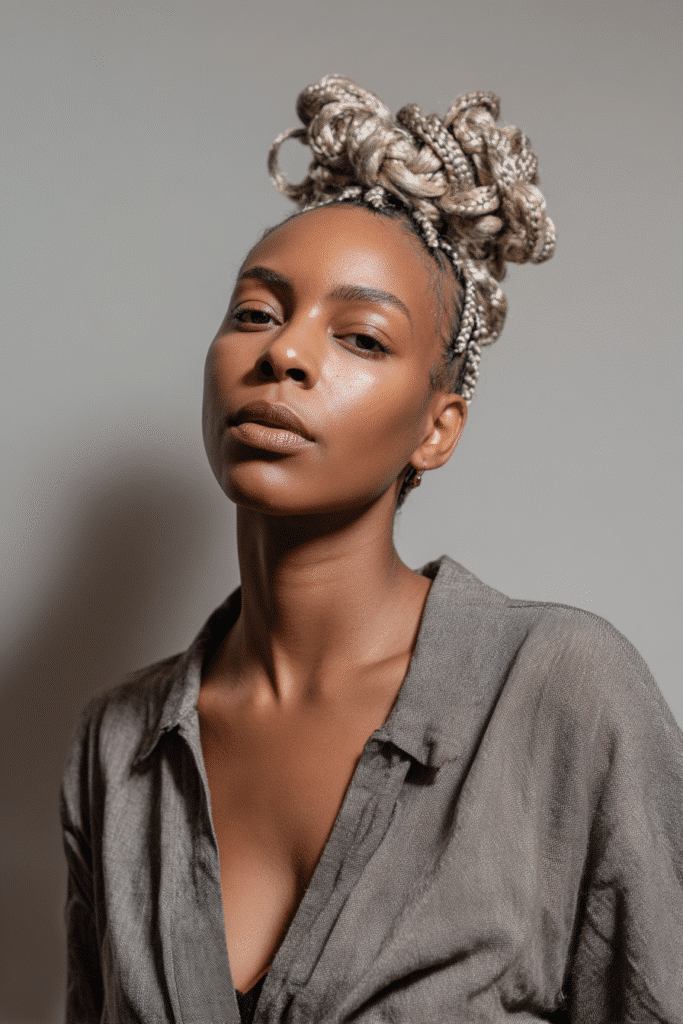
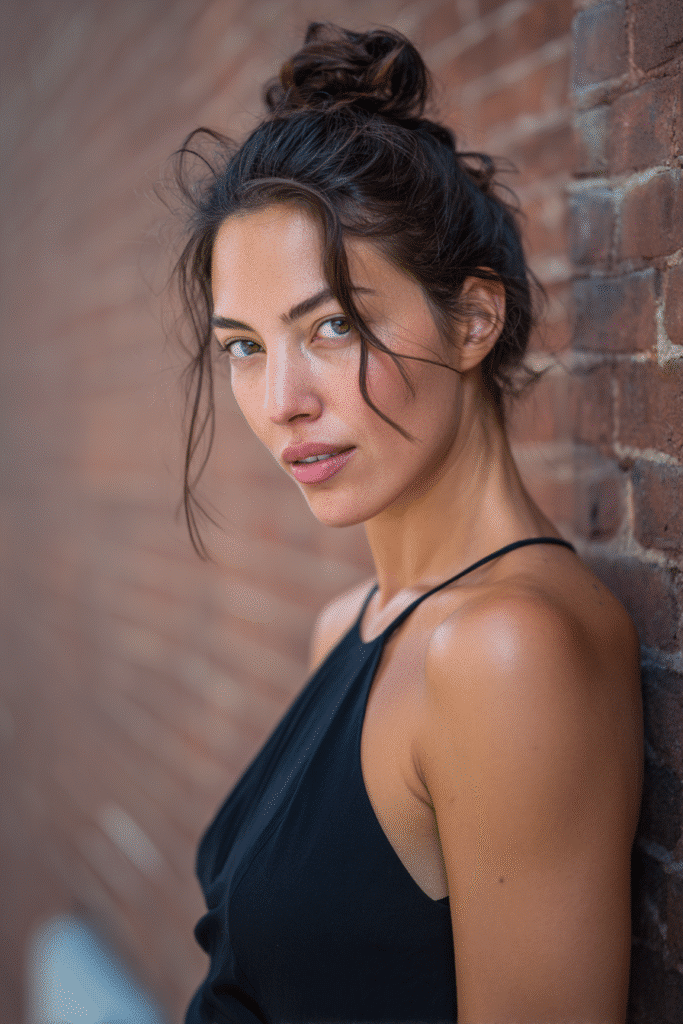
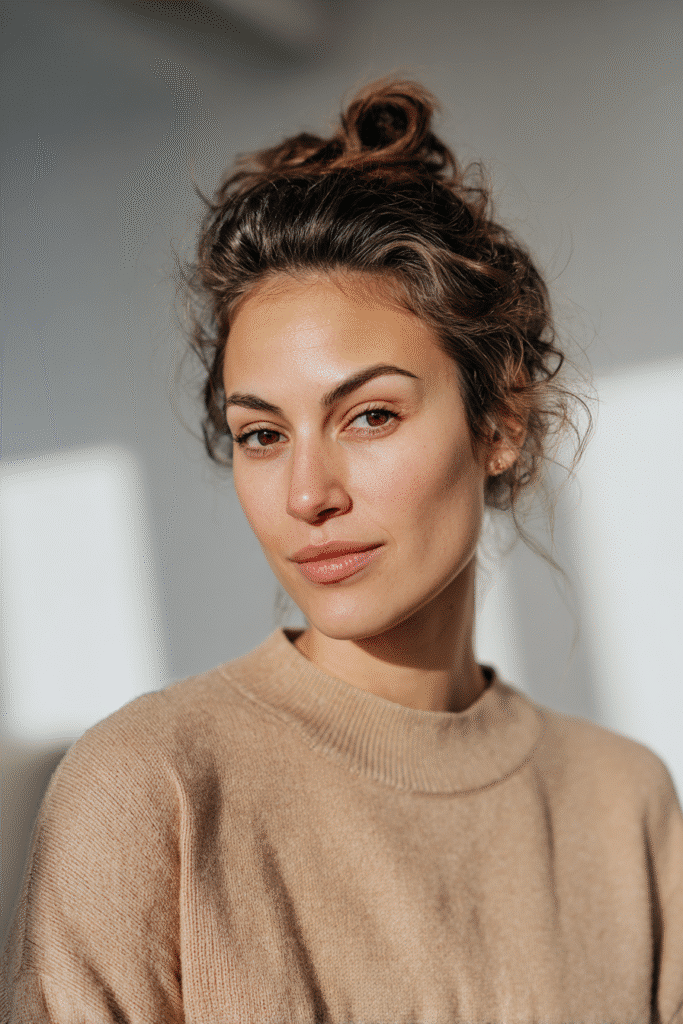
Textured Top Knot
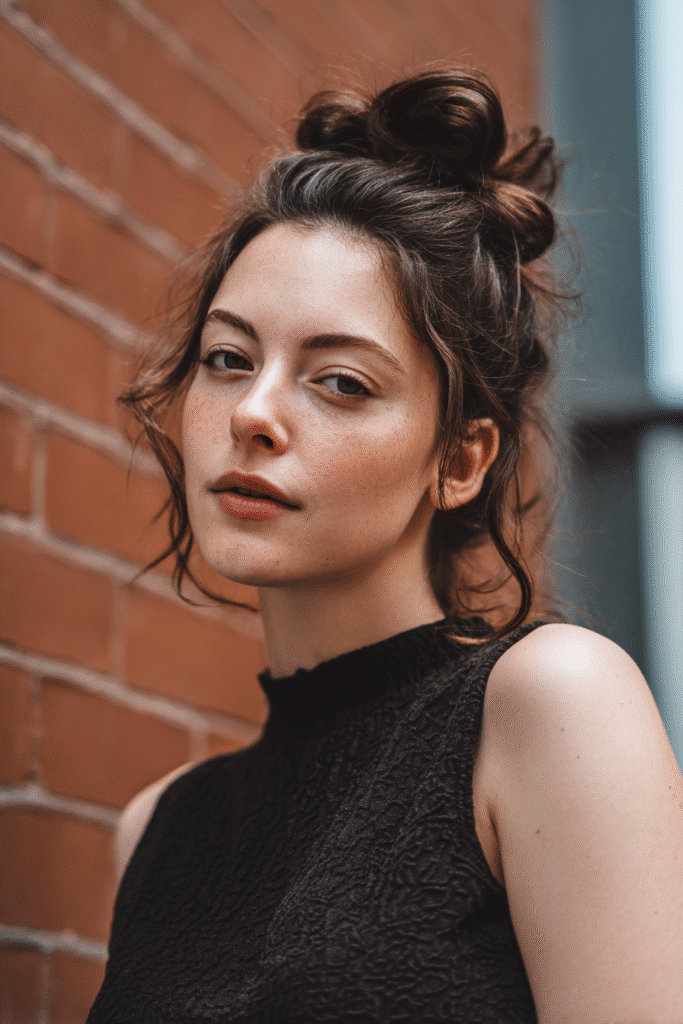
The textured top knot has become my everyday hero whenever I’m headed for a night out with minimal prep time. This style epitomizes that perfect balance of “I tried” and “I’m effortlessly chic” that we’re all secretly aiming for.
What is the Textured Top Knot
A textured top knot is essentially a voluminous, slightly disheveled bun positioned high on your head. Unlike sleek buns, this style embraces natural texture and intentional messiness. The “textured” element refers to the deliberately tousled appearance—with strategic looseness and volume that creates dimension. It’s that “perfectly imperfect” look that’s become a runway favorite before trickling down to red carpets and everyday wear.
Why Textured Top Knot is a quick hairstyle
The textured top knot has rightfully earned its place as every busy person’s best friend for quick styling. Naturally, it thrives on second or third-day hair, making it perfect for those mornings after. Plus, the style:
- Hides oiliness while turning it into an advantage for hold
- Creates the illusion of effort while requiring minimal skill
- Works on virtually all hair types with slight adjustments
- Takes literally 5 minutes or less to complete
How to style Textured Top Knot quickly
Creating this look is refreshingly straightforward:
- Prep hair with dry shampoo or texturizing spray for grip and volume
- Flip your head over and gather hair into a high ponytail
- Secure with an elastic, but don’t pull the tail through completely on the final loop
- Fan out the loop to create a “clover” shape
- Wrap remaining hair around the base and secure with bobby pins
- Gently pull sections to create fullness and that intentionally undone look
- Finish with a light mist of hairspray for all-day hold
Above all, don’t aim for perfection—the beauty of this style lies in its artful messiness!
Slicked-Back Chignon
Whenever I’m aiming for sophistication in minutes, the slicked-back chignon consistently delivers that perfect balance of elegance and efficiency for my evening outings.
What is the Slicked-Back Chignon
The slicked-back chignon is a polished updo where hair is pulled tightly back and twisted into a neat bun at the nape of your neck. This timeless style features smooth, snatched strands that create a sleek silhouette from every angle. Oftentimes described as a ballerina bun, the chignon offers a more refined and formal variation with its ultra-smooth appearance.
Why Slicked-Back Chignon works for evenings
This hairstyle has become my evening essential because:
- Creates an instant “face lift” effect by accentuating cheekbones
- Provides that sophisticated, model-off-duty look without professional help
- Works beautifully with statement jewelry and dramatic necklines
- Surprisingly versatile across different hair textures
Notably, the slicked-back chignon thrives on second or third-day hair, making it perfect for those evenings when a full wash isn’t feasible yet you need to look impeccable.
How to style Slicked-Back Chignon quickly
My 10-minute method:
- Prep with smoothing cream or hair oil for shine and control
- Using a boar bristle brush, pull hair back tightly to desired height
- Secure into a ponytail with a strong elastic
- Twist the ponytail around itself to form the chignon
- Secure with bobby pins or a second hair tie
- Finish with hairspray for all-night hold
For extra polish, use a light styling cream along the hairline to catch flyaways.
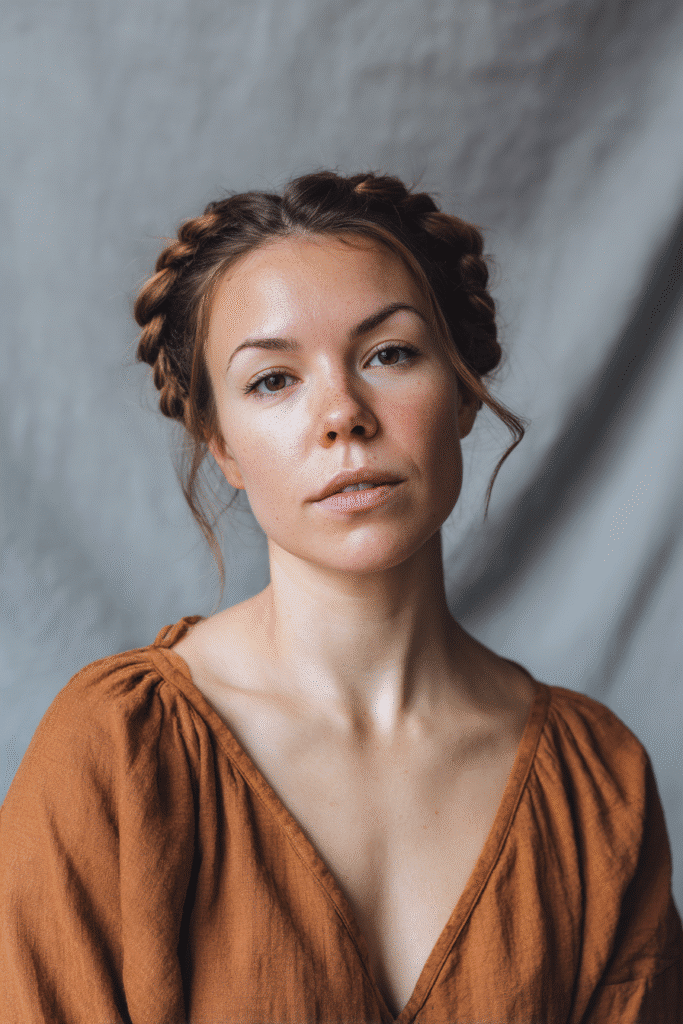
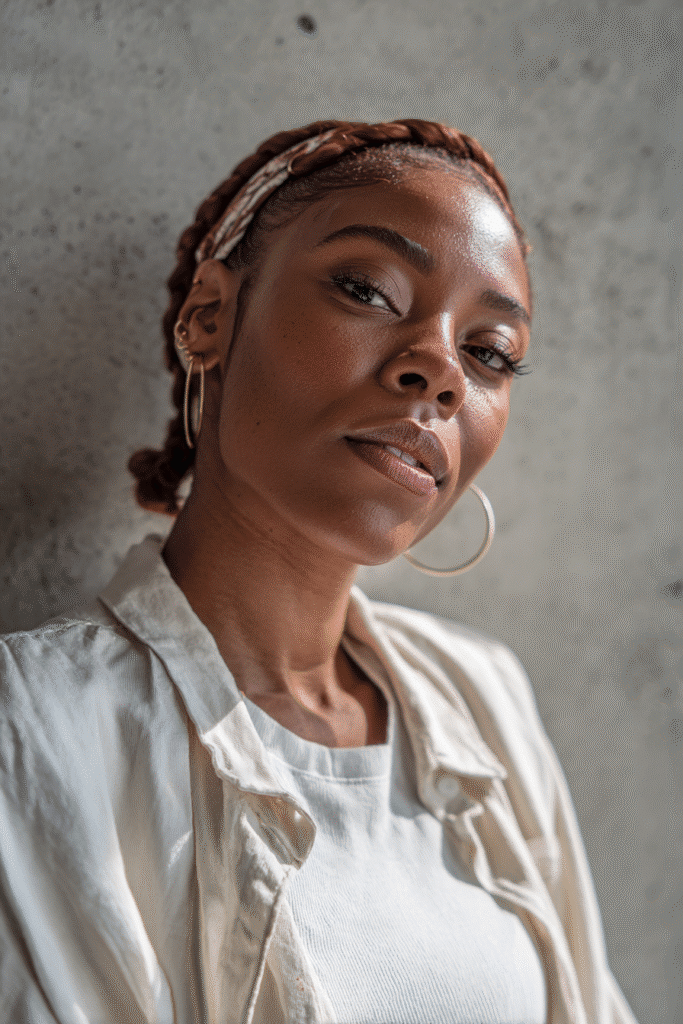
Braided Headband
The braided headband has completely transformed my rushed morning routine, becoming my ultimate hair savior for days when style and speed need to work hand in hand.
What is the Braided Headband style
A braided headband is a versatile style that features a braid running across your forehead like a headband, either using your own hair or as an accessory. This style beautifully frames your face while keeping hair neatly tucked away. Several variations exist—French braided headbands create a seamless look, Dutch braids offer texture, lace braids add delicacy, or rope twists provide quick elegance.
Why Braided Headband is a quick fix
The headband braid has earned its place in my rotation of easy hairstyles for going out since:
- It’s wonderfully versatile, working equally well for casual outings or formal events
- Keeps pesky strands from messing with my makeup, especially during summer
- Takes merely 5 minutes to create once you’ve practiced
- Works on various hair textures and lengths
- Perfect for growing out bangs or framing different face shapes
How to style Braided Headband quickly
For a speedy braided headband:
- Create a deep side part, sectioning a 3-inch strip from your part to behind your ear
- Divide this section into three strands and begin braiding along your hairline
- Add hair only from the front side as you braid (like a lace braid)
- Once you reach your opposite ear, secure with bobby pins or a small elastic
- Tuck the end underneath other hair or wrap around for a finished look
Half-Up Twisted Knot
I’ve fallen in love with the half-up twisted knot every time I need that perfect balance between sophistication and casual vibes. It’s my favorite five-minute miracle!
What is the Half-Up Twisted Knot
The half-up twisted knot combines the best of both worlds—a polished upstyle with the freedom of leaving most hair down. This lovely style involves taking two sections from the front of your hair, twisting them towards the back, and fastening them with a cute clip or creating a knot. Furthermore, it beautifully frames your face while showcasing your length.
Why Half-Up Twisted Knot is a quick hairstyle
This hairstyle has become my secret weapon for several reasons:
- Perfect for third-day hair (hello, dry shampoo days!)
- Takes literally just 5 minutes to complete
- Creates that youthful, effortless vibe
- Radiates a feminine, polished look without trying too hard
In essence, half-up half-down styles strike that perfect balance between the polish of an upstyle and the ease of wearing your hair down. Coupled with twists and knots, this versatile look adapts to both casual coffee dates and evening events.
How to style Half-Up Twisted Knot quickly
Here’s my foolproof method:
- Section and divide: Take hair from above your ear, divide into two pieces
- Twist toward back: Twist sections around each other
- Repeat on other side: Create identical twist on opposite side
- Create the knot: Take a small section underneath where twists meet, wrap around your finger, then pull ends through the gap
- Secure with pins: Use bobby pins to hold everything in place
For extra volume, gently pull on the edges of your twists before securing them!
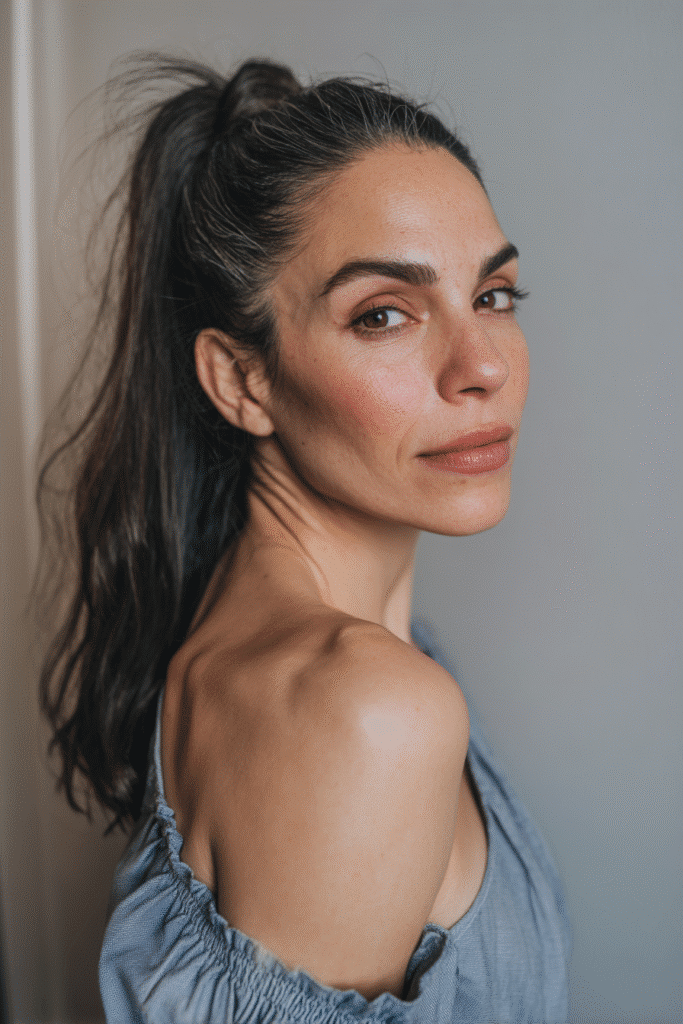
Hair-Tied Ponytail
My absolute favorite time-saving style has to be the hair-tied ponytail. After discovering this technique, I’ve never looked back—it’s become my signature look for impromptu evenings out!
What is the Hair-Tied Ponytail
The hair-tied ponytail is a sophisticated variation where a small section of your own hair wraps around the elastic, creating a polished, seamless look. Unlike standard ponytails, this style conceals the hair tie completely, giving a refined appearance that elevates the classic ponytail to evening-worthy status.
Why Hair-Tied Ponytail is a sleek option
Oftentimes, basic ponytails can look too casual for evening events. Meanwhile, the hair-tied version:
- Instantly adds sophistication without complicated techniques
- Creates that model-off-duty esthetic that works across occasions
- Provides a clean, polished silhouette that pairs beautifully with statement earrings
- Stays secure throughout the night without constant adjustments
How to style Hair-Tied Ponytail quickly
My foolproof method takes just 5 minutes:
- Gather hair at desired height (low ponytails create an ultra-chic look)
- Secure with elastic, leaving it slightly looser than final position
- Take a small section from underneath your ponytail
- Wrap this section around the elastic, completely concealing it
- Secure the end underneath with a bobby pin
- Finish with light hairspray for flyaway control
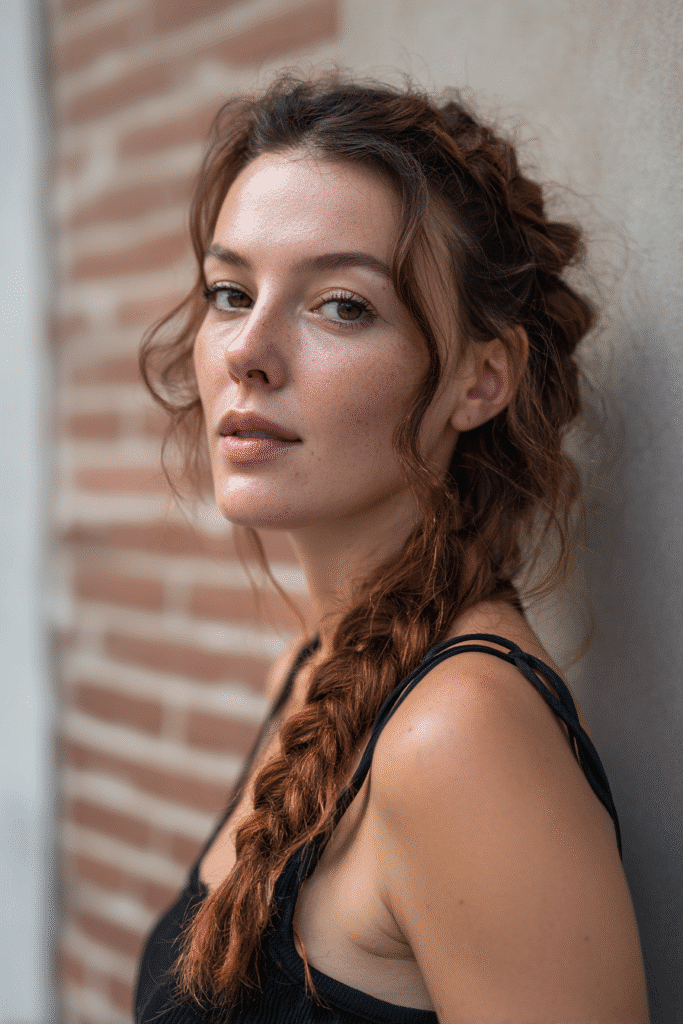
Loose Braid
The timeless loose braid is a hairstyle I reach for repeatedly on days when my hair needs that perfect blend of effortless style and practicality.
What is the Loose Braid
A loose braid is a relaxed, three-strand plait characterized by its intentionally undone appearance and volume. Unlike tight, structured braids, this style embraces a carefree, slightly disheveled esthetic with strands gently pulled apart for fullness. It’s essentially a traditional three-strand braid woven with deliberate looseness, allowing for texture and movement throughout.
Why Loose Braid is a timeless quick style
Throughout fashion history, braids have maintained their appeal as one of the most versatile and enduring hairstyles. Ultimately, their longevity comes from balancing both esthetic and practical benefits:
- Creates an instant bohemian-chic vibe that works for casual outings or dressed-up events
- Functions beautifully on unwashed or bedhead hair (making it perfect for those no-wash days)
- Offers protection for hair ends while looking intentionally styled
- Transitions easily between different fashion eras yet always appears current
The loose side braid, in particular, has become a go-to for effortless beauty that suits virtually any occasion.
How to style Loose Braid quickly
Creating this look takes merely minutes:
- Prep hair with dry shampoo or texturizing spray for extra grip and volume
- Optionally bring all hair to one side for a side braid variation
- Divide hair into three equal sections
- Begin weaving a traditional three-strand braid, crossing right over middle, left over middle
- Continue braiding loosely down the length, securing with a clear elastic
- Gently pull sections of the braid outward (called “pancaking”) to create fullness
- Pull out a few face-framing pieces for that perfectly undone finish
For extra texture, try this on second-day hair—it actually works better with a bit of natural grip!
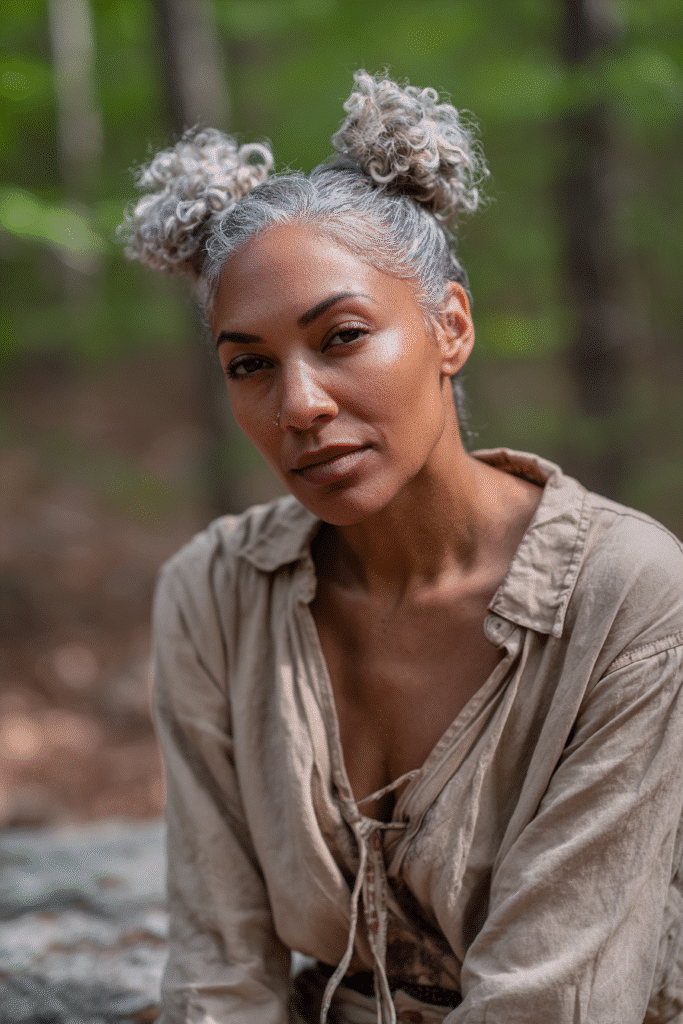
Space Buns
Space buns have rescued me from countless styling emergencies! This playful yet practical style has become my festival season favorite and ultimate quick fix.
What are Space Buns
Space buns are a fun hairstyle where your hair is divided into two sections and styled into buns positioned on either side of your head. Think of them as pigtails, but with buns instead of ponytails. Originally inspired by Princess Leia’s iconic look in Star Wars, this style has evolved into a festival staple beloved for its bold, eye-catching appearance.
Why Space Buns are fun and fast
Oftentimes, I need a style that’s both practical and statement-making. Space buns perfectly fit that need:
- Keep hair off your face throughout long events
- Work on almost any hair type and length
- Can be sleek and polished or messy and textured
- Add volume for those with thinner hair
- Perfect for festival season or casual outings
How to style Space Buns quickly
My 10-minute space bun method:
- Create a center part dividing hair into equal sections
- Form two high ponytails on either side of your head
- Twist each ponytail around itself to form bun shapes
- Secure with elastics or bobby pins
- Pull gently on buns for desired fullness
- Finish with hairspray for all-day hold
French Twist
The elegant French twist rescued me at a recent evening event when I had exactly ten minutes to transform my hair from office-ready to evening-glamorous!
What is the French Twist
The French twist is a classic updo where hair is smoothly gathered, twisted upward, and tucked inward, creating an elegant vertical roll along the back of the head. Unlike casual styles, this sophisticated look features hair twisted in one direction, with ends neatly concealed inside the “tunnel” created by the twist. Essentially, it’s a timeless style that works beautifully for both formal occasions and everyday elegance when created with a looser finish.
Why French Twist is a classic going out hair
Certainly, few hairstyles have maintained their status as the French twist has throughout decades. Therefore, I consider it my ultimate sophistication secret when preparing for special evenings:
- Instantly elevates any outfit with its timeless elegance
- Showcases your neck and shoulders beautifully
- Transitions seamlessly from office to evening events
- Works surprisingly well on second-day hair
Primarily, I love how versatile this style can be—sleek and polished for formal affairs or slightly undone for more casual outings.
How to style French Twist quickly
My 10-minute French twist method never fails:
- Brush hair toward one side of the back of your head
- Secure it to that side with pins
- Hold your hair and twist in the opposite direction
- As you twist, tuck the ends into the tunnel you’re creating
- Insert pins beneath the twist to secure it to your scalp
- Mist lightly with flexible-hold hairspray
For added texture, try teasing the roots slightly with a fine-tooth comb beforehand!
Conclusion
Life gets busy, but that doesn’t mean your hair has to suffer! These 15 quick hairstyles have saved me countless times when rushing from work to dinner plans or preparing for unexpected outings. Each style requires minimal effort yet delivers maximum impact—exactly what we all need for those moments when time feels like a luxury.
Certainly, the beauty of these hairstyles lies in their versatility. Whether you prefer the sophisticated elegance of a French twist, the playful charm of space buns, or the effortless chic of a messy high ponytail, there’s something here for every occasion and personal style. Additionally, most of these looks actually work better with second or third-day hair, turning what might seem like a styling challenge into a genuine advantage!
Despite our hectic schedules, we deserve to feel confident and put-together. The next time you find yourself with just minutes to spare before heading out, remember that gorgeous hair doesn’t always require professional help or hours in front of the mirror. Instead, these quick styles prove that sometimes, simplicity truly is the ultimate sophistication.
My personal favorite remains the sleek low bun—it has never failed me regardless of the dress code or occasion. However, I encourage you to experiment with all these styles until you find your own signature quick fix. After all, the perfect hairstyle isn’t just about looking good—it’s about feeling amazing while spending less time getting ready and more time actually enjoying your evenings out!