
Your perfect prom look deserves an equally perfect hairstyle. Half-up half-down hairstyles will be your ultimate companion this prom season. My years as a professional hairstylist have taught me how a mismatched hairstyle can diminish an otherwise stunning outfit.
These styles stand out because they complement every hair type and texture beautifully. They create an elegant face-sculpting effect by softly lifting your temples and accentuating your cheekbones. You can dance the night away confidently, knowing your hair will stay perfectly in place whether you choose a formal pantsuit or a flowing gown.
My curated collection features 17 breathtaking half-up half-down styles that will make you shine at prom 2025. Each style ranges from casual chic to ultra-formal elegance. Your personality and mood will find their perfect match while keeping your face beautifully framed and your confidence soaring.
Classic Twisted Crown

A Classic Twisted Crown ranks among my favorite half-up hairstyles for prom clients. This elegant style brings a romantic, boho-chic touch that looks amazing with formal gowns and casual outfits.
Styling Steps
Brush your hair and create a center part. Take two small sections from each side of your head, close to the part. Split each section into two pieces and twist them toward your face. The front piece should cross over the back piece. Add new hair to both sections before twisting again.
Keep this pattern going until you reach the back of your head. Stop adding new hair at this point and just twist the remaining sections to the ends. Use clear elastics to secure. Do the same steps on the other side.
Best Face Shapes
This style looks fantastic on heart-shaped faces and creates great balance. People with oval faces rock this style too, since the crown adds nice height and dimension.
Required Products
You’ll need these essential items:
- Durable bobby pins (avoid the cheap ones that bend and break)
- Two transparent elastic bands
- Texturizing spray for enhanced grip
- Light-hold hairspray for the finishing touch
For professional-quality bobby pins that won’t let you down, I recommend the Goody Bobby Pins Slideproof available on Amazon – they’re designed with a special grip coating that keeps your style secure all night long.
Maintenance Tips
Spray your hair with a light texturizing mist before you start styling. Fine hair gets better volume and texture if you sleep with a loose braid the night before. Bobby pins crossed in an X shape will give you extra hold.
This style’s magic comes from its flexibility – wear it sleek for formal events or pull the twists gently for a relaxed, bohemian look. The style really shines with curled or wavy hair, which adds beautiful dimension.
Straight-haired people should think over adding some curls or subtle waves to boost the style’s romantic feel. The best part? You can create this look in under five minutes during your prom prep.
Boho Braided Cascade
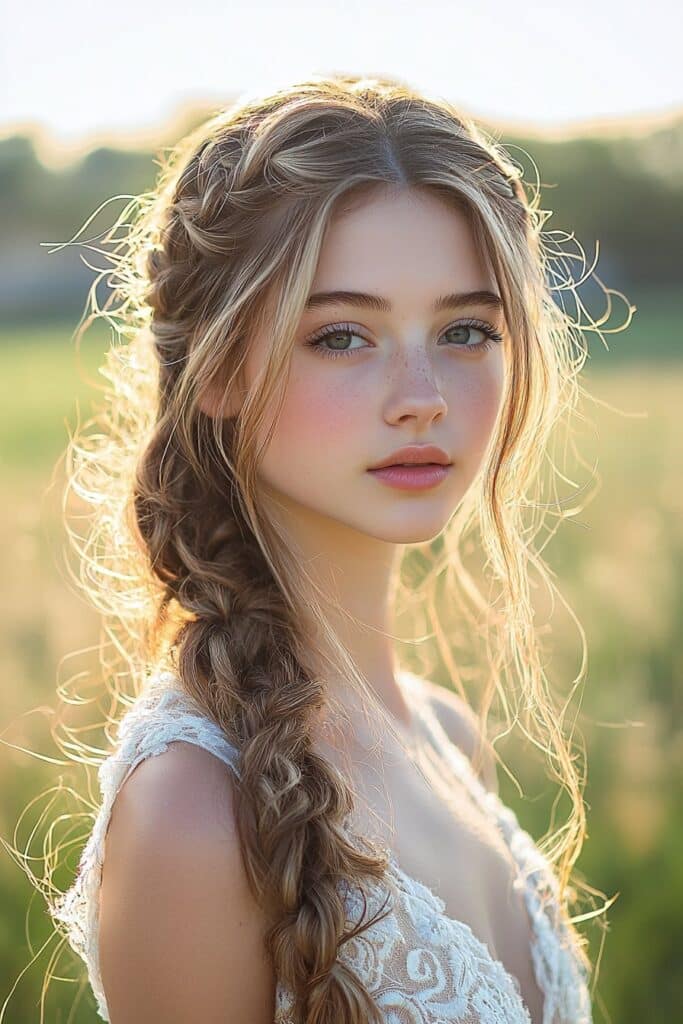
My experience styling countless prom looks has taught me that the Boho Braided Cascade creates a dreamy, soft, romantic style that naturally turns heads. This enchanting half-up hairstyle creates a delicate waterfall effect and works beautifully with any prom dress.
Braiding Technique
The magic starts when you section off your hair’s top half. Create a simple three-strand braid near your crown. Drop one strand after each crossover and pick up a new section to replace it. This technique gives you that signature ‘waterfall’ effect where loose strands fall gracefully through the braid.
You can add extra dimension by pancaking – a technique where you gently tug at the braid sections to create fuller, more voluminous looks. Pull out some soft, face-framing pieces to achieve that effortless, lived-in effect. This style looks amazing with layered hair and makes highlights stand out.
Styling Duration
You can achieve this complete look in about 15-20 minutes. Start by prepping your hair with texturizing spray to get better grip. Divide your hair into manageable sections and focus on creating even, consistent braids. The crown area needs extra attention since it forms your style’s foundation.
Product Recommendations
These essential products will ensure your style stays perfect:
- A flexible-hold hairspray keeps the style intact without creating stiffness
- Texturizing spray provides grip and adds volume at the root area
- Leave-in conditioner enhances natural texture while managing frizz
- Sea salt spray or texturizing mousse boosts grip significantly
The Herbal Essences Set Me Up Hairspray on Amazon is my top recommendation for achieving that perfect balance of hold and flexibility – it delivers long-lasting style control with a lightweight feel that moves naturally with your hair.
Clear elastics or hair-colored ties that blend with your natural color work best to secure the style. A light mist of dry shampoo at your roots absorbs excess oil throughout the evening.
This boho style’s beauty comes from its versatility – it looks great with both straight and curly hair textures. The style looks especially stunning when you add loose waves or subtle curls, as they boost the cascade effect and add romantic movement to the overall look.
Elegant Rose Bun
My signature half-up prom hairstyle has become the Elegant Rose Bun over my years as a professional hairstylist. This romantic style changes regular hair into a stunning floral masterpiece and takes just 10 minutes to create.
Creating the Rose Shape
Your hair needs to be secured in a half-up ponytail. The ponytail section should be braided and gently poofed out for volume. A circular shape forms the rose’s foundation when you loop it. The perfect rose effect comes from starting with a large outside coil that spirals inward. This technique creates a pattern like in a cinnamon roll and shapes the distinctive rose.
Securing Techniques
The rose bun’s picture-perfect look lasts through prom night when you divide the ponytail into four sections and wrap each with a thin, transparent hair net. The first section becomes a figure-eight shape secured with bobby pins. Each remaining section wraps around this center piece like in building a cinnamon bun. A light mist of hairspray and additional pins secure any loose pieces.
Recommended Hair Length
Hair reaching mid-back or bra-band length gives the fullest rose effect, though this style works with hair of all lengths. Medium-length hair looks best with face-framing pieces that boost the overall look. A smaller yet elegant version works for shorter hair when secured with spiral hair pins.
This style is perfect for fine or limp hair because it adds bold dimension and makes hair appear thicker and bouncier. Your hair’s texture improves when you prep with texturizing products and sleep in a loose braid before styling.
The rose bun’s versatility means each creation takes its own unique form, just like real flowers. Delicate accessories or wispy face-framing strands can add extra glamor and create a softer, more romantic look.
Waterfall Braid Glory
My clients never fail to be amazed by the Waterfall Braid’s enchanting cascade effect. I’ve seen this reaction countless times in my work as a celebrity makeup artist and hairstylist. This stunning half-up style creates a magical flow that looks complex but you can actually master it quite easily.
Step-by-Step Guide
Start with a good brush-through to get rid of any tangles. Take a two-inch section near your hairline and split it into three equal parts. A simple three-strand crossover comes first – move the back strand over the middle, then the front strand. The magic happens when you drop the right strand and add a new section from behind, creating that signature waterfall look. Keep this pattern going by dropping sections and adding new ones until you reach where you want to end.
Hair Type Compatibility
The waterfall braid looks beautiful on all hair types. Straight hair might need some light waves first to help it grip better. You’ll get fuller braids with thick hair naturally, while fine hair looks best with some texturizing products for extra volume. Hair that’s a day old usually works best – it has just the right amount of texture to hold well.
Styling Products
Here’s what I love using for long-lasting results:
- A texturizing spray before you start braiding gives better grip
- Light-hold hairspray keeps everything in place without making it stiff
- Volumizing spray clay adds texture and hold
- A bit of working wax makes those dropped strands pop
My time at prestigious beauty academies taught me that steady tension makes the perfect waterfall braid. You’ll get a more dramatic look if you start with bigger dropped sections. Finish by securing the end with clear elastics, then wrap a small piece of hair around them for that polished touch.
Straight hair looks even better with some curls or soft waves added first. Yes, it is a style that works just as well for casual days as it does for formal events – perfect for prom night.
Romantic Curled Twist
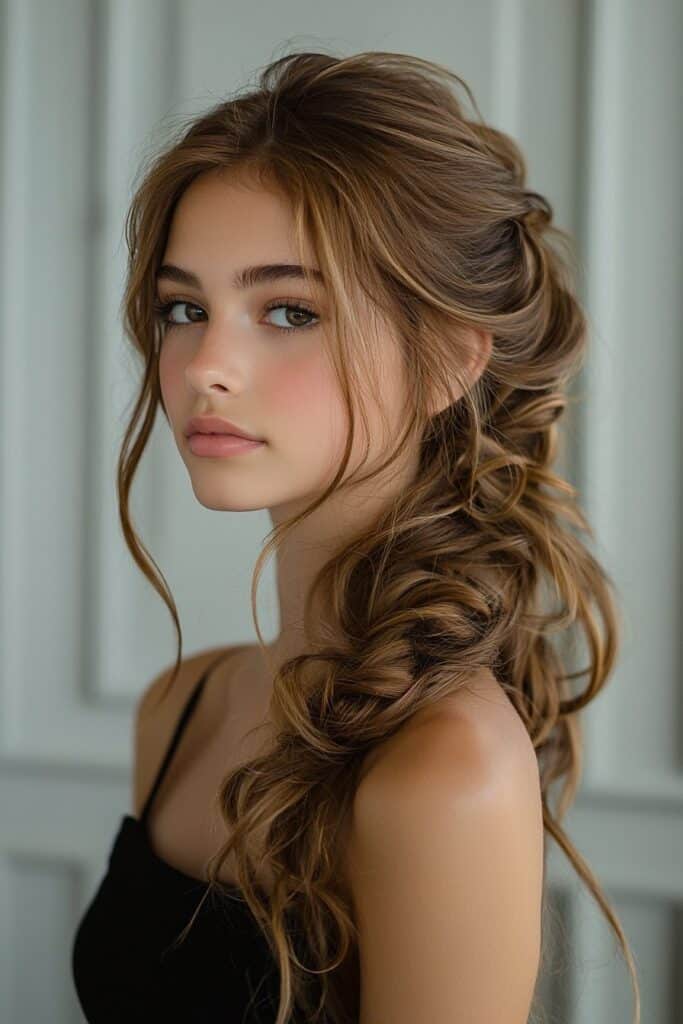
My years at top beauty academies taught me that the Romantic Curled Twist creates a beautiful mix of elegance and playfulness – exactly what you need to stand out at prom.
Curling Methods
The quickest way to start is by splitting your hair into 1-inch sections. You should curl each section away from your face and keep the temperature at 360 degrees to get the best results. When you let each curl loose, pull it down gently to create softer, more natural waves. Your style will look more dynamic when you alternate curl directions – this stops them from clumping together.
Pinning Techniques
Take a section of hair above your ear and split it into two parts. You’ll want to twist these sections around each other and secure them at the back of your head. The same twisted section should be created on the opposite side. The perfect finish comes when you place your finger under a 2-inch section beneath the center of the twists, wrap the hair around it, and make a knot by twisting your hand right.
Long-lasting Tips
My styling experience shows that second-day hair works best as a base for this style. A texturizing spray before styling will help your hair grip better and last longer. Your style will hold best when you:
- Put on heat protectant before curling to keep your hair healthy
- Fix each twist with bobby pins crossed in an X shape
- Spray with texture spray and gently pinch and pull at the crown for extra volume
A dry texture spray between waves helps your style last all night at prom. This adds volume and soaks up extra oil that might flatten your style. A bristle brush helps you smooth out the curls into beautiful, vintage-inspired waves.
Straight hair needs special prep the night before. Sleep with a loose braid to create natural texture that holds the style better. This approach means less heat styling, which protects your hair’s health and keeps your romantic curled twist looking amazing throughout your special night.
Modern Space Buns
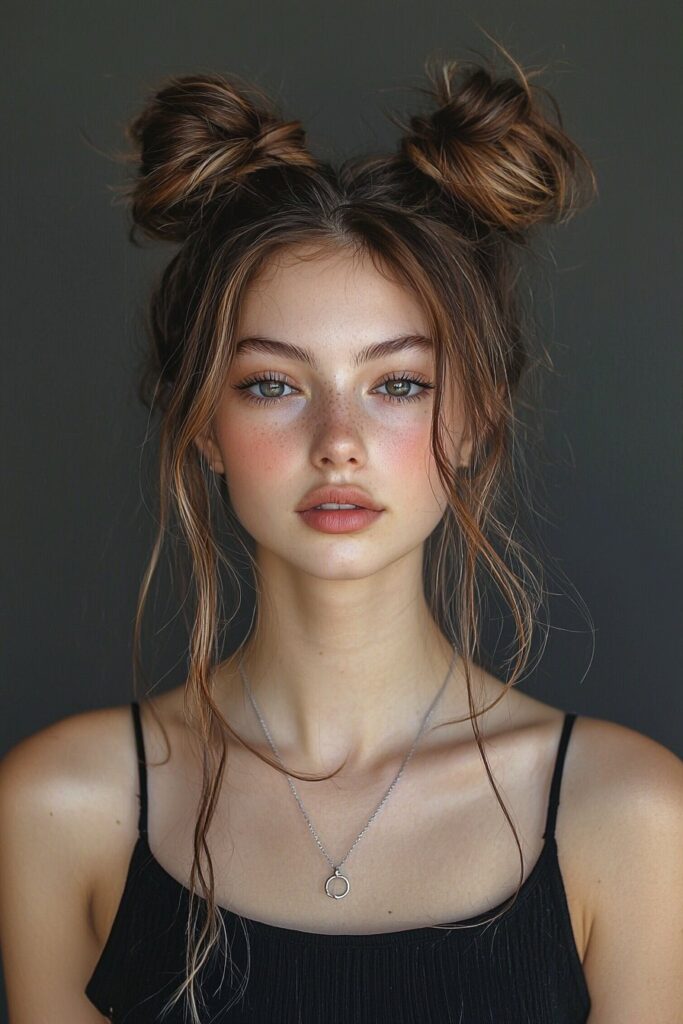
My years of styling celebrities’ hair have shown that space buns are becoming a hit among prom-goers. This style naturally combines fun with sophistication and makes a perfect choice for your big night.
Creating Perfect Buns
A fine-tooth comb helps you part your hair down the middle. Make a clean line from forehead to neck. Split your hair into two equal parts to get the same volume on both sides. High ponytails should sit near your crown on both sides of your head. The best placement lines up with your eyebrows’ center.
Texture Tips
Hair works better on the second day because it has more grip. Add dry shampoo all over your hair to get more texture. If you have fine hair, try backcombing each ponytail before you wrap it. You can also use texturizing spray at the roots where the buns will be.
Embellishment Ideas
Simple space buns become prom-ready with the right touches. Pearl strands woven through the buns or metallic accessories add sparkle. Temporary glitter spray around the buns creates glamor. Small sections of hair left loose near your temples soften the look after you’ve secured the buns.
Your style needs to last through a night of dancing. Cross bobby pins in an X shape to hold each bun. Use flexible-hold hairspray to smooth flyaways. Wrap some hair around each elastic band to hide it and give your style a polished finish.
Space buns are amazing because they’re so flexible. You can wear them sleek for a modern look or pull them slightly loose for a relaxed style. This hairstyle looks great on straight or curly hair, whatever your natural texture.
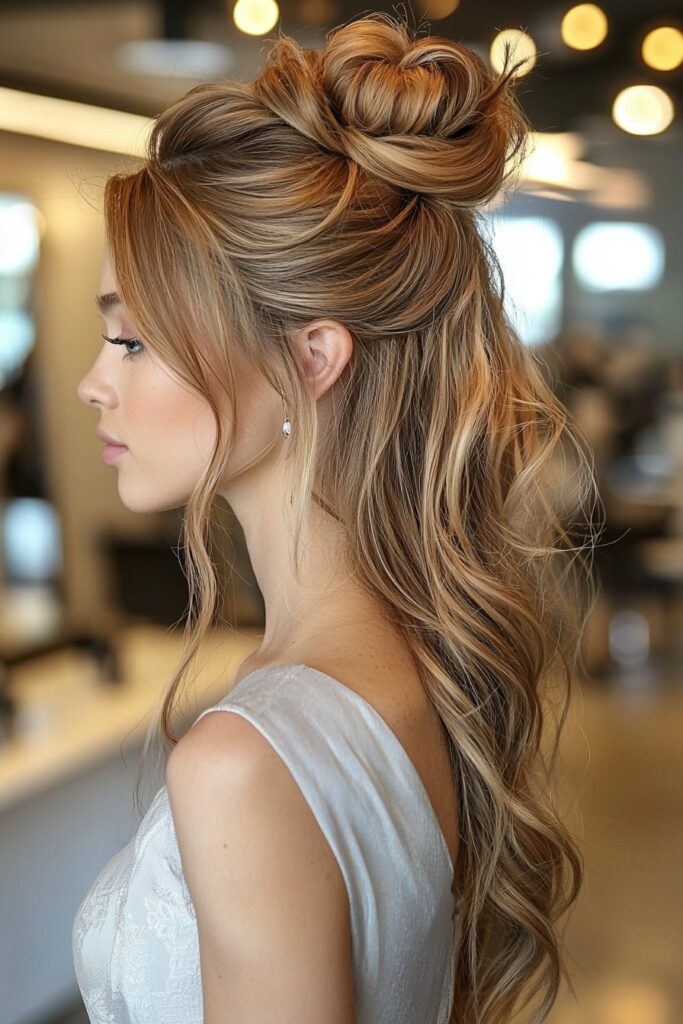
Sleek Top Knot

My years at top beauty academies helped me become skilled at creating the perfect sleek top knot – a sophisticated half-up style that adds instant polish to any prom look. This refined style shines through its versatility and timeless appeal.
Smoothing Techniques
Second-day hair works best because it gives better grip and manageability. Start by flipping your hair over and mist with a setting spray. Blow-dry your hair for the smoothest results. Brush your hair back carefully and catch those stray wisps around your temples and hairline.
Product Selection
Experience has taught me that choosing the right products can make or break this style. Thick or curly hair needs alcohol-free hairspray that smooths strands without stiffness. Fine hair looks best with volume-building non-aerosol sprays that hold without weighing down the style.
You’ll require these key products:
- Medium-hold gel for slicking hair backward
- Smoothing oil for added luminosity
- Strong-hold hairspray for the final step
- Dry shampoo for texture creation
The Garnier Fructis Style Pure Clean Styling Gel available on Amazon provides the perfect medium hold without residue, making it ideal for creating that sleek, polished look that photographs beautifully.
Style Duration
The sleek top knot takes just five minutes to create – that’s what makes it so great. Prep your hair with texturizing spray first. Your style will stay put all through prom night without needing fixes.
Secure loose strands with bobby pins and a light mist of hairspray to keep that sleek look. Cross bobby pins in an X shape at the knot’s base for extra hold. A boar bristle brush helps achieve that smooth finish you want.
This versatile style works great for formal events and casual outings alike. You can adjust the knot’s height or add volume at the crown to make it your own. Naturally straight hair takes to this style beautifully and complements any prom outfit perfectly.
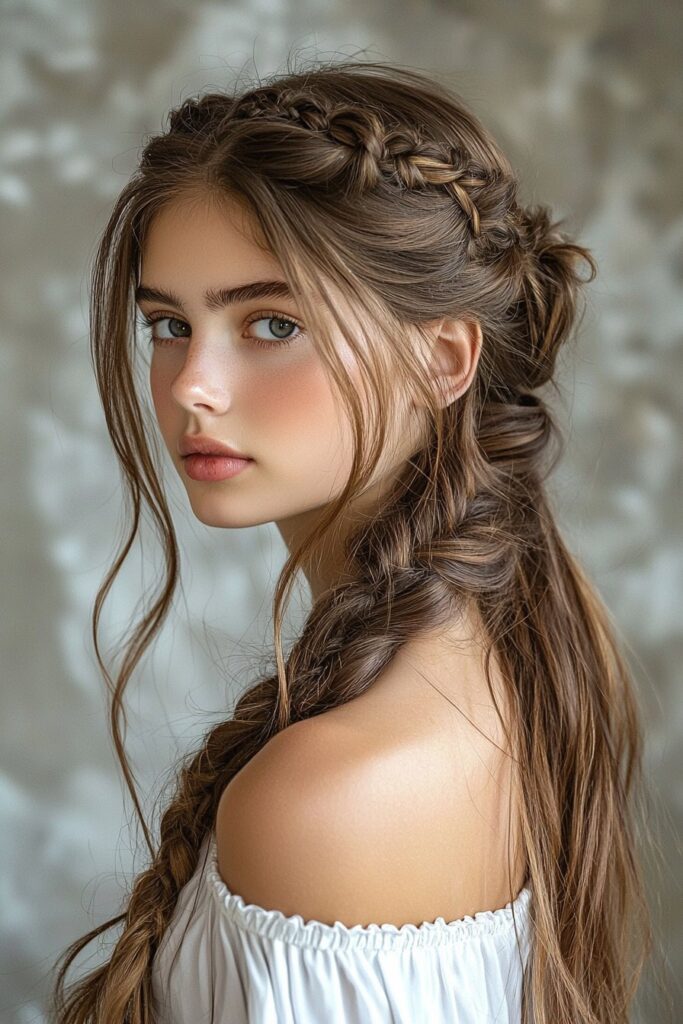
Braided Crown Princess

My years of experience as a beauty educator at prestigious academies have shown that the Braided Crown Princess style has become a top choice for prom. This magical half-up hairstyle creates an ethereal look that blends elegance with modern charm.
Braiding Pattern
The secret to this regal look lies in the Dutch braiding technique. Starting behind one ear makes the style look more polished and hides where the braid begins. The braid pops outward when you cross the strands underneath each other, unlike traditional French braiding. You’ll get the best results when you pull new hair sections close to the previous hairline and keep even tension throughout.
Securing Methods
Your crown will stay picture-perfect all prom night with smart pinning techniques. Clear elastics should secure your original braid. The braid’s tail needs to be folded in half and pinned discreetly. Bobby pins crossed in an X formation at vital points give extra stability. Both braids need to be sealed together with additional pins where they meet.
Hair Length Requirements
My comprehensive styling background demonstrates this adaptable style works wonderfully with various hair lengths. Mid-back length hair delivers the most stunning results. Those with shorter hair can absolutely achieve a modified version using transparent elastics and clever pinning techniques. Hair styled the previous day provides superior grip and becomes much more manageable.
To create smooth, sleek sections that braid beautifully and hold their shape, the Got2b Glued Styling Gel on Amazon provides the perfect control for achieving crisp, defined braids that maintain their structure throughout your prom night.
Straight hair needs subtle texture beforehand. A light mist of hairspray on your hands helps you control the hair while braiding. This style shines at formal occasions and keeps hair secure without looking too stiff. The crown braid creates beautiful waves the next day, so you can enjoy the style even after prom night.
Vintage Victory Rolls
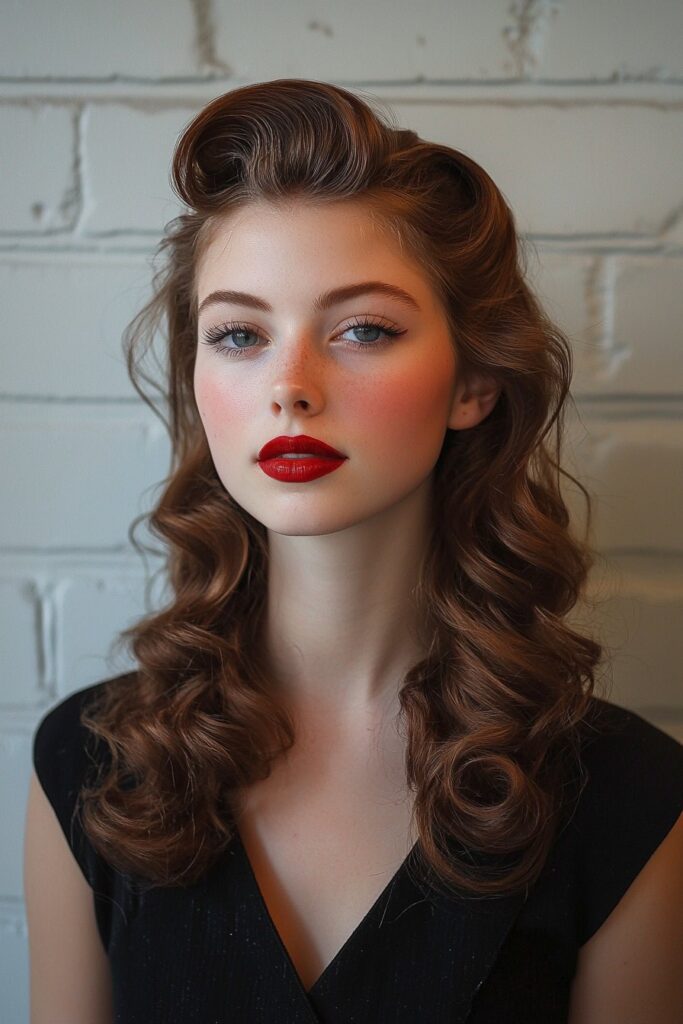
My years of styling vintage-inspired looks have taught me that Victory Rolls create a stunning half-up hairstyle. These rolls capture the 1940s glamor perfectly and have evolved from wartime into an eye-catching prom style that turns heads.
Rolling Technique
Light mousse will make your hair easier to work with when creating Victory Rolls. Take a large section of hair from each side of your head and tie back the rest. Create a small loop at the end and roll the section downward toward your head. Back-brush each section and pack the base tight for the best hold. A teasing comb will help smooth the surface while keeping the inside tease firm.
Setting Products
The right products make all the difference. Mix setting lotion or medium-hold gel with instant conditioner to help curls keep their shape. Add medium-hold hairspray inside the roll as you style. Dry shampoo gives silky hair the texture it needs. Bad weather calls for anti-humidity products to keep everything in place.
Style Maintenance
Lock each roll with 3-4 hair pins under bobby pins. You’ll get extra stability by bending one side of two pins in the middle at a backward angle. Hold your hairspray about 12 inches away for even coverage. A decorative scarf, headband, or hair net will boost that vintage look.
Your hair will grip better on day two, so skip washing 24 hours before styling. You can also curl your hair first with rollers or a curling iron in 3/4″ sections or smaller. This prep work creates a solid base for rolls that last.
Straight hair needs roller setting first to get the right texture and grip. Cross your bobby pins in an X shape under each roll and they’ll stay put all night long. Without doubt, this classic style works both ways – sleek for formal events or slightly loose for a relaxed vibe.
Messy Boho Bun
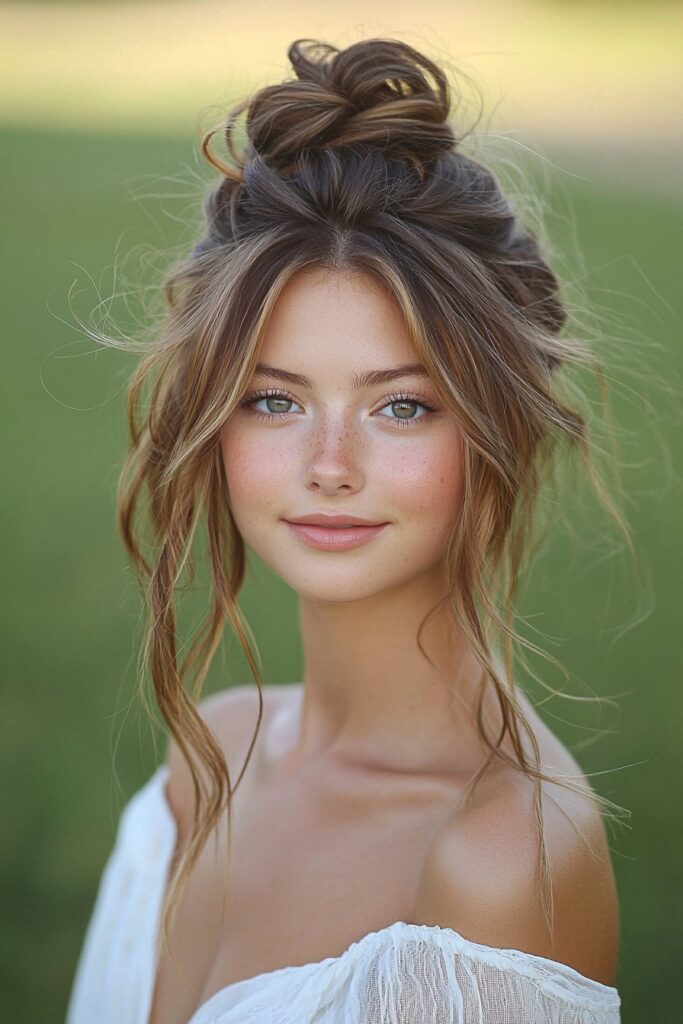
My experience styling countless red carpet events has shown that the Messy Boho Bun remains a client favorite. This half-up style strikes the perfect balance between sophistication and that sought-after undone look.
Creating Controlled Mess
Your hair preparation makes all the difference. Second-day hair gives you the best grip and manageability. Secure your natural hair in a bun or ponytail first, then attach the synthetic piece over it. The hairpiece needs a gentle fluff before securing it. This approach creates that sweet spot between elegance and controlled chaos.
Product Selection
My years at prestigious academies have taught me that the right products substantially affect how long this style lasts. You’ll need these essentials:
- Texturizing finishing sprays that boost root volume
- Sea salt sprays that improve manageability
- Volumizing mousses made specifically for thin hair
- Light-hold hairspray that allows natural movement
Face Shape Guide
The right bun placement will give a flattering look based on your face shape. A high messy bun with layers works best to elongate round faces. People with oval faces can pull off any bun height or style with ease. Square faces look best with the bun placed slightly above or below the jawline, while side-swept strands help soften angular features.
Mid-height buns create balance for heart-shaped faces by drawing attention downward. Low buns at the nape suit rectangle faces best, as they avoid adding unwanted height. Diamond faces look stunning with twisted variations that highlight their cheekbone structure.
This style adapts to your comfort level – you decide how messy you want it. The whole look takes less than a minute to create, perfect when you’re rushing to get ready for prom. Cold water shampoo and conditioning helps refresh the style, so your investment lasts well beyond prom night.
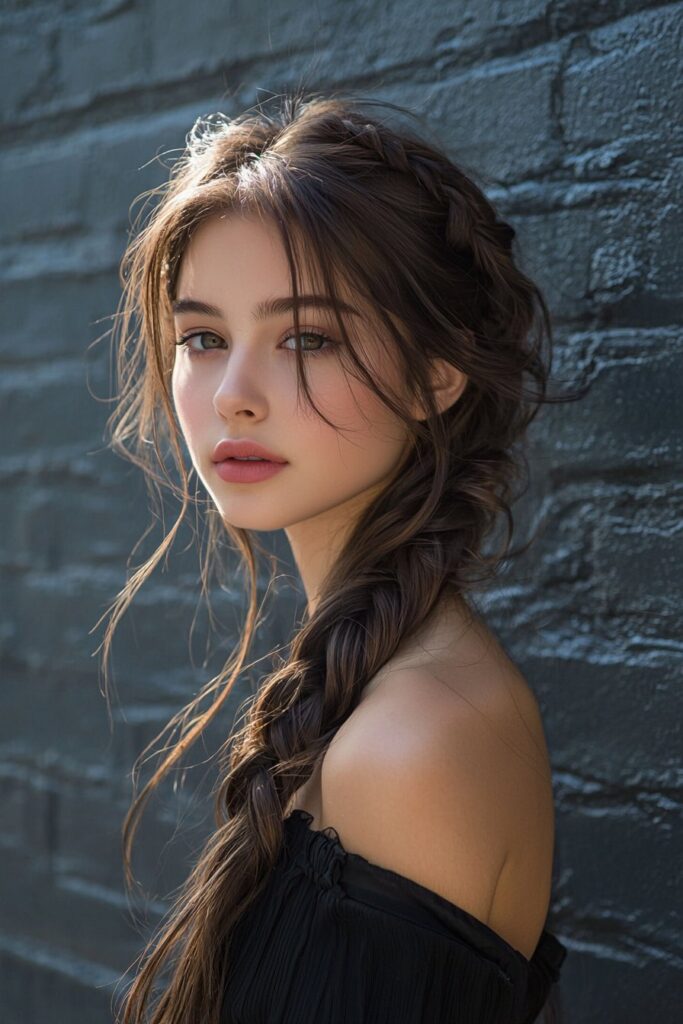
Fishtail Fantasy
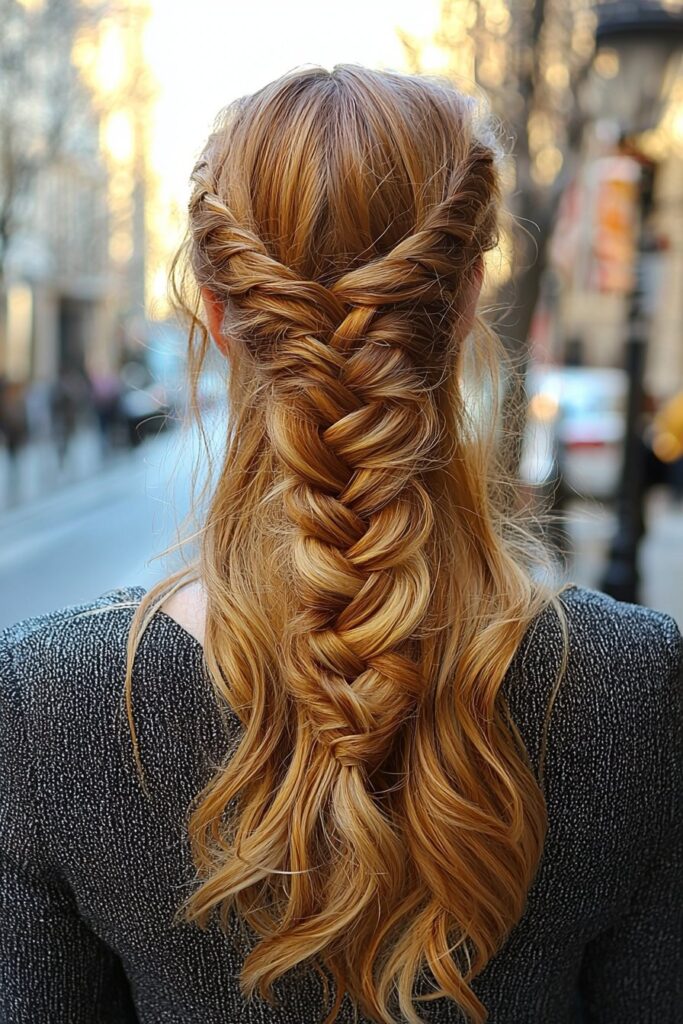
My experience as a professional hairstylist has taught me that the Fishtail Fantasy is a sophisticated half-up style perfect for prom. The braid creates a beautiful pattern that looks like overlapping fish scales, making it stand out at your special event.
Braiding Steps
Split your hair into two equal sections down the middle. Take a small portion from the right section’s outer edge, about half an inch thick. Cross this strand over the right section and blend it into the left section. The process continues on the other side – take a small section from the left and cross it to join the right.
Your braid will look best if you keep even tension throughout. Thin sections create detailed patterns as you move downward. New braiders should start with bigger sections and make them smaller as they build confidence.
Securing Methods
A thin, clear elastic band will keep your fishtail looking great all night at prom. Hair wax on layered ends adds extra hold. The braid’s edges need gentle tugging to create fullness.
Style Duration
Expert stylists can create this look in 10-15 minutes. New stylists need extra time to practice and perfect their technique. The style holds its shape really well when you start with slightly damp hair.
Your hair needs texturizing spray or dry shampoo to create grip. People with smooth hair might want to mist their hair lightly with water before they start. This elegant style works great on straight and curly hair, so it matches any prom outfit perfectly.
Pearl-Adorned Twist
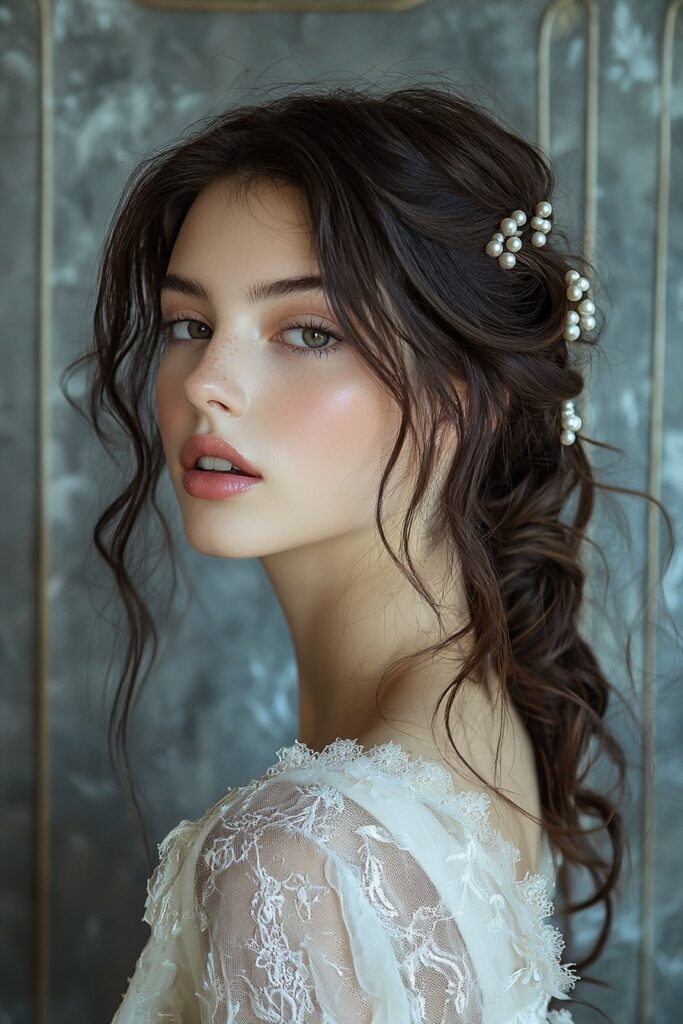
My work as a beauty educator has shown me that pearls are making a stunning comeback in hairstyling. The Pearl-Adorned Twist brings together timeless elegance with modern sophistication. This enchanting look works perfectly for prom night.
Accessory Placement
You should create a simple twist before adding pearls. Place small pearls carefully throughout the twist in spots where light naturally hits. Dark glue works best for dark hair, while clear or white glue blends better with blonde hair to create that floating effect. The pearls should be spaced evenly to create eye-catching focal points that work well with your natural hair texture.
Securing Technique
My time at prestigious academies taught me that the right securing techniques make styles last longer. Pick up each pearl with tweezers and apply lash or hair glue. Let the glue become slightly tacky before placing the pearl to keep it from sliding. Clean your tweezers between applications – this helps avoid any messy glue situations.
Hair Type Guide
This style looks beautiful on all hair types. People with straight hair might want to add some subtle waves first to help the style grip better. Curly hair creates a gorgeous backdrop that really shows off the natural texture. The pearls create amazing dimension whether your hair is sleek or textured.
A light mist of texturizing spray before styling helps the look last all night. Use clear elastics or hair ties that match your natural color. Eyelash glue can give you better staying power than regular hair adhesive.
This versatile style works for both formal and relaxed occasions. Pearl’s natural shine adds sophistication that lifts any prom outfit. The style turns regular hair into an artistic masterpiece that catches everyone’s eye without looking overdone.
Butterfly Braid Blend
My love for creating unique hairstyles got me hooked on the beautiful world of butterfly braids. This style perfectly blends elegance with playfulness for prom night. The half-up style mixes detailed braiding with soft loops that create a stunning butterfly effect.
Braiding Pattern
Start by splitting your hair into two equal sections down the middle. The best results come from regular braiding near your crown area. The butterfly effect comes alive when you gently pull each side of the braid. Your butterfly wings get wider and more defined the more you pull them apart. The perfect wing shape emerges when you braid downward first, then curve your pattern toward the ponytail section.
Styling Products
My time at top academies helped me find the right products that will give you long-lasting results. Here’s what you’ll need:
- BTL braid gel gives you amazing hold and sleekness
- Paul Mitchell’s shine spray adds extra sparkle
- Beach Wave braiding hair creates better texture
- Wax stick keeps those flyaways in check
Maintenance Tips
Wash your hair with cold water shampoo and conditioner before you start. Loose braids make it easier to spread the sections apart for that perfect butterfly look. A rat tail comb helps with precise partitioning. Black rubber bands work great for securing the ends if you want curled tips.
Butterfly braids look amazing on straight and textured hair. People with naturally slippery hair should try a texturizing spray first. The style stays put nicely once it’s secured properly. Take your time pulling the braid sections apart. Quick pulling might cause frizz or make them too loose.
This gorgeous style fits right in at casual hangouts and fancy events like weddings or birthday parties. The controlled yet artistic nature of butterfly braids looks fantastic in photos. They’re just perfect for capturing those special prom memories.
Elegant Side Sweep
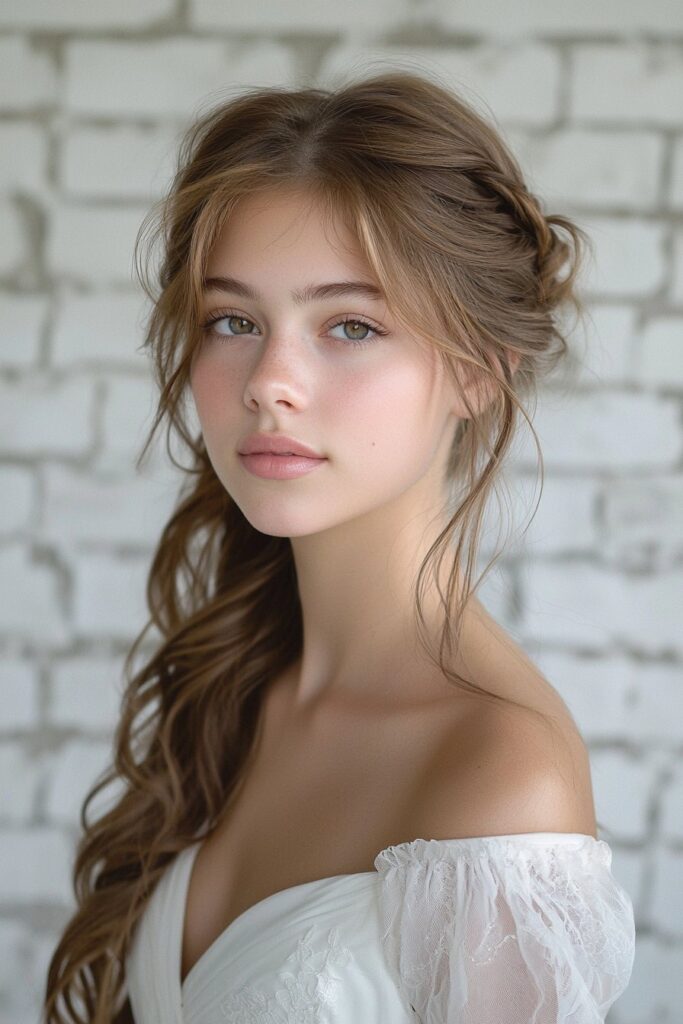
My experience creating stunning looks at prominent beauty academies shows that side-swept styles never go out of fashion for prom. This elegant half-up hairstyle adds sophistication and frames your features perfectly.
Sweeping Technique
Success with this look depends on proper parting. Start with a deep side part that lines up with your eyebrow arch to get maximum lift. A chopstick helps create a zigzag pattern along the scalp, which prevents visible lines or “railroad tracks” in your hair. Bobby pins should crisscross for the best hold – place one from the top and another from the bottom.
Face Shape Guide
Side-swept styles work beautifully with different face shapes. A dramatic side sweep adds visual dimension to round faces. The balanced proportions of oval faces make this style look exceptional. Soft, wispy side-swept bangs create diagonal lines that soften square faces’ angular features.
Product Selection
These products deliver lasting results:
- Flat Iron Perfector before using a wide-barrel wand to curl the ends
- Multi-tasking hair prep spray primes any hair texture without weight
- Touchable medium-hold hairspray keeps flyaways in check while allowing movement
Dry shampoo adds texture and grip that boosts the style’s staying power. A leave-in conditioner smooths the hair and defines its natural texture. People with naturally slippery hair should use a light mist of texturizing spray for essential grip.
This versatile style adapts easily – you can create waves, full-on curls, or keep it straight based on what you like. Decorative pins on the side add extra glamor. Consistent tension while styling ensures your side sweep stays picture-perfect throughout prom night.
Crown Braid Cascade
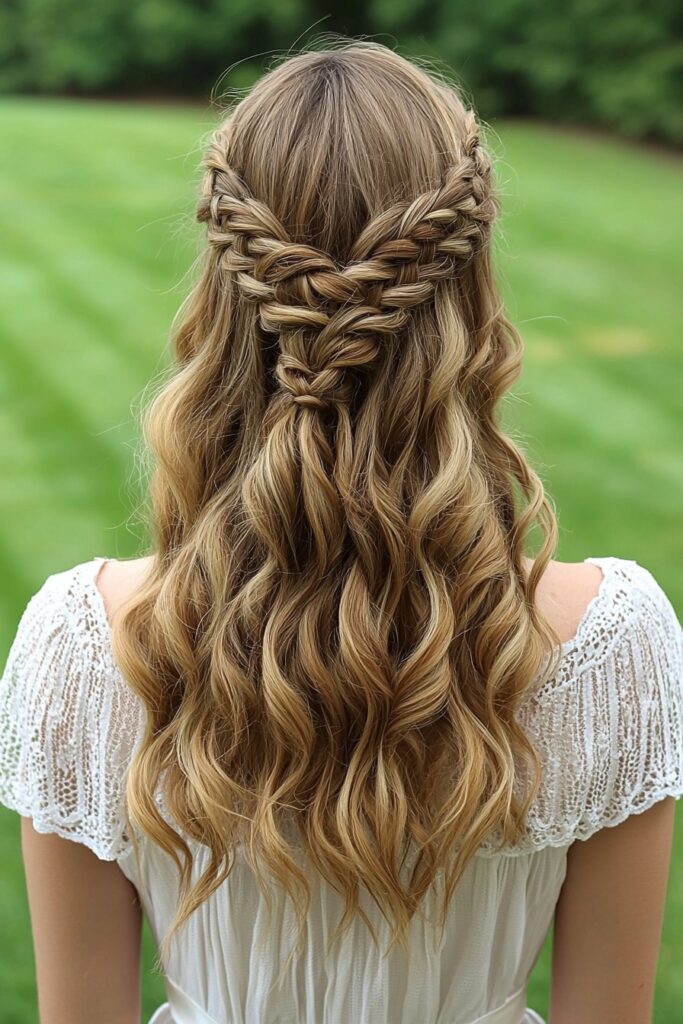
My years at top beauty academies helped me perfect the Crown Braid Cascade – a half-up style that blends classic elegance with modern flair. This beautiful look has become a favorite for prom because it looks sophisticated and stays in place all night.
Braiding Steps
Clean, dry hair gives you the best grip. Part your hair down the middle to create two equal sections. Behind one ear, take a section of hair and split it into three strands. The Dutch braid effect looks best when you cross strands underneath instead of over, and add new hair from both top and bottom as you braid.
Your braid should stay close to your scalp and follow your natural hairline. When you reach your ear, braid normally without adding new hair. Secure the first braid with an elastic, then do the same thing on the other side. Make sure you keep even tension throughout.
Securing Methods
Bobby pins that match your hair color work best when placed under the braid. Put pins in an X shape where the braids meet. The base of each braid needs securing before you wrap it around your head. More pins will anchor the style – just hide them under the braid pattern.
Style Duration
A skilled stylist needs 15-20 minutes to create this look. Here’s how to make it last:
- Use second-day hair or add texturizing spray for better grip
- Tease the crown area lightly before you start braiding
- Let the braids be once they’re set
Dry shampoo works great on slippery hair. A light hairspray keeps everything in place without making it stiff. This style even creates pretty waves the next day, so you can rock a different look after prom.
Twisted Rope Design
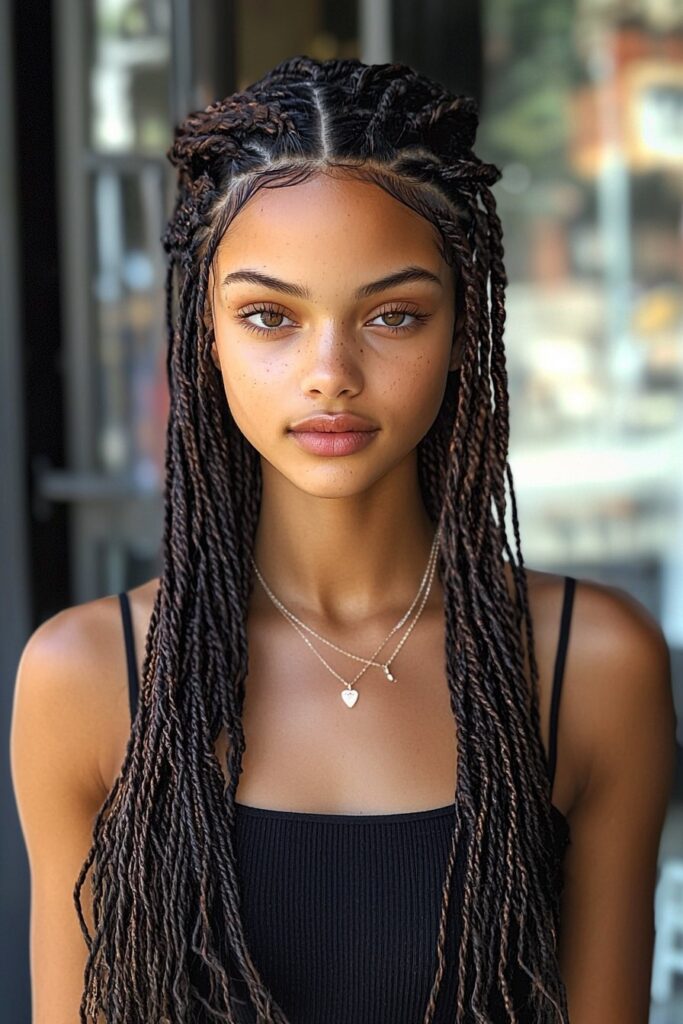
My years at prominent beauty academies taught me that rope twists create a perfect blend of protection and style for prom night. This technique creates patterns that look like intertwined ropes. You’ll love how it works as an elegant yet unique half-up style.
Twisting Technique
Start by splitting your hair into two equal sections. Twist one section clockwise around your finger with a finger coil technique. The next step involves crossing this twisted section over the other while you keep twisting. Your finger coiling combined with two-strand twisting creates that special rope-like look. The key to great results lies in keeping even tension throughout. This helps each twist stay tight and uniform.
Product Recommendations
My extensive styling background reveals that day-old hair serves as the optimal foundation for this look. A texturizing spray applied before styling will enhance your hair’s grip and extend the style’s longevity. Your hairstyle will maintain its shape best when you:
- Apply heat protectant prior to curling to preserve hair health
- Secure each twist using bobby pins positioned in an X formation
- Mist with texture spray and softly pinch and lift at the crown for additional volume
The TRESemmé Thermal Creations Heat Tamer Spray on Amazon is an excellent heat protectant that shields your hair from damage while providing a smooth base for styling.
Hair Type Guide
Rope twists work beautifully with hair of all textures. People with naturally straight hair should use a texturizing spray first to improve grip. This protective style helps curly and coily hair types lock in moisture while showing off their natural texture. The style works great with both natural hair and extensions, so you can achieve any look you want.
Your style will last longer if you wash your hair every 7-10 days instead of daily. Twist your hair into buns during showers to fight frizz. Remember not to twist too tightly because this can break your hair. Rope twists shine because they stay fresh longer and give you options – wear them down, in a ponytail, or create an elegant updo.
Hollywood Waves

My red carpet styling experience shows that Hollywood waves remain a classic prom hairstyle choice. This glamorous half-up look brings sophistication and works great with all hair textures.
Wave Creation
Perfect waves need proper sectioning and a consistent curl pattern. Take 1-inch thick sections and keep them uniform to get the best results. Each section needs curling in the same direction with medium heat at 360 degrees. A heat protectant creates a safety barrier between your hair and hot tools.
Setting Methods
Your part placement makes a big difference – a deep side part really shows off your facial features. Let each curl cool while gently secured to set the wave pattern properly. A rat tail comb placed horizontally under each wave and pushed up slightly adds definition without teasing.
Long-lasting Tips
My time at prestigious academies helped me find that there was several ways to make waves last:
- Layer lightweight products to build a strong foundation
- Each section needs flexible-hold hairspray before curling
- A wide-tooth comb breaks down curls into waves gently
- A shine-enhancing spray gives that classic Hollywood glamor
Straight hair works better with texturizing spray as prep. Your hair will have better grip and manageability on day two. This style looks amazing on one-length hair and creates flowing waves that stay put all night long.
Let waves cool completely before touching them. Cold water washing seals the hair cuticle and gives you more shine that lasts. The signature uniform wave pattern that makes Hollywood glamor so special comes from curling every section in the same direction.
Conclusion
My heart fills with joy to see how these stunning half-up half-down styles transform not just appearances but confidence levels too. I’ve spent countless hours perfecting them at prestigious beauty academies and with my clients. These 17 hairstyles have something special that matches every personality and hair type, making them the perfect choice to your unforgettable prom night.
The styles range from the simple Classic Twisted Crown to more intricate designs like the Butterfly Braid Blend. They adapt beautifully to hair of all textures and lengths. My professional experience shows that success comes from picking a style that matches your natural hair texture and comfort level.
Note that beautiful hair starts with proper preparation and technique. Hair that’s a day old gives better grip. The right product selection will give a style that lasts throughout prom night. Most styles just need simple tools – quality bobby pins, clear elastics, and reliable hairspray. You don’t need expensive equipment to create stunning results.
Watching clients’ faces light up at their finished look remains my greatest joy after years of styling experience. These hairstyles do more than frame your face – they boost confidence and create lasting memories. Choose a style that speaks to you, practice beforehand, and trust your instincts. Your perfect prom hairstyle awaits in these timeless options.