Headband hairstyles saved me from countless bad hair days when I was running late yet still wanted to look put together. It’s actually exciting to see these versatile accessories making a major comeback! From runway-inspired looks to everyday styles, headbands offer that perfect blend of fashion and function.
Whether you’re heading to the grocery store or transitioning from work to date night, there are so many cute hairstyles with headbands that can elevate your look in minutes. I love how different ways to wear a headband can transform any hair length or texture. In fact, learning how to style a headband properly opened up a whole new world of styling possibilities for me. The best part? These accessories work beautifully with everything from sleek straight hair to natural ringlets and beachy waves. In this guide, I’ll show you how to wear hair with headband for 16 quick styles that take just 5 minutes but look like you spent much longer. Trust me, your morning routine will thank you!
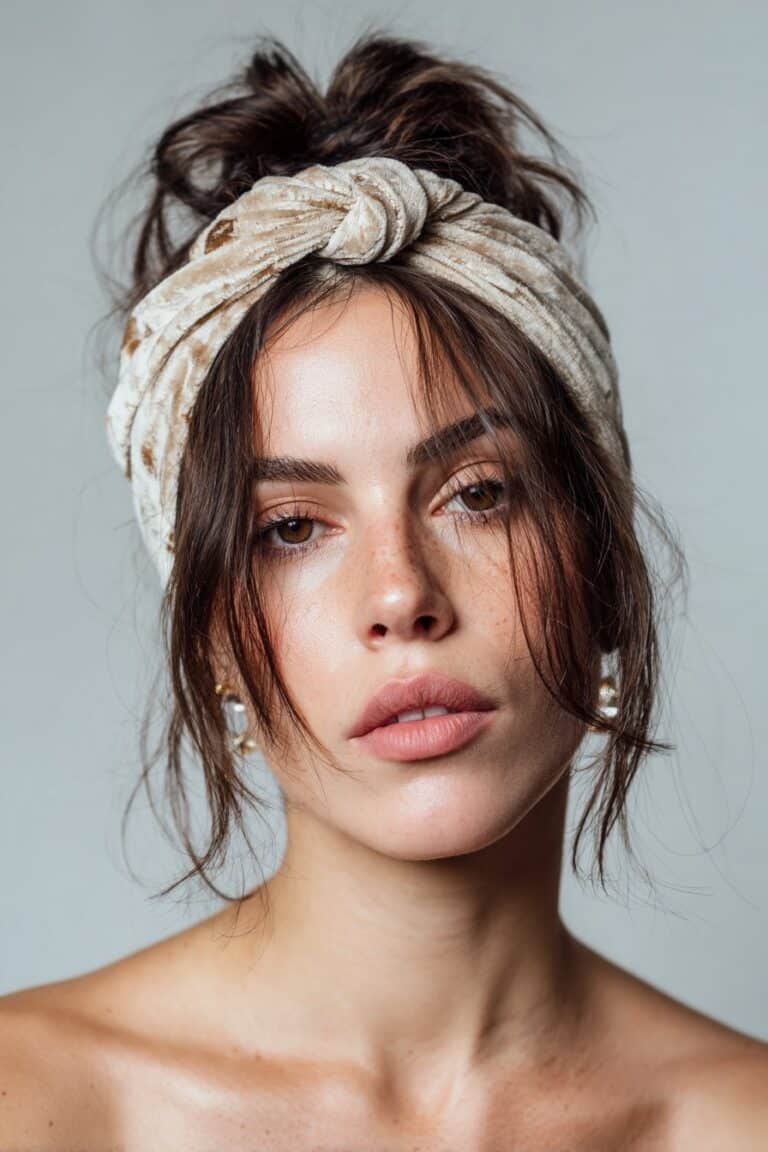
Bangs Back with Statement Earrings
I’ve discovered that pushing my bangs back with a headband creates the perfect opportunity to showcase statement earrings. This simple yet elegant headband hairstyle has become my go-to for transforming mundane mornings into stylish days.
What it is
The bangs-back headband style involves using a headband to sweep your fringe away from your face, creating a clean canvas that naturally draws attention to your ears. This look pairs a practical hair solution with a fashion-forward accessory moment. Furthermore, unlike other headband hairstyles that might hide your ears, this style intentionally showcases them, making it ideal for those statement earrings you’ve been saving for special occasions.
Why it works
This combination works brilliantly for several reasons. First, pulling your bangs back opens up your face completely, creating a fresh, polished appearance. Additionally, the visual balance between a headband at the crown and statement earrings frames your face perfectly. I’ve found this pairing particularly helpful on those not-so-great hair days when I need a quick yet stylish fix. The contrast between the headband and earrings creates what fashion enthusiasts call “a winning combo” that elevates even the simplest outfit.
How to style Bangs Back
To achieve this look in just minutes:
- Start with dry hair (works with freshly washed or second-day hair)
- Position your headband about an inch back from your hairline
- Gently push all bangs backward and under the headband
- Secure any stray pieces with bobby pins if needed
- Add your statement earrings as the finishing touch
For extra polish, I sometimes mist a light hairspray over the front to keep everything in place. Throughout the day, you may need to readjust slightly, especially if you have shorter bangs that tend to escape.
This versatile style works with various headband types—from thin metal bands to wider fabric options—though I personally find that medium-width bands hold bangs most securely while still allowing your earrings to shine.
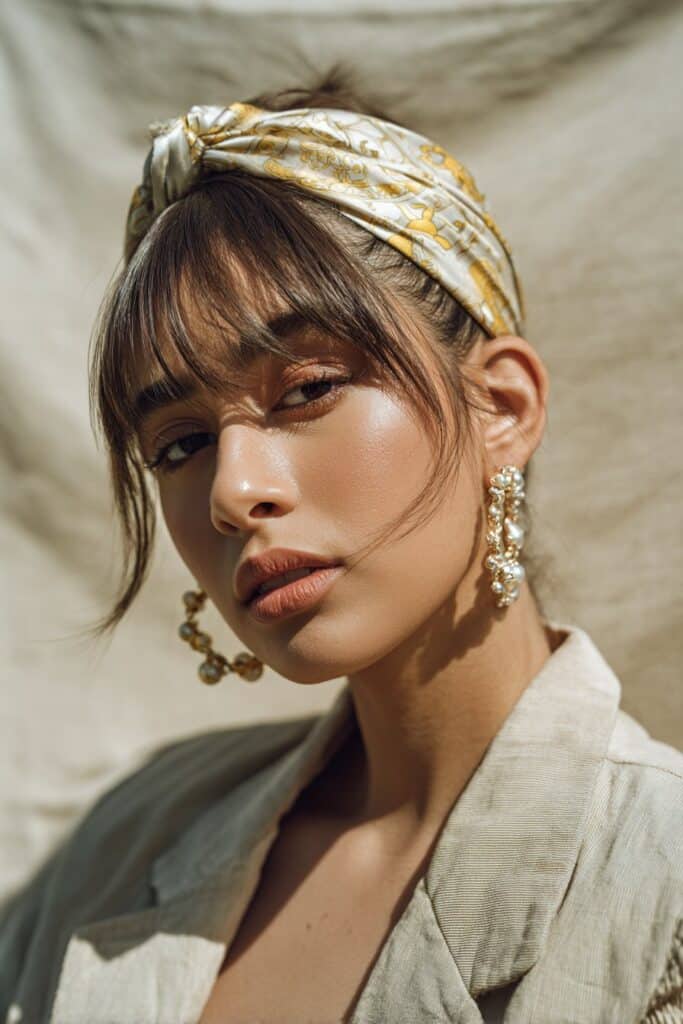
Middle Part with Sleek Straight Hair
The classic middle part has become my secret weapon for creating an instantly polished look. Pairing sleek, straight hair with a well-chosen headband elevates this style from basic to fashion-forward in seconds—perfect for those mornings when I’m rushing out the door.
What it is
This style centers around a clean, precise middle part with straight hair that frames the face symmetrically. The headband sits slightly back from the hairline, maintaining the part while adding a touch of sophistication. The middle part creates a sleek, modern look that serves as the foundation for this elegant hairstyle. What makes this versatile is how it works with various headband types—from minimalist thin bands to statement pieces with embellishments.
Why it works
A middle part naturally creates balance and symmetry, which is why it remains timeless despite changing trends. Moreover, this style works across different face shapes and complements various outfits. For formal events, I’ve paired this with a low bun and statement headband for a look that screams fashion week elegance. The clean lines of the middle part provide the perfect canvas for showcasing the headband itself, making it ideal for those special occasions where you want to highlight a particular accessory.
How to style Middle Part
Creating this look requires minimal effort yet delivers maximum impact:
- Start with freshly washed and dried hair (or use a dry shampoo for second-day hair)
- Use a fine-tooth comb to create a precise middle part from forehead to crown
- Straighten your hair section by section for that sleek finish
- Select your headband—knotted and embellished options work beautifully for elevating this style
- Position the headband about an inch back from your hairline
- Ensure the part remains visible and defined in front of the headband
For those with bangs, you can either incorporate them into the style or sweep them back beneath the headband. This versatile technique works regardless of hair length, yet appears most striking with shoulder-length or longer hair where the symmetry becomes truly noticeable.
Natural Ringlets Style

For years, I struggled with how to incorporate headbands into my curly hair routine until I discovered the beauty of embracing rather than fighting my natural ringlets. Now, pairing the right headband with my curls has become my favorite five-minute style fix.
What it is
The natural ringlets headband style celebrates your curly texture while keeping hair off your face. Unlike styles that flatten or hide curls, this approach uses headbands to frame and enhance your natural curl pattern. Essentially, it works with your hair’s natural tendency to spring and bounce rather than attempting to control it. This style is perfect for second or third-day curls when definition may be fading but volume is still going strong.
Why it works
Curly hair creates more motion during activities, requiring headbands that can securely hold their place through movement. The right headband gives curls the space they need while keeping everything secure. Since curly hair tends to be drier and more prone to breakage, proper material choice becomes crucial. Materials that are soft and moisture-wicking prevent friction-caused frizz while maintaining curl definition throughout the day. Generally, wider bands with some stretch work best as they don’t compress your texture or leave awkward dents.
How to style Ringlets
To achieve this quick yet effective style:
- Start with defined curls – either refresh with a spray bottle or style as usual with your go-to curl products
- Position the headband halfway between your hairline and crown, with some fabric resting on your forehead
- Instead of pressing curls down, gently lift them up and over the headband – this maintains volume and prevents flat spots
- Let shorter curls frame your face naturally in front of the band
- Ensure the band feels snug but not tight to avoid pressure on your scalp
For added definition, I sometimes twist face-framing curls away from my face before positioning the headband. This technique works beautifully with stretchy fabric headbands that won’t snag or pull at delicate curls. Remember, placement is everything – the right position catches forehead sweat while preventing shorter curls from escaping.
Messy Bun with Face-Framing Pieces

The messy bun paired with face-framing pieces has been my lifesaver for those mornings when I need to look polished with minimal effort. This combo creates an effortlessly chic vibe that works for everything from office meetings to casual coffee dates.
What it is
A messy bun with face-framing pieces combines the casual elegance of a slightly undone updo with deliberately left-out strands around your face. The style involves gathering your hair into a loose, somewhat disheveled bun at the top of your head while allowing some carefully selected pieces to hang freely around your face. Adding a headband elevates this look from merely casual to intentionally stylish. According to hairstylists, these face-framing sections add dimension and can help plump up thinner front sections, creating that desirable “corner” at the front that makes everything appear fuller and healthier.
Why it works
This hairstyle has become increasingly popular because it offers multiple benefits. First, it’s remarkably versatile—what other style looks equally appropriate at both summer festivals and professional settings? Additionally, it works beautifully on second or third-day hair since natural oils help hold everything together. Perhaps most importantly, it provides a clever way to hide greasy roots while drawing attention elsewhere with adorable headband details. Furthermore, the face-framing pieces soften your features and create a flattering frame that enhances your natural beauty.
How to style Messy Bun
Creating this look takes just minutes:
- Start with dry, preferably second-day hair (skip washing—natural oils help!)
- Optional: Apply dry shampoo to your roots for extra volume and freshness
- Section off two small pieces of hair at the front to frame your face
- Gather remaining hair on top of your head using “claw” hands
- Secure with a hair tie (not too tight—messiness is key)
- Twist the ponytail loosely and wrap it around the base
- Secure with pins as needed, then gently pull at sections for desired volume
- Add your headband, positioning it to sweep baby hairs back while keeping face-framing pieces forward
- Finish with a light mist of hairspray to tame flyaways
I often call this my “secret weapon” look—it appears effortful yet takes mere minutes to create. Ultimately, the beauty of this style lies in its deliberate imperfection—the messier it looks, the better!
Beachy Waves with Neutral Headband

Every time I want effortless style with minimal effort, beachy waves paired with a neutral headband comes to my rescue. This combination has saved countless mornings when I needed to look put-together without spending hours in front of the mirror.
What it is
Beachy waves with a neutral headband combines tousled, natural-looking waves with a simple, versatile accessory that complements rather than competes with your hair texture. The style mimics that “just back from the beach” look, with soft, undefined waves that appear effortlessly chic. The neutral headband—typically in earthy tones like beige, brown, or soft cream—anchors the look while keeping hair off your face. These headbands often feature wavy tooth designs that grip hair securely without causing damage or headaches.
Why it works
Neutral-colored headbands work perfectly with any hair color, making them incredibly versatile. The combination creates a relaxed yet polished esthetic that’s appropriate for numerous settings—from casual coffee runs to professional environments. Neutral tones allow your waves to remain the focal point yet add that finishing touch. Plus, this style offers a practical solution for those growing out bangs or dealing with awkward-length layers. The zigzag design of many neutral headbands integrates naturally with wavy textures, giving better grip without tangling or sliding off.
How to style Beachy Waves
Creating this look takes minimal time yet delivers maximum impact:
- Prep your waves – Either enhance your natural texture or create heatless waves overnight using braids or a curling ribbon method
- Choose your headband – Opt for a comfortable design with teeth that grip without pulling—recycled plastic options are both stylish and eco-friendly
- Position properly – Place the headband slightly back from your hairline, allowing some face-framing pieces to remain free
- Secure with confidence – Press the headband gently into place, making sure it feels snug yet comfortable
- Final touches – Tousle your waves gently with fingers for that perfectly undone look
For those with fine or thin hair, this style creates the illusion of volume and texture. As one happy user noted, “These headbands stay put and are a really great way to change up my hairstyle”.
Timeless Headband Chignon

Whenever I want to channel timeless elegance in minutes, the headband chignon becomes my go-to style. This sophisticated updo has rescued me through wedding seasons, important meetings, and even casual dinner dates where I needed to look polished without salon-level effort.
What it is
The headband chignon is a twisted updo that sits at the nape of your neck, using a headband as both a styling tool and accessory. Initially inspired by vintage hairstyles like those from “The Great Gatsby” era, this classic look creates a sleek, knotted bun that exudes refinement. What makes this style special is how it transforms ordinary headbands into functional styling accessories that help create structure while adding elegance to your overall look.
Why it works
This headband hairstyle has remained popular across decades primarily due to its versatility. It works beautifully for almost any hair length below the chin and can be styled either texturized for maximum volume or sleek and polished. Furthermore, it creates gorgeous, heat-free waves once you take it down. I appreciate how this updo allows the headband to act as a complement that adds a spark of originality while keeping hair neatly away from my face.
How to style Chignon
To create this elegant look:
- Brush your hair back into a low ponytail
- Place a stretchy headband around your forehead to the back of your head, resting over your hair
- Gather hair into a ponytail grip and smooth with a brush
- Create a twist by folding hair up toward the back of your head, tucking it into the headband
- Secure the twist with medium hairpins once you reach the back
- For a more dramatic effect, use a medium bun form underneath for volume
As a final touch, I sometimes pull gently on sections for a bit more texture or leave a few face-framing pieces out for a softer effect. This adaptable style transitions perfectly between seasons and occasions—proof that sometimes the most timeless techniques truly are the simplest.
Double French Braids with Knotted Band

Double french braids paired with a knotted headband have completely transformed my morning routine. This hairstyle offers the perfect blend of sophistication and practicality for those days when I need a quick yet polished look.
What it is
Double headband french braids combine two parallel french braids positioned along your hairline, creating a crown-like effect with a knotted band securing them. Unlike single braid styles, this technique creates a more intricate look through its symmetrical design. The braids sit close to the head, starting near your part and following along the hairline toward your temples.
Why it works
This style excels at keeping hair securely in place throughout the day. The flat french braid style works perfectly for fine, straight hair while remaining nearly invisible in your overall look. Most impressively, putting this headband on takes less than a minute yet creates the illusion that you’ve spent much more time styling. The braided headband typically includes a generous elastic part ensuring a comfortable fit that won’t slip backwards.
How to style Double Braids
To create this look:
- Begin by parting your hair on one side
- Divide a section from your part down to the opposite ear
- Split this forward section into two parts
- Start a french braid near the part with each section
- Continue both braids toward your temples, crossing strands over middle while incorporating new hair
- Once you reach your temples, continue regular braiding to the ends
- Secure both braids underneath the crown section of your hair
- Release the top hair to conceal the ends
Volume Look with Turban Band

The iconic volume look with a turban band has recently recaptured my heart. Alongside today’s minimal styles, this retro-inspired option offers major impact with minimal styling time.
What it is
This style combines dramatic height at the crown with a wide turban headband positioned just above the ears. The signature elements include backcombed volume at the crown, sometimes a flipped-out end, and that unmistakable 60s silhouette. The look draws inspiration from icons who wore wide fabric headbands with teased blonde hair and cat-eye makeup. Turban bands effectively create volume at the back while keeping hair off the face – think bold patterns or solid colors depending on your outfit.
Why it works
Surprisingly, this vintage style is perfect for those less-than-perfect hair days. The backcombing creates intentional messiness that looks deliberately styled. Moreover, the wide band simultaneously adds structure and makes a fashion statement. For those with fine or thin hair, volumizing scrunchies underneath the turban create that sought-after 60s height.
How to style 1960s Look
- Section off the top layer of hair, pinning it away temporarily
- Backcomb the underneath sections toward the crown for height
- Brush the backcombed hair toward the back of your head
- Place hot rollers in the bottom sections for that signature flip (cool for 5-10 minutes)
- Add your turban band just above the ears
- Adjust height as desired with light hairspray
Boho Side Braid with Twist Band

My favorite festival-ready look combines bohemian flair with practical styling—the boho side braid with twist band. This effortless combination has gotten me through outdoor concerts and summer picnics while keeping my style on point.
What it is
The boho side braid combines a waterfall twist headband with a diagonal French braid positioned along one side. Unlike traditional braids, this style features a more relaxed, deliberately undone appearance with strands pulled gently to create fullness. The signature element is the twist band that wraps around your head like a crown, creating a carefree, festival-inspired look that works beautifully with natural texture.
Why it works
This style strikes the perfect balance between structure and messiness. The braided headband effect gives your hairstyle a sporty yet fun dimension, creating texture that accentuates natural highlights. Additionally, the side positioning creates asymmetry that flatters nearly every face shape. For those with frizzy hair or waves, small rubber bands secure everything without creating bulk.
How to style Boho Braid
- Part your hair down the center
- Near the crown, take a small section from one side
- Create a Dutch lace braid diagonally toward the front
- Only add new hair to the top strand for that “lace” effect
- Shape the braid in a heart-like curve
- Gather all hair on that side into a loose side braid
- Gently “pancake” the edges for fullness
- Finish with a leather headpiece or flower crown
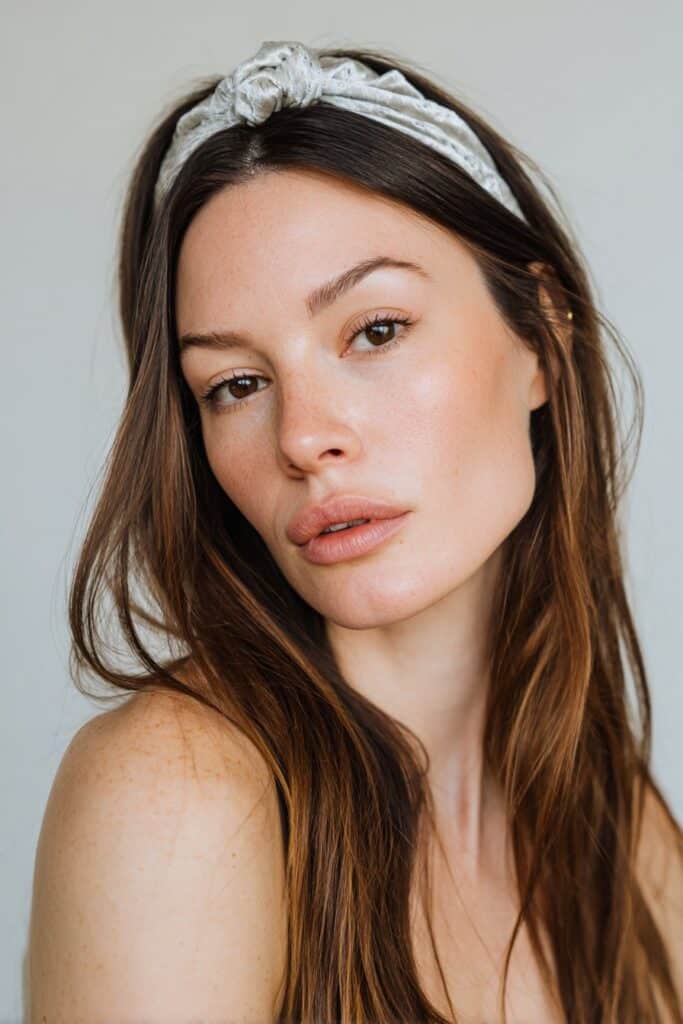
Half-Up, Half-Down with Patterned Band

The half-up, half-down hairstyle paired with a patterned headband has become my ultimate time-saving hack. This combination offers that perfect middle ground between fully styled and completely casual, making it ideal for nearly any occasion.
What it is
The half-up, half-down headband style involves sectioning your hair horizontally at the back of your head, then pulling just the top half into a ponytail, bun, or braid while letting the rest flow freely. Adding a patterned headband elevates this look from basic to eye-catching. This versatile style works beautifully with any hair length or texture – straight, wavy, or curly. Alternatively, you can use a silk scarf wrapped around your head or choose a headband with an elastic strip for easier placement.
Why it works
This headband hairstyle remains consistently popular because it truly delivers the best of both worlds – you get the neatness of an updo combined with the romantic appeal of flowing locks. It adds instant volume while staying perfectly styled throughout the day. For active days, it provides practicality by keeping hair securely out of your face. Furthermore, the half-up style creates an excellent foundation for accessories, with patterned bands adding a personalized touch that complements any outfit.
How to style Half-Up
Creating this look takes minimal effort:
- Section your hair horizontally just above your temples
- Pull the top section back into a small ponytail, bun, or braid
- Secure with an elastic or decorative clip
- Add your patterned headband, positioning it about an inch back from your hairline
- Adjust any face-framing pieces as desired
This style works exceptionally well for outdoor activities like music festivals where both style and function matter. Plus, it accommodates virtually any headband material – from velvet to floral patterns – allowing endless customization options.
Bubble Braids with Stretchy Headband

Bubble braids paired with a stretchy headband quickly turned into my go-to style after discovering this playful yet polished look. Now I recommend it to everyone seeking that perfect balance between fun and functional hairstyles.
What it is
Bubble braids create a series of small “puffs” or “bubbles” in your hair using elastic bands placed at intervals. The stretchy headband variation either incorporates the bubble technique around your head like a crown or uses a stretchy band to complement traditional bubble pigtails. Interestingly, this versatile style works on various hair lengths—even shorter cuts can rock a bubble braid headband by creating the effect around the front hairline.
Why it works
The bubble effect instantly adds visual interest to otherwise plain hairstyles. Hence, it’s perfect for keeping hair neatly secured while looking intentionally styled. Subsequently, the elastics create secure sections that stay put through activities without feeling tight or uncomfortable. Plus, the style offers endless customization options with ribbons, bows, or scrunchies between bubbles.
How to style Bubble Braids
- Create pigtails (lower ones work best for beginners)
- Place clear elastics 1-2 inches apart down each pigtail
- Gently pull at each section between elastics to create “bubbles”
- Add a stretchy headband for extra polish
- For short hair, create the bubble effect directly along the hairline for a headband look
Low Bun with Braided Wrap

The elegant low bun with braided wrap elevates my everyday headband looks to special-occasion status without requiring professional styling skills.
What it is
This sophisticated style features a twisted low bun positioned at the nape of your neck, enhanced with braided elements wrapped around it. Unlike simpler updos, this look incorporates either a herringbone braid, French braid, or rope braid that encircles the bun, creating visual interest. The style pairs beautifully with headbands that sit comfortably atop your crown while the intricate braid work does the heavy lifting.
Why it works
This versatile updo transitions seamlessly from casual settings to formal events. Although elegant, it remains secure enough for dancing throughout a party without becoming frizzy or undone. Even those with shorter locks can achieve this look by creating small braids joined into a low updo. The combination of braided elements with a low position creates a sophisticated silhouette that flatters almost every face shape.
How to style Low Bun
- First, toss hair back and lift from the middle for volume
- Secure a low ponytail using a hair bungee or elastic
- Divide your ponytail into two sections
- Twist each section counterclockwise, then twist them around each other clockwise (creating a rope braid)
- Wrap the braided section clockwise around your ponytail base
- Fan out the bun for desired fullness
- Secure with French pins or bobby pins
- Finally, add your headband for the finishing touch
Twist Crown Braid with Bow Accent

The twist crown braid with bow accent has completely changed how I approach five-minute hairstyling. Whenever I need a hairstyle that looks intricate yet takes minimal effort, this elegant twist technique comes to my rescue.
What it is
A twist crown braid creates a halo-like effect around your head using a twisting technique rather than traditional braiding. Unlike regular crown braids, this version involves twisting two small sections of hair toward your face, crossing them back, and continuously adding hair as you work around your head. The bow accent adds a feminine touch to this otherwise bohemian style. Consequently, the finished look resembles a rope braid wrapped elegantly around your crown.
Why it works
This versatile style appears quite fancy yet remains surprisingly simple once you master the technique. Likewise, it works beautifully with wet hair, making it perfect for those mornings when you’re short on time. Many people find this style easier than traditional crown braids, as the twisting motion creates a secure hold. Additionally, this hairstyle gives you nice waves once taken down, offering two styles in one.
How to style Twist Crown
- Brush your hair thoroughly (wet hair makes this easier!)
- Take two small sections from the top of your head
- Twist these sections toward your face, then cross them back
- Add hair to the front section, twist toward your face, cross back
- Continue this process around your head, keeping twists tight
- Once you reach the starting point, finish with a simple rope braid
- Wrap the braid around your crown and secure with bobby pins
- Add your bow accent for the finishing touch
For beginners, start with a basic rope braid and practice until comfortable with the technique.
Tousled Waves with Pearl Headband

I discovered that pairing tousled waves with pearl headbands creates an instantly sophisticated look with minimal effort. As an everyday style that can transition to special occasions, this combination has saved me countless times when I needed to look polished yet effortless.
What it is
Tousled waves with pearl headbands combine soft, undone texture with elegant accessories. This style features loosely defined waves that appear naturally windswept, paired with headbands embellished with pearls or rhinestones. Primarily, these embellished bands add a crown-like effect that elevates the entire look. The pearls help transform even simple styles into something special, creating that refined, handcrafted appearance many desire.
Why it works
Pearl-embellished headbands show up beautifully on all hair colors, matching virtually any outfit imaginable. Nonetheless, they’re particularly stunning for special events like weddings or garden parties where they instantly boost elegance. Indeed, the real beauty of this combination lies in its practicality—pearl headbands make even second or third-day hair look freshly styled. Plus, the contrast between undone waves and structured embellishment creates visual interest suitable for both casual and formal settings.
How to style Tousled Waves
- Start with dry hair—either natural texture or day-old waves
- Apply texturizing spray to add grip and volume
- Take a small amount of hair putty/pomade and work through mid-lengths, shaping strands in different directions
- For extra volume, flip your head over and spritz dry texturizing spray at the roots
- Position your pearl headband slightly back from the hairline
- Finish with a light shine spray for that polished touch
Slicked Back Pixie with Embellished Band

My pixie cut journey transformed completely after discovering how embellished headbands could elevate this short style from ordinary to extraordinary. With just five minutes and the right accessories, even the shortest cuts can make a statement.
What it is
The slicked-back pixie with embellished band combines a sleek, controlled short cut with a decorative headband that adds visual interest. Primarily, it involves smoothing the hair back away from the face using styling products and securing it with an embellished headband. These embellishments might include crystals, pearls, or intricate designs that draw attention while holding your style in place.
Why it works
Short pixie cuts create the perfect canvas for statement accessories. Thin, dainty headbands work wonderfully with super-short crops as they add just enough flair without overwhelming the style. Even pixie cuts that might seem limited in styling options become versatile with this technique. Alongside practical benefits of keeping hair off your face, this style creates an elegant, put-together look that transitions effortlessly from casual to formal settings.
How to style Pixie Look
- Begin with freshly washed hair and create your desired part
- Apply a small amount of shine-inducing oil through your strands
- Next, coat hair with lightweight styling gel (use sparingly to avoid a “helmet” effect)
- Comb everything back, following the natural growth pattern
- Choose a thin embellished headband and position slightly back from hairline
- For longer pixies, secure any excess length with bobby pins as needed
Sporty Chic with Wide Fabric Band

Wide fabric headbands completely saved my workout-to-errands transitions. This nineties-inspired style offers both function and fashion when I need to look put-together without washing my hair.
What it is
The sporty chic look features a wide fabric band positioned just behind the hairline, creating a throwback vibe with modern appeal. Typically made from stretchy materials like cotton, these bands come in various colors and patterns—from simple black for everyday wear to vibrant prints that make a statement. Plus, many wide headbands now use recycled materials, offering eco-friendly options. These versatile accessories create a sporty esthetic that pairs perfectly with both casual outfits and athletic wear.
Why it works
Wide fabric bands excel at concealing post-workout edges and keeping sweaty hair under control. First, their textured backs grip hair securely without sliding, solving the common problem of headbands falling off during movement. Secondly, these bands offer more coverage than their thinner counterparts, making them ideal for keeping ears warm in winter. Often, they serve multiple functions simultaneously—hiding unstyled hair while adding that fashionable finishing touch.
How to style Sporty Look
- Choose a wide headband that complements your outfit
- Position it just above your hairline
- Push the band back slightly for a relaxed look
- Pair with a simple ponytail or loose hair
- Consider adding a claw clip for a unique style combination
For extra security during intense activities, look for options with a textured back or stretchy fabric.
Conclusion
Headbands truly rank among my favorite hair accessories for quick transformations. Throughout my journey with these versatile pieces, I’ve discovered how they rescue everything from second-day hair to special occasions with minimal effort. The sixteen styles shared above demonstrate perfectly why headbands deserve a special place in your accessory collection.
My personal experience proves that headbands work beautifully across all hair types and lengths. Curly-haired friends often tell me they’ve avoided headbands, assuming they wouldn’t stay put. However, the right headband material paired with proper placement makes all the difference. Similarly, those with pixie cuts express surprise when discovering how embellished bands can completely elevate their short styles.
Undoubtedly, the greatest advantage remains the time factor. Each morning presents its own challenges, yet these five-minute styles consistently deliver polished results without sacrificing precious time. The pearl headband with tousled waves has saved countless mornings when I hit snooze too many times yet still needed to look put-together for important meetings.
Another wonderful aspect lies in the seasonal versatility. Wide fabric bands provide perfect winter warmth while keeping flyaways at bay. Meanwhile, lightweight knotted options offer summer style without adding heat or bulk. This adaptability makes headbands worth the small investment many times over.
Perhaps most importantly, headbands allow easy expression of personal style. Whether you gravitate toward vintage-inspired looks with turban bands or prefer modern minimalism with sleek metal options, your choice instantly communicates your esthetic. My collection has grown over the years to include everything from bohemian patterns to elegant pearls, each serving different purposes in my styling routine.
Finally, mastering these quick techniques empowers you to create salon-worthy looks independently. Though simple, these styles appear thoughtfully crafted, giving that perfect balance between effort and effortlessness. Next time you face a bad hair day or simply want a fresh look without the fuss, grab a headband and give one of these styles a try. Your morning routine will thank you!