Stressed about finding the perfect homecoming hairstyles for medium length hair while everyone else seems to have their look figured out? I’ve been there! Homecoming is the first major event of the school year—a time to celebrate your school’s community and create memories with friends.
While medium length hair offers incredible versatility, it can still feel challenging to decide on a style that complements your dress, shows off your personality, and actually stays put through hours of dancing. I’ve curated this collection of easy homecoming hairstyles specifically for medium hair that highlight your natural texture and balance glam with effortlessness. Whether you prefer something curly, braided, or elegantly upswept, these homecoming hairstyles for medium length will help you establish your individual style and look stunning for the big night. After all, the right hairstyle should enhance your overall look while still feeling authentically you!
Low Braided Ponytail

Looking for an effortlessly elegant homecoming hairstyle that balances sophistication with ease? The low braided ponytail has become my go-to recommendation for medium length hair—it’s versatile, romantic, and stays put through hours of dancing.
A low braided ponytail creates a refined yet relaxed statement that works beautifully with various dress styles. I love how it combines the practicality of a ponytail with the intricate detail of braiding for that perfect balance of polished and playful.
Low Braided Ponytail styling tips
Creating this look is simpler than you might think. First, brush your hair into a low ponytail positioned at the nape of your neck. For a sleek finish, I recommend applying a small amount of hair gel only to your scalp—never throughout the length of your hair as that’s enough for control without stiffness.
For the braid itself, you have options:
- Traditional three-strand braid for a classic look
- Fishtail braid for added visual interest (my personal favorite!)
- Loose, slightly “pulled-out” braid for a more romantic feel
Lock your style in place with a lightweight hairspray to ensure it lasts throughout the evening. Moreover, I strongly suggest using scrunchies or soft hair ties instead of elastic bands, as they distribute tension better and prevent damage.
Low Braided Ponytail best face shapes
Although this style flatters most face shapes, it’s particularly complementary for those with oval-shaped faces. The symmetrical nature of oval faces allows them to pull off virtually any ponytail variation.
For round faces, try positioning the braid slightly to the side rather than centered—this creates an elongating effect. Furthermore, leaving a few face-framing pieces out can soften the look and add dimension.
Low Braided Ponytail accessories to try
The beauty of a low braided ponytail lies in its versatility as a canvas for accessories. During homecoming season, I particularly love:
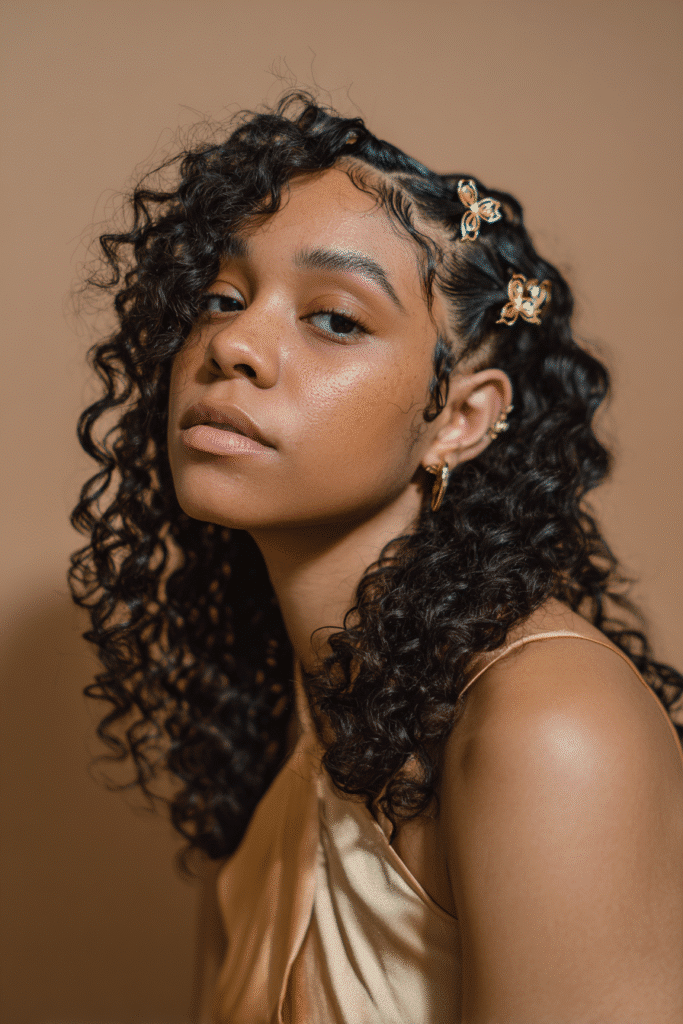
- Butterfly hair clips positioned strategically along the braid for a whimsical, fairy-tale aesthetic
- Decorative combs to secure and elevate the style with rhinestones or pearl detailing
- Hair gems woven into the braid for a subtle sparkle that catches the light as you move
Additionally, if you’re wearing a one-shoulder dress, consider positioning your braid slightly to that side for a coordinated look. This seemingly minor adjustment creates a beautifully balanced overall appearance.
For added dimension, gently pull sections of your braid outward to create a fuller, more textured effect before securing with accessories.
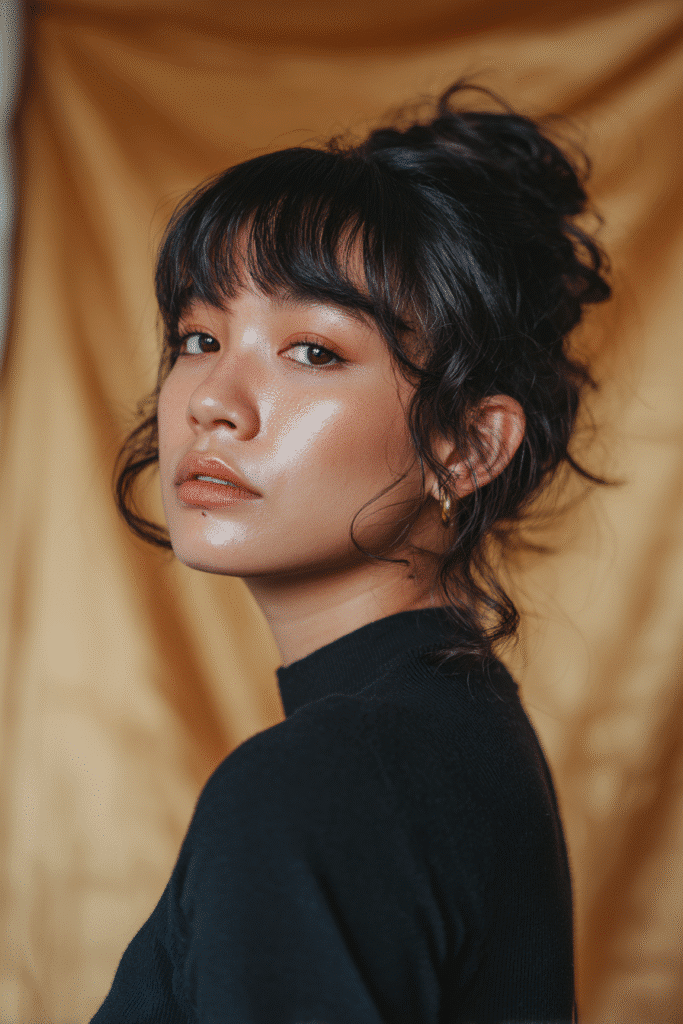
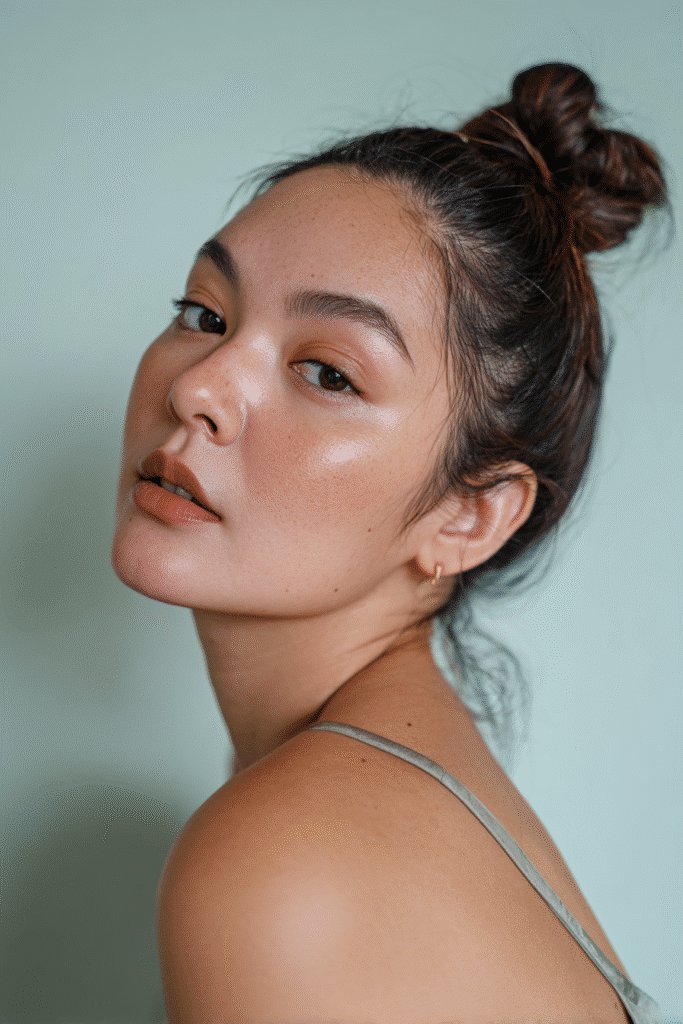
Messy Bun with Volume

When it comes to homecoming hairstyles for medium length hair, the messy bun with volume remains my absolute favorite! This effortless yet chic style has saved me countless times when I wanted something that looks deliberately undone yet perfectly put together.
Messy Bun with Volume styling tips
For the perfect voluminous messy bun, I always start with 2-3 day old hair—trust me, dirty hair creates better texture. First, apply texturizing spray or dry shampoo throughout your hair to build volume. If you have fine hair like me, this step is non-negotiable!
To add even more dimension, I curl my hair first, alternating between curling toward and away from my face. This technique creates varying textures that make the finished bun look naturally full.
Next, gather your hair where you want your bun to sit (I find positioning it in line with your cheekbones extremely flattering). Create your ponytail, subsequently divide it horizontally into two equal sections. The magic happens when you gently pinch and pull at sections to create that coveted messy volume!
Messy Bun with Volume best face shapes
Here’s the good news—the messy bun suits virtually all face shapes! Yet I’ve found some subtle variations work better for certain features.
For round faces, a high messy bun draws the eye upward, elongating your face shape. Regardless of your face structure, leaving some face-framing pieces loose softens the look and highlights your cheekbones.
What I love about this style is its flexibility—you can position it slightly off-center or adjust the height depending on what flatters you most. Plus, the messier it is, the more unique it becomes!
Messy Bun with Volume how to secure it
The key to a messy bun that actually stays put? Start with the right foundation. Secure your ponytail tightly, since this serves as your anchor point.
I use slim silk scrunchies or clear elastics for the initial ponytail. Then wrap sections around the base, pinning them strategically with bobby pins. In fact, I place pins in a crisscross pattern underneath the bun for maximum hold.
Finish with a good hairspray, focusing on the bun itself and any flyaways. Nevertheless, keep some texture showing—that’s what makes it “messy” in all the right ways!
Twisted Half-Up Style
For a romantic yet effortless homecoming look, I’ve fallen in love with the twisted half-up style—it perfectly balances sophistication with that carefree vibe we all want for special events. This feminine hairstyle has saved me countless times when I needed something quick yet beautiful.
Twisted Half-Up Style styling tips
Creating this elegant look is surprisingly simple. First, I always start with loose waves as they add texture and grip. You don’t absolutely need waves, but they definitely help make the style look more polished and give your hair some necessary grit.
To achieve this look:
- Take a section of hair near your temple and twist it upward and back toward the crown of your head
- Secure temporarily with bobby pins
- Repeat on the opposite side, twisting that section back toward the crown as well
- For the magic touch, tuck the ends of each twist under the opposite twist to create that beautiful twisted effect
- Secure everything with bobby pins, hiding them beneath the twists
The secret to this style is definitely in the volume—don’t be afraid to gently pinch and pull at both the top and bottom of your twists to create fullness. This technique, often called “pancaking,” transforms tight twists into gorgeously voluminous ones.
Twisted Half-Up Style best for medium hair
This hairstyle is particularly ideal for medium length hair because it offers the perfect balance—enough length to create substantial twists yet not so long that the style becomes unmanageable. The style works exceptionally well for fine to medium hair textures, as the twisting technique actually creates the illusion of thickness.
What makes this style so versatile is how it can be adapted for various events. I’ve worn this for casual outings with friends, yet it’s equally stunning for homecoming with more defined waves and accessorized appropriately.
Twisted Half-Up Style accessories to enhance
The beauty of this half-up style lies in how it creates the perfect canvas for accessories. Some of my favorite ways to elevate this look include:
- Delicate pearl or gemstone pins strategically placed where the twists meet
- Minimalistic hair clips in place of traditional elastics
- Floral pins for a romantic, nature-inspired touch
For homecoming specifically, consider matching your hair accessories to your dress details—if your gown has crystal embellishments, opt for similar sparkly pins in your twists.
Finally, seal everything with a light-hold hairspray to ensure your style lasts through hours of dancing yet maintains that coveted natural movement. The goal is secure but not stiff—your hair should still look touchably soft.
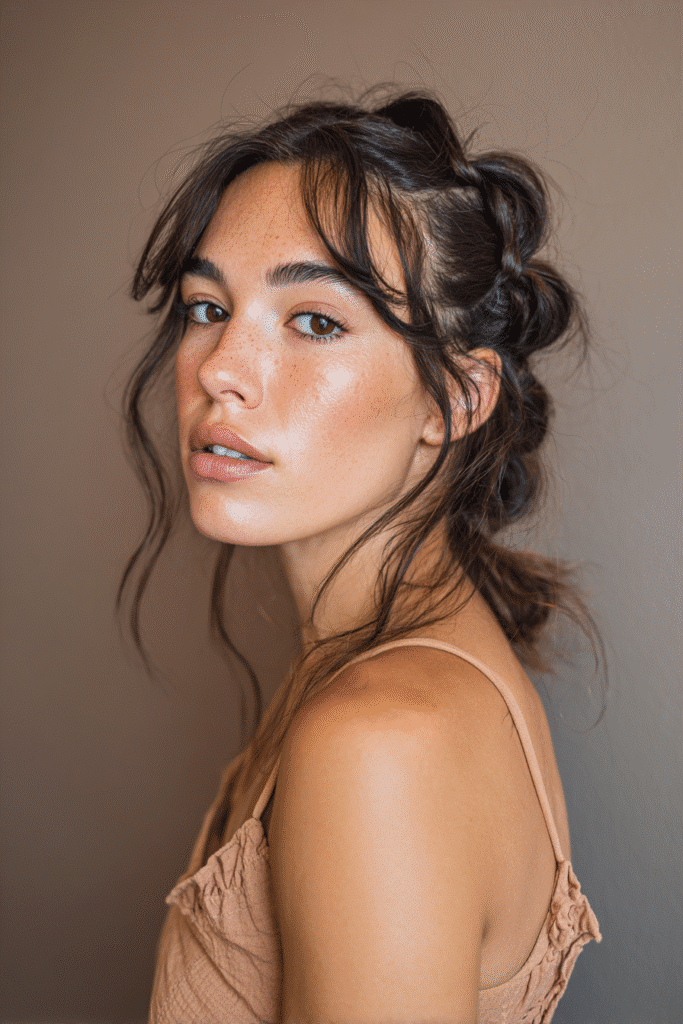
Romantic Side Braid
The romantic side braid has been my secret weapon for homecoming events—it’s that perfect combination of casual elegance that photographs beautifully yet requires minimal upkeep throughout the night. As someone with medium length hair, I’ve discovered this style creates a dreamy, wind-swept look that’s especially flattering for thicker hair textures.
Romantic Side Braid styling tips
I always start with a deep side part, gathering all my hair to the opposite side. For extra grip, I apply a smoothing cream or lightweight gel—this is crucial for preventing flyaways. The magic happens when you begin French braiding from the top near your part, moving along your hairline toward your ear.
The technique that truly elevates this style is bringing horizontal sections from the opposite side around to where you’re braiding. This creates that wrapped effect that looks intricate yet only takes minutes to achieve!
After securing the end with a clear elastic, I gently tug on the edges of the braid to create fullness. This “pancaking” technique transforms an ordinary braid into something truly spectacular, especially for those of us with finer hair.
Romantic Side Braid best for layered cuts
Let’s be honest—layered hair can make braiding tricky. Yet, that shouldn’t stop you from trying this gorgeous homecoming style! For successfully braiding layered hair:
- Use texturizing products to add grip and reduce slipping
- Start with slightly tighter braiding to help contain shorter layers
- Secure any stubborn pieces with mini bobby pins concealed within the braid
Though this style works optimally with fewer layers, I’ve found that embracing the slightly messier look actually enhances the romantic vibe.
Romantic Side Braid how to keep it neat
The key to a long-lasting side braid is proper preparation. Consequently, I always apply a light hairspray before braiding, focusing on the roots and ends. For flyaways, I keep a small bristle brush and hairspray handy for quick touch-ups.
Leaving a few face-framing pieces out softens the look beautifully. Furthermore, strategically placed accessories like small pearl pins or delicate floral clips can both enhance the style and secure any troublesome sections.
Soft French Twist

I’ve always considered the soft French twist the epitome of elegance for homecoming events—it’s that timeless updo that simultaneously looks sophisticated yet achievable for medium length hair. Unlike other styles that lean casual, this classic hairstyle offers that red-carpet worthy polish without feeling outdated.
Soft French Twist styling tips
Creating this elegant updo doesn’t require professional skills, merely the right approach. Initially, I prep my hair with texture—the French twist actually works better when hair isn’t freshly washed! For fine hair like mine, I apply volumizing mousse to damp hair before styling, which helps create body that lasts up to 24 hours.
The secret to modernizing this look lies in its finish. Undoubtedly, pulling out a few face-framing strands creates that effortlessly chic vibe rather than the severe, every-hair-in-place twist our mothers wore. Throughout my styling process, I focus on:
- Teasing the crown lightly for height
- Gathering hair smoothly at the back
- Rolling the twist upward rather than sideways
- Securing with larger clips for thick hair or bobby pins for finer textures
Struggling with flyaways along your hairline? A neat trick I’ve discovered is using a clean toothbrush to apply a small amount of gel just to those problem areas.
Soft French Twist best for formal looks
This hairstyle truly shines with formal attire, primarily because of its structured yet feminine silhouette. The soft French twist creates a beautiful canvas that complements one-shoulder dresses exceptionally well.
What makes this style standout among other homecoming hairstyles for medium length is its versatility—you can adapt it from sleek and polished for black-tie events to tousled and undone for a more contemporary approach. Oftentimes, I’ve worn this same style to both daytime and evening events just by adjusting how sleek or messy I make it.
Soft French Twist how to add volume
Volume makes all the difference between a flat twist and a show-stopping one. For natural fullness, I start by curling my hair first with a 1.25-inch iron, creating soft waves that add dimension. Likewise, strategic backcombing at the crown creates that desirable height.
For fine or thin hair, notably, clip-in extensions can help achieve fuller looks without detection. Just be careful when securing your twist to avoid accidentally pulling them out!
My favorite technique involves brushing out curls with a boar bristle brush before twisting—this creates that airy, fluffy texture that photographs beautifully from every angle.
High Ponytail with Curls
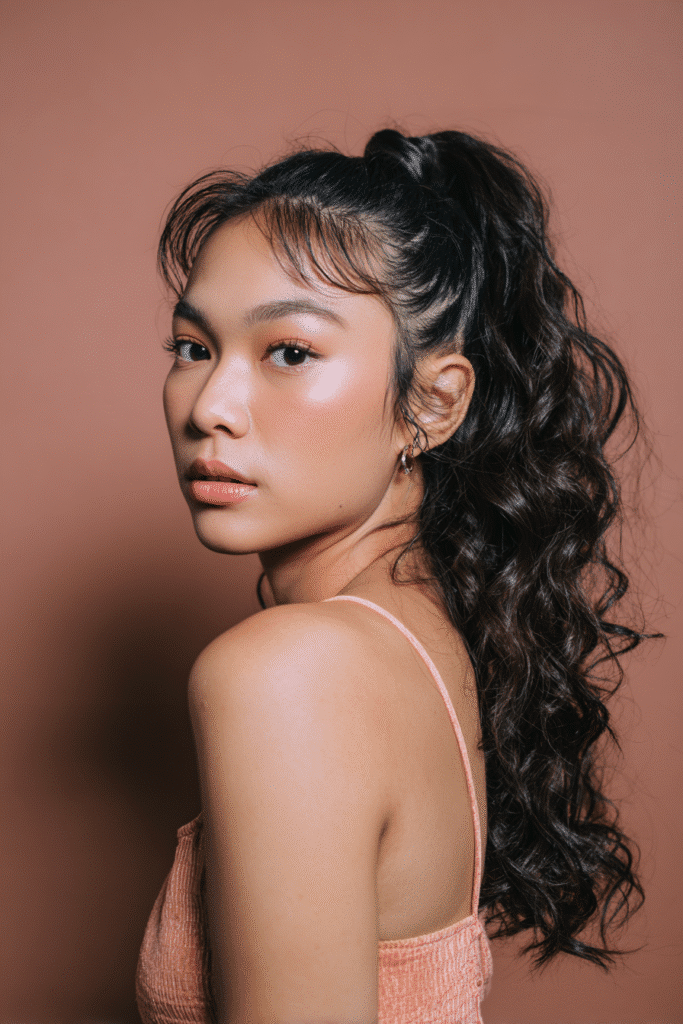
A high ponytail with curls stands out as the ultimate show-stopping homecoming hairstyle for medium length hair that perfectly balances elegance with playfulness! This dramatic yet practical style has always been my go-to recommendation for those wanting to make a statement while keeping hair off their neck for dancing.
High Ponytail with Curls styling tips
The secret to a flawless high ponytail begins with correct positioning. Many people mistakenly place their ponytails too low or too far back. For maximum impact, position your ponytail directly on top of the middle of your head. This creates that perfect “poking up” effect that adds height and drama.
Preparation is crucial! Start with very wet hair for that sleek, professional look that lasts. Apply a quality gel (I prefer Heart Up Style Sexy Hair gel) at the roots for maximum hold. For those struggling to achieve proper height, try sectioning hair from ear to ear, dividing it in half before securing.
High Ponytail with Curls best for dancing
This hairstyle truly shines on the dance floor! The elevated position allows your curls to bounce and sway with every movement, creating that captivating effect as you dance. Plus, the secure nature of a properly styled high pony means zero hair-fixing bathroom trips between songs.
To ensure it remains flawless throughout the night, secure with doubled-up hair ties if you have thick hair. Afterward, create a clean finish by wrapping a small section of hair around the elastic and securing with a bobby pin.
High Ponytail with Curls how to add bounce
For those enviable bouncy curls, remember this golden rule: every single piece needs individual attention. Spray each section separately before curling with a tapered curling iron that gets smaller toward the tip. This creates natural-looking curls that last longer.
For extra volume and that beautiful round shape, try the bubble technique by placing additional elastics down the length of your ponytail, then gently pulling each section outward to create fullness.
Side-Swept Bun
The side-swept bun has saved me countless times for homecoming—this hairstyle combines elegance with effortless charm that photographers absolutely love! This versatile style creates a romantic vintage vibe with just the right amount of polish.
Side-Swept Bun styling tips
To create this look, I start by deciding which side complements my face best. Next, I brush my hair toward that side and secure a low ponytail at the nape of my neck. The magic happens when I add texture—either quick curls or gentle teasing creates that perfect undone look. Simply divide your ponytail into sections, pin each section up one at a time, building your bun gradually. For a polished finish, wrap the ends around the base to form the bun shape, yet leave a few face-framing tendrils for that perfectly undone appearance.
Side-Swept Bun best for one-shoulder dresses
This hairstyle truly shines with one-shoulder dresses! The asymmetrical nature of the hairstyle beautifully balances the asymmetry of the dress. Plus, the side placement creates a cohesive, intentional look that photographs wonderfully from every angle.
Side-Swept Bun how to pin securely
For a bun that lasts all night, I always pin as I go. Starting from the perimeter, I secure with bobby pins in an inward direction, essentially creating a crisscross pattern underneath. Hairspray is your best friend—lock everything with a medium-hold formula that maintains flexibility.
Twisted Crown Braid
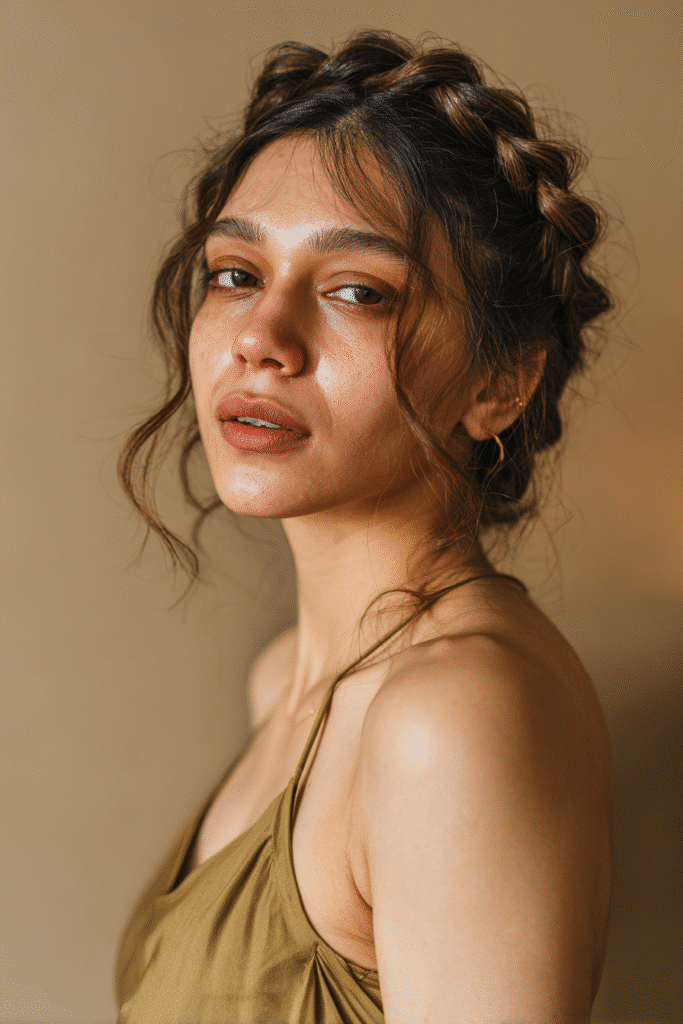
For homecoming, the twisted crown braid delivers that magical, fairy-tale vibe that stands out in photographs yet remains surprisingly achievable for medium length hair. This halo-inspired style offers that perfect balance between romantic and boho-chic.
Twisted Crown Braid styling tips
The beauty of twisted crown braids is their deceptive simplicity. First, I gather my supplies: a rattail comb, bobby pins, and perhaps some elastic bands. Starting with a side part, I divide a small section at the crown, twist it together, and pin at the back of my head. From there, I separate my hair into left and right sides.
Working on one side, I take a 1-inch section near my temple, split it into two pieces, and begin twisting away from my face. The secret? Adding new hair to each section as I twist – similar to a French braid technique. Usually, I continue until reaching the back of my head, then secure with a clear elastic before repeating on the opposite side.
Twisted Crown Braid best for medium length hair
Medium length hair creates the ideal canvas for this style given its manageability without excessive weight. Interestingly, wet hair often makes this look easier to achieve for beginners. For those with layers, this style actually works better than traditional braids as the twisting motion helps contain shorter pieces.
Twisted Crown Braid how to accessorize
Beyond the basic style, accessories truly transform this homecoming look. My favorite approach involves strategically placing floral pins or pearl accents where the twists meet. To create that ethereal fairy appearance, delicate hairpins with tiny crystals scattered throughout the crown portion catch the light beautifully.
Given these points, I always finish by gently tugging on the edges of my twists—this “pancaking” technique creates fullness that makes the style appear more intricate than it actually is.
Bubble Half-Up Style
The bubble half-up style brings that perfect playful touch to any homecoming look—it’s fun, youthful, yet surprisingly sophisticated for medium length hair. This trending style has become my personal favorite as it combines the elegance of an updo with the casual vibe of wearing hair down.
Bubble Half-Up Style styling tips
Starting with freshly brushed, tangle-free hair is critical for this look. First, I horizontally divide my hair, clipping the bottom portion out of the way temporarily. Taking the top section, I secure it with a clear elastic near my scalp. One technique I’ve discovered: clip back any loose hair not being used yet—this prevents frustrating tangles getting caught in your elastics.
For hair ties, I recommend placing them 2-3 inches apart down the length of your ponytail. Hereafter, gently pull the hair between each elastic outward to create that distinctive “bubble” shape.
Bubble Half-Up Style best for volume
This hairstyle truly shines on oval, square, or heart-shaped faces, as it accentuates these features beautifully. For those with fine hair like me, I always tease each section lightly or apply thickening spray beforehand. The result? Bigger, more defined bubbles that create the illusion of thicker hair.
Bubble Half-Up Style how to create bubbles
Creating uniform bubbles requires consistent spacing between elastics coupled with careful pulling. As I place each new elastic, I immediately shape the bubble above it by gently tugging outward from both sides. This technique ensures round, even bubbles throughout. Likewise, adding decorative elements such as velvet bows or colorful elastics transforms this already eye-catching style into something truly memorable.
Folded Voluminous Updo
Thick, luscious hair deserves a show-stopping homecoming style, which is why the folded voluminous updo has become my signature recommendation for medium length tresses. This elegant yet surprisingly quick style tames curls beautifully into a dreamy updo that photographs like a dream.
Folded Voluminous Updo styling tips
For this style, I always start with 2-3 day old hair as it provides better grip. First, apply volumizing powder to your roots at the crown and brush it through for instant texture. Next, gather all your hair into a low ponytail, gently pulling up the hair at your crown for height. The magic happens as you tightly wrap the base of your ponytail up and over your fingers, twisting counterclockwise.
Folded Voluminous Updo best for thick hair
This style truly shines on medium to thick hair types! For those with abundant tresses, the folding technique distributes weight evenly, hence creating a balanced look. Above all, French pins work far better than standard bobby pins for thicker hair—I recommend bending them slightly for a more comfortable fit. As you secure, focus on the outer edges first, working inward.
Folded Voluminous Updo how to fold properly
To fold correctly, wrap your ponytail base up over your fingers to the right, correspondingly twisting your fingers counterclockwise. Pull upward at the base to create the French twist appearance. Despite its elegant appearance, this entire process takes less than 60 seconds yet looks incredibly polished!
Braided Mid-Pony
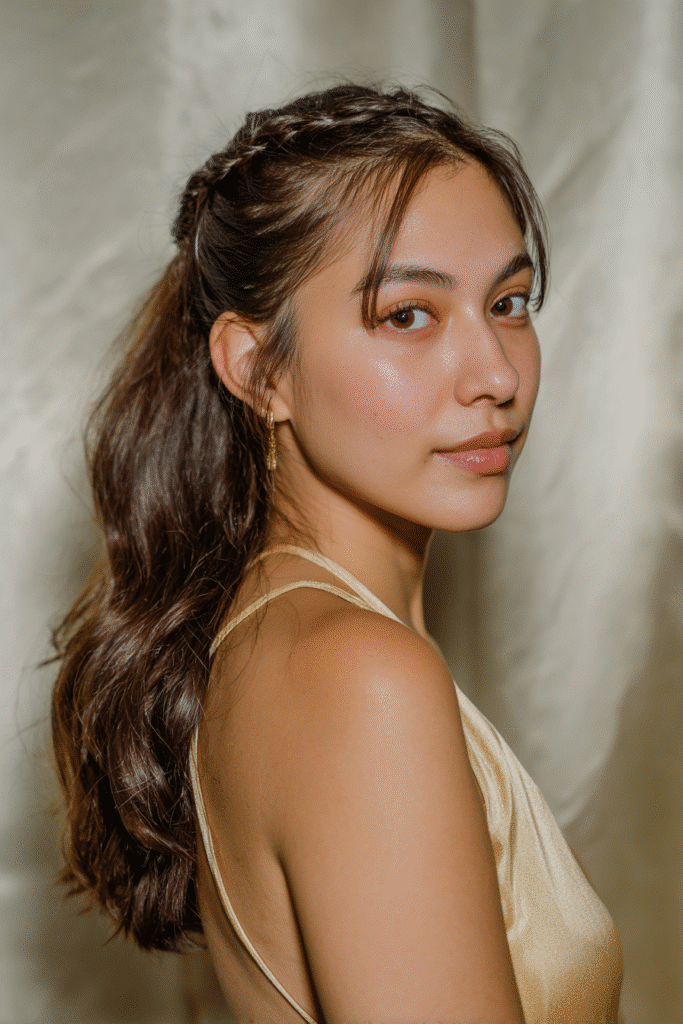
For a stylish yet simple homecoming option, the braided mid-pony has become my reliable go-to when I need something that looks intentional without hours of effort. This elegant style works wonderfully for medium length hair, striking that perfect balance between casual and polished.
Braided Mid-Pony styling tips
Creating this look is remarkably straightforward. First, gather your hair into a mid-height ponytail positioned neither too high nor too low—right at the middle of the back of your head. Secure with a clear elastic for a cleaner look. Occasionally, I section my ponytail into two or three smaller braids rather than one large braid, creating more visual interest and texture. Straightaway after securing your ponytail, divide it into three equal sections and create your preferred braid style—traditional three-strand works beautifully here, although fishtail braids offer extra dimension.
Braided Mid-Pony best for casual glam
This style truly shines for those who want a low-maintenance yet stylish homecoming look. Indeed, it’s perfect for dancing all night without constant touch-ups! Generally, I recommend leaving a few face-framing pieces out to soften the overall appearance. Furthermore, this versatile style pairs wonderfully with any dress style, making it an ideal choice for those still finalizing their outfit details.
Braided Mid-Pony how to wrap hair tie
To elevate this look, take a small section of hair from the underside of your ponytail before braiding. Once your braid is complete and secured, wrap this reserved piece around the elastic to conceal it completely. Thereupon, secure with a bobby pin tucked underneath. This simple technique immediately transforms your style from ordinary to elegant with minimal effort!
Curly Side Part with Clips
For those of us with natural waves or curls, a glamorous side part adorned with stylish clips creates that perfect balance of sophistication and youthful charm for homecoming night. This eye-catching style frames the face beautifully while allowing your natural texture to shine.
Curly Side Part with Clips styling tips
To achieve this stunning look, I start by sectioning my hair when it’s still damp and apply a quality leave-in conditioner for enhanced definition. Creating the perfect side part is crucial—I use the arch of my eyebrow as a guide for placement. Once positioned, I blow-dry with a diffuser to maintain curl integrity and volume.
For tighter curls, I recommend using an anti-frizz serum to keep everything looking fresh and defined throughout the night. Understandably, some areas might need extra attention—I gently twist stubborn sections around my finger to enhance their natural pattern.
Curly Side Part with Clips best accessories
The magic truly happens with the right accessories! Embellished hair clips featuring pearls, rhinestones, or marble details elevate this style from pretty to showstopping. Consider matching your clips to your dress details—if your gown has crystal embellishments, opt for similar sparkly pins.
Curly Side Part with Clips how to define curls
For perfectly defined curls, I apply a curl-enhancing cream throughout damp hair. Hereafter, I scrunch gently upward rather than pulling downward to encourage bounce.
Half-Up Fishtail Braid

The half-up fishtail braid combines the best of both worlds—the intricate detail of braiding with the casual elegance of wearing your hair down. This showstopper has become my signature homecoming style recommendation because it photographs beautifully from every angle while staying secure throughout the night.
Half-Up Fishtail Braid styling tips
Starting with loose waves creates the perfect foundation for this style. First, I section off the top portion of my hair and secure it with a clear elastic. For added dimension, I create a reverse “topsy tail” by making a hole above the elastic and pulling the ponytail through.
The magic happens in the details! I divide this section into two equal pieces, creating an “X” by crossing them over each other. From here, I take small sections from the outer edges, crossing them under to the opposite side.
My secret technique? Once I’m midway through my fishtail, I immediately start “pancaking” by gently pulling the sides with my index finger and thumb. This creates that coveted fuller appearance without damaging backcombing.
Half-Up Fishtail Braid best for medium hair
Medium length hair provides the perfect canvas for this style—not too short that the fishtail looks stunted, yet not so long that it becomes unmanageable. Unlike complete updos, this half-up approach allows your natural length to shine.
I’ve found this style remarkably versatile across different hair textures. For added volume, I recommend incorporating small, invisible layers throughout the fishtail. Understandably, these intricate braids truly become the statement piece of your entire look.
Half-Up Fishtail Braid how to braid evenly
Consistency is key! Taking equally sized small sections creates that professional-looking fishtail. Furthermore, directing the braid backward rather than straight down prevents it from getting too tight.
My foolproof technique involves remembering to always pull from the outer edges of each section. After completing, I gently tug sections outward for that lived-in, effortlessly chic appearance that’s perfect for homecoming celebrations.
Sleek and Smooth Bun
The sleek and smooth bun makes a bold statement at homecoming while allowing your dress to shine as the star of the show. This daring yet timeless style has become my signature recommendation for those seeking an elegant, polished finish.
Sleek and Smooth Bun styling tips
Firstly, preparation is crucial! I always start with damp hair and apply heat protectant and anti-frizz serum. For those with naturally curly hair, this step is non-negotiable. Creating a clean part with the tail of a comb comes next—whether middle or side part depends on your preference. Afterwards, apply styling gel on both sides to keep everything in place.
Once your part is set, pull all hair back tightly into a low position on your neck. Secure with a bungee tie for maximum hold. Twist the ponytail tightly, wrap it into a bun, and secure with another elastic plus bobby pins as needed.
Sleek and Smooth Bun best for formal looks
This upswept style works beautifully for more formal homecoming events. Primarily, it complements high-neckline dresses or gowns with low-cut backs, making it incredibly versatile. The sleek finish creates that sophisticated, clean aesthetic that photographs magnificently.
Sleek and Smooth Bun how to keep it sleek
To maintain sleekness, I use a boar bristle brush for smoothing flyaways. Thereafter, a light coating of hair oil adds shine without heaviness. For stubborn baby hairs, a toothbrush sprayed with hairspray works wonders! Finishing with a strong-hold hairspray seals everything for all-night perfection.
Classic Curls with Headband
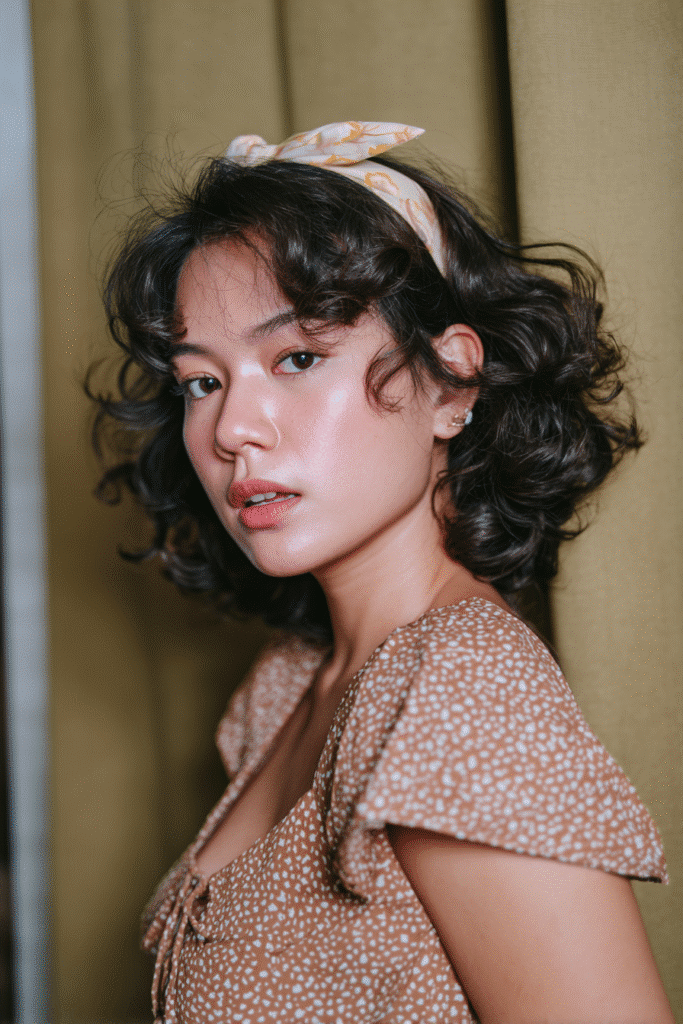
Looking for a timeless yet ultra-feminine homecoming hairstyle? Classic curls paired with a stylish headband create that perfect blend of romantic charm and practical staying power that’s ideal for medium length hair.
Classic Curls with Headband styling tips
To achieve this enchanting look, I start with dry hair rather than damp. Comparatively, bone-dry hair creates longer-lasting results than slightly moistened strands. First, I prepare my hair with a light leave-in conditioner, focusing on mid-lengths to ends. For enhanced definition, I curl small sections away from my face, setting each curl with the cool air setting on my dryer to ensure longevity throughout dance-filled evenings.
Once finished curling, I gently finger-comb through the curls rather than brushing, which maintains their structure while creating that coveted soft, unified look.
Classic Curls with Headband best headbands
For an elegant homecoming statement, I recommend a gilded or sparkly headband positioned about two inches back from your hairline. This placement creates that lifted, effortless look while keeping curls off your forehead.
Predominantly, I’ve found that selecting a headband that coordinates with your dress details elevates the entire look—matching metals creates a sophisticated effect, whereas mixing materials offers playful charm.
Classic Curls with Headband how to curl evenly
The secret to consistent curls? Taking equally-sized sections and allowing proper cooling time prior to handling. For those with layered hair, I’ve discovered that twisting and pinning two to four curls around your face before adding the headband helps keep shorter pieces secure.
Conclusion
Finding the perfect homecoming hairstyle for medium length hair doesn’t have to be overwhelming anymore. These 15 stunning styles prove that you have countless options to express your personality while staying comfortable throughout the night. From the effortless elegance of a low braided ponytail to the show-stopping drama of classic curls with a headband, there’s truly something here for every face shape, hair texture, and personal style preference.
What I love most about these homecoming hairstyles is their versatility. Whether you’re drawn to the romantic charm of a twisted half-up style or prefer the polished sophistication of a sleek and smooth bun, each look can be customized with accessories and styling techniques to make it uniquely yours. The key is choosing a style that not only complements your dress but also feels authentically you—after all, confidence is your best accessory.
Remember, the most important aspect of any homecoming hairstyle isn’t perfection—it’s how it makes you feel. These styles are designed to enhance your natural beauty while allowing you to dance, laugh, and create memories without constantly worrying about touch-ups. Take the time to practice your chosen style beforehand, gather the right tools and products, and most importantly, have fun with the process.
Your homecoming night should be about celebrating with friends and feeling absolutely stunning. With these tried-and-tested hairstyles for medium length hair, you’re equipped to create a look that will photograph beautifully, stay secure through hours of dancing, and leave you feeling confident and radiant throughout this special evening. Here’s to a homecoming night filled with beautiful hair and even more beautiful memories!