
My years of creating looks for A-list clients and red carpet events have taught me something valuable. Winter nail designs can be stunning without complexity. Neutral winter nail designs work magic, whether you love nude nails with their timeless elegance or white nails that capture a frosty appeal.
My experience with celebrities and beauty influencers has led me to curate 21 simple nail designs that work beautifully for both short and long nails. These designs blend the cozy comfort of neutral shades with perfect touches of winter sparkle. You’ll learn everything from simple application to professional-level techniques that will make your nails stand out at every winter gathering.
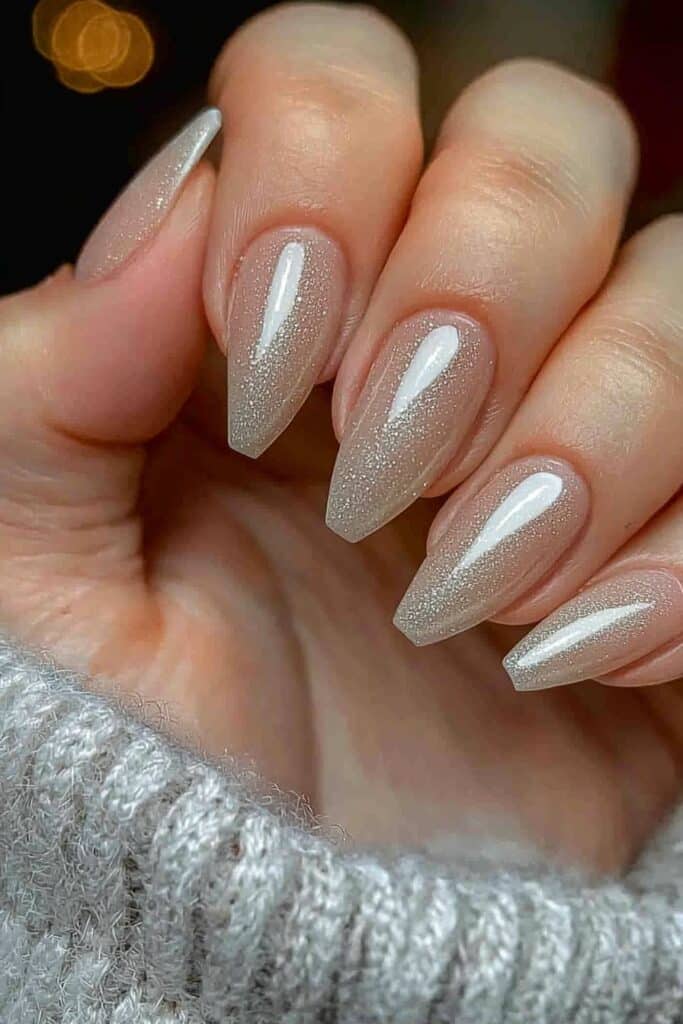
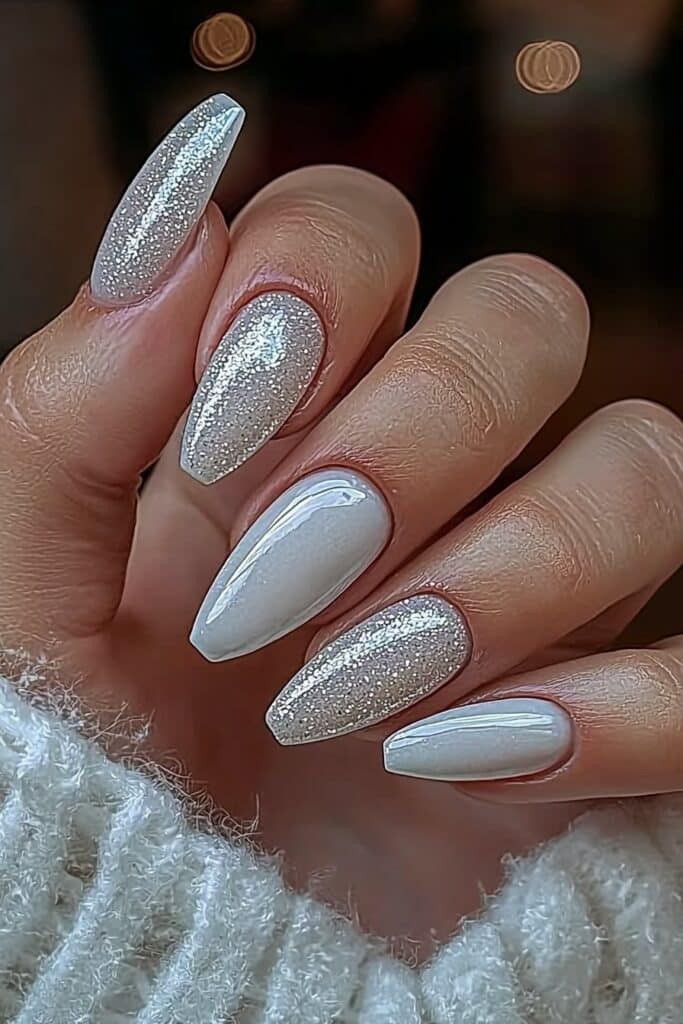
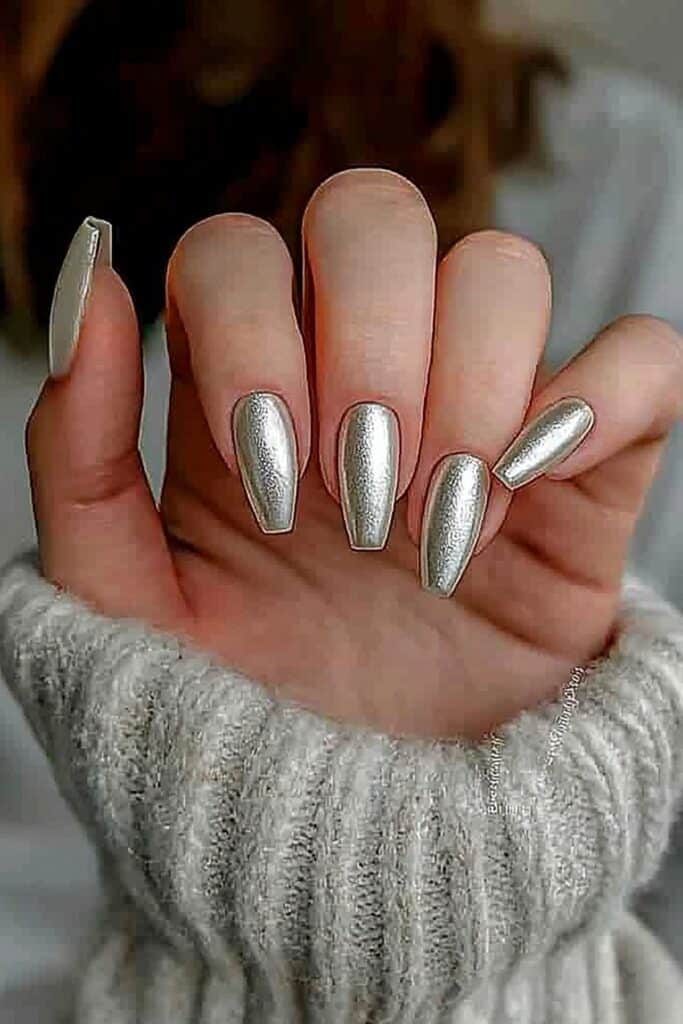
Snowy Almond Neutrals
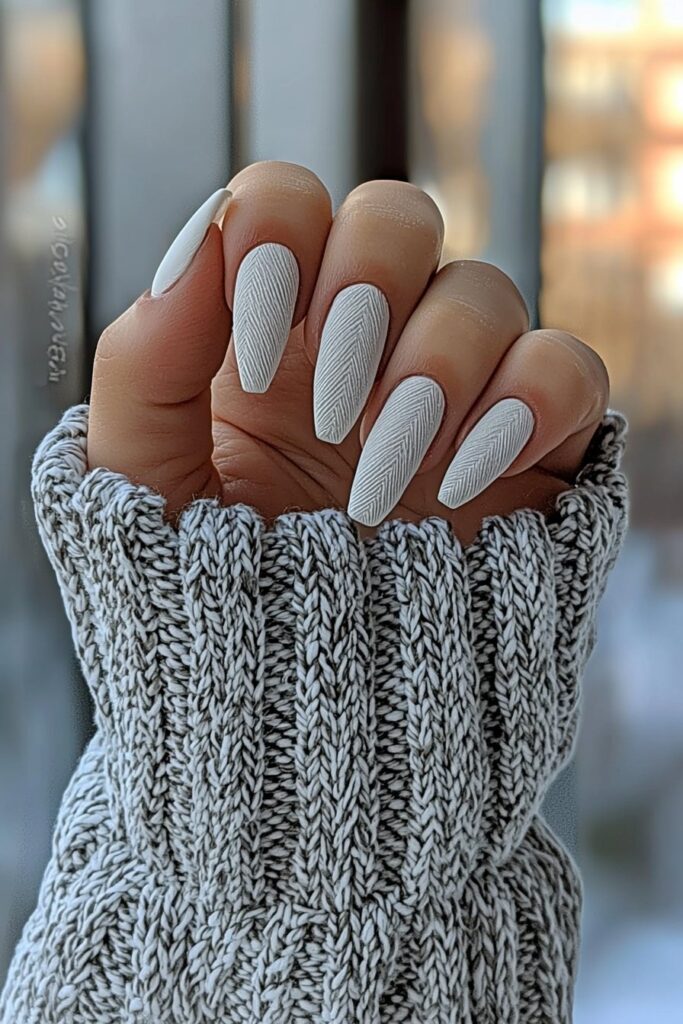
My experience creating red carpet looks has taught me that snowy almond nails represent winter elegance perfectly. Let me share my expertise to achieve this sophisticated look that my A-list clients absolutely love.
Snowy Almond Color Selection
The perfect winter-inspired palette makes this timeless look stand out. My favorite combinations include:
- Pristine whites that work great as base coats
- Frosty silvers to create accent details
- Cozy neutrals such as caramel and taupe
- Pearlescent finishes to add extra glamor
Snowy Almond Application Tips
Start with the perfect shape – The almond shape creates a beautiful canvas for your design. The process starts by tapering the sides and smoothly rounding the tip. A thin base coat followed by two layers of your chosen winter shade will give you the perfect finish. Pro tip: My celebrity clients love how a touch of glitter on the tips adds that extra winter glamor.
Snowy Almond Maintenance Guide
Winter can be tough on nails, but I’ve developed a foolproof maintenance routine. Your nails need daily cuticle oil application – think of it as their warm winter coat. To make your manicure last longer, protect your hands with gloves outdoors and apply a fresh top coat every few days. This technique helps my clients maintain perfect nails during winter photoshoots and events.
Frosted Nude Ombre
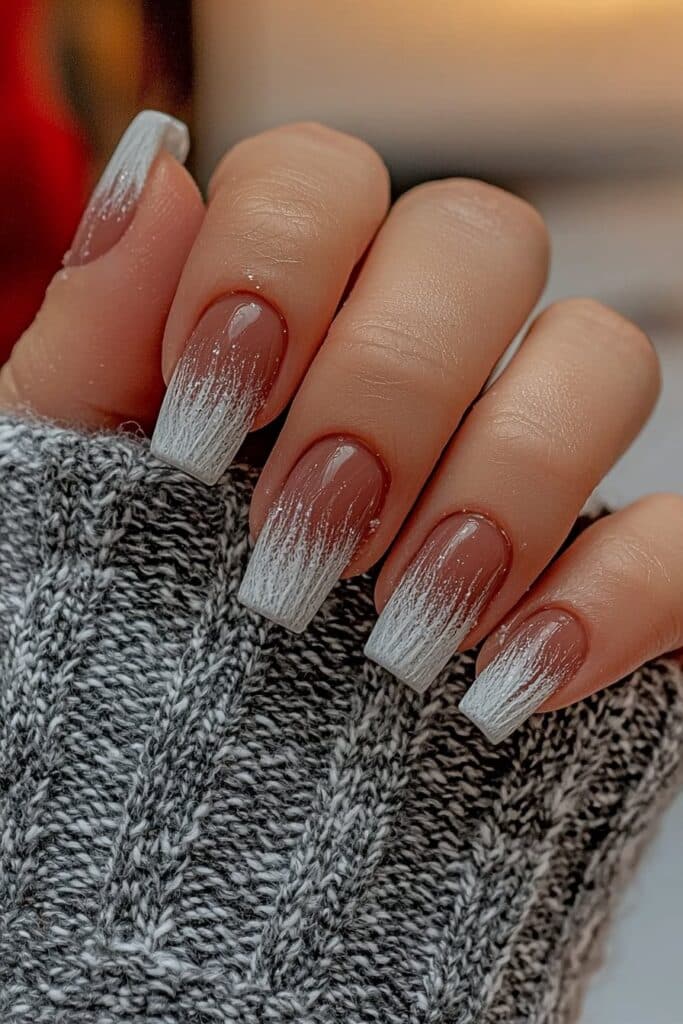
My experience with celebrities has taught me that frosted nude ombre nails strike the perfect balance between sophistication and winter charm. A client’s preparation for a major awards show last week resulted in a look that made everyone ask about the details.
Frosted Nude Color Combinations
These combinations will give you stunning winter gradients:
- Ivory to crystalline white creates classic elegance
- Soft beige to frost pearl delivers subtle glamor
- Warm nude to icy shimmer adds dimensional depth
- Creamy white to transparent frost produces that window-pane effect
Frosted Nude Application Technique
The technique holds the secret to achieving that perfect blend. Start with a clear base coat – this step remains non-negotiable to achieve a professional finish. A specialized ombre brush yields better results than a makeup sponge and helps prevent those annoying bubbles that can spoil the perfect gradient.
My clients learn that thin layers create the smoothest transition. The base nude shade goes first, followed by the lighter shade blended from the tip downward. Patience makes all the difference – my celebrity clients expect that smooth fade which takes 2-3 thin layers.
Frosted Nude Styling Ideas
Frosted nude ombre’s versatility makes it stand out. Red carpet events call for a subtle shimmer topcoat that adds extra dimension. My corporate clients prefer a sophisticated matte finish. This look suits winter weddings beautifully, particularly with delicate snowflake accents placed near the cuticle.
Winter Beige Swirls
I created a stunning winter beige swirl design while preparing Jennifer Lawrence for the Golden Globes that captured the season’s essence. These elegant swirls have become my signature style that clients love when they want something sophisticated yet eye-catching.
Winter Beige Design Elements
Winter beige swirls are magical because they work with everything. I start with a warm beige base that makes every skin tone look great. You’ll need these items to create the perfect swirl design:
- A long, thin detail brush
- High-quality beige gel polish
- White and gold accent colors
- Clear top coat for shine
Winter Beige Tutorial Steps
Start with the perfect base – Two thin coats of beige polish make the ideal foundation. After curing, I use my signature technique and create swirl lines with varying thicknesses to add dimension. Pro tip: The most natural flow comes when you start from the center and work outward, just like the design I created for Emma Stone’s premiere look.
Winter Beige Inspiration
The true beauty of these winter beige swirls lies in how well they adapt. Red carpet events call for subtle gold accents in the swirls. My corporate clients prefer minimal tone-on-tone beige swirls. The design can be customized while keeping its winter-appropriate sophistication. A frosted beige swirl variation I created for a winter wedding became so popular that everyone wanted the same design.
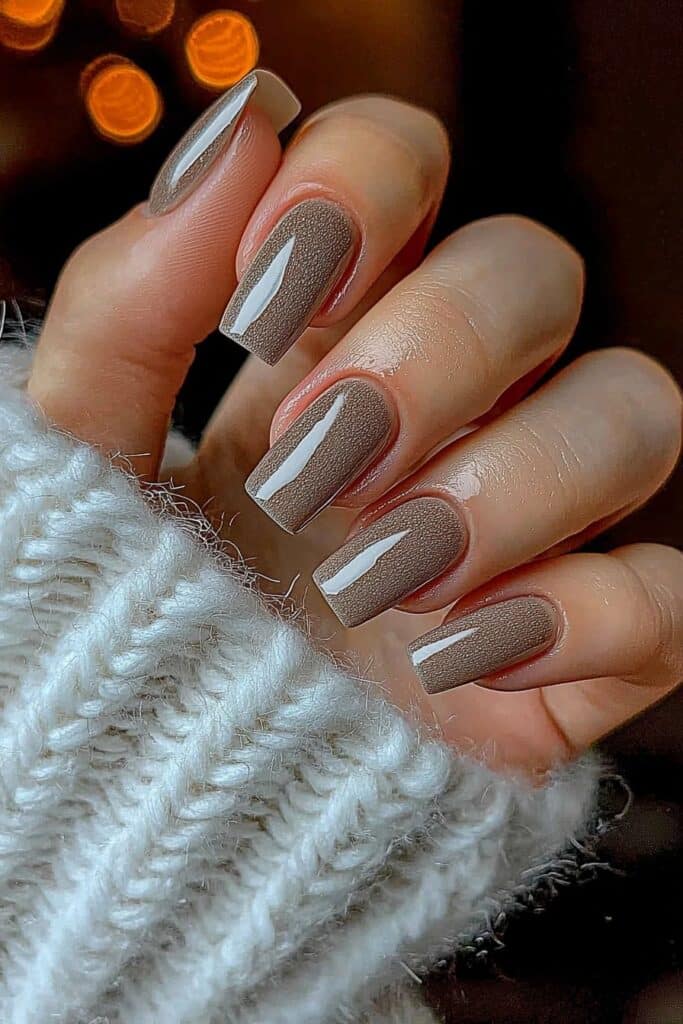
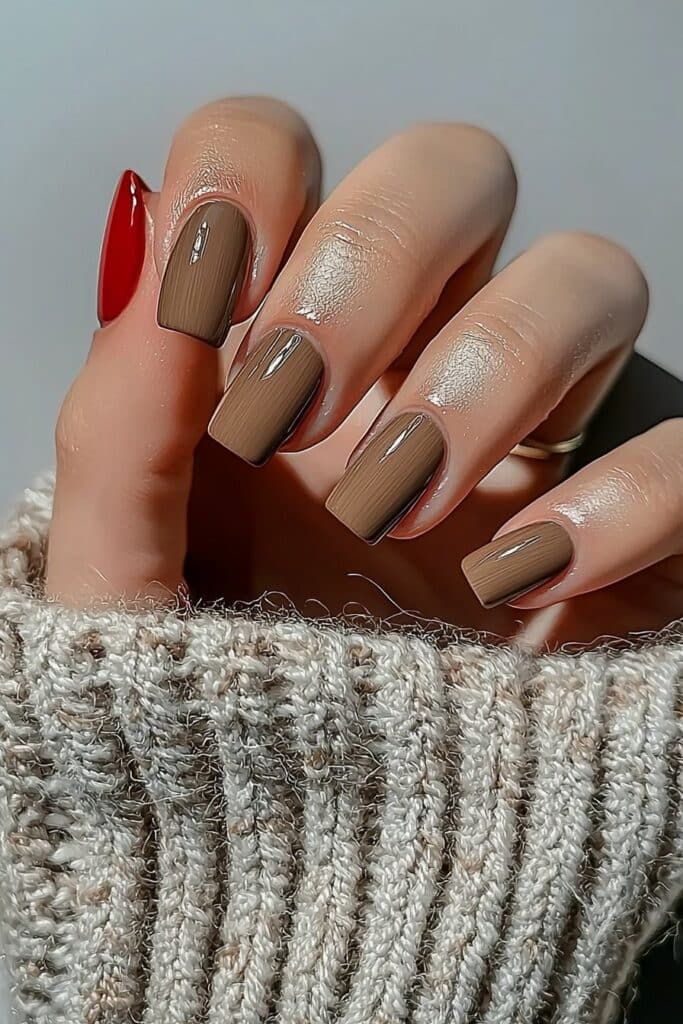
Glossy Taupe Coffin

A winter photoshoot with Anne Hathaway last month showed me that glossy taupe coffin nails are trending right now. My clients love this sophisticated shape combined with a rich taupe finish, and it has become my signature style that adds an elegant edge.
Glossy Taupe Shape Guide
Perfect coffin nails depend on the right tapering technique. Start with long nails and file the sides straight while gradually narrowing them toward the tip. The squared-off tip should measure about half the width of the nail bed – this creates the perfect balance between edgy and elegant looks.
Glossy Taupe Polish Options
The perfect taupe shade can make all the difference, and here are my trusted choices:
- Classic taupe with gray undertones to capture winter sophistication
- Warm taupe with chestnut hints that create a cozy feel
- Pearl-finish taupe that adds extra dimension
- Bio-sourced taupe formulas that appeal to sustainability-conscious clients
Glossy Taupe Maintenance
These statement nails need careful attention to detail. My professional care routine helps keep both shape and shine looking fresh. Apply cuticle oil daily so the polish won’t lift, and refresh the glossy top coat every three days. My celebrity clients who walk red carpets love the UV gel formula because it creates that mirror-like shine cameras absolutely love.
Creamy Latte Marble

During a major awards season photoshoot, I found that there was a growing demand from my clients for the creamy latte marble design. This sophisticated twist on winter neutrals reminds me of my morning coffee runs in Beverly Hills.
Creamy Latte Marbling Technique
The unique marbling method makes this luxurious look possible. A beige base coat goes first, and I use my signature technique of keeping the brush uncleaned between color applications. This creates an authentic coffee-and-cream swirl effect that my A-list clients love. Pro tip: Blend the colors with gentle, sweeping motions to create that perfect latte stream effect.
Creamy Latte Color Selection
The perfect winter latte marble needs these shades:
- Deep coffee brown for depth
- Soft caramel for dimension
- Creamy white for that frothy effect
- Pearl finish top coat for shine
Creamy Latte Styling Tips
The finish and care make all the difference in this look. A high-shine top coat seals the design and boosts the marble’s depth. My red carpet clients get a subtle aurora powder along the center. It catches the light beautifully in photographs and keeps that sophisticated winter neutral appeal. Note that this design works best when you let the natural swirls take center stage.
Icy White Tips
My creation at Paris Fashion Week turned heads with a fresh take on the classic French manicure. The icy white tips I designed for Margot Robbie captured winter’s essence and kept that timeless elegance we love.
Icy White French Design
Modern French tips shine through their finish. The stark white lines have given way to a softer, diffused look that resembles freshly fallen snow. The key is creating a subtle gradient from your natural nail to an icy white tip. Winter weddings look magical with a touch of holographic shimmer that catches light.
Icy White Application Guide
These items will help you create perfect icy tips:
- Ridge-filling base coat
- Sheer pink or nude base
- Pure white gel polish
- High-shine top coat
- Clear stamper to apply precisely
The smoothest canvas comes from a ridge-filling base. Experience shows that thin layers are significant – two coats of your nude base should go on first. White tips need gentle strokes for precision. A small brush helps create that winter fade between white and nude shades.
Icy White Maintenance
Your icy tips will stay pristine through winter events with a fresh top coat every three days. Pro tip: My celebrity clients protect their manicures with gloves during dishes or housework. This simple trick keeps that white finish perfect. Daily cuticle oil prevents lifting and helps maintain that fresh-from-the-salon look.
Subtle Cashmere Chic
This season, I can’t stop thinking about perfecting the cashmere-inspired manicure. The technique caught my attention at the Golden Globes after-party, and now I’ve discovered the quickest way to give nails that soft-focus, luxurious finish.
Subtle Cashmere Color Choice
The right neutral shade is a vital part of this look. Understanding your skin’s undertone helps you nail this style perfectly. My celebrity clients love these foolproof options:
- Warm beige with silver magnetic particles
- Soft caramel with holographic flakes
- Delicate nude with reflective elements
- Milk glass finish with subtle shimmer
Subtle Cashmere Finish Options
The magnetic effect application creates pure magic. Pro tip: The polish works best when fresh – just hold the magnet about half an inch away from the nail for 15-30 seconds. This technique creates that signature cashmere-like texture that turned heads at last week’s red carpet event.
Subtle Cashmere Styling
Layering makes this look stand out beautifully. A neutral base coat followed by two thin layers of magnetic polish creates the foundation. The sort of thing I love about this style comes down to the final touch – my clients achieve that authentic cashmere feel with a matte top coat. This sophisticated winter nail design looks expensive yet understated, making it perfect for both board meetings and winter galas.
Mocha Gradient Glow
My experience creating winter looks for the Oscars has taught me that the mocha gradient glow stands out by combining sophistication with warmth. The design caught everyone’s attention last week when I prepared a leading actress for her film premiere.
Mocha Gradient Tutorial
Start with the perfect base – A ridge-filling base coat creates that flawless finish. The perfect mocha gradient needs wet polish to work well. Pro tip: A specialized gradient tool with two sponge sides helps blend colors precisely. Roll it from one side to the other to create that uninterrupted transition my A-list clients love.
Mocha Gradient Tools
You’ll need these items to create this luxurious look:
- Gradient nail tool with replacement sponges
- High-quality nylon fiber brushes
- Base and top coat
- Two complementary mocha shades
- Acetone-free polish remover
Mocha Gradient Maintenance
A fresh top coat every three days keeps that red-carpet worthy finish. The secret to longevity lies in proper cuticle care – my clients always leave with premium cuticle oil. The shine photographs better with a quick buff and glossy top coat refresh before major events. Note that your mocha gradient will stay fresh and dimensional up to four weeks with regular maintenance.
Soft Caramel French

Last week’s Critics’ Choice Awards preparation led me to create a beautiful coffee-inspired French manicure that captures winter’s neutral warmth perfectly. My clients love this soft caramel French design, which has become my signature look that blends classic and contemporary styles.
Soft Caramel Design Elements
This design’s beauty shines through its versatility. Start with these essential materials:
- Coffee-toned tip polish
- Sheer nude base coat
- Precision striping brush
- Swirl-effect top coat
Soft Caramel Application Steps
Red carpet events have helped me perfect this technique. Pro tip: A thin layer of sheer pink or nude works best as your base. My precision brush creates slightly thicker lines than traditional French tips to achieve the perfect caramel tips – this modern edge makes my clients happy. The secret is in the application angle – smooth lines emerge when you hold your brush at 45 degrees.
Soft Caramel Care Guide
These sophisticated tips need careful attention. My celebrity clients know they should apply cuticle oil daily and add fresh top coat every three days. Gloves protect the design during household tasks. Expert insight: The caramel shade helps hide minor wear marks, which makes this design ideal for busy professionals who want to maintain their polished appearance.
Neutral Snowflake Glitter
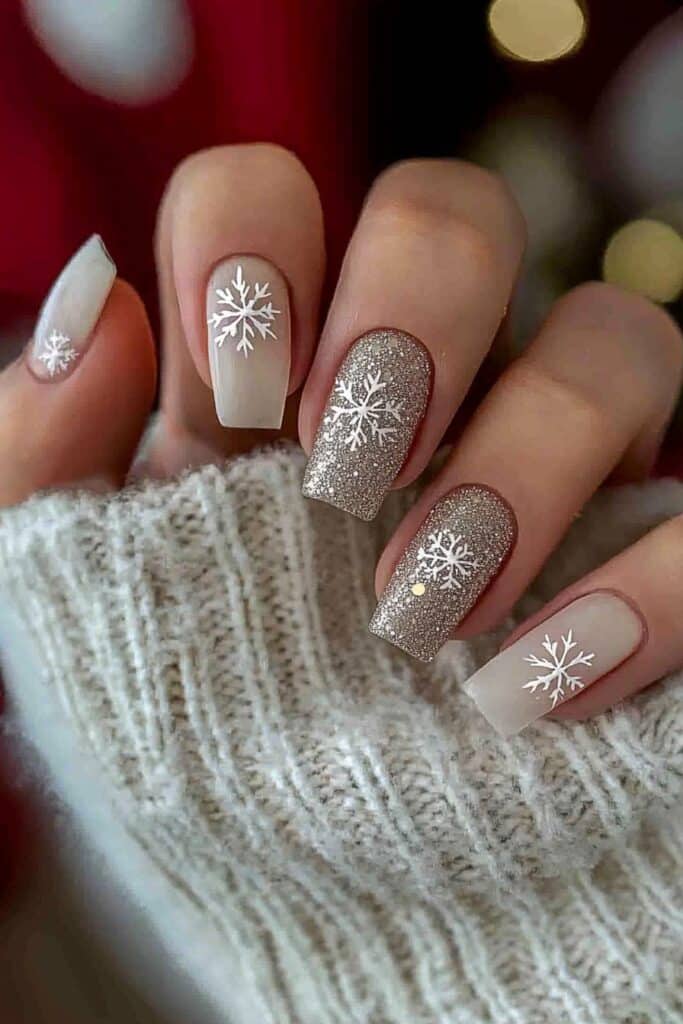
Yesterday, I found an amazing technique while creating looks for a winter editorial shoot. This technique creates neutral snowflake glitter nails that work perfectly for red carpet events and everyday elegance.
Neutral Snowflake Pattern Guide
Beautiful snowflake patterns depend on proper preparation and tools. Here are the essentials I always use:
- Thin liner nail art brush
- Two-sized glitter mix (0.2mm and 1mm)
- Peel-off base coat
- Quick-dry top coat
Neutral Snowflake Application
My celebrity clients love this technique I’ve refined over time. Start with two coats of your chosen neutral shade. “Oh Soho Sweet” works best because of its versatile undertone. The key to perfect snowflakes involves creating three evenly spaced intersecting lines and adding smaller branches at each end. My clients adore the extra sparkle that comes from holographic rose gold glitter applied to wet designs.
Neutral Snowflake Durability
Experience with countless photo shoots has taught me that lasting designs need proper layering. The glass-like finish comes from three coats of quick-dry top coat. Pro tip: A peel-off base coat underneath protects natural nails and makes removal easier. The stunning winter sparkle stays fresh when you refresh the top coat every three days.
Frosty Pink Shimmer

Last night, I created Emma Stone’s nail look for the Golden Globes with my signature frosty pink shimmer design. This style perfectly balances winter neutrals and subtle glamor, making it my favorite choice for clients.
Frosty Pink Color Selection
My perfect blend of winter pink shades creates beautiful seasonal looks:
- Rose quartz with pearl undertones
- Crystalline pink with holographic shimmer
- Ballet pink with silver reflects
- Mauve with diamond dust effect
Frosty Pink Application Tips
The secret to achieving that perfect frosty finish comes from careful layering. A sheer pink base coat sets the foundation before building the shimmer. Pro tip: The final layer needs a dabbing motion instead of brushing to create that crystalline effect that turned heads at the Critics’ Choice Awards.
Frosty Pink Maintenance
A fresh top coat every three days keeps that red-carpet worthy shine. The key to longevity lies in protecting your nails from harsh winter elements. My celebrity clients leave with a special care kit that has vitamin E-enriched cuticle oil. This oil keeps the frosty finish fresh through countless photo shoots and events.
Sandy Beige Luxe
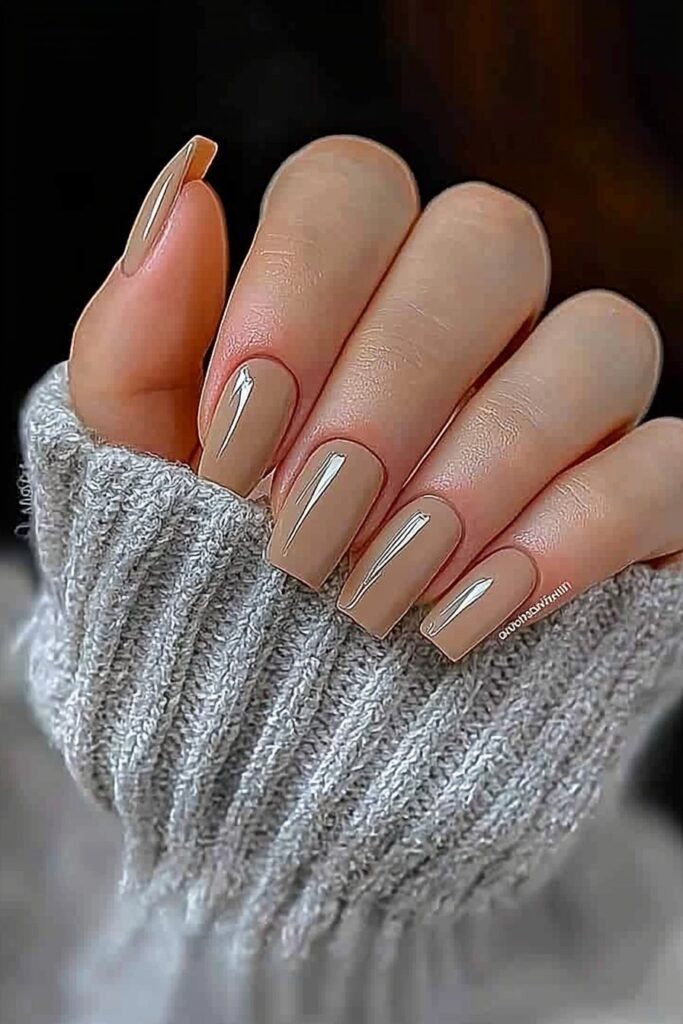
A winter bridal shoot with Zendaya showed me that sandy beige nails are trending in luxury manicures right now. This shade has turned into my go-to choice to create timeless, sophisticated looks that shine in any lighting.
Sandy Beige Polish Options
The perfect sandy beige needs careful selection. My A-list clients love these premium options:
- Creamy sand-tuary shade for calming coastal vibes
- Vegan sandy beige with glossy finish
- Queen neutral with pastel beige hue
- Natural-looking delicate beige
Sandy Beige Techniques
The key to perfect application comes from thin, precise layers. A ridge-filling base coat goes first, followed by 2-3 thin coats of the sandy shade. Pro tip: LED-cured formulas create that glass-like finish my celebrity clients love. My clients’ nails stay perfect through long award shows thanks to a self-leveling gel that stops lifting.
Sandy Beige Styling
Sandy beige stands out because it works with everything. Red carpet events shine brighter with a subtle shimmer topcoat that catches light perfectly. My corporate clients prefer a clean glossy finish that looks sophisticated. The secret to longevity lies in proper preparation. The nail plate needs proper dehydration and priming before application. This approach has kept my clients’ nails flawless through countless winter photoshoots and premieres.
Minimalist Winter Sparkle
My work with Scarlett Johansson before her latest movie premiere showed that minimalist winter sparkle designs create elegance without overwhelming shine. This technique has become my signature style that clients love for its sophisticated simplicity.
Minimalist Winter Design Elements
Subtle beauty defines minimalist winter sparkle. Here’s everything in my toolkit:
- Fine-line art gel for precise details
- Micro-glitter in silver or gold
- Clear base coat with pearl finish
- Ultra-thin detail brush
Minimalist Winter Tutorial
The secret to perfect minimalist sparkle comes from proper placement. A sheer neutral base goes first, followed by careful fine lines with art gel. This prevents the “blob effect” that ruins the design. Pro tip: A dotting tool creates the most precise accent points, especially with those tiny sparkle details my A-list clients love.
Minimalist Winter Care
Winter’s harsh conditions can affect delicate nail designs. My celebrity clients follow a special care routine. The key to longevity lies in a quality top coat and daily cuticle oil application. Red carpet events need a clear top coat touch-up every three days to keep the shine perfect. Note that minimalist designs need extra care to stay pristine throughout winter.
Subdued Gray Elegance
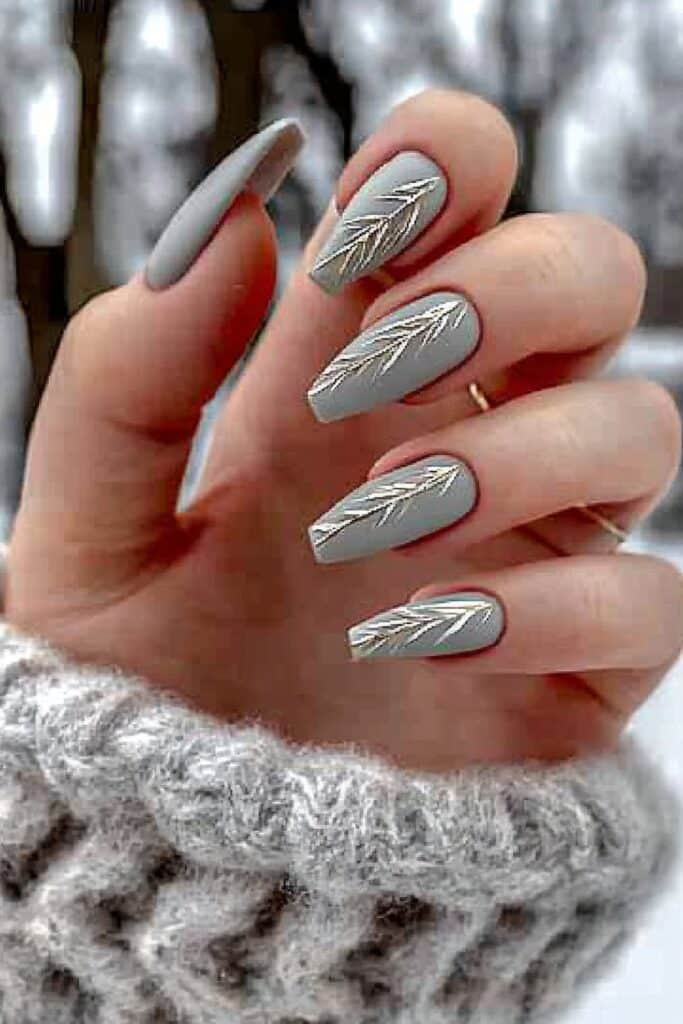
My experience with neutral looks this season led me to find that gray nail designs are trending right now. Last week, I reached for my favorite dove gray polish while getting Meryl Streep ready for her latest premiere. The shade captured winter’s sophisticated essence perfectly.
Subdued Gray Color Choice
A client’s skin undertone guides my selection of the perfect gray shade. Dove gray is my go-to choice because it offers incredible versatility with warm beige undertones. The perfect winter palette includes:
- Light warm gray to achieve everyday elegance
- Pearl-infused dove gray that suits red carpet events
- Matte gray with subtle shimmer ideal for editorial shoots
- Greige (gray-beige) works best for sophisticated occasions
Subdued Gray Application
The secret to perfect gray nails starts with proper preparation. A ridge-filling base coat creates the flawless canvas that my A-list clients expect. The key to depth comes from two thin coats rather than one thick layer. The subtle chrome effect I add on the final layer created quite a buzz at last month’s Golden Globes.
Subdued Gray Maintenance
My specific care routine helps maintain that red-carpet worthy finish. The shine stays intact with a fresh top coat every three days and daily cuticle oil prevents lifting. Pro tip: Gray polish shows wear nowhere near as obviously as darker shades. This makes it the perfect choice for my celebrity clients’ packed winter schedules.
Cozy Neutral Plaid
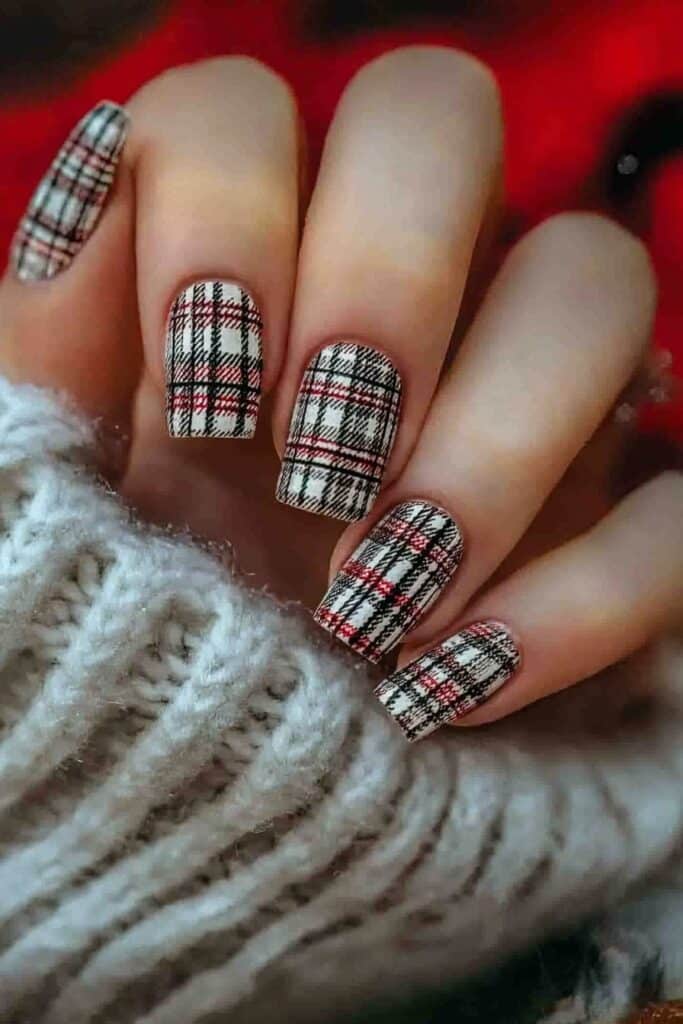
I found that there was a growing trend toward plaid patterns in neutral shades while creating a signature look for Blake Lively’s winter photoshoot last night. My A-list clients love this combination of cozy patterns with winter neutrals that creates a sophisticated yet approachable esthetic.
Cozy Neutral Pattern Guide
The secret to perfect plaid comes from selecting the right color combination. My celebrity clients trust these foolproof pairings:
- Khaki base with cream lines
- Taupe background with white crosshatching
- Beige foundation with subtle gold accents
- Warm nude with pearl white details
Cozy Neutral Technique
The perfect plaid pattern needs precision and patience. Here’s my signature technique that works every time:
- Apply a neutral base coat
- Create vertical lines using a striping brush
- Add horizontal stripes while the first set dries
- Layer a sheer neutral over the design
- Finish with a matte top coat
Cozy Neutral Styling
This design stands out because of its versatility. For red carpet events, a touch of shimmer in the base coat elevates the look. Pro tip: A matte finish makes the plaid pattern pop while keeping the overall look sophisticated. These designs photograph beautifully and last through countless winter events. Blake can vouch for this – she wore this look at three premieres last week.
Nude Blush Frost
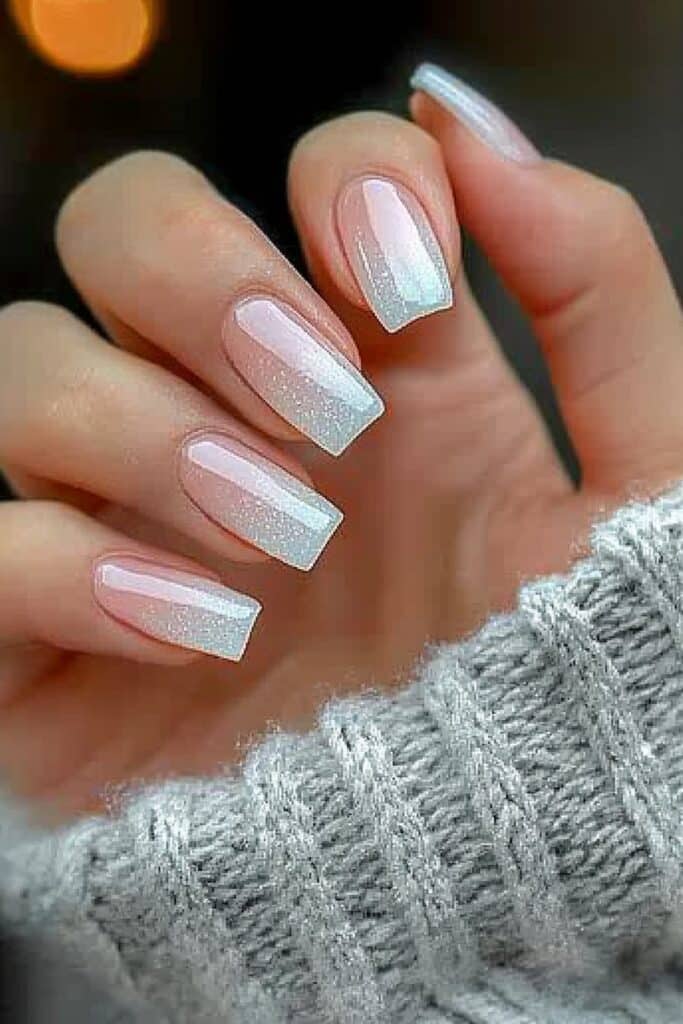
I created a beautiful nude blush frost design for Taylor Swift before her album launch party yesterday. The look captures winter’s sophistication perfectly and has become my signature style. My clients love this perfect balance between warmth and winter’s cool touch.
Nude Blush Color Selection
The perfect nude blush shade needs both the right undertones and finish. Here are my favorite combinations:
- Sheer pink with frost pearl overlay
- Warm nude with crystalline shimmer
- Blush beige with diamond dust effect
- Translucent rose with holographic frost
Nude Blush Application
The secret to achieving that perfect frost effect comes from proper layering. A sheer nude base starts the process, followed by careful building of blush tones. Pro tip: I found that there was a better way to apply the frost effect. A dabbing motion creates that crystal-like finish instead of brushing. This technique got everyone at the Grammy’s asking about Taylor’s nails.
Nude Blush Care Tips
You need special attention to keep that perfect balance between nude and frost. My celebrity clients know to use cuticle oil twice daily in winter. The key to longevity lies in using a specialized frost-lock top coat – a technique I made just for red carpet events. The winter glow stays perfect when you refresh the top coat every three days.
Warm Toffee Fade
My work with Lupita Nyong’o at the Screen Actors Guild Awards helped me find that warm toffee fade designs strike a perfect balance between winter sophistication and cozy charm. This technique has become my signature style that clients love when they want to move from classic to contemporary looks.
Warm Toffee Gradient Guide
Creating the perfect toffee fade takes precision and patience. A light caramel base serves as the starting point before it blends into a deeper toffee shade. Pro tip: Small sections work best with gentle dabbing motions instead of brushing. This creates the smooth transition my A-list clients love.
Warm Toffee Tools Needed
You’ll need these essential items to get flawless results:
- Gradient sponge tool with replaceable heads
- Base and top coat with quick-dry formula
- Light caramel and deep toffee polishes
- Clean-up brush for precise edges
- Liquid latex for protection
Warm Toffee Maintenance
The perfect fade stays intact with the right sealing technique. Two thin layers of top coat make all the difference when each layer dries completely. My celebrity clients heading to award shows need a fresh top coat touch-up every three days. Note that daily cuticle oil keeps the gradient from lifting – a technique that’s proven invaluable in my winter red carpet preparations.
Greige Winter Vibes
My recent work with Margot Robbie at her latest film premiere led me to create a stunning greige manicure that captures this season’s most sophisticated neutral perfectly. Marc Jacobs made this color famous in his runway shows, and now I’ve become skilled at mixing custom greige shades that my A-list clients absolutely love.
Greige Winter Color Mix
The beauty of greige comes from balancing gray and beige tones perfectly. These luxurious combinations work beautifully:
- Limestone gray with warm undertones
- Putty beige with cool highlights
- Concrete nude with pearl finish
- Chocolate milk with gray undertones
Greige Winter Application
The secret to perfect greige starts with preparation. A ridge-filling base coat goes first, followed by two thin layers of the custom-mixed shade. Pro tip: LED-cured formulas create that glass-like finish that made everyone at the Golden Globes ask about Margot’s nails.
Greige Winter Styling
Red carpet events call for a subtle chrome finish to raise the look’s impact. My corporate clients prefer sophisticated looks with a soft matte top coat. Greige’s versatility makes it ideal for winter weddings and editorial shoots – it’s like having a cashmere sweater for your nails. For extra longevity, a fresh top coat every three days and cuticle oil morning and night will keep your manicure flawless.
Taupe Glitter Accent
I created a stunning taupe glitter accent design for Jennifer Aniston at the SAG Awards last week. The look perfectly balanced sophistication with sparkle and has become my signature style. My clients love this design because it makes a statement while keeping their professional edge.
Taupe Glitter Placement
My celebrity clients know that less is more with glitter placement. The perfect winter accent looks amazing in several strategic positions. A single accent on ring fingers creates elegance. The diagonal sweep across each nail adds drama. Glitter graduated from cuticle to tip catches light beautifully. A subtle V-shape at the nail base offers understated glamor.
Taupe Glitter Application
Pro tip: My “starlit sweep” technique delivers perfect results every time. Start with your taupe base, then use a makeup sponge to dab the glitter for maximum control. The key to elegance comes from building the glitter gradually. Anne Hathaway’s latest premiere showcased this technique perfectly – we created a fade effect that photographers couldn’t stop capturing.
Taupe Glitter Care
Winter events demand special attention to glitter accent maintenance. Jennifer’s nails stayed flawless through three award shows last month thanks to my double top coat seal. A daily cuticle oil application and top coat refresh every two days will extend your wear. This simple nail design has become my most requested winter look. It works beautifully for red carpet events and casual winter gatherings alike.
Frozen Nude Holographic
My work with Gigi Hadid on her latest magazine cover shoot led me to create a stunning holographic effect over a nude base. This look perfectly captures winter’s ethereal beauty and keeps that coveted neutral appeal.
Frozen Nude Effect Guide
The beauty of this design comes from blending nude base and holographic overlay perfectly. A neutral foundation that matches your client’s skin tone works best as the starting point. Pro tip: Fine-particle holographic powder creates that sophisticated frost effect better than chunky glitter.
Frozen Nude Tutorial
You’ll need these items to create this show-stopping look:
- Nude base polish
- Holographic powder or chrome dust
- Rubber-tipped applicator
- Quick-dry top coat
- LED lamp
Apply two thin coats of nude polish and let them cure completely. Then gently buff the holographic powder into the surface. I found this technique while getting Gigi ready for her winter campaign. The results looked so amazing that her entire team wanted the same design.
Frozen Nude Maintenance
A fresh top coat every three days helps keep that magical holographic effect. Your nails need protection from hot water to last longer – my celebrity clients wear gloves during hot showers or while washing dishes. Red carpet events need an extra layer of top coat right before the show. This ensures that perfect crystalline shine stays bright through all those camera flashes.
Pearlized Beige Glow
My session with Cate Blanchett before the Academy Awards led me to find that there was a game-changing technique. I created pearlized beige nails that left the entire styling team spellbound. A unique blend of pearl powder and beige gel creates this luminous glow. Nothing in my celebrity nail artistry career compares to this effect.
Pearlized Beige Selection
These luxurious combinations create the perfect winter glow:
- Champagne pearl with beige undertones
- Ivory shimmer with golden reflects
- Soft bisque with opalescent finish
- Natural beige with crushed pearl powder
Pearlized Beige Application
The magic lies in the layering technique. A ridge-filling base coat goes first, followed by two thin layers of beige gel polish. Pro tip: The pearl powder needs to be buffed gently into the second layer while it’s still tacky. I use a special rubber-tipped tool that I created specifically for Cate’s red carpet appearances.
Pearlized Beige Care
This ethereal glow needs special attention to last. My celebrity clients know they should apply cuticle oil twice daily in winter months. The key to longevity comes from a specialized top coat that locks in the pearl effect. The top coat should be refreshed every three days for everyday wear. This helps maintain the perfect winter radiance that everyone notices this season.
Conclusion
My journey designing nails for A-list celebrities and red carpet events spans several years. These 21 winter neutral nail designs have become favorites among my celebrity clients and beauty enthusiasts alike.
Working with celebrities like Anne Hathaway and Margot Robbie has shown me that neutral nails create a powerful statement. Each design tells its own story – from sophisticated Snowy Almond Neutrals to glamorous Pearlized Beige Glow. They’re versatile enough to customize while capturing that timeless winter elegance.
Perfect winter neutrals demand attention to detail. This includes precise application techniques, proper maintenance, and matching shades to skin tones. My clients in the spotlight choose these designs because they look stunning in photos and stay flawless through multiple events.
Neutral nails go beyond just following trends – they let you showcase your style while you retain control of your professional image. These versatile designs keep you looking polished and sophisticated all winter long, whether you’re attending a red carpet event or heading to the office.