
Styling your little one’s natural hair doesn’t need to feel complicated. Many parents I’ve worked with as a hairstylist struggle to create natural hairstyles for Black girls that look beautiful and stay manageable.
Natural hair care might seem daunting at first, but now is the perfect time to try these styles. Today’s looks range from simple Afro puffs to fun bubble braids, with a focus on age-appropriate styles that work without extensions. These styles do more than just make your child look adorable – they help protect and nurture your little one’s hair.
You can master these 15 simple, protective hairstyles easily, whether you’re just starting with natural hair care or want to add more styles to your routine. These versatile looks work great for rushed mornings, special events, and regular days. Your daughter’s natural hair can be both beautiful and easy to manage!
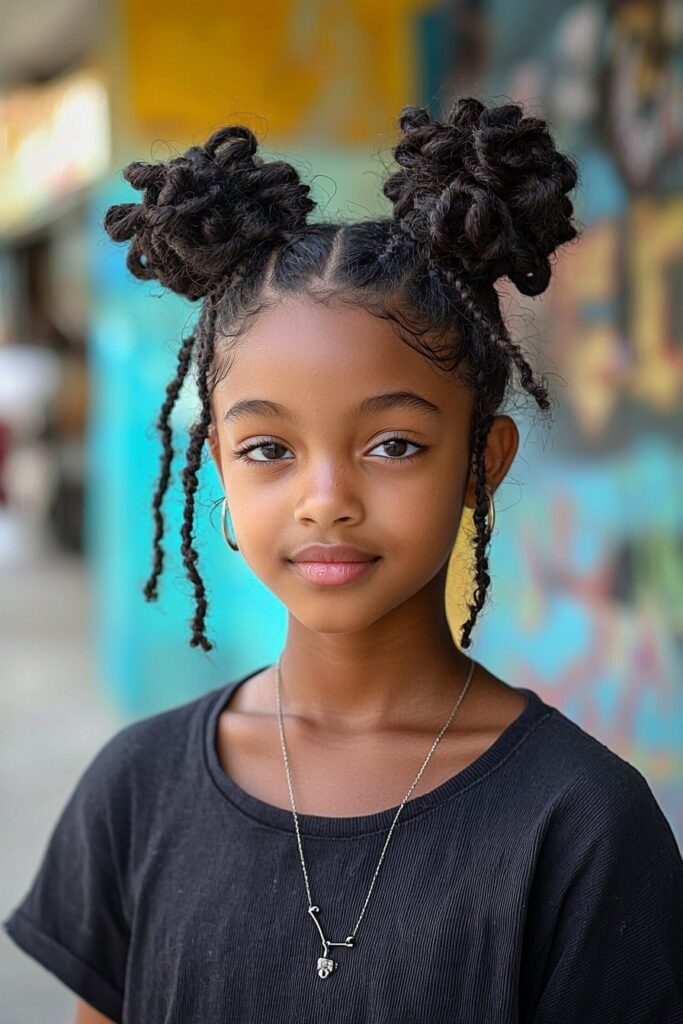
Simple Two-Strand Twist Puffs
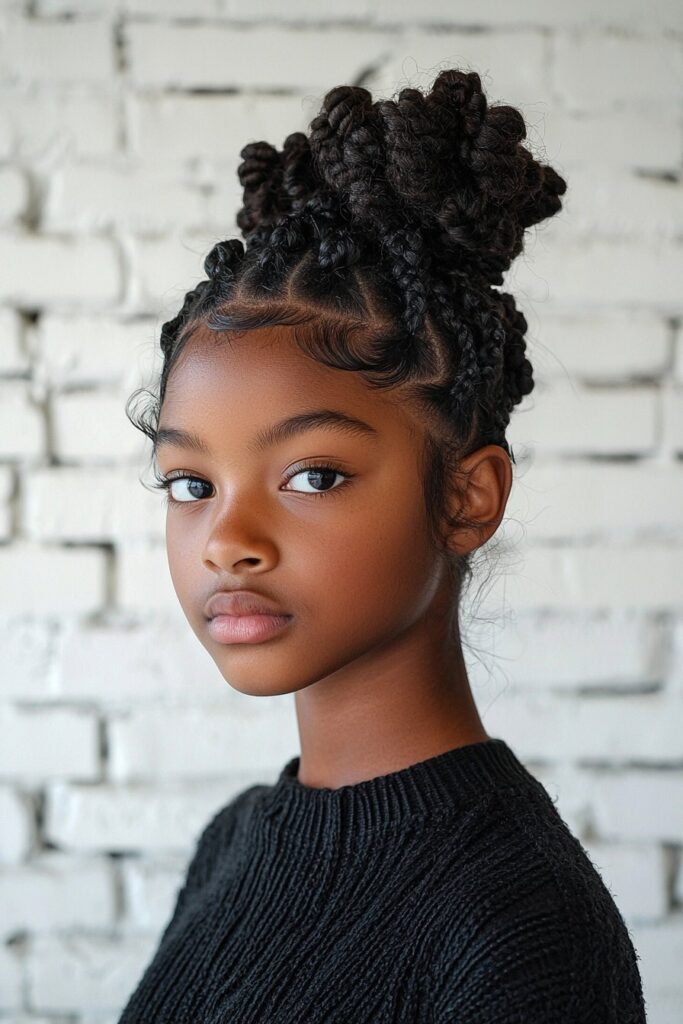
As a professional hairstylist who specializes in natural hair care, the sort of thing I love about two-strand twist puffs is their versatility as a protective style for young Black girls. This style protects delicate strands and creates an adorable look that lasts for weeks.
Tools and Products Needed
You’ll need these items to create perfect two-strand twist puffs:
- Wide-tooth comb for detangling
- Rat-tail comb for precise parting
- Hair ties with plastic balls for secure hold
- Spray bottle filled with water
- Leave-in conditioner or hair pomade
- Boar bristle brush
- Hair clips for sectioning
Step-by-Step Tutorial
Start with clean, damp hair that has minimal tangles. The hair should be divided into manageable sections using the rat-tail comb. Each section needs to be secured with clips to stay organized.
Here’s how to create each twist:
- Apply leave-in conditioner or pomade to moisturize the section
- Create a secure ponytail close to the scalp
- Divide the ponytail into two equal parts
- Cross the left section under the right strand
- Continue twisting until reaching the ends
- Secure the ends firmly to prevent unraveling
Style Duration and Maintenance
You can expect two-strand twist puffs to last 2-3 weeks if they’re managed to keep properly. Here’s how to make them last:
- Sleep with a satin scarf or use a silk pillowcase
- Add moisture to the ends every 2-3 days with water and leave-in conditioner
- Give your scalp a gentle oil massage at the time it feels dry
- Skip washing while wearing twists to avoid tangling
- Touch up twists as needed, especially around week 2
Best Occasions for This Style
This protective style works great for:
- Daily school wear
- Active play and sports activities
- Special events with decorative accessories
- Summer activities that need neat and manageable hair
The style looks even better with colorful hair accessories or unique parting patterns. It also dresses up nicely with headbands for special occasions.
Note that secure twisting at the roots prevents early puffiness, especially in the first week. The elastics shouldn’t be too tight or they might damage the hair. The key is finding the sweet spot between security and comfort.
Active days call for keeping twists in one of the nighttime positions – wrapped around the head, in a high pineapple, or gathered in a protective bun. This helps prevent too much movement that leads to frizz or unraveling.
Classic Afro Puff with Accessories
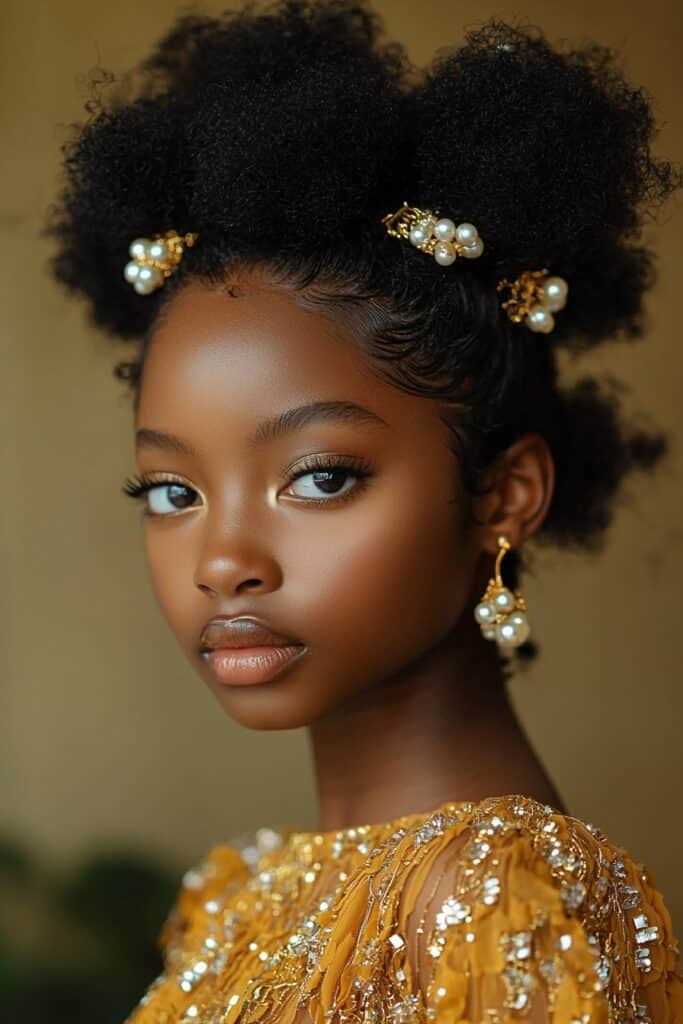
My experience as a professional hairstylist has taught me that the classic Afro puff stands out as one of the most versatile and charming hairstyles for young Black girls. This enduring style celebrates natural texture and lets you create countless personalized variations.
Required Hair Length
The perfect Afro puff needs hair that’s long enough to pull into a ponytail. Your stretched hair works great with this style because you can easily comb or brush it into place. While longer hair creates stunning results, shorter hair measuring at least 3 inches looks just as beautiful.
Styling Instructions
Start with clean hair that’s well moisturized using a sulfate-free shampoo and deep conditioner. Here’s how to create the perfect puff:
- Mist hair lightly with water to dampen
- Apply leave-in conditioner or curl cream for definition
- Section hair carefully based on desired puff size
- Smooth edges with a boar bristle brush
- Secure with an elastic headband, wrapping it 1-2 times
A sleeker finish comes from applying edge control along the hairline. The process needs gentle handling when pulling hair back to protect those delicate edges. Success lies in finding the sweet spot between security and comfort – your headband should feel snug without creating tension.
Accessorizing Tips
Your simple puff becomes a statement style through creative accessories. Here are some great options:
- Wrap a colorful scarf around the base
- Add dynamic scrunchies for extra flair
- Incorporate vibrant-colored elastic bands
- Place decorative bobby pins strategically
- Use beaded headbands for special occasions
Daily wear calls for subtle accessories that enhance without overpowering. A silk scarf or elegant hair clips can lift the look while keeping its classic charm.
A small bottle mixed with sweet almond oil and essential oils helps maintain freshness throughout the day. Quick spritz refreshes your style and adds a lovely fragrance. Your nighttime routine should include a satin-lined bonnet that prevents frizz and locks in moisture.
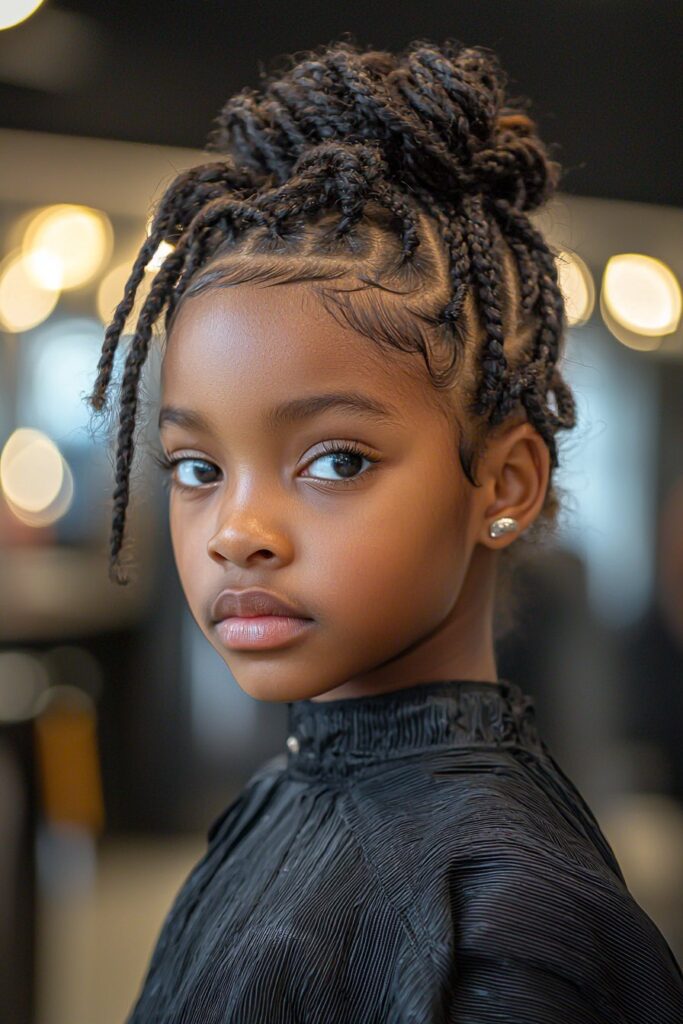
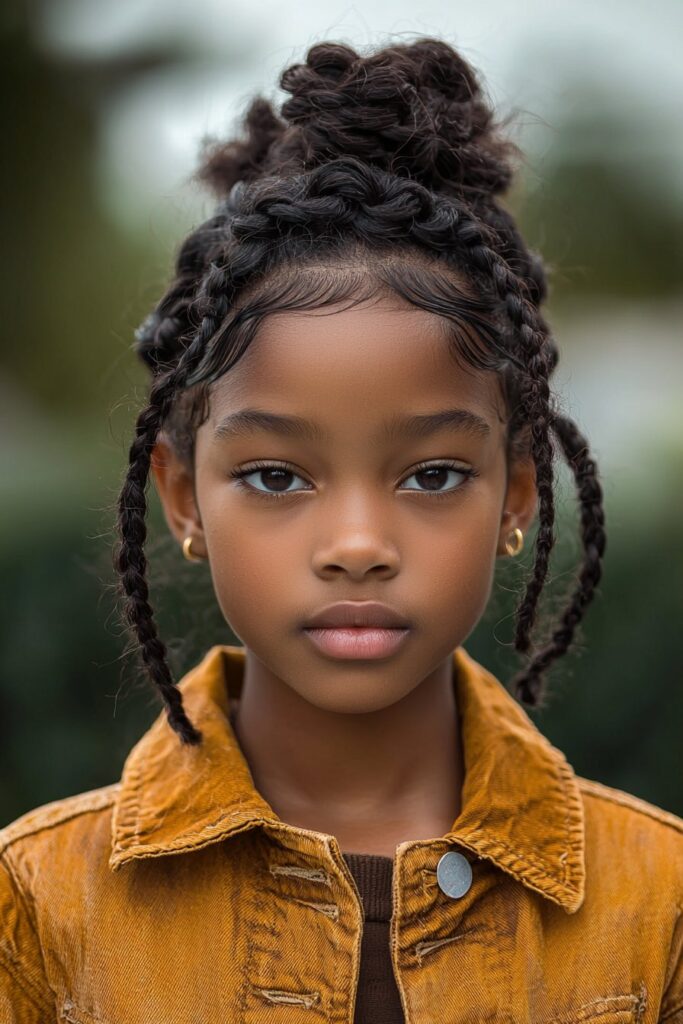
Protective Cornrow Ponytail
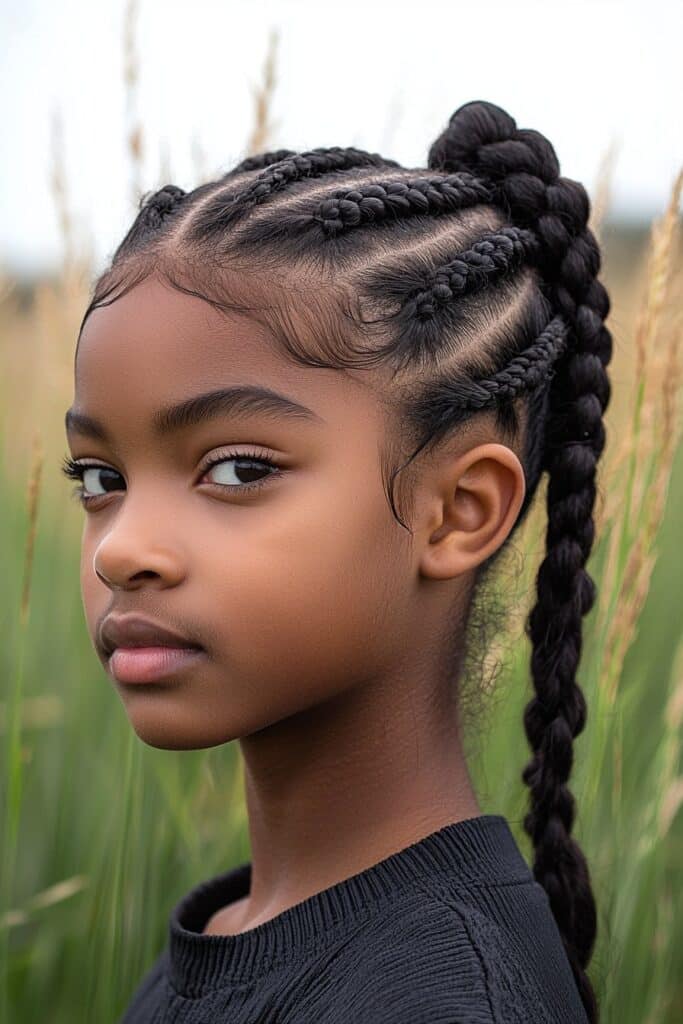
My years as a celebrity makeup artist and beauty educator have shown me that cornrow ponytails stand out as one of the most practical protective styles for young Black girls. This elegant style beautifully blends the durability of cornrows with a ponytail’s playful charm.
Simple Cornrowing Technique
Clean, detangled hair works best to start your cornrows. A rat-tail comb helps create precise parts. Success comes from steady tension while you braid close to the scalp. Beginners should focus on these steps:
- Split hair into three equal sections
- Add small amounts of hair with each cross-over
- Braid toward your chosen ponytail spot
- Secure the ends tightly
Styling Time
You’ll need about 30-45 minutes to complete a cornrow ponytail. Hair thickness and pattern complexity affect the timing. New stylists might take longer as they master the technique.
Maintenance Tips
The style stays fresh when you:
- Clean your scalp with gentle shampoo every 7-10 days
- Put essential oils between cornrows to moisturize
- Sleep with a silk scarf covering
- Choose lightweight, water-based products that won’t build up
A daily spritz of water mixed with light oils helps keep the scalp moisturized without weighing down the style. Edge control along the hairline keeps everything looking neat and polished.
Duration of Style
Cornrow ponytails last 2-6 weeks with good care. Your hair texture and maintenance routine play a big role in how long they’ll look fresh. Best results come from:
- Minimal style manipulation
- Protection during workouts
- Regular moisture without product overload
- Light cleansing to avoid buildup
Your hair needs rest between styles. Take at least a week’s break so your scalp can breathe and hair can grow healthy. Protective updos during the day help reduce strain on individual braids.
Bubble Braids with Beads
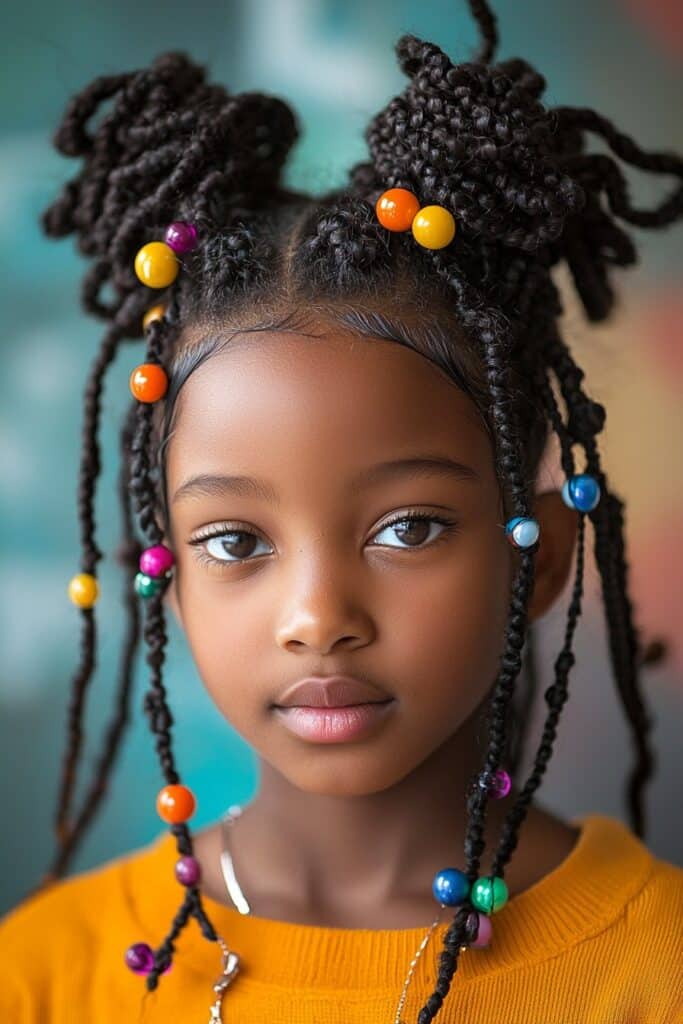
My Los Angeles salon buzzes with excitement as bubble braids with beads gain popularity among young Black girls. This protective style brings together bubble braids’ playful bounce and beaded accessories’ cultural heritage.
Required Materials
You’ll need these items to create perfect bubble braids:
- Marley hair extensions
- Clear or colored rubber bands
- Crochet needle
- Beads in various sizes
- Leave-in conditioner
- Edge control gel
- Tri-fold mirror helps you part hair precisely
Installation Steps
Start with clean, well-moisturized hair. Here’s how to create the style:
- Part hair cleanly based on your desired pattern
- Secure each section with rubber bands
- Push crochet needle through the braid’s middle
- Thread two pieces of Marley hair through the needle
- Pull through and wrap around the base
- Space rubber bands evenly using your finger as a guide
Your finger works great as a measurement tool to keep bubbles evenly spaced. This helps create consistent rubber band placement.
Bead Selection Guide
Pick beads that match your style and occasion:
- Larger beads suit everyday styles best
- Add 5-6 beads per strand to distribute weight well
- Glow-in-the-dark beads make special occasions pop
- Small beads create delicate final touches
Care Instructions
Keep your style fresh with these tips:
- Sleep with a giant bonnet
- Keep your bonnet secure with a rubber band during showers
- Use moisturizing scalp spray often
- Don’t play with the bubbles too much
This style usually lasts 2-3 weeks with good care. Daily care should focus on your scalp’s health – use anti-dandruff sprays or essential oils. Silk scrunchies work better than regular elastics and prevent breakage.
Bubble braids offer amazing versatility – style them into single braids or complex patterns. Taking them down remains simple – just carefully cut the rubber bands.
Easy Bantu Knots
A beauty educator’s journey working with natural hair spans many years. Bantu knots have grown into more than just a protective style – they’re a celebration of cultural heritage. The Zulu tribes of Southern Africa created this versatile hairstyle that gives young Black girls endless styling possibilities.
Sectioning Tips
Beautiful Bantu knots start with clean, detangled hair. A rattail comb helps create precise parts. The size of your sections depends on your desired results:
- Smaller sections (1/2 inch) work best for shorter hair
- Longer hair needs larger sections (3-4 inches)
- Medium sections create wavy results
- Tiny sections give defined curls
Knotting Technique
The key to comfortable knots lies in starting your twist at least an inch from the roots. This reduces scalp tension. Your best results will come from:
- Using non-water-based products like whipped shea butter
- Twisting each section into a rope-like string
- Coiling the twisted hair around itself
- Tucking ends underneath or securing with bobby pins
Nighttime Care
Your knots will last longer with proper overnight protection. A silk bonnet or wrap makes a big difference. Here’s what you need:
- A larger bonnet that fits your knot size
- Keep knots dry to avoid frizz
- Minimal water-based products
- Edge control creates neat edges
Style Variations
Basic Bantu knots can become stunning looks with creativity:
- Colorful beads add flair for special occasions
- Geometric parting patterns create visual interest
- Flat twists at the base add dimension
- Decorative hair cuffs enhance the style
Stretched dry hair gives the best results. This method keeps frizz away and ensures complete drying. Wet or damp hair often leads to incomplete drying and unwanted frizz the next morning.
Well-maintained Bantu knots can stay fresh for up to two weeks. A witch hazel scalp cleanse every 3-4 days keeps the style refreshed. This protective style shines in its versatility – rock the knots as they are or unravel them for beautiful, heat-free curls.
Quick Flat Twist Crown
My experience styling natural hair in my Los Angeles salon has shown that flat twist crowns make an elegant yet protective style for young Black girls. This classic look blends simplicity with sophistication and works great for both everyday wear and special occasions.
Basic Technique
A flawless flat twist crown starts with clean, really detangled hair. Create a side part from front to back of the head and divide the hair into two main sections. Here’s what works best:
- Dampen the hair with leave-in conditioner
- Work with small sections near the hairline
- Split each section into two equal parts
- Cross the right section over the left
- Add small amounts of hair from the scalp as you cross
The twists should stay close to the scalp to look neat. Your final style will look more polished when you keep the twists tight.
Common Mistakes
My years at the salon have taught me what can go wrong:
- Using soaking wet hair (you want it about 50% damp)
- Not taking time to section properly
- Overloading with styling products that cause buildup
- Making twists with uneven tension
- Not securing the ends well
Style Duration
These flat twist crowns usually last 2-3 weeks with good care. Here’s how to make them last:
- Sleep with a silk bonnet
- Keep excess moisture away to stop frizzing
- Apply lightweight oils to your scalp
- Keep parts between twists clean
- Touch up edges when needed with minimal product
A light curl spray mixed with essential oils works great for daily upkeep. This keeps moisture balanced without creating product buildup that ruins the style’s clean look.
Know your desired finished look before you start. This helps you plan your parting technique and overall approach. Take your time – quick installations often mean uneven results and twists that come loose too soon.
Simple Box Braids
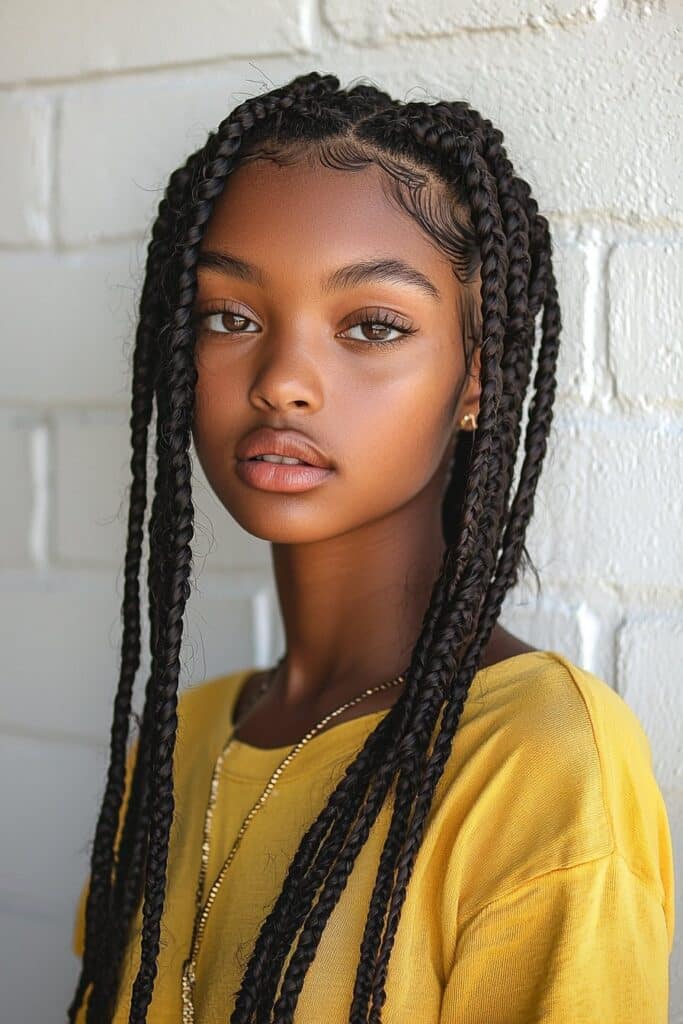
My unmatched experience with protective hairstyles has shown that box braids remain a timeless choice. They blend elegance with practicality. The techniques I’ve refined in my salon make this style durable yet gentle on delicate strands.
Parting Guide
Clean, precise parts are the foundations of flawless box braids. You’ll need to section the hair horizontally from ear to ear and divide it into manageable portions. Here’s what works best:
- Start with three sections on each half of the head
- Create a part from ear to ear
- Make one straight line down the middle
- Use shine and jam in the yellow bottle for grip
People with thicker hair textures should work with smaller sections to keep control. The gel needs to go directly onto each part. Re-part again to get those crisp, clean lines.
Braiding Instructions
Your hair must be properly prepped before you start braiding. These steps will give you natural-looking results:
- Measure braiding hair using one finger width
- Split the measured hair into 3/4 and 1/4 portions
- Position the middle strand directly on natural hair
- Add hair gradually while braiding to keep everything even
A complete style usually takes five to six hours, depending on how fast you braid. The boxes should be staggered on top of each other like bricks. This creates fuller-looking braids without adding extra weight.
Maintenance Tips
Your style will stay fresh longer if you:
- Cover braids with a silk scarf at night
- Clean your scalp every two weeks
- Use lightweight leave-in conditioner to moisturize
- Keep washing minimal to prevent frizz and loosening
The style should last 6-8 weeks at most. You might want to get the perimeter redone around week four to keep things looking fresh. Your edges need protection, so avoid tight styling and stick to alcohol-free products.
Essential oils should be massaged between braids regularly to keep your scalp healthy. A light, water-based moisturizer will prevent product buildup and keep your braids looking fresh.
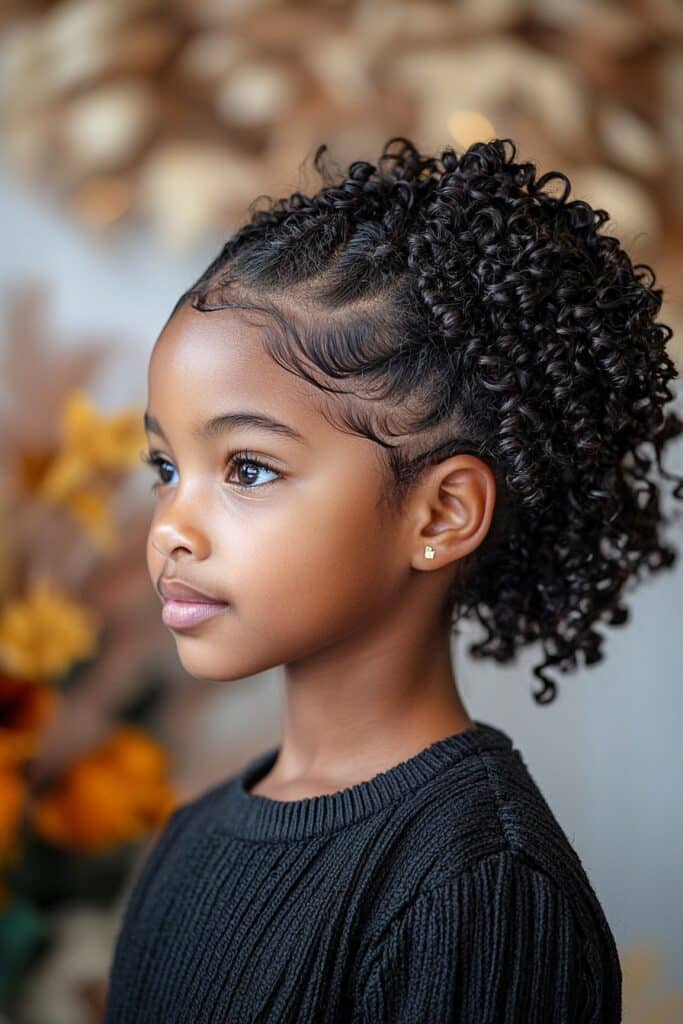
Natural Curly Ponytail
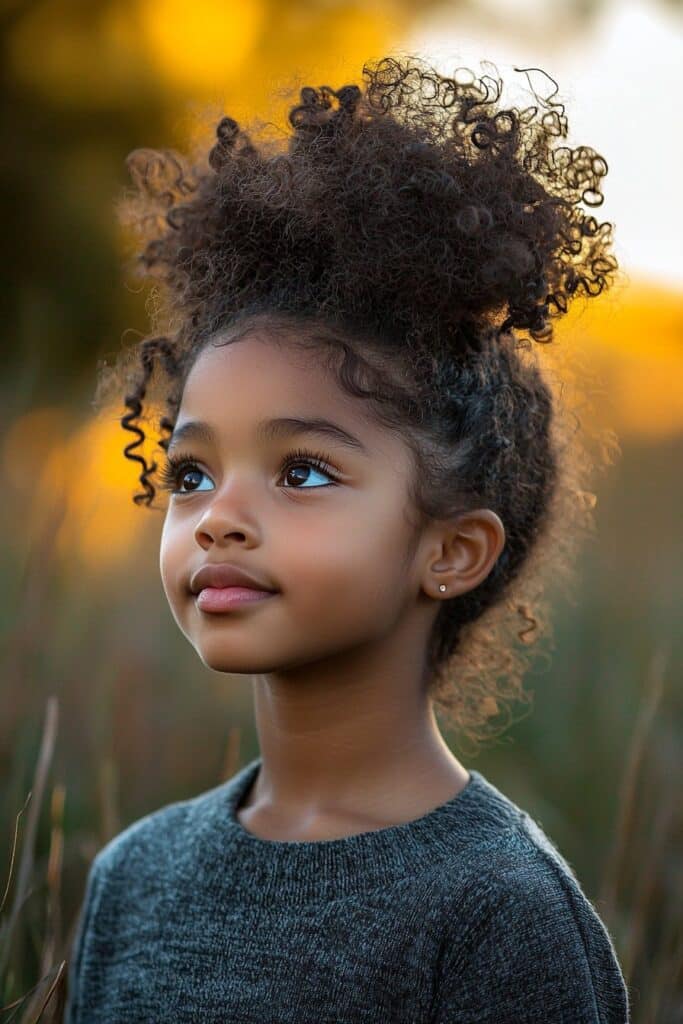
My experience styling natural hair has shown that curly ponytails create endless possibilities for young Black girls. This versatile style celebrates natural texture and provides a comfortable, manageable look for active days.
Curl Definition Methods
Perfect curl definition starts with properly moisturized hair. Apply a lightweight leave-in conditioner to damp strands. The hair should be sectioned horizontally from ear to ear to create manageable portions. The shingling method works best – apply product to each section individually so it spreads evenly through your curls.
Securing Techniques
A long-lasting curly ponytail depends on how well you secure it. Gather hair at your desired height, usually at the crown where you’ll get maximum volume. Thick, heavy hair needs a small claw clip just beneath the ponytail holder to stay in place. A coily ponytail holder gives soft hold without creating strong bends or dents.
Product Recommendations
The right products make a huge difference in your final look. Here’s what works best:
- Cleansing: Sulfate-free shampoos keep natural moisture intact
- Conditioning: Pantene Curl Define & Shine Conditioner gives better definition
- Styling: DevaCurl Curl Heights Volume + Boost Curl Cream adds bounce
- Finishing: Pattern Beauty Palo Santo Curl Mousse refreshes curls
Daily care needs just a light spritz of water and essential oils between curls. This keeps moisture without causing buildup. Your style stays fresh overnight with a giant bonnet or silk scarf that preserves curl definition.
The curl-by-curl method works great for touch-ups, especially on those loose baby hairs around your face that need extra attention. Your curls stay defined longer when you avoid touching them too much. Special occasions call for decorative scrunchies or colorful elastic bands that lift the whole look.
Two-Puff Hairstyle
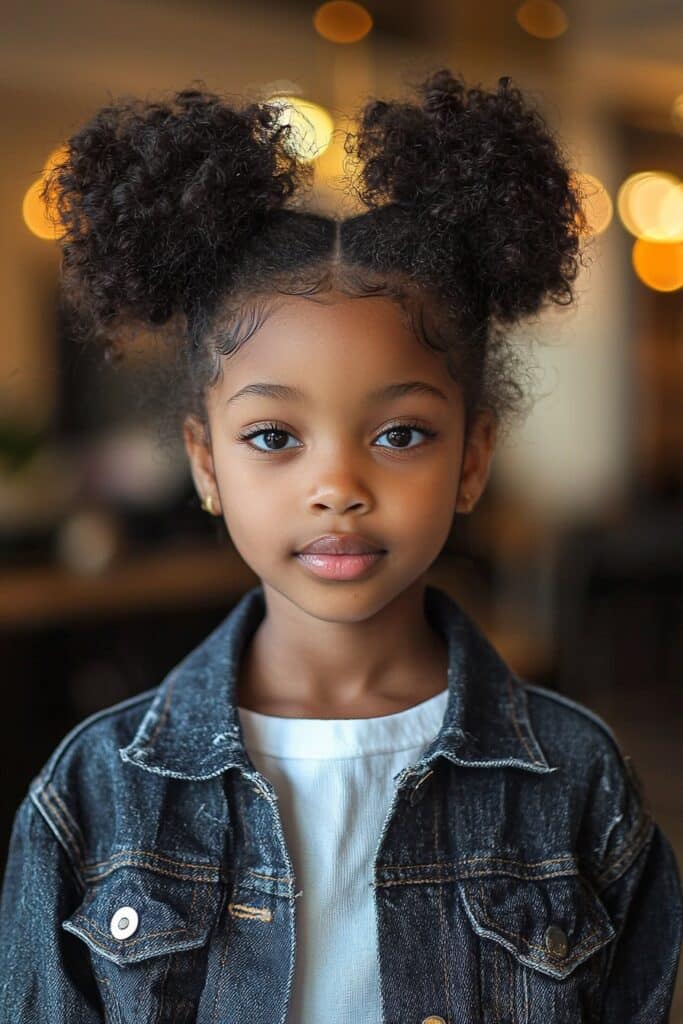
My experience styling countless young clients in my Los Angeles salon has shown that Black girls absolutely love the two-puff hairstyle. This playful yet polished look brings out their natural beauty and makes maintenance simple for busy parents.
Sectioning Guide
The right sectioning forms the foundation of perfect two puffs. Start by parting the hair straight down the middle from front to back. Here’s how to get precise results:
- Dampen hair slightly with a sulfate-free shampoo
- Apply deep conditioner to create soft, manageable strands
- Use leave-in conditioner or curl cream to define curls
- Create clean, even parts with a rat-tail comb
Securing Methods
Your puffs will last longer with the right securing techniques. Smooth the roots with a brush or comb and pull hair into ponytails with tight bands. You’ll get the best hold when you:
- Place puffs high like Minnie Mouse ears or lower for a subtle look
- Apply edge control along the hairline to keep it sleek
- Secure each section with elastic bands
- Tug at curls gently to create your desired volume
Accessorizing Options
Simple puffs become statement styles with creative touches. Here are some ways to raise the look:
- Stylish hair clips add flair
- Colorful berets work great for special occasions
- Dynamic scrunchies create extra pop
- Ribbons give a feminine touch
A mixture of water and essential oils works great for daily touch-ups between styling sessions. Your child’s style stays fresh when you protect it overnight with a silk bonnet or scarf – this prevents frizz and locks in moisture.
This adaptable style shines at every occasion, from playground fun to formal events. Each child’s unique puff hairstyle works with practically any length of hair, and you can customize the volume to match their personality.
Handle the hair gently when pulling it back to protect those delicate edges. Small sections at the front can create face-framing tendrils that add sophistication to this timeless style.
Easy Twist Out

My experience as a beauty educator in my Los Angeles salon has helped me become skilled at twist outs – a versatile protective style that creates stunning curl definition without heat. Years of styling sessions have helped me find the secrets to achieving perfect twist outs that last.
Product Selection
The right products are the foundations of success. A sulfate-free shampoo comes first, followed by deep conditioning. The LOC method (leave-in, oil, cream) works best after cleansing. The best results come from:
- A moisturizing leave-in conditioner to start
- Natural oils like coconut or jojoba
- A curl-defining cream or gel to finish
Twisting Technique
Perfect twist outs depend on proper technique. Your hair should be about 50% dry before you start. Here’s what works best:
- Section hair into manageable portions
- Apply products evenly through each section
- Split each section into two equal parts
- Twist strands around each other with consistent tension
- Secure ends by twirling them around your fingers
Your twists will look better if you avoid “borrowing” hair from opposite sections – this only creates unwanted frizz and tangling. On top of that, even tension throughout each twist gives you uniform curl definition.
Unraveling Tips
You’ll need patience when unraveling twists. Make sure your hair is completely dry to keep frizz away. These steps give perfect results:
- Apply light oil to hands before untwisting
- Unravel each twist by twisting in the opposite direction
- Separate curls where they naturally divide
- Use a pick only at the roots for volume
- Keep defined curls intact by not combing through them
This style usually lasts 2-3 days with good maintenance. A mixture of water and essential oils between styling sessions helps extend its life. A satin bonnet or silk pillowcase at night will keep your definition intact.
Note that each twist needs enough time to dry – rushing just creates frizz. Think over twisting your hair the night before you plan to wear it so everything dries completely.
Basic Cornrows

My daily interactions with clients at my Los Angeles salon have shown that cornrows are a vital protective style that celebrates cultural heritage. These braids create stunning patterns while protecting delicate strands when woven close to the scalp.
Beginner’s Guide
Learning to cornrow takes patience and practice. Start with clean, detangled hair that’s divided into manageable sections. Here are the simple steps:
- Hold three pieces of hair between your fingers
- Cross the right section to the middle
- Pick up more hair with your index finger
- Pull the left section to the center
- Keep this pattern going with even tension
You should never braid too tightly. This can cause traction alopecia – a type of hair loss from excessive pulling. Your braids should feel snug but comfortable against the scalp.
Pattern Options
Cornrows let you create endless designs, from straight-back styles to complex geometric patterns. Popular styles include:
- Traditional straight-back cornrows
- Side-swept patterns
- Zig-zag designs that add flair
- Nigerian-inspired geometric layouts
New stylists should start with straight-back cornrows to build confidence. You can try curved patterns or asymmetrical designs as your skills grow.
Edge Care
Healthy edges are vital for great-looking cornrows. Talk to your stylist about tension levels to prevent damage. Here’s what helps keep edges healthy:
- Put lightweight oils between braids
- Keep braids from being too tight
- Use alcohol-free products that moisturize
- Let edges rest between styles
- Massage essential oils into the hairline
Fresh looks need touch-ups every two to three weeks, especially the front row. Flat twists along the hairline add extra protection. Watch your edges for signs of thinning or breakage and adjust your styling methods when needed.
A gentle shampoo applied with a spray bottle helps keep your scalp clean. This keeps your scalp healthy without ruining your style.
Protective Mini Buns
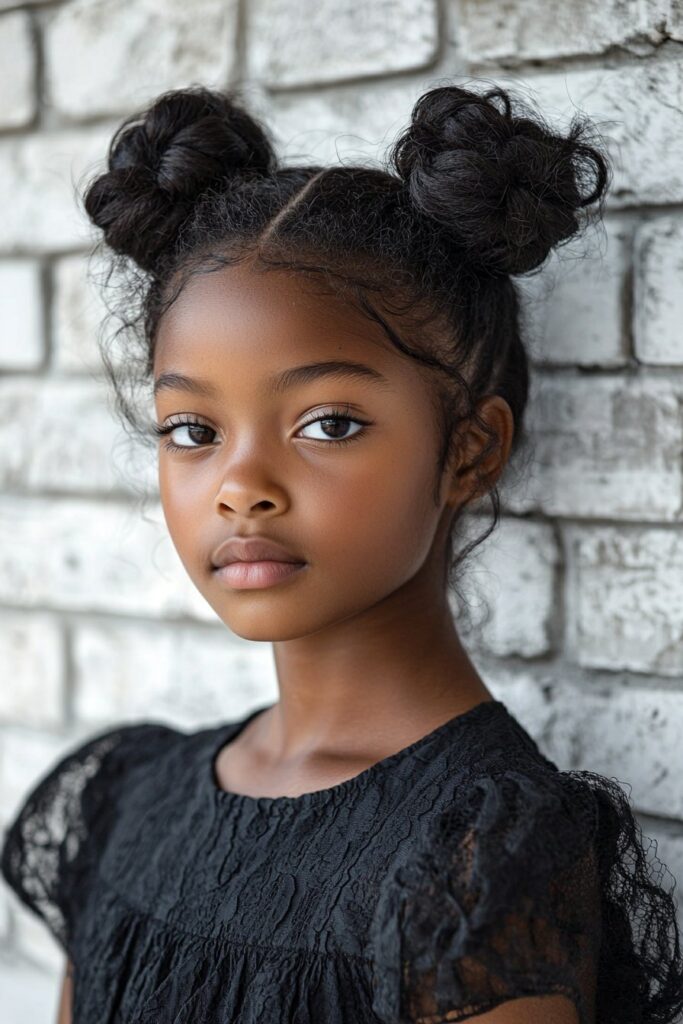
Mini buns have become a favorite protective style in my private styling studio. They strike the perfect balance between sophistication and playfulness for young Black girls. This versatile style protects the hair and works well for any occasion.
Sectioning Tips
The right sectioning will give you flawless mini buns. Start by dividing the hair horizontally from ear to ear to create manageable portions. Here’s what works best:
- Create clean, even parts using a rat-tail comb
- Apply leave-in conditioner to make hair manageable
- Secure each section with clips while you work
- Make sections proportional for a balanced look
Your sections should be consistent throughout the head. This will help create uniform bun sizes and a polished final appearance.
Securing Methods
The way you secure mini buns substantially affects how long they last. Start by gathering each section into a tight ponytail base. These steps work best:
- Use silk scrunchies to prevent breakage
- Apply edge control along the hairline
- Wrap hair around the base clockwise
- Secure with bobby pins in an X pattern
You might want to add decorative elements like pearl sugar or flaked sea salt for special occasions. These touches raise the style’s appeal while keeping its protective benefits.
Style Duration
Mini buns usually last 4-5 days with good maintenance. Here’s how to make them last:
- Cover hair with a satin bonnet at night
- Touch up edges when needed with minimal product
- Don’t manipulate the style too much
- Apply light oils between buns
You can store these buns in an airtight container or wrap them in foil to make them last longer. They’ll stay good in the freezer for up to 6 months, which makes them great for advance prep. The right nighttime protection and minimal product use will keep your buns fresh.
Watch the tension levels to keep the style comfortable yet secure. Focus on keeping moisture balanced by applying essential oils and leave-in conditioners regularly.
Simple Side-Swept Style

Side-swept styles have fascinated me throughout my styling career because of their timeless elegance and versatility. This graceful look enhances natural beauty and gives you countless ways to personalize it.
Parting Technique
You need to identify which side of your head has more hair to create the perfect side sweep. Here’s the quickest way to achieve optimal results:
- Start with damp, clean hair
- Apply a heat protector to add shine and protection
- Create a deep side parting using a comb
- Blow-dry the side with less hair upward and away from your face
The magic happens when you direct your side part slightly past your regular comfort zone. This simple trick adds extra glamor to your style instantly.
Securing Methods
The right securing techniques are the foundations of a long-lasting hold. Brush all hair over one shoulder while keeping the texture smooth throughout. Here’s how to secure it properly:
- Insert hair pins angled upward toward the ear
- Take sections directly in front of the ear
- Twist hair toward the back
- Pin strategically to hide previous pins
Heavy hair might need braiding back with clear elastics at the opposite side of the neck. Matte bobby pins are a great way to get excellent grip without showing in photographs.
Accessorizing Ideas
You can revolutionize this classic style with smart accessorizing. Special occasions call for:
- Decorative hair combs to add elegance
- Pearl-adorned pins for formal events
- Colorful scrunchies for casual days
- Statement earrings to complement the exposed side
Your hair accessories should match other elements like earrings and necklaces in color and style. Face shape plays a crucial role when picking accessories – this style looks amazing especially when you have oval, heart, and square face shapes.
A small bottle mixed with sweet almond oil and essential oils helps with daily maintenance. A quick spritz refreshes your style and adds a lovely fragrance. Side-swept styles work beautifully with hair of all types, though you might need to adjust techniques based on texture.
Easy Finger Coils
My bustling beauty studio has made finger coils its signature style. This look perfectly combines simplicity with stunning results. Over the last several years of working with this technique, I found that there was a right approach that turns ordinary curls into defined, long-lasting coils that celebrate natural texture.
Product Selection
Start with freshly cleansed hair using sulfate-free shampoo. A moisturizing leave-in conditioner will help you detangle your hair. Pick your products based on your hair’s unique needs:
- Curl-enhancing cream for definition
- Lightweight gel for hold
- Essential oils for shine
- Water-based moisturizer for hydration
Coiling Technique
Perfect finger coils depend on proper sectioning and tension control. Divide your hair into manageable portions based on how thick you want your coils. Here’s what works best:
- Apply curl-enhancing cream evenly from roots to tips
- Take small sections (approximately 1 inch)
- Twirl each section around your finger
- Keep consistent tension throughout
- Gently release the coil to secure it
Your roots should stay slightly undefined to create better volume. On top of that, it helps to let each coil retract naturally without touching it during the setting process.
Drying Methods
The right drying technique is vital for long-lasting results. These approaches will give you the best definition:
Start with the perimeter to set exterior definition. Let the outer sections get about 85-90% dry before moving to the interior portions. Air drying is another great option, but you’ll need patience since it can take a full day.
A silk or satin scarf will protect your coils overnight. You can refresh the style with a lightweight moisturizing spray when needed. These coils can last up to five days when taken care of properly.
Note that you should wait until your coils are completely dry before separating or styling them. This protective style ended up offering great versatility – wear it as is or separate gently for a fuller look. With the right technique and patience, finger coils create beautiful definition while keeping your natural hair healthy.
Quick Braided Headband
My years of creating protective styles in my Los Angeles studio have shown me how braided headbands add an elegant touch to natural hairstyles. This timeless look brings together protection and sophistication – a perfect choice for young Black girls who want both style and comfort.
Braiding Pattern
A flawless braided headband starts with smart parting. Draw a line upwards right above your ear and split the hair in half. Here’s the quickest way to achieve great results:
- Take a chunk of hair in a circle behind your ear
- Start braiding upward with even tension
- Keep the pattern going across the crown
- Add new hair only from the side closest to your face
Securing Tips
Your braided headband will last longer with proper securing techniques. Pull the braid over to the opposite side and place it right above your ear. These steps help you retain control:
- Cross two bobby pins in an X pattern
- Hide each pin under the previous one
- Secure the braid beneath your neck area hair
- Clear elastics can give extra support
The key is to avoid pulling too tight near the hairline. This helps prevent strain while keeping everything neat and polished.
Style Variations
Simple braided headbands can look completely different with creative changes. Your style will stand out when you:
- Design geometric parting patterns
- Add flat twists at the base
- Build volume at the crown
- Let loose tendrils frame your face
Special occasions call for curled hair or a loose bun with the remaining hair. On top of that, anti-frizz cream and light hairspray help the style last longer.
A silk bonnet at night will protect your style. This simple step keeps your braided headband looking fresh and fights frizz. This versatile style works great with all kinds of hair lengths and textures – from shoulder-length to longer tresses.
Conclusion
My styling experience in Los Angeles shows how protective hairstyles have helped countless young Black girls welcome their natural beauty and maintain healthy hair. Parents tell me they see major improvements in their children’s hair health after trying these protective styles.
Success with natural hairstyles comes from gentle handling and consistent maintenance. My clients get the best results when they treat hair care as a nurturing ritual instead of a daily struggle. These styles make morning routines easier for parents and boost their daughters’ confidence.
Natural hairstyling celebrates both tradition and innovation that lets each twist, braid, or coil tell a unique story of self-expression. These styles work perfectly for active children and protect delicate strands from daily wear.
Note that becoming skilled at these techniques needs time and patience. You should start with simple styles like two-strand twists or Afro puffs and gradually try more intricate options as your confidence grows. Your experience with natural hairstyling should feel enabling and fun while creating precious bonding moments and nurturing healthy, beautiful hair.