Welcome to the world of natural protective hairstyles for Black women! We’re excited to share some fantastic options that not only look beautiful but also help keep your hair healthy and strong. As someone who’s experimented with various styles over the years, I know how important it is to find looks that are both stylish and easy to maintain.
In this article, we’ll explore 15 easy natural protective hairstyles that are perfect for Black women in 2024. From classic box braids to trendy passion twists, we’ve got you covered with a range of options for different hair lengths and textures. These styles not only protect your natural hair but also give you the freedom to express your unique personality. So, let’s dive in and discover some amazing hairstyles that’ll have you looking and feeling fabulous!
Box Braids

Box braids are my go-to protective hairstyle for black women. They’re versatile, low-maintenance, and promote hair growth. I love how they shield my natural hair from damage caused by heat styling and environmental factors. Plus, they’re a time-saver! I can rock these braids for 4-6 weeks without frequent salon visits.
The best part? Box braids offer endless styling possibilities. From simple updos to intricate patterns, I can express my creativity while keeping my hair protected. They’re perfect for busy lifestyles and allow me to embrace my natural texture proudly.
Box Braids Styling Tips
When it comes to styling box braids, I’ve learned a few tricks. First, I always handle them gently to avoid frizz and breakage. Using my fingers instead of styling tools helps maintain their neat appearance. For a chic look, I love doing a half-up, half-down style or a sleek ponytail.
Adding accessories like beads or hair cuffs can really elevate the look. And for those days when I want to switch things up, a top knot or side-swept style does the trick. The key is to be creative while keeping your edges protected.
Box Braids Maintenance
To keep my box braids looking fresh, I’ve developed a simple maintenance routine. I start by moisturizing my scalp regularly with a lightweight oil to prevent dryness and itching. Washing my braids every few weeks helps keep them clean and odor-free.
I use a diluted shampoo and focus on my scalp, gently squeezing the braids to avoid frizz. To protect my braids while sleeping, I wrap them in a satin scarf or use a satin pillowcase. This reduces friction and helps maintain the neat appearance of my braids for longer.
Box Braids Benefits
I can’t stress enough how beneficial box braids are for natural hair. They provide excellent protection, allowing my hair to grow without constant manipulation. The braids shield my strands from harsh weather and reduce breakage. I’ve noticed significant hair growth, especially around my edges, since wearing box braids regularly.
They’re also a great way to give my hair a break from heat styling. Plus, the versatility of box braids lets me explore different looks without compromising my natural hair journey. It’s empowering to define my own beauty standards through this timeless protective style.
Knotless Braids
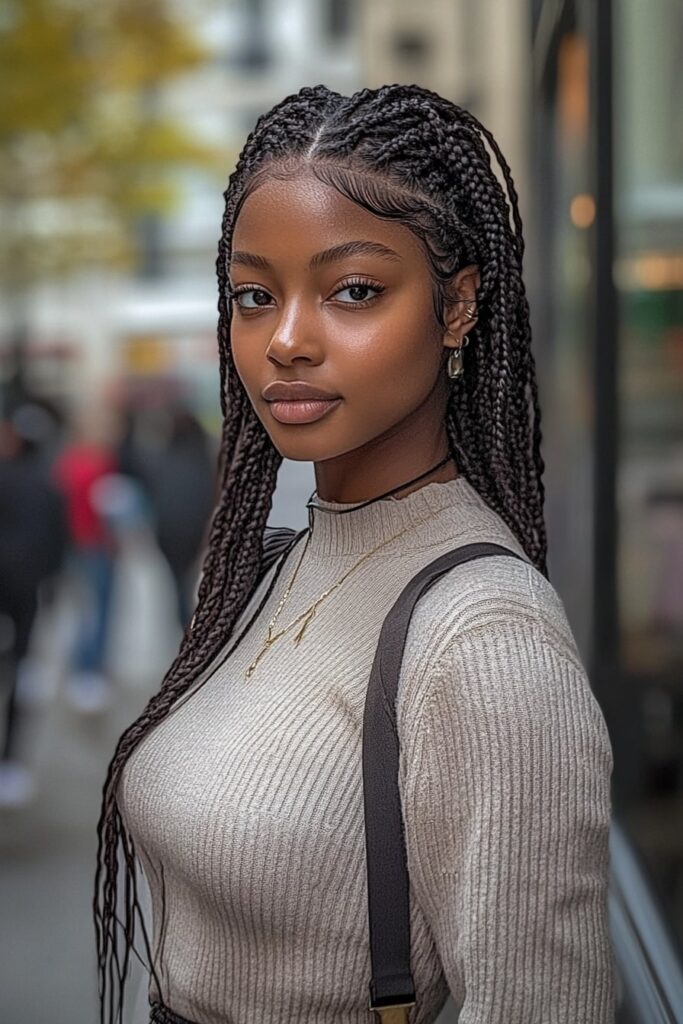
I love knotless braids as a natural protective hairstyle for black women. They’re a game-changer! Unlike traditional box braids, knotless braids start with your natural hair and gradually feed in extensions. This technique puts less stress on my scalp and feels so much more comfortable. Plus, I can style them right away without any pain.
The installation process takes longer, but it’s worth it for the lightweight, natural look. I’ve noticed my hair grows better with knotless braids too. They’re perfect for anyone wanting a protective style that’s gentle on their edges.
Knotless Braids Installation
When I get knotless braids, I start by washing and deep conditioning my hair. It’s crucial to begin with clean, moisturized strands. The stylist then parts my hair into sections and begins braiding with my natural hair before adding in the extensions.
This gradual feed-in technique is what gives knotless braids their signature look and feel. I love how the process allows for easy access to my scalp, making it simple to keep clean and moisturized throughout the weeks I wear the style.
Knotless Braids Advantages
For me, the biggest perk of knotless braids is the reduced tension on my scalp. I can sleep comfortably from day one without any painful tugging. Another advantage is the natural-looking hairline – no more obvious bumps at the roots!
These braids are also incredibly versatile. I can style them in various updos or wear them down without worrying about visible knots. Plus, they’re great for promoting hair growth since there’s less stress on my follicles.
Knotless Braids Care
To keep my knotless braids looking fresh, I’ve developed a simple care routine. I moisturize my scalp regularly with lightweight oils and use a leave-in conditioner to keep my braids hydrated. Washing every few weeks with a diluted shampoo helps prevent buildup. At night, I wrap my braids in a satin scarf to reduce frizz. With proper care, my knotless braids usually last about 4-6 weeks, giving my natural hair a nice break while still looking stylish.
Cornrows
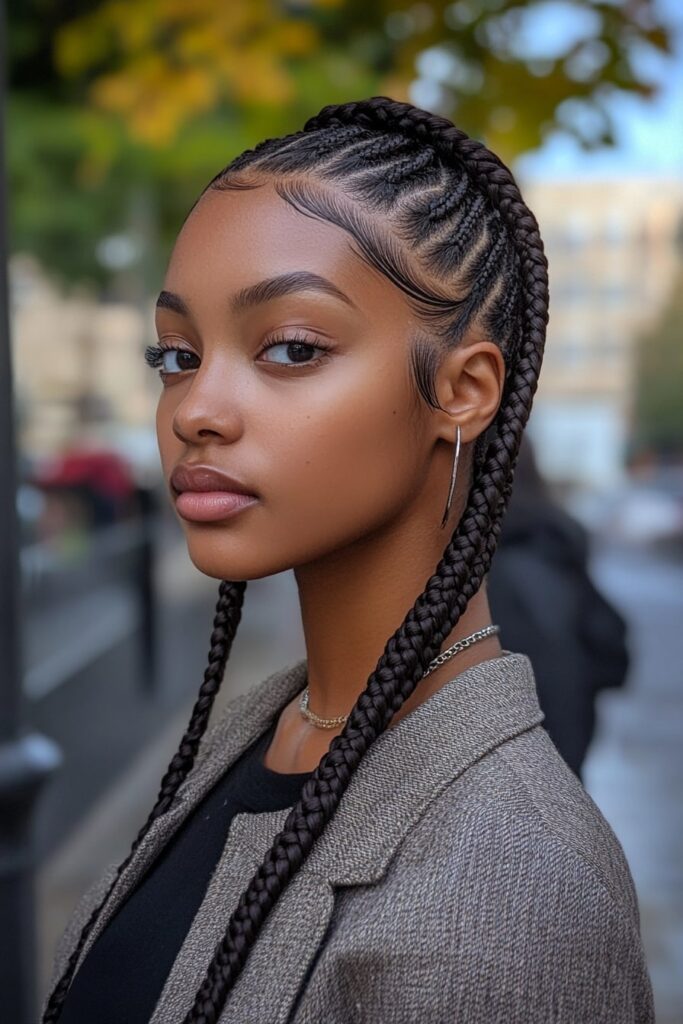
I love cornrows as a natural protective hairstyle for black women. They’re versatile, low-maintenance, and perfect for any occasion. I’ve found that cornrows can help protect my natural hair by minimizing daily styling damage. Plus, there are countless ways to wear them! From elegant updos to zig-zag styles, the options are limitless.
I especially love Fulani braids, which feature a few cornrows down the center and several going out towards the temples. They look stunning with beads and metallic accessories. For a playful twist, I sometimes opt for double cornrow ponytails or mix thin and thick cornrows for added texture.
Cornrows Designs
When it comes to cornrow designs, I’m always amazed by the creativity. I’ve tried everything from simple straight-back styles to intricate geometric patterns. One of my favorites is the zig-zag design, which adds a dynamic and fun element to the look. For special occasions, I love getting swirling cornrow braids.
They create a mesmerizing, artistic style that really showcases the braider’s skill. I’ve also experimented with side cornrows for an asymmetrical look and Mohawk cornrows for an edgy vibe. The possibilities are endless, and I love how each design allows me to express my personality.
Cornrows Longevity
I’ve found that cornrows can last anywhere from two to eight weeks, depending on how well I take care of them. To keep my cornrows looking fresh, I make sure to moisturize my scalp regularly with lightweight oils. I also use a leave-in conditioner to keep the braids hydrated. At night, I wrap my hair in a satin scarf to reduce frizz.
If I’m planning to keep them in for a longer period, I’ll gently wash them every few weeks using a diluted shampoo. With proper care, I can enjoy my cornrows for over a month while protecting my natural hair.
Cornrows Versatility
One thing I absolutely adore about cornrows is their versatility. I can style them in so many ways! For a quick and easy look, I often pull my cornrows into a low ponytail or twist them into a bun at the nape of my neck. When I want to add some flair, I incorporate beads or metallic cuffs along the braids. For a more dramatic style,
I sometimes add extensions to create jumbo cornrows or mix in some curls for a textured look. I’ve even tried cornrow bob styles for a chic, low-maintenance option. The best part is that I can switch up my look without compromising the protection cornrows offer to my natural hair.
Fulani Braids

I absolutely love Fulani braids as a natural protective hairstyle for black women. These intricate braids have a rich history dating back centuries in West Africa. What makes them unique is the combination of cornrows braided close to the scalp and a central parting, often adorned with beads and other decorative elements.
I find them incredibly versatile – you can rock them in classic patterns or get creative with modern twists. Plus, they’re great for protecting natural hair while still looking stylish. Let me share some insights about their origin, customization, and upkeep.
Fulani Braids Origin
The Fulani braids we love today have deep roots in West African culture. They originated with the Fulani tribe, also known as Fula or Fulbe, who live across countries like Nigeria, Mali, and Senegal. Back in the day, these braids weren’t just about looking good – they were a way for women to show their social status, whether they were married, and which tribe they belonged to.
The intricate patterns and decorations, like beads and cowrie shells, weren’t just for show – they had cultural meaning too, often hinting at a person’s wealth and beauty.
Fulani Braids Customization
What I adore about Fulani braids is how customizable they are. You can really make them your own! I’ve tried adding beads along the length of the braids for a touch of personal flair. Some of my friends love mixing in curly extensions for extra volume and texture. For a more polished look, you can style them into a high or low bun – perfect for formal occasions.
And don’t get me started on the endless design possibilities! You can go for classic patterns or get creative with zigzags and swirls. It’s all about expressing your unique style while honoring the cultural roots.
Fulani Braids Upkeep
Keeping Fulani braids looking fresh does take some effort, but it’s totally worth it. I make sure to moisturize my scalp regularly to prevent dryness – a little oil goes a long way. At night, I wrap my hair with a silk or satin scarf to keep the style intact and reduce frizz. When it comes to washing, I use a diluted shampoo solution and gently cleanse my scalp without rubbing the braids too much.
With proper care, my Fulani braids usually last about 4-6 weeks. It’s important to avoid tight styles and over-manipulation to protect your edges and natural hair underneath.
Bantu Knots
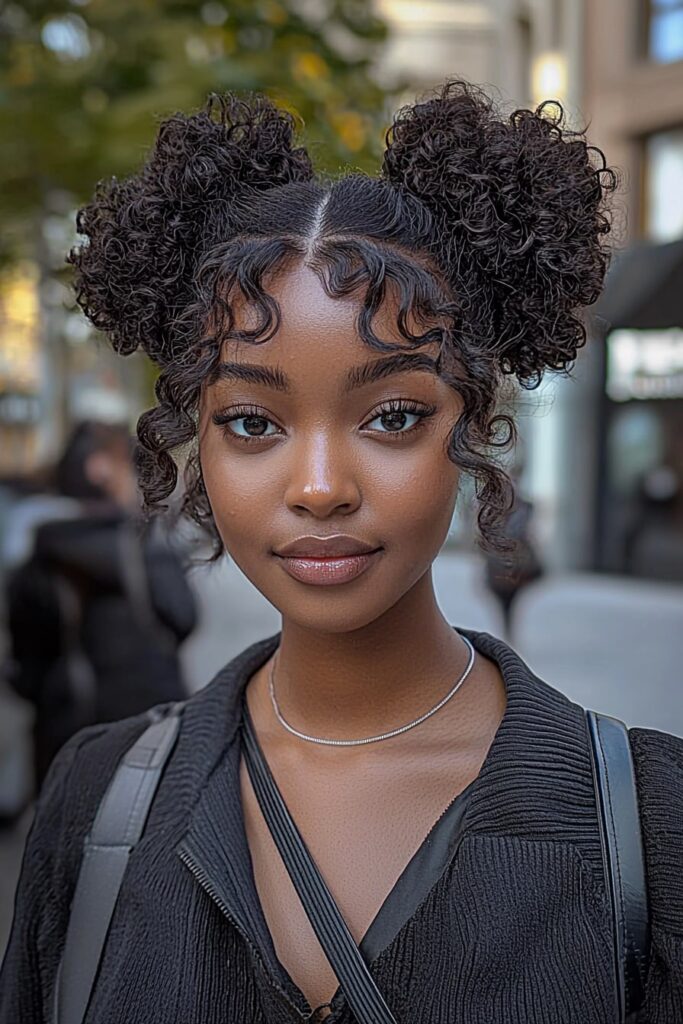
I love Bantu knots as a natural protective hairstyle for black women. They’re versatile, low-maintenance, and perfect for all hair types and lengths. Originating from the Zulu people in southern Africa, this style has been rocked by celebs like Rihanna and Tracee Ellis Ross. I find Bantu knots not only protect my natural hair but also help with hair growth.
Plus, they’re a great way to create heatless waves or defined curls when taken out. Let me share some tips on how to achieve this beautiful, culturally significant style.
Bantu Knots Tutorial
To start, I always make sure my hair is clean and moisturized. I section my hair into triangular parts using a rat-tail comb for precision. The number of sections depends on my desired look and hair length. I apply a leave-in conditioner and light styling product to each section before twisting. Starting from the scalp, I twist each section tightly but not too tight to avoid breakage.
Then, I wrap the twist around itself to form a knot, tucking the end underneath. I secure with bobby pins instead of rubber bands to prevent damage.
Bantu Knots Styling Options
What I love about Bantu knots is their versatility. I can rock them as is for a bold, edgy look, or use them as a foundation for other styles. Sometimes, I add beads or hair cuffs for extra flair. For a more polished appearance, I smooth my edges with a light gel. If I want defined curls, I leave the knots in overnight and unravel them in the morning. The size of the knots determines the tightness of the curls – smaller knots for tighter curls, larger for looser waves.
Bantu Knots Hair Health
Bantu knots have been great for my hair health. They minimize daily manipulation, which helps reduce breakage. I’ve noticed significant growth, especially around my edges, since incorporating this style into my routine. To keep my hair and scalp healthy, I moisturize regularly with lightweight oils and use a satin scarf at night to prevent frizz. This protective style allows my natural hair to thrive while embracing my cultural roots. It’s a win-win for both style and hair health!
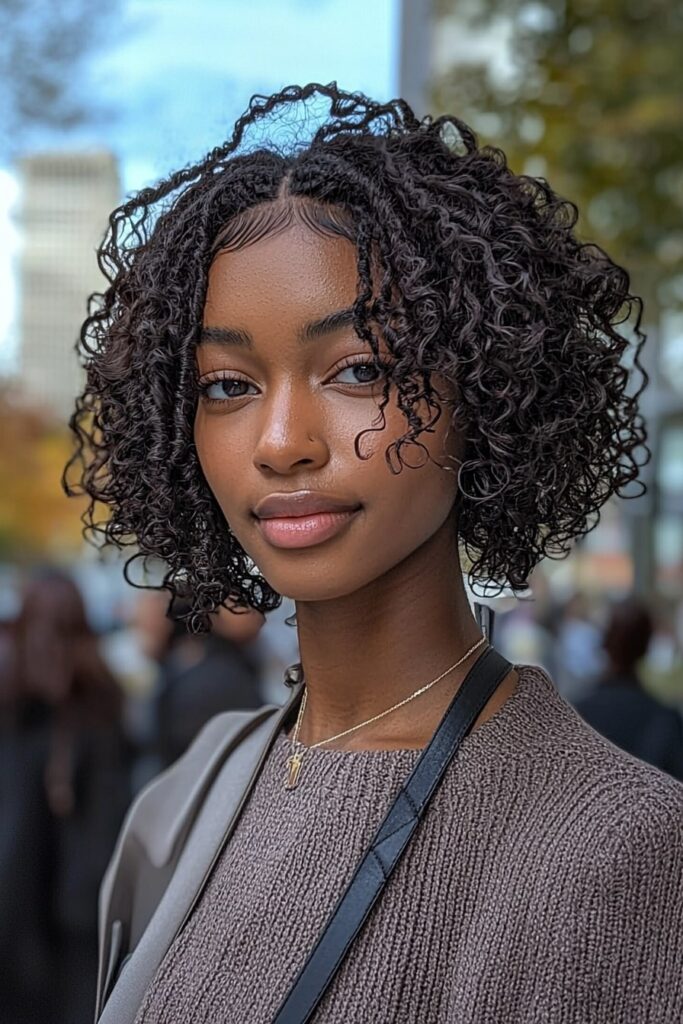
Twist-Outs
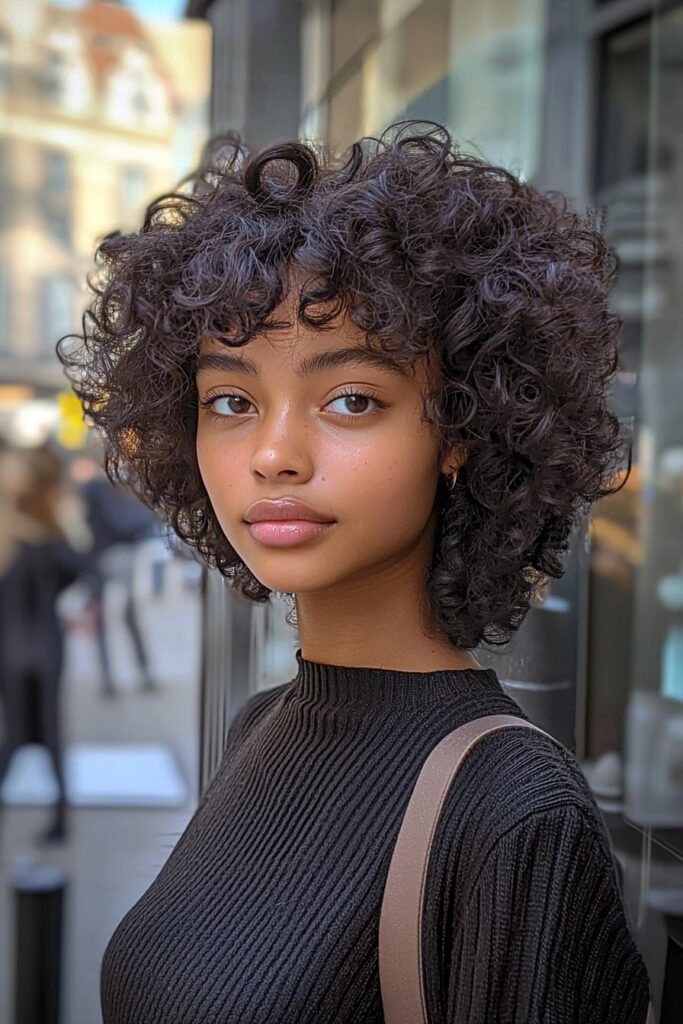
I love twist-outs as a natural protective hairstyle for black women. They’re versatile, low-maintenance, and perfect for all hair types and lengths. To achieve the best results, I start with damp hair and apply a leave-in conditioner and light styling product. Then, I section my hair and twist each part tightly.
For a defined look, I make smaller twists, while larger ones give more volume. I leave them in overnight or for a few days before unraveling. The key is to be patient and let them dry completely for long-lasting, beautiful curls.
Twist-Outs Technique
When creating twist-outs, I’ve found that technique is crucial. I start by sectioning my hair evenly using a rat-tail comb. Then, I apply products section by section to ensure even distribution from root to tip. This prevents weighed-down, greasy-looking hair.
I divide each section into two smaller parts and twist them around each other tightly, but not so tight that it causes tension. For extra definition, I do a finger coil at the ends. This method helps me achieve a more polished look that lasts longer.
Twist-Outs Products
Choosing the right products is essential for a successful twist-out. I love using a combination of a curl cream and a mousse for definition, hold, and shine. My go-to is a hydrating curl cream like Oribe Curl Butter, which softens my hair and prevents crunchy twists. For added hold, I layer on a mousse like
The Doux’s Mousse Def Texture Foam. This combo keeps my twist-out looking fresh and defined for days. I always make sure to use products that are free from mineral oils, silicones, and parabens to keep my hair healthy.
Twist-Outs Duration
The duration of my twist-outs depends on how long I leave the twists in before unraveling. I’ve found that leaving them in overnight gives a nice result, but wearing them for a week can make the style last even longer. To maintain my twist-out, I use the “pineapple” method at night, tying a scarf around the sides and back of my head.
I also sleep on a silk or satin pillowcase to prevent friction and moisture loss. With proper care, I can make my twist-out last for several days, giving me a beautiful, low-maintenance protective style.
Flat Twists

I love flat twists as a natural protective hairstyle for black women. They’re versatile, easy to maintain, and perfect for all hair types and lengths. To create flat twists, I start with clean, damp hair and apply a leave-in conditioner. Then, I section my hair and twist each part close to the scalp, adding more hair as I go. This technique helps protect my natural hair while creating a beautiful style that can last for weeks.
Flat Twists Patterns
When it comes to flat twist patterns, the possibilities are endless. I’ve tried everything from simple straight-back styles to intricate geometric designs. One of my favorites is the zig-zag pattern, which adds a fun and dynamic element to the look. For special occasions, I love getting swirling flat twists.
They create a mesmerizing, artistic style that really showcases the braider’s skill. I’ve also experimented with side flat twists for an asymmetrical look and Mohawk-inspired patterns for an edgy vibe.
Flat Twists Maintenance
To keep my flat twists looking fresh, I’ve developed a simple maintenance routine. I start by moisturizing my scalp regularly with lightweight oils to prevent dryness and itching. At night, I wrap my hair in a satin scarf or use a satin pillowcase to reduce friction and maintain the neat appearance of my twists.
If I plan to keep them in for longer, I gently wash them every few weeks using a diluted shampoo, focusing on my scalp. With proper care, my flat twists can last up to four weeks.
Flat Twists Styling
What I adore about flat twists is their styling versatility. For a quick and easy look, I often pull my twists into a low ponytail or twist them into a bun at the nape of my neck. When I want to add some flair, I incorporate beads or metallic cuffs along the twists. For a more dramatic style, I sometimes add extensions to create jumbo flat twists or mix in some curls for a textured look. The best part is that I can switch up my look without compromising the protection flat twists offer to my natural hair.
Two-Strand Twists
I love two-strand twists as a natural protective hairstyle for black women. They’re versatile, low-maintenance, and perfect for all hair types and lengths. To create this look, I start with clean, moisturized hair. Then, I section my hair and carefully twist two pieces around each other from root to tip.
What’s great about two-strand twists is that they protect my natural hair while promoting healthy growth. Plus, they’re incredibly versatile – I can wear them down, in updos, or even unravel them for a beautiful twist-out. It’s a win-win for both style and hair health!
Two-Strand Twists Method
To start my two-strand twists, I always make sure my hair is freshly washed and deeply conditioned. I apply a leave-in conditioner and some styling cream for extra moisture and hold. Then, I section my hair into manageable parts. For each section, I split it into two equal pieces and start twisting them around each other, working from the root to the tip.
I make sure to twist away from my face for a neater look. The key is to keep the tension consistent throughout for uniform twists. I love how this method allows me to create a protective style that’s both beautiful and beneficial for my natural hair.
Two-Strand Twists Care
Caring for my two-strand twists is crucial to maintain their look and protect my natural hair. I moisturize my scalp and twists regularly with lightweight oils to prevent dryness. At night, I wrap my hair in a satin scarf to reduce frizz and keep the twists neat. When washing, I use a diluted shampoo and focus on my scalp, gently squeezing the twists to avoid unraveling.
I also refresh my twists every few days with a hydrating mist. With proper care, my two-strand twists can last for weeks, giving my natural hair a much-needed break while still looking stylish.
Two-Strand Twists Variations
One thing I adore about two-strand twists is their versatility. I can create so many variations with this protective style. For a chic look, I sometimes do flat twists at the front, blending them into regular two-strand twists at the back. Mini twists are great for a more defined look, while jumbo twists give a bold, statement style.
I also love mixing in some color by adding extensions in shades like chestnut or bronze. For special occasions, I might add beads or hair cuffs for extra flair. The possibilities are endless, allowing me to express my creativity while keeping my natural hair protected.
Senegalese Twists

I love Senegalese twists as a natural protective hairstyle for black women. They’re versatile, low-maintenance, and can last up to 16 weeks with proper care. To install, I start with clean, moisturized hair and use straight braiding hair. I twist two strands together, adding more hair as I go.
This technique protects my natural hair while creating a beautiful style that promotes growth. Senegalese twists offer endless styling options, from updos to loose looks, making them perfect for any occasion.
Senegalese Twists Installation
When installing Senegalese twists, I start by sectioning my hair and applying a leave-in conditioner. I then split the braiding hair into two equal parts and begin twisting from the root. To ensure a neat look, I keep the tension consistent and twist away from my face. I love how this method allows me to create a protective style that’s both beautiful and beneficial for my natural hair. The key is to twist all the way down to the ends to prevent unraveling.
Senegalese Twists Longevity
To make my Senegalese twists last, I moisturize regularly with natural oils and avoid excessive manipulation. I protect them at night with a satin scarf and limit heat usage. For added longevity, I use hair elastics to secure the ends and re-twist any loose sections. I’ve found that using a sticky gel or eco-style gel on the ends helps prevent unraveling. With proper care, my twists can look fresh for weeks, giving my natural hair a much-needed break.
Senegalese Twists Removal
When it’s time to remove my Senegalese twists, I’m always careful to avoid damaging my natural hair. I start by cutting off the excess length, making sure to cut well below my own hair. Then, I gently unravel each twist from the bottom up. If there’s any resistance, I use a bit of conditioner to help loosen the hair.
This method ensures I don’t accidentally cut or break my own strands. After removal, I always deep condition my hair to restore moisture and promote healthy growth.
Marley Twists
I love Marley twists as a natural protective hairstyle for black women. They’re versatile, low-maintenance, and perfect for all hair types and lengths. To create this look, I start with clean, moisturized hair. Then, I section my hair and carefully twist two pieces around each other from root to tip.
What’s great about Marley twists is that they protect my natural hair while promoting healthy growth. Plus, they’re incredibly versatile – I can wear them down, in updos, or even unravel them for a beautiful twist-out. It’s a win-win for both style and hair health!
Marley Twists Technique
To start my Marley twists, I always make sure my hair is freshly washed and deeply conditioned. I apply a leave-in conditioner and some styling cream for extra moisture and hold. Then, I section my hair into manageable parts. For each section, I split it into two equal pieces and start twisting them around each other, working from the root to the tip.
I make sure to twist away from my face for a neater look. The key is to keep the tension consistent throughout for uniform twists. I love how this method allows me to create a protective style that’s both beautiful and beneficial for my natural hair.
Marley Twists Maintenance
Caring for my Marley twists is crucial to maintain their look and protect my natural hair. I moisturize my scalp and twists regularly with lightweight oils to prevent dryness. At night, I wrap my hair in a satin scarf to reduce frizz and keep the twists neat. When washing, I use a diluted shampoo and focus on my scalp, gently squeezing the twists to avoid unraveling.
I also refresh my twists every few days with a hydrating mist. With proper care, my Marley twists can last for weeks, giving my natural hair a much-needed break while still looking stylish.
Marley Twists Styling
One thing I adore about Marley twists is their versatility. I can create so many variations with this protective style. For a chic look, I sometimes do flat twists at the front, blending them into regular Marley twists at the back. Mini twists are great for a more defined look, while jumbo twists give a bold, statement style.
I also love mixing in some color by adding extensions in shades like chestnut or bronze. For special occasions, I might add beads or hair cuffs for extra flair. The possibilities are endless, allowing me to express my creativity while keeping my natural hair protected.
Passion Twists
I love passion twists as a natural protective hairstyle for black women. Created by Kailyn Rogers, these twists blend Senegalese twists and goddess locs for a stunning boho look. They’re versatile, low-maintenance, and perfect for promoting hair growth. I use Freetress Water Wave braiding hair to achieve that signature curly texture.
What’s great about passion twists is their water-friendly nature, making them ideal for summer. Plus, they can last up to two months with proper care, giving my natural hair a much-needed break while still looking stylish.
Passion Twists Installation
To start my passion twists, I always prep my hair thoroughly. I begin with a sulfate shampoo to remove any build-up, followed by a deep conditioning treatment. After blow-drying, I section my hair into medium-sized squares and apply an extra hold jam to the roots for a sleek finish. I secure each section with a rubber band to make installation easier.
When adding the extensions, I braid the base for about an inch and a half before twisting down the length. This method ensures a natural-looking, secure style that can last for weeks.
Passion Twists Care
Caring for my passion twists is crucial to maintain their look and protect my natural hair. I moisturize my scalp and twists regularly with lightweight oils to prevent dryness. At night, I wrap my hair in a satin scarf to reduce frizz and keep the twists neat. When washing, I use a diluted shampoo and focus on my scalp, gently squeezing the twists to avoid unraveling.
I also refresh my twists every few days with a hydrating mist. With proper care, my passion twists can last for weeks, giving my natural hair a much-needed break while still looking stylish.
Passion Twists Styling
One thing I adore about passion twists is their versatility. I can create so many variations with this protective style. For a chic look, I sometimes do flat twists at the front, blending them into regular passion twists at the back. Mini twists are great for a more defined look, while jumbo twists give a bold, statement style.
I also love mixing in some color by adding extensions in shades like chestnut or bronze. For special occasions, I might add beads or hair cuffs for extra flair. The possibilities are endless, allowing me to express my creativity while keeping my natural hair protected.
Halo Braid

I love halo braids as a natural protective hairstyle for black women. They’re versatile, elegant, and perfect for any occasion. To create this look, I start with clean, moisturized hair. Then, I section my hair and carefully braid it around my head, close to the hairline. What’s great about halo braids is that they protect my natural hair while promoting healthy growth. Plus, they’re incredibly versatile – I can dress them up with accessories or keep them simple for everyday wear. It’s a win-win for both style and hair health!
Halo Braid Tutorial
To start my halo braid, I always make sure my hair is freshly washed and deeply conditioned. I apply a leave-in conditioner and some styling cream for extra moisture and hold. Then, I section my hair into manageable parts. I begin braiding from behind one ear, working my way around my head. As I braid,
I add small sections of hair to create a French braid effect. The key is to keep the tension consistent throughout for a uniform look. I love how this method allows me to create a protective style that’s both beautiful and beneficial for my natural hair.
Halo Braid Variations
One thing I adore about halo braids is their versatility. I can create so many variations with this protective style. For a chic look, I sometimes do flat twists at the front, blending them into the halo braid at the back. Mini braids are great for a more defined look, while jumbo braids give a bold, statement style.
I also love mixing in some color by adding extensions in shades like chestnut or bronze. For special occasions, I might add beads or hair cuffs for extra flair. The possibilities are endless, allowing me to express my creativity while keeping my natural hair protected.
Halo Braid Maintenance
Caring for my halo braid is crucial to maintain its look and protect my natural hair. I moisturize my scalp and braid regularly with lightweight oils to prevent dryness. At night, I wrap my hair in a satin scarf to reduce frizz and keep the braid neat. When washing, I use a diluted shampoo and focus on my scalp, gently squeezing the braid to avoid unraveling.
I also refresh my halo braid every few days with a hydrating mist. With proper care, my halo braid can last for weeks, giving my natural hair a much-needed break while still looking stylish.
Braided Updo
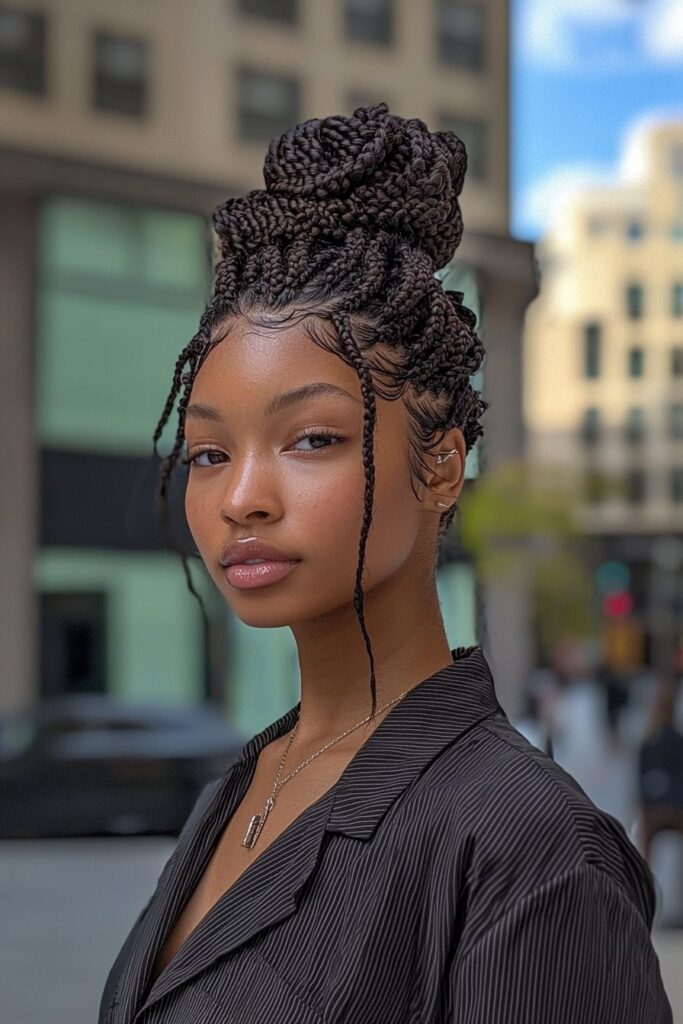
I love braided updos as a natural protective hairstyle for black women. They’re versatile, elegant, and perfect for any occasion. From classic crown braids to modern twists, there’s a style for everyone. Braided updos not only protect natural hair but also promote growth. They’re great for special events or everyday wear, and can be customized with accessories like beads or jewels. Let’s explore some popular styles and techniques to create stunning braided updos.
Braided Updo Styles
Braided updos offer endless possibilities. Some popular styles include the braided crown, half-up half-down with Senegalese twists, feed-in braids low bun, and braided high ponytail with side braids. For a unique look, try the butterfly braid or braided and twisted mohawk. Space buns and cornrow braided buns are also trendy options. These styles can be dressed up or down, making them perfect for various occasions.
Braided Updo Techniques
To create a braided updo, start with clean, moisturized hair. Section your hair and begin braiding close to the scalp. For a crown braid, work your way around the head, adding hair as you go. For a high ponytail, create cornrows leading to the top of the head. The key is to keep tension consistent for a neat look. Don’t forget to secure your style with bobby pins and a light hold spray.
Braided Updo Care
To maintain your braided updo, wrap it in a silk scarf at night to prevent frizz. Moisturize your scalp and braids regularly with lightweight oils. When washing, use a diluted shampoo and focus on the scalp. Refresh your style with a hydrating mist every few days. With proper care, your braided updo can last for weeks, giving your natural hair a much-needed break while keeping you looking stylish.
Cornrows Ponytail

I love cornrow ponytails as a natural protective hairstyle for black women. They’re sleek, sophisticated, and perfect for any occasion. To create this look, I start with tight cornrows that vary in size and pattern, then gather them into a ponytail. It’s ideal for professional settings and keeps my hair out of my face during workouts.
I can even add extensions for extra length and volume, creating a stunning contrast between the precise cornrows and flowing ponytail. Let’s explore some designs, maintenance tips, and versatile styling options for this classic look.
Cornrows Ponytail Designs
When it comes to cornrow ponytail designs, I’m always amazed by the creativity. I’ve tried everything from simple straight-back styles to intricate geometric patterns. One of my favorites is the swoop design, which adds a dynamic element to the look. For a chic twist, I sometimes do double cornrow ponytails on either side of my head. I love how I can customize the size and pattern of the cornrows to suit my mood or the occasion. Adding a weave can create a more powerful, fuller appearance that really turns heads.
Cornrows Ponytail Maintenance
To keep my cornrow ponytail looking fresh, I’ve developed a simple maintenance routine. I start by moisturizing my scalp and braids regularly with lightweight oils to prevent dryness. At night, I wrap my hair in a satin scarf to reduce frizz and keep the style neat.
When washing, I use a diluted shampoo and focus on my scalp, gently squeezing the braids to avoid unraveling. I also refresh my cornrow ponytail every few days with a hydrating mist. With proper care, this style can last for weeks, giving my natural hair a much-needed break.
Cornrows Ponytail Versatility
One thing I adore about cornrow ponytails is their versatility. I can dress them up or down for any occasion. For a casual look, I might add some colorful hair ties or beads. When I want to glam it up, I wrap loose strands around the ponytail for a braided waterfall effect.
I can even transform the style into a chic updo by twisting the ponytail into a bun. The possibilities are endless, allowing me to express my creativity while keeping my natural hair protected. It’s a win-win for both style and hair health!
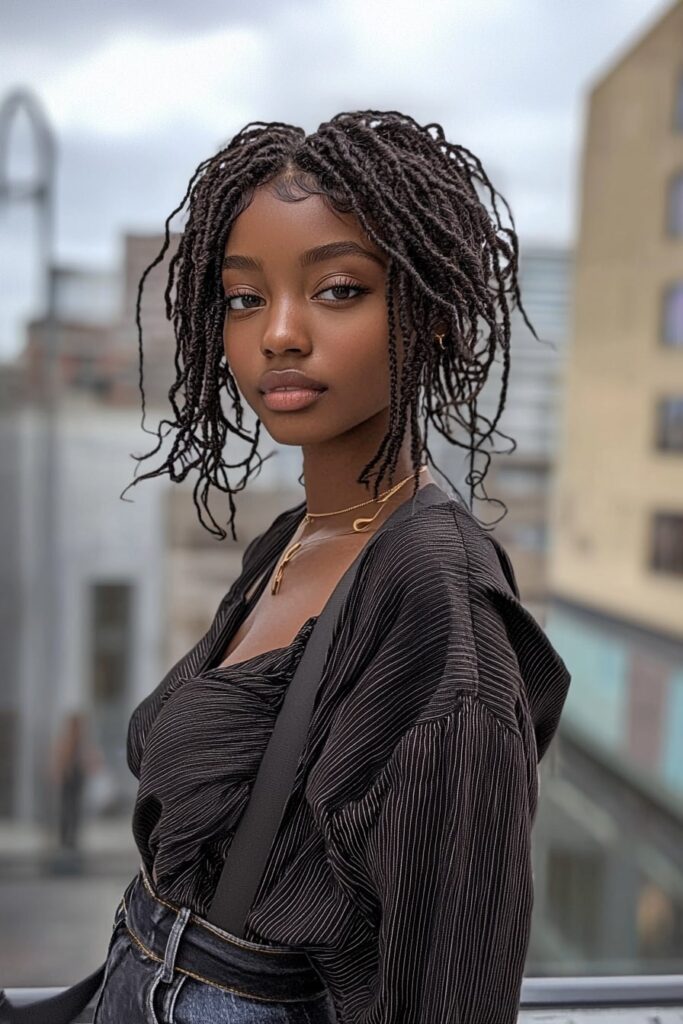
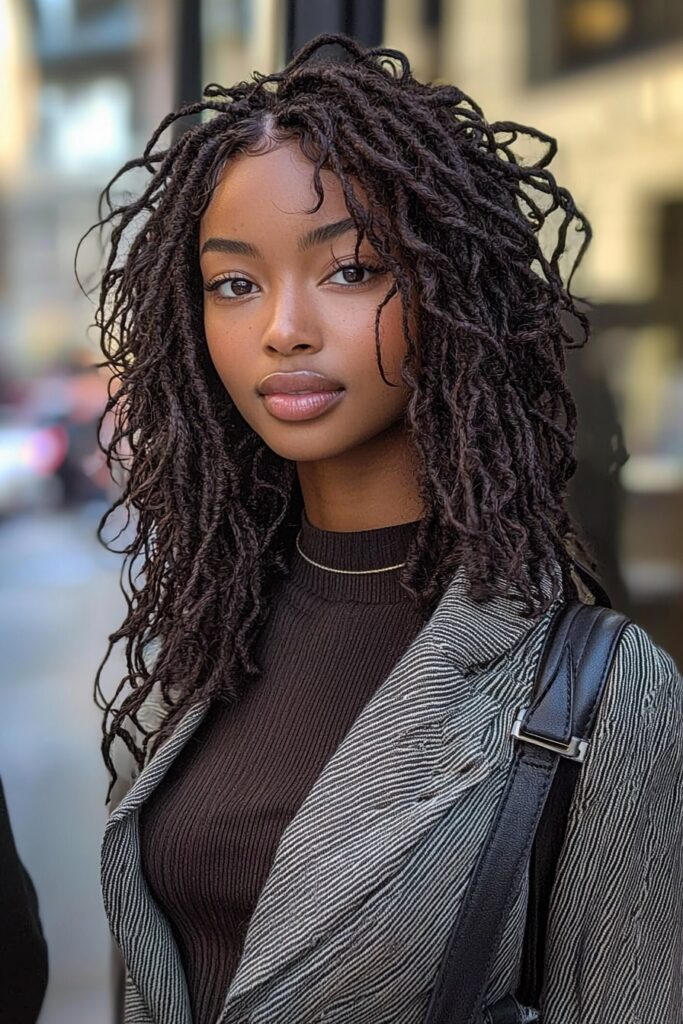
Faux Locs

I love faux locs as a natural protective hairstyle for black women. They’re versatile, low-maintenance, and perfect for any occasion. To create this look, I start with clean, moisturized hair. Then, I section my hair and carefully wrap synthetic hair around each section.
What’s great about faux locs is that they protect my natural hair while promoting healthy growth. Plus, they’re incredibly versatile – I can wear them down, in updos, or even add accessories for extra flair. It’s a win-win for both style and hair health!
Faux Locs Installation
When installing faux locs, I always prep my hair thoroughly. I begin with a sulfate-free shampoo and deep conditioning treatment. After blow-drying, I section my hair and apply a leave-in conditioner. I use the individual method, braiding my natural hair first, then wrapping the synthetic hair around each braid.
This technique ensures a natural-looking, secure style that can last for weeks. I love how this method allows me to create a protective style that’s both beautiful and beneficial for my natural hair.
Faux Locs Care
To keep my faux locs looking fresh, I’ve developed a simple care routine. I moisturize my scalp and locs regularly with lightweight oils to prevent dryness. At night, I wrap my hair in a satin scarf to reduce frizz and keep the locs neat.
When washing, I use a diluted shampoo and focus on my scalp, gently squeezing the locs to avoid unraveling. I also refresh my faux locs every few days with a hydrating mist. With proper care, my faux locs can last for weeks, giving my natural hair a much-needed break while still looking stylish.
Faux Locs Styling
One thing I adore about faux locs is their versatility. I can create so many variations with this protective style. For a chic look, I sometimes do a half-up, half-down style or a sleek ponytail. Adding accessories like beads or hair cuffs can really elevate the look. For special occasions, I might twist my locs into an elegant updo.
The possibilities are endless, allowing me to express my creativity while keeping my natural hair protected. It’s amazing how faux locs can be both a protective style and a fashion statement!
Conclusion
These protective hairstyles offer Black women a wonderful way to express their creativity while keeping their natural hair healthy and strong. From classic box braids to trendy passion twists, there’s a style for every occasion and preference. These versatile looks not only protect the hair but also celebrate the rich cultural heritage and beauty of Black hair.
As we wrap up, it’s clear that protective hairstyles are more than just a fashion statement. They’re a form of self-care, a celebration of identity, and a way to nurture healthy hair growth. Whether you’re looking to switch up your look or give your hair a break, these styles provide endless possibilities to explore and enjoy. So go ahead, embrace your natural beauty, and rock these stunning protective styles with confidence!