
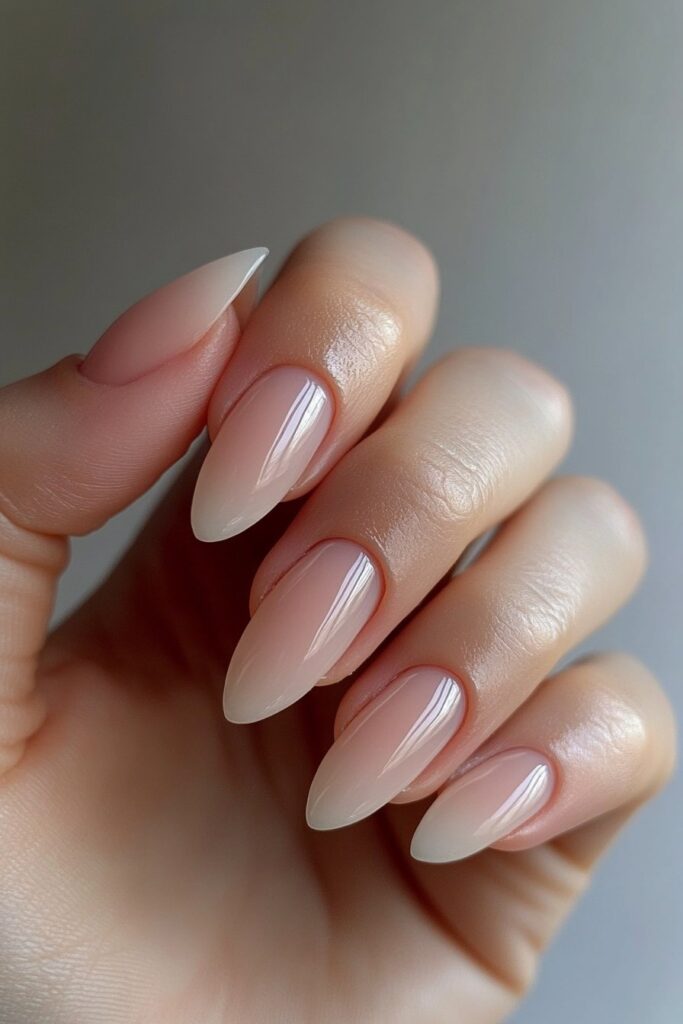
Neon summer nails have dominated the beauty world for 35 years, and 2025 promises their most exciting comeback.
These vibrant designs range from minimal patterns to eye-catching abstracts. The trend has evolved from basic French tips to stunning chrome finishes with 3D effects. Celebrities like Hailey Bieber embrace this style, especially when you have those trending highlighter yellow shades.
Tie-dye and ombré styles remain popular while new interpretations of neon bright summer nails feature aura effects and crystal glazed finishes. My curated collection includes 16 show-stopping designs that blend traditional techniques with 2025’s innovative neon nail ideas.
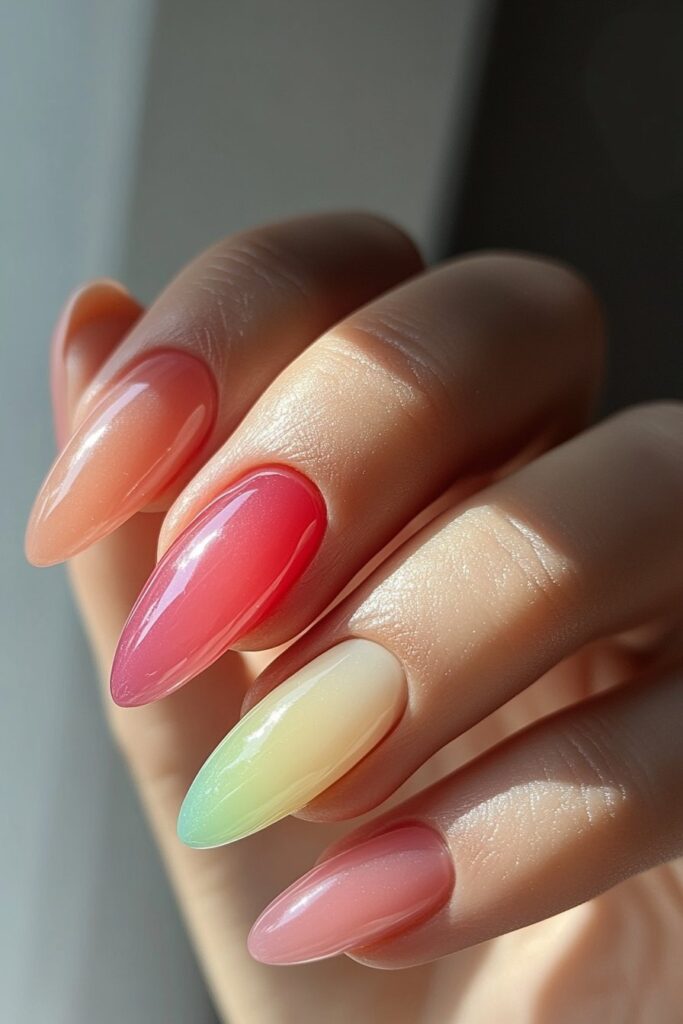
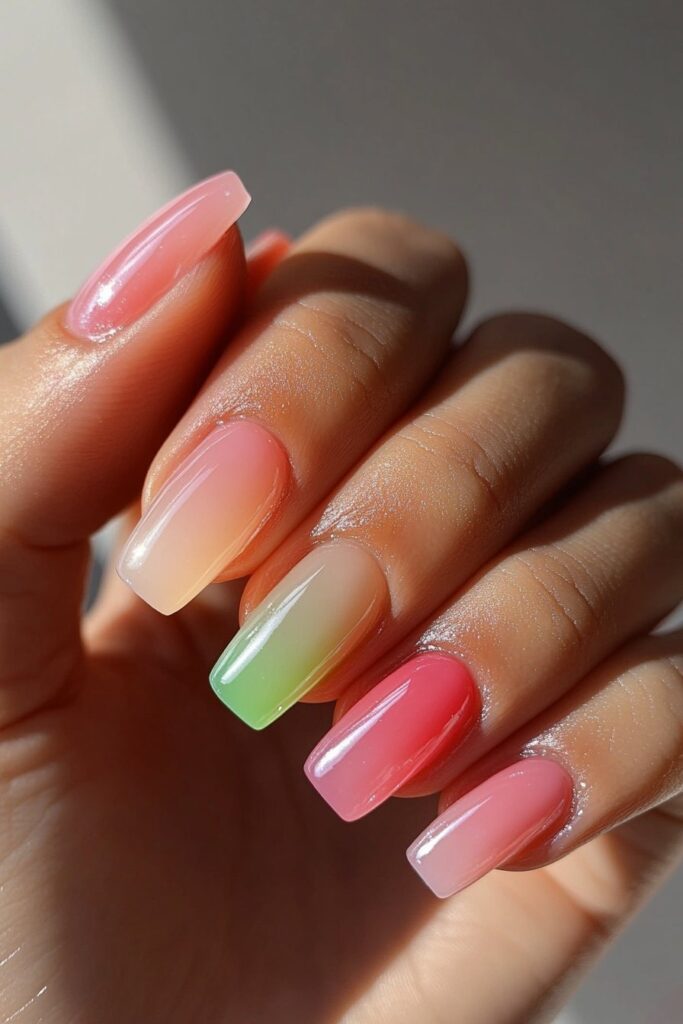
Neon Aura Effect Nails
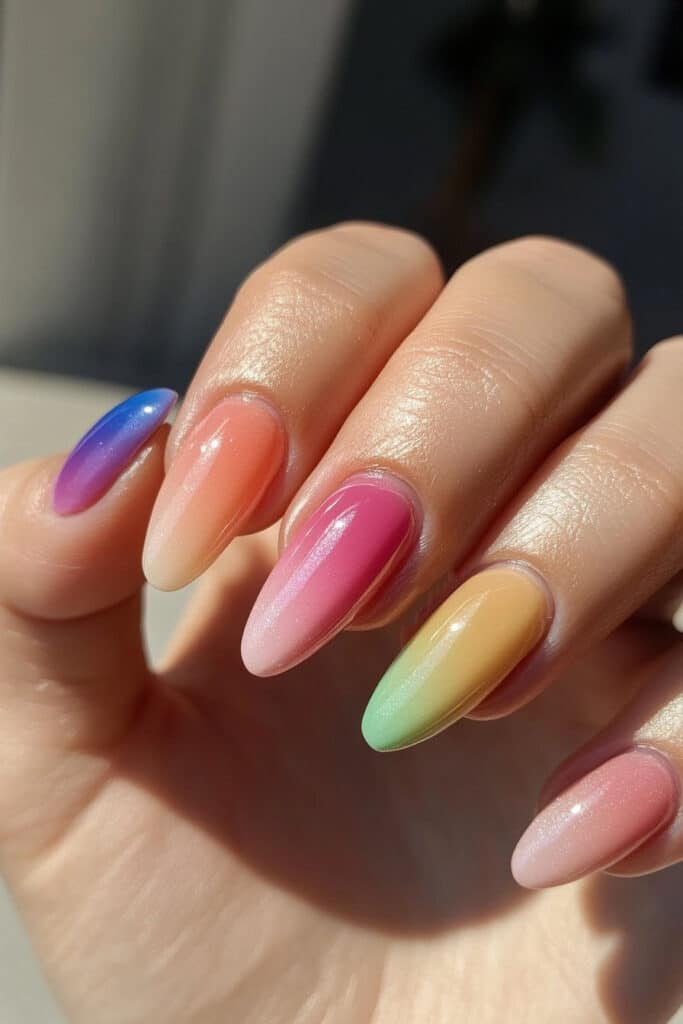
My experience as a professional nail artist with Belle Hathaway has shown that neon aura nails are trending because of their stunning glow effect. This creative technique gives nails an enchanting luminous halo that makes them perfect for summer.
Technique Overview
Aura nail designs capture the essence of energy fields and create a dreamy gradient that looks sophisticated yet catches everyone’s eye. You’ll need a makeup sponge or nail art brush, neon gel polishes, and a high-gloss top coat to create this look. Belle suggests beginners should use a small beauty blender since it helps control the gradient better.
Color Selection
The best neon aura nails start with a light base color and a darker neon shade in the center to create that gorgeous glow. Here are some amazing color combinations:
- Lime green base with electric blue center
- White base with neon pink gradient
- Nude base with neon orange or watermelon red
Application Steps
Start by applying your light base coat and let it dry completely. On top of that, make sure each gel polish layer cures fully to avoid color mixing. Take your sponge and gently tap the darker neon shade into the center of each nail. Build the color gradually with 3-4 layers until you get the perfect opacity. The signature glow effect comes from concentrating the darker shade in a smaller area with each new layer.
The perfect blend comes from taking your time and mastering the right technique. Let each layer dry before moving to the next one. A final layer of high-gloss top coat will make those neon colors pop and keep your design looking fresh longer.
Floating Neon Lines Design
Drawing inspiration from the iconic 1989 Memphis Milano design style, floating neon lines have become one of the most striking neon nail designs of 2025. My work with Belle Hathaway in her Los Angeles studio helped me become skilled at this technique that blends retro esthetics with modern flair.
Pattern Guide
Simple geometric shapes are essential to create captivating floating neon lines. Belle’s sessions taught me that triangles, circles, and squiggly lines are the foundations of this design. Clean, precise lines make this pattern successful rather than complex details.
Application Process
A black base coat with even coverage starts the process. You’ll need these items:
- A high-quality liner brush to create precise lines
- Pure white gel polish for original outlines
- Neon colors of your choice
- Clear top coat to seal
Sketch your design in white, then add translucent neon colors over it. Hand pressure control is a vital step – light pressure creates thin lines, while more pressure gives you thicker strokes.
Style Variations
Belle’s studio experience showed me which color combinations create stunning effects. These designs shine with:
- Neon yellow and glossy black create dramatic contrast
- Nude base with bright yellow and gold accents add elegance
- Multiple neon shades blend into a rainbow effect
Layered translucent colors and holographic elements boost the glow effect. This versatile technique opens up endless creative possibilities, from minimalist single-line designs to intricate geometric patterns.
Neon Jelly Finish
My experience at Belle Hathaway’s Los Angeles studio shows jelly nails as a favorite trend among our celebrity clients. These translucent, ultra-glossy nails create a stunning glass-like effect that captures summer’s playful spirit.
2025 Innovation
Jelly nails now blend traditional techniques with modern twists. We created a transparent, buildable finish that lets your natural nail show through. These polishes pair beautifully with chrome overlays and holographic elements to create a mesmerizing stained-glass effect.
Application Steps
Make sure your nails are clean and oil-free before starting. You’ll need these items to create the perfect jelly finish:
- Clear base coat
- Neon jelly polish
- LED/UV lamp
- High-shine top coat
Start with a thin layer of clear base coat and cure it for 60 seconds. Layer your chosen neon jelly shade gradually until you reach your desired transparency. Remember that thin coats prevent bubbles and ensure even coverage.
Maintenance Tips
Your jelly nails should last two to three weeks with good care. Cap your nail edges horizontally with both color and top coat to extend their life. Daily cuticle oil applications prevent brittleness and keep your nails healthy. Protect your nails from harsh chemicals and wear gloves during household chores.
Holographic Neon Flames
My recent work with Belle Hathaway at her Los Angeles studio opened up an amazing world of holographic neon flames – a design that blends fierce patterns with ethereal shimmer effects.
Design Template
This fiery design begins with a curvy “Y” shape that flows from the nail tip to the cuticle. The shape becomes a blueprint to create flame outlines. We rounded the edges to capture a natural flame look. Belle showed me how a clear base makes the design stand out and lets the holographic effect dazzle.
Color Combinations
Holographic neon flames shine in their adaptability. Belle’s studio became our playground to test these stunning combinations:
- Electric blue base with neon green flames
- Clear base with rainbow holographic overlay
- Mint green French tips with flame accents
Application Guide
This design demands attention to detail. You can pick from three methods: hand-painting, stencils, or self-adhesive vinyl decals. A detailing brush helps create clean lines for hand-painted designs. The holographic decals need a top coat seal or gel encapsulation to last longer.
Perfect flames come from careful layering. Start with the base color and build the holographic effect step by step. Vinyl decals give a professional touch without advanced nail art expertise. The design looks stunning with French tips or makes a bold statement on its own.
Neon Crystal Glazed Effect
My recent training with Belle Hathaway helped me find an amazing technique – crystal glazed neon nails that create a stunning dimensional effect and capture light beautifully. This innovative technique brings together crystal’s brilliance with neon’s bold appeal.
Material Requirements
You’ll need these specific tools to create the perfect crystal glazed effect:
- White or light base color gel polish
- Neon pigment powders
- Chrome effect gel
- Eyeshadow application tool
- Non-wipe top coat
- UV/LED lamp
Step-by-step Process
We started with a white base color to make the neon pigments stand out. Each layer needs proper curing according to the manufacturer’s instructions. The next step involves applying a layer of non-wipe top coat that needs complete curing. The most vital step requires you to buff the neon chrome powder onto the cured surface with an eyeshadow tool.
A soft brush helps remove excess powder once you achieve the desired intensity. The design needs sealing with a generous layer of top coat. Even pressure during the buffing process ensures long-lasting results.
Care Instructions
Your crystal glazed nails need protection from harsh chemicals, so wear gloves during household tasks. Cuticle oil application prevents chipping and makes your manicure last longer. The glossy finish might get damaged from rough surfaces, so handle with care.
Belle’s technique shows that good maintenance can make your manicure last up to two weeks. The original shine comes back quickly with a gentle cleaning using an alcohol-soaked lint-free wipe.
Abstract Neon Watercolor
My countless hours at Belle Hathaway’s studio helped me find that abstract neon watercolor nails combine artistic expression with technical precision. This stunning design shows the fluid beauty of watercolors with vibrant neon shades.
Technique Guide
A white or light-colored base coat makes the watercolor design pop. Your workspace needs water-based nail polishes or sheer, jelly-like formulas that blend easily. We focused on the layering technique – starting with lighter shades and building up with darker tones.
Color Selection
Color theory knowledge can turn ordinary designs into extraordinary masterpieces. Of course, complementary colors create striking contrasts – think blue paired with orange or red with green. These sophisticated combinations work well:
- Neon pink with electric blue undertones
- Lime green fading into yellow
- Hot orange blending into coral
Styling Tips
Perfect watercolor effects come from the right tools and techniques. Small dabs of polish on a palette and brush dips in water create that signature translucent effect. Heavy, opaque polishes might look tempting, but they won’t give you the watercolor finish you want.
A light touch keeps the appearance clean and clear. My time with Belle taught me that gentle brushstrokes and patience create captivating results. A high-shine top coat seals your masterpiece and keeps your neon summer nails vibrant throughout the season.
Neon Chrome Overlay
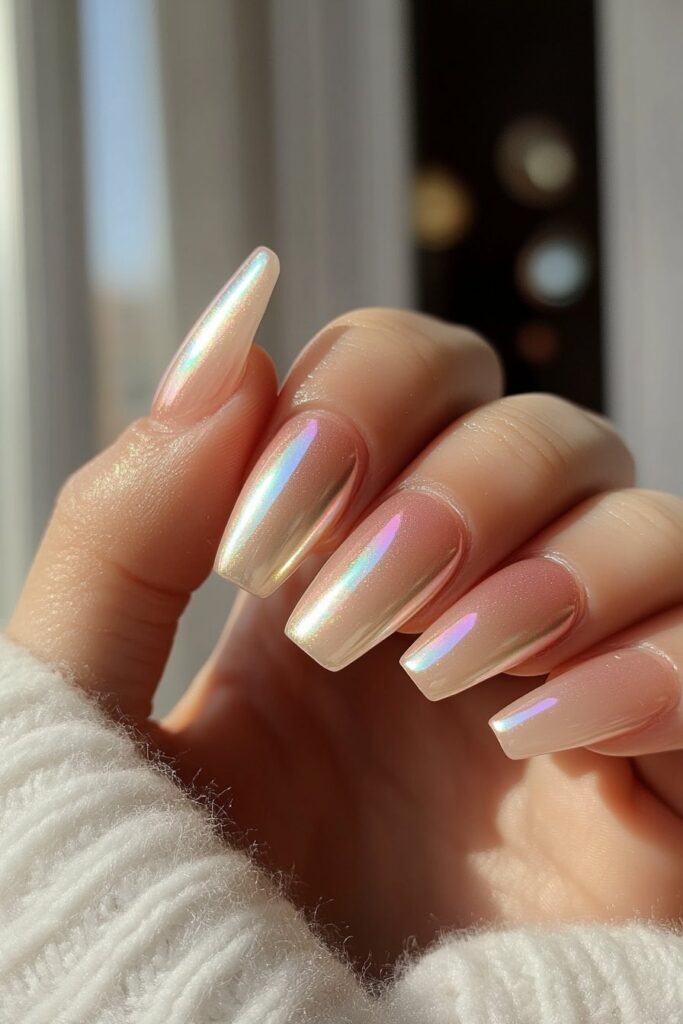
My experience with chrome overlay techniques at Belle Hathaway’s studio revealed an amazing new world of neon nail artistry. This innovative approach blends reflective properties with vibrant neon shades that create a stunning metallic finish and catch every ray of light.
Technology Explained
Chrome overlay uses specialized pigments to create a highly reflective, metallic-like manicure with an iridescent look. We applied chrome powder over a sticky base layer that adheres to create a mirror-like finish. The distinct holographic effect comes from the interaction between chrome particles and the neon color underneath.
Application Steps
Start by applying a no-cleanse top coat without capping the edge. Then use an eyeshadow applicator to buff the chrome powder into the nail surface. The perfect chrome effect depends on:
- Base gel polish application
- Chrome powder selection
- Proper buffing technique
- Sealing top coat
A fluffy brush helps sweep away excess powder to keep the mirror-like appearance. To get the best results, add a final no-cleanse top coat and cap the free edge.
Durability Guide
A GelColor Chrome manicure can last up to two weeks when applied correctly. The finish’s longevity depends on good maintenance and care. The chrome finish stays intact when you avoid harsh chemicals and wear protective gloves during household tasks. A water-based top coat over the chrome powder, followed by a regular top coat, will give maximum durability.
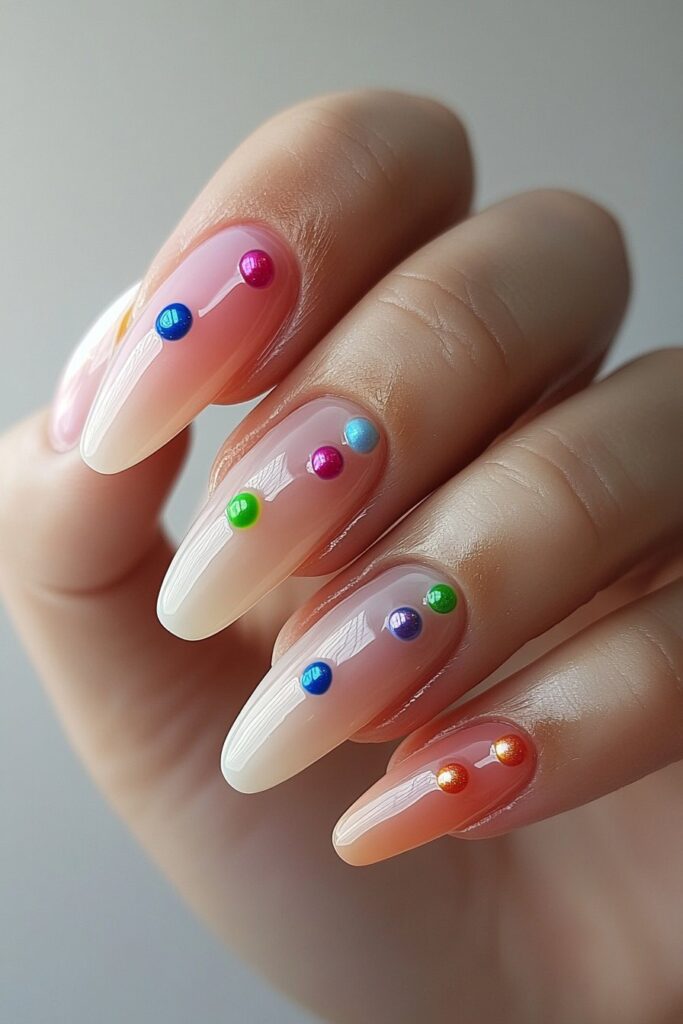
Minimalist Neon Dots
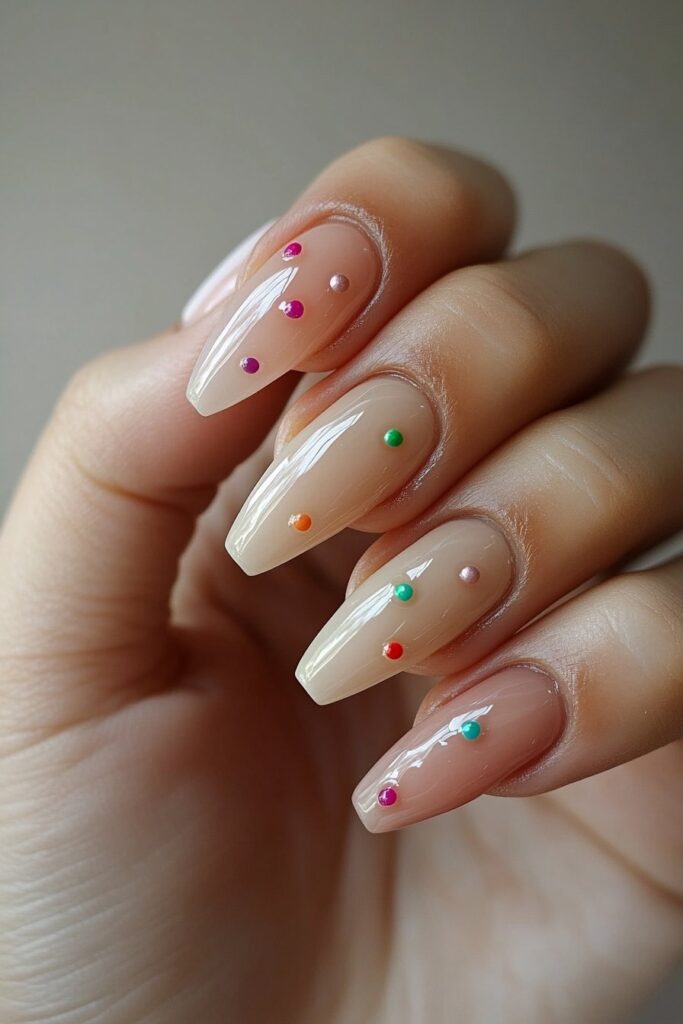
My journey with minimalist neon dots began at Belle Hathaway’s Los Angeles studio. This understated yet striking design creates a perfect balance between minimalism and vibrant summer energy.
Design Concepts
Minimalist dot nail art brings clean elegance with a playful twist. The dot placement makes all the difference – random patterns give a carefree look and we focused on negative space to keep it sophisticated. Short nails work great for this design, which makes it adaptable to any nail length.
Color Combinations
Belle helped me find these eye-catching color pairings:
- Neon coral pink base with purple and orange dots
- Nude base with bright neon accents
- White foundation with electric yellow pops
- Clear base with multicolor neon spots
Application Tips
Your tool selection and technique will make or break this design. A base coat protects your nails effectively. A dotting tool or the blunt end of a bamboo skewer creates precise dots. The spacing between dots should be generous – this lets each neon accent shine.
A quality top coat seals your design beautifully. Belle taught me that thin, even layers are the foundations of long-lasting results. She tells beginners to start with larger dots and work their way to smaller sizes as their confidence grows.
This versatile design shines at casual beach days and formal summer events alike. The right color selection and precise application turn this into a sophisticated version of traditional neon nail art.
Neon Cloud Effect
Belle Hathaway’s exclusive masterclass taught me how neon cloud nail art blends whimsical design with precise technique. Our celebrity clients love this dreamy style’s ethereal yet bold look.
Technique Overview
Cloud nails shine when you create soft, billowy shapes that float on your nail bed. Start with a thin coat of base color and let it dry. The brush from your polish works best to draw a line down your nail’s middle. We focused on getting rounded edges to achieve that cloud-like look.
Color Selection
Belle showed me that opaque colors work best. These combinations create striking neon summer nails:
- Electric blue base with white clouds
- Neon pink foundation with pastel overlays
- Mint green background with neon yellow accents
Pick three opaque shades that complement each other. Sheer polishes need multiple layers and might chip early, so it’s best to avoid them.
Maintenance Guide
A high-quality top coat seals the edges and protects your neon cloud design. Daily cuticle oil keeps your nails healthy and prevents brittleness. These designs last up to two weeks with proper care. Your nails need protection from harsh chemicals, so wear gloves during household tasks.
The secret to lasting cloud nails starts with proper application, as Belle taught me. You can try dotting tools for precise cloud shapes or create an ombre effect with multiple neon shades.
3D Neon Bubble Design
My experience with Belle Hathaway helped me find the magic of 3D neon bubble nails and changed how I approach dimensional nail designs. This creative technique makes beautiful raised elements that capture light and draw attention with their depth.
Material Requirements
Perfect 3D bubble nails need specific tools to get the best results. Here’s everything you’ll need:
- Builder gel or clear sculpting gel
- No-wipe top coat
- Neon pigments or chrome powders
- LED/UV lamp
- Fine-grit buffing file (280 grit)
- Detailing brush to outline bubbles
Application Process
The secret to amazing 3D bubble nails lies in careful layering. A layer of top coat goes first, followed by curing. We buffed the nail surface with a gentle touch to remove shine. The bubble shapes come next – paint them with no-wipe top coat and let them cure fully.
Chrome powder or neon pigments should be applied to the bubble shapes, and they stick only where you want them. White outlines around bubbles boost dimension. Colors and light reflections add depth before curing. The final touch involves placing a blob of 3D gel on each bubble and spreading it carefully to create a dome shape.
Care Instructions
3D bubble nails need special attention because of their raised design elements. These beautiful creations last longer with a thin layer of top coat over the whole design. You should wear gloves during household tasks to protect your nails from harsh chemicals.
Belle showed me that good maintenance goes beyond simple care. Regular cuticle oil keeps nails strong and the design looking fresh. The bubble effect stays beautiful longer when you stay away from rough surfaces.
Neon Tie-Dye Pattern
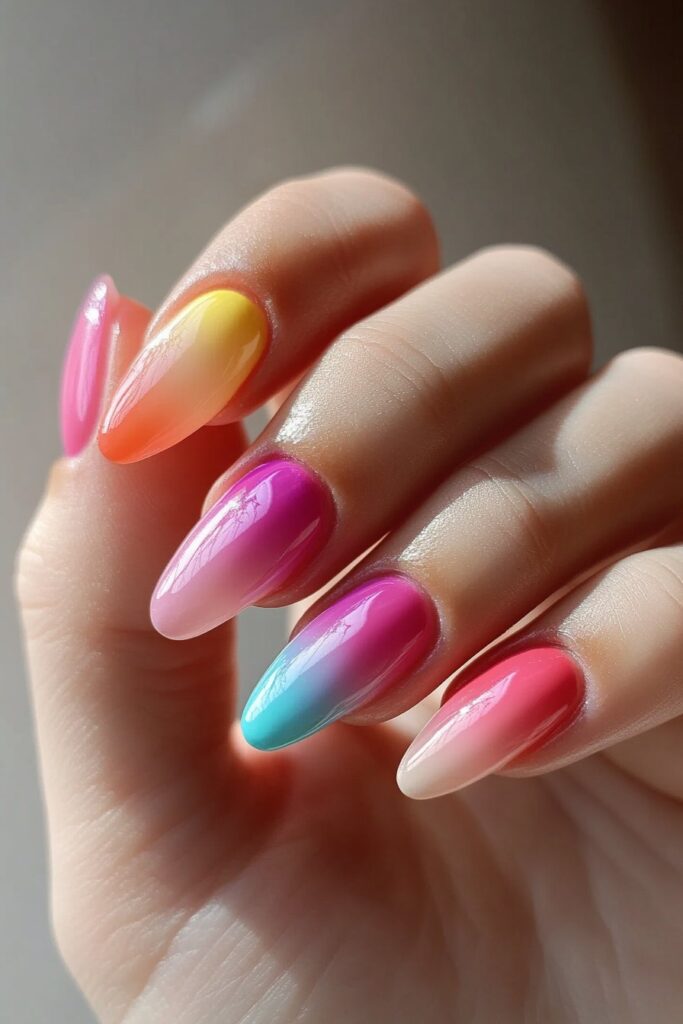
My intensive training sessions with Belle Hathaway helped me become skilled at creating neon tie-dye nails – a technique that combines vibrant colors with mesmerizing patterns. This retro-inspired design has gained popularity among our celebrity clients who want bold, playful summer looks.
Color Selection
We focused on choosing the right color combinations for success. Belle’s expertise showed that bright blues, purples, yellows, and pinks create striking effects. The best results come when you avoid mixing greens and oranges since they can create unwanted brown tones. Here are some eye-catching combinations:
- Neon yellow with lime green accents
- Electric blue paired with bright pink
- Fluorescent orange with coral undertones
Application Steps
Start with a white base coat – we use Models Own ‘Coconut Cream’ for the best coverage. Create small triangles by using tape as guides. Let the base dry completely, then take your chosen neon shade onto a sponge and press it randomly over the nails. You can also use a nail art brush if you want more precise control over the design.
Style Guide
Tie-dye nails shine because of their versatility. You can paint the entire nail with swirling patterns for a statement look. The design ended up looking best when sealed with a high-shine top coat that evens out the surface and adds brilliant shine. Daily application of cuticle oil and protection from harsh chemicals helps maintain the vibrant appearance. My time at Belle’s studio has shown that these designs can last up to two weeks with proper care.
Electric Neon Zebra Print
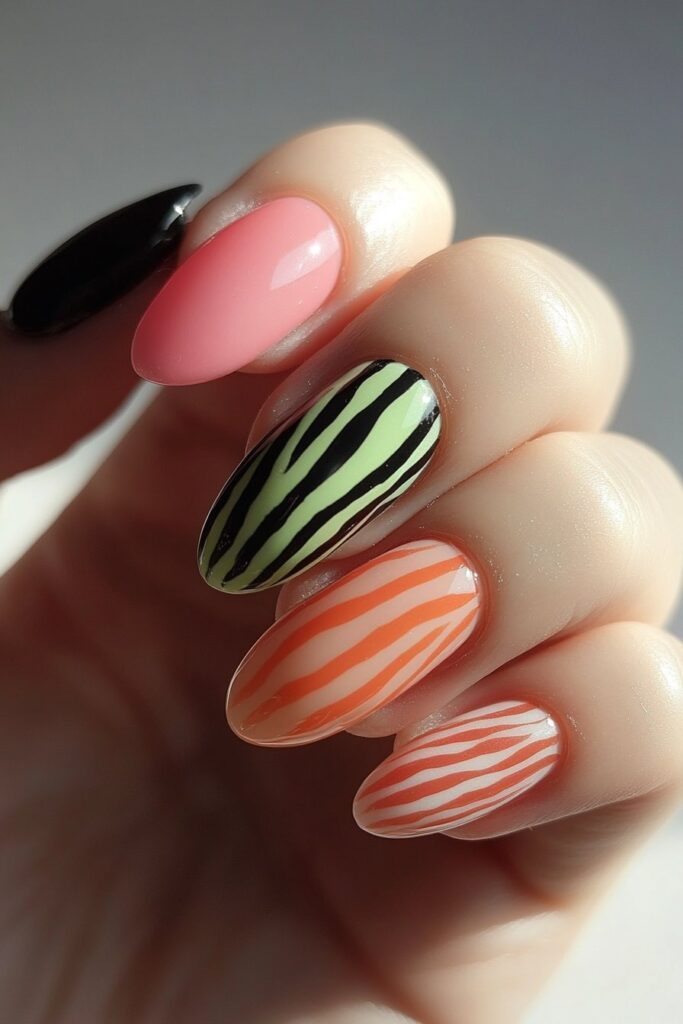
My recent session at Belle Hathaway’s Los Angeles studio let me explore an amazing mix of neon colors with classic zebra patterns. The design beautifully blends fierce and chic elements that capture summer’s bold spirit without losing its sophistication.
Pattern Guide
Creating authentic zebra stripes depends on their natural irregularity. We focused on making uneven, jagged lines that look just like real zebra fur. The design looks great with both thin, delicate stripes and wider, dramatic lines. You can create better results by alternating between different stripe widths and directions.
Application Process
Start with a solid base coat – black gives you dramatic contrast, while neutral shades add subtle sophistication. Then use a thin nail brush to paint irregular stripes in your chosen neon shade. This design is super versatile – you can pair electric pink with black to make it pop, or combine lime green with a nude base for a more subtle look.
Belle taught me a great trick for beginners: paint the middle stripe first so you can cover any mistakes with the layers that follow. The most eye-catching combinations are:
- Electric yellow with black undertones
- Neon pink layered over neutral gray
- Fluorescent orange with metallic accents
Maintenance Tips
These neon zebra designs usually last a week with good care. A high-quality top coat helps them last longer, so stay away from harsh chemicals. Your cuticles need regular oil to prevent chipping and keep the design bright. Non-acetone polish remover works best for removal and protects your natural nails.
Neon Foil Accent Design
My experience at Belle Hathaway’s private masterclass showed me how to utilize neon foil accents. This creative technique blends metallic elegance with bold summer vibrancy. The designs catch everyone’s eye and shimmer beautifully under the sun.
Material Selection
Quality supplies will give you the best results. You’ll need:
- Nail foil glue or adhesive gel
- UV/LED lamp for curing
- Premium transfer foils
- Non-smudging top coat
- Silicone nail tool
Application Steps
Your success with neon foil designs depends on getting the technique right. Start with a polish that matches your chosen foil – white makes a perfect backdrop that brings out bright patterns. Add a thin layer of foil glue and wait until it feels slightly tacky.
The foil goes onto the nail with its design side up. Use gentle pressure with a silicone tool to smooth away air bubbles. A light touch with the glue prevents clumping and gives clean transfers. Stars, animal prints, and edgy neon patterns look stunning and reflect light in amazing ways.
Care Guide
A water-based top coat will seal your foil design perfectly. We ended up learning that wearing gloves during household chores protects the design from harsh chemicals. Belle taught us that matching foil trim to nail shapes stops lifting at the edges and gives precise results.
Cap the tips horizontally with both color and top coat to make the design last. The design might not transfer perfectly the first time – just try again from a different angle to cover any gaps. This method, which I learned at Belle’s Los Angeles studio, will give your neon summer nails lasting brilliance throughout the season.
Geometric Neon Gradient
My career at Belle Hathaway’s studio took off when I became skilled at geometric neon gradient nails. This advanced technique pairs precise patterns with vibrant color transitions. The result creates stunning dimensional effects that capture summer’s energy.
Design Concepts
Clean, sharp lines using striping tape form the simple contours of geometric neon gradients. You should sketch your design with basic shapes like triangles and zigzag patterns. We succeeded by keeping steady hand pressure – lighter strokes create thinner lines, while firmer pressure makes bolder statements. Belle suggests new artists start with simple horizontal lines before moving to complex patterns.
Color Combinations
My time at Belle’s studio helped me find these striking combinations:
- Neon yellow base with electric blue transitions
- White foundation with bright coral gradients
- Nude base with neon pink and gold accents
Perfect gradients come from picking colors that blend naturally without creating muddy transitions. Mixing colors with white creates lighter shades and adds more depth to your geometric designs.
Application Tips
A solid base coat comes first – white makes neon colors pop. Use a striper brush to create zigzag lines with your lightest shade. The best results come from building up the color gradually with thin layers. The design needs a fast-drying top coat to prevent smudging.
Belle showed me how proper spacing between geometric elements stops overcrowding. These neon summer nails stay vibrant for up to two weeks with careful layering and precise application. The free edges need horizontal capping with both color and top coat to boost durability.
Neon Stained Glass Effect
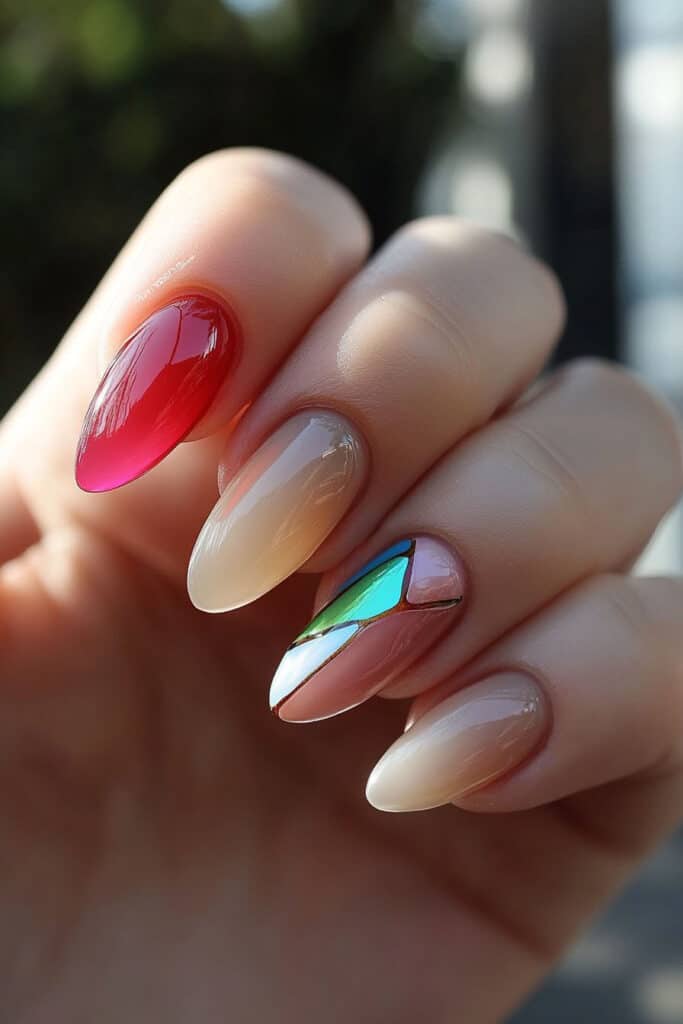
Belle Hathaway showed me how to create stunning stained glass neon nail designs. This beautiful technique blends classic artistry with modern neon elements that perfectly capture summer’s vibrant spirit.
Technique Guide
A pristine white base coat helps achieve optimal color vibrancy. The next step involves creating random lines with black nail polish or paint to form geometric shapes on the nail. These lines become the foundation of your stained glass masterpiece. Your nail becomes a canvas, and each section between the lines will showcase different neon shades.
Color Selection
Stained glass neon’s beauty comes from smart color combinations. These pairings create amazing effects:
- Neon pink with sheer finish to create an ethereal glow
- Cobalt blue base paired with vivid gel strips
- Dark base enhanced with neon-colored overlays
Maintenance Instructions
A premium top coat seals your artwork and prevents chipping. My time at Belle’s studio taught me that light elegance super shiny top coat gives the best results. You can also use soak-off p+ top coat if you want easier removal.
Belle emphasized that good nail care starts with protection from daily wear. Your nails will last longer if you apply cuticle oil and keep them away from harsh chemicals. This versatile technique allows you to paint over the design with fresh colors as it grows out while keeping the stained glass effect at the tips.
Metallic-Edge Neon Design
My time at Belle Hathaway’s studio changed how I view the combination of reflective finishes with vibrant colors in metallic-edge neon designs. This creative technique creates stunning dimensional effects that make neon summer nails pop.
Material Requirements
You need specific tools to create perfect metallic-edge neon designs. The essential items include:
- Neon gel polishes or regular polish
- Metallic chrome powder
- No-wipe top coat
- LED/UV lamp
- Fine-detail brush
- Eyeshadow applicator tool
Application Process
Start by applying a thin layer of base color evenly. The key to success lies in applying one thin coat of metallic gel – multiple layers can make the finish cloudy. The surface needs gentle buffing after 2-3 minutes of curing to achieve a smooth, glass-like finish.
The best technique involves working on one finger at a time while applying the final top coat. You can seal the edges horizontally with both color and top coat to improve durability. My training with Belle taught me that proper curing between layers stops wrinkling and keeps the metallic shine intact.
Style Tips
Metallic-edge neon designs offer amazing versatility. Lime neon paired with silver undertones creates striking results. Rose gold accents combined with neutral bases give a sophisticated look. My extensive experiments at Belle’s studio showed that water-based top coats seal metallic elements perfectly without clouding the finish.
Conclusion
My trip to become skilled at these 16 neon nail designs among Belle Hathaway changed how I see summer nail artistry. Each technique, from simple dots to complex 3D bubbles, is a chance to express creativity and keep professional standards.
These designs look amazing for daily wear and special events. Neon aura effects make ethereal glows that catch light in dramatic ways. Chrome overlays paired with geometric patterns create show-stopping results that stay perfect up to two weeks with proper care.
Belle’s Los Angeles studio taught me that quality materials and exact application steps lead to success. Good base preparation, smart color choices, and protective top coats keep these vibrant designs brilliant through summer activities.
Belle showed me how neon nail art celebrates both technical skill and creative expression. Her focus on proper technique and artistic freedom lets these designs truly shine. My clients love mixing different elements – maybe chrome edges with watercolor effects or 3D bubbles with holographic touches.
These neon summer nail designs ended up giving endless ways to express yourself. You can choose minimalist dots or detailed stained glass patterns. These techniques create eye-catching manicures that capture summer’s playful spirit with sophisticated style.