My experience as a professional makeup and nail artist has led me to create these pink and white Christmas nail designs that will enhance your holiday look perfectly. My work with celebrity beauty expert Belle Hathaway taught me how pink and white combinations create an elegant winter wonderland effect. This combination brings sophistication and playfulness to your holiday style.
Our carefully selected collection of 24 designs features delicate snowflake patterns and glamorous pink French tips. The collection has charming holiday nails with candy cane stripes and pink Christmas designs that sparkle beautifully in the light. These intricate designs will make you the center of attention at holiday parties. These looks will spread holiday cheer whether you’re experienced with nail art or trying festive designs for the first time.
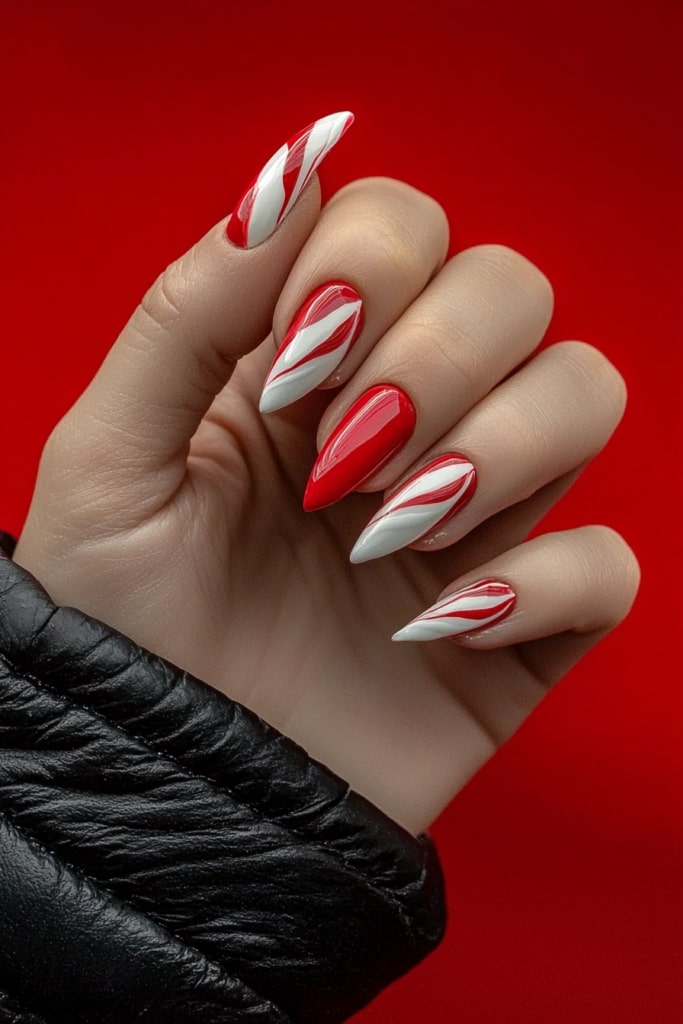
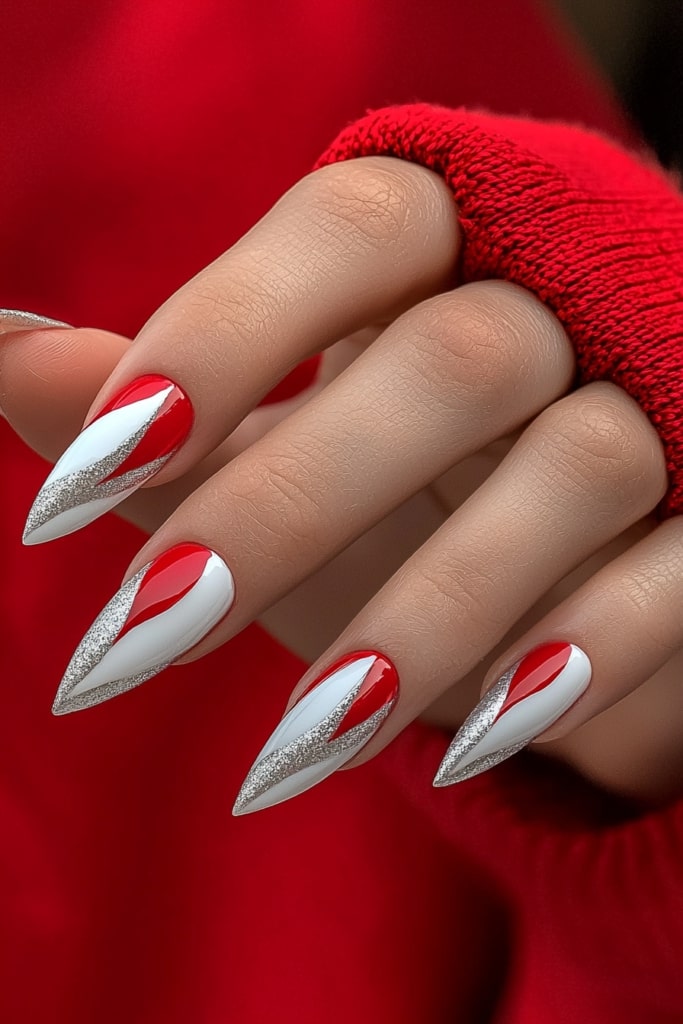
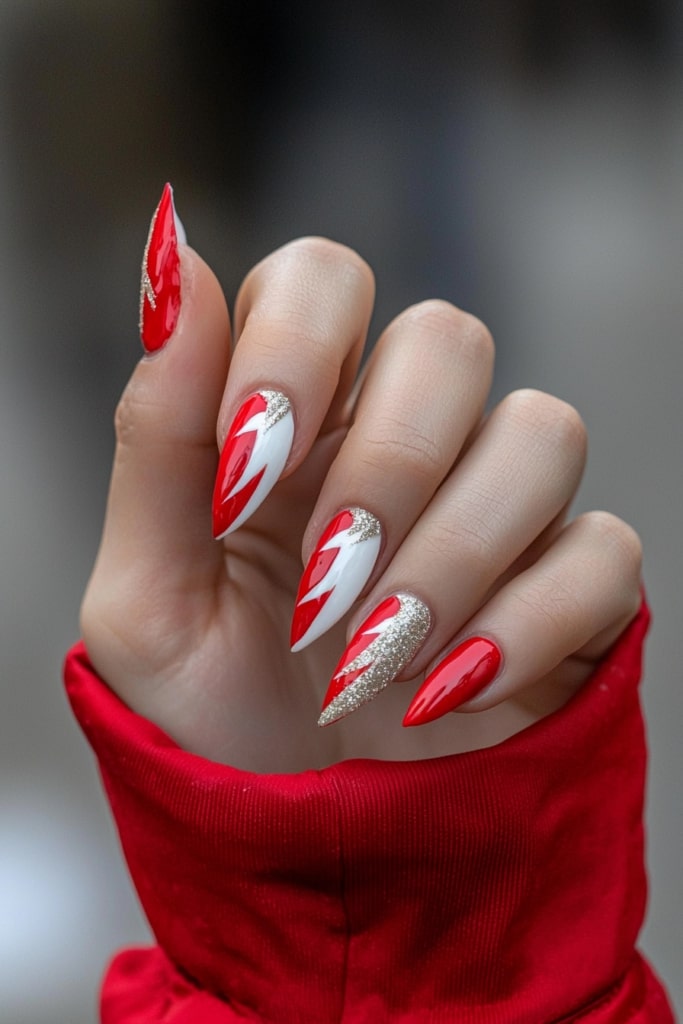
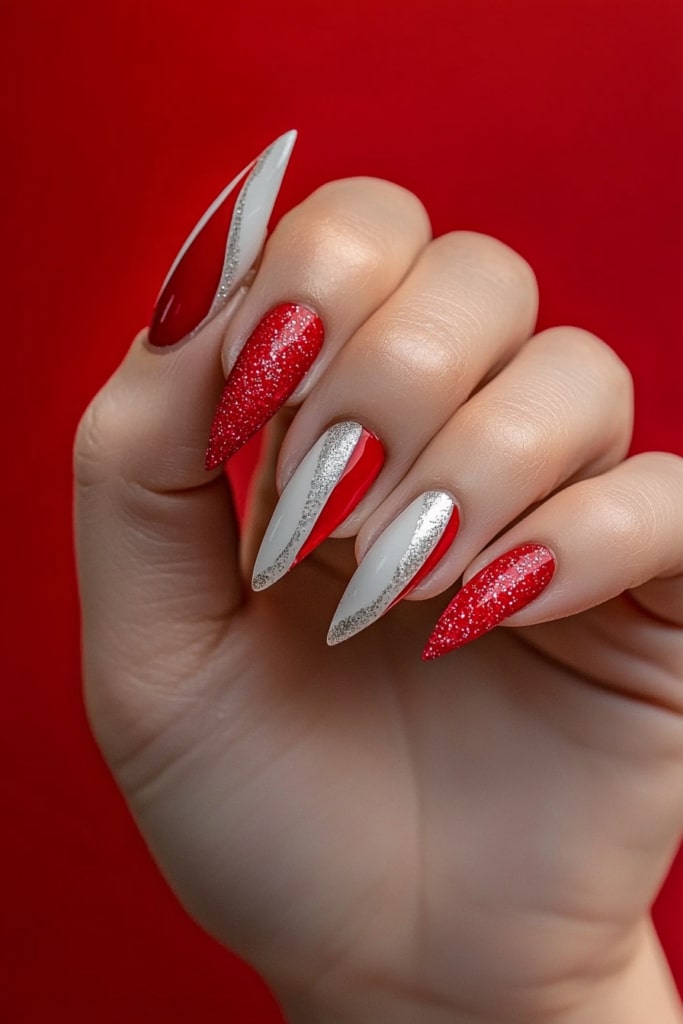
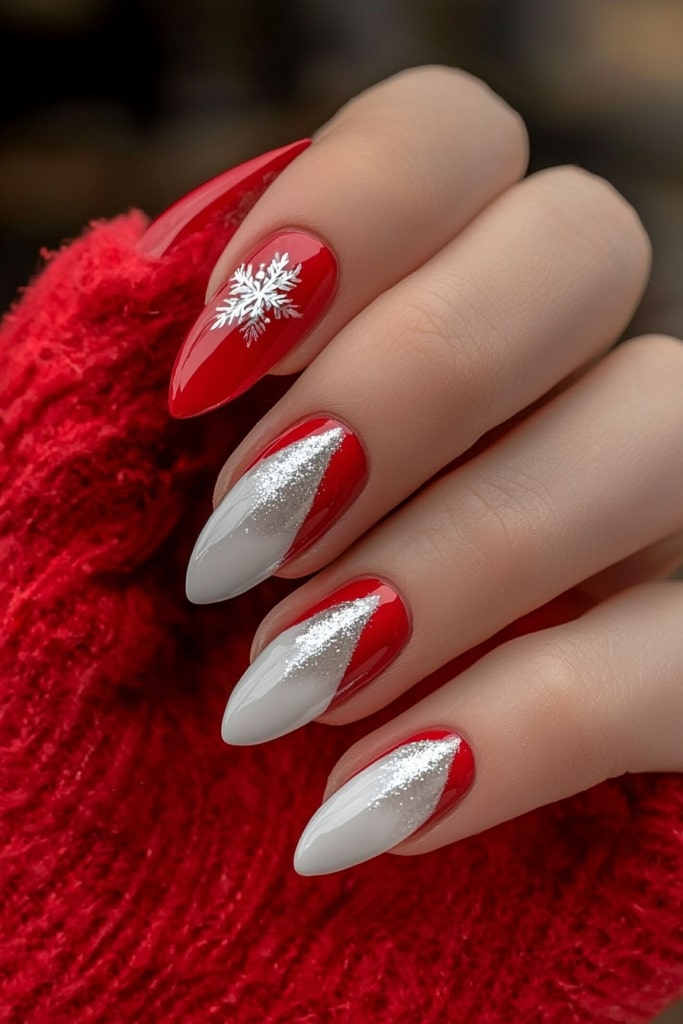
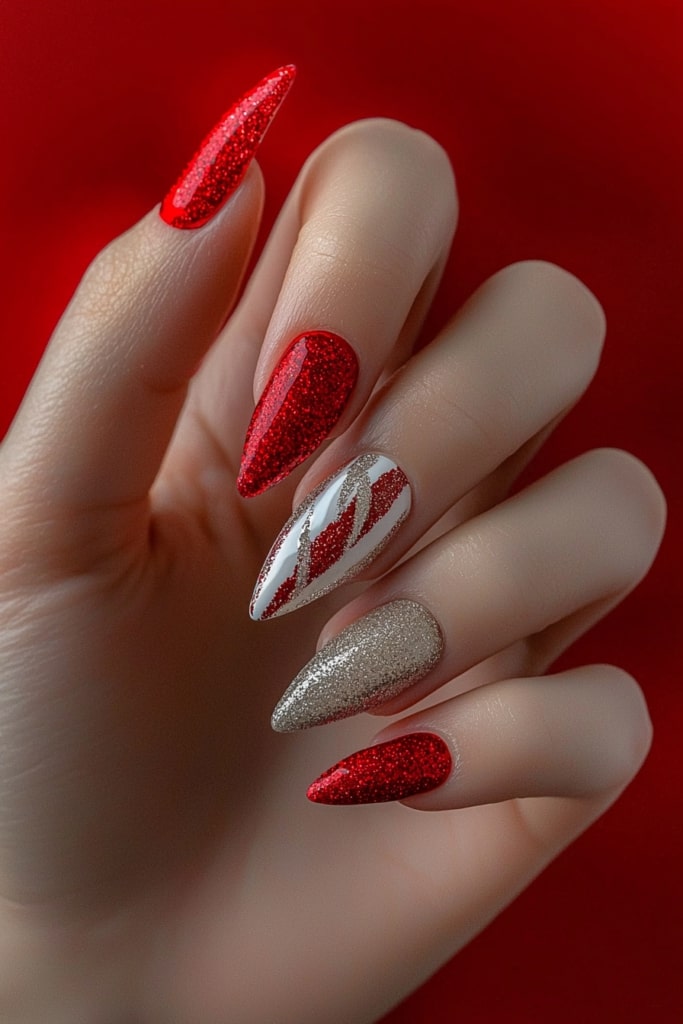
Candy Cane Pink Nails
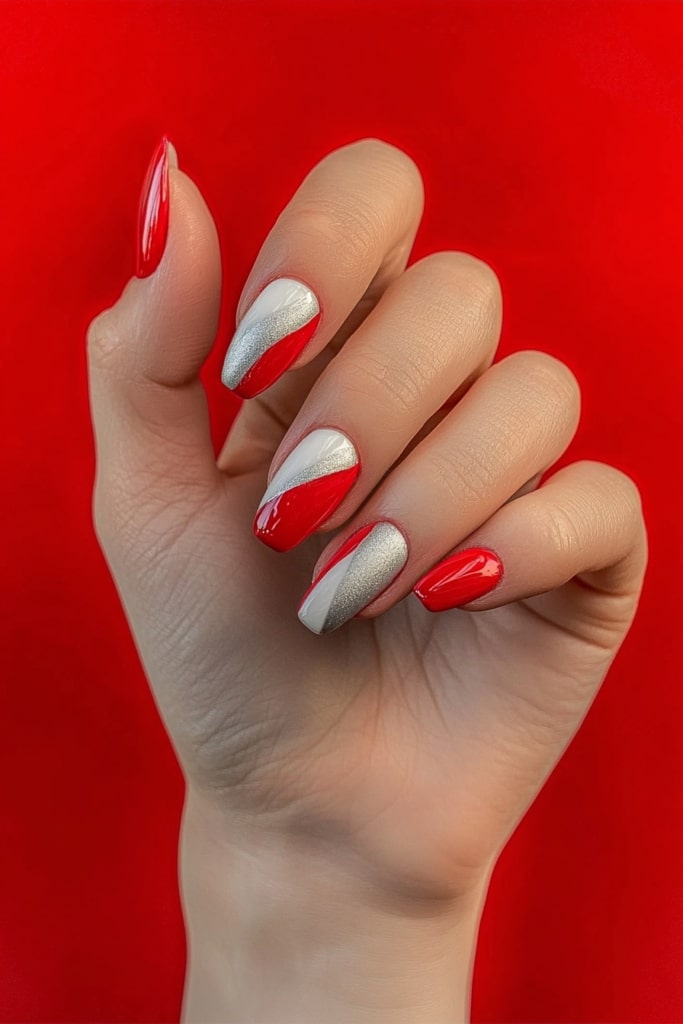
This Candy Cane Pink Nails design stands out as my favorite holiday creation. The look blends classic holiday elements with a modern twist that I refined through countless seasonal designs. My clients love how it brings holiday cheer to their manicures.
Candy Cane Pink Nails Design
A delicate Pink Cloud base sets a perfect canvas for this festive nail artistry. The curved candy cane stripes in red and white blend beautifully with heart-shaped patterns to create a romantic holiday feel. This charming design has:
- Swirling candy cane patterns
- Frosted sugar effect with pearl white mica
- French tip accents
- Heart-shaped candy cane details
Candy Cane Pink Nails Application
Pink Cloud serves as your perfect foundation layer. Create gentle curved stripes with Red Velvet detail paint and a striper brush. The signature frosted effect requires these steps:
- White detail paint belongs between the red stripes
- Create curved C-shaped lines that add dimension
- Pearl white mica powder dusts the surface
- Let it cure under the lamp for 60 seconds
- A final IPA wipe removes excess and reveals the perfect finish
Candy Cane Pink Nails Maintenance
Your candy cane design needs a quality top coat every 3-4 days. This festive pattern works beautifully on both almond and squared nails. The versatile design adapts perfectly to any nail shape. Your hands should stay moisturized, and you should wear gloves during dishwashing that will protect the intricate details and the gorgeous sugar-frosted effect.
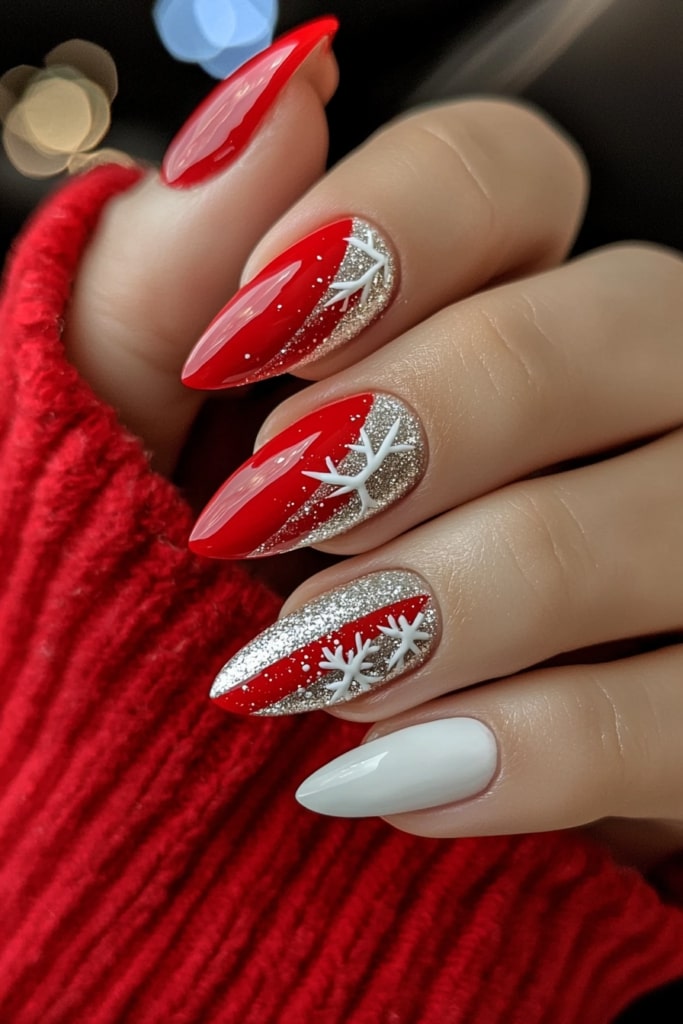
Frosted Pink Snowflakes
My work with Belle Hathaway has shown me how unexpected combinations create the most striking designs. The Frosted Pink Snowflakes design shows this approach beautifully by blending vibrant pink with delicate winter elements.
Frosted Pink Snowflakes Design
This eye-catching design features a hot pink base that perfectly highlights delicate white snowflake details. The holographic clear glitter adds a perfect winter sparkle while keeping the look elegant. The snowflakes seem to dance on the vibrant pink background and create an enchanting winter wonderland effect.
Frosted Pink Snowflakes Application
The perfect nail design starts with a full picture of nail preparation:
- Apply Protein Bond to ensure lasting wear
- Use Bioseaweed Gel ‘Frosting’ as base coat
- Create snowflake patterns with acrylic paint to achieve precise details
- Encapsulate with clear powder to add depth
- Finish with a no-wipe top coat
Frosted Pink Snowflakes Maintenance
Your frosted snowflakes need a fresh top coat every 5-7 days. This elegant design stays beautiful for 2-3 weeks when maintained properly. Pro tip: My clients protect their snowflake’s intricate details and that stunning frosted effect by wearing gloves during dishwashing and heavy cleaning tasks.
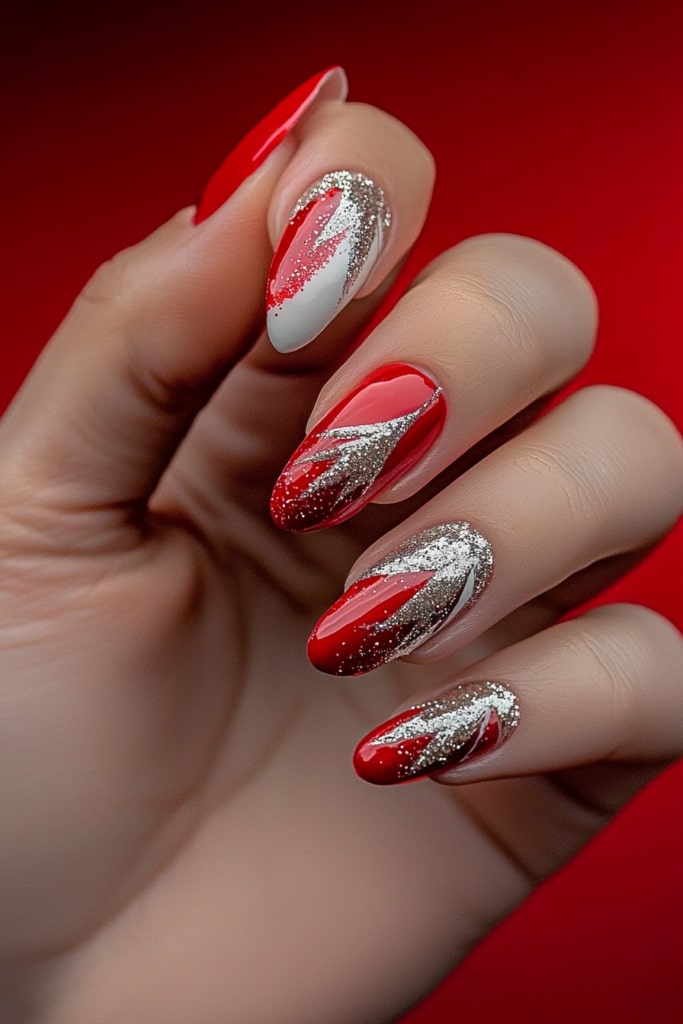
Pink Christmas Glitter Ombre
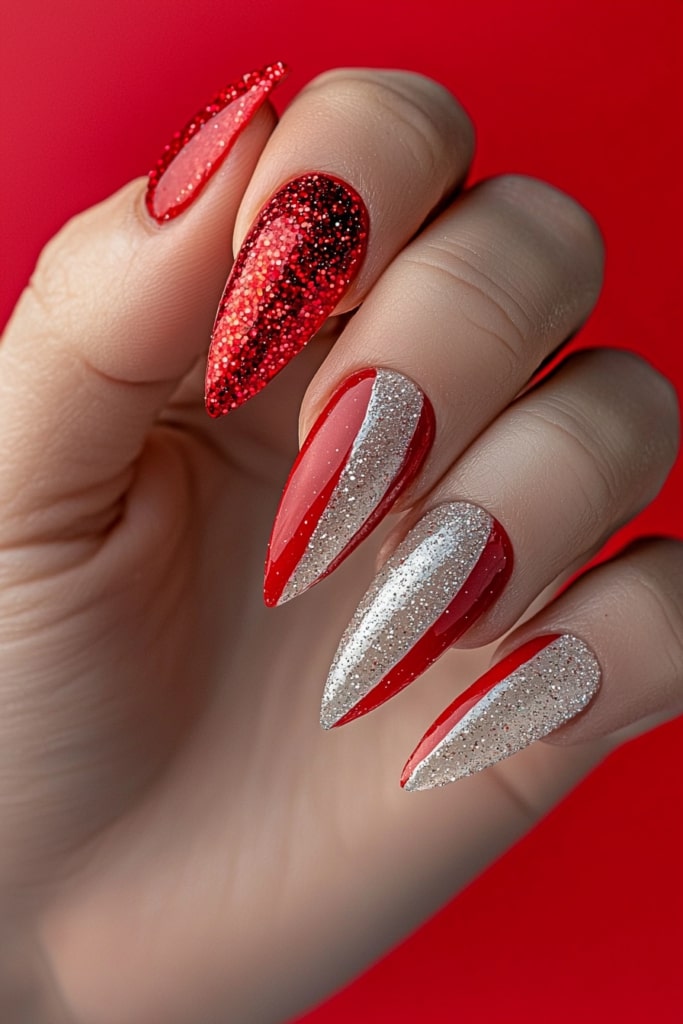
Nothing captures Christmas magic better than a sparkling pink glitter ombre design. A recent masterclass with Belle Hathaway helped me perfect this stunning technique that blends ombre elegance with holiday glitter’s festive charm.
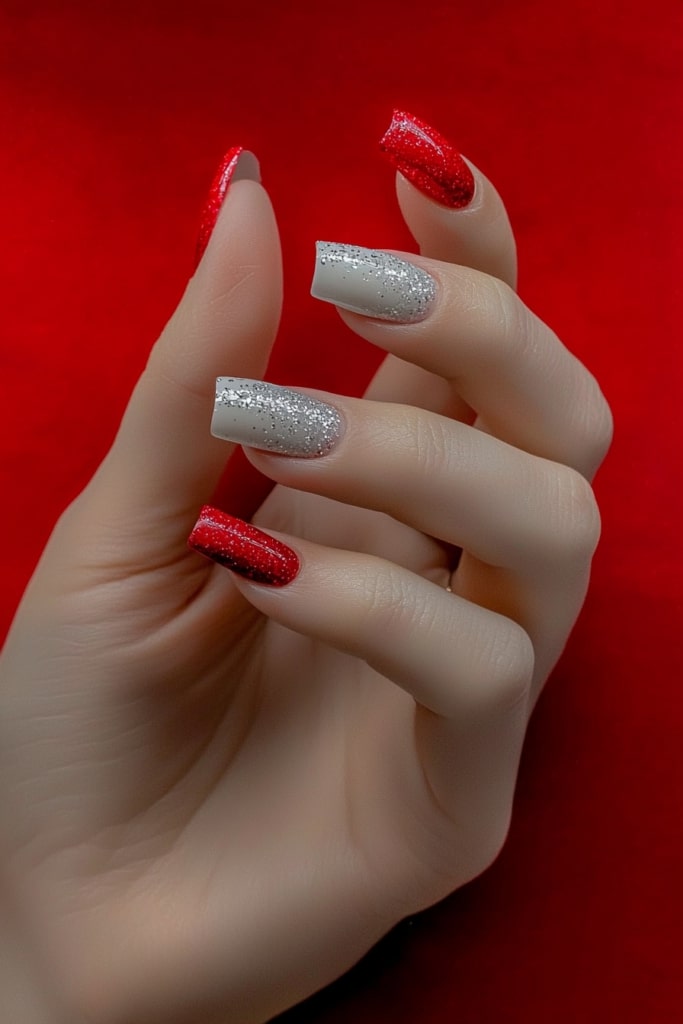
Pink Christmas Glitter Ombre Design
A natural pink base transitions smoothly into a stunning glitter finish in this eye-catching design. The Aurora chrome effect adds a mystical winter-wonderland shimmer that transforms the entire look. This design’s beauty shines through as it reflects light differently with each movement, which makes it an ideal choice for holiday celebrations and parties.
Pink Christmas Glitter Ombre Application
These items create the perfect application:
- Natural Pink Polygel
- Protein Bond
- Primer and Dehydrator
- Christmas glitter gels
- Aurora chrome powder
The application begins with protein bond, which creates a base for the natural pink polygel. A beautiful ombre effect emerges when you blend the glitter concentration gradually from sparse to dense at the tips. Custom glitters add unique effects and save money.
Pink Christmas Glitter Ombre Maintenance
Your glitter ombre needs a fresh top coat every 4-5 days to stay vibrant during the holidays. This stunning design lasts 2-3 weeks and the chrome effect stays brilliant if you avoid harsh chemicals. Daily cuticle moisturizing and wearing protective gloves during household chores will give you the best results.
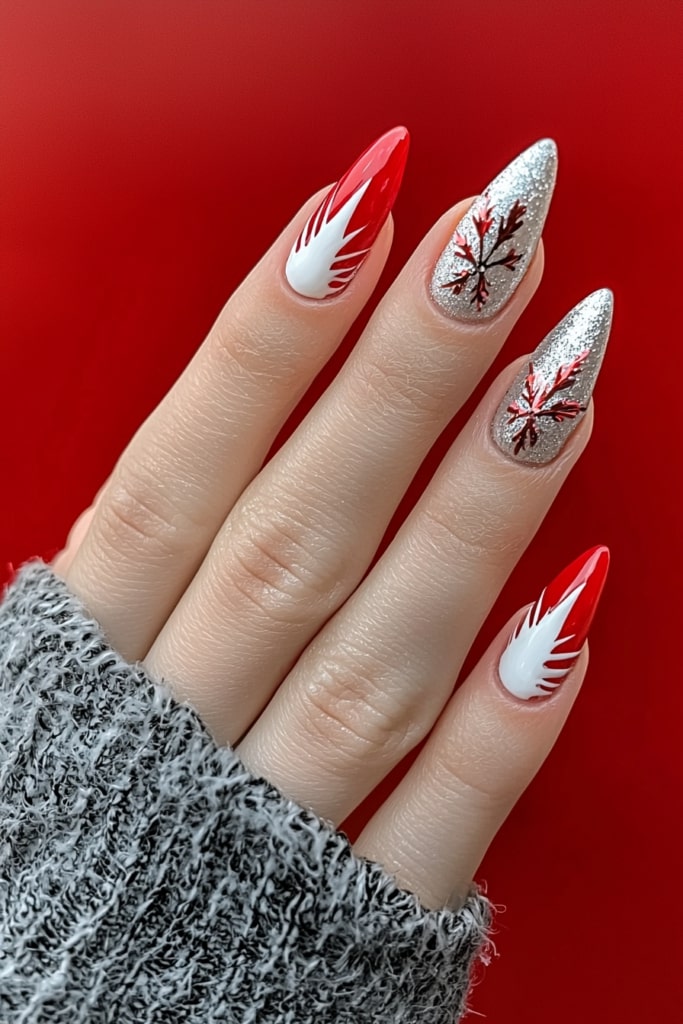
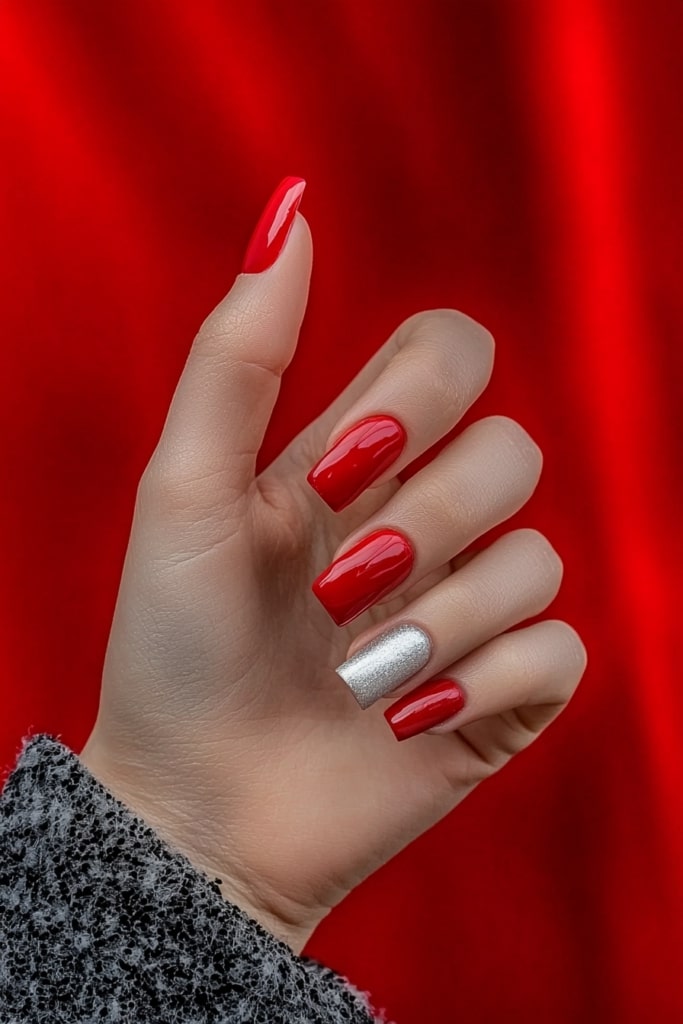
White Snowflake Accent Nails
Belle Hathaway’s masterclass gave me a brilliant insight about accent nails that completely changed my viewpoint. The White Snowflake Accent Nails design has turned into my clients’ most requested holiday look because it combines simplicity with stunning winter elegance.
White Snowflake Accent Nails Design
This design captivates with its versatility and elegance. A statement snowflake stands out beautifully on selected nails while others remain understated. The design combines these essential elements:
- Pure white snowflakes that create intricate patterns
- A choice between rose gold or pink as the base color
- Delicate shimmer details that catch the light
- Strategic negative space that adds modern flair
White Snowflake Accent Nails Application
This festive nail design looks complex but anyone can create it easily. Let me share my simple steps with you:
- Start with a protein bond and base coat
- Add your favorite base color (pink or neutral shades work best)
- Grab a toothpick or fine brush to create the snowflake design
- Draw intersecting lines that form the snowflake’s basic shape
- Build delicate details with white polish
- Lock your design with a quality top coat
White Snowflake Accent Nails Maintenance
My clients love these accent nails that can stay beautiful for up to 4 weeks when maintained properly. A fresh top coat application every 5-7 days will protect the detailed snowflake work effectively. Daily cuticle oil application and wearing gloves during household chores will keep your intricate design pristine.
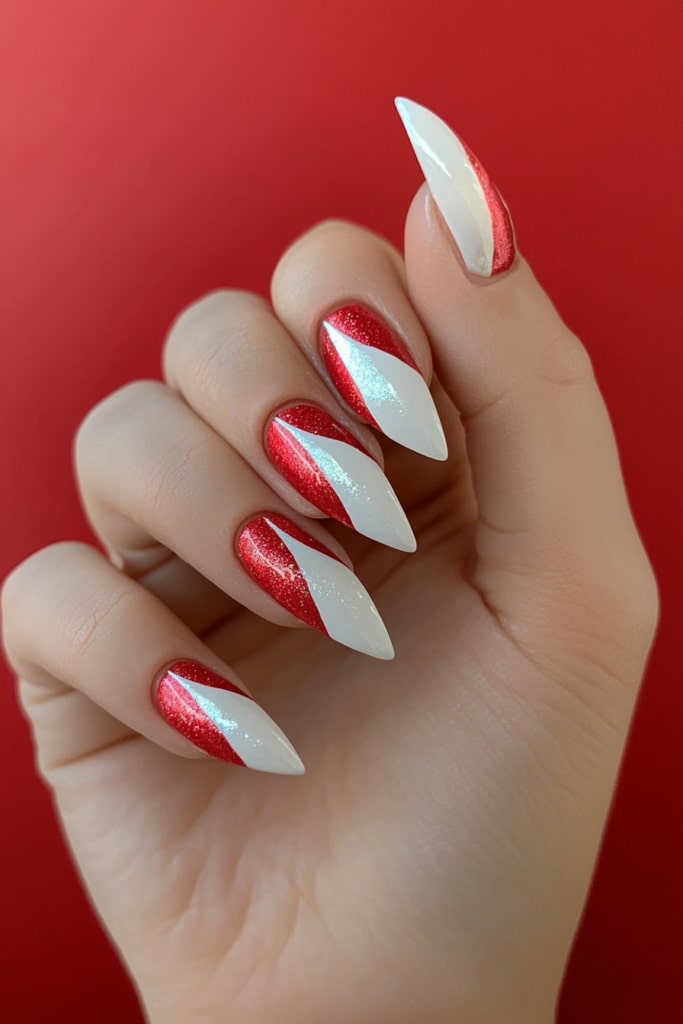
Pink Peppermint Swirl Nails
I found while creating holiday looks at my salon that the Pink Peppermint Swirl design has become increasingly popular among my clients recently. This playful twist on the classic candy cane pattern brings a fresh viewpoint to festive nail art.
Pink Peppermint Swirl Nails Design
Belle Hathaway showed me this soft pink shade that transformed my traditional red design completely. The nail art showcases swirling patterns that radiate from the center and create a mesmerizing peppermint candy effect. This design stands out because the pink and white blend creates an elegant, softer version of the classic holiday pattern.
Pink Peppermint Swirl Nails Application
Your perfect peppermint swirl design requires these essential items:
- White gel polish
- Pink gel polish
- Fine detail brush
- Top coat with glitter
A small dot serves as your center point. The secret behind beautiful swirls lies in gentle, curved strokes that flow from the center outward. The outer edges should appear slightly thicker than the center, which creates that classic peppermint candy appearance. The original lines need a 60-second curing time before you add those final artistic touches.
Pink Peppermint Swirl Nails Maintenance
Your peppermint swirl design stays fresh with a fresh top coat application every 3-4 days. This beautiful pattern can last 2-3 weeks when cared for properly. Daily application of oil keeps your cuticles healthy and maintains that perfect holiday look. The intricate swirl patterns need protection, so wear gloves during dishwashing.
White Winter Wonderland Nails
My studio experiments with numerous winter designs led to an elegant White Winter Wonderland nail art. Belle Hathaway praised this creation when we worked together. The design reflects the peaceful beauty of fresh snow and adds a contemporary flair.
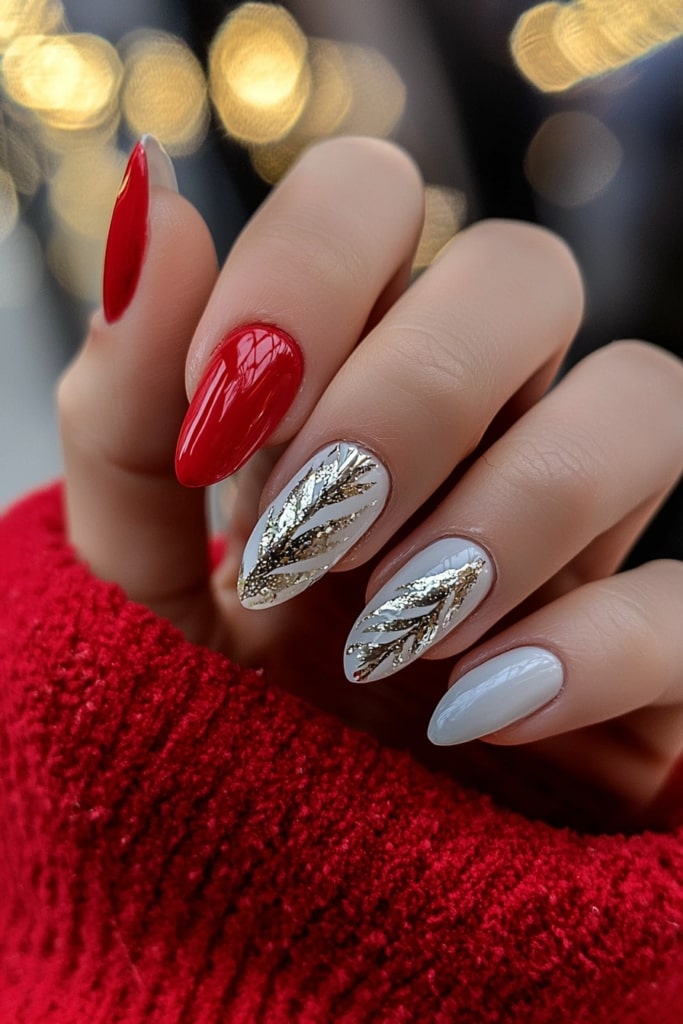
White Winter Wonderland Nails Design
This design’s beauty radiates from its holographic base that creates a dazzling sparkle. Delicate white snowflake patterns blend with a scattered holographic topper to capture a perfect winter morning frost. The design’s magic shines through its ability to change under different lighting conditions and creates an enchanting display that mirrors sunlight dancing on ice crystals.
White Winter Wonderland Nails Application
Create a magical winter wonderland on your nails with these simple steps:
- Start with a white polish containing gold shimmer as your base
- Add a scattered holographic topper that sparkles like fresh snow
- Press delicate light blue snowflakes using stamping technique
- Place darker blue snowflake accents strategically
- Design one feature nail with intricate white snowflakes
- Lock your winter masterpiece with a quick-dry top coat
White Winter Wonderland Nails Maintenance
Your winter wonderland nails need proper care to stay pristine:
- A fresh top coat application every 3-4 days keeps the design sparkling
- Daily cuticle oil maintains that snow-kissed glow
- The design stays perfect when protected from hot water
- A gentle buff refreshes the holographic effect beautifully
Belle’s winter collection showcase taught me a valuable tip – a matte top coat creates an authentic frosted look.
Pink and White Christmas French Tips
Belle Hathaway and I worked together to lift the traditional French manicure into a holiday-season masterpiece. The design blends classic elegance with festive charm and has become our clients’ most requested look.
Pink and White Christmas French Tips Design
This reimagined French tip design features a soft pink base paired with pristine white tips. A delicate glitter underline adds a subtle sparkle that captures the essence of fresh snow. My friend Belle showed me how to enhance accent nails with tiny Santa caps, which turned this classic style into a festive holiday masterpiece.
Pink and White Christmas French Tips Application
This elegant look requires:
- Ultra White Gel polish
- Pink base coat
- Fine liner brush
- Glitter topcoat
- Holiday nail charms
A protein-bonded base creates the perfect foundation. Apply a light pink coat next. A thin brush helps create crisp white lines for the French tip. The perfect curve emerges when you hold the brush at a 45-degree angle.
Pink and White Christmas French Tips Maintenance
These sophisticated French tips need a fresh top coat application every 2-3 days. Your nail design will last up to three weeks when you care for them properly. Regular moisturizing with cuticle oil and protection during household chores keeps the nails in perfect condition. My clients’ French tips stay pristine throughout the holiday season with this simple maintenance routine.
Pink Glitter Snowfall Nails
A recent masterclass helped me find an amazing technique that creates mesmerizing glitter snowfall effects. Belle Hathaway calls this “winter magic in motion.” The design blends pink elegance with winter frost sparkle and has become my signature holiday look.
Pink Glitter Snowfall Nails Design
This design features a dreamy mix of winter-themed shapes with delicate snowflakes and sparkles in holographic and iridescent finishes. A gradient effect makes the glitter look like snow falling softly against a pink backdrop, creating a magical snow globe effect.
Pink Glitter Snow Nails
These steps create a beautiful snowfall effect on your nails:
- Start with apricot cuticle oil to moisturize
- Put down your favorite base coat
- Paint two coats to build the pink base
- Create a glitter gradient that gets denser at the tips
- Use a dry brush technique to add delicate snowfall details
- Lock everything in with a gel setter top coat
Pink Glitter Snowfall Nails Maintenance
Your snowfall design will keep its sparkle throughout the season with these tips:
- A fresh top coat works best every 3-4 days
- Clean with gentle soap
- Stay away from harsh chemicals that could dull the glitter
- Wear gloves during household tasks
This design has managed to keep its beauty for 2-3 weeks with proper care. It’s perfect for holiday celebrations. The holographic elements create a stunning display as they catch the light, just like real snowfall.
White Frosty Tip Nails
At Belle Hathaway’s winter nail art workshop, I found that there was a new technique to create perfect White Frosty Tip Nails. The elegant design blends a classic French tip with a modern, crystalline finish that captures the essence of winter celebrations.
White Frosty Tip Nails Design
This stunning nail design combines a crystal-clear base that elegantly flows into frosted white tips. Light dances off the iridescent shimmer effect and creates a delicate appearance of freshly fallen snow on your fingertips. The design’s unique beauty comes from its seamless gradient that blends the natural nail perfectly with the frosty white tip.
Creating Beautiful White Frosty Tip Nails
These simple steps will give you perfect frosty tips:
- Start with a thin gel layer on the nail’s bottom third
- Take a sharp brush with minimal acetone
- Make one smooth wrist rotation to create clean lines
- Perfect the smile line and clean the cuticle area
- Let it set under UV light
- Add a second coat to complete the coverage
White Frosty Tip Nails Maintenance
Your frosty tips need regular care to maintain their pristine appearance:
- A fresh top coat works best when applied every 3-4 days
- Daily cuticle oil keeps the nails healthy
- Your tips need protection during household chores
- White pencil underneath adds extra brightness
Quality UV/LED light and primer create lasting results. This stunning crystalline design stays beautiful up to three weeks when maintained properly.
Pink Holly Berry Nails
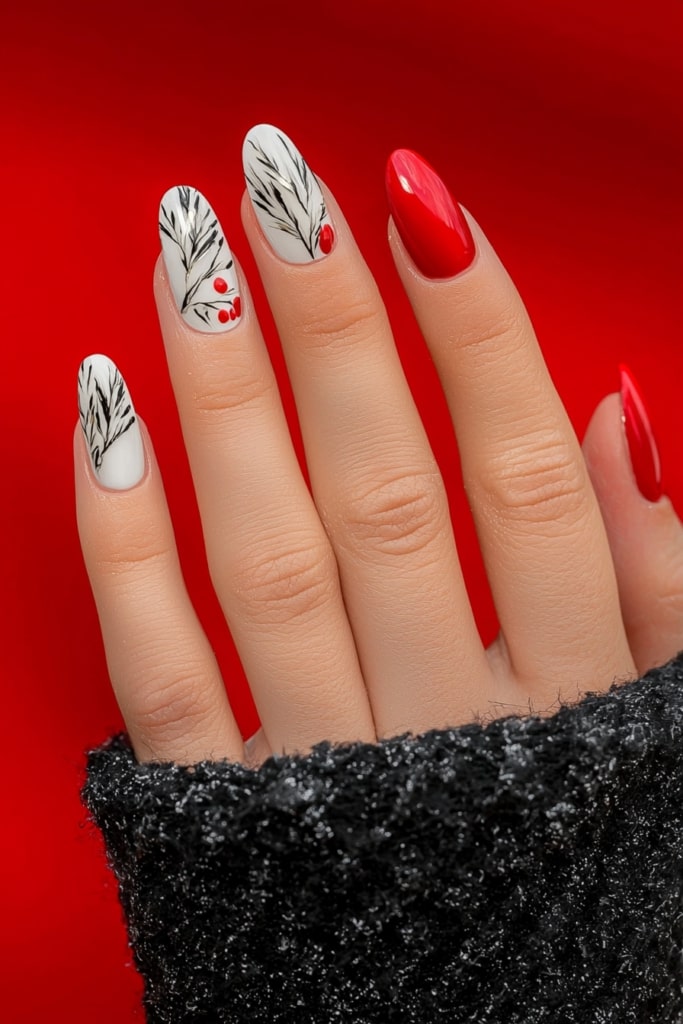
I worked with Belle Hathaway recently to create a fresh take on classic holly berry nail art, drawing inspiration from traditional holiday designs. Our winter collection’s showcase proved that soft pink tones blend perfectly with traditional holly elements to create a modern, sophisticated look.
Pink Holly Berry Nails Design
A classic holly pattern gets a modern twist with a sheer pink backdrop that creates an elegant foundation. This charming design showcases delicate holly leaves painted in various green hues. Deep rose berries add a shimmering accent throughout the pattern. Soft white details create a snowy effect that enhances the festive look. A pearl finish top coat completes the design with an extra touch of glamor.
Pink Holly Berry Nails Application
My studio experiments have led to this perfect application technique:
- Start with a sheer white shimmer base coat
- Paint holly leaves with multiple green shades
- Design berries using rose-tinted polish
- Add dimension with a light pearl powder coating
- Complete the look with a no-wipe top coat
Pink Holly Berry Nails Maintenance
Your holly berry design stays fresh with daily application of hydrating cuticle balm. The pearl finish retains its beautiful luster up to three weeks with proper care. Belle shared her expert tip that a fresh top coat application every 4-5 days preserves the delicate holly leaves and berries perfectly. Household chores can damage your nail art, so wearing gloves provides essential protection.
Pink and White Reindeer Nails
Belle Hathaway and I created a pink and white reindeer nail design that brings out the playful spirit of holiday art. We found that pink bases paired with reindeer motifs make the winter collection truly enchanting.
Pink and White Reindeer Nails Design
This design features a light pink base that creates a perfect canvas. The accent nails showcase delicate reindeer faces with soft pink noses. White antler accents add a magical touch to the overall look. The design comes together beautifully with French tips that shimmer with holiday spirit.
Pink and White Reindeer Nails Application
Creating adorable reindeer designs begins with a protein bond base and two coats of light pink gel. The secret to cute reindeer faces comes from selecting the right brush size – a fine detail brush works best for the eyes and nose. My friend Belle showed me how adding stardust glitter around the reindeer’s features creates that enchanting holiday sparkle.
Pink and White Reindeer Nails Maintenance
Your reindeer nail design needs a fresh top coat every 4-5 days. The charming artwork stays intact for 2-3 weeks when maintained properly. Daily application of cuticle oil enhances the design’s clarity and keeps those cute reindeer faces looking sharp. The design remains beautiful longer when you shield your nails during household tasks.
Pink Christmas Tree Accent Nails
Belle Hathaway joined us for a holiday photoshoot where we created a magical Christmas tree accent nail design. The festive look perfectly embodies the holiday spirit. Our clients love this stunning combination of elegant pink tones and delicately hand-painted Christmas trees, making it one of our most photographed designs to date.
Pink Christmas Tree Accent Nails Design
This design features a soft pink base that creates a perfect canvas for festive trees. Carefully placed Swarovski crystals add a magical twinkling effect that resembles Christmas tree lights. The design’s charm comes from several beautiful elements:
- Hand-painted miniature trees
- Sparkling crystal accents
- Glitter gradient effects
- Delicate white snowfall details
Pink Christmas Tree Accent Nails Application
Create perfect Christmas tree accent nails by following these steps:
- Apply protein bond and pink base coat
- Draw tree outline with dark green gel
- Fill tree shape with lighter green shades
- Place crystal accents carefully
- Add fine glitter to create snow effect
- Lock design with no-wipe top coat
Pink Christmas Tree Accent Nails Maintenance
Your festive nail design stays fresh with a new top coat application every 4-5 days. The crystal accents need extra care – they shouldn’t catch on fabric and require gentle cuticle oil application around them. This beautiful design can last 2-3 weeks if you managed to keep up with proper care, which makes it an ideal choice that covers all your holiday celebrations.
White and Pink Snow Dust Nails
My studio experiments with holiday designs led to a breakthrough technique that uses shimmering snow dust. Belle Hathaway later showcased this method in her winter collection. The design creates a mesmerizing diamond-like sparkle and works beautifully for festive occasions.
White and Pink Snow Dust Nails Design
This Snow Effect technique creates a stunning shimmer that serves as an elegant alternative to traditional jewelry. A delicate pink base blends with crystalline white dust to catch light beautifully. The magical winter effect looks sophisticated and festive.
White and Pink Snow Dust Nails Application
These precise steps will help you create flawless snow dust nails:
- Apply classic gel polish base
- Add pink or white color coat
- Apply top coat (I recommend Dry Top)
- Sprinkle Snow Effect dust while the top coat remains wet
- Cure under UV/LED lamp
- Use a soft brush to remove excess dust
- Complete with a final top coat to seal the design
White and Pink Snow Dust Nails Maintenance
Here are my recommended care tips to keep your snow dust nails sparkling:
- Apply fresh top coat every 4-5 days
- Avoid excessive exposure to water
- Use gentle cleaning techniques
- Protect free edges with extra top coat
Belle showed me that proper curing time and careful application of the effect dust create long-lasting results. This design managed to keep its brilliance for up to three weeks with proper care.
Blush Pink Christmas Lights Nails
Belle Hathaway and I collaborated on a special holiday collection that led me to create this enchanting Blush Pink Christmas Lights design. Our late-night brainstorming session helped us find that soft pink combined with luminous effects creates a magical holiday ambiance.
Blush Pink Christmas Lights Nails Design
This design showcases a pale pink holiday base that sets an elegant foundation. Delicate string-light patterns dance across the blush background and create a festive look suitable for any occasion. The design’s magic lies in its subtle sparkle – each movement makes the lights appear to twinkle naturally.
Blush Pink Christmas Lights Nails Application
These steps will help you create perfect Christmas lights on your nails:
- Start with a protein bond and pale pink base
- Draw thin green lines that represent light strings
- Place white dots as bulb bases
- Layer colored glow-in-the-dark polish over each bulb
- Lock your design with a quality top coat
- Your nails will sparkle more with silver accent details
Blush Pink Christmas Lights Nails Maintenance
These holiday-themed nails need proper care to sparkle throughout the season. A fresh top coat application every 3-4 days keeps the design vibrant. The design’s beauty lasts longer with minimal water contact. Gentle cleaning helps preserve the festive look. Wearing gloves during household tasks protects your nail art’s sparkle.
My experience shows this cheerful design stays beautiful up to three weeks with proper care. The lasting charm makes it ideal for all your holiday gatherings and celebrations.
White Glitter Pink Gradient Nails
Belle Hathaway and I found at a recent holiday nail art workshop that a soft pink gradient mixed with white glitter creates an ethereal effect perfect for winter celebrations. The design’s elegant simplicity and stunning effect has made it one of our most requested looks.
White Glitter Pink Gradient Nails Design
This design combines a white glitter ombre technique that flows naturally into a pink nude base. The beauty emerges from the uninterrupted blend between colors, which creates an elegant yet festive look. White opal flat-back crystals add a magical touch as they sparkle and catch light from every angle.
White Glitter Pink Gradient Nails Application
These steps create the perfect gradient effect:
- Start with protein bond and base coat
- Build a pink nude foundation
- Place polish stripes on a makeup sponge
- Create the gradient effect with gentle dabbing
- Enhance tips with white glitter
- Place opal crystals carefully
- Complete the look with super gloss gel top coat
White Glitter Pink Gradient Nails Maintenance
Your sparkle and gradient effect will stay fresh with a new top coat application every 3-4 days. The crystal embellishments need extra care, so keep them away from fabric and apply cuticle oil with caution around them. Belle’s expert tip suggests that thin polish coats help the design stay beautiful longer. This stunning nail design typically retains its brilliance for three weeks.
Cozy Sweater Pink Nails

I found this unique design through texture technique experiments in my studio. Belle Hathaway fell in love with these nails during our winter collection planning. The design captures a cozy winter sweater’s essence in an elegant way.
Cozy Sweater Pink Nails Design
This charming design captures the essence of a textured sweater pattern through specialized stamping plates and flocking powder. A soft pink base perfectly complements white cable-knit patterns, striking an elegant balance between comfort and sophistication. Your nails transform into tiny sweaters with raised elements that feel authentic to touch.
Cozy Sweater Pink Nails Application
These items create the perfect cozy sweater effect:
- MoYou London Fashionista plate
- Flocking powder in white
- Base colors: gray, rose, and white
- Crystal-clear stamper
- Matte top coat
A ridge-filling base coat provides the foundation before applying the chosen color combination. The flocking powder needs application right after stamping when the polish remains tacky. This technique creates an authentic sweater texture that clients love.
Cozy Sweater Pink Nails Maintenance
Your sweater nails need a matte top coat application every 3-4 days to maintain their fresh look. This textured design stays beautiful for two weeks when you care for it properly. My friend Belle showed me that a soft brush gently cleans and preserves the raised pattern’s definition. These gorgeous nails will last longer if you avoid long water exposure.
Pink and White Polar Bear Nails
Last week at my studio, a delightful idea struck me as I worked on holiday nail designs. The polar bear pattern turned out to be a perfect festive touch, and Belle Hathaway particularly admired how it balanced cute charm with elegant style.
Pink and White Polar Bear Nails Design
This design features a cool-toned gradient background that creates a perfect canvas for a charming polar bear. The bear’s face peeks into the frame, showing just the upper half and creates a delightful photobomb effect. My clients love this playful design.
Pink and White Polar Bear Nails Application
This adorable design needs careful attention to detail:
- Start with two even coats of neutral gray or taupe polish
- Paint a white half-circle shape that will become the bear’s face
- Draw two smaller white half-circles above the face to create ears
- Mix dark gray and white polish to add depth to the ears
- Define the bear’s features by shading around the eyes and snout area
- Use your dotting tool to add tiny eyes and a cute nose
- Complete the look with sweet pink cheeks
Pink and White Polar Bear Nails Maintenance
Your polar bear nail design stays beautiful with these simple care steps:
- A fresh top coat application every 3-4 days
- Gentle cleaning around detailed areas
- Clear strengthener protection
- White touch-ups when needed
Adding delicate snowflake details around the bear creates a perfect winter wonderland effect that Belle especially loves during holiday photoshoots.
White Snowflake Pink Tips
Belle Hathaway and I connected at a nail art class where we discussed ways to blend traditional French tips with winter elements. Our collaboration led to a design that captures both elegance and festive charm.
White Snowflake Pink Tips Design
I’ve created this design with a sheer pink base that flows into crisp white tips and features elegant snowflake patterns. The design balances empty spaces with intricate artwork. This combination creates a refined yet fun look that fits holiday celebrations perfectly.
White Snowflake Pink Tips Application
These steps create beautiful snowflake tips with perfect results:
- Start with a protective base coat on natural nails
- Cover the middle nail in white polish and paint others in pale pink
- Brush white glitter polish across accent nails
- Design delicate snowflake patterns with a striping brush
- Add dots strategically to create depth and dimension
- Lock everything in place with a no-wipe top coat
White Snowflake Pink Tips Maintenance
I have found these tips keep their beauty longer with proper care. The crystal-clear finish remains pristine up to three weeks if you apply a fresh top coat every 5-7 days. Belle’s technique of using a gentle nail brush helps preserve the snowflake detail’s intricate design. These beautiful nails last longer when you wear protective gloves during household tasks and apply cuticle oil daily.
Candy Pink Winter Nails
Belle Hathaway and I spent last winter’s evening creating candy-inspired designs that captured the season’s sweetness. Our creative session produced this enchanting Candy Pink Winter design that blends a candy shop’s charm with winter frost’s elegance.
Candy Pink Winter Nails Design
This design features a dreamy pink base that looks just like cotton candy clouds. A subtle shimmer effect makes these nails sparkle like crystallized sugar. My friend Belle showed me how to add delicate white accents that transform into magical snowflakes on the sugary surface.
Sweet Pink Winter Nail Design
This charming winter design requires these essential items:
- Ultra-fine white detail paint
- Pink Cloud base coat
- Pearl white mica powder
- Protein bond
- No-wipe top coat
The magic begins with a Pink Cloud base coat. Add elegant swirls with white detail paint. The secret lies in the pearl mica powder application – dust it over the tacky top coat. This technique creates a stunning crystallized sugar effect that makes your nails sparkle like winter frost.
Candy Pink Winter Nails Maintenance
Your candy pink winter nails need a fresh top coat every 3-4 days to maintain their beauty. The sugar-frost effect remains pristine with proper care and protection from hot water. Wearing gloves during household tasks helps preserve the design. Belle’s advice about daily cuticle oil application keeps the sparkle intact and ensures healthy nails throughout the winter season.
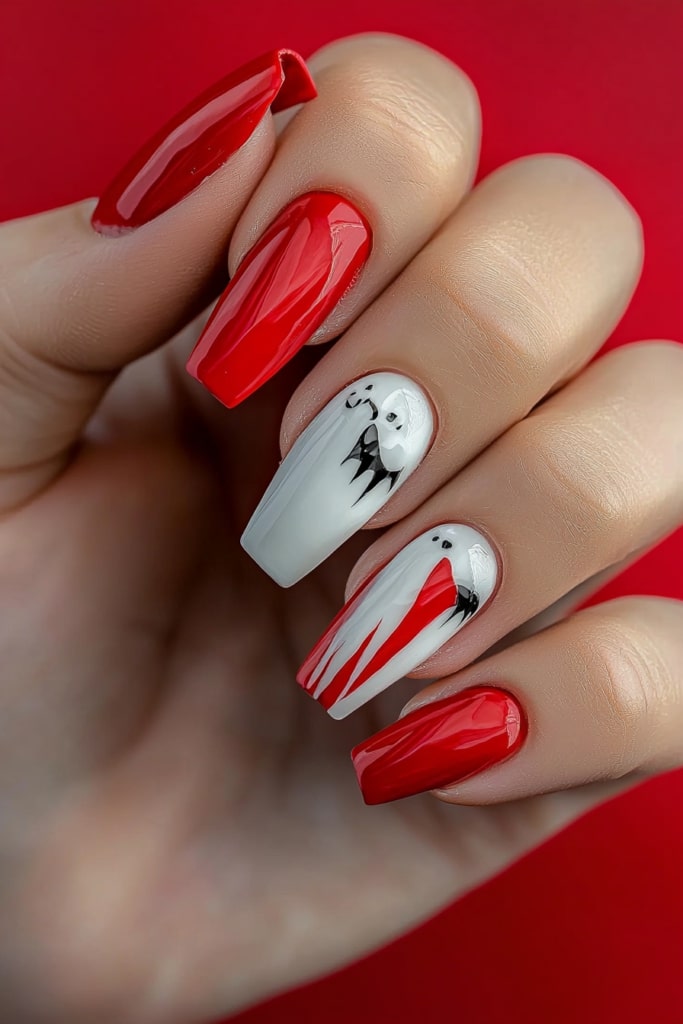
White Christmas Star Nails
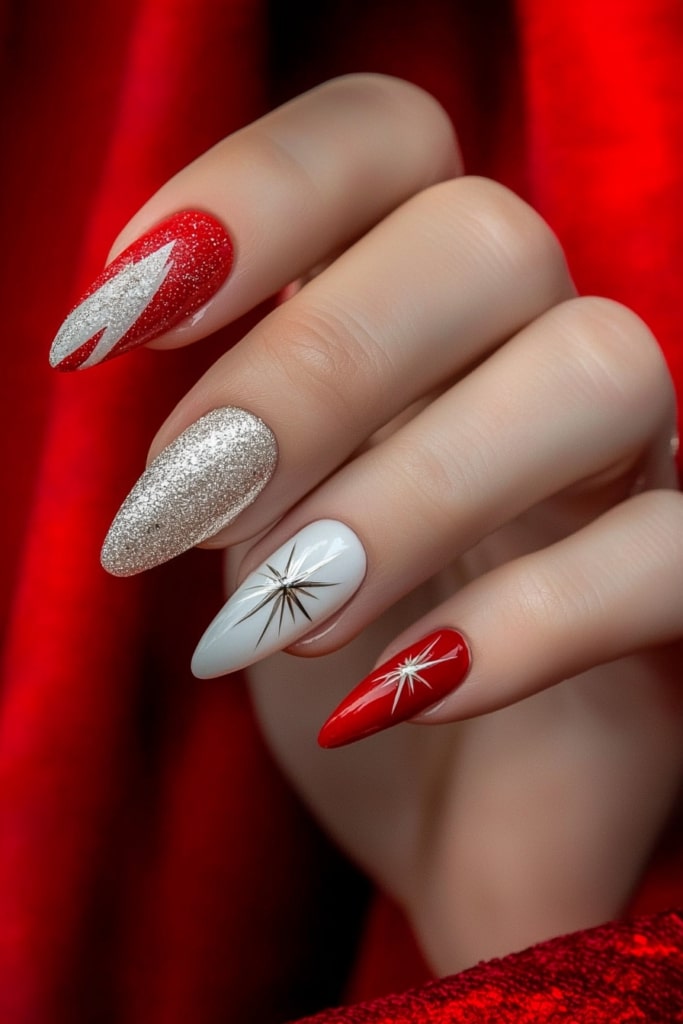
My latest holiday nail art session led to a magical discovery. I found that there was a way to bring starlight to fingertips. The design became an instant hit at Belle Hathaway’s winter workshop and earned countless compliments for capturing the essence of a starlit Christmas night.
White Christmas Star Nails Design
This design features a shimmering white base that sets a perfect canvas for delicate star patterns. The look stands out with its mix of different-sized stars. Belle finds the celestial effect reminds her of snowflakes dancing under streetlights.
White Christmas Star Nails Application
This starlit design creates a magical winter look with simple steps and careful attention to detail.
- Start with a protein bond layer and apply a clean white base coat
- Use your striper brush to paint the main star pattern carefully
- Your dotting tool helps create delicate smaller stars around the design
- Enhance the sparkle by gently dusting diamond powder over the design
- Complete the look with a no-wipe top coat to seal and protect
White Christmas Star Nails Maintenance
These celestial designs maintain their beauty with proper care and attention. A fresh top coat application every 4-5 days keeps the sparkle alive. Belle showed me a helpful technique that uses a gentle brush to clean around the star patterns and preserves their crisp edges. Your starlit masterpiece needs protection with gloves during household tasks. Daily cuticle oil applications will keep your festive nail art twinkling beautifully throughout the holiday season.
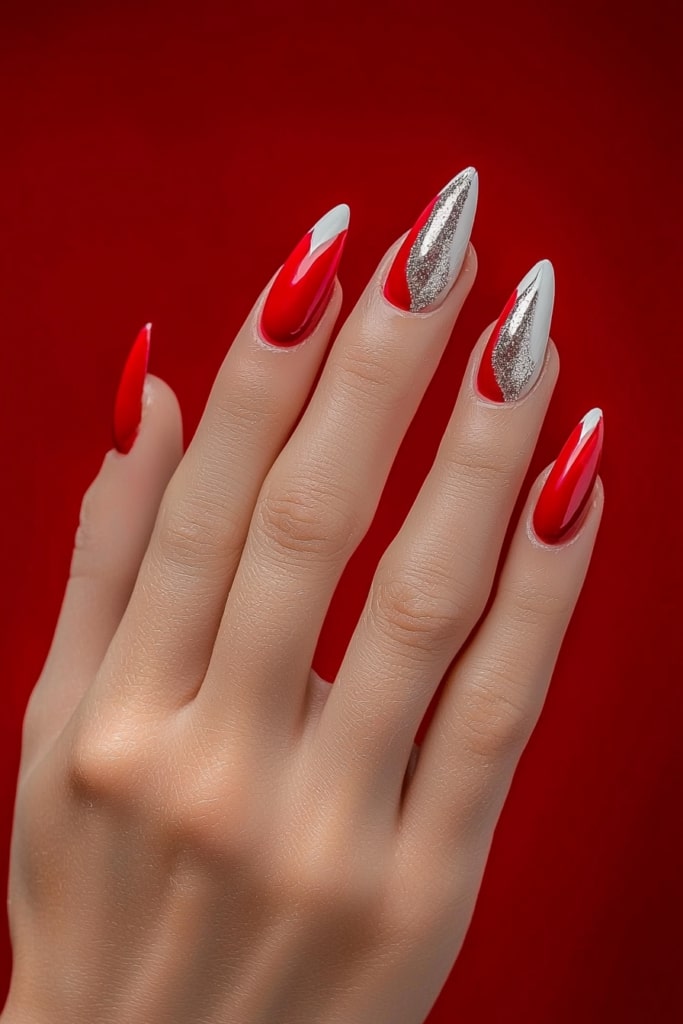
White Icy Stiletto Nails

Belle Hathaway taught me a stunning technique to create dramatic stiletto nails that mirror winter ice during a nail art showcase. This design is now my signature style when clients want to stand out in the holiday season.
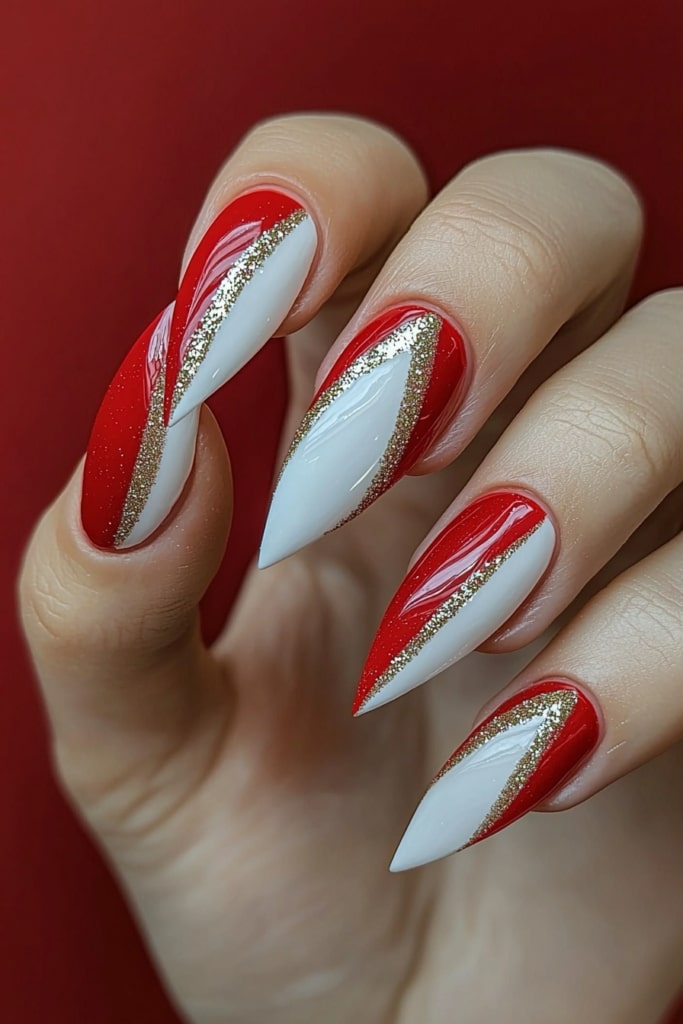
White Icy Stiletto Nails Design
I created this stunning look with a crystal-clear base that turns into a brilliant white masterpiece. Sharp, elongated tips catch the winter light like delicate icicles. This design stands out with its unique blend of pearl white mica powder and holographic elements that sparkle with an enchanting ice-crystal effect.
White Icy Stiletto Nails Application
These stunning tips demand careful attention to detail and a steady hand:
- Start with protein bond and dehydrator application
- The stiletto forms need precise fitting
- A clear acrylic builds the perfect apex
- Shape the free edge into a sharp point
- Layer the surface with white gel polish
- Add shimmer with pearl mica powder
- Complete the look with a no-wipe top coat
White Icy Stiletto Nails Maintenance
These dramatic tips need special care and attention. My clients learn about proper nail care through daily cuticle oil treatments. They should wear protective gloves when doing housework. A maintenance visit every 2-3 weeks helps prevent lifting and keeps that perfect ice-queen look. Remember to handle them with care – these stunning stilettos are meant to dazzle, not work as tools!
Pink Snowman Accent Nails

My recent holiday nail art exhibition revealed a playful twist on traditional snowman designs that captured everyone’s attention. Belle Hathaway and I found that there was something special during our late-night brainstorming session. We transformed classic snowmen with a pink makeover that created an unexpectedly charming effect.
Pink Snowman Accent Nails Design
A soft pink base creates a dreamy backdrop for adorable snowmen in this perfected design. Traditional white snowman features blend seamlessly with modern elements like crystal accents and pearlescent finishes. The design’s uniqueness comes from Belle’s suggestion to add tiny rose-gold scarves, which brings an extra touch of sophistication to these charming snowmen.
Pink Snowman Accent Nails Application
These adorable snowmen nail designs need careful attention and specific tools.
- Start with a protein bond and pink base coat
- Shape small white circles to form the snowman’s body
- Use a detail brush to draw the snowman’s face
- Add delicate rose-gold gel scarves around the neck
- Place crystal accents as sparkling buttons
- Lock your design with a no-wipe top coat
Pink Snowman Accent Nails Maintenance
Your snowmen designs will stay fresh with a new top coat application every 3-4 days. The crystal accents require extra care – they shouldn’t catch on fabric and need careful cuticle oil application around them. This festive design has managed to keep its charm for 2-3 weeks with proper care, which makes it an excellent choice for holiday celebrations.
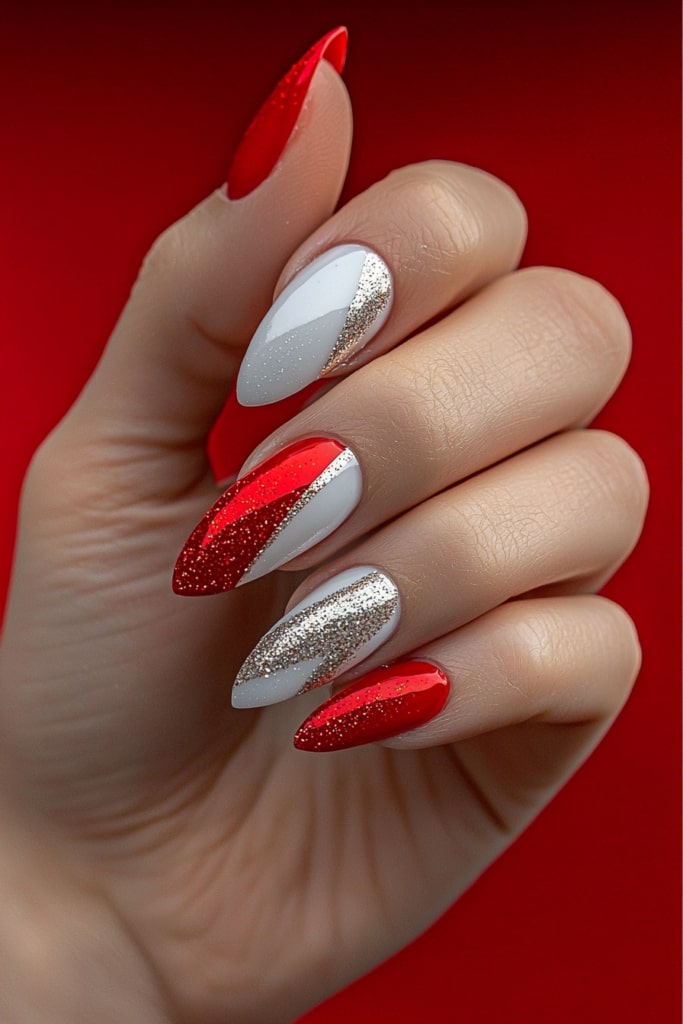
Shimmery White Pink Ombre Nails
I discovered inspiration while browsing my holiday design collection. The natural ombre patterns created by morning frost on winter windows caught my eye. This natural phenomenon sparked a productive collaboration with Belle Hathaway that resulted in our Shimmery White Pink Ombre technique, which has now become a holiday favorite.
Shimmery White Pink Ombre Nails Design
The signature gradient effect features a soft pink base that naturally blends into a crystalline white finish. This design stands out with our innovative use of aurora powder that adds a multi-dimensional shimmer and reflects light beautifully from every angle.
Shimmery White Pink Ombre Nails Application
A stunning ombre nail design needs careful attention to detail. Here’s how to achieve the perfect look:
- Start with a protein bond and pink base coat
- Master the gradient effect by using a makeup sponge technique
- Paint the white polish carefully at the tips
- Enhance the shimmer with aurora powder
- Build beautiful dimension with crystal glass powder
- Lock your masterpiece with a no-wipe top gloss
Shimmery White Pink Ombre Nails Maintenance
My shimmery ombre nails stay brilliant with proper care. Belle’s advice helped me understand that a fresh top coat every 3-4 days keeps the gradient effect perfect. Daily cuticle oil application and hand protection during household chores make a difference. The design stays beautiful for 2-3 weeks with this care routine.
Pink Glitter Christmas Ornaments
One evening in my studio, Belle Hathaway and I found that chunky glitter with precise placement creates beautiful ornament-like effects on nails. This special technique has become my signature holiday design. The result perfectly suits clients who want their nails to sparkle like Christmas tree decorations.
Pink Glitter Christmas Ornaments Design
This ornament-inspired look combines fine and chunky glitters beautifully. A delicate pink base creates the perfect canvas that brings dimensional ornament effects to life. The design’s magic shines through when glitter catches light at various angles and creates an enchanting holiday sparkle.
Pink Glitter Christmas Ornaments Application
These steps will help you create stunning ornaments:
- Start with a clear base coat
- Build a pink foundation layer
- Brush glitter polish onto the tips
- Layer dense glitter to create ornament texture
- Lock everything with a quality top coat
- Dust with final sparkle powder
Pink Glitter Christmas Ornaments Maintenance
Special attention makes glitter polish last longer. My friend Belle’s technique works perfectly – she fills a cap with remover solution and soaks each nail for 30-60 seconds. This method removes stubborn glitter without causing any damage. A thin layer of glitter polish fixes any chips, and glitter’s forgiving nature makes these touch-ups blend seamlessly.
Conclusion
During my time as a nail artist, I’ve worked with the incredible Belle Hathaway to create these 25 stunning pink and white Christmas nail designs. Each design, from the delicate Frosted Pink Snowflakes to the bold White Icy Stiletto Nails, tells its own festive story.
These designs stand out because of their versatility. A perfect design awaits you, whether it’s for a formal holiday gala or a casual family gathering. Belle’s teachings showed me that memorable holiday nails come from balancing festive charm with elegant sophistication.
My clients’ faces light up when they find their perfect match among these pink holiday nail designs. Soft pinks blend with pristine whites to create a magical winter effect that stays both timeless and trendy. Each look brings its unique sparkle to the holiday season, from the playful Pink Snowman Accent Nails to the sophisticated White Winter Wonderland design.
These designs go beyond just looking festive – they express your personal style during the most wonderful time of the year. Belle’s words ring true: “The best nail design is the one that makes you smile every time you look at your hands.” I couldn’t agree more, and these pink and white Christmas nail designs might inspire you to create your own magical holiday moments.