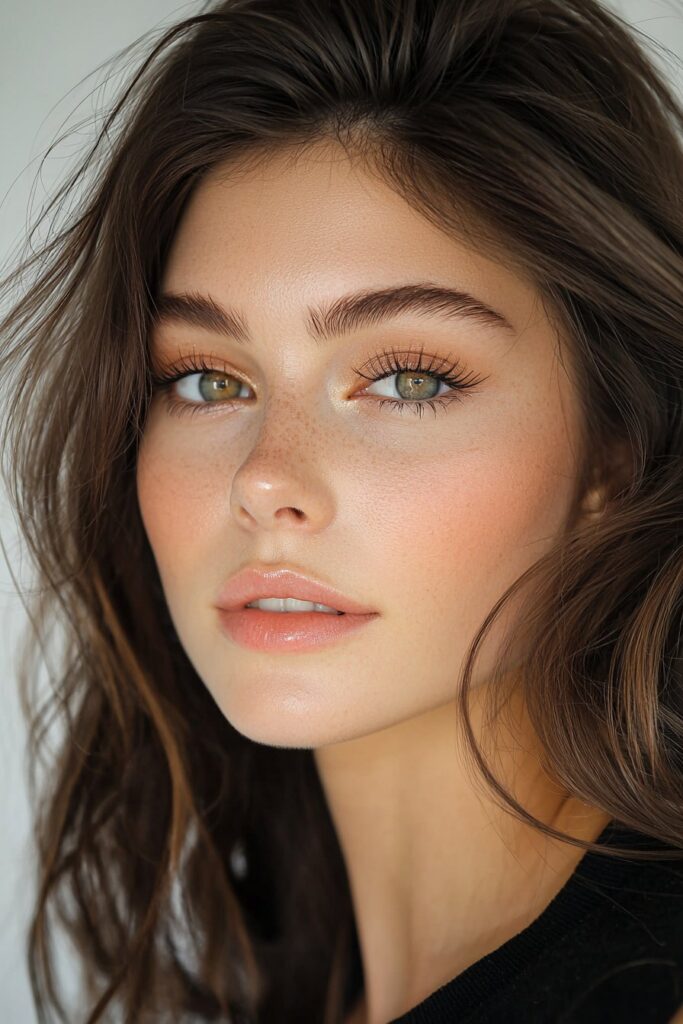
Pretty makeup looks have never been more varied or exciting than today, from monochromatic styles to glossy lips. My experience as a professional makeup artist has exposed me to countless trends. The best part is how beautiful makeup has become more available to everyone.
Creating pretty eye makeup doesn’t need to feel overwhelming despite the many options. The trending ‘Latte Girl’ look features warm neutrals, while sunset eye makeup combines oranges and pinks beautifully. My years of teaching clients have shown that natural pretty makeup can be both simple and stunning. This led me to curate 12 simple makeup ideas that anyone can recreate to improve their natural beauty without professional expertise.
These gorgeous looks stem from my experience with clients at different skill levels. The tutorials will help you create simple pretty makeup that works perfectly for any occasion – from office touch-ups to everyday glamor.
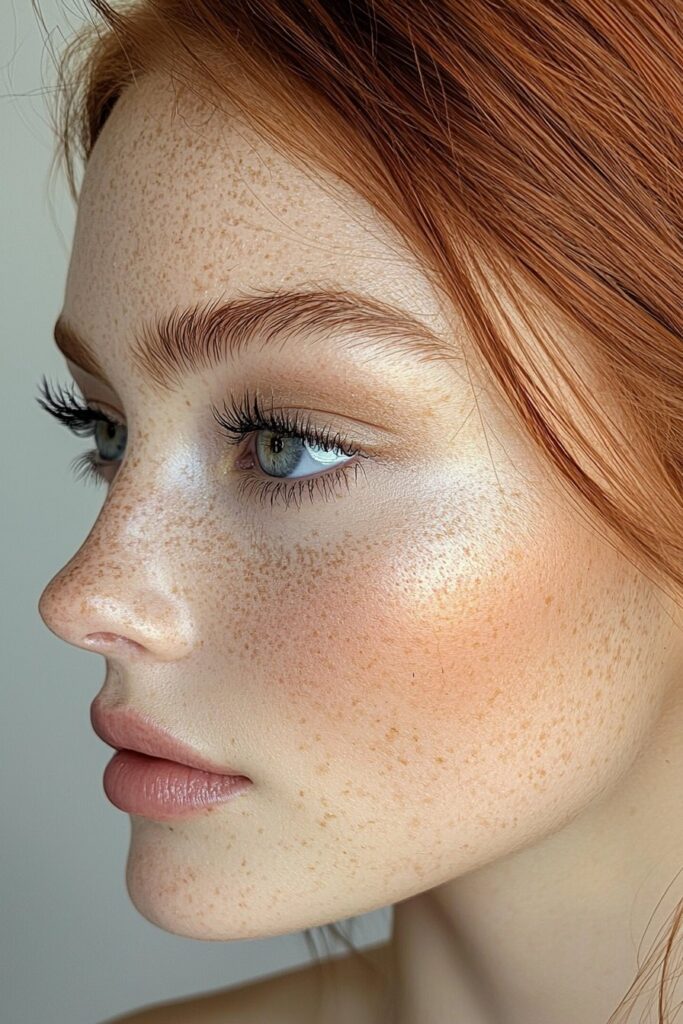
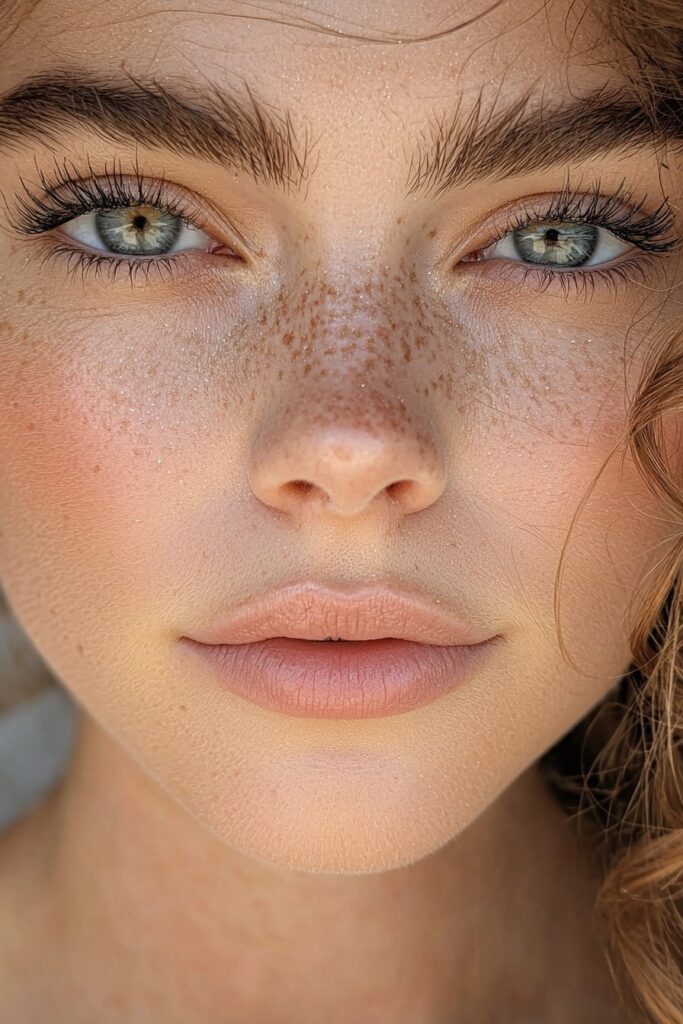
Radiant Skin Base
My years as a makeup artist have taught me that radiant skin starts with good prep work. I’ve found that beautiful makeup looks come from knowing how products work with your skin.
Skin Prep Steps
Start by cleaning your skin really well to get rid of impurities and create a clean canvas. Next, gently exfoliate to remove dead skin cells – this helps create an even texture. You’ll get the best results using a chemical exfoliant or a soft cloth to massage your skin in circular motions.
Once you’ve cleansed, use a softening toner to bring back your skin’s natural glow. I’ve learned that pressing toner-soaked cotton pads on dry areas for about 10 seconds works great to lift away dead skin cells.
Product Layering
The key to a flawless base comes from layering products correctly. Start with light, water-based products before you move to heavier ones. Let each product sink in for 1-2 minutes before adding the next layer.
Here’s my professional layering sequence:
- Hydrating toner or essence
- Lightweight serums
- Eye cream
- Moisturizer
- Primer
- Foundation
Glow-Boosting Techniques
I’ve developed several techniques that give amazing results for that sought-after luminous finish. My recommendation is to massage your face before applying makeup – use your knuckles from the center outward, then sweep upward along your jawline.
One of my favorite tricks is mixing liquid illuminator with foundation. You should also focus highlighter on your face’s high points, especially your cheekbones and nose bridge.
Here are my go-to methods for extra radiance:
- Mix foundation with a drop of liquid highlighter for an all-over glow
- Put on cream products before powders to keep that dewy look
- Lock in the luminosity with hydrating setting sprays
Working with different skin types has shown me that keeping skin hydrated during makeup application affects the final look by a lot. That’s why I always suggest using products with hyaluronic acid and vitamin C to boost your skin’s natural radiance.
Give each product time to settle – this stops pilling and keeps your makeup fresh all day. Your skin will tell you what it needs, since everyone’s skin responds differently to products.
Flushed Cheek Look
Creating that perfect flushed cheek has been one of my signature techniques throughout my career as a makeup artist. My years of experience have taught me that a natural-looking flush comes from knowing your products and mastering application methods.
Cream vs Powder
Your skin type and desired finish should guide your choice between cream and powder blush. Cream blushes give dry skin a dewy, luminous finish that blends naturally into the skin. Powder blushes prove more effective for oily skin types and let you control color intensity better.
My professional kit usually contains both formulations for longer-lasting wear. The best results come from layering – cream blush goes on bare skin or over liquid foundation, followed by a light dusting of powder blush. This approach not only makes the color last longer but adds more dimension to the flush.
Color Selection
Your skin’s undertone plays a crucial role in picking the right blush shade. Mauves, berries, and brick shades work beautifully on warm or olive undertones. Baby pinks, light plum, and peach variations complement cool or pink undertones perfectly.
My foolproof guide for different skin tones:
- Fair skin: Soft pink or light coral creates a natural look
- Medium skin: Rich pinks and deep peaches add dimension
- Olive skin: Coral and bronze tones bring out natural warmth
- Deep skin: Vibrant fuchsia, deep berry, or tangerine makes a statement
Application Methods
A natural-looking flush depends heavily on your application technique. Cream blush application works best from front to back, with more color intensity at the front of the cheeks. My clients love this method because it creates that authentic “just-pinched” effect.
Powder blush application starts at the cheeks’ apples and blends upward toward the temples. This lifting motion creates a more natural, diffused finish. The right amount of product should just show up on your brush.
A pro trick I love involves warming cream blush between your fingers before applying. The product melts into the skin and creates that gorgeous “from-within” glow. Sometimes a thin foundation layer over the blush creates a subtle, veiled flush.
Beautiful flushed cheeks need gentle blending. Use circular motions with your brush or fingertips until the edges disappear into your foundation. This creates what I call the “crush-worthy” flush – striking the perfect balance between natural and noticeable.
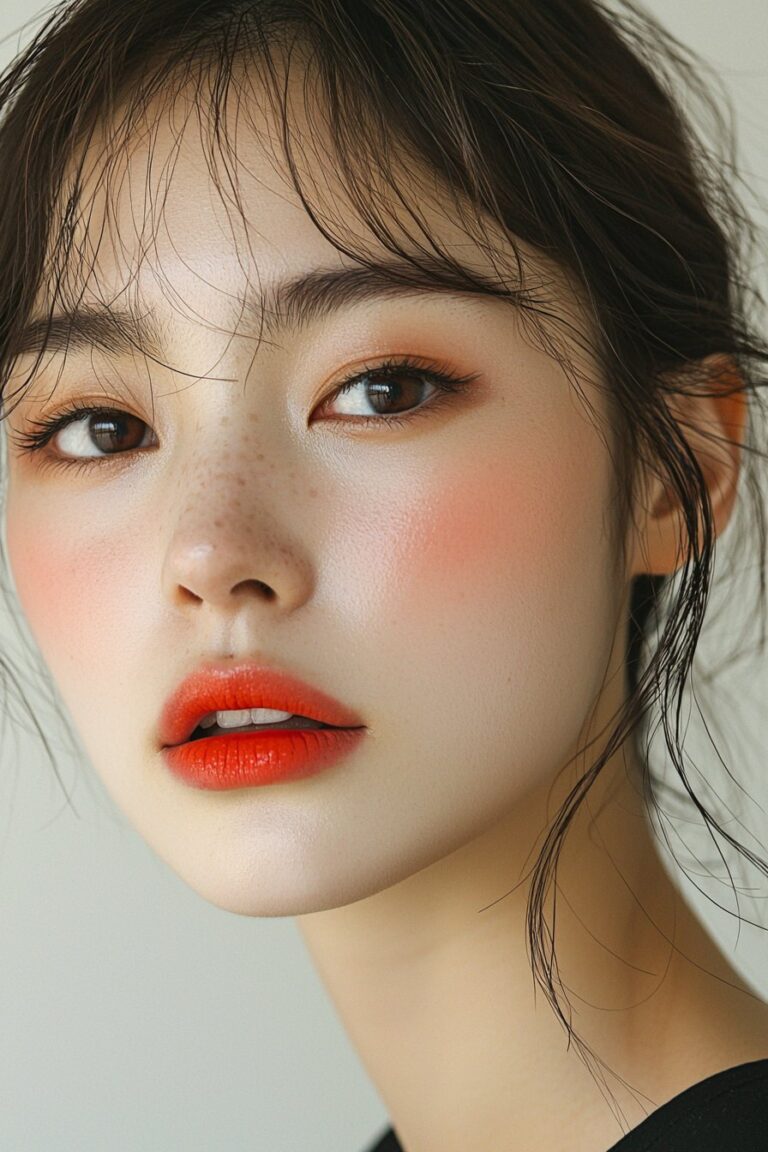
Shimmery Neutral Eyes
Shimmery neutral eyes have been my signature style throughout my career. My work with a variety of eye shapes and skin types has shown me that the right shimmer can elevate any look from simple to breathtaking.
Shadow Selection
The quickest way to create pretty eye makeup starts with a neutral palette that has both matte and shimmer finishes. My professional kit always has shadows with varying textures – from soft satins to striking sparkles. Mature lids or fine lines work better with sequence eyeshadows instead of direct shimmers. These special formulations have matte bases with subtle sparkle specks that create dimension without highlighting texture.
Application Techniques
A 24-hour eye base ensures longevity. Matte shadows create depth, particularly in the crease area. My technique works wonderfully – shimmer placement should be slightly higher on the lid rather than directly on the mobile lid. This creates lifted eyes without emphasizing texture.
My professional approach has these steps:
- Start with the center of the lid for original shimmer placement
- Build intensity gradually with light layers
- Keep shimmer tight to the lash line where it naturally catches light
- Add a touch of sparkle to the inner corner for brightness
Blending Tips
Experience has taught me that flawless shimmery eyes depend on blending technique. Windscreen-wiper motions diffuse the edges of matte shadows, especially with darker shades in the outer corner. My fingertip gives the most intense payoff for shimmer application.
My signature approach combines different textures. Matte and shimmer formulas create a multidimensional effect that looks sophisticated rather than overwhelming. Clean brushes blend after each layer to keep colors true and vibrant.
Note that pretty eye makeup doesn’t require packing on product – strategic placement and thoughtful blending matter most. Setting spray on brushes before applying shimmer shadows intensifies their effect. This technique creates that coveted wet-look finish that photographs beautifully and lasts all day.
Lifted Lash Look
My career changed dramatically after I became skilled at creating lifted lashes that enhance makeup looks. Years of trying different techniques helped me find that there was a sweet spot between using the right methods and products to achieve naturally lifted lashes.
Curling Methods
Clean, dry lashes are essential before starting the curl. A professional trick I love involves using a blow dryer to warm up the lash curler. In spite of that, make sure the curler feels warm and not hot to protect your delicate lashes.
The best results come from this three-step curling approach:
- Start at the base of lashes to get the original lift
- Move to mid-lash to add curve
- Finish with the tips to create a natural-looking curl
Mascara Application
The right mascara application plays a vital role after curling to keep that lift. You should wait 24-48 hours after any lash lift treatment before putting on mascara. Water-based formulas give the best results, while waterproof mascaras can damage your lashes.
My foolproof technique delivers amazing results:
- Use a back-and-forth motion at the lash base when applying mascara
- Keep the wand at the lash tips for about 10 seconds
- Make an upward sweep to finish
Enhancement Tips
You can improve your lash game beyond simple curling and mascara. A lash serum or conditioner helps maintain healthy lashes. Your lifted lashes last longer if you avoid rubbing your eyes or sleeping on your face.
These maintenance tips have proven highly effective in my experience:
- Oil-free eye makeup removers help preserve the lift
- Daily brushing with a clean spoolie keeps lashes neat
- Lash conditioner provides essential nourishment
Professional lash lifts offer a semi-permanent solution lasting 6-8 weeks. Note that you need a 4-week break between treatments so your lashes can recover naturally.
My signature approach combines different techniques to maximize results. A small amount of aloe on a clean spoolie before curling provides extra hold without mascara’s heaviness. You can also mix mascara formulas – a volumizing formula at the roots paired with a lengthening one for the tips creates stunning effects.
Soap Brow Technique
My years of creating pretty makeup looks have taught me that soap brows stand out as an amazing technique to get that feathered, fluffy look. Working with brows of all types has helped me refine this method. You can get professional results without spending time at the salon.
Product Guide
Your choice of soap makes all the difference. My testing shows that clear, glycerin-based soaps give the best results. These soaps hold strong without leaving white marks on your brows. Look for products with aloe, botanical oils, and vitamin E. These ingredients will keep your brow hairs healthy.
You’ll need these items to get started:
- A translucent or clear glycerin soap
- A clean spoolie brush
- Setting spray or water
- Waterproof brow products (if filling is needed)
Step-by-Step Process
Years of practice have led me to develop a method that works every time. Start with clean brows that don’t have any product on them. If you need to fill sparse spots, use waterproof products first.
Here’s how to apply:
- Dampen your spoolie slightly with setting spray or water
- Run the spoolie across the soap surface gently
- Begin at the inner corner and brush upward and outward
- Shape the tail while maintaining your desired look
Setting Methods
My professional career has taught me some great tricks to make soap brows last. Backcombing works wonders – apply soap to both sides of the hairs for better hold. Let each layer dry before you add more product. This helps your brows stay put longer.
Take care of your brows by:
- Taking off all product at night
- Using a brow-specific gentle cleanser
- Taking breaks from soap styling
Soap brows hit the sweet spot between regular brow gel and professional lamination. While the results look amazing, don’t use this technique daily as it might dry out your brows. Mix it up between soap brows and regular styling to keep your brows healthy.
A light touch works best during application to protect your delicate brow hairs. If your brows tend to be stubborn, try building up thin layers rather than one thick coat. This gives you more control and creates a natural finish.
Pretty Pink Lips
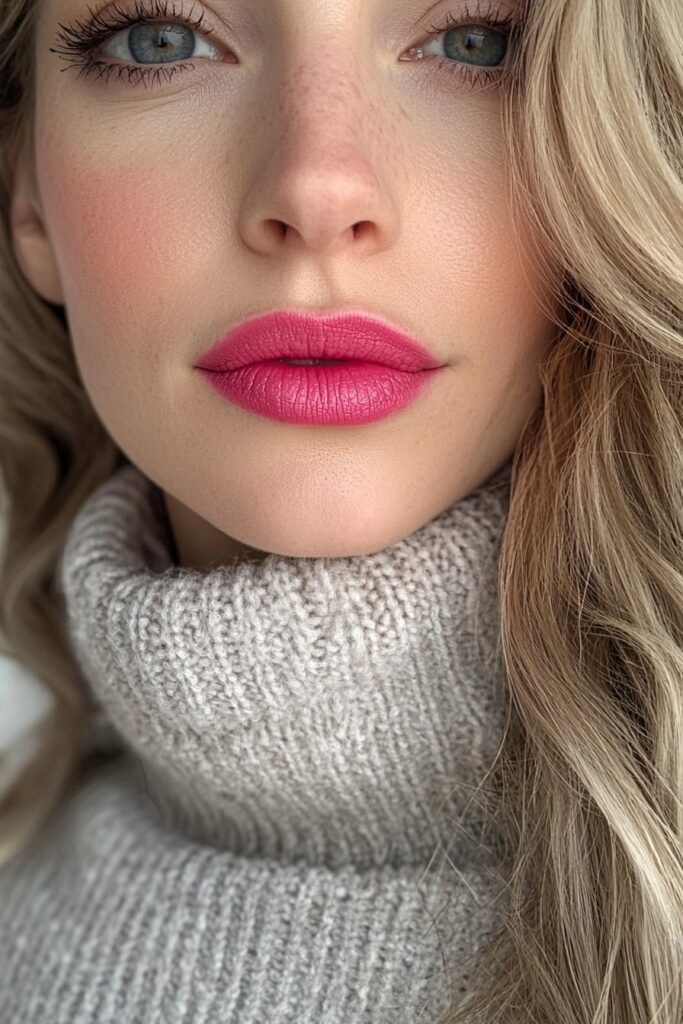
Pink lips fascinate me because they bring a perfect balance of sophistication and playfulness to pretty makeup looks. My unique experience working with clients in a variety of settings has helped me become skilled at creating the perfect pink pout that improves natural beauty.
Color Selection
The ideal pink shade depends on your skin’s undertone. People with cool undertones look best in blue-based pinks that mirror their skin’s natural flush. Those with warm undertones shine with peachy pinks or shades that have caramel hints.
My professional experience shows these combinations work best:
- Fair skin: Peachy pinks or lilac-tinted shades
- Medium skin: Caramel-undertoned pinks
- Deep skin: Bold, vibrant pink hues
Application Steps
Start by prepping your lips with a gentle exfoliant to remove dead skin. I mix sugar, honey, and rose water to create a natural scrub. A nourishing lip balm should follow to lock in moisture.
To apply flawlessly:
- Start with your bottom lip, moving onto the top
- Create an X at your Cupid’s bow to define precisely
- Blot gently with tissue
- Apply a second layer to intensify
Long-wear Tips
Without doubt, proper preparation and setting are crucial for long-lasting pink lips. A light layer of concealer as a base helps the lipstick stick better and prevents feathering.
These tips ensure extended wear:
- Set with translucent powder after the original application
- Use waterproof formulas for both liner and lipstick
- Apply in thin layers instead of one thick coat
- Blot between layers to improve adherence
One of my signature tricks uses a lip stain under lipstick. This technique dyes the top layer of skin and creates a natural-looking pink that stays longer. On top of that, a lip liner in a matching shade prevents color bleeding and improves longevity.
Note that healthy lips hold color better. Stay hydrated and use SPF-containing lip products during the day. This creates the perfect canvas for any pink shade.
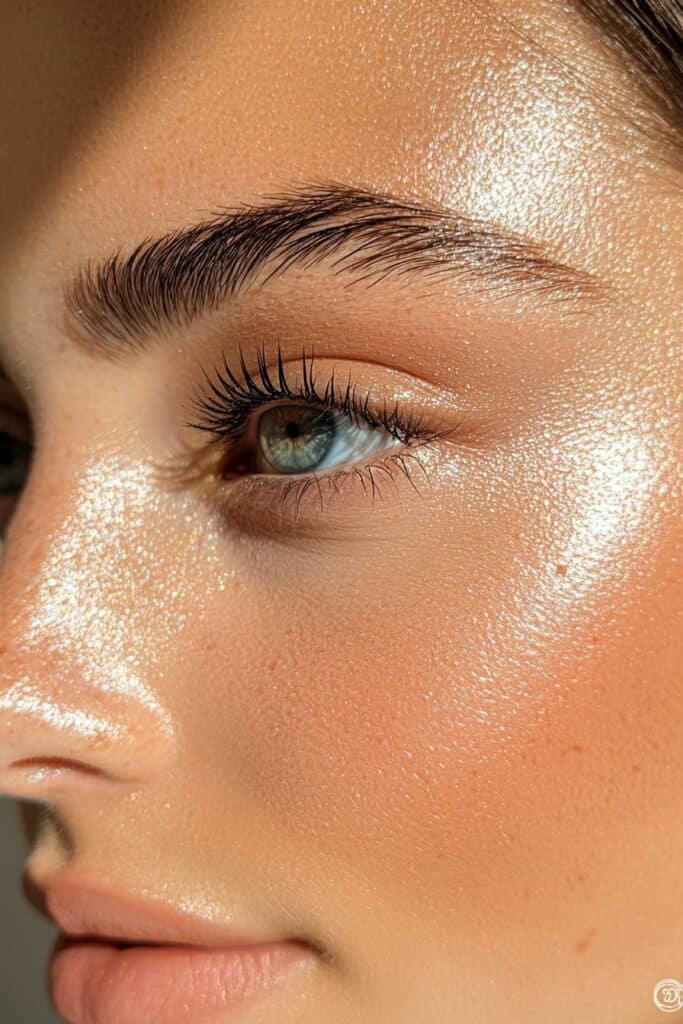
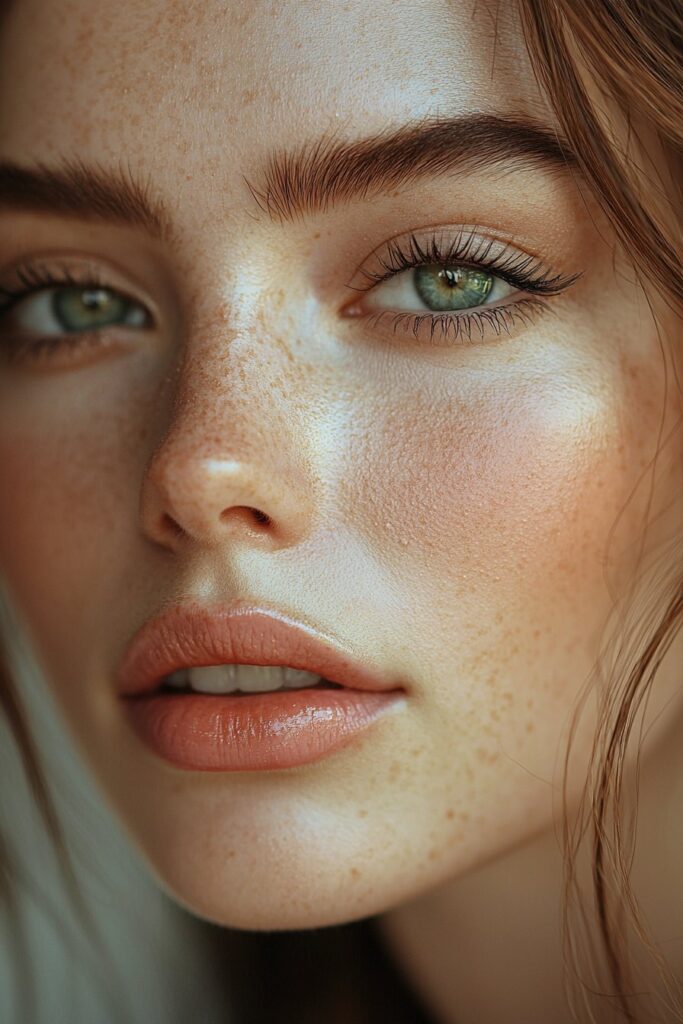
Glass Skin Finish

Glass skin has become my signature technique that creates ethereal, luminous makeup looks. My journey as a professional makeup artist started in Savannah and led me to Los Angeles, where I adapted this Korean beauty trend to work with different skin types and tones.
Product Layering
The secret to glass skin lies in how you layer products. I start with an oil-based cleanser that dissolves makeup and sunscreen. A water-based cleanser follows to deep clean the skin. Working with countless clients helped me find that essence plays a vital role – it balances skin’s pH and prepares it for other products.
My proven layering sequence includes:
- Hydrating sheet mask to boost moisture intensely
- Rich face cream to improve hydration
- Dewy primer to blur pores and fill fine lines
- Lightweight foundation mixed with liquid highlighter
Technique Guide
The perfect glass-like finish comes from the right application method. I use a makeup sponge in my studio to apply foundation lightly and create smooth coverage. Then I place brightening concealer on the face’s high points with a shade slightly lighter than natural skin tone.
My oily-skinned clients need minimal powder, just on the T-zone. Years of experience taught me that keeping powder away from cheeks helps maintain that signature glass-like glow.
Maintenance Tips
The glass skin finish needs proper care to last. A highlighter stick works best to add glow to specific areas – cheekbones, nose bridge, Cupid’s bow, and forehead. Cream blush on the cheeks’ apples mixed with highlighter creates extra radiance.
The eyes need soft, simple makeup – a light wash of peach or pink eyeshadow does the trick. Liquid highlighter on the eyelids creates a beautiful glossy effect. A final spritz of hydrating setting spray keeps everything fresh all day.
Soft Contour Method
Soft contouring has changed the way I create pretty makeup looks. My work with clients in Savannah and Los Angeles has taught me that natural sculpting needs the right products and techniques.
Product Selection
Your skin type should guide your choice between cream and powder formulas for daily contouring. Powder contours give oily skin a perfect matte finish. Cream contours blend naturally into dry skin and look more authentic.
My professional kit always contains:
- Cool-toned shades that work for fair to medium skin
- Olive-hued products perfect for warm undertones
- Neutral formulas with balanced blue and red undertones that suit dark skin
Placement Guide
Strategic placement makes soft contouring work. You can find your cheekbones by gently sucking in your cheeks – this creates a natural line to follow. My years of experience show that placing contour slightly above the hollow areas lifts your features better.
The best results come from focusing on:
- Below the cheekbones with upward blending toward temples
- Along the hairline to frame your face
- Beneath the jawline to define structure
Blending Steps
Good blending turns harsh lines into natural shadows. My studio work has taught me to start light and build up slowly. When I use cream products, I work them into the skin with circular motions using a dense brush.
A damp beauty sponge helps me create an airbrushed finish with cream contours that looks natural in any light. I always check my blend from different angles to make sure it merges with the foundation.
Setting cream contours with matching powder helps the soft-sculpted look last all day. Natural light or a window spot works best for applying contour since artificial lights can trick your eyes.
Inner Corner Highlight
Inner corner highlighting is my secret weapon to create eye-catching pretty makeup looks. My journey started in Savannah and led me to Los Angeles, where I became skilled at this technique through countless client sessions.
Product Types
The right product choice makes all the difference, as I learned through testing. Pearlescent formulas create a brightening effect without chunky glitter particles. Cream highlighters or liquid eyeshadows blend naturally into the skin and work best for daily wear.
Your skin tone determines the best shade options:
- Fair to medium: Champagne or ivory shades
- Medium to deep: Rose gold or bronze tones
- Olive undertones: Soft gold highlighters
Application Tips
Perfect inner corner highlighting depends on precise application. A small, detailed brush ensures controlled placement. Tap the brush into your chosen product and gently press it into the inner corner to create an inverted ‘V’ shape.
Your highlight will last longer if you:
- Start with a clean, oil-free base
- Use setting spray on your brush before application
- Build intensity gradually with light layers
Enhancement Methods
Years of experience have taught me professional techniques that maximize inner corner highlights’ effect. The quickest way involves applying the same highlighter shade to your lid’s center and brow bone, which creates a cohesive, luminous effect.
Extra brightness comes from strategic product layering. Start with a cream base and top it with a matching powder highlighter for intense luminosity. The highlight should extend slightly onto the tear duct area to create larger, more awake-looking eyes.
Note that you should use formulas specifically made for the eye area. My studio experience shows that waterproof options last longest, especially when clients have oily skin or attend special events.
Quick Office Makeup
My work with countless clients in both Savannah and Los Angeles has taught me that becoming skilled at quick office makeup needs simplification and smart product choices. My years of experience have helped me develop methods that give polished results quickly.
Essential Products
The life-blood of the quickest way to do office makeup comes down to picking products that can do multiple things. A tinted moisturizer with SPF creates a natural base that gives you skincare and coverage. Spot-treating with concealer works better than applying full foundation when you need extra coverage.
My professional kit for office makeup has:
- Tinted moisturizer with SPF
- 2-in-1 cheek and lip tint
- Tinted brow gel
- Volumizing mascara
- Hydrating lip balm
Time-saving Tips
A consistent routine cuts down application time substantially. My studio experience shows that cleansing with gentle pads and following up with hydrating moisturizer works best. This preps your skin well and helps you feel more awake.
The quickest way to get ready involves:
- Keeping products in a designated area
- Using cream formulas you can blend with fingers
- Applying concealer only where needed
- Using tinted brow gel instead of pencils
Professional Finish
My career has taught me that you don’t need many products for a professional finish. In fact, good skin prep gives you that coveted “I woke up like this” glow. A fluffy brush with bronzer along your cheekbones adds warmth and dimension without looking overdone.
Your small touch-up kit should have:
- Blotting papers
- Tinted lip balm
- Face mist with SPF
- Brow refresher
One of my signature techniques uses cream blush as lip color too, which saves time and space. It also helps to remember that healthy, hydrated skin creates the perfect canvas for quick makeup. You’ll end up looking polished and professional without spending too much time getting ready.
Minimal Glam Look
My passion has always been minimal glam makeup that combines sophistication with effortless beauty. My studio experience has helped me find that perfect balance between enhancement and subtlety to achieve this look.
Product Selection
Lightweight, skin-like formulas are the foundations of minimal glam. My professional expertise suggests using tinted serums, moisturizers, or sheer coverage foundations for a natural base. Cream or liquid formulas create a more natural, dewy-looking finish compared to powder products.
You’ll need these vital products for minimal glam:
- Lightweight foundation or tinted moisturizer
- Concealer for spot correction
- Cream blush and highlighter
- Brown mascara gives softer definition
Application Steps
Good skin prep with proper moisturizer helps your makeup blend naturally. A damp makeup sponge works best to apply your base product and creates that coveted skin-like result. Light layers create the most natural finish – I’ve learned this through experience.
Earthy browns, beiges, and creams work best for eye makeup. I often mix foundation with moisturizer to create an ultra-light, sheeny base. My signature technique uses cream products before powders to keep that dewy finish.
Balance Tips
Strategic product placement makes minimal glam work. My studio focuses on creating glowing skin, brushed-through brows, and diffused eyeshadow. A small amount of cream or liquid highlighter applied before blush creates a natural-looking glow.
These tips help maintain balance throughout the day:
- Apply translucent powder only in the T-zone
- Use a ‘W’ pattern for blush to create a gentle, diffused flush
- Check your blend in natural light
Your hands are the best tools for application – many celebrity makeup artists stand by this technique. Minimal glam ended up celebrating your features while keeping a polished, effortless appearance.
Korean-Inspired Beauty

My love for Korean beauty techniques started in my early industry days. K-beauty’s philosophy celebrates healthy, glowing skin and natural beauty that lines up perfectly with my approach to creating pretty makeup looks.
Key Elements
K-beauty makeup focuses on creating a natural, radiant complexion through proper skincare. Double cleansing serves as the life-blood of this approach. You start with an oil-based cleanser and follow with a water-based formula. My studio experience shows this is the quickest way to remove makeup while your skin’s natural barrier stays intact.
The signature elements include:
- Dewy, translucent skin finish
- Straight, well-groomed brows
- Subtle eye makeup with downturned wings
- Gradient lip effect
Product Guide
My professional kit always contains specific products that are the foundations of Korean-inspired beauty. BB creams and cushion compacts have become more prominent than traditional foundations. These products give lightweight coverage and create that coveted glass-like finish.
My eye makeup relies on subtle shimmer shadows and brown mascara to create “puppy eyes” – a technique that makes eyes look larger and more youthful. On top of that, cream blushes in soft pink or peach tones create that characteristic flushed look when applied high on the cheekbones.
Application Steps
Korean-inspired makeup works best with proper technique and layering. The skin needs essence and moisturizer first. BB cream or cushion foundation goes on next with gentle patting motions instead of sweeping strokes.
The signature gradient lip effect starts with concealer to minimize natural lip color. The lip tint or stain goes in the center and blends outward to create that “just-bitten” look. I ended up finishing with a light dusting of translucent powder just on the T-zone. This keeps the dewy finish on the face’s high points.
My work features highlighting the aegyo sal – the small pocket of fat under the eyes that creates a youthful appearance when smiling. This technique pairs with straight brows and subtle contouring to deliver that exceptional K-beauty freshness my clients love.
Conclusion
My trip from Savannah to Los Angeles taught me twelve makeup techniques that create pretty, effortless looks. Teaching numerous clients has shown me that beautiful makeup doesn’t need complex methods or costly products – just good understanding and proper application.
Each look we explored has its own benefits. Radiant skin creates a perfect canvas, and soft contouring adds subtle definition. Glass skin gives an ethereal glow, while Korean-inspired techniques bring a fresh point of view to natural beauty. These approaches blend well, so you can mix and match based on your priorities and needs.
My professional career has shown me that makeup runs on simplicity and purpose. Instead of chasing every trend, become skilled at techniques that improve your features. Pick one look that appeals to you and practice until you’re confident. Then add other elements gradually.
Note that pretty makeup celebrates instead of conceals. Your natural beauty is the foundation – these techniques just highlight what makes you gorgeous. With good prep, smart product choices, and careful application, anyone can create these stunning looks.
Nothing makes me happier than seeing clients find their confidence through makeup. These twelve looks are a starting point for your beauty trip, but adapt them to match your style. Trust your gut, try new things, and above all, enjoy the process.