
Want to discover prom ponytail hairstyles that’ll make everyone take notice without breaking the bank? Ponytails are nowhere near simple – they stand out as one of the most versatile and elegant choices for prom night.
Your hair type doesn’t matter – these styles work beautifully with everything. Thick, long locks or shorter hair can be transformed into stunning ponytails that blend sophistication with practicality. High ponytails create drama while lower ones deliver subtle elegance. These gorgeous styles look expensive yet remain surprisingly easy to create and maintain throughout the evening. Simple accessories can lift your look to create that perfect expensive-looking finish.
This piece showcases 17 stunning ponytail variations that deliver a high-end salon look without the premium price tag. Each style keeps you secure enough to dance all night and looks beautiful from any angle.
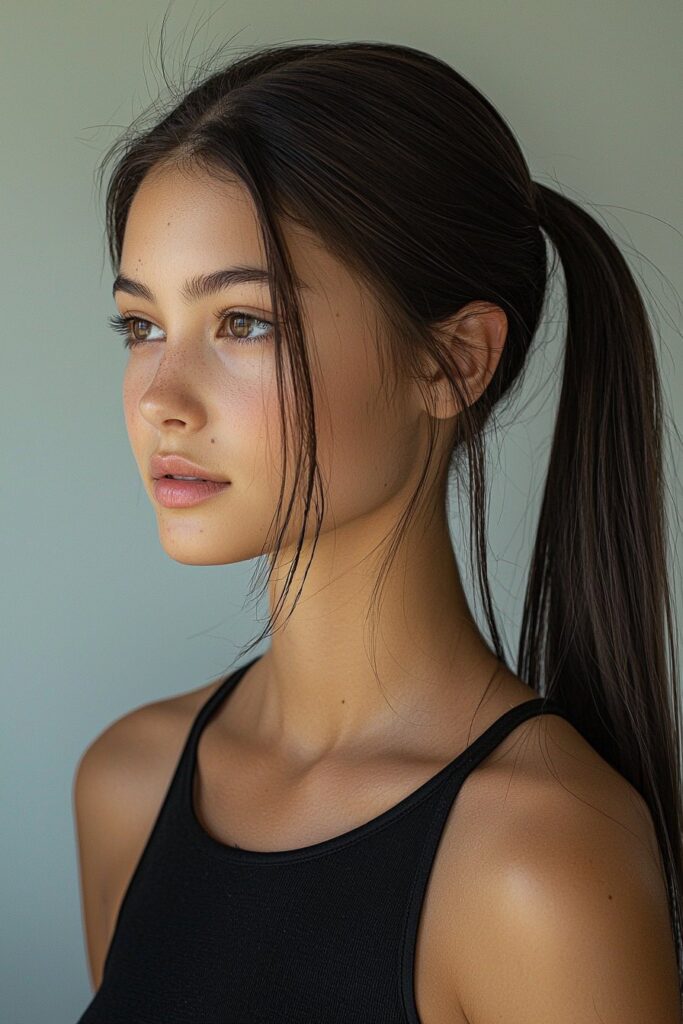
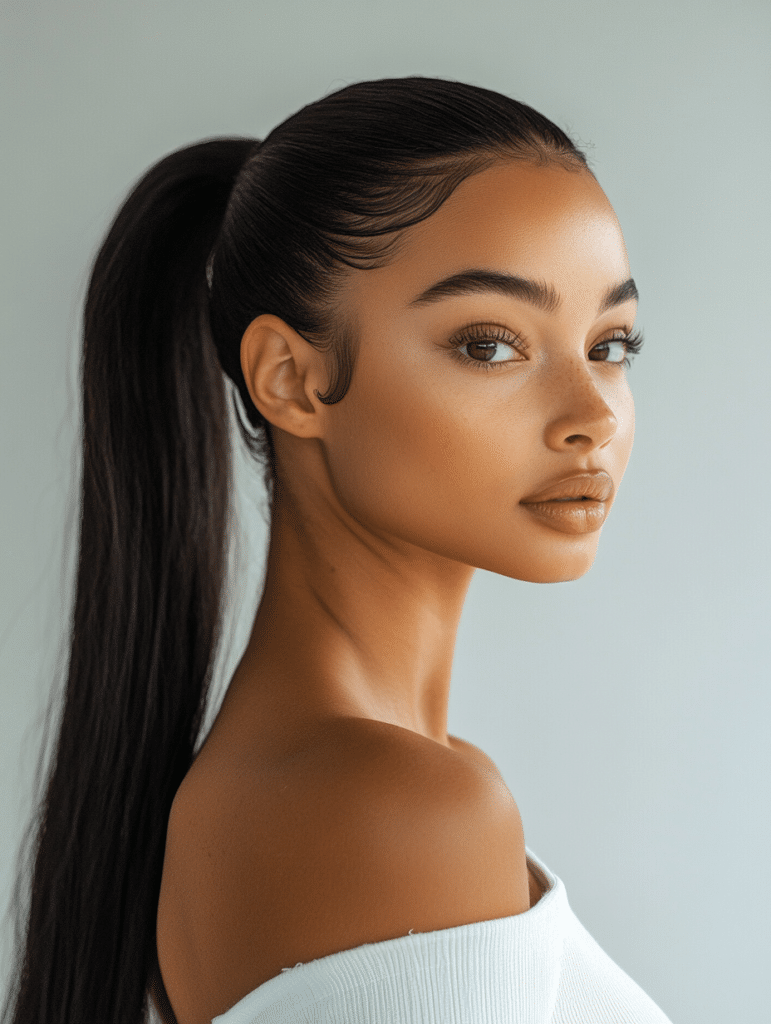
Sleek High Ponytail with Face-Framing Pieces
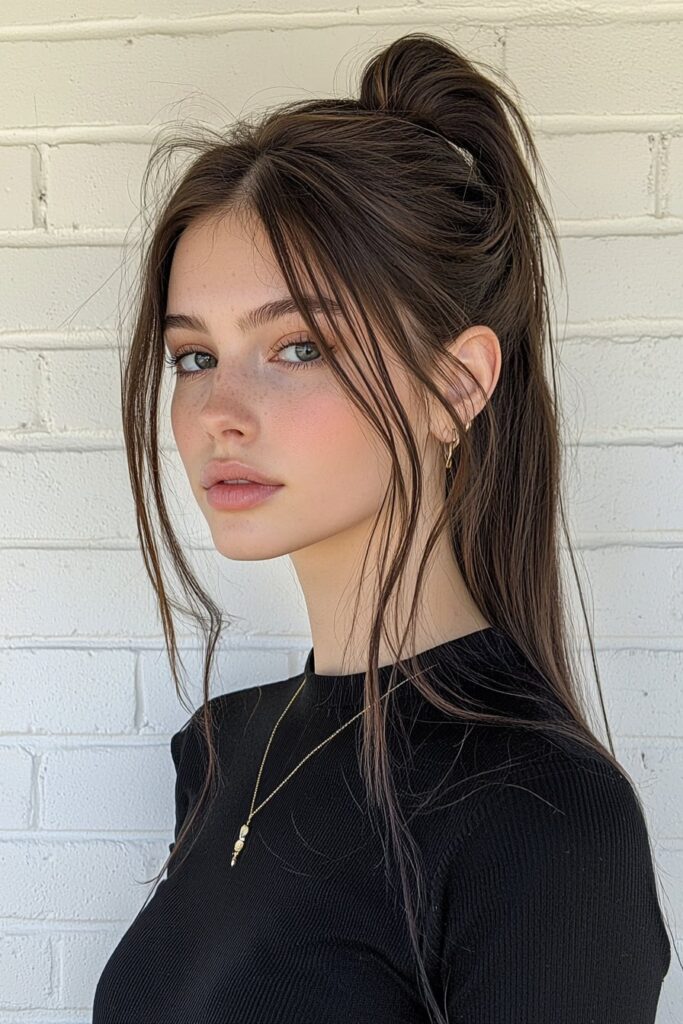
A sleek high ponytail with face-framing pieces has become my go-to style for prom clients. This elegant yet modern look will make you stand out on your special night.
Essential Styling Tools
Your toolkit should include a boar bristle brush that helps spread natural oils and adds amazing shine. You’ll also need multiple hair elastics, bobby pins, and a rat-tail comb to section hair properly. A smoothing brush made for sleek styles rounds out your essentials.
Step-by-Step Tutorial
Thick hair needs proper sectioning first. Make a center part from your front hairline to crown and keep the sides loose. Apply lightweight gel to damp hair at the roots. A large round brush helps you blow-dry from the nape up.
Place your ponytail just above the nape and wrap hair around the base to hide the elastic. Add some height at the crown and pin it securely. The styling brush helps you shape the sides over your ears while keeping those face-framing pieces perfect.
Budget-Friendly Products for Sleekness
Pure clean hair gel works great as your starting product – it holds well without leaving any residue. A simple smoothing cream helps control flyaways effectively. Light hair oil on mid-lengths and ends adds shine without spending too much.
Tips for Long-Lasting Hold
Second-day hair works better since fresh-washed hair tends to slip. Spray hairspray on wet roots to maximize control. A clean toothbrush with gel smooths down those stubborn baby hairs.
Double up on hair ties to make your style last through every dance. A light mist of hairspray over the finished look, especially on the crown where frizz shows up first, keeps everything in place.
Textured Low Ponytail with Waves
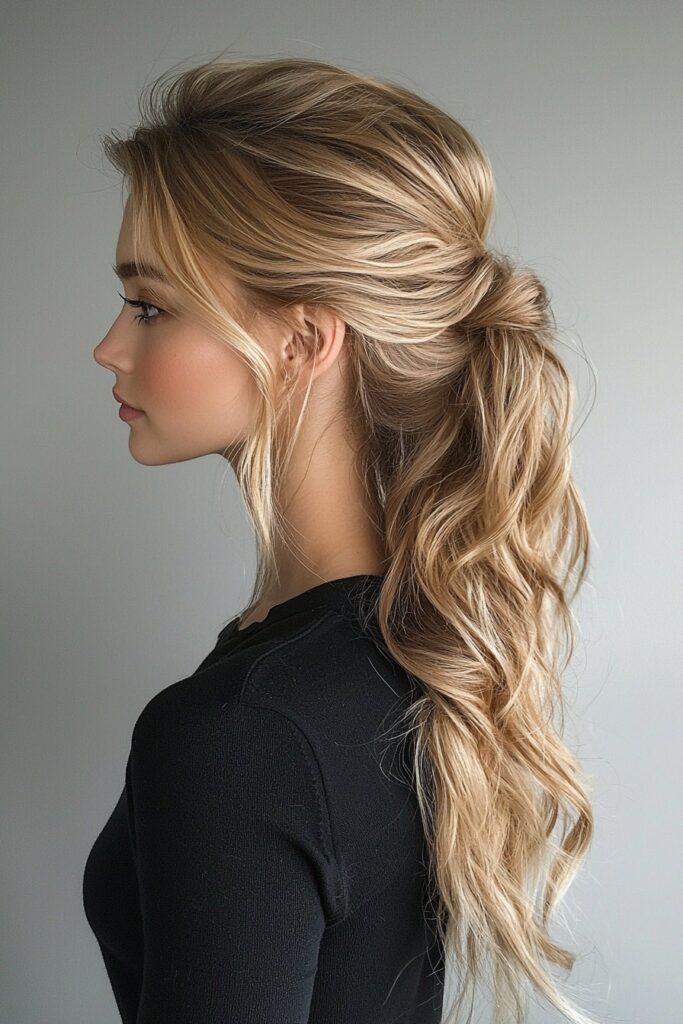
My experience styling countless prom hairstyles has taught me that a textured low ponytail with waves creates a relaxed elegance perfect for any formal occasion. This adaptable style looks beautiful with all hair types and textures. It gives off an expensive vibe while staying budget-friendly.
Affordable Heat Styling Tools
A large-barrel curling iron, about one-and-a-half inches in diameter, works best to create perfect waves. Quality tourmaline ceramic barrels get more and thus encourages more negative ions that prevent heat damage and give silky-smooth results. Of course, your hair type and texture should guide your tool selection – thinner hair needs lower temperature settings than thicker strands.
Creating Long-Lasting Waves
Start with hair that’s about 75% dry to help waves last longer. Apply heat protectant throughout damp strands first. Next, section your hair and create loose waves by wrapping one-inch sections around the curling iron. The face-framing pieces should curl away from your face for a natural look.
These products will help your waves last longer:
- A curl-enhancing cream to define and control frizz
- Curl mousse to make waves stay longer
- Sea salt spray to add texture and volume
Securing the Perfect Low Pony
The most flattering look comes from positioning your ponytail at your neck’s nape. So tuck your chin down to your chest while securing the ponytail – this helps you place it perfectly low. A boar bristle brush smooths hair back without bumps or tangles.
Your ponytail needs more volume, so gently pull apart both sides after securing it. Small sections at the crown should be carefully pulled upward to loosen the hair. Hide the hair elastic by wrapping a small section around it and securing with bobby pins. A light mist of flexible-hold hairspray tames flyaways while keeping your waves’ natural movement.
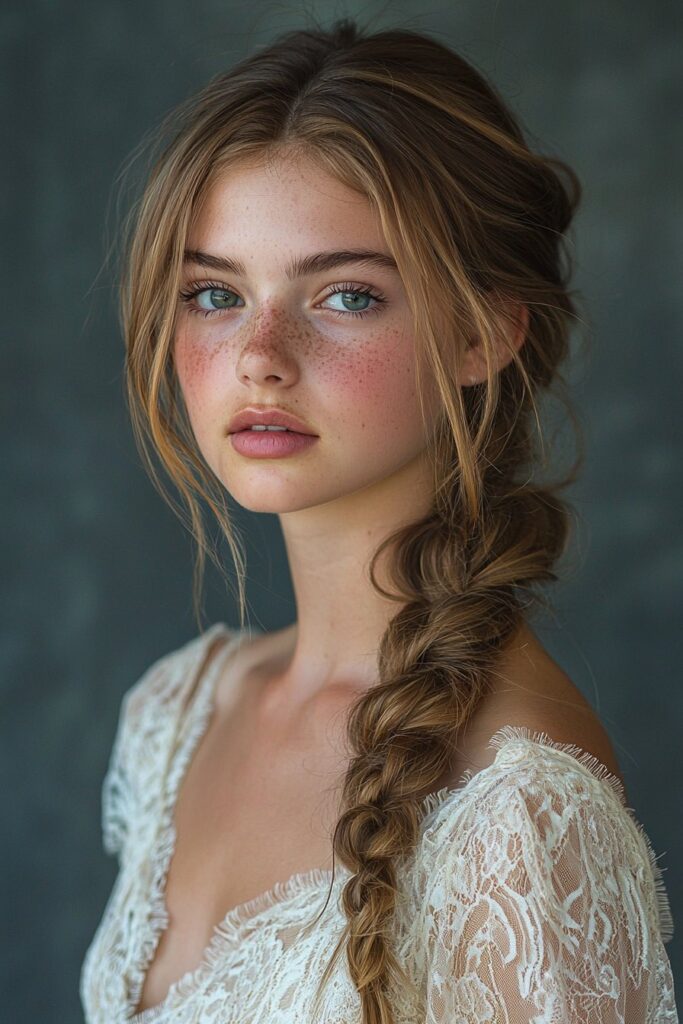
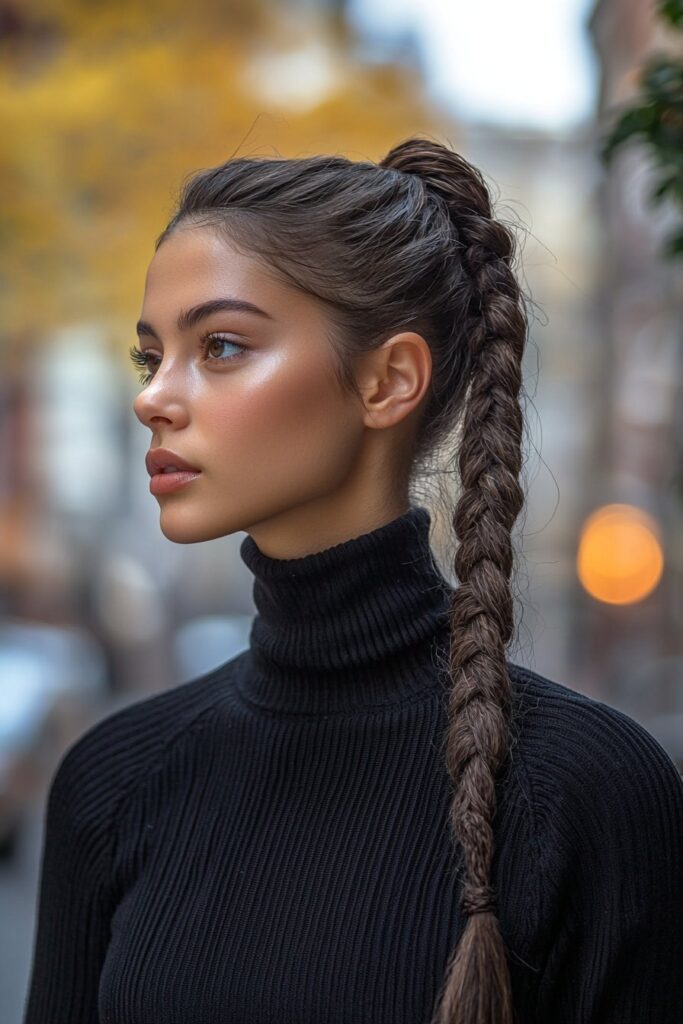
Braided Wrap-Around Ponytail
My signature prom hairstyle has become the braided wrap-around ponytail after working many years as a celebrity makeup artist and hairstylist. This elegant style blends classic braiding with modern sophistication. It creates a luxurious look without breaking the bank.
Easy Braiding Technique
Brush your hair really well and make a regular ponytail at your preferred height. Take a thin portion of hair from under the ponytail – about a finger’s width thick. The bottom section stays loose while you braid the top portion. This creates a second braid underneath naturally. The technique works well with thick and thin hair, but longer hair gives better results.
Securing Methods
Once you finish the braid, flip the bottom section through the gap between top and bottom braids, like in a topsy-tail effect. Small, clear elastic bands that match your hair color help keep everything secure. Bobby pins work best with their bumpy side down toward your scalp. You might also want to use satin-covered hair ties or soft scrunchies to protect your hair from breakage.
Making It Look Professional
Clean, precise sections give you that salon-worthy finish. Put some lightweight gel or hair putty near the roots to smooth everything down. Leave out a small section of hair before you tie your ponytail – you’ll use this piece to wrap around the elastic later. You can create more texture and volume by gently pulling apart the braid’s loops while holding the elastic. This gives you that full, professional look.
A light mist of hairspray over your finished style keeps frizz away. To make the style last up to two weeks, wrap the braid into a bun at night and cover it with a silk scarf.
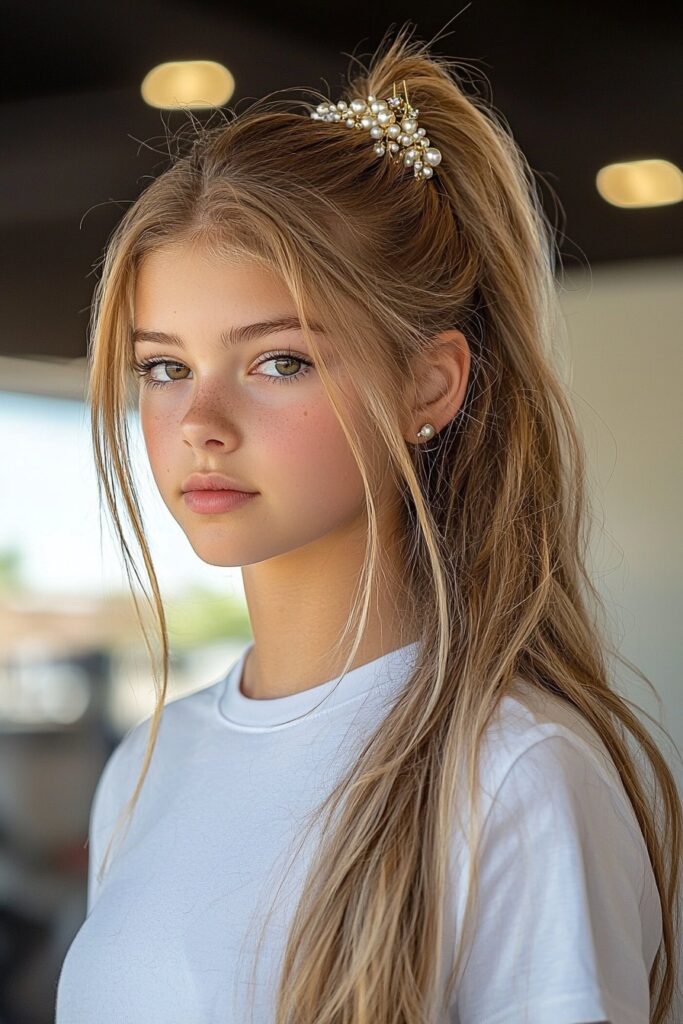
Bubble Ponytail with Pearls
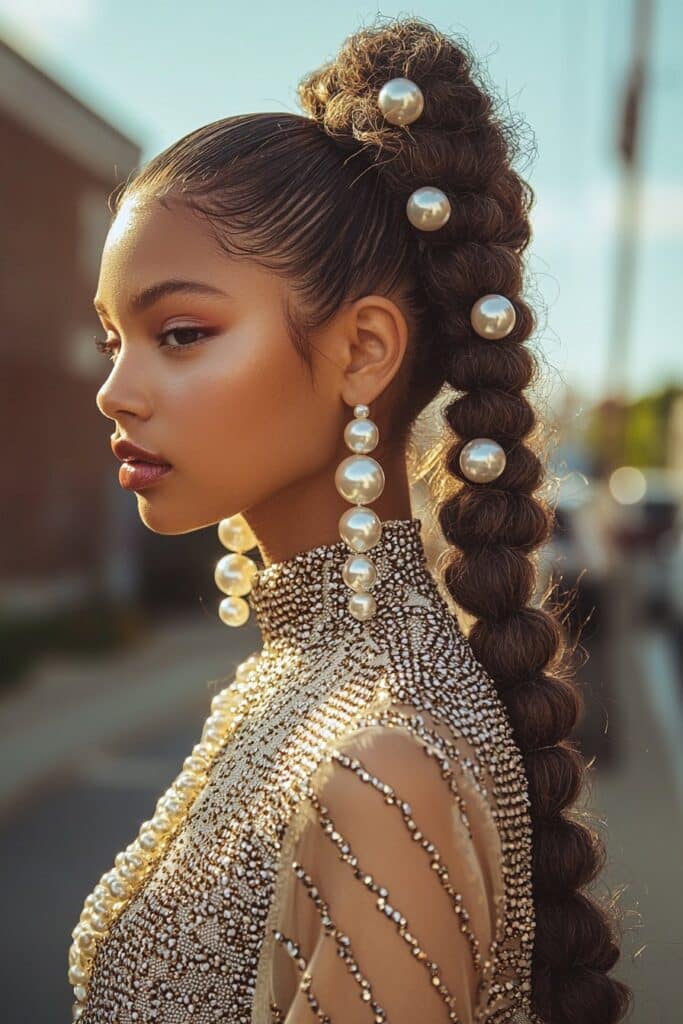
My experience styling hair for special occasions has taught me that bubble ponytails with pearls blend classic elegance with modern charm. This style really shines with second or third-day hair since the extra texture gives better hold and volume.
DIY Pearl Accessories
You can add a personal touch by making your own pearl hair accessories without spending too much. Start by gathering clear hair clips or barrettes and pearl beads of different sizes. A strong adhesive should be applied to the clip’s surface, and pearls need gentle pressure to attach. Let each piece dry fully before using it. Another option is to make delicate pearl pins with silver-plated wire and Swarovski crystal pearls that give a luxurious look.
Creating Perfect Bubbles
Your hair needs dry shampoo throughout to get the best volume and grip. The original ponytail should sit high on your crown – position it on top of your head rather than at the back. Clear elastics should be placed about two inches apart down your ponytail’s length. You’ll get the perfect bubble effect by gently pulling the sides of each section while keeping the bubbles evenly sized.
Securing Each Section
A small, secure base ponytail at the crown sets the foundation. Each section should be teased to improve volume before creating the bubble. Clear elastics work best, though dark hair looks better with matching colored bands. The style stays intact when you spray each bubble with hairspray as you move downward.
A small amount of styling wax helps smooth any flyaways. Here are some professional tips that ensure lasting results:
- Apply dry shampoo before styling to get better texture
- Keep spaces between bubbles even
- Pull each section gently to make it fuller
- Use multiple elastics to hold better
A light layer of hairspray should cover the completed style, especially in areas that tend to frizz. This sophisticated blend of pearls and bubbles creates a prom look that captures beautifully from every angle.
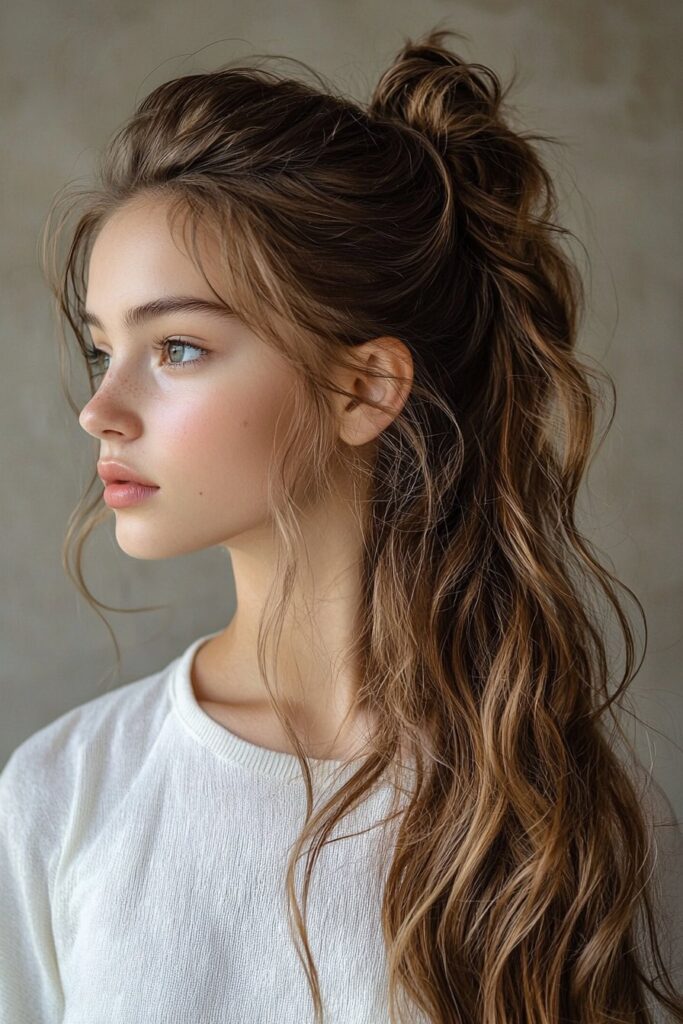
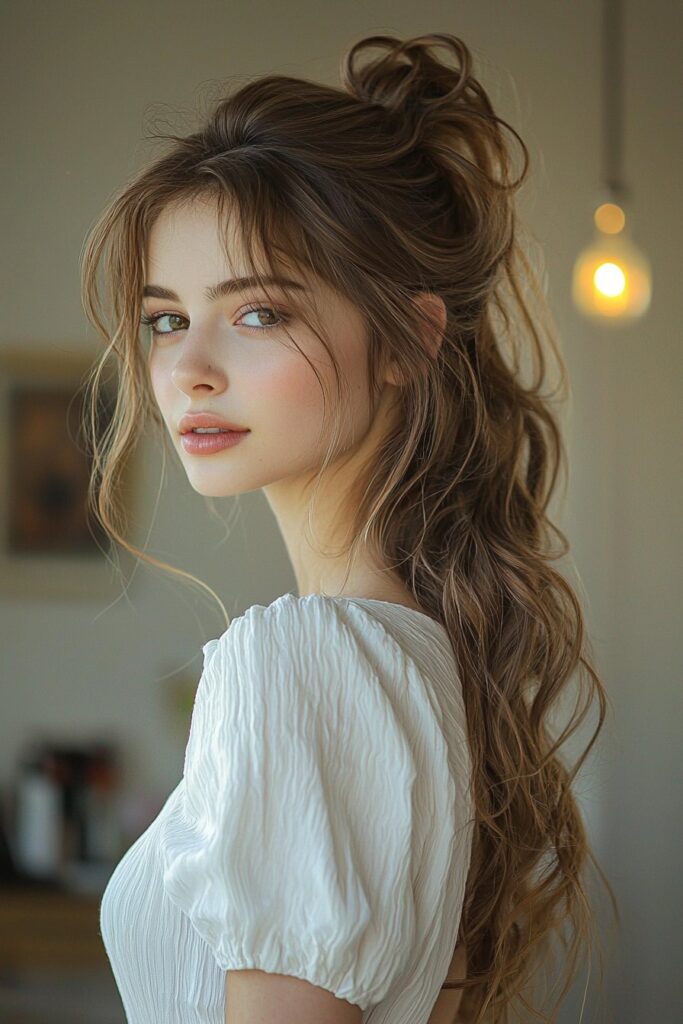
Messy Boho High Ponytail
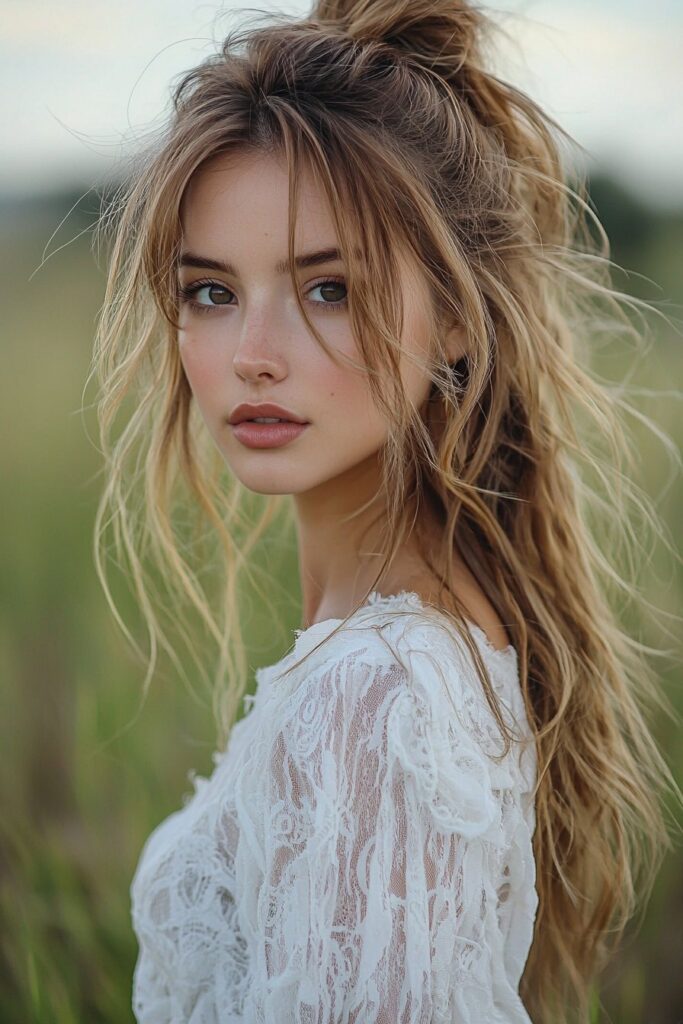
My work as a celebrity makeup artist has helped me become skilled at creating the perfect messy boho high ponytail that radiates effortless glamor. This style is a hit with my prom clients who want that coveted “undone” look without breaking the bank.
Texturizing Products on a Budget
The perfect messy texture starts with a volumizing or thickening shampoo and conditioner. A budget-friendly sea salt spray works great on damp hair, especially at the roots for extra lift. A lightweight texturizing spray adds dimension to your strands. You’ll find great value in products like Tresemmé Between Washes Volumizing Dry Shampoo.
Creating Controlled Mess
Pull your hair into a high ponytail at the crown. Don’t make it too tight since this can hurt after 30 minutes. Split your ponytail’s length into three parts – top, middle, and bottom. Your fingers should pinch and pull each section to create that desired messy texture.
Long-Lasting Volume Tips
Day-old hair gives better grip and lasting volume. A quick mousse application before blow-drying creates bouncy, voluminous results. These professional techniques will help you nail the look:
- Make pulsing motions instead of combing through to avoid flat spots
- Scrunch your hair with your hands to spread products evenly
- Use a lightweight finishing spray that holds without stiffness
Two hair ties at the base will keep everything secure. Small sections pulled upward at the crown area create that perfect looseness. This messy boho high ponytail looks expensive and keeps its shape all through prom night. The magic lies in striking that sweet spot between controlled chaos and elegant sophistication.
Twisted Side Ponytail
My years as a beauty expert have taught me that the twisted side ponytail stands out as one of the best prom hairstyles. This elegant style brings together sophistication and romance, which makes it a great choice when you want a stunning look without spending too much.
Easy Twisting Technique
Start by moving all your hair to one side – pick the side where you want your ponytail. Take a section of hair from the front and set it aside for later. The twist begins from the opposite side. Roll your hair up toward the crown and add more strands as you go. Keep this motion going across the back of your head while you bring in more hair with each twist.
Securing Methods
Clear elastic bands that match your hair color will give you the best hold. You might want to think about small bobby pins as an option – just place them with the textured side against your scalp to get the best grip. Now grab that section of hair we set aside earlier and wrap it around the base of your ponytail. Add another clear elastic to lock everything in place and make sure the tail end stays put.
Adding Volume
Your hair will work better if it’s a day old since this gives you more grip and texture. Put on some volumizing powder, but don’t use too much of either – you don’t want it to look overdone. Here’s a pro tip to get more lift:
- Split the crown area and tease the hair underneath
- Smooth the top layer to keep it looking polished
- Place pins at the base to boost the height
A light mist of flexible-hold hairspray will make your style last. You can create more volume by pulling the sides of your twists gently outward. This makes them look fuller without ruining the style. This technique lets you adjust the look based on your priorities while keeping that expensive salon finish all evening long.
Curly Waterfall Ponytail
My experience with countless clients looking for affordable yet glamorous prom hairstyles has led me to become skilled at the curly waterfall ponytail technique. This enchanting style creates a cascading effect that looks like flowing water and will make you stand out on your special night.
Affordable Curling Methods
Budget-friendly styling starts with damp hair and a lightweight mousse that gives the best hold. The next step needs you to divide your hair into sections and create a regular ponytail that isn’t too tight. A rat-tail comb helps make a hole against the scalp, and you’ll push the ponytail through from bottom to top to create that beautiful waterfall effect.
Product Recommendations
These products will help you get curls that last without breaking the bank:
- A volumizing or thickening shampoo with leave-in conditioner
- Budget-friendly curl-enhancing cream that defines your curls
- Flexible-hold hairspray that lets your hair move naturally
Setting Techniques
Start by washing your hair with moisturizing shampoo and add leave-in conditioner while your hair is still damp. This method works best when your hair is about 80% dry. Here are my professional tips to get the best results:
Secure your base ponytail at the height you want. Create small sections within the ponytail that you’ll curl. You can use overnight braids or foam rollers – whatever works best for you. Once your hair is dry, your fingers will help separate the curls gently to keep their shape.
A light layer of hairspray on each section as you work will help your style last longer. Your curls will keep their bounce all evening with this technique. Don’t brush or comb your curls after styling because that will mess up their natural pattern.
Your style will stay fresh overnight if you wrap the curled ponytail into a loose bun and cover it with a silk scarf. This step will keep your curls defined and ready for all those prom photos.
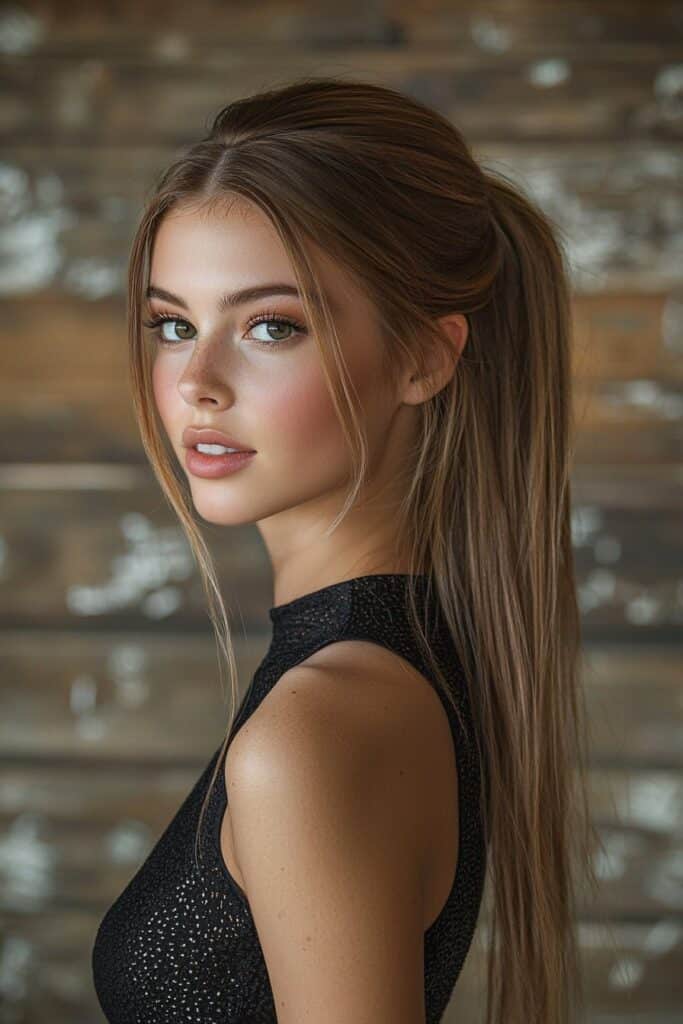
Sleek Middle-Part Ponytail
My years as a beauty expert have taught me that a sleek middle-part ponytail ranks among the most sophisticated prom hairstyles you can create. This classic look pulls hair back into a simple ponytail that makes a statement without breaking the bank at salons.
Smoothing Techniques
The perfect sleek finish starts when you reset your roots with water from a spray bottle. A lightweight serum or leave-in conditioner adds moisture and shine. Sea salt spray works magic to get that sleek look without flyaways – Balmain texturizing salt spray does the job perfectly.
Budget-Friendly Tools
You’ll need a boar bristle brush to create that mirror-like, polished finish. People with finer hair should use powder or brown eyeshadow to fill sparse areas along the hairline. Here’s what else you’ll need without spending too much:
- A tail comb to part precisely
- Clear hair elastics
- Anti-flyaway wax stick
- Flexible-hold hairspray
Long-Lasting Methods
Start with a clean middle part that lines up with your eye line. Your hair should be brushed straight back and upward to look lifted. This pro technique will help your style last:
Section your hair and work hairspray into each part before blow-drying. This approach uses less product but holds just as well. A double ponytail system adds extra volume and makes sure your style stays put.
Your frizzier hair will need pomade after the sea salt spray step. A toothbrush with sea salt spray helps flatten those stubborn spots. This mix of techniques gives you a sleek, pro finish that looks amazing in photos from any angle.
Double-Twisted High Ponytail
The double-twisted high ponytail has become my signature prom hairstyle as a professional hairstylist in Los Angeles. This elegant yet budget-friendly look adds instant volume by stacking two ponytails on top of each other. The result is a sophisticated finish that looks like you just stepped out of a high-end salon.
Twisting Tutorial
Your hair needs to be split into two equal sections. The right section should be twisted from left to right, starting at ear level. The left section follows the same pattern but twists from right to left until both sides match. You’ll get the best results by twisting each section one more time to make them tight and secure.
Securing Methods
A loose ponytail at the nape of your neck creates the foundation. A quick spray of texturizing product gives you that perfect matte finish. Here’s a stylist secret – make a small opening under the pony with your thumb and forefinger, then pull your ponytail through and back out. Multiple elastics will keep both twists firmly in place.
Making It Look Expensive
These professional techniques will give you that high-end finish:
- A light shine serum keeps those shorter layers perfectly in place
- Stick-straight strands create dramatic shine
- One-inch sections on each side should wrap around the elastic in opposite directions
A flyaway-eliminating treatment before styling will improve the overall look. The hair should be brushed back with a comb while keeping tension for that sleek look. This style works really well with day-old hair since it provides better grip and texture.
A flexible-hold hairspray misted over the crown area will help your style last all night. The double-twisted technique not only doubles your volume but creates an intricate effect that looks amazing in photos from any angle. You’ll get that expensive salon look without the hefty price tag.
Ribbon-Wrapped Low Ponytail
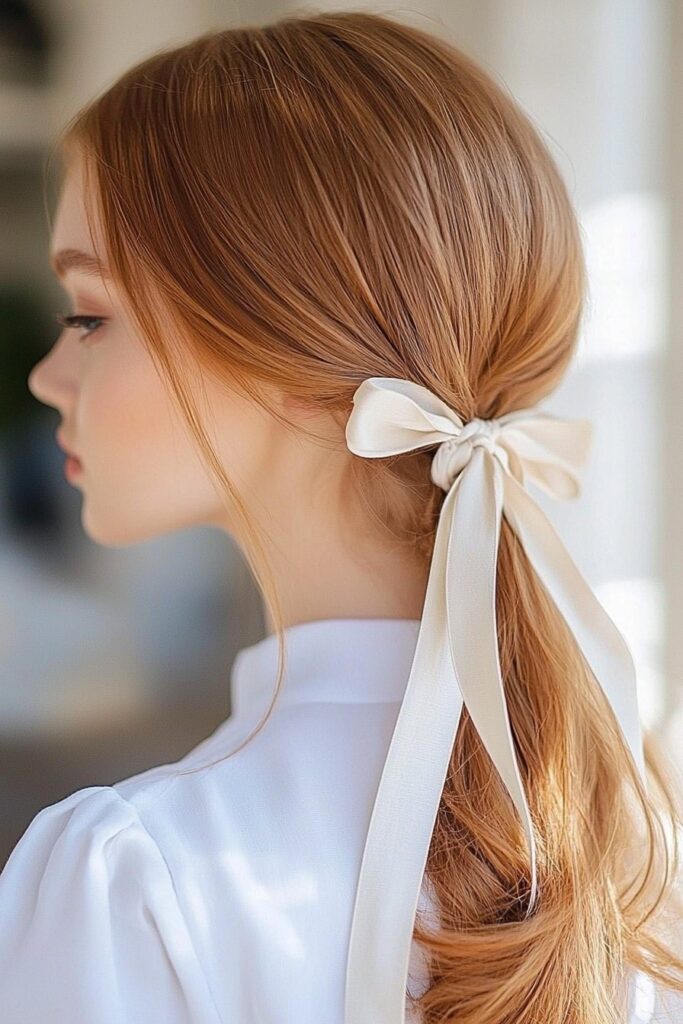
My years of doing bridal and prom hairstyles in Los Angeles have taught me that ribbon-wrapped low ponytails give you that perfect mix of romance and value. This style works great with hair of all textures and lengths.
Choosing Affordable Ribbons
The best results come from using a 2-inch wide ribbon that matches your hair color, or you can pick a contrasting shade to make it stand out. Suede or velvet ribbons add a touch of class, while pastel-colored satin ribbons look softer and more feminine. Quality ribbons won’t break the bank – beautiful white double-face satin ribbons start at just USD 1.40.
Wrapping Techniques
Start by putting your ponytail at the nape of your neck with an elastic. Cut the ribbon long enough to wrap around your ponytail several times based on your hair’s length and thickness. Wrap one end of the ribbon around the base of your ponytail until the elastic is hidden. Take both the ribbon and tail end under the ponytail and tie them in a tight knot.
Securing Methods
These pro tips will help your style last:
- Tuck the ribbon’s tail end under itself on the first wrap
- Keep the rows even as you wrap down the ponytail
- Use clear elastics that match your hair color
The great thing about this style is how you can make it your own – wrap just a few inches, half the ponytail, or go three-quarters down. Small, clear elastic bands placed along the wrapped section add extra hold. A light spray of hairspray will help keep the ribbon in place all evening.
Note that sealing the ribbon ends stops them from fraying. Just run a clean flat iron on low heat over synthetic ribbons. This trick keeps your style looking perfect for photos all through prom night.
Crimped Texture Ponytail
My Los Angeles salon clients love how the crimped texture ponytail has made an exciting comeback. This fresh twist on traditional prom hairstyles blends vintage charm with modern sophistication. You’ll get a striking look that won’t break the bank.
DIY Crimping Methods
You don’t need a crimping iron to create this look. Start by making tiny three-strand braids throughout your hair. Secure each braid with clear elastic bands. A flat iron works great to gently press each braid – just watch out for those elastics. Let your hair cool down completely. Cut the elastics and unravel your braids to reveal beautiful crimped waves.
Budget Tools
The best crimpers have notched plates that create perfect zig-zags in your hair. Here are some affordable styling options that work just as well:
- A wide-plate straightener creates larger waves
- Changeable plates give you versatile styling options
- A triple-barrel iron makes wider crimps
Styling Tips
Your hair should be straight or wavy before you start – curly or frizzy hair needs straightening first. The quickest way to crimp is to start at the roots and work your way down. Slide the crimper further down before clasping the plates together again. These professional techniques will give you amazing results:
A vintage-style ponytail needs texture along the entire length of your hair. You might want a subtle effect by crimping small sections or just the tips. This versatile style works in several positions – high on top gives you a perky look, mid-height creates casual elegance, and low at the nape shows sophisticated charm.
Heat protection is crucial before you start styling. A tiny amount of shine-enhancing product distributed through your crimped waves makes all the difference. You can easily customize this look based on your style and keep that expensive salon finish throughout your special evening.
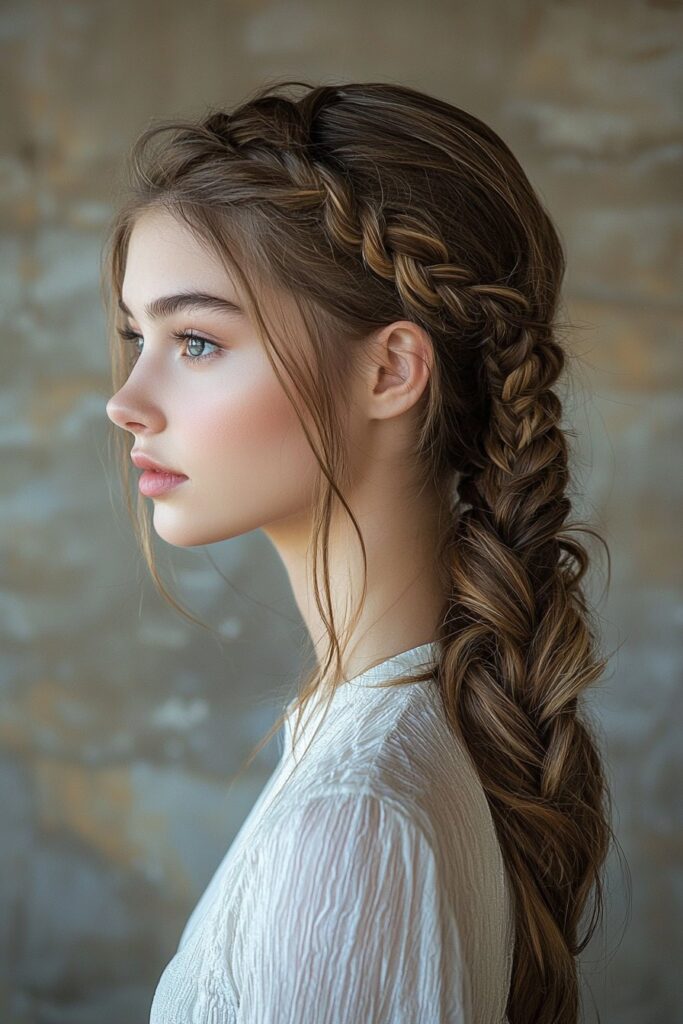
Braided Crown into Ponytail
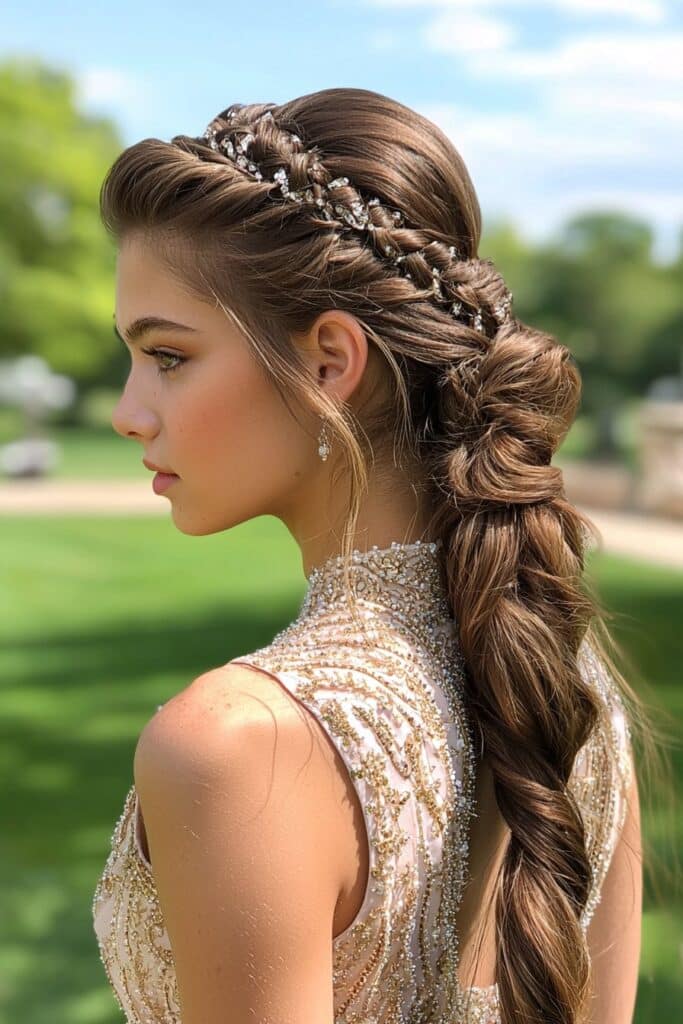
My experience with countless brides and prom clients in my Los Angeles studio shows that the braided crown into ponytail never goes out of style. This classic style brings together elegance and practicality, which makes it a perfect choice when you want an affordable yet sophisticated look.
Easy Braiding Tutorial
A clean middle part splits your hair into two equal sections. The process starts behind your left ear with a small section about three inches wide. The next step creates a Dutch braid by crossing the outer sections under the middle, which continues this pattern for three stitches. The technique changes when you reach your ear – you stop adding new sections to the top strand.
Securing Techniques
The best hold comes from clear elastic bands that match your hair color. Small bobby pins work best with their flat side facing upward, and they should only catch the outer layers of hair. This approach gives great support without any discomfort. People with thicker hair should use multiple bobby pins instead of just one.
Making It Last
Your hair needs prep with a lightweight mousse before styling. A gentle mist of flexible-hold hairspray on a toothbrush helps smooth down flyaways. These professional techniques will boost your style’s durability:
- Gentle stretching of braids creates a fuller look
- Extra pins between braid stitches add security
- Hairspray mist focuses on frizz-prone areas
Second-day hair works best for this style since natural oils give better grip and texture. The goal isn’t perfection – we’re after a romantic, slightly messy finish that looks amazing in photos. This versatile style can last up to two weeks with proper care. Just wrap the crown into a loose bun and cover it with a silk scarf at night.
Voluminous Retro Ponytail

My years of creating retro-inspired hairstyles in my Georgia salon have taught me that the voluminous retro ponytail steals the show on prom night. This classic style brings vintage glamor at a reasonable cost, making it a perfect choice to raise your look without breaking the bank.
Creating Volume
Clean, dry hair needs a heat protectant before you start styling. The next step involves sectioning your hair near the crown and back brushing gently from tips to roots to create that signature ’80s-inspired volume. A volumizing dry shampoo works best when misted at the roots and worked through each section. The crown area needs careful teasing – brush out the original frizz to get a polished yet voluminous finish.
Budget-Friendly Tools
You’ll need these affordable essentials to create this sophisticated style:
- A fine-tooth comb to tease precisely
- A boar bristle brush to smooth
- Clear elastic bands matching your hair color
- Flexible-hold hairspray to keep the volume
Setting Techniques
Start by applying mousse before blow-drying to get bouncy, voluminous results. The next step focuses on creating height at the crown through gentle back-combing of small sections. Bobby pins inserted underneath the ponytail’s base in a crisscross pattern will boost durability.
Your special evening needs a style that lasts. Volumizing powder applied to the roots gives extra lift. Two hair ties instead of one provide additional support. The style ended up looking best with a medium-hold hairspray that locks in volume while allowing natural movement.
Shorter layers work well with a lightweight shine serum that keeps strands in place. This retro style actually works better with second-day hair since natural oils give better grip and texture. The best lift comes from focusing the teasing on the crown and back of the head.
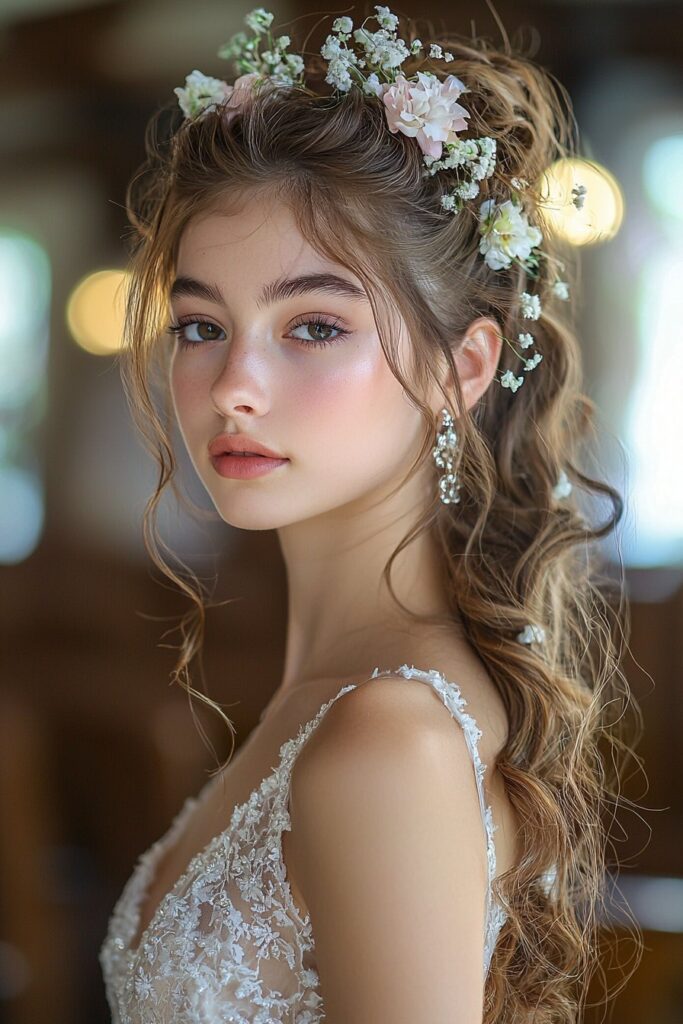
Side-Swept Romantic Ponytail
My move from Georgia to Los Angeles changed how I create romantic hairstyles. The side-swept ponytail has become a hit with my prom clients. This elegant style blends sophistication with affordability and works perfectly for special occasions.
Styling Steps
Part your hair deeply on one side so it lines up with your face shape. A heat protectant should go all over your strands before you curl them with a wide-barrel iron to create loose waves. The unique part comes when you sweep all your hair behind your head toward the opposite side. Let it fall naturally over your shoulder. A few face-framing pieces should stay loose on both sides to soften your look.
Affordable Products
These budget-friendly essentials work great:
- A wide-barrel curling iron that creates perfect Taylor Swift-inspired curls
- Clear elastic bands matching your hair color
- Bobby pins in coordinating shades
- A flexible-hold hairspray that allows natural movement
Long-Lasting Methods
Your hair works better when it’s slightly dirty because it has more grip and texture. The crown area needs gentle backcombing for extra lift, especially at the roots where volume drops first. Bobby pins should cross for better security – you’ll need about four pins to keep the style in place.
Your prom night hairstyle will last longer with these professional techniques. Start with a lightweight primer spray before styling to protect your hair from heat damage. Each section needs bobby pins crossed underneath for the best hold. This style looks amazing with second-day hair since your natural oils create better texture and hold.
A light layer of hairspray should cover the finished style. Pay attention to areas that might frizz. These steps will give your side-swept ponytail its romantic appeal and make it look beautiful in photos from any angle.
Twisted Rope Ponytail
My salon’s move to Los Angeles revealed that prom clients increasingly request the twisted rope ponytail. This elegant style combines two simple twists into one sophisticated look. The style offers an affordable yet polished option for special occasions.
Rope Braiding Tutorial
The rope braid creates an intricate appearance but isn’t actually a braid – it forms through a series of strategic twists. Your hair needs to be secured in a simple ponytail near the crown. Tilt your head back for better control and brush out any tangles before splitting the ponytail into two equal sections. The first section should be twisted clockwise along its full length and secured temporarily. The remaining half follows with a clockwise twist as well.
Securing Tips
Clear elastics matching your hair color provide optimal hold. The style’s uniqueness comes from covering the original elastic by wrapping a small section from the ponytail around its base. Each twist should be held in one hand and rotated counterclockwise around each other along your hair’s length. A styling powder application beforehand helps improve grip.
Making It Look Polished
Clean, brushed hair and a deep side part create that expensive-looking finish. The style works exceptionally well with bangs or fringe – the rope braid twists keep them secure whatever the temperature. These professional techniques add sophistication:
- Apply a flexible-hold styler before twisting
- Cross sections opposite to your original twist direction
- Add small hair pieces to both sections before crossing
A small elastic should secure the ends together. The style becomes more versatile when loosely twisted over your shoulder without the top elastic. A light mist of hairspray locks in your style, especially in areas prone to frizz.
Sleek Wrapped High Ponytail
My years of creating stunning hairstyles have taught me that sleek wrapped high ponytails give clients that expensive look they love. This sophisticated style has become a prom favorite because it looks elegant without costing too much.
Wrapping Techniques
Start by securing your ponytail with a strong elastic band matching your hair color. Take a pencil-width section of hair from under the ponytail. The section needs slight backcombing to create grip before you wrap it. A unique approach is to wind the hair around one side of a bobby pin first, then wrap it to hide the elastic completely.
Budget Products
You can achieve that salon-worthy finish on a budget with these items:
- Professional-quality bobby pins (like Goriki brand or 333) that hold better
- Stainless steel 3-inch hairpins work great for thick hair
- A lightweight gel matching your hair color
Professional Finish Tips
Damp hair gives you better control while styling. A mousse application before blow-drying creates amazing bounce and volume. The style lasts longer with this special technique: weave the ends through using a larger bobby pin and push it through the ponytail’s top.
Your style will last all evening with these expert tips. Curl any shorter layers under before you begin to stop them from poking through. A Topsy Tail tool helps pull the ends through after wrapping – do this on the ponytail’s underside.
Stick-straight strands with intense shine create that perfect expensive look. Your hair might not be long enough, so think about getting a wrap extension matching your natural color and texture. This combination of techniques will give your wrapped ponytail a sophisticated appeal that photographs beautifully from any angle.
Accessorized Classic Ponytail
My Georgia salon has styled countless red carpet events, and I’ve found that there was something magical about a classic ponytail with the right accessories. This timeless style becomes a real showstopper when you add carefully chosen embellishments.
DIY Hair Accessories
You can add a personal touch and save money by making your own hair accessories. To name just one example, see how stunning ponytail bows look with 1-inch ribbons in matching colors. The process starts with cutting ribbon strands about 20 inches long and folding them in half to find the center. The trick is to weave thread through each strand without stacking them on top of each other, which creates a fuller look. Pearl embellishments need clear beads attached to hair clips with strong adhesive. Silicone beads work best for hair ties because they last longer.
Placement Tips
Statement clips look best about an inch away from your hairline to naturally frame your face. Floral pins scattered throughout your ponytail create a dreamy, ethereal effect. Pearl-detailed accessories really shine when they line up with your cheekbones or eyes. The style stays elegant when you spread one or two decorative clips behind your head instead of bunching them together.
Securing Methods
Start with dry shampoo or texturizing spray near the roots to boost grip. A strong elastic band that matches your hair color should hold your ponytail firmly. A small comb attachment slipped underneath your hair elastic adds extra stability. Bobby pins crossed horizontally hold better, especially in spots where accessories feel loose.
A velcro base that sticks together will keep your style intact all evening. The final touch involves wrapping a long strand of hair around the base and securing it with matching bobby pins. These techniques combined will give your accessorized ponytail a sophisticated look that stays put for hours.
Conclusion
My years of creating prom hairstyles across Georgia and Los Angeles have shown that ponytail variations consistently deliver the perfect mix of elegance and affordability. These styles photograph beautifully and stay secure throughout special evenings, which my clients absolutely love.
You can recreate these sophisticated looks at home with simple styling tools and affordable products. Students pick up these techniques quickly, particularly when they work with day-old hair and properly prep their strands.
Note that stunning hair doesn’t need expensive salon visits or premium products. My experience with countless prom clients has proven that simple techniques make all the difference. Strategic bobby pin placement and careful product selection create amazing results. These ponytail styles adapt wonderfully to every hair type and texture, showing that skill matters more than spending.
Teaching these styles brings me joy as I watch my clients grow more confident while they create salon-worthy looks independently. The perfect prom-ready ponytail is within reach. Take time to practice these techniques before your big night, and you’ll achieve stunning results with patience and the right approach.