
Looking for prom updos that will stay perfect throughout the night? I know exactly how you feel – prom night stands out as one of life’s unforgettable moments, and the right hairstyle can raise your look to another level.
My experience as a hairstylist has taught me how to create beautiful updos that look amazing and stay intact during hours of dancing and photo sessions. You’ll find everything from classic chignons to romantic braided crowns. These prom hairstyles complement your dress and showcase your natural beauty perfectly. The best news? You can create these stunning updos at home without much hassle. Let me show you 17 beautiful options that will help you feel confident and radiant on your special night.
Sophisticated Low Knot
Want a timeless prom hairstyle that radiates sophistication? The low knot updo is one of my favorite picks for formal events. This classic style strikes the perfect balance between elegance and modern flair, and it shows off intricate dress necklines beautifully.
Knot Tying Technique
My process begins with a defined center part before gathering the hair into a low ponytail, with strands tucked neatly behind the ears. A dry volume product applied to the roots adds amazing texture. The ponytail should be split into two sections and twisted together. You can wrap these around the base and secure them with bobby pins. Keep the knot close to your head for that polished look.
Smoothing Tips
A light smoothing with a flat iron before styling gives you that perfect sleek finish. Layer in some dry texture spray to control flyaways and create just the right texture, paying extra attention to the crown area. On top of that, break down the hair in the crown with your fingers to create subtle separation and volume. This approach balances polish with effortless chic perfectly.
Adding Elegance
You can lift this sophisticated style by pulling small pieces of hair in front of the ears to softly frame your face. A smooth crown area with good volume works best for formal occasions. This style’s beauty comes from its versatility – it looks stunning with both silky smooth and slightly textured hair. The updo pairs perfectly with elegant gowns and looks even better with delicate hair pins or pearl accents.
The low knot updo works especially well with second-day hair since texture helps the style stay put. Your hairstyle will remain secure through a night of dancing and photos, making it perfect for prom.
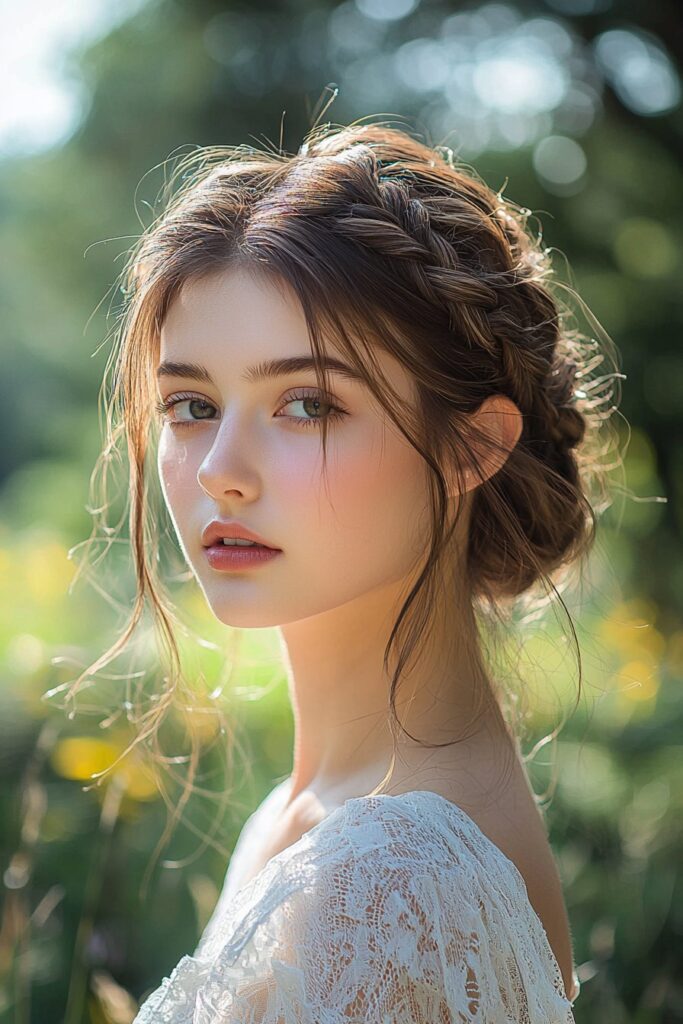
Braided Halo Crown

The braided halo crown makes a perfect romantic and ethereal prom hairstyle. My experience as a hairstylist shows this style works best with second-day hair that provides better grip and texture.
Halo Braid Steps
The process begins with a deep side part above one eyebrow. Dutch braiding follows toward the side with less hair. The Dutch braid technique requires crossing each strand under instead of over to make the braid pop from the scalp. A smooth corner requires careful hand position swapping just under the ear – this is a vital part of the process.
The braid continues across the back of the head and up the other side. My favorite volume-boosting trick uses forefingers and thumbs to pull the edges of each braid section gently. This “pancaking” technique creates fuller-looking hair while keeping the style’s structure intact.
Securing the Crown
Prom night demands a secure halo, so flat-pressed closed bobby pins work best against the scalp. Strategic pin placement at the braid’s least stable points works better than opening pins, which tend to pop out. A medium-hold hairspray helps the style withstand weather and dancing.
Adding Flowers
Fresh flowers can lift this romantic style beautifully. Small blooms or baby’s breath that match your dress create a cohesive look. The flowers need careful tucking into the braid without disrupting its shape. Green and white flowers offer a classic, refreshing look perfect for winter proms.
This versatile style shines at formal events and casual occasions alike. A few loose pieces around the face and ears create a sophisticated look that’s softer than a strict, pulled-back style.
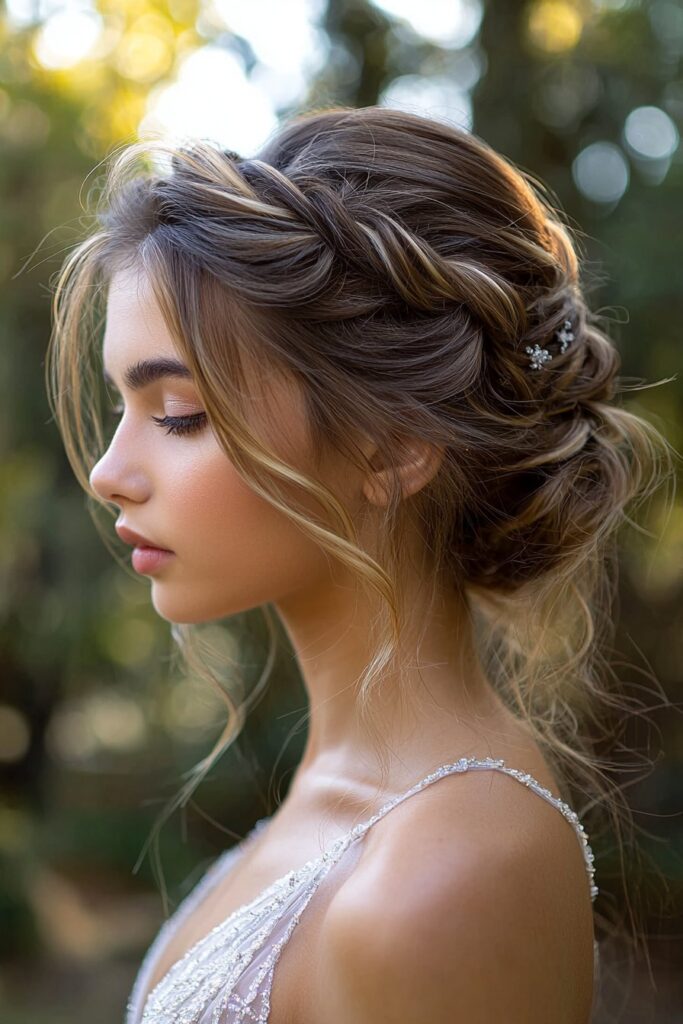
Modern Twisted Updo
My specialty as a hairstylist is formal updos, and I have found that there was something special about the modern twisted updo. It perfectly combines classic elegance with contemporary style. This versatile hairstyle works great with slightly textured or second-day hair and makes a perfect choice for your prom night.
Twist Placement
Creating this sophisticated look depends on where you place the twists. I create texture by alternating curl directions with a flat iron. The hair needs to be divided into two sections. I start from the right side and leave some strands to frame the face. The bottom strand crosses over the top strand as I add hair from the outside while working downward.
The French twist technique adds more dimension when the hair rolls over and around the base of a bump. This creates an elegant swirled look. The style should sit lower at the nape but stay balanced with volume at the crown.
Securing Methods
Your updo needs to last through prom night, so here are my proven techniques to keep it in place:
- Closed bobby pins give maximum hold when you slide them straight along the edges
- A firm-hold hairspray designed for formal styles keeps everything secure
- Texture spray at the roots provides better grip and control
Slippery hair needs rubbery bobby pins or regular pins sprayed with hairspray beforehand. The final touches involve gentle pulling at sections that creates controlled volume while keeping the overall structure intact.
This modern take on the classic French twist looks amazing with any prom dress. You can customize it through different textures and placements to complement your features perfectly.
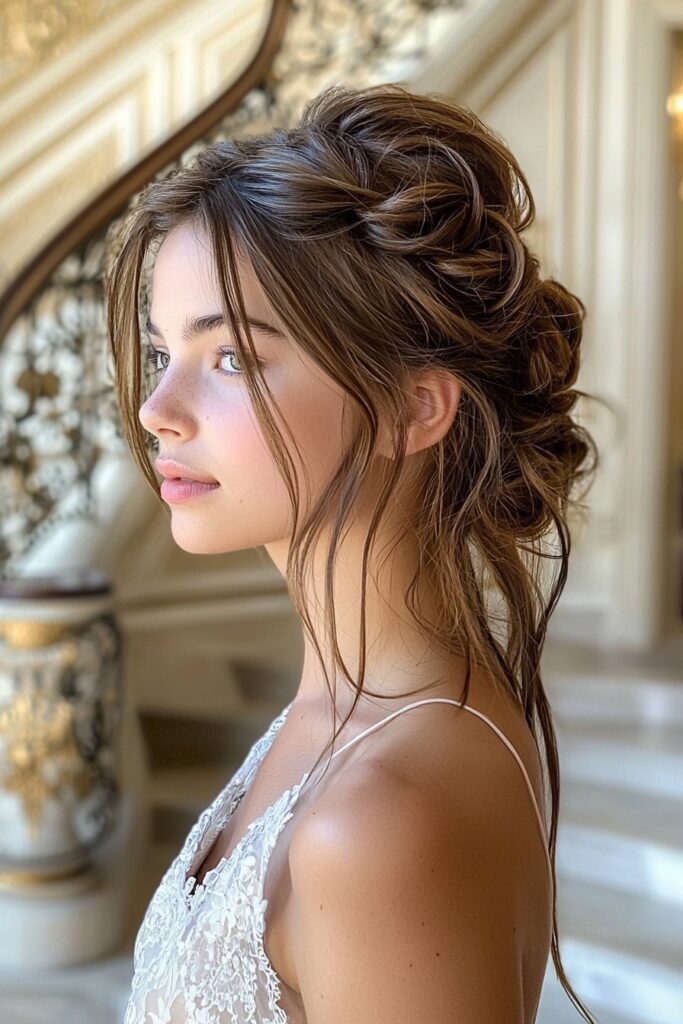
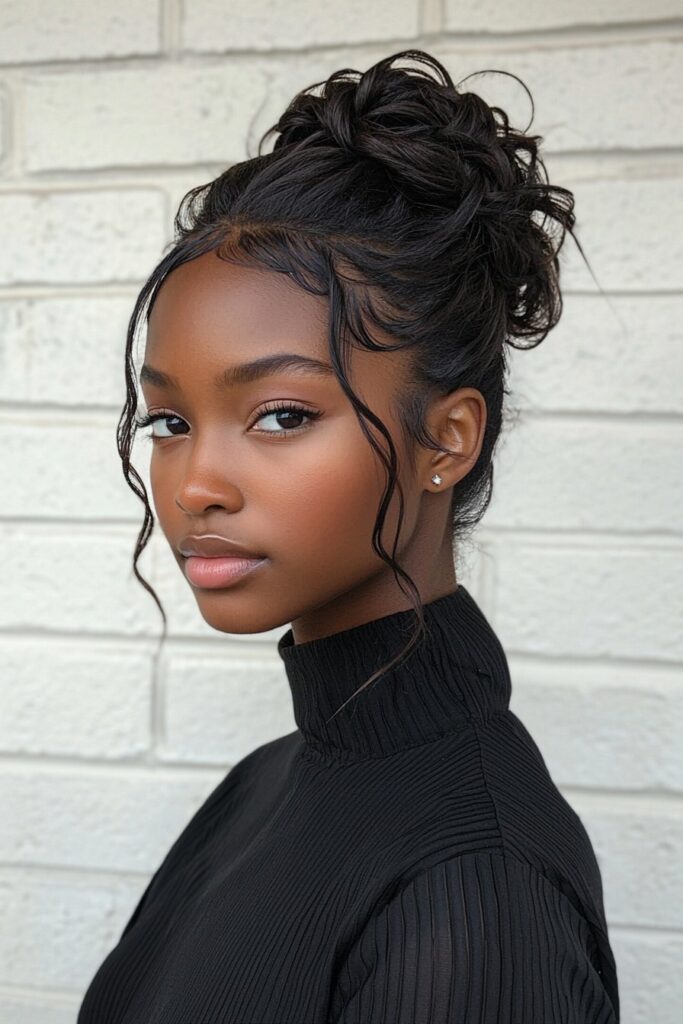
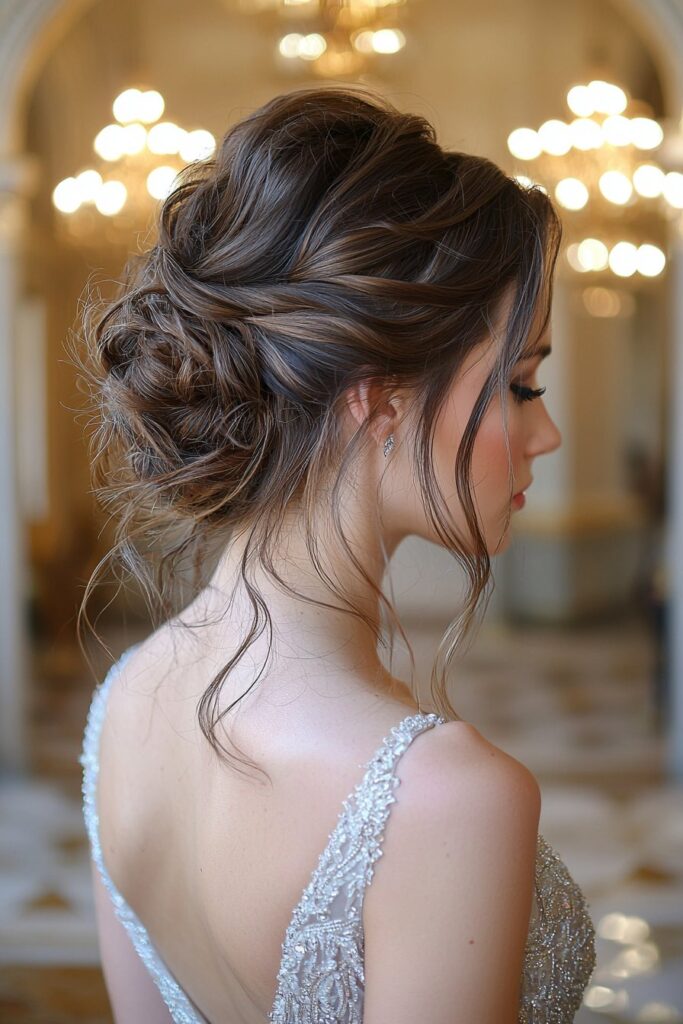
Voluminous High Bun
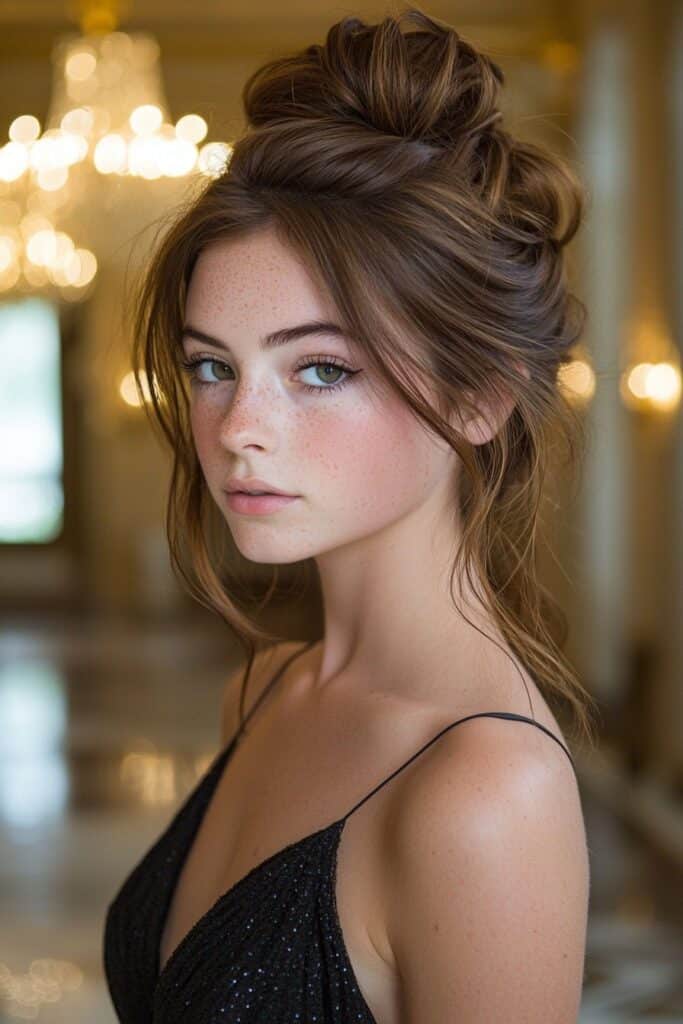
A high bun is both practical and glamorous among prom updos. This style lets you show off your statement jewelry and necklines. My experience styling formal events has taught me the best techniques to create a voluminous high bun that lasts all night.
Creating Volume
Your hair needs grip and texture, so start with second-day hair. Apply dry shampoo to the roots and shake your hair gently to build volume. Pull your hair into a high ponytail. Leave some pieces loose near your face and ears to create a softer look. You can achieve extra lift by pulling the ponytail forward after securing it.
Bun Shaping
A perfect bun shape starts with the right preparation. Curl the ponytail with a 1.25-inch iron if needed. A mesh hair donut creates the foundation for fullness. Place the donut and wrap your hair around it section by section. Secure each part with bobby pins. Here’s what makes it look polished:
- Use a hair net that matches your hair color to eliminate flyaways
- Place the bun where your crown meets the back of your head
- Tease the wrapped sections to create controlled volume
Using Extensions
Clip-in extensions can turn a simple bun into a stunning updo. Apply extensions upside down with clips facing up, but only to the widest part of your head. Your extensions will blend naturally if you:
- Add texture to your natural hair with dry shampoo before clipping
- Secure extensions through both natural hair and the weft
- Use light hairspray for better hold
This style works great with straight or textured hair. You can customize the look by adjusting the height and adding face-framing pieces to suit any face shape or dress style.
Fishtail Crown Updo
The fishtail crown updo adds a royal touch to any prom look. It’s one of my favorite styles to create for formal events. My experience with countless prom hairstyles has shown that this look is both stunning and achievable when you want something special.
Fishtail Technique
The process begins with a center part that divides the hair into two equal sections. You’ll need to become skilled at the cross-under method. Take a small piece from the back section and guide it underneath before you blend it into the front section. Then grab another small strand from the front, cross it under and merge it with the back portion.
The style gets more dimension when you work loose hair from above the braid into the upper section before crossing it under. The same applies when you blend hair from below the braid into the lower section. Keep the tension consistent so your braid stays secure and elegant.
Crown Placement
Once your fishtail braid is ready, pull the edges gently to create fullness. This technique works just like fanning a deck of cards and adds volume while keeping the style’s integrity. The crown shape comes together as you drape the braid around the head and secure it with bobby pins.
Blonde or lighter hair types need a smoothing serum to keep frizz under control. The sort of thing I love about this style is that it works better with second-day hair because it gives you more grip and texture.
This updo’s beauty comes from its adaptability – you can wear it sleek and polished or relaxed for a romantic feel. Bobby pins placed behind the ears and at the neck’s nape will keep everything secure during prom night dancing. A light mist of hairspray finishes the look and helps maintain its regal appearance all evening long.
Elegant Side Sweep
Side-swept hairstyles are trending for prom right now. They strike a perfect balance between sophistication and modern style. My years as a professional hairstylist have taught me the best ways to create this timeless look that pairs perfectly with strapless and one-shoulder dresses.
Side Sweep Steps
Let’s start with a deep side part that lines up with your eyebrow’s arch – this naturally flatters most face shapes. The hair needs to be sectioned diagonally from the part down to your neck’s nape. I secure the larger section away first. Next, I spray strong-hold hairspray close to the roots on the smaller side and comb it through evenly. This keeps your style looking fresh all evening.
Adding Waves
Those glamorous waves come from wrapping 2-inch sections around a 1.5-inch curling iron. I alternate between clockwise and counterclockwise directions to create natural-looking movement instead of uniform curls. A sea salt spray before styling works wonders. Just scrunch your hair gently to bring out its natural wave pattern.
Securing the Style
Your side sweep will last longer with the right pinning technique. Bobby pins should form a straight line that follows your hair’s direction. I cross them in an X-pattern at key points to make them extra secure. Here’s a pro tip: spray those bobby pins with hairspray before putting them in – they’ll grip better.
The waves should cascade beautifully over one shoulder to frame your face. If you’re wearing an asymmetric dress, I suggest putting your hair on the opposite side of any detailed areas. This style looks amazing with both sleek and textured finishes, so it works with pretty much any dress style you choose.
A few delicate hair accessories or fresh flowers can add that final touch of elegance. Just place them carefully so they enhance rather than overpower your look. This style stays polished yet effortlessly chic throughout prom night.
Twisted Rope Bun
The twisted rope bun stands out among my favorite prom hairstyles. It adds texture and interest to traditional updos. This elegant style works great with second-day hair, which makes it perfect when you’re getting ready for prom.
Rope Twist Tutorial
I start this stunning updo by gathering all the hair to one side and splitting it into two equal sections. The magic happens in the twisting technique – both sections need to be twisted in the same direction, usually to the right. I wrap these sections together in the opposite direction to create that rope-like look.
Want extra volume? Try pulling at the edges of the rope twist before making the bun. I use this technique often at formal events because it creates a fuller look without ruining the style.
Bun Formation
After completing the rope twist, I secure the end with a clear elastic that matches the hair color. This helps it blend naturally into the final style. The braid curves around to form a bun, and I place bobby pins carefully to keep its shape. Bobby pins go at important points where the bun meets the head to keep it secure all evening.
These professional styling tips will help you create a more formal look:
- A light mist of hairspray before twisting gives better grip
- Micro rope twists add intricate texture details
- Small, clear elastics keep each twist secure
You can customize this style based on what you like. The rope twisted bun looks beautiful whether you want a sleek, polished look or a looser style with romantic tendrils framing your face. It works with any prom dress.
I sometimes add delicate accessories or weave small flowers into the twists for extra glamor. In spite of that, this updo’s real beauty lies in how it stays elegant through hours of dancing and celebration.
Boho Braided Updo
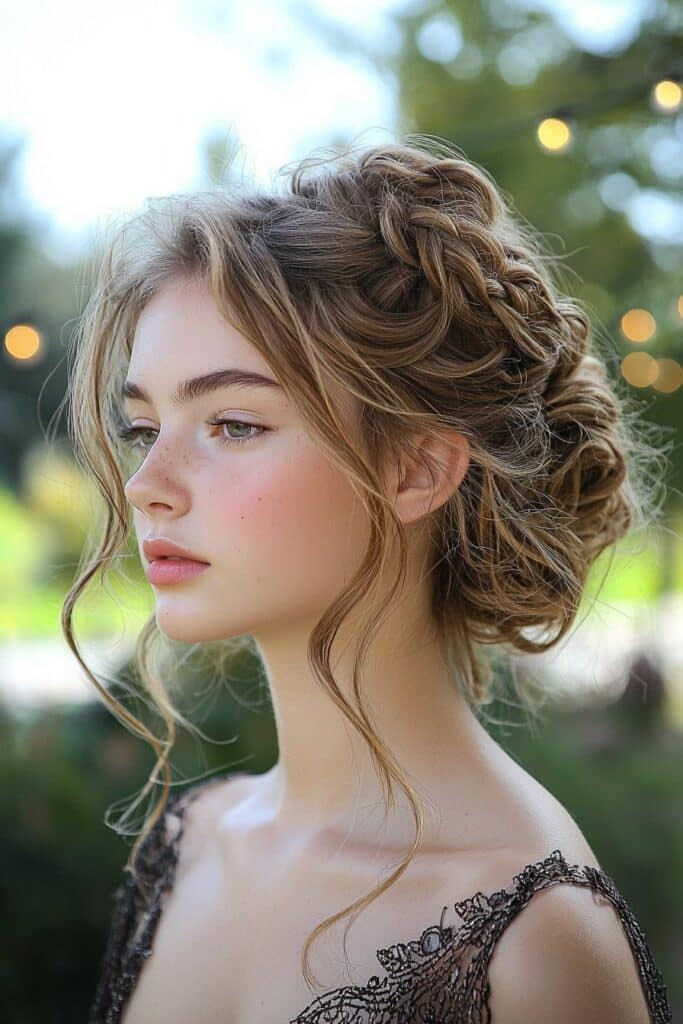
Boho braided updos have become my signature style for prom hairstyles. Over the last several years, I’ve found that this free-spirited look works really well with textured or second-day hair. It gives both elegance and comfort to the wearer.
Braid Pattern Guide
The process starts at the crown with a loose Dutch braid. I separate the hair into three equal sections. The trick is to cross strands under rather than over while keeping even tension throughout. My technique involves working with diagonal sections during braiding. Each piece blends naturally into the overall pattern. This approach creates a natural flow that makes the bohemian look even better.
Texture Tips
The perfect boho texture comes from starting with curled hair. I work with diagonal sections but leave the crown untouched. This naturally builds volume at the top. A gentle pull at the braid’s edges creates a fuller, more relaxed look. These tips help you get better grip and control:
- Put dry shampoo on before styling
- Create controlled messiness with strategic teasing
- Use clear elastics on each section for lasting hold
Adding Accessories
Boho braided updos are great for trying different accessories. I pick delicate flowers that work well with the braid pattern. Fresh flowers look amazing for spring proms. Here are some other great additions:
- Small accent braids to add style details
- Pearl or crystal pins for a touch of sparkle
- Delicate hair chains woven between braid sections
Bobby pins go strategically behind the ears and at the nape. They stay hidden within the braid pattern. A light spray of flexible-hold hairspray keeps the purposefully undone look while allowing natural movement.
This updo style matches both formal and relaxed prom dresses. It strikes the right balance between sophisticated and carefree. Face-framing pieces and adjustable braid tension let me customize each style to match individual features and dress necklines.
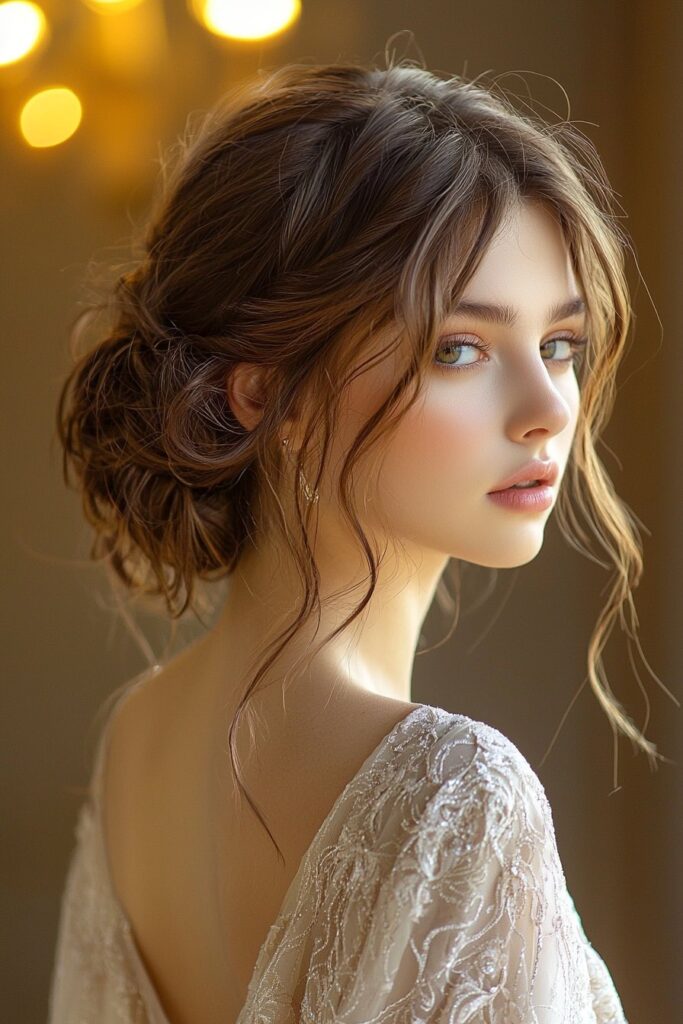
Classic Chignon
A classic chignon remains a timeless choice for prom night. This sophisticated updo, pronounced “sheen-yon,” creates an elegant knot at the neck that works beautifully with any dress style.
Chignon Basics
Your perfect chignon’s foundation starts with proper preparation. Day-old hair works best because it gives natural texture and better grip. Unlike traditional buns that twist around themselves, a chignon gives you more flexibility – you can style it as a simple tuck-under or create an intricate wrapped design. The best results come from gathering the hair into a low ponytail and making sure all sections stay smooth without bumps.
Modern Variations
Modern chignons blend classic elegance with fresh touches. Texturizing sprays help create controlled volume at the crown. A relaxed look comes from lifting sections at the crown and letting some pieces frame the face naturally. You might also want braided elements or an asymmetrical placement that adds a modern twist.
Securing Methods
Your chignon’s staying power depends on the right securing techniques. Medium-hold hairspray near the roots improves grip. Bobby pins work best when placed in a straight line, facing toward the hair’s growth direction. These tips help secure the style:
- Use hairpins instead of bobby pins to hold better
- Apply product strategically to prevent slipping
- Create anchor points at vital spots around the updo
This style’s versatility lets you customize it based on your priorities – from sleek and polished for traditional gowns to artfully undone for a contemporary look. Strategic placement of accessories and careful securing techniques ensure your elegant updo stays perfect throughout prom night.
Wrapped Ponytail Updo
The wrapped ponytail updo has become my signature style that creates polished prom looks effortlessly. This versatile hairstyle turns a simple ponytail into an elegant updo and stays secure all evening.
Wrapping Technique
My perfect wrap starts with gathering the hair into a ponytail at the desired height using a flat hair tie. A small half-inch section from the top of the ponytail needs separation. The section should be curled with a curling iron, threaded through a bobby pin, and twisted once or twice for extra grip. This preparation will give better control as the hair wraps around the ponytail’s base.
Height Adjustment
This style’s beauty comes from its adaptability. Your dress neckline and facial features should determine the ponytail’s position. A mid-height placement works beautifully with strapless gowns and elongates the neck. The perfect height comes from gently pulling the ponytail upward or downward after securing it, while the base stays smooth without bumps.
Smoothing Tips
A flawless finish needs careful attention to detail. The process begins with applying a frizz-fighting cream before blow-drying with a boar bristle brush. Those stubborn baby hairs at the nape can be smoothed upward with a clean toothbrush spritzed with hairspray. The sleek appearance stays with these steps:
- Start with freshly washed hair using a frizz-control shampoo system
- Apply dry texture spray at the roots for better grip
- Use closed bobby pins, pressing them flat against the scalp
A shine-enhancing hairspray spritz once the style is complete ensures lasting hold. This technique works perfectly with straight and wavy textures, making it great for hair of all types. Strategic bobby pin placement and proper product application help this sophisticated updo maintain its elegance from the first photo until the last dance.
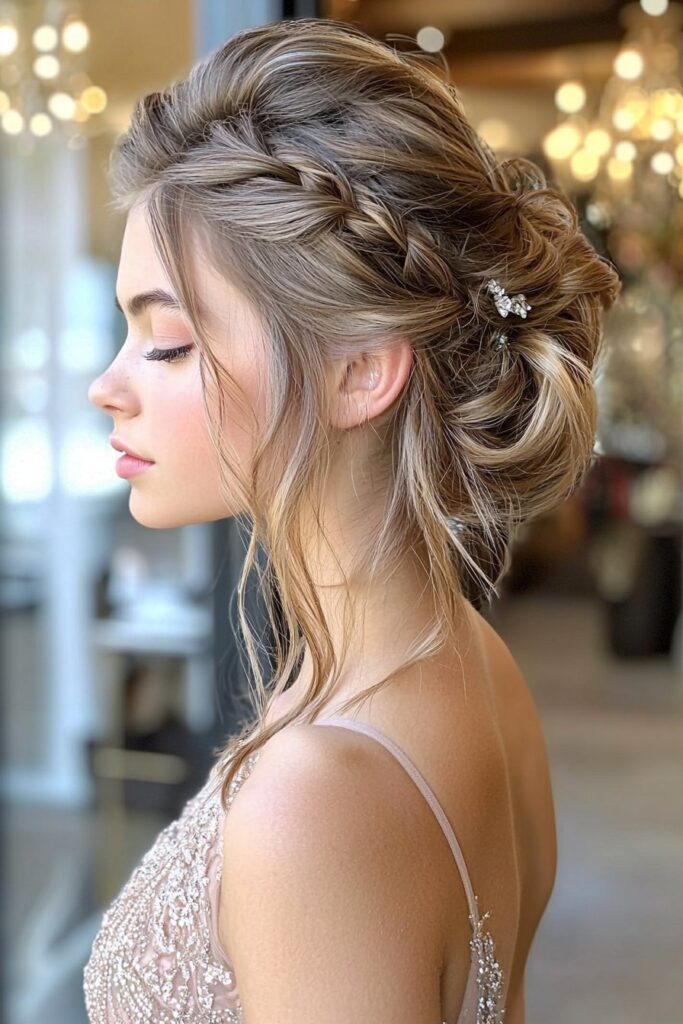
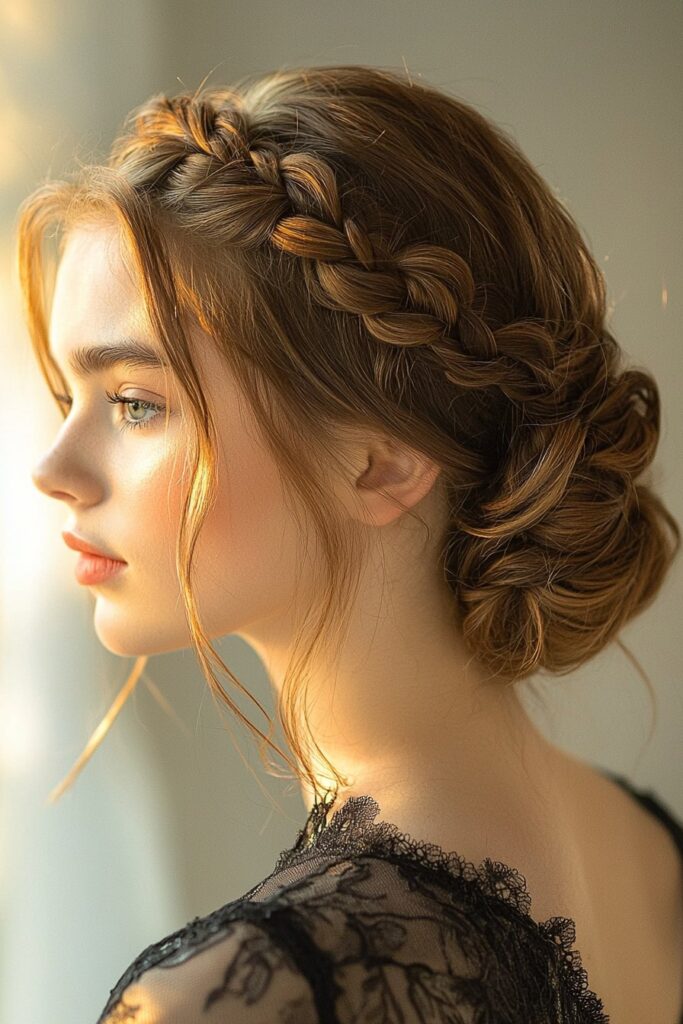
Twisted Crown Braid
My experience styling formal events has taught me that twisted crown braids bring a fresh look to traditional prom updos. This beautiful style blends a crown’s elegance with modern rope twists to create a sophisticated look that frames the face perfectly.
Crown Formation
The magic starts with careful sectioning. I make a deep side part that matches my brow’s arch. I take two 1-inch sections of hair and place them halfway at the part. One section needs to sit right below the other. The technique works best when you cross the bottom section up in front of the top piece. Keep the tension steady as you work.
You need to add new sections of hair to the bottom strand while moving around the head. Make sure the hair stays completely smooth. The best results come from:
- Using small sections about 1-inch wide
- Following your hair’s natural direction
- Keeping the twists tight against your head so they stay secure
Securing the Twist
The perfect circular shape comes after you finish the basic twist. Cross the twist firmly at the crown’s base. Then push the ends upward and secure them with bobby pins in an X-pattern. This gives you the strongest hold. These professional techniques will make your style last:
- Put in at least eight bobby pins to keep everything secure
- Make an X with your pins to lock the style
- Tuck the twist under the front section so it looks smooth
The style looks even better when you pull small pieces at the crown gently. This creates nice volume and detailed texture. Put bobby pins anywhere the braid needs support. Your style will stay perfect throughout prom night.
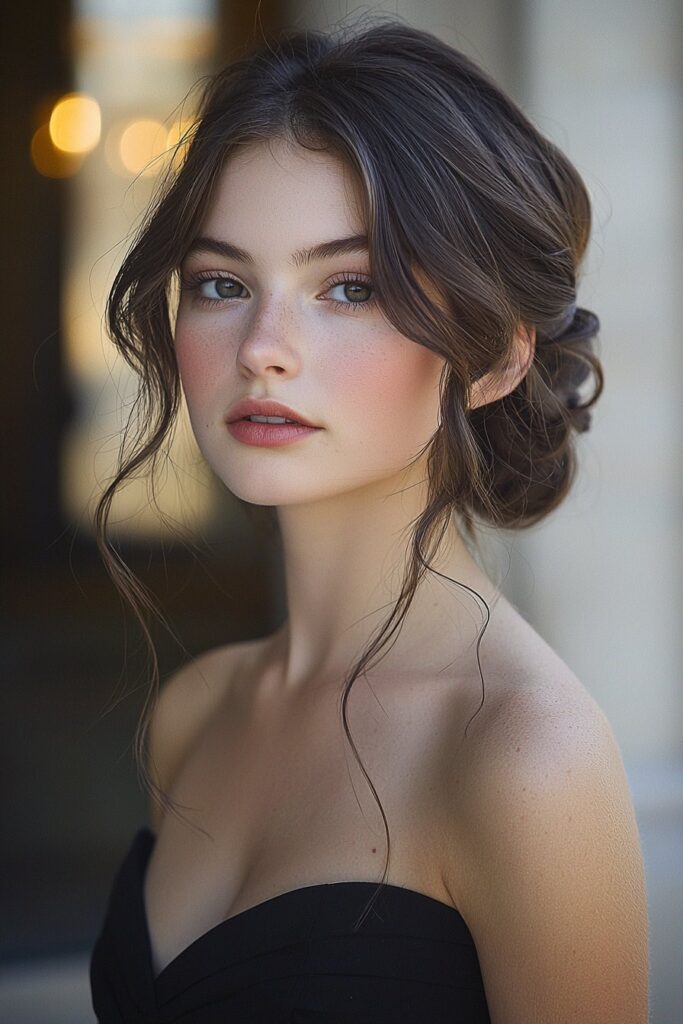
Romantic Side Bun

My years as a celebrity makeup artist and hairstylist have shown me that the romantic side bun is a magical choice for prom night. This updo strikes the perfect balance between sophistication and charm. It creates a timeless look that feels modern.
Side Positioning
The bun looks best when placed just below one ear, which creates a beautiful face-framing asymmetry. Your hair should have some texture to give you better grip and control while styling. I start by gathering half the hair into a side ponytail and secure it with a hair-colored elastic band. This helps the bun sit naturally against your head without looking too stiff.
Adding Waves
The romantic texture comes from alternating curl directions with a one-inch curling iron. This stops the curls from clumping together and creates natural movement throughout your style. Day-old hair works best, but you can use texturizing spray on clean hair. The secret is to create just enough volume while keeping everything polished.
Accessorizing
This updo’s beauty shines through its adaptability to different embellishments. A bohemian look emerges when you add fresh flowers or delicate hair pieces above the bun. The style will last all night if you follow these professional techniques:
- Use rubbery bobby pins at the base to keep everything secure
- Apply firm-hold hairspray to the crown area
- Cross pins around the bun to create strong anchor points
The style looks softer when you gently pull out small sections near your face. This technique works beautifully with straight or wavy hair, adapting to your hair’s natural texture. The right placement and securing methods will keep this romantic updo looking elegant from your first dance until your final photo.
Double Dutch Braid Updo
The double Dutch braid updo is a perfect mix of detailed work and staying power. My specialty is formal hairstyles, and this stunning style has become a top choice for prom. Students love it because it looks elegant and stays comfortable all night.
Dutch Braid Steps
A center part helps me split the hair into two equal sections from front to nape. The hair should be slightly damp to get a better grip and handle tangles better. I start with the right section by taking a small portion at the front and splitting it into three pieces. The main difference between Dutch and French braids is simple – we cross strands under instead of over.
New sections of hair from the sides need to go under the middle strand as I move along. The crown area should stay smooth while leaving some height at the top to work on the volume. The braid continues just below the ear, where I secure it with a bobby pin.
Combining the Braids
Both Dutch braids need careful attention when I take out the temporary pins to join them. The right braid needs a small gap above the planned bun position. The left braid weaves through this opening to create an intricate pattern that adds a sophisticated touch.
The braids wrap around the head strategically with gentle but firm pinning. Pulling the edges of each braid creates what we call a “pancaked” effect. This technique adds fullness without losing the style’s structure.
These tips help the style last through prom night:
- Use texturizing spray before braiding for better grip
- Press closed bobby pins flat against the scalp
- Finish with medium-hold hairspray
This updo works great for both formal events and casual occasions. The right technique and smart pinning methods keep this sophisticated style looking elegant from first photos to last dance.
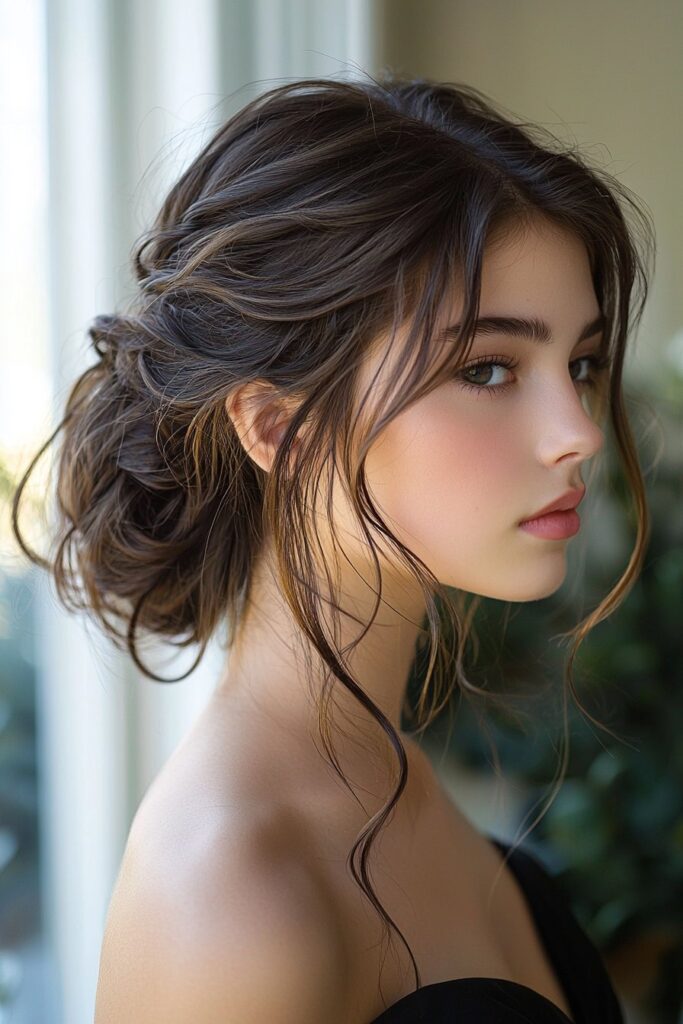
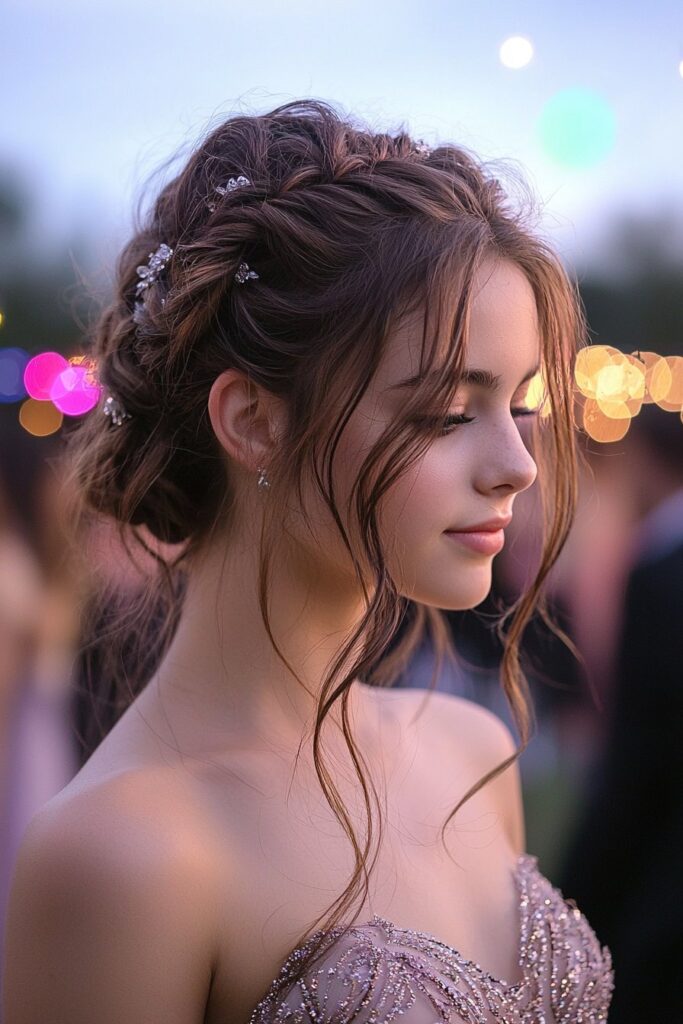
Messy Twisted Bun

I’ve styled countless prom updos and become skilled at creating the perfect messy twisted bun. This style strikes an ideal balance between elegance and a relaxed charm. The versatile updo works really well with second or third-day hair and makes a stunning choice to your special night.
Creating Controlled Mess
A sophisticated look needs the right preparation. Dry shampoo should be applied to slightly oily roots. Make sure to distribute it well to avoid any white residue. The hair should be gathered into a loose ponytail at the back of the head. Keep it relaxed instead of sleek.
The perfect twist needs the ponytail divided into two even sections. Each section should be twisted in opposite directions before wrapping them around the base. This contrasting twist technique creates natural texture and adds dimension throughout the style.
Texture Tips
These professional techniques will improve the natural volume and create that coveted lived-in appearance:
- Texturizing spray works best on the crown area – gently pinch and pull to create controlled volume
- Natural texture should guide the style, letting some pieces fall naturally around the face
- Bobby pins need to be pressed flat against the scalp for invisible hold
Fine, straight hair needs subtle waves using alternating curl directions. This technique gives essential grip and stops the style from falling flat. A thickening texturizing paste at the roots works really well when thoroughly distributed before styling.
Small sections around the crown and hairline should be loosened carefully. This creates movement while keeping the overall structure intact. The style stays elegant yet gives that coveted effortless vibe throughout your prom celebration.
Pearl-Studded Updo
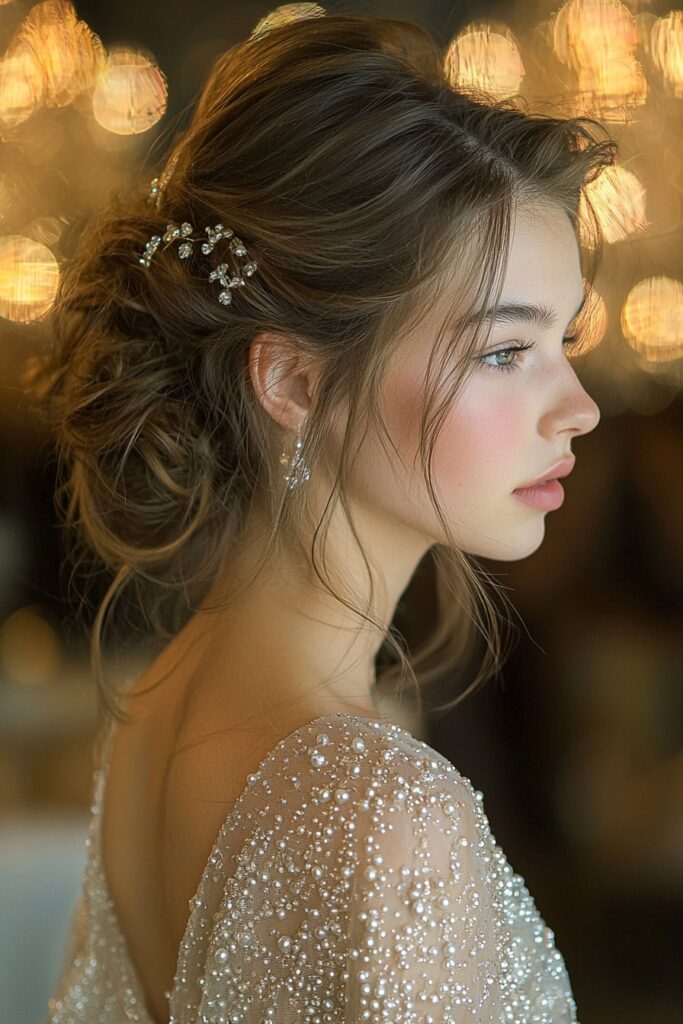
My professional experience as a hairstylist has shown that pearl-adorned updos make an enchanting choice for prom night. These timeless accessories add sophistication to any hairstyle and create an unforgettable look that photographs beautifully.
Pearl Placement
A smooth, polished base works best as your starting point. Floating pearl accessories complement both textured and sleek styles perfectly. Small pearl pins need strategic positioning throughout the updo to create balanced patterns that enhance the overall design. My work has helped me find that weaving pearls into small braids before gathering them into the updo creates an intricate, woven effect.
The coveted ethereal look comes from carefully weaving multisize pearl pins by hand. I secure the pearls onto bobby pins with cream-colored thread and a glue gun for extra stability. This custom approach lets me create unique patterns that match each style perfectly.
Securing Method
Proper preparation and application techniques ensure lasting hold. A small amount of lash glue on each pearl before placement makes the style dance-proof. The style’s success depends on these professional techniques:
- Use clear elastics that match your hair color for invisible hold
- Apply texturizing spray before styling for better grip
- Position bobby pins strategically behind each pearl cluster
Your heirloom pearls work best as a headband after the updo sets and hairspray dries. This approach preserves both the pearls and your hairstyle’s integrity. Pearl hair accessories need gentle care, whether they’re freshwater, Swarovski crystal, or glass pearls.
Strategic placement and proper securing methods help this elegant style maintain its grace throughout prom night. Pearl accessories’ versatility lets me customize each look, from delicate scattered patterns to bold statement designs, so every updo reflects the wearer’s unique style.
Infinity Knot Bun
A figure-eight shaped updo called the infinity knot bun has become my signature style as a professional hairstylist. This elegant look adds sophistication to any prom ensemble and works great with both dry and wet hair.
Knot Formation
The process begins with creating a low ponytail slightly off-center from the middle of the head. A texturizing spray provides extra grip and texture. The ponytail needs to be twisted counter-clockwise halfway down its length while maintaining tight tension to keep strands in place.
The real transformation happens when I circle the twisted section around the ponytail base counter-clockwise. Bobby pins secure it at the top to create a curved shape from left to right. Two to three more twists complete the look. The end gets pinned to create a diagonal line from right to left, which reveals the vertical figure-eight pattern.
Styling Tips
Your prom night hairstyle needs these professional techniques to stay perfect:
- A smoothing brush helps detangle hair completely
- Strategic pin placement behind the ears keeps the style secure while dancing
- A flexible-hold hairspray gives lasting shine and control
Gentle pulling at the edges boosts fullness before final securing. A missing piece can create a stylish messy look without affecting stability. The style can get extra glamor with texturizing spray before styling that gives strands more grip and volume.
This updo adapts well to match your dress style and personal taste. The right placement of bobby pins and proper products help this sophisticated style stay elegant from photos through final dances. Extra pins keep each section secure where needed while maintaining that distinctive figure-eight shape that makes this style special.
Cascading Braid Updo
The waterfall braid updo has become my clients’ favorite prom hairstyle. This enchanting cascade of braided elegance looks perfect with any formal dress. Years of creating this intricate style have taught me the best techniques to make it beautiful and long-lasting.
Braid Pattern
My process begins with a two-inch section at the front of the head, divided into three equal pieces. This section anchors the entire style. The distinctive waterfall technique comes next. I add hair to the right strand and move it over the middle. The left strand is then released to create that signature cascading effect.
Securing Loose Ends
Clear elastics that match your hair color provide dance-proof security. The style needs professional-level hold, so I cross two bobby pins in an X shape. The braid’s end tucks under remaining hair for a flawless finish. The base braid secures horizontally across the back of the head, which keeps the style shaped throughout the evening.
Adding Volume
Several professional techniques help create the braid’s fullness. A volumizing product goes on before blow-drying to build body and texture. Fine hair needs special attention – I place the braid about half an inch from the scalp. This adds natural lift without too much teasing. Tiny clip-in extensions near the root can discreetly add thickness to the sides while maintaining the style’s integrity.
This style works best with slightly textured hair that provides better grip and control. The look’s versatility shines through with both straight and curled finishes. A wide-barrel curling iron creates loose, carefree curls that boost the waterfall effect. These curls add romantic appeal to this sophisticated updo.
Conclusion
My professional career as a hairstylist has shown me 17 timeless prom updos that perfectly balance elegance and practicality. These styles range from classic chignons to modern twisted creations, and each one matches beautifully with your dress and personal style.
Success in prom hair styling depends on the right preparation and technique. The perfect updo will stay beautiful from your first photos to your last dance when you start with the right hair texture, use proper products, and secure the style strategically.
Your hair type and desired look determine which style works best. Some updos look amazing with second-day hair, while others need freshly washed strands. Bobby pin placement and the right product application make the difference between a lasting updo and one that falls apart.
A beautiful hairstyle boosts your confidence throughout this special night. Choose an updo that resonates with you, practice the styling techniques ahead of time, and trust your styling instincts. The right hairstyle will not only improve your appearance but also make you feel confident and radiant all evening.