Short 4c hairstyles are having a major moment right now, and I couldn’t be more thrilled! As someone who’s spent countless mornings staring at my reflection, wondering how to make my tight coils look fabulous without spending an hour styling them, I understand the struggle.
Let’s be honest—finding easy hairstyles for short 4c hair can feel like searching for a needle in a haystack. But here’s the good news: celebrities with natural curls are proving that crops and coils are a perfect match. From sleek and sophisticated buns to playful pigtails, these quick 4c hairstyles let you rock your natural texture with confidence. I’ve discovered that simple 4c hairstyles don’t have to be boring or time-consuming. In fact, the Teeny Weeny Afro (TWA) has become one of my favorite beginner short 4c hairstyles because it’s both effortless and empowering.
I’ve gathered 15 easy short 4c hairstyles that you can create in just 10 minutes—perfect for those rushed mornings or when you want to switch up your look without the hassle. These styles work with your natural texture rather than against it, saving you time while still looking absolutely stunning.
Space Buns
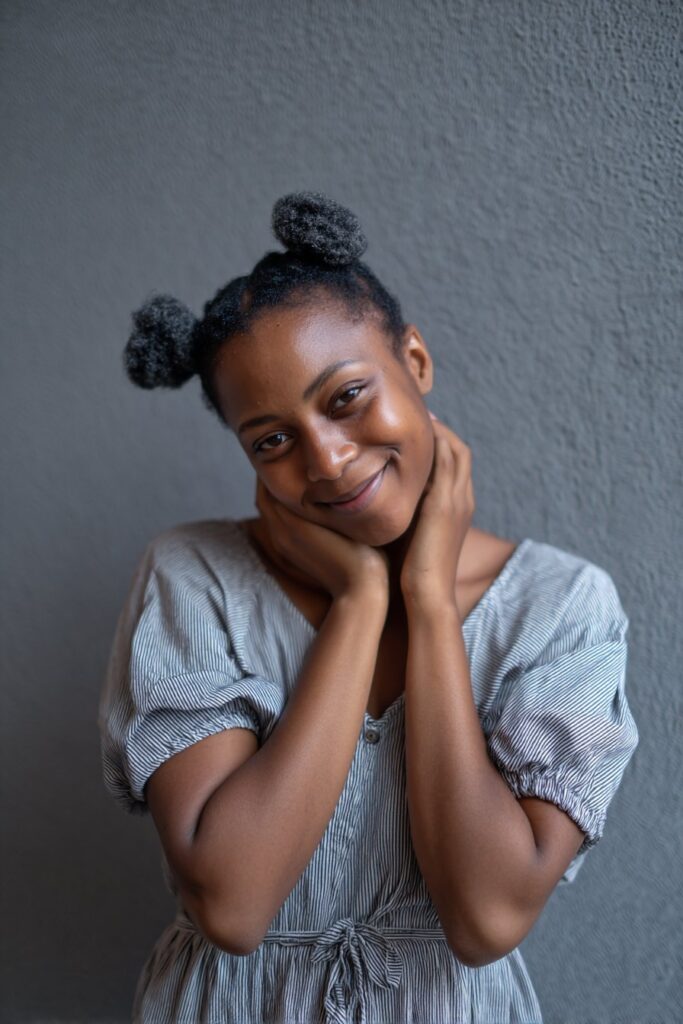
I’ve fallen in love with space buns as my go-to style whenever I need a quick yet eye-catching look for my short 4c hair. This playful ’90s-inspired style features two buns positioned on either side of your part, creating a fun and youthful appearance that works surprisingly well for various occasions.
Space Buns styling tips
Creating space buns on 4c hair requires just a few essential products. First, I always start with freshly washed or slightly damp hair—it makes the styling process much easier and requires less product. For the perfect space buns, I recommend:
- A good leave-in conditioner or detangler spray
- Strong-hold gel (I love isoplus hair gel which costs around $19.99)
- A gel wax for extra hold and definition
- Bobby pins (smaller ones work best for short hair)
- A rat-tail comb for precise parting
The key to flawless space buns lies in the smoothing technique. After creating a clean middle part, I apply gel generously and use a bristle brush to smooth each section thoroughly. Furthermore, I’ve found that teasing the hair slightly before forming the bun adds much-needed volume, especially for shorter styles.
Space Buns for short 4c hair
Working with short 4c hair presents unique challenges, yet space buns remain surprisingly versatile. If your hair is particularly short, consider doing half-up space buns instead of pulling all your hair into the style. Additionally, braiding your pigtails before wrapping them helps secure shorter strands that might otherwise escape.
For extra fullness, I sometimes incorporate synthetic hair. Simply cut jumbo braiding hair in half, tease the ends slightly, and attach it to your natural hair using a small elastic. Moreover, creating a twist with the added hair before wrapping it around helps cover the base of your bun more effectively.
Why Space Buns are beginner-friendly
Space buns have become my favorite beginner-friendly style because they’re forgiving and adaptable. Unlike more complex protective styles, space buns don’t require extensive practice or perfect technique—just basic parting and twisting skills.
The style can be done in approximately 10 minutes once you get the hang of it, making it perfect for busy mornings. If flyaways appear, a quick spritz of hairspray on your hands to smooth them down works wonders. Above all, space buns offer endless customization—wear them sleek and polished for work or loose and messy for casual days.
My clients with 4c hair particularly appreciate how space buns preserve moisture while looking fashionable. The style works exceptionally well on freshly washed hair or as a second-day refresh when your TWA needs a boost.
Sleek Low Bun
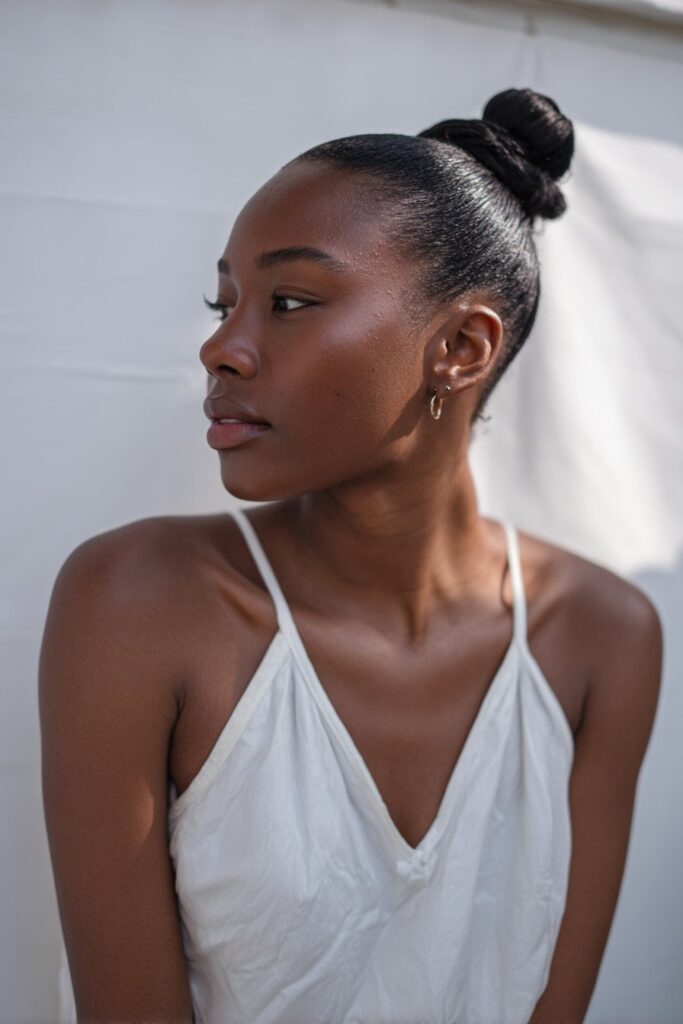
The Sleek Low Bun has become my reliable companion for those mornings when I need to look put-together with minimal effort. This elegant style works wonderfully for short 4c hair and creates a sophisticated look that lasts all day.
Sleek Low Bun for quick styling
For a hairstyle that takes less than 10 minutes, the Sleek Low Bun is unmatched in efficiency. I’ve found that second or third-day hair works best for this style, as it gives your hair more grip and makes it easier to manage. Meanwhile, if you’re working with freshly washed hair, a conditioning mist can provide the necessary grip without weighing down your curls.
What makes this style perfect for short 4c hair is its simplicity. You only need:
- A soft bristle brush (or a beard brush works surprisingly well!)
- Strong-hold gel (eco styler coconut oil gel is my go-to)
- Edge control gel for those stubborn baby hairs
- A heat protector spray if you’ll be using heat
- Bobby pins for securing flyaways
How to achieve a polished look
To get that glossy, professional finish, I start by sectioning my hair from ear to ear, creating front and back sections. Next, I apply gel generously and use a brush to slick everything down toward the nape of my neck. Generally, I find that working in smaller sections ensures a smoother finish for 4c hair.
For extra sleekness, I apply edge control gel specifically to the corners where hair tends to lift first. Consequently, after securing with a hair tie, I use a toothbrush to perfect those edges. Finally, a light spritz of holding spray seals everything in place.
Sleek Low Bun for work or school
In addition to being quick to style, the Sleek Low Bun is incredibly versatile. For formal environments, this hairstyle looks polished and professional, making it perfect for work presentations or important school events. On the contrary, you can dress it up for special occasions with statement earrings or hair accessories.
The style typically lasts about a week with proper care, which makes it an efficient choice for busy schedules. For this purpose, I always sleep with a satin scarf and bonnet to preserve the sleekness. As a result, my hair stays moisturized while maintaining that polished appearance that brings out my facial features beautifully.
High Puff
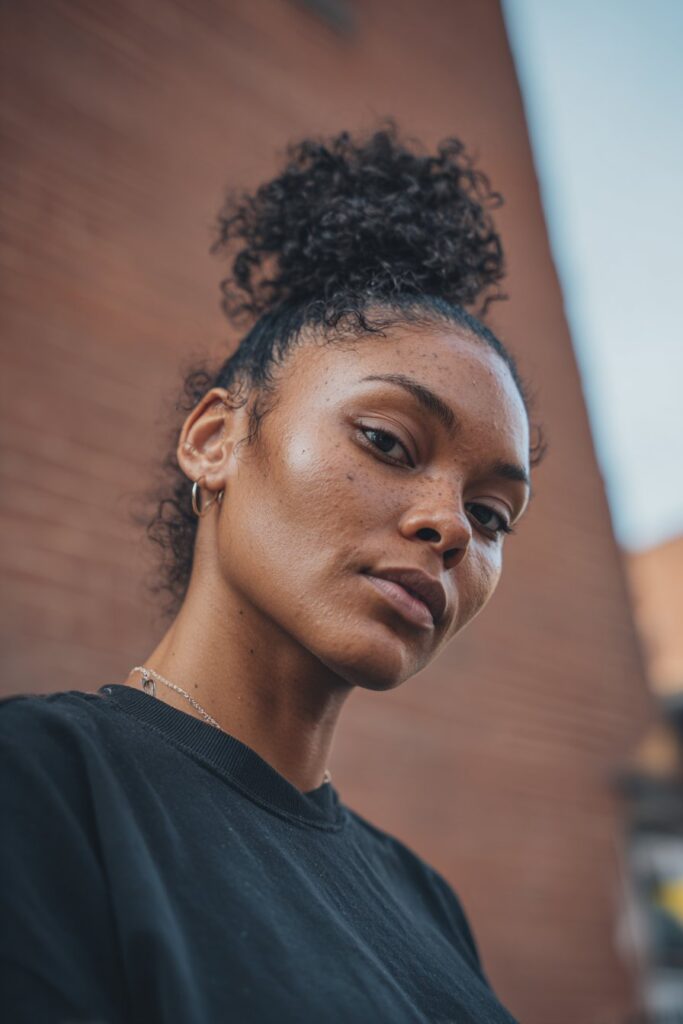
Among my favorite quick 4c hairstyles, the High Puff stands out for its versatility and simplicity. This style beautifully showcases your natural volume while keeping hair somewhat stretched—a perfect combination for those mornings when you need to look polished with minimal effort.
High Puff volume tips
Creating a voluminous High Puff with short 4c hair requires strategic preparation. Initially, I recommend starting with stretched hair for the best results. You can achieve this by:
- Doing a braid-out first—work in sections, moisturize, and braid your hair
- Adding your choice of oil to braided hair
- Taking out braids after a few hours when hair is properly stretched
- Working in sections and brushing from tip to root for maximum volume
For additional fullness, I’ve discovered that parting in larger sections creates more apparent volume since our tight 4c curls can sometimes appear flat. Likewise, using a diffuser helps tremendously—just pull sections taut with one hand while pressing the diffuser against your roots with the other.
High Puff for natural curls
The High Puff is ideal for 4c natural hair since it’s a low-manipulation style that showcases our beautiful texture. Indeed, this style helps stretch the hair, keeping it off the neck and shoulders, therefore reducing the chance of breakage and damage.
When creating this style on natural curls, I start by spritzing only my hairline with warm water to loosen the curls without causing shrinkage throughout other parts of my hair. Subsequently, I massage the water in around both the front and back of my head before moving to the styling phase.
After gathering my hair up, I use my hands and a wide-tooth pick comb to fluff and create more volume. Accordingly, this helps achieve that big, bold look we all love with 4c hair.
Best products for High Puff
Through trial and error, I’ve found these products work exceptionally well:
- Organic coconut oil—combats flakiness and adds softness that lasts throughout the style
- Eco Styler Olive Oil gel—provides soft hold without leaving hair feeling dry or hard
- Edge control—smooths edges for a polished finish
- Volumizing products—forms a coating around hair to make it appear plump and shiny
Since this style can sometimes lead to single-strand knots, naturally, I recommend using products with slip and keeping manipulation to a minimum once styled.
For securing your puff, avoid using scrunchies—opt for a shoelace or satin tie instead to create a fuller look. This simple switch makes a remarkable difference in the final appearance of your High Puff!
Half Up Half Down
The half-up half-down style has evolved from a special occasion look to my everyday go-to for short 4c hair. First and foremost, I love how this versatile style offers the best of both worlds—keeping hair off my face while still showcasing my natural texture and volume.
Half Up Half Down for short 4c hair
Working with short 4c hair might seem challenging, but this style actually thrives on our texture. Notably, the natural volume of 4c hair creates a beautiful contrast between the sleek pulled-back section and the free-flowing bottom half. For those of us with shorter lengths, this style is perfect because it doesn’t require excessive manipulation or length to achieve.
To begin with, I always dampen my hair slightly before styling—this minimizes breakage and makes the process much more comfortable. When working with short 4c hair, I focus on creating clean, defined parts that frame my face beautifully. Most importantly, I’ve found that this style suits many different face shapes and hair types, making it universally flattering.
Styling tools needed
For a flawless half-up half-down style, these tools are essential:
- Water spray bottle (for dampening hair)
- Rat-tail comb (for clean partings)
- Gel and gel wax combination (for sleekness and hold)
- Styling spritz or holding spray (to set the style)
- Bobby pins (to secure any loose sections)
- Sectioning clips (to keep hair organized while styling)
- Wide-tooth comb (for detangling without disturbing your curl pattern)
Of course, I’ve learned that working in sections is crucial—I use my sectioning clips to separate the top from bottom portions before styling each individually. What’s more, having the right products makes all the difference in achieving that polished look without damaging your delicate 4c strands.
Occasions to wear this style
In reality, the half-up half-down style has become my signature look because it transitions effortlessly between settings. It’s perfect for casual brunches with friends, yet equally appropriate for work or school environments where a more polished appearance is expected.
Coupled with the right accessories, this style can be elevated for formal events—simply add some decorative pins or a statement headband. For evening occasions, I sometimes add subtle definition to my curls in the loose section for extra dimension.
One of my favorite aspects of this style is how it adapts to whatever I’m doing. For active days, it keeps hair secure and out of my face, while for special events, it creates an elegant silhouette that highlights my facial features.
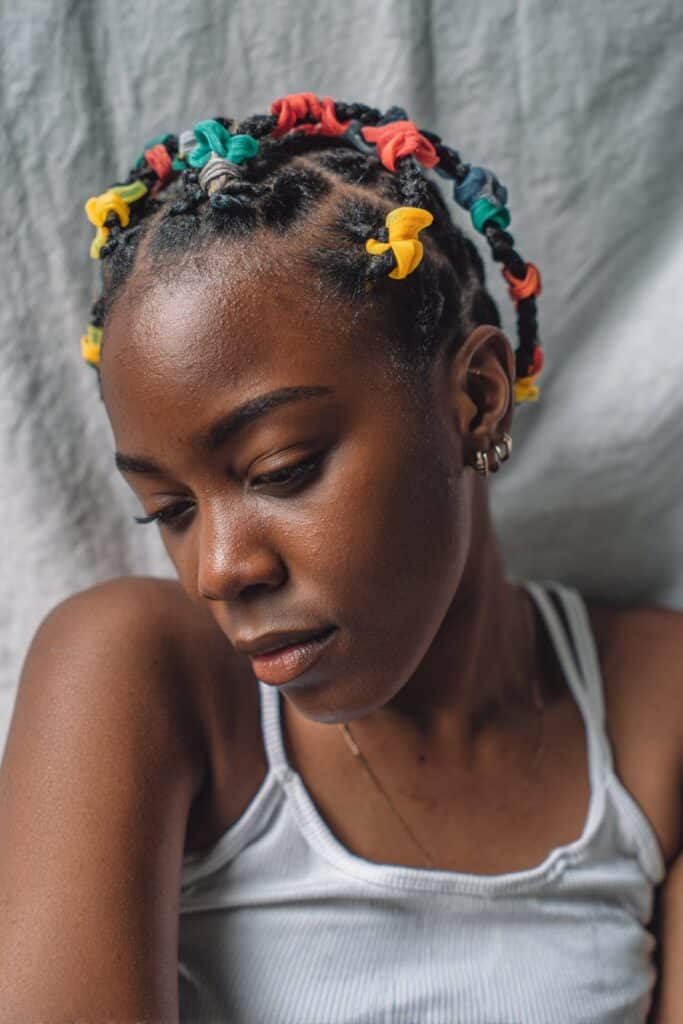
Rubber Band Style
Rubber band styles have completely changed my approach to styling short 4c hair! Essentially, these versatile styles offer endless creative possibilities while being surprisingly accessible for beginners. Unlike other protective styles, rubber band hairstyles work beautifully on various hair lengths and textures, making them a staple in my styling repertoire.
Rubber Band Style creativity
The beauty of rubber band styles lies in their versatility. Depending on how you section your hair, you can create hearts, criss-cross patterns, or even geometric shapes. Primarily, I love experimenting with colorful rubber bands that add a playful touch to my short 4c hair. You can create simple box sections or intricate designs that showcase your personality.
For these styles, you’ll need:
- Hair gel or control paste (blueberry control paste works wonderfully)
- Water and oil mixture for moisture
- Pack of rubber bands (preferably oiled to prevent tension)
- Comb for sectioning
How to part and section hair
Whenever I create rubber band styles, I start by spraying my hair with a water and oil mixture to add moisture. Firstly, I section my hair based on the design I want—for beginners, try dividing your hair into three main sections horizontally. Within each section, create smaller boxes (three boxes in the first section, four in the second, and five or six in the third).
To achieve clean parts, I apply gel to each section before combing thoroughly. The rubber band method typically takes about an hour and a half to complete, although simpler designs can be created in 30 minutes. Remember to secure each section with a rubber band without pulling too tight to avoid tension headaches.
Rubber Band Style for kids and adults
What makes rubber band styles so appealing is their suitability for all ages. For children, these hairstyles offer durability without excessive tension on delicate scalps. I always recommend oiling the rubber bands beforehand to prevent pulling and discomfort, particularly for younger ones.
Adults can elevate this style with more complex patterns or by combining rubber bands with other techniques like braids or twists. In essence, the 2023 trend is showing rubber band hairstyles taking over with their beautiful versatility.
Mini Twists

When it comes to long-lasting protection for my short 4c hair, mini twists have proven to be a true game-changer in my natural hair journey. These small two-strand twists create a versatile protective style that works beautifully for various occasions while giving my strands a much-needed break.
Mini Twists for protective styling
Mini twists are undoubtedly one of the best protective styles for retaining length and promoting hair growth. After trying countless styles, I’ve discovered that mini twists stand out because they put virtually no tension on my scalp or strands, reducing unnecessary breakage.
For instance, my ends stay completely protected from external factors like weather and daily manipulation. As a result, my hair retains moisture longer and maintains better elasticity. During my busiest weeks, I appreciate how this style keeps my hands out of my hair—the key to length retention is sometimes simply leaving your hair alone!
What makes mini twists exceptional compared to other protective styles:
- They help retain length which contributes to noticeable hair growth over time
- They’re extremely low-tension, preventing stress on your scalp and strands
- They keep ends protected from external factors that could cause dryness
How to maintain Mini Twists
To keep my mini twists looking fresh, I’ve developed a simple maintenance routine. At this point, I recommend wearing them for a maximum of 2 months—for very coily 4c hair like mine, 2 months is the upper limit to avoid matting and knots.
By comparison to other styles, mini twists require minimal upkeep. I hydrate mine 1-2 times weekly with a water-based spray and nourish my scalp with growth-promoting oil to prevent itching. After all, although mini twists are low-maintenance, they still need some care to prevent breakage.
For sleeping, I never skip my satin bonnet—exposed twists can become dry and tangled when rubbing against bedding. In due time (about 3-4 weeks), I refresh my twists by shampooing (focusing on my scalp), applying conditioner, and redoing any frizzy sections.
Mini Twists for short 4c hair
Even with shorter 4c hair, mini twists work remarkably well. For example, I’ve installed them on my TWA (Teeny Weeny Afro) phase with great success. To clarify, starting on freshly washed, slightly damp hair makes installation much easier.
For hold without crunchiness, I apply leave-in conditioner followed by a cream like Uncle Funky’s Daughter Extra Butter Cream before using a lightweight gel. Obviously, the closer you twist to the scalp on moisturized hair, the neater your twists will appear.
The versatility of mini twists for short 4c hair is impressive—I can style them in buns, bantu knots, or even with cute accessories. Primarily, what I love most is how they give my short hair the appearance of length while protecting every strand.
Finger Coils
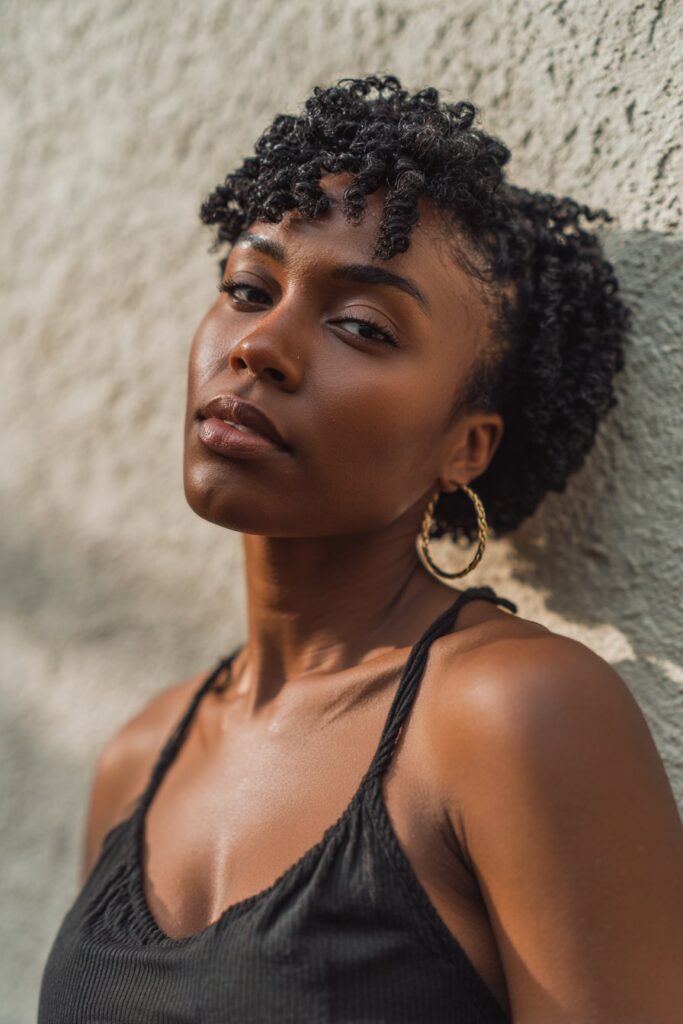
Finger coils have transformed my styling routine for short 4c hair by creating defined curls with minimal tools. Fundamentally, this technique involves forming curls using just your fingers—making it perfect for those days when I need a quick yet polished look.
Finger Coils definition tips
For perfectly defined finger coils, I’ve discovered that technique matters more than products. To create these coils:
- Start with damp, not soaking wet hair
- Apply a good styler throughout your hair for hold
- Take small to medium sections depending on your desired look
- Hold the section between your thumb and index finger
- Twirl around your index finger, maintaining gentle tension
- Focus on twisting tighter at the roots to prevent puffiness
Currently, I prefer grabbing different-sized sections when coiling—sometimes tiny pieces, sometimes medium chunks. This creates a more natural, fuller look with dimensional curls rather than uniform ones. After drying completely, I gently separate my coils for additional volume and a less “perfect” appearance.
How to do Finger Coils fast
Though some people spend 3 hours creating finger coils, I’ve mastered doing them in under 10 minutes! Ideally, the key is working with properly moisturized hair and using a product with excellent slip.
To speed up the process:
- Section hair loosely before starting
- Begin at the nape of your neck and work upward
- Apply your styling product as you go
- Don’t aim for perfection—varying sizes actually look better
- Use a head scarf or durag overnight to help the curls set
Naturally, finger coils can last up to 10 days when properly maintained—making the initial styling time well worth it!
Best gels for Finger Coils
Through trial and error, I’ve found these products work wonderfully for finger coils on 4c hair:
- Eco Styler Gel—provides excellent hold without flaking
- Shine n’ Jam Black Castor Flaxseed Oil Styler—adds moisture while styling
- Blueberry Bliss Repair and Grow Curl Sculpting Mousse—creates lightweight definition
- Kinky Tresses Coconut Mango Butter—works beautifully even without gel
Alternatively, if you prefer a gel-free approach, a good butter-based product can work just as effectively. Possibly the most important tip is ensuring your sections are damp enough to create defined coils regardless of which product you choose.
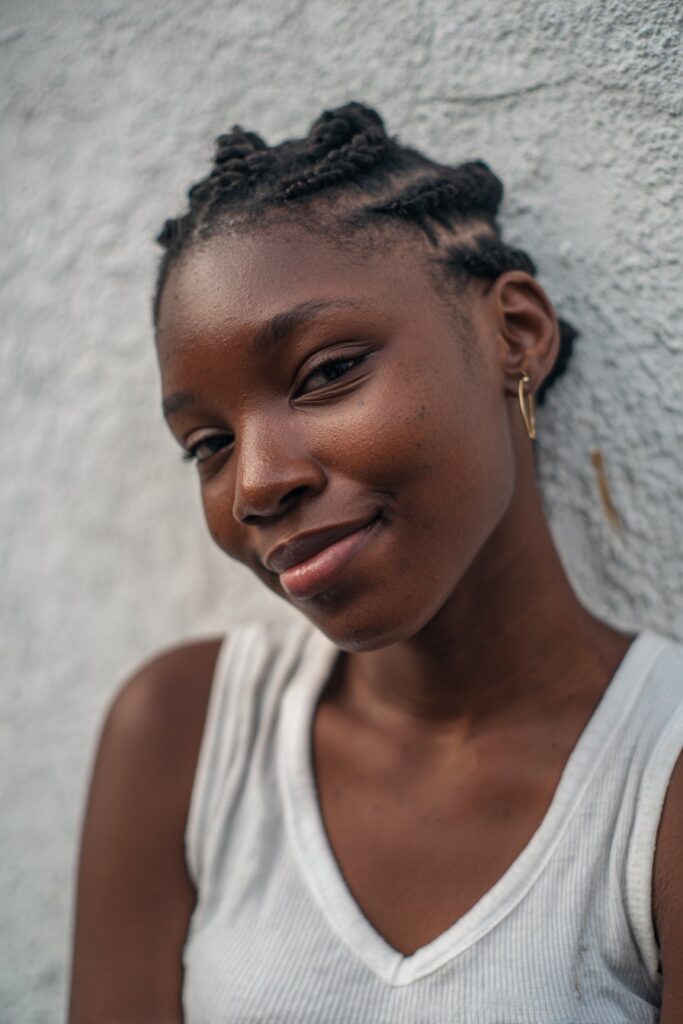
Flat Twists
Flat twists quickly became my secret weapon for styling short 4c hair when I’m pressed for time. As someone who values both protection and style, I’ve found this technique creates beautiful definition while keeping manipulation minimal—a win-win for our delicate 4c strands.
Flat Twists for beginners
When I first attempted flat twists, understanding the basic technique made all the difference. Fundamentally, flat twists require twisting two strands in opposite directions—one hand twists forward while the other twists backward. This contrary motion is critical; if both twist in the same direction, your style will unravel immediately.
For newcomers to flat twisting, I recommend:
- Starting with freshly washed or slightly damp hair
- Creating clean, precise parts using a rat-tail comb
- Working with small sections to maintain control
- Using your thumb to help hold and separate strands
Even more important, maintain a firm grip throughout the process. As I’ve discovered, once a flat twist unravels, it’s frustratingly difficult to restart without beginning again. Remarkably, most beginners master this technique after just a few attempts.
Flat Twists vs Cornrows
Throughout my natural hair journey, I’ve often been asked about the difference between flat twists and cornrows. Primarily, flat twists involve two strands twisted together, whereas cornrows use three strands braided downward. In contrast to cornrows, flat twists are significantly quicker to install and gentler on your hairline.
Cornrows typically last longer (up to 2-3 weeks) versus flat twists (about 1-2 weeks), yet flat twists create less tension and are easier to remove. For those just starting their natural hair journey, flat twists provide an excellent entry point before advancing to more complex cornrow styles.
Flat Twists for short hair
Undeniably, flat twists work wonderfully on short 4c hair. To start, I’ve found that creating a deep side part adds dimension and style to shorter lengths. Furthermore, working with slightly smaller sections creates the illusion of length and fullness.
One technique I love for short hair involves twisting toward a center point—perfect for creating stylish updos that stay secure without excessive pins. Evidently, flat twists offer incredible versatility for short styles, serving as both a standalone look and a foundation for twist-outs with amazing definition.
Tapered Cut with Curls
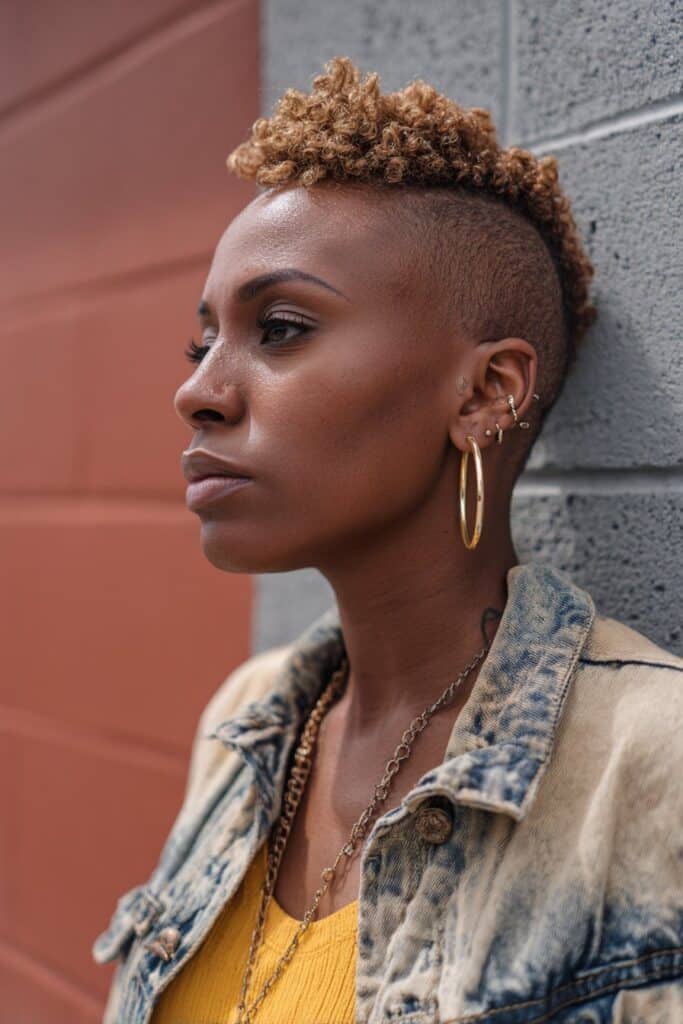
The tapered cut stands as a perfect canvas for those of us with 4c hair who want versatility without excessive styling time. My journey with this cut began when I craved something bold yet manageable for my natural texture.
Tapered Cut styling ideas
A tapered cut features longer hair at the top that gradually shortens as it moves down the natural hairline on the nape and sides. Given these points, this structure creates endless styling possibilities! I’ve discovered that two-strand twists on top blended into a faded nape offer a gorgeous protective style that lasts for weeks. In turn, a deep side part adds dimension that frames my face beautifully.
For daily wear, I alternate between:
- A textured top with shorter sides for a stark contrast
- Finger coils that transform my hair into a sculpted masterpiece
- A tapered TWA (teeny weeny afro) for effortless confidence
Incidentally, maintenance requires consistent trimming every 6-8 weeks depending on how tight you prefer the cut.
How to define curls on a tapered cut
Defining curls on my tapered cut became much simpler once I mastered proper technique. First, I always ensure my hair is completely saturated with water—this helps “activate” my natural curl pattern. Simultaneously, I apply a leave-in conditioner and seal with Jamaican Black Castor Oil to keep my curls moisturized and shiny.
For styling, I found that Uncle Funky’s Daughter Curly Magic creates amazing definition without the annoying gel clumps. As such, I focus on twirling sections around my pointer finger to create coils, starting from the back and working forward.
Tapered Cut for bold looks
Beyond that, what I adore about my tapered cut is how it exudes confidence without trying. The shorter sides draw attention to my facial features while the textured top showcases my natural pattern. For even bolder statements, I sometimes add a razor-sharp part using a tiny trimmer for precision.
The beauty of this style lies in its versatility—it works for both professional settings and casual days, transitioning effortlessly between both worlds.
Teeny Weeny Afro (TWA)
My journey to embracing my natural texture began with the Teeny Weeny Afro (TWA)—that perfect starting point for many naturalistas. A TWA refers to an afro that’s short in length with smaller volume, typically the result of a big chop or simply a preferred style choice for those who love short hair.
TWA for natural hair journey
The TWA isn’t just for newcomers to natural hair—many long-time naturalistas sport this style by choice. Typically, this style becomes the foundation after cutting away chemically damaged hair, allowing healthy new growth to flourish. From personal experience, I discovered that starting with a TWA offered me a chance to truly understand my natural hair pattern without the complication of managing multiple textures.
Once I embraced my TWA, styling became surprisingly straightforward. Certainly, the journey required patience as I learned what products worked best for my specific texture. Eventually, my TWA became the perfect canvas for experimenting with different styling techniques that later translated to longer lengths.
How to shape a TWA
Shaping a TWA properly creates definition and highlights your facial features. First, I recommend combing out the sides slightly before trimming. For uniform shaping, color-coded clipper combs make finding the right size easier. Using a number four comb works perfectly for cleaning up strays while blending the sides with the top.
When lining up the edges:
- Start from the sides, aiming for a clean shape
- Keep the look feminine by avoiding edges that are too hard
- Use scissors for trimming any strays
- Brush with a boar bristle brush before using clippers
For maintenance between professional cuts, I gently trim with scissors to manage any uneven sections without disrupting the overall shape.
TWA maintenance tips
Despite its short length, a TWA needs proper care to thrive. Most importantly, don’t neglect moisturizing just because your hair is shorter—proper hydration prevents breakage and split ends. Deep conditioning remains essential, as it helps your hair retain moisture better over time.
Nighttime protection is crucial—I recommend separating your hair with small clips to prevent tangling while sleeping. Furthermore, keeping your scalp healthy encourages growth and allows your strands to receive natural oils. A light oil blend works wonderfully for nourishing the scalp without clogging pores.
For daily styling, consider:
- Water-based moisturizers with leave-in conditioner
- Lightweight oils to seal in moisture
- Defining products like gels or curl creams in small amounts
Ultimately, what makes the TWA so special is its versatility—it’s both a beautiful standalone style and the foundation for many of the quick styles covered in this article.
Side Part Afro
For someone who loves dramatic hairstyles without the drama of styling, a Side Part Afro has become my trusted ally. This iconic style offers a beautiful asymmetry that frames my face while showcasing my natural texture in all its glory.
Side Part Afro for volume
Whenever my 4c hair seems to lack fullness, a Side Part Afro immediately transforms it. The key to maximizing volume lies in proper preparation. Prior to styling, I remove product buildup with a clarifying shampoo at least once a month since buildup can make roots appear limp and weighed down.
To enhance volume, I use an afro pick starting at the roots, combing down only 2-3 centimeters to create fullness without disturbing the overall shape. Primarily, I hold my head upside down while picking to amplify the volume effect. For extra body, I occasionally diffuse my hair with a blow dryer, flipping from side to side to create dimension.
How to create a clean part
Creating that perfect part makes all the difference in this style. I’ve found that a proper rat-tail comb with a sharp end is absolutely essential for precision.
To achieve a clean part:
- Start with a “rough part” as a guideline using the pointed end of the comb
- Apply braid gel generously along the part line (this is crucial for definition)
- Use your fingers to work the gel into the roots on both sides
- Run the comb through the part again for crisp definition
The gel application is my secret weapon—being generous with it ensures sleekness that lasts throughout the day. Hence, if hairs keep popping up, I know I need to add more product.
Side Part Afro for quick styling
The beauty of this style is its simplicity. Unlike more complex styles, a Side Part Afro takes minutes to create yet looks intentional and polished. As such, for those mornings when I’m rushing, sectioning my hair properly saves considerable time.
For maintenance, I wrap my hair at night, and in the morning, I just refresh the part and fluff the rest with my fingers. Afterward, a light oil on my ends keeps everything looking fresh without weighing down my volume.
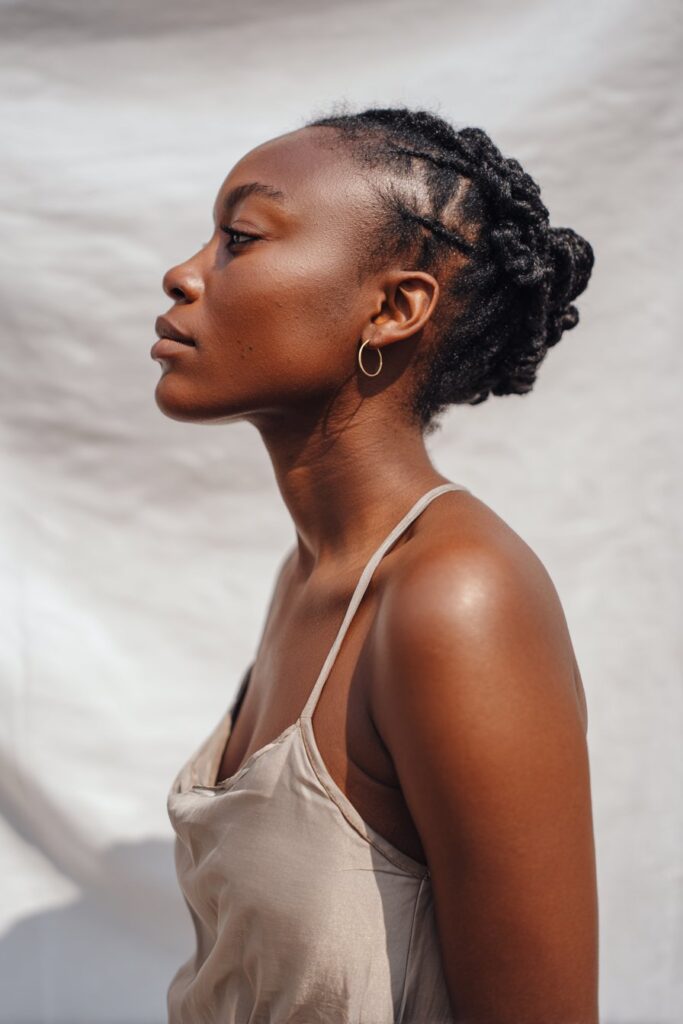
Two-Strand Twists

The humble two-strand twist remains my go-to protective style whenever I need something quick yet effective for my short 4c hair. In the first place, this style strikes the perfect balance between simplicity and protection—ideal for both beginners and seasoned naturalistas alike.
Two-Strand Twists for short hair
Two-strand twists work beautifully on short 4c hair, creating definition while protecting delicate ends. To put it differently, even with TWA-length hair, you can achieve stunning results. When working with shorter lengths, I focus on smaller sections that create more definition and the illusion of length.
For best results on short 4c hair, I always start with clean, thoroughly moisturized strands. Straightaway, I apply a water-based leave-in conditioner followed by a cream or butter product to seal in moisture. Starting with slightly damp (not soaking wet) hair helps reduce shrinkage and creates more elongated twists.
How to twist quickly
In a time crunch? Here’s my method for creating two-strand twists in 10 minutes:
- Section hair roughly into quadrants using clips
- Work with medium-sized sections (smaller sections look great but take longer)
- Apply product as you go rather than pre-applying to everything
- Split each section into two strands and twist them around each other from roots to ends
- For the ends, don’t twist all the way down but wrap them around your finger to create a curl that holds the twist
Similarly, I’ve found that not obsessing over perfect parts saves considerable time. As a matter of fact, slightly uneven parts often create a more natural-looking result once the style settles.
Best products for hold
Finding the right products transformed my twisting experience. Given that moisture is essential for 4c hair, these products consistently deliver excellent results:
- Camille Rose Almond Jai Twisting Butter—provides supreme softness with a nutty aroma that elongates hair beautifully
- As I Am Twist Defining Cream—creates shiny, well-defined twists that last while minimizing frizz
- The Doux C.R.E.A.M. Twist & Curl Cream—reduces shrinkage while increasing elasticity to prevent breakage
Nonetheless, remember that using too much product can weigh down your twists and leave hair feeling oily. Until now, I’ve found that a small amount worked through from roots to ends delivers the perfect balance of hold and movement.
Claw Clip Updo
Claw clips have recently surged in popularity, and I’ve discovered they work wonderfully for our short 4c hair too! The sleek updo created with a simple clip offers that polished look without hours of styling—perfect for my busy lifestyle.
Claw Clip Updo for short 4c hair
Many believe claw clips only work for longer, looser hair textures, but my experience proves otherwise. For my thick, short 4c curls, the key lies in proper preparation. Initially, I create a clean middle part using a rat-tail comb—this forms the foundation for a balanced look. Typically, I dampen my hair slightly with a water spray bottle, which makes it more manageable without causing excessive shrinkage.
Interestingly, I’ve found that combining this style with other techniques elevates the finished look. Creating two flat twists on each side works brilliantly for frames with shorter lengths that might not reach the clip. This method effectively provides a sleek appearance while ensuring all hair stays secured throughout the day.
How to secure with a clip
Securing short 4c hair with a claw clip requires specific techniques:
- After creating your middle part, dampen hair slightly
- Apply gel evenly throughout your hair using a denman brush
- Put your hair into a loose ponytail first, then tighten gradually
- Apply edge control to smooth flyaways and create a polished look
- Twist your ponytail and secure with the claw clip
Remarkably, placement matters—position the clip higher toward your crown rather than lower on your neck for a more balanced appearance. Furthermore, leaving out a bit of baby hair around the edges softens the look beautifully.
Claw Clip Updo for casual days
The versatility of this style makes it ideal for everyday wear. Ultimately, what I love most about the claw clip updo is how it transitions effortlessly from morning errands to evening gatherings. For casual outings, I sometimes opt for colorful clips that add personality to the style—black for classic looks or brighter options for a fun twist.
This hairstyle effectively frames my face while keeping hair off my neck, making it practical for warmer days. Additionally, pairing this updo with statement earrings creates an effortlessly chic look that appears much more complex than the 10 minutes it actually took to style!
Pigtails

Pigtails have saved me countless times when I needed a playful yet practical style for my short 4c hair. This versatile look takes me from casual coffee runs to weekend adventures in just minutes, making it a staple in my quick styling arsenal.
Pigtails for playful looks
Pigtails instantly add a youthful, energetic vibe to any outfit. Fortunately, there are numerous variations to explore based on your mood and occasion:
- Slick pigtails with edge control for a polished finish
- Puff pigtails that showcase your natural volume
- Pigtail buns for a more sophisticated twist
- Afro pigtails that celebrate your natural texture
To elevate this style, I often incorporate colorful accessories or create a zigzag part instead of a traditional straight one. Currently, butterfly clips are trending as decorative add-ons that instantly transform simple pigtails into a fashion statement.
How to part evenly
Creating balanced pigtails begins with proper parting. In this case, I’ve found that starting with a slant before going straight down the middle creates more interest than a basic center part. For those struggling with straight lines, zigzag parts are equally effective and hide any unevenness.
To achieve clean parts:
- Section damp (not soaking) hair using a rat-tail comb
- Apply edge control along the part line
- Work in small sections, adding product as you go
- Use your hands to smooth everything into place
For extra sleekness, I comb through with a small brush, using firm pressure to distribute product evenly from roots to ends.
Pigtails for short natural hair
Short 4c hair creates adorably compact pigtails that frame your face beautifully. Primarily, I focus on proper prep—slightly dampening my hair makes it more manageable without causing excessive shrinkage.
For the best hold on short natural hair, I apply leave-in conditioner followed by a gel with strong hold. Until recently, I struggled with flyaways, but discovered that applying clear ice gel over edge control prevents white residue while maintaining sleekness.
Pigtails work wonderfully as a protective style since they keep ends tucked away and minimize manipulation—perfect for supporting healthy hair growth while looking absolutely adorable.
Half Up Space Buns
Half up space buns have rescued me countless times when I wanted the cute space bun look but didn’t have enough length for the full style. In other words, this versatile hairstyle offers the perfect solution for those of us with shorter 4c hair who still want to embrace trendy styles without extensions.
Half Up Space Buns for fun style
Half up space buns create a funky, eye-catching look that works beautifully with our natural curly texture. Within minutes, this style transforms my everyday appearance into something playful yet practical. At first, I was hesitant about whether my shorter 4c curls would cooperate, but I quickly discovered that half up space buns actually showcase our texture perfectly.
For those days when I need my hair to transition from daytime errands to evening gatherings, this style remains intact throughout. Not only does it keep hair off my face, but it also allows me to show off my natural curls underneath. To that end, I’ve made this my signature weekend style—comfortable enough for casual outings yet stylish enough for social media-worthy photos.
How to balance volume
Creating balanced half up space buns requires attention to proportion. My technique involves:
- Sectioning hair straight down the middle, taking two even sections at the front
- Securing one section while working on the other (prevents mixing)
- Creating a dutch braid or twist on each section for added security
- Backcombing each ponytail for extra volume before forming buns
- Twisting backcombed sections into buns and securing with elastics
Even if your 4c hair is on the shorter side, backcombing creates the illusion of fullness. For symmetrical buns, I always check my work from multiple angles in the mirror before finalizing with bobby pins for extra security.
Accessories for Half Up Space Buns
The possibilities for accessorizing half up space buns are endless! In time, I’ve collected various accessories specifically for elevating this style:
Mini claw clips work wonderfully for securing space buns with shorter hair. Nevertheless, my favorite addition has been biodegradable glitter applied along the part or directly to the buns for special occasions. Beyond that, colorful hair bands or ribbons transform this already fun style into something truly unique.
For everyday wear, subtle gold hair pins add just enough sparkle without overwhelming the look. Ultimately, these accessories not only enhance the style but also help secure shorter pieces that might try to escape throughout the day.
Conclusion
Throughout my natural hair journey, finding quick, protective styles for my 4c hair felt like searching for buried treasure. Now, armed with these 15 stunning styles that take just 10 minutes or less, styling short 4c hair has transformed from a time-consuming challenge into an enjoyable creative outlet.
Short 4c hair offers endless styling possibilities, regardless of what anyone might tell you. From sleek buns that command attention in professional settings to playful space buns that showcase your personality, these hairstyles work with our natural texture rather than against it. What matters most is finding styles that protect your strands while allowing you to express your unique style.
My personal favorites rotate depending on my mood and schedule. Space buns serve as my weekend go-to, while the sleek low bun rescues me during busy workweeks. Finger coils offer definition when my TWA needs some extra love, and half-up styles provide versatility when I want something fresh yet practical.
These quick styles have undoubtedly changed my relationship with my natural hair. Rather than dreading wash day or morning styling sessions, I now approach them with confidence, knowing I have multiple options that celebrate my texture without demanding hours of my time.
Remember that practice makes perfect with any new technique. Your first attempt at flat twists might not look Instagram-ready, but each try improves your skill. Most importantly, these styles should make you feel beautiful while keeping your hair healthy.
Which style will you try first? Whichever you choose, these 10-minute styles prove that short 4c hair can be both manageable and magnificent. After all, our coily crowns deserve styles that honor their natural beauty while fitting seamlessly into our busy lives.