Simple braided hairstyles have been my secret weapon throughout my makeup artist career. A good braid can turn your worst hair day into something truly stunning – trust me on this one.
My daily client work has shown me how quick braids save precious time while looking amazing. These easy braid styles work great with hair that isn’t perfectly clean – we’ve all been there! Your hair gets a much-needed break from heat and cold damage when you use braids as protective styles in harsh weather. Your hair’s full potential comes alive with simple braiding, and these styles help keep your lengths healthy too.
These 13 braided styles are totally doable, even if you’ve had trouble styling your hair before. I worked with several braid experts to create techniques that anyone can become skilled at, whatever their level. You’ll find perfect braids here for both everyday wear and special events, all while keeping things simple and fresh.
Classic Three-Strand Braid

The three-strand braid is the foundation of almost every braided style I create in my studio. My experience with clients of all hair types has shown that this technique gives everyone a perfect starting point to become skilled at simple braided hairstyles.
Classic Three-Strand Braid basics
This braid’s beauty comes from its simplicity—you only need two repeating steps after dividing the hair. You can use it quickly when you’re running late or take your time to create something special for an event. Here’s the quickest way to do it:
- Start by brushing through your hair to remove any tangles
- Divide your hair into three equal sections—left, middle, and right
- Cross the right strand over and into the middle position
- Next, cross the left strand over and into the middle
- Continue this alternating pattern until you reach the ends
- Secure with a clear elastic band
My workshop students learn best when they practice on someone else’s hair first. This helps them see the pattern before they try it on themselves.
Classic Three-Strand Braid for different hair types
My client’s hair types range from fine to coarse, and this style works well for everyone. The hair’s natural texture makes it easier to braid on the second day after washing rather than with freshly washed hair.
Fine-haired clients get better results with a lightweight texturizing spray that adds grip without weighing down their delicate strands. For my clients with thicker or curlier hair, a small amount of leave-in conditioner helps smooth each section as they braid.
Classic Three-Strand Braid styling tips
Let’s take a closer look at some ways to enhance this simple style. My clients love how a loose braid protects their hair overnight—they wake up without tangles and find beautiful heatless waves in the morning.
Professional settings call for a sleeker look. Try braiding slightly damp hair and finish it with a light-hold hairspray. Another option is to part your hair down the back of your head and create two braided pigtails—this style works great for active days.
The sort of thing I love about this style is how you can make it fuller by gently tugging at the edges of your completed braid. This technique, which I call “pancaking,” gives your braid a softer, more relaxed look that’s perfect for casual occasions.
Baby Braids
Baby braids have become my favorite style to recommend to clients who want something stylish without much effort. This Y2K-inspired trend took off during lockdown when people needed quick hairstyles they could do without visiting a stylist.
Baby Braids for framing the face
My studio experience shows these delicate face-framing braids work with almost any face shape. Baby braids are simple – just tiny braids using the front sections of hair. Most clients look best with sections about one to two inches wide from each side of the middle part, but we can adjust this based on what you like.
These braids work so well because they highlight your best features. Baby braids create a “picture frame” for your face that brings out your cheekbones and eyes in a subtle yet effective way.
Baby Braids styling variations
Baby braids never stop amazing me with their versatility. I’ve created so many variations of this simple style over my career. Here’s how I customize baby braids for different clients:
- Combine with tousled waves for that effortless beach look
- Pair with sleek, straight hair for a more polished appearance
- Add small clips, butterfly accessories, or beads for personalization
- Vary the thickness of the braids according to hair density
Baby braids work with any hair texture or length. I’ve created them successfully on everything from chin-length bobs to waist-length locks, and on straight, wavy, and curly hair textures. The technique stays the same whatever your hair type.
Baby Braids for quick braided hairstyles
Baby braids are perfect when clients only have five minutes to spare. These simple face-framers need minimal time but make a big impact.
Second-day hair looks fantastic with baby braids. They refresh your look and keep those annoying face-framing pieces out of your way. You can raise the style by adding baby braids to half-up styles or low ponytails.
Creating baby braids is straightforward. A small amount of texturizing spray helps with grip. Then loosely braid the front sections and secure them with tiny elastics. You can create a more undone look by gently pulling the braid’s edges outward. A light hold spray keeps everything in place without making it stiff.
The style gets better as the day goes on, making it perfect for everything from casual mornings to evening events.
Braided Low Ponytail
A braided low ponytail has become my favorite go-to hairstyle as a makeup artist who loves versatile styling. This style blends the elegance of braids with a practical ponytail that works for any occasion.
Braided Low Ponytail for everyday wear
My clients love the braided low ponytail because it’s reliable and works beyond special events. The look shifts naturally from morning errands to evening gatherings. You won’t miss a beat.
My experience in the beauty industry shows that braided low ponytails do more than just look good. They keep hair tidy, prevent tangles, and look polished without much work. That’s why I recommend them to clients with busy lifestyles.
A low ponytail lets my curly-haired clients show off their natural texture while keeping their strands in check. Their beautiful curls stay visible without fighting frizz all day.
Braided Low Ponytail styling tips
Here’s how to create a perfect braided low ponytail:
- Gather your hair into a sleek low ponytail at your neck’s nape
- Secure with a hair elastic (clear ones look best)
- Split the ponytail into three sections for a classic braid
- Braid while keeping even tension
- Add another small elastic at the end
You can create more texture by pulling the braid’s edges gently – a technique I call “pancaking.” Your braid will look fuller with more dimension.
Here’s a styling trick I love: take a small strand from the ponytail and wrap it around the elastic to hide it. This simple touch lifts the whole style with minimal effort.
Braided Low Ponytail for work or casual days
The braided low ponytail has saved many clients from professional hair disasters. It might be simple, but it looks polished and perfect for the workplace.
The unicorn braided ponytail variation works great for casual days. A center braid flows into a low ponytail that hides oily roots while looking effortlessly chic.
Your braided low ponytail gets a personal touch when you wrap a colorful scarf around its base. The scarf adds fun to this classic look.
The braided low ponytail remains one of my most-taught simple styles. It gives you options without complexity – perfect for anyone who wants quick braided hairstyles without sacrificing style.
Half-Up Crown Braid

The half-up crown braid stands out among my repertoire of braided styles. It strikes a perfect balance between elegance and simplicity. This charming half-up version of the Dutch crown braid gives you versatility that other styles can’t match.
Half-Up Crown Braid for romantic looks
My clients love how this style blends fancy and casual elements together. The magic lies in how it frames your face while letting the rest of your hair flow naturally behind the crown. This braid creates a whimsical, romantic look that works great for casual gatherings and formal occasions alike.
This style has become one of my go-to recommendations for summer events. The secure crown section keeps hair away from your face and neck to curb heat, while the flowing sections maintain that soft, feminine quality. My clients who want something special without being too formal absolutely love this look.
Half-Up Crown Braid step-by-step
You’ll need more technique than simple braids to create this beautiful hairstyle, but it’s totally doable:
- Create a deep side part (the right side works best for most face shapes)
- Section off hair from the heavy side and split it into three equal pieces
- Start a Dutch braid by crossing the back strand under the middle
- Move the front strand under the middle, then keep bringing in hair from both sides
- Work the braid around your head until you reach the opposite ear
- Pull in hair pieces closer to the braid in the back section for uninterrupted flow
- Keep braiding until you’ve used all the hair and reached your starting point
- Use an elastic to secure and gently loosen the braid edges
- Pin the tail discreetly behind where the braid began
My clients with slippery hair get better results with dry shampoo or light hairspray before they start. It also helps to spray bobby pins with these products so they stay put.
Half-Up Crown Braid for medium to long hair
Medium to long hair works best for this style because you need enough length to create that crown effect. The style is perfect for clients whose hair sits in that awkward growing-out phase.
Layers look great with the half-up approach because loose sections hide shorter pieces that might not reach the braid. Bobby pins with a touch of hairspray help tuck in any stubborn layers that stick out.
The style looks even better when you curl the free-flowing hair underneath to boost that romantic feel.
Rope Twist Braid

The rope twist braid is a fresh take on traditional braiding techniques that has become a favorite in my Los Angeles studio. Most people don’t realize this style isn’t actually a braid – it’s a series of twists that create a beautiful rope-like pattern.
Rope Twist Braid technique
My work with clients has helped me develop a straightforward approach to the rope twist:
- Start with clean, detangled hair (a rat tail comb works wonderfully for smooth partings)
- Split your hair into two equal sections
- Twist both sections in the same direction (twisting toward the right works best)
- Cross the right section over the left so they switch places
- Continue twisting both strands in the same direction, then cross them in the opposite direction
Clients with slippery hair should use a styling powder to add grip. This simple trick has helped many of my fine-haired clients avoid frustration while learning this technique. Dry hair works best for practice since wet hair can be trickier to manage.
Rope Twist Braid for quick styling
My experience as a makeup artist shows the rope twist is one of the fastest braided styles to create. The style uses only two sections instead of three, making it substantially faster than traditional braids.
This versatile style blends naturally with second-day hair and works great when there’s no time for shampooing. My busy clients love rope twists because they take less than five minutes yet look polished enough for any professional setting.
Quick-styling tips that work well:
- Start with a high or low ponytail for faster application
- Secure ends with small, clear elastics
- Use a light hairspray to tame flyaways
Rope Twist Braid for sleek finishes
My clients love the polished look that rope twists create. The style not only looks refined but also stays in place throughout the day.
The sleekest finish comes from applying shine products before twisting. My studio technique uses a small amount of leave-in conditioner or beeswax to help natural hair blend naturally with the twist pattern.
This simple braided hairstyle lifts to special-occasion status by wrapping a small section of hair around your elastic or adding delicate accessories. The rope twist changes from casual to sophisticated without extra complexity.
Rope twists work well with hair of all types – from fine straight strands to thick curly textures. Medium-length hair creates the most defined rope pattern because of its manageable weight and length.
Braided Headband
The versatile braided headband stands out as my favorite styling solution that works with almost any hair type. My styling career has taught me that this technique works great for beginners and looks amazing at special occasions.
Braided Headband for simple hair braids
A braided headband looks complex but remains quite simple to create. My clients usually choose between two main approaches: braiding their natural hair or using a pre-made braided piece. New learners should start with a pre-made piece to build confidence.
Natural hair braiding needs about 2-3 inches of hair sectioned from ear to ear across the crown. This creates a solid base to work with. A premade braided headband offers a quick alternative that doesn’t need any braiding skills.
This style’s adaptability makes it perfect for any occasion. My clients love how it works for both casual outings and formal events.
Braided Headband for short to medium hair
People often think braided headbands work only for long hair. My experience with clients of all types proves this style works beautifully even on shoulder-length hair.
Second-day hair with dry shampoo provides the best grip for shorter styles. Your braid will stay put all day without slipping. This headband style also helps hide those tricky growing-out phases and awkward length transitions.
The braid sits flat against your head, which makes it perfect for shorter styles. This technique adds beautiful texture and creates an illusion of fuller hair.
Braided Headband styling ideas
My favorite creative variations include:
- Loose waves paired with the braid for a romantic boho look
- A low bun combination for elegant occasions
- A thin sparkly headband next to your braid for extra dimension
- Baby braids near the face combined with your headband braid for texture
Special events call for a double-pattern approach. Using two different braid patterns creates an intricate headband. This looks complex but stays within the realm of easy braided hairstyles.
Braided headbands solve many common hair challenges. They tame flyaways, manage growing-out bangs, and turn second-day hair into something polished. These versatile styles work as a base for many looks, from casual waves to elegant updos.
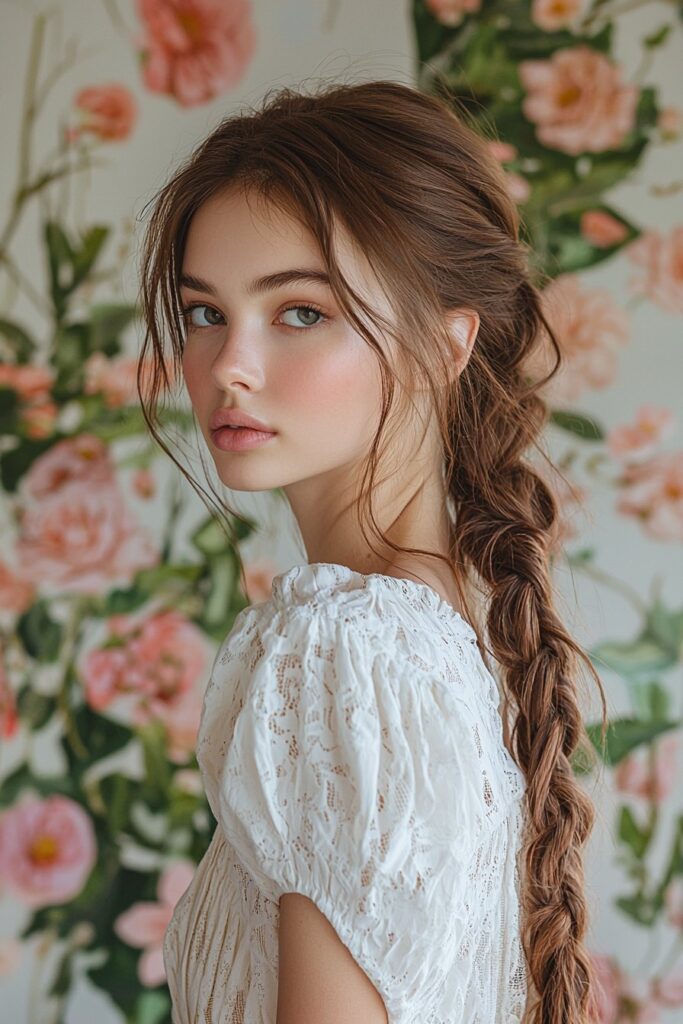
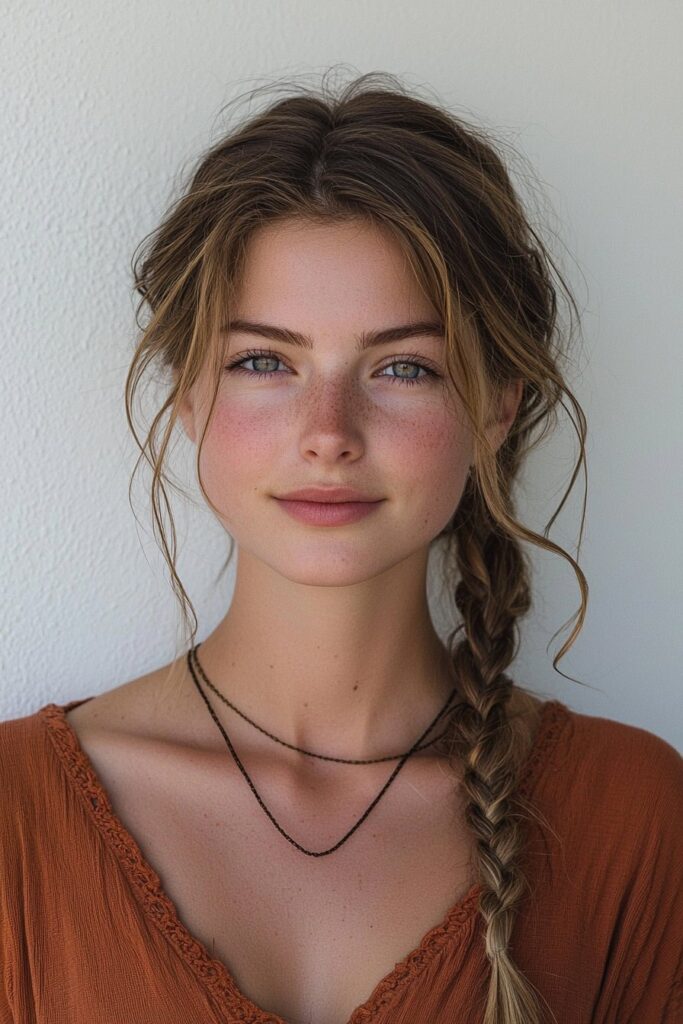
Messy Side Braid
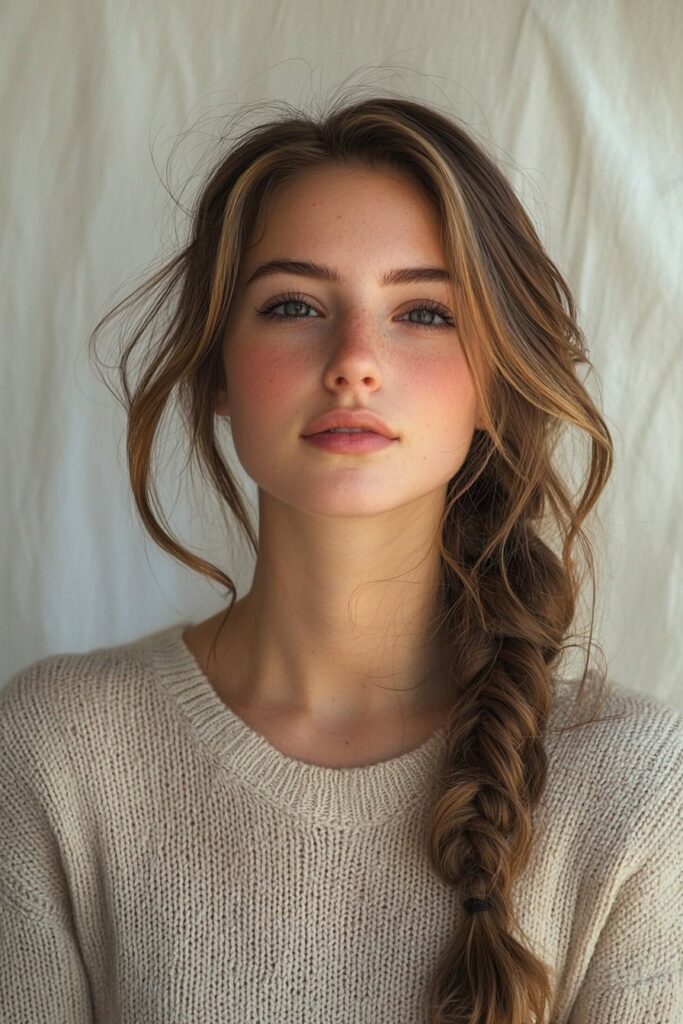
My clients love how the messy side braid strikes that perfect balance between “I tried” and “I didn’t try too hard.” This style has become the life-blood of my quick styling repertoire throughout my career in Los Angeles.
Messy Side Braid for effortless charm
The messy side braid’s special quality comes from its unfinished appearance. My clients hear this often – the style should be imperfect! Start with dry, slightly curly or textured hair—second or third-day hair works perfectly. You’ll get the best results by gathering all your hair loosely to one side over your shoulder, then braiding with a regular three-strand technique. The transformation happens after you gently tug at the “elbows” of the braid to loosen and flatten it—a technique stylists call “pancaking.”
Messy Side Braid for textured hair
Textured hair makes this style truly shine. My studio experience shows that naturally curly or wavy hair creates the perfect foundation for a messy side braid. Those flyaways or loose strands add to the charm! Clients worried about frizz can apply a small amount of serum or oil before braiding. Straight-haired clients can create similar texture with a curling wand before they start braiding.
Messy Side Braid for casual days
This style stands without doubt as my go-to recommendation for relaxed days when you want that put-together look without too much effort. The style works beautifully as a second-day hairstyle after curling. Busy morning clients should create a deep side part (directly above their eyebrow’s arch) before gathering hair over one shoulder. To name just one example, my clients with early morning appointments love this style because it keeps them looking stylish all day.
You can lift this look by pulling out a few face-framing pieces and curling them gently away from your face. This softens the overall appearance while you retain control of the casual vibe that makes this braid so appealing to everyone.
Faux Fishtail Braid

My clients who find complex fishtail braiding intimidating now have a fantastic alternative that creates the same beautiful effect with half the work. The faux fishtail braid has become a hit in my studio, especially with clients who want an intricate braided look but don’t have much time.
Faux Fishtail Braid illusion technique
This technique creates a fishtail look without any actual fishtail braiding! You can create the signature texture of a traditional fishtail by making a series of inverted ponytails or “topsy tails.” My experience shows that simple ponytails and loop-throughs will give you that beautiful woven appearance.
The simple technique involves:
- Start with a ponytail section at the crown
- Create a gap above the elastic and flip the tail through this opening
- Add a new section of hair below the first, secure with elastic
- Create another flip-through, pulling tight to maintain structure
- Continue this pattern down the length of your hair
This method creates a texture that looks like a fishtail braid but needs just half the work of the real technique.
Faux Fishtail Braid for beginners
My years of working with clients at different skill levels have shown that this style works great, especially when you have trouble with traditional fishtail braiding. Anyone can rock this beautiful look whatever their braiding skills.
This braided hairstyle is perfect for beginners because you only need simple ponytail skills instead of complex weaving. The faux fishtail stays put better than regular fishtail braids that tend to come loose during the day.
My first-time clients with slippery fingers become skilled at this technique quickly because they can build the braid in clear, manageable sections instead of continuous weaving.
Faux Fishtail Braid styling tips
You can raise your faux fishtail game by gently pulling the edges outward after you finish to create a fuller, messier texture. Clear elastic bands that blend into your hair will make it look more authentic.
Small wildflowers or tiny accessories help boost the bohemian feel of this style. A light hairspray will help set the structure without making it stiff.
This quick braided hairstyle works great as a side braid, wrapped into a bun, or as part of a half-up style for special events. My short-haired clients get the same beautiful effect with fewer loops.
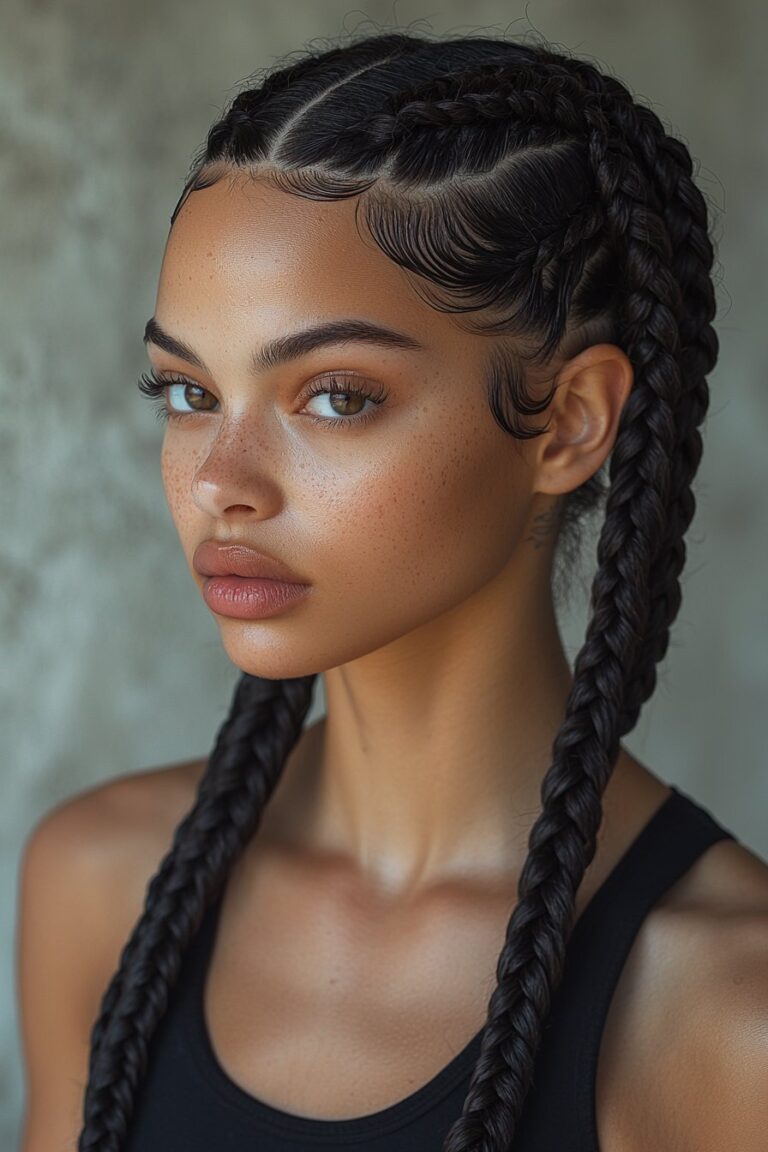
Double Dutch Braids

Double Dutch braids have become my salon’s go-to style for clients who want both looks and practicality. My experience with different hair textures and lengths shows these braids are adaptable and they hold up amazingly well.
Double Dutch Braids for sporty looks
Double Dutch braids create a bold, eye-catching style that works great for athletic activities. Unlike standard braids, Dutch braids need you to cross hair under the middle strand instead of over, which creates that striking raised effect. We’ve found this style works so well for sports because it keeps hair secure against the head, so no strands fall into your face when you move.
My recommendations for clients heading to intense workouts:
- Start with neatly brushed hair (wet or dry works equally well)
- Create a clean center part from forehead to nape
- Section off one side with a clip while working on the other
- Begin at the hairline with a small section divided into three strands
- Cross the strands under rather than over, pulling tight as you go
- Continue adding hair from both sides until reaching the nape
- Finish with a regular three-strand braid and secure with an elastic
This style gives you that amazing “wow factor” while being super practical.
Double Dutch Braids for active days
My clients tell me these braids stay put through their busiest days. That’s why I suggest Double Dutch braids to anyone with a packed schedule that includes physical activity.
These braids are a great way to style hair without heat too. You can create loose Dutch braids on damp hair before bed and wake up to beautiful waves—perfect for my clients who want quick morning routines.
A strong-hold gel along the hairline and smoothing each section with your fingernails while braiding keeps even the finest strands in place during tough workouts.
Double Dutch Braids for all hair types
Double Dutch braids work well on hair of all textures. I’ve created these braids successfully on everything from fine straight hair to thick curly textures.
My clients with natural hair love these braids as protective styles. People with thick hair appreciate how the style spreads weight evenly while keeping everything in place.
You can style these braids many ways—from casual pigtails to wrapping them into a crown or bun for dressier occasions. This flexibility makes Double Dutch braids one of the simple braided hairstyles my clients ask for most often throughout the year.
Braided Bun
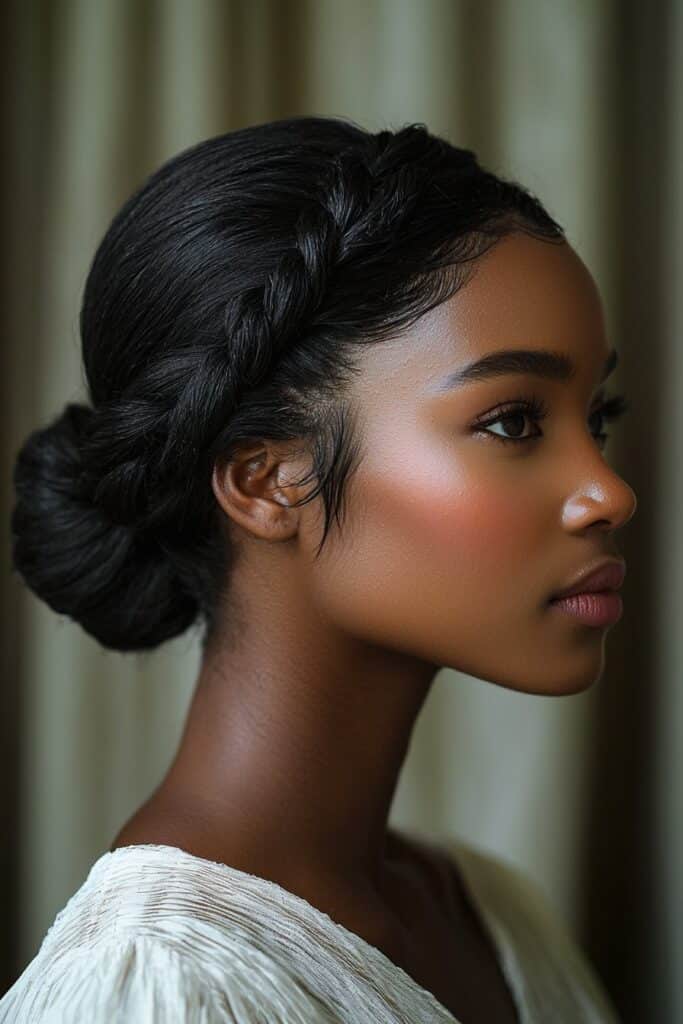
Braided buns have transformed how I style hair for clients with packed schedules. The combination of secure braids and elegant buns has become my go-to recommendation for anyone who wants to look polished without the fuss.
Braided Bun for formal and casual events
Braided buns adapt to almost any occasion. My clients wear them to red carpet events and beach outings. The style looks more complex than it really is. Most of my clients get compliments on looks that took just ten minutes to create!
The slick-back low braided bun stands out as my studio favorite. You pull hair into a low ponytail, braid it, wrap it around the base and secure it with bobby pins. This fresh take on the classic slicked-back bun trends everywhere but keeps its timeless elegance.
Braided Bun for protective styling
My years of experience show that braided buns work great as protective styles, especially for natural hair textures. The biggest benefit? Your hair stays safe from harsh elements while requiring minimal handling.
The style offers several options:
- Combinations with cornrows to protect hair better
- Chunky twists that reduce tension
- Space buns with Dutch braids underneath for a fun look
Clients with textured hair love how braided buns lock in moisture and prevent breakage. All the same, I warn against styles that pull too tight at the hairline since they might cause thinning later.
Braided Bun for quick braided hairstyles
My clients who say they lack styling time learn my five-minute braided bun technique. The process is simple: gather hair in a ponytail, braid it fully, secure with an elastic, then wrap the braid around itself in an upside-down U-shape.
This style works better on second or third-day hair than freshly washed strands. Busy clients who need a quick upgrade can add a simple three-strand braid before the bun wrap. This creates that “I spent time on this” look they love.
The magic of simple braided styles lies in gentle tugging at your finished braid’s edges before wrapping. This technique adds volume that makes even fine hair look fuller.
Waterfall Twist Braid

Waterfall twist braids have rescued me from countless styling emergencies in my studio. This unique technique creates an ethereal, cascading effect that looks nowhere near as complex as it appears. Traditional braids use three strands, but waterfall twists need just two strands while strategically dropping pieces to create that stunning “waterfall” effect.
Waterfall Twist Braid for soft waves
Waterfall twist braids’ gentle structure perfectly complements soft waves and curls. My clients’ styles start with loose curls created using a large-barrel curling iron or flat iron. The dropped strands flow elegantly through the twisted pattern after completion, which creates a romantic look perfect for everyday wear.
My experience shows that waterfall twists take only 5-7 minutes to create with naturally wavy hair, yet look impressively intricate. This style frames the face beautifully and draws attention to your eyes and cheekbones while enhancing existing waves.
Waterfall Twist Braid for special occasions
My career experience proves that waterfall twist braids work beautifully for wedding parties and formal events. This style’s unique flowing design creates a romantic, cascading effect. Bobby pins crossed in an X-shape secure the ends better than visible elastics for important occasions.
Women of all ages can rock this versatile style, which adapts easily from casual to formal looks. My bridal and bridesmaid clients often love adding delicate accessories or tiny flowers that lift the whole look with an ethereal touch.
Waterfall Twist Braid for long hair
Waterfall twist braids shine on medium to long hair, which provides enough length to showcase the beautiful cascading effect. My longer-haired clients’ styles usually begin with a side part, and the waterfall twist starts near the temple.
The simple technique involves:
- Divide a small section into two equal parts
- Twist the front section over the back section
- Pick up a new section of hair and place it between your twisting strands
- Allow this new section to “fall” through your twist
- Continue twisting the original sections once more
- Repeat until reaching your desired endpoint
The style’s edges need gentle pulling to create a fuller appearance after completion. This simple styling trick transforms even the most basic waterfall twist into something extraordinary.
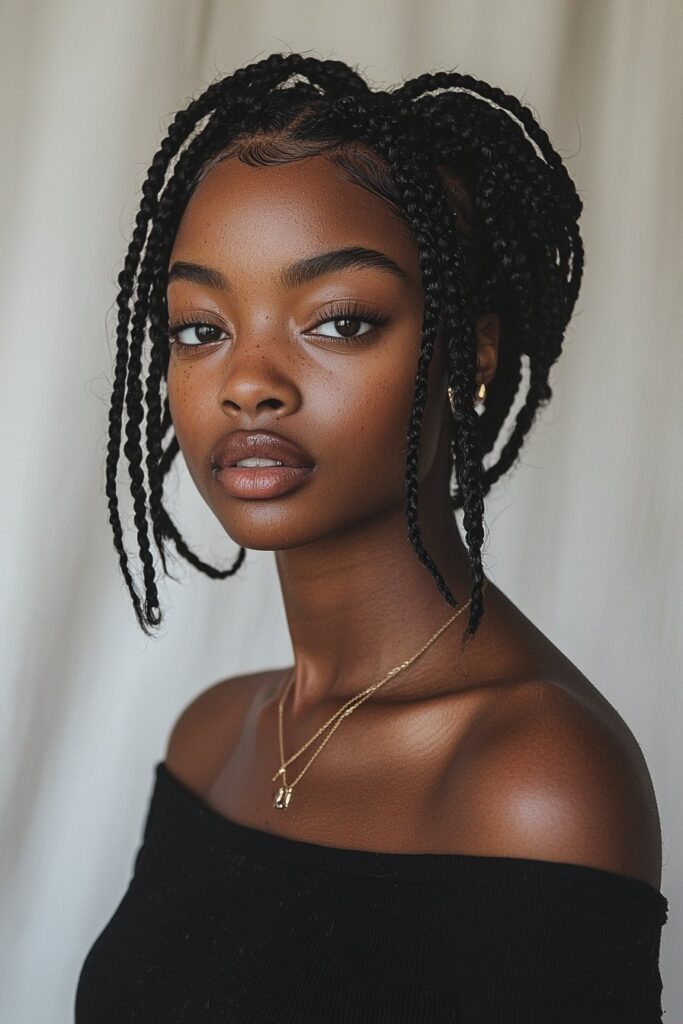
Simple Box Braids

Box braids have revolutionized hair care options for my clients with natural hair. My Los Angeles career has given me countless opportunities to recommend this timeless protective style. Clients love how it promotes hair health while looking absolutely stunning.
Simple Box Braids for protective styling
The distinctive box-shaped parts created on the scalp during installation gave these braids their name. Their real value shines through their effectiveness in protecting natural hair. Box braids create a protective barrier around natural strands that prevents excessive manipulation and reduces breakage.
This style stands out because it works well with hair of all types, though thicker, coilier textures see the best results. My client preparation always begins with a sulfate-free shampoo cleanse and hydrating conditioner treatment. A full picture of the process shows that clean, detangled, and moisturized hair creates the ideal foundation.
My clients appreciate how their natural hair can rest while they still look polished with box braids. On top of that, proper care helps accelerate hair growth by reducing daily styling damage.
Simple Box Braids maintenance tips
The right maintenance routine extends your braids’ lifespan and keeps natural hair healthy underneath. Note that keeping both your scalp and braids moisturized remains essential. A light moisturizing routine works best with natural oils like coconut, jojoba, or almond oil applied to both scalp and braids.
For washing, I advise my clients to:
- Mix shampoo with warm water (1:1 ratio)
- Gently massage the mixture from scalp to ends
- Apply natural oils afterward to restore moisture
Nighttime care cannot be skipped – wrap your braids with a silk or satin scarf before bed to prevent frizz and breakage. Most clients find box braids surprisingly low-maintenance compared to other styles, needing just weekly moisturizing and minimal styling.
Simple Box Braids for long-term wear
Box braids typically last 6-8 weeks with proper care. Even if they look fantastic beyond this timeframe, I strongly advise removal to prevent potential damage to your hairline and scalp. Traditional knotted box braids might outlast knotless variations because the root knots provide better anchoring.
Professional installation starts around $150, varying by size, length, and location. DIY box braids become possible with practice and patience. Some clients have created their own styles successfully using simple techniques and 3-4 packs of braiding hair.
Box braids offer protection and versatility. Style options include ponytails, buns, and updos, making them perfect for everyday wear and special events.
Side-Swept Cornrow Braid

My clients are fascinated by side-swept cornrow braids that protect their hair while adding attitude. After creating countless braided styles, I’ve seen how this asymmetrical design can change even basic hairstyles into something bold and fresh.
Side-Swept Cornrow Braid for edgy looks
Side-swept cornrows create a chic, asymmetrical look that beautifully frames your face. My clients who want more personality love this style because it makes such a statement. The technique is simple – we braid cornrows horizontally instead of vertically. We start near one ear and create an elegant arc that sweeps across the head.
This style stands out because it looks clean and polished while making a bold statement. You can make it even edgier by playing with different cornrow angles. This adds amazing dimension and visual interest to your overall look.
Side-Swept Cornrow Braid for natural hair
Natural hair works perfectly with side-swept cornrows. The style offers great versatility and protection. Your hair’s texture doesn’t matter – the horizontal braiding pattern adapts beautifully while protecting your natural locks.
This style lets your hair rest by reducing daily manipulation. Your hair might even grow healthier as a result. Side-swept cornrows are perfect if you’re transitioning between styles. They hide different textures while keeping everything neat and polished.
Side-Swept Cornrow Braid styling ideas
Here are my studio’s favorite looks:
- Classic Lemonade Braids – These sleek side-swept cornrows start small at the hairline and get thicker gradually. The result is sophisticated yet edgy
- Asymmetric Side-Part Cornrows – A deep side part becomes the focal point while angled braids create stunning visual interest
- Swoopy Cornrow Braids – These create flowing designs with curved patterns that move toward one side
Beads or decorative strings can add extra flair to your side cornrows. Color highlights are another great way to make heads turn.
Edge control gel gives your side-swept cornrows that perfect polish. This versatile style works everywhere – from the office to special events.
Conclusion
My Los Angeles studio has taught me something valuable over the years – these 13 braided hairstyles never go out of style and anyone can do them. You’ll find a style that works for you, whether you’re working with day-old hair or getting ready for something special. I’ve seen how a simple braid can boost someone’s confidence and completely change their look.
These braided styles are amazing because you can do so much with them. You don’t need fancy tools or professional equipment – just your hands and some hair ties will do the job. These styles work beautifully on all hair types and lengths. My clients pick up these techniques quickly, and most of them master the basics after trying a few times.
Nothing makes me happier than watching someone’s face light up when they create something beautiful with their own hands. It’s amazing to see their joy when they nail their first crown braid or get that fishtail just right. Braiding might look tough at first, but breaking it down into easy steps makes it much more doable.
Practice is your best friend when it comes to braiding. Your first try might not be perfect for social media, but each attempt helps build your skills and confidence. Feel free to make these styles your own – add some accessories, loosen up some sections, or mix different techniques together. Start with a basic three-strand braid and work your way through the list. You’ll find styles that work best with your hair type and match your personal taste.