
Are you exhausted from endless scrolling through complex nail designs that only professional artists can create? Finding simple yet stunning summer nail ideas seems like an impossible task.
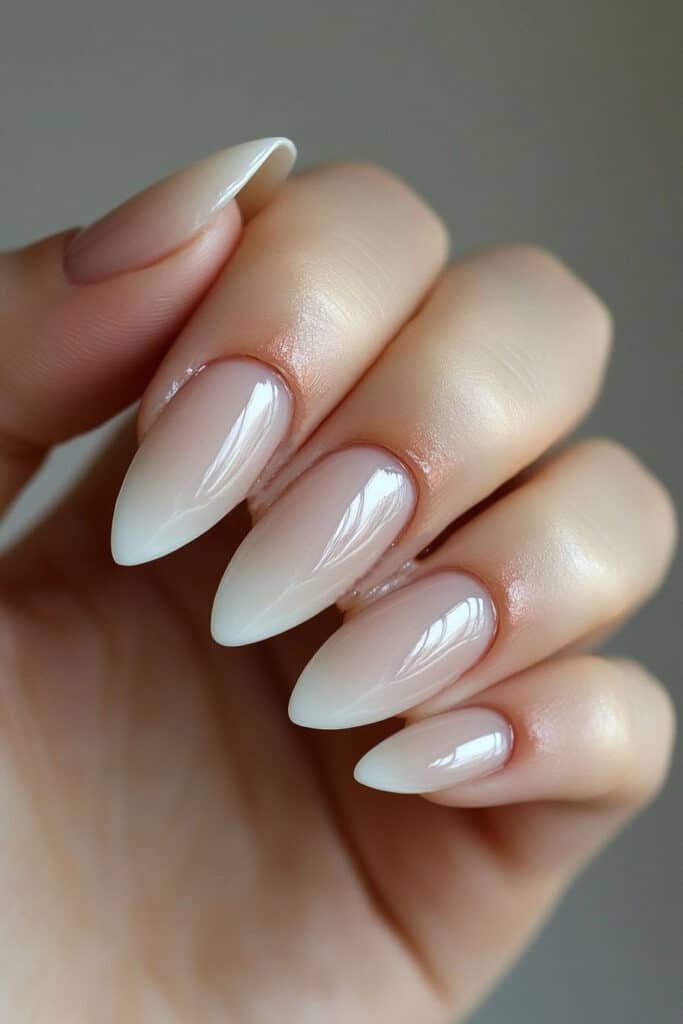
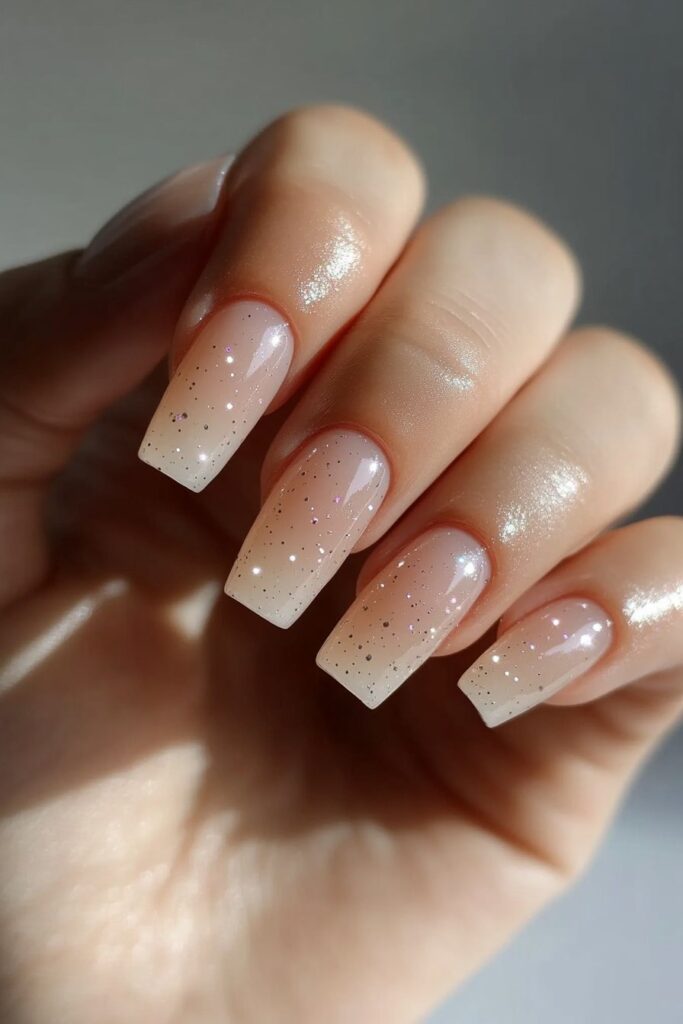
Summer 2025 brings a refreshing focus on achievable elegance. This season’s hottest trends celebrate natural beauty, from the popular “Clean Girl Nails” with their glossy finish to contemporary micro French tips. The trends range from soft pastel ombre patterns to vibrant, mood-lifting color combinations that you can easily create at home.
Here’s a carefully selected collection of 15 simple summer nail designs that strike the perfect balance between minimalism and style. You’ll discover your ideal match here, regardless of your preference – be it classic red manicures with orange undertones or delicate floral art that enhances your natural nails. These easy-to-create looks will keep your hands looking effortlessly chic throughout the summer season.
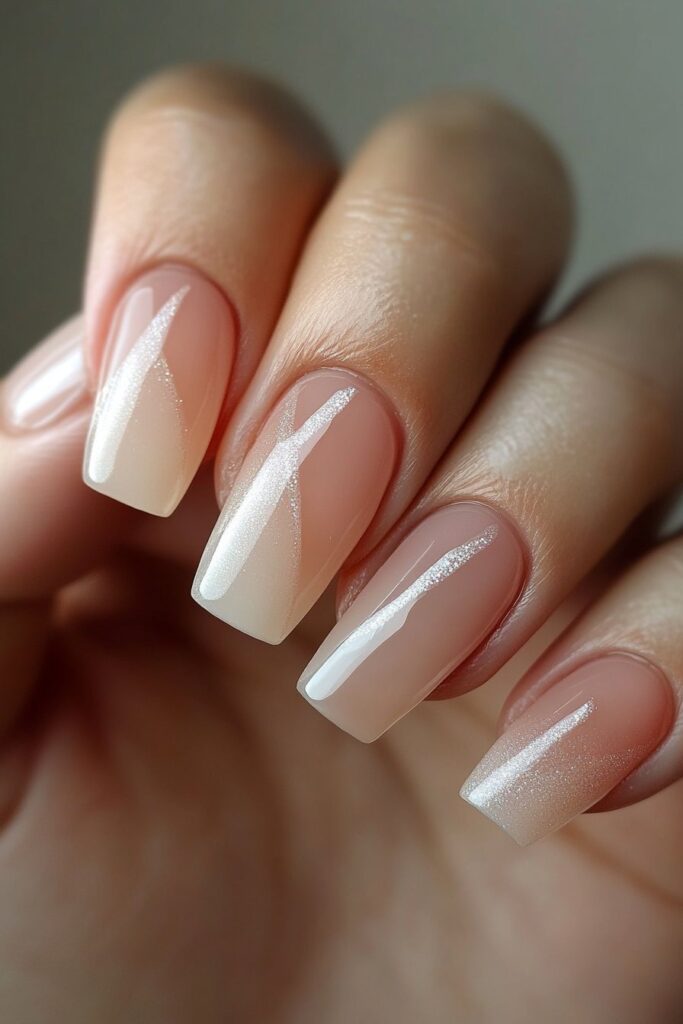
Classic French Tips with a Twist
French manicures have come a long way since their Paris debut in the 1970s. My work as a celebrity makeup artist has shown me how this timeless style continues to fascinate clients through modern interpretations that blend classic elegance with fresh style.
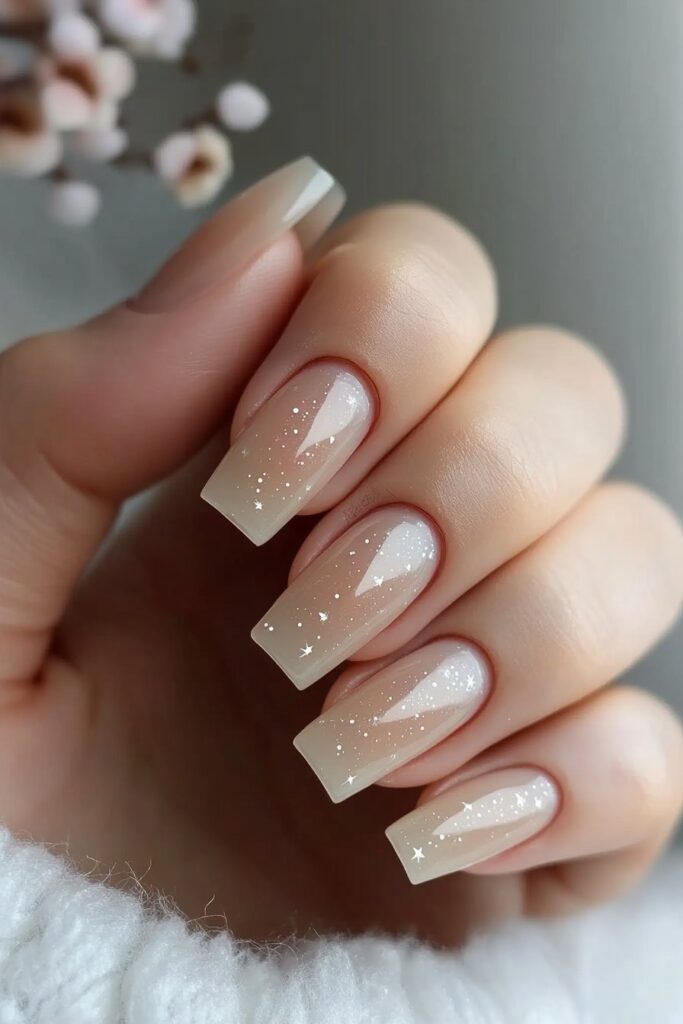
Modern French Tip Variations
The micro French tip emerges as 2025’s most sophisticated trend. Through collaboration with A-list celebrities, I’ve noticed a change toward ultra-thin lines that create subtle, refined looks. Chrome finishes have gained popularity and add a futuristic twist to traditional French tips. My colleague Lindsay Worthen, a veteran cosmetologist, believes these adaptable styles give the classic look its lasting appeal.
Color Combinations for Summer
Summer’s palette moves beyond traditional white tips and embraces:
- Glazed butter yellow to create a subtle sunshine effect
- Chrome pink to add modern sophistication
- Peach fuzz tones with tiny daisy accents
- Electric blue to capture oceanic vibrancy
Application Tips and Techniques
The perfect French tips start with a center dash and connect with arcs on each side. On top of that, nail guards are a great way to get clean separation between colors. A quality striping brush helps with precise application, especially when you have thinner lines to work with.
My experience at New York Fashion Week has taught me that proper preparation is vital. Clean, shaped nails and a salon-quality base coat should come first. Patience and practice with guides help create professional-looking results at home.
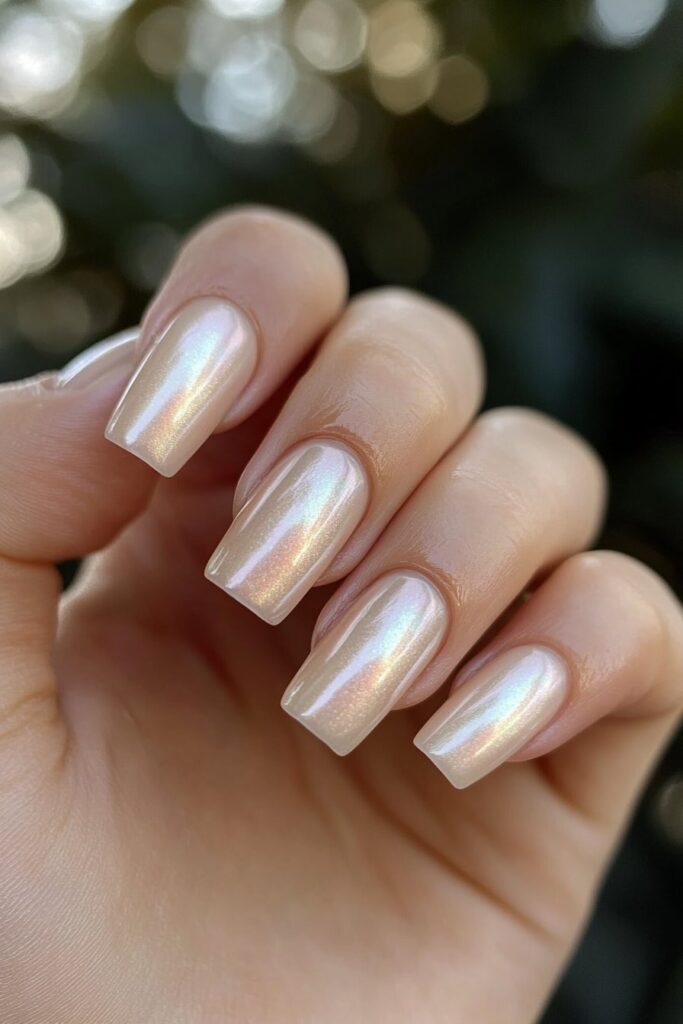
Minimalist Chrome Nails
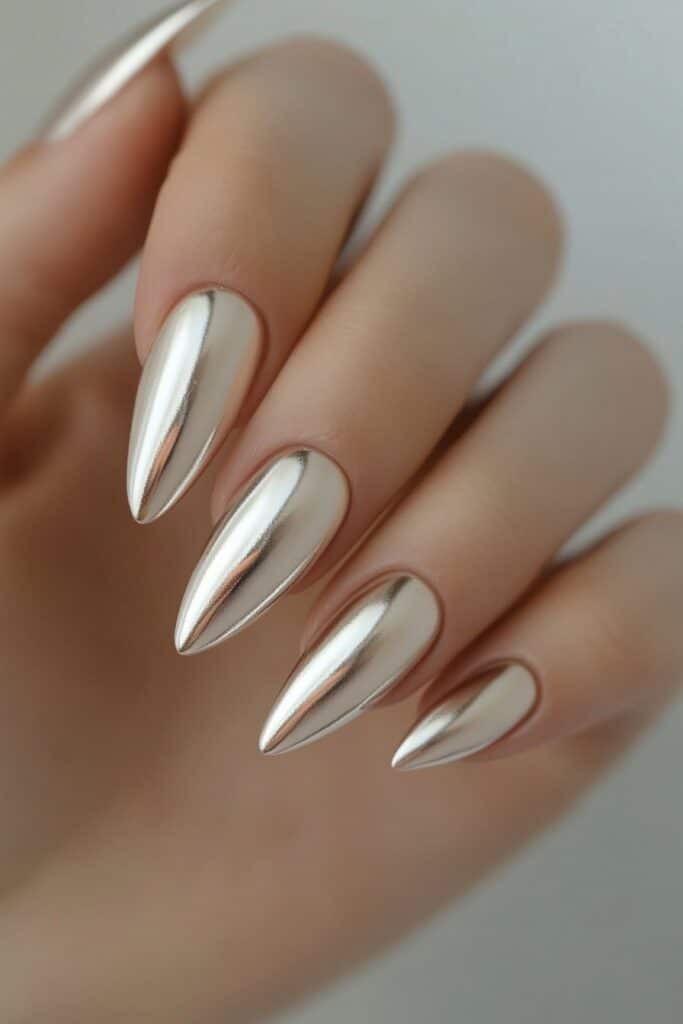
I’m a celebrity makeup artist, and chrome nails have become one of the hottest simple summer nail trends. My work at New York Fashion Week has shown me how this reflective finish makes an elegant statement without complex designs.
Chrome Finish Types
Chrome nails come in many finishes, from mirror-like metallics to subtle glazed effects. The most popular styles right now include holographic shimmer, pearl essence, and metallic chrome. My A-list clients love neutral chrome nails with simple swirls that create sophisticated yet understated looks.
Application Process
You’ll need to follow these steps to get flawless chrome nails:
- Prep your nails well
- Apply a quality gel base coat and cure for 60 seconds
- Use dark polish for visible chrome effect or lighter shades for iridescent finish
- Apply no-wipe top coat and cure
- Buff chrome powder with a tight-pored sponge
- Seal with final top coat
Maintenance Tips
Chrome nails can last up to two weeks when you take good care of them. Wear gloves during household chores and apply cuticle oil daily. Stay away from harsh chemicals and keep your nails out of water for the first 24 hours to prevent lifting.
Best Chrome Colors for Summer
This summer’s chrome trends are amazing. Silver mirror chrome adds a futuristic edge, and pink-tinted chrome brings feminine sophistication. My celebrity clients can’t get enough of vanilla chrome – it’s got this versatile elegance that works with everything. Gold-tinted chrome gives you that perfect sun-kissed glow for beach days.
Pastel Rainbow Design

My work with countless celebrities at red carpet events has shown that pastel rainbow designs blend playfulness and sophistication perfectly. These soft, multi-colored looks are summer 2025’s most popular nail trend.
Color Selection Guide
Baby blue works best as a starting point for cool undertones. Add soft lavender to create elegance, mint green for a fresh look, and peachy coral to bring warmth. You could also try candy pink, pale yellow, and light purple to create a dreamy cotton candy effect.
Application Methods
My time at fashion shows has helped me develop these reliable techniques:
- Classic Rainbow Stripes: Paint thin stripes down the nail side. Start with light blue and add consecutive colors. Two coats will give you the right intensity
- Pastel French Tips: Give your nails a modern twist with different pastel shades on each tip
- Ombre Blend: Mix multiple polish colors to create a smooth gradient effect
Perfect Occasions
These designs look amazing at summer weddings and beach parties. Pastel rainbow nails are great for:
- Professional settings with subtle tips
- Pride month celebrations that feature geometric patterns
- Spring and summer festivities
As a celebrity makeup artist, I see how pastel rainbow designs boost people’s mood. My A-list clients love these looks before red carpet events. They tell me the soft, candy-like hues make them smile every time they look at their hands. This style’s versatility makes it special – you can keep it subtle with nude bases for meetings or add glitter accents to make it pop for special occasions.
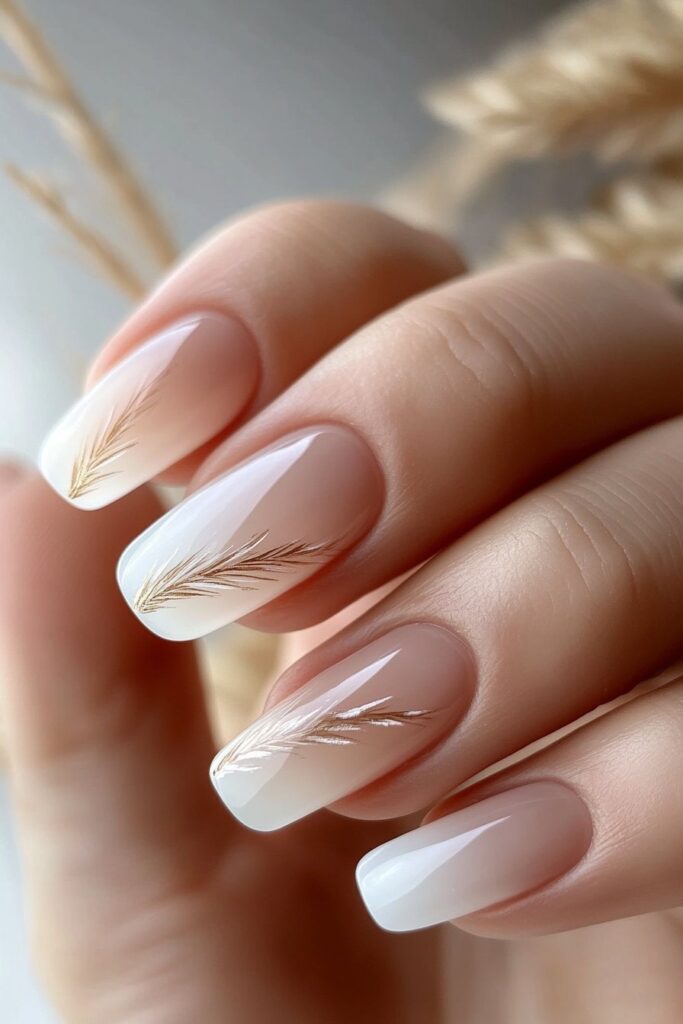
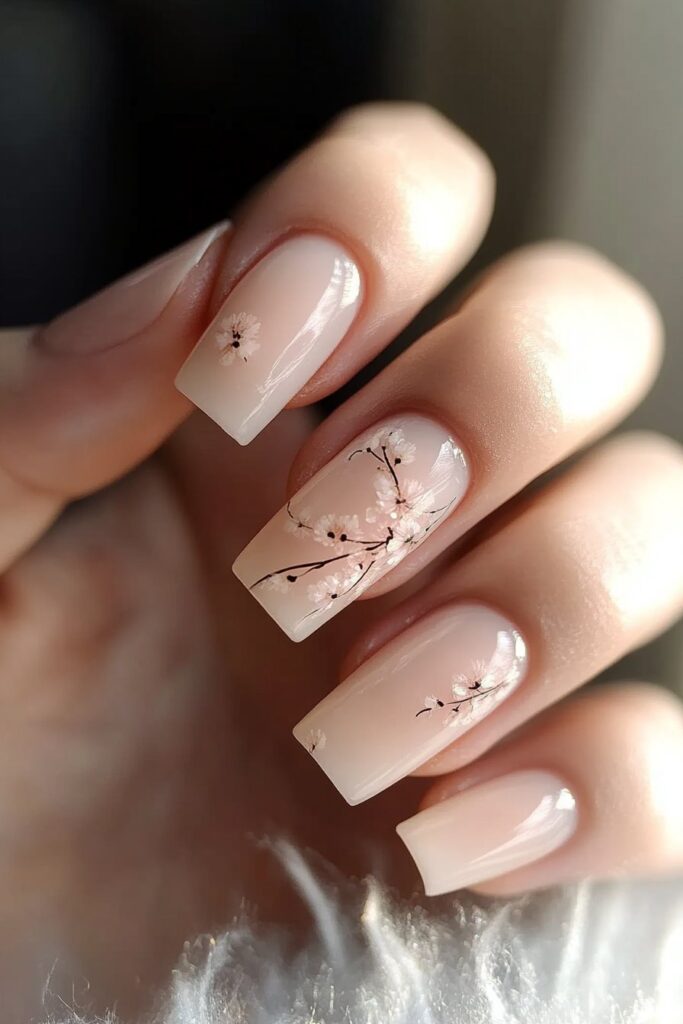
Simple Floral Accents
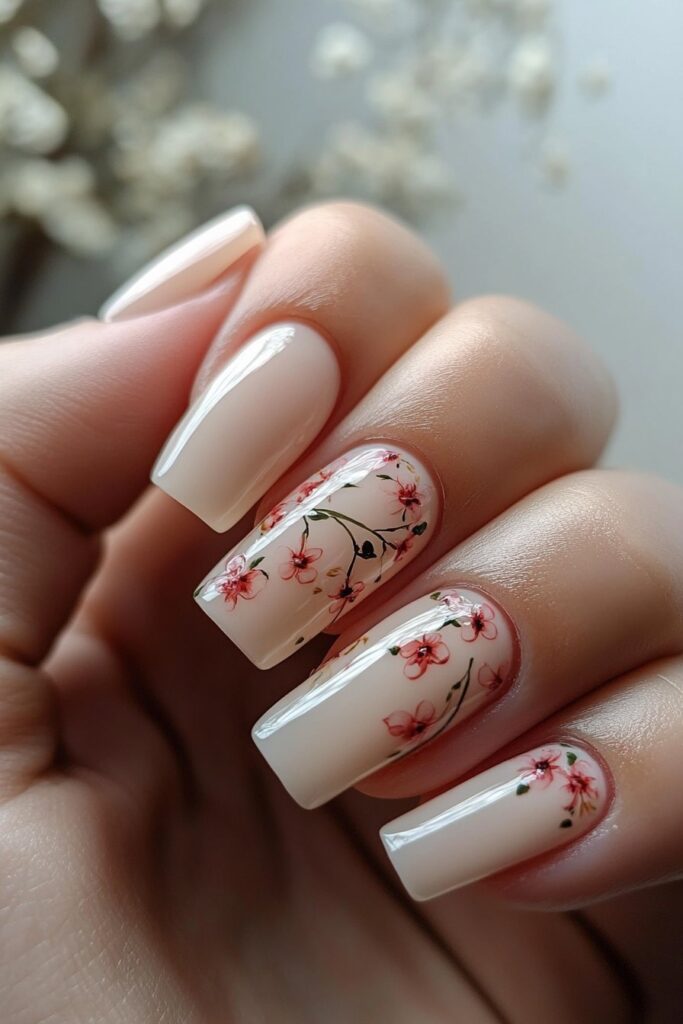
Floral nail designs add nature’s elegance to your fingertips. My work with A-list celebrities has shown that simple flower accents create stunning summer looks without professional expertise.
Easy Flower Patterns
A dotting tool helps create perfect petals. My recent New York Fashion Week experience taught me to place a center dot and add five surrounding dots for simple flower shapes. The process becomes easier when you drag each dot toward the center with a clean thin brush.
Color Combinations
Electric blue paired with white creates striking summer florals. Celebrity styling sessions prove that butter yellow bases with delicate white flowers give a fresh, seasonal look. Neutral bases like nude or clear polish let your floral designs stand out beautifully.
Seasonal Inspiration
Red carpet events demonstrate how floral designs adapt to different seasons. Earth tones like brown and burgundy create sophisticated flower patterns in fall. White and gold floral accents work best on matte finishes during winter. Vibrant pinks and purples bring a garden-fresh look that clients love in summer.
Nail art beginners should start with single accent nails. My tutorials at Sally Beauty show this approach builds confidence while creating a polished look. Gel polish users need to flash-cure between layers – a technique refined through countless celebrity preparations.
Subtle Glitter Tips
I’ve made glitter tips my signature style, and they really took off after I used them in my work at New York Fashion Week. As Belle Hathaway, I got better at these techniques while working with celebrities and doing their nails for red carpet events.
Glitter Types and Textures
Working with A-list clients taught me that picking the right glitter changes everything. Here are the basic types you’ll need:
- Fine, iridescent particles work great for daytime shimmer
- Small-sized glitter creates smooth, metallic looks
- Combo glitter with multiple sizes adds dimension
- Chunky hexagonal pieces make bold statements
Application Techniques
A quality base coat starts the perfect glitter tips. I don’t brush the glitter on directly – instead, I dab it exactly where I want it. This method gives even coverage and stops clumping. You can build up thin layers and let each one dry if you want extra sparkle.
My celebrity styling sessions showed me that encapsulation makes glitter last longer. Pro tip: Put your glitter between clear gel layers to get a smooth, lasting finish.
Durability Tips
Glitter tips need special care to keep their shine. My fashion show experience tells me to use plenty of top coat to smooth out rough spots. Don’t take hot showers or go to saunas right after getting them done – it can weaken the adhesive. Protective gloves during chores will help your design last longer.
My red carpet clients know to touch up their top coat every few days. This keeps the shine fresh and protects the glitter. I got this technique down while working with A-list celebrities, and it helps simple summer nail ideas look amazing all season long.
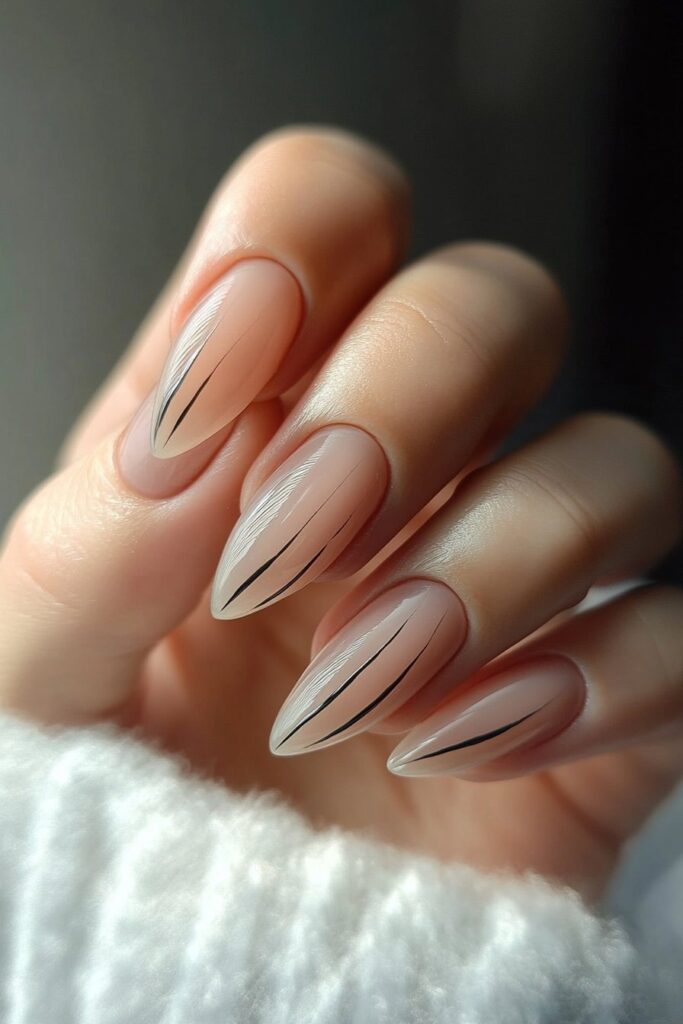
Negative Space Designs
My decade as a celebrity nail artist has shown me that negative space designs are a great way to get endless possibilities for simple summer nail ideas. The modern looks at my recent New York Fashion Week showcase caught everyone’s attention with their artistic yet achievable appeal.
Simple Geometric Patterns
Negative space nail art leaves parts of the nail bare to create striking designs. My A-list clients love geometric patterns because they work so well with this technique. We started with simple shapes like triangles near the cuticle or diagonal stripes across the nail. My fashion show sessions have proven that symmetrical patterns look most sophisticated.
Tools Needed
You’ll need these items to create flawless negative space designs:
- Base coat and top coat
- Striping tape or stencils
- Fine liner nail art brush
- Dotting tool
- Orange wood sticks
Style Variations
My celebrity styling sessions have shown how negative space designs can take different forms. Here are some options to try:
Modern Half-Moons: Leave the area above the cuticle bare while painting the rest of the nail. This style looks stunning with matte finishes, as I’ve seen at countless red carpet events.
Checkerboard Patterns: Checkerboard patterns with negative space make bold statements. My signature technique combines painted squares with bare nail sections for a modern twist.
Abstract Shapes: Irregular shapes in negative space add an artistic touch. I’ve been playing with organic curves and asymmetrical patterns at recent fashion shows. Each nail becomes unique.
The tape or stencil must stick securely to prevent polish bleeding. My years with celebrity clients have taught me that less polish creates cleaner lines in negative space designs.
Micro Dot Patterns
My latest nail art collection at Fashion Week generated huge interest in micro dot patterns. This technique combines precision with playful creativity. Working with A-list clients, I’ve found that dots work as building blocks for countless nail designs.
Dot Placement Ideas
Start with a single row of dots at the nail base if you’re new to this technique. We created an elegant pearl-like effect that my celebrity clients love. My studio experiments show that graduated dots from large to small add stunning visual depth.
Color Selection
My signature color combinations include:
- Sheer black dots on marigold yellow base for summer sophistication
- Baby blue dots at the base for fresh, clean looks
- Two-toned blue and orange dots for statement designs
Required Tools
A dual-ended dotting implement with 1.4mm and 2.0mm tips helps create perfect dots. My experience shows that common household items work amazingly well too. Bobby pins create perfect dots, and toothpicks excel at tiny details – something I learned in my early career.
Clean your dotting tool with nail polish remover between color changes to achieve professional results. My experience with red carpet events taught me that proper tool maintenance matters most. You’ll create crisp, precise dots every time with a steady hand and clean tools.
Watercolor Effect

My fascination with watercolor nail designs began when I first tried them in my Savannah studio. Being a celebrity nail artist, I’ve become skilled at this technique by working on countless red carpet preparations. Water-based paints create the most authentic watercolor effect.
Color Blending Techniques
Watercolor nails have a magical quality in their delicate, fluid movements. We used water-based paints or sheer, jelly-like formulas that blend naturally. My time at Fashion Week taught me that layering different shades adds mesmerizing depth. Small amounts of diluted polish work best when built up gradually. This prevents a muddled appearance.
Summer Color Palettes
My favorite summer palette has:
- Soft pastels that remind me of summer: yellow, pink, and blue
- Light green with turquoise that creates ocean vibes
- Acid green mixed with dark turquoise to make bold statements
Application Steps
A white or light-colored base coat makes your watercolor design stand out. Place drops of your chosen colors on aluminum foil and dilute them slightly. The first color needs 10 seconds to set before you add the second shade. Let the water do its work – it will create that dreamy watercolor effect naturally.
Wrap a tissue around your finger to gently dab off excess water and paint. A glossy top coat seals the design perfectly, though a matte finish gives an authentic watercolor paper look. My celebrity styling sessions have shown that this technique looks beautiful on all nail shapes. This makes it ideal to create simple summer nail ideas.
Minimal Striping
Stripes have become my go-to minimalist nail design. I found their versatility during my recent celebrity styling sessions. My work at Sally Beauty taught me that simple striped patterns create sophisticated looks that work great for summer occasions.
Stripe Patterns
Single stripe sophistication stands out as 2025’s most elegant trend. Diagonal stripes add movement to your manicure. My signature design has edge accents – a thin stripe along one side of each nail creates unexpected visual interest. My Fashion Week experience showed me that metallic minimalism, with a slim gold or silver stripe on a matte base, delivers striking sophistication.
Color Combinations
My clients ask for these summer combinations the most:
- Nude base with metallic gold stripes for subtle glamor
- Soft gray foundation paired with classic black lines
- Pastel perfection featuring lavender, mint, and baby blue stripes
- Matte black base highlighted by silver accents
Application Methods
The right preparation is vital to create flawless stripes. Clean nails with alcohol or nail polish remover make the perfect canvas. Very thin brushes and nail striping tape help create precise lines. Red carpet preparations taught me that pressing the tape firmly against the nail stops polish from bleeding.
Pro tip: Press the tape against your arm first to reduce its stickiness. My celebrity clients prefer minimal stripes that create maximum effect. Let each layer dry completely before you add the next stripe.
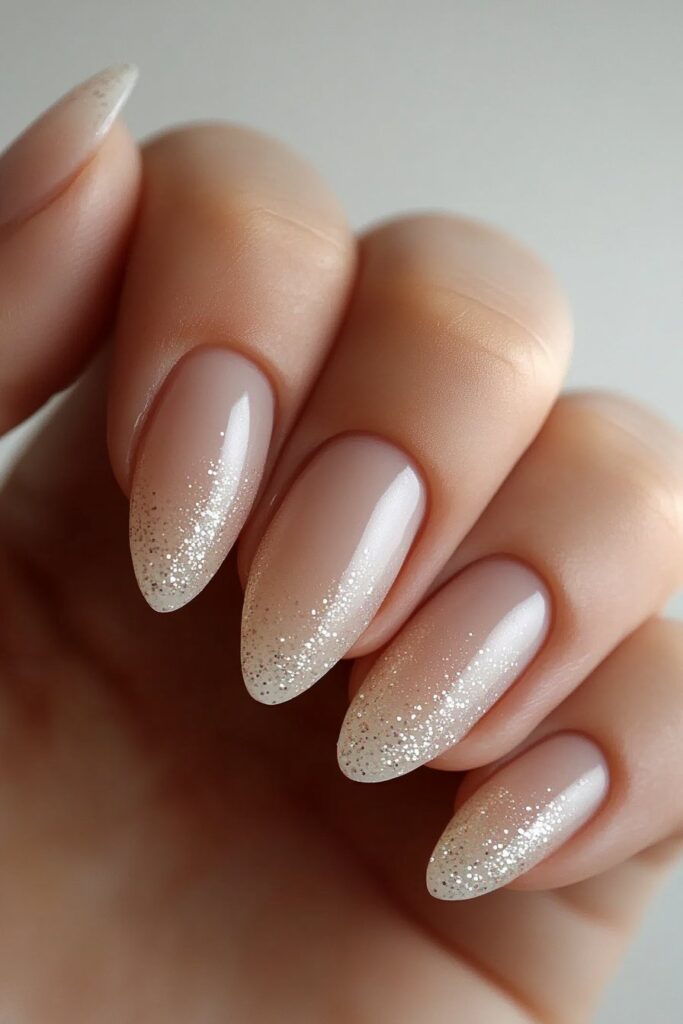
Simple Ombré Nails
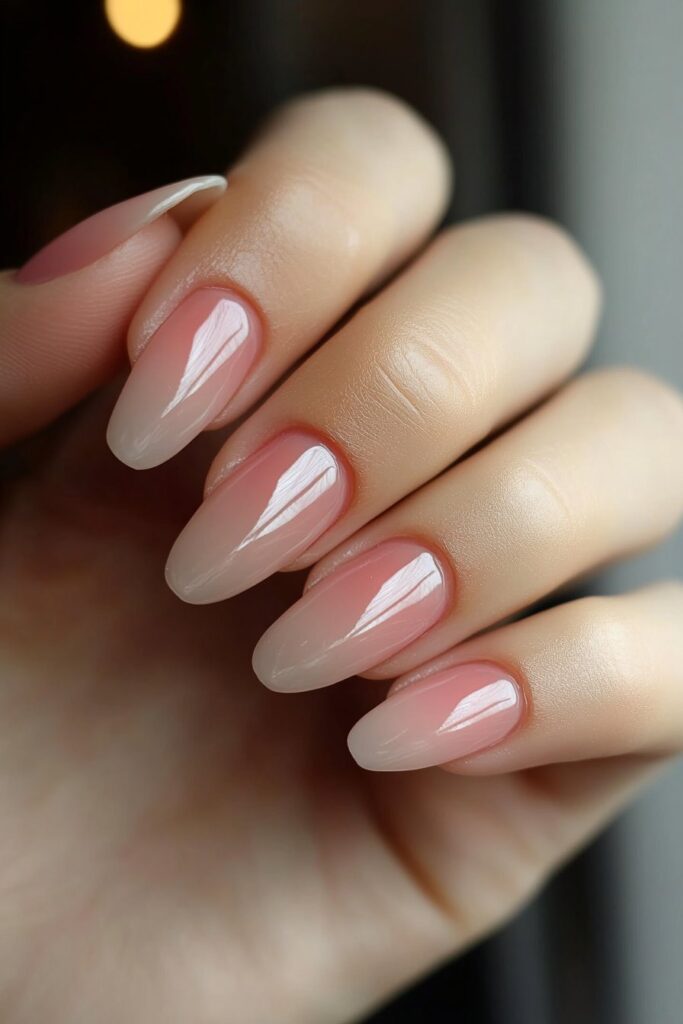
I’ve been creating perfect ombre nails since my early days at Makeup Designory. My signature technique has helped me prep countless celebrities. Now I can create unmatched color transitions that look stunning for summer.
Color Transition Tips
The right polish type is a vital part of flawless ombre nails. We used semi-opaque or jelly colors to create the smoothest transitions. Beginners should start with lighter shades because they blend more easily. My red carpet work has shown that sheer colors like Essie Gel Couture in Fairy Tailor create the most natural gradients.
Application Process
This technique needs careful attention to detail. Start with a thin layer of sheer base color. Paint your chosen shades onto a makeup sponge and make sure they slightly overlap. Pro tip: The sponge should be slightly damp before applying polish – a technique I perfected during Fashion Week.
These methods also work well:
- Use jelly colors: Paint lighter shade near cuticle, blend darker color at tip while wet
- Apply pigments: Start with matte gel polish, cure, then use flat brush for application
- Create glitter gradient: Dab glitter over sheer base for subtle dimension
Maintenance Guide
Good care keeps your ombre nails looking fresh. You should apply a quality top coat to seal your design. Of course, wearing gloves during chores protects your gradient from fading. A weekly clear top coat touch-up maintains shine and prevents chipping.
My time at Sally Beauty taught me that cuticle oil keeps polish vibrant. My celebrity clients love this maintenance routine. It keeps their ombre nails fresh throughout summer events.
Pearlescent Finish
Pearl nail designs caught my eye when a celebrity client asked for them at the Makeup Designory. Their subtle shimmer and sophisticated finish make them ideal for simple summer nail ideas.
Pearl Effect Options
Pearl effects come in finishes of all types – from subtle shimmer to dramatic chrome. We work with three distinct types:
- Pearlescent powder for delicate shimmer
- Chrome-based pearl for mirror-like finish
- Glazed pearl effect for iridescent glow
Application Steps
A perfect pearl finish needs the right technique. Apply a quality base coat to ensure proper adhesion. Then add your chosen color in thin, even layers. The best results come from using a no-wipe top coat before adding pearl powder.
Pro tip: Want stunning 3D effects? Hold the magnetic wand at an angle over wet polish for 30-60 seconds. You can also use a dotting tool to create swirly textures that catch light beautifully.
Best Base Colors
My time at Sally Beauty taught me how base color selection affects the final look. Pale colors like white and pink create the most elegant finish. Black bases make white pearl effects stand out remarkably. Summer sophistication calls for alternating between white and pink tones. This keeps that pearlescent shimmer my A-list clients love.
Seal your design with a quality top coat for maximum staying power. This technique gives you a sophisticated, elegant alternative to traditional nude nails that lasts through all your summer activities.
Matte Pastel Designs
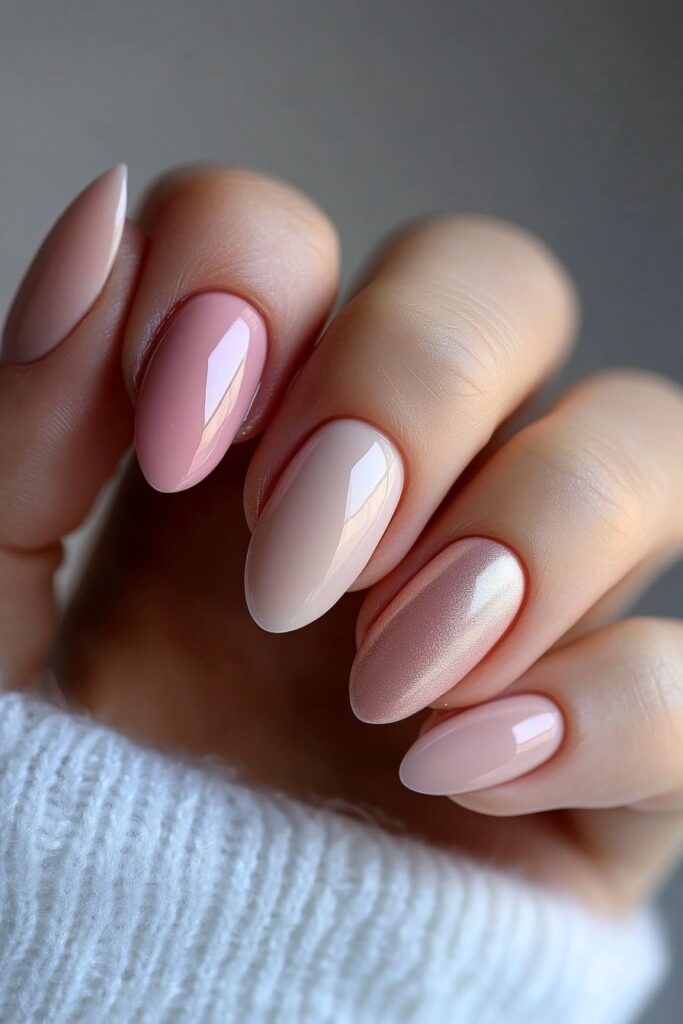
My clients at the Sally Beauty workshop loved the matte pastel designs we created for simple summer nails. The soft hues with their velvety texture bring an understated elegance that everyone seems to love.
Color Selection
Working with A-list celebrities, I found that there was something special about pastel neons – they give the most striking matte finish. We worked mostly with beige, pink, and orange combinations to create a joyful summer look. The warm shades mixed with subtle peach hues look amazing on skin tones of all types.
Finish Types
Matte finishes stand out from traditional glossy looks in unique ways. These finishes dry faster and don’t chip as easily. A quality base coat before the matte color gives the best results. The velvety texture makes any manicure look sophisticated.
Style Variations
My signature matte pastel designs showcase these distinctive styles:
- 3D floral art with matte-on-matte effects
- Geometric patterns on natural nails
- Skittle nails featuring different pastel shades
Simple monochrome pastel designs with matte top coats are perfect for a subtle elegant look. My red carpet experience shows that pearl flakes added to matte finishes create amazing dimension. This mix of textures helps raise simple summer nail designs to something special.
Minimalist Wave Pattern
Wave patterns have become my signature design at Los Angeles fashion shows. They blend playful and minimal esthetics perfectly. I found that there was this technique while getting A-list clients ready for red carpet events at Sally Beauty.
Wave Design Options
Wave patterns are incredibly versatile. We started with custom nail stencils made from washi tape. My experience at New York Fashion Week shows that paper tape sticks perfectly to base polish without causing damage. Blue bases with white polish hook shapes can deliver stunning summer looks.
Tools Required
You’ll need these items to create flawless wave patterns:
- Washi tape and small scissors
- Base color and top color polish
- Fine detailing brush
- Quality top coat
Application Steps
Apply your chosen base color and let it dry completely. Cut a wave pattern in the tape – this smart technique gives you two usable pattern sides. The tape needs firm pressure on your nails before applying the top color. Important tip: The polish should still be wet when you remove the tape.
My sessions at Makeup Designory taught me that wave designs shine with summer-inspired color combinations. The magic happens when you pick shades that complement each other. I love pairing ultramarine blue with marbled white flecks to capture ocean waves’ essence. Silver trim on wavy tips creates an elegant finish that’s perfect for beach weddings and summer events.
Single Accent Nail
I fell in love with accent nails at a special Sally Beauty event. That’s where I saw how one standout nail could change a whole manicure. My work with A-list celebrities has shown me that accent nails are a great way to get creative with self-expression.
Accent Design Ideas
The ring finger makes the best canvas to showcase accent designs. Here are my favorite accent styles:
- Delicate hibiscus flowers for tropical vibes
- Sparkly butterflies for ethereal elegance
- Minimalist stars for subtle sophistication
- Tiny chili designs for spicy personality
Color Coordination
We focused on picking colors that work well with your base shade. Summer looks shine when you match nude nails with terracotta accents. You can also create drama by mixing navy with bright yellow. My red carpet prep sessions have shown that sparkly gold accents on natural bases never go out of style.
Placement Tips
Your nail shape and length should guide where you place your accents. Pro tip: Long coffin nails give you plenty of room for detailed designs. After countless celebrity styling sessions, I’ve found that using different accent nails on each hand creates an eye-catching look.
Balance is everything with accent nails. Whether you go for simple dots or complex patterns, your accent should flow with your overall nail design to look polished. My time at New York Fashion Week taught me that the best designs often come from the simplest ideas.
Clear Base with Tiny Details
I found clear base nail designs fascinating while working with Vogue magazine. My time at Makeup Designory taught me how transparent polish creates an elegant canvas that enhances delicate artistry.
Detail Options
A clear base helps simple designs pop beautifully. These detail elements give the best results:
- Tiny rhinestones add subtle glamor
- Dried flowers create natural elegance
- Gold foil flakes bring sophisticated shine
- Micro stars offer playful sophistication
Application Techniques
Quality base coat protects your natural nails. Pro tip: Clear bases show every detail, so use transparent adhesive and prep with extra care. Fine detailing brushes or dotting tools help create precise patterns.
Style Ideas
My signature clear base designs feature encapsulated elements that add depth without overpowering the natural nail. We focused on simple line art using specialized polish with thin brushes. Clear jelly nails offer another option – mix two parts clear top coat with one part color to create a stunning transparent effect.
Celebrity styling sessions showed me how blooming gel creates mesmerizing effects on clear bases. A thin coat of blossom gel with a drop of colored polish spreads naturally before curing. Gold accents or delicate star stickers paired with clear bases create summer sophistication – just seal everything with a quick-dry top coat.
Conclusion
My ten years of experience as a celebrity nail artist has shown me that beautiful summer nails can be simple. These 15 nail designs have fascinated both A-list celebrities and beauty enthusiasts during countless red carpet events and Fashion Week showcases.
Summer 2025’s most popular looks include classic French tips with modern twists, chrome finishes, and pastel rainbows. Artists can express themselves through watercolor effects and minimalist wave patterns without complex techniques. On top of that, negative space designs and micro dots show that simplicity can make a stronger statement.
My Savannah studio’s clients have taught me that simple nail art creates the most memorable impressions. Natural beauty shines through pearl accents, subtle glitter tips, and clear bases with tiny details – perfect for summer occasions.
The beauty of these designs lies in their balance of sophistication and achievability. You don’t need hours to create intricate patterns. Start with single accent nails or simple French tips and explore more creative options as your confidence grows.
Note that summer nail art celebrates your personal style and creativity. These simple designs let you express your unique personality through nail art, whether you love classic chrome finishes or playful pastel patterns.