
Have you seen those perfect slicked back hair buns taking over your social feeds? With over 3.3 million views and 90.9K likes on TikTok, these elegant styles have become my absolute go-to for nearly every occasion.
I’ve fallen in love with the slick back bun not just for its polished look but also for its practicality. This versatile style works perfectly during summer when hair feels dry and frizzy from heat and salt water, or when you’re on your last day before wash day. Actually, the sleek bun hairstyle works even better on slightly dirty hair — it stays in place better when you move around! Whether you prefer a slick back low bun for professional settings or a slick back high bun for a night out, there’s a version that works for everyone.
What I love most about these looks is how they combine elegance with efficiency. In this guide, I’ll share 16 stunning slick back updo variations you can create in just 5 minutes. Plus, I’ll let you in on my little secret — adding oil before styling not only helps achieve that perfect sleek look but also acts as a pre-wash treatment instead of applying oil to clean hair. Trust me, once you master these quick styles, you’ll never look back!
Classic Slick Back Low Bun
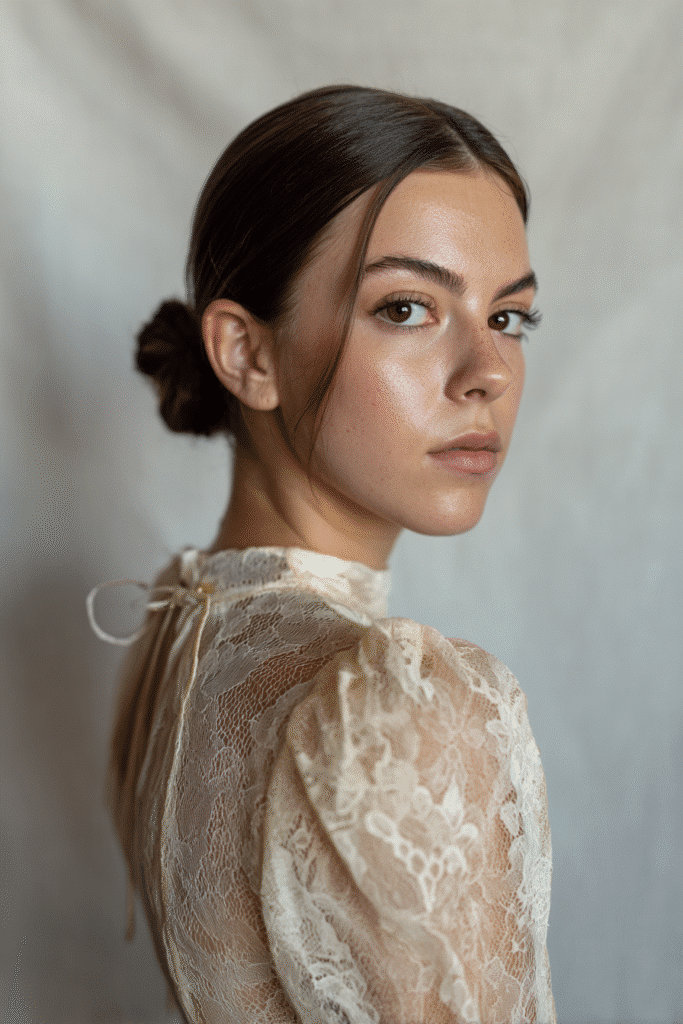
The classic slick back low bun remains my favorite go-to style whenever I need something polished yet effortless. This timeless updo sits elegantly at the nape of the neck, creating a sophisticated look that works for virtually any occasion.
Style overview
The classic slick back low bun is essentially a sleek, tightly pulled hairstyle that sits low on the head. What makes this style so popular is how it elegantly accentuates cheekbones, providing an invisible contour effect and natural face lift. I’ve found this style to be particularly versatile—perfect for professional meetings, casual brunches, or even formal events.
To achieve this look, you’ll need:
- A bungee hair tie (allows better hold than standard elastics)
- Bobby pins (essential for securing layers or short pieces)
- Natural bristle brush (creates that smooth, bump-free finish)
- Hair gel or oil (for shine and hold)
- Hairspray (tames flyaways and adds staying power)
Best hair type for classic slick back low bun
Surprisingly, this slick back low bun actually works better on second, third, or even fourth-day hair. If you have thin hair like me, a little bit of natural grease and grit at the roots helps your strands hold the style much better than freshly washed hair. Moreover, the slight texture gives the bun more grip and staying power throughout the day.
For those with straight or wavy hair, you might want to use a flat iron first for an ultra-sleek look. Meanwhile, if you have curly or coily hair, dampen your hair with water or leave-in conditioner, followed by a moisturizing cream or gel.
Belle Hathaway’s tip for a polished finish
My secret for that extra-polished finish? Position is everything. The classic low bun should sit neither too high nor too low on your nape—aim for the middle of the back of your head. Furthermore, try using a light styling cream and secure the bun slightly looser for a more relaxed yet still polished look.
To protect your hair, I recommend alternating between this tight style and looser ones. Since the hair is pulled back firmly, doing it too often can lead to breakage or even a receding hairline. Your beautiful locks deserve that occasional break!
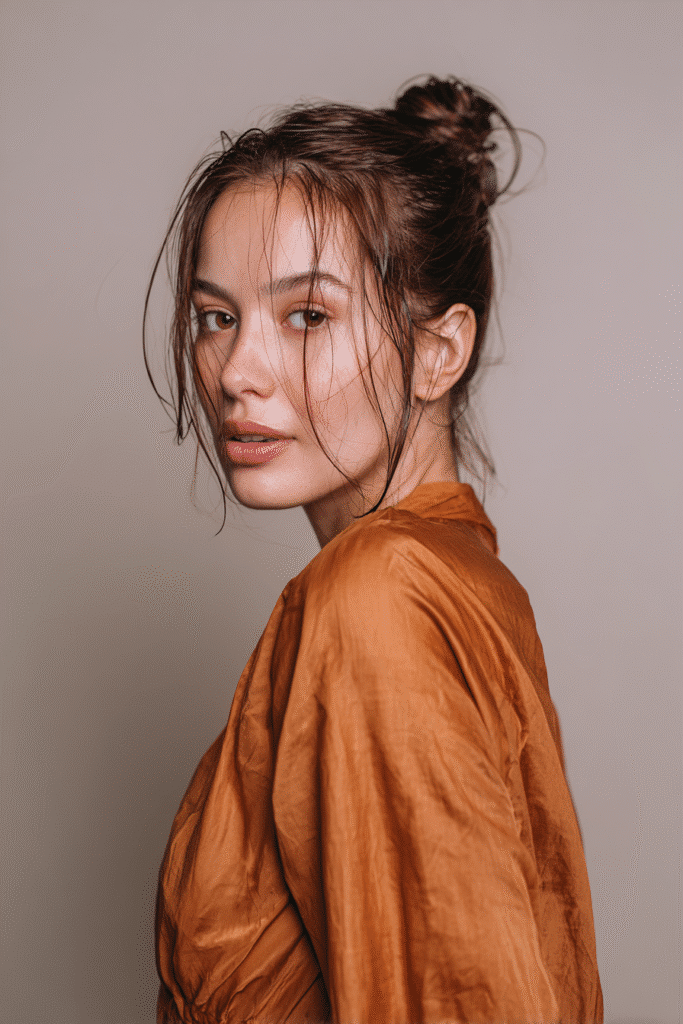
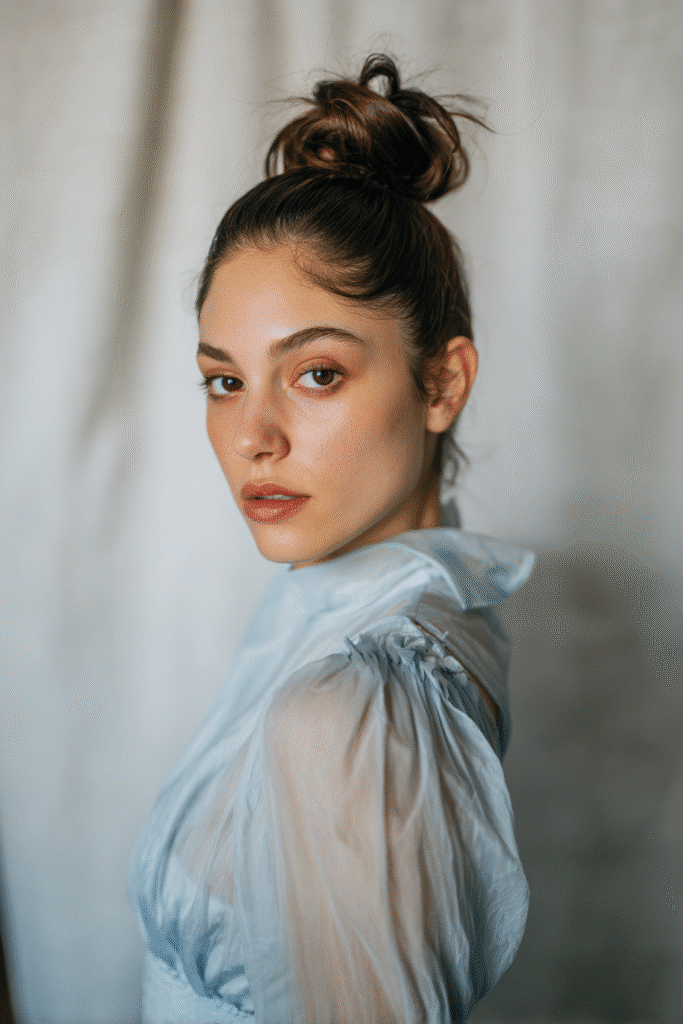
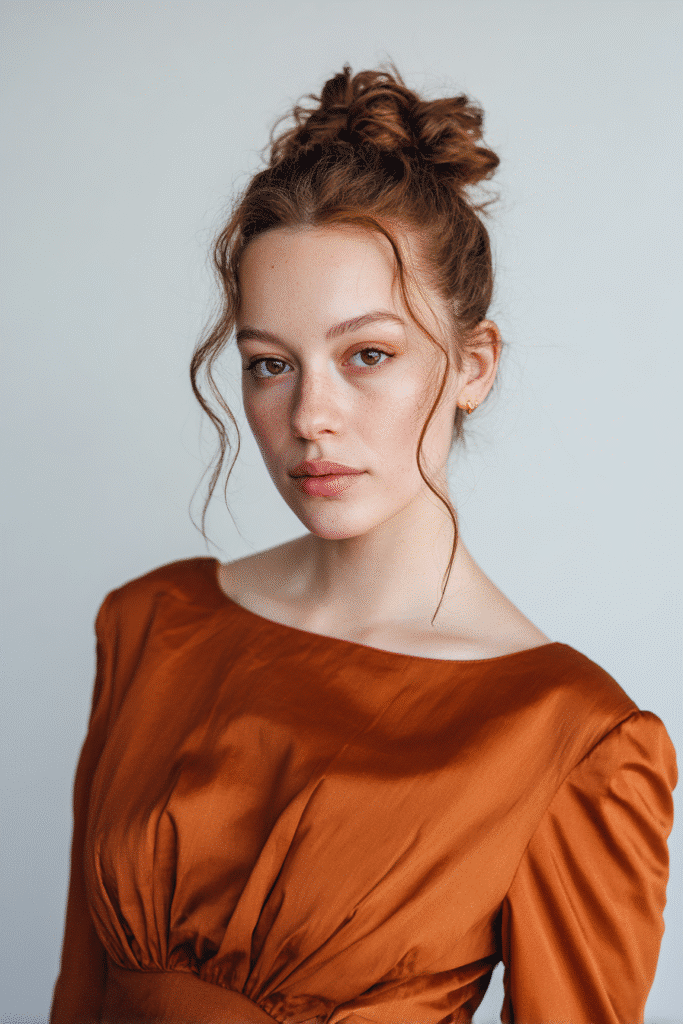
High Sleek Top Knot
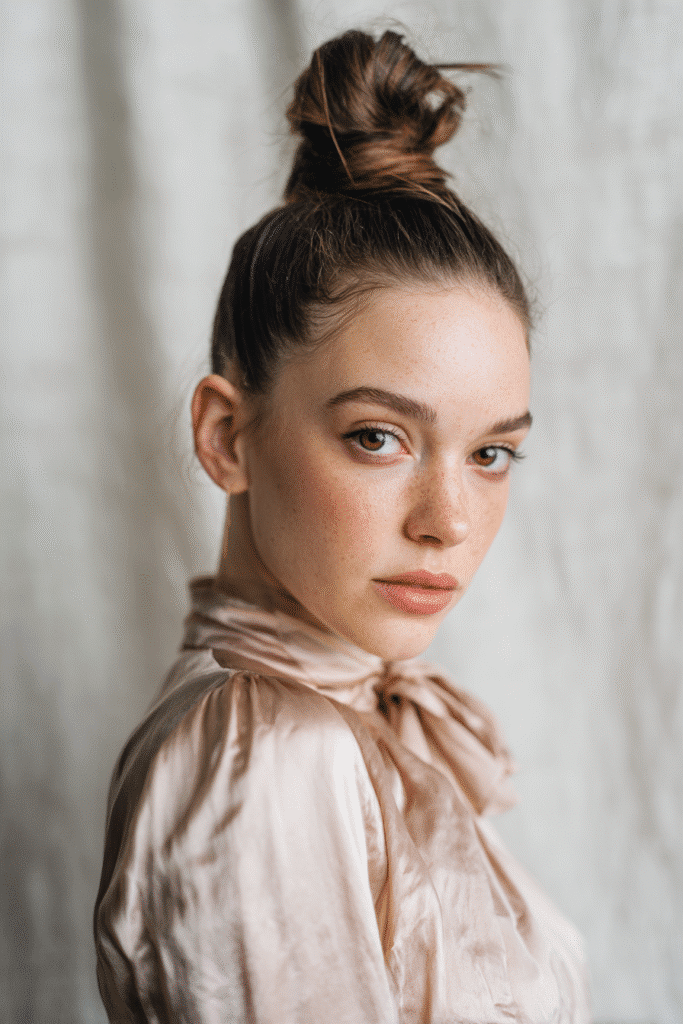
For days when I want a style that literally elevates my look, the high sleek top knot becomes my ultimate savior. This ballet-inspired updo has become increasingly popular because it offers both sophistication and practicality while giving your face a natural lift.
Style overview
The high sleek top knot is essentially a polished bun positioned at the crown of your head. What makes this style truly special is how it creates an instant face-lifting effect by following your cheekbones. I’ve found this versatile look works wonderfully for both professional settings and casual outings—you can even dress it up with ornaments like bobby pins, headbands, and barrettes for a chic yet relaxed appearance.
To create this sleek statement, you’ll need:
- Hair brush
- Mousse or gel
- Hairspray
- Elastic bands
- Bobby pins
The basic process involves brushing your hair back, applying product for slickness, creating a high ponytail, dividing and twisting sections, then wrapping them around the base. Finally, secure with pins and set with hairspray.
Best hair type for high sleek top knot
Although this style works across various hair types, I’ve discovered that slightly dirty hair creates the perfect canvas. Five-day-old hair is actually ideal because it’s heavier and more controllable. The natural oils help everything stay in place as you move throughout your day.
For those with curly or textured hair, begin by blow-drying straight for a smoother finish. Additionally, anyone with frizz-prone strands should consider adding a small amount of gel around the hairline before styling.
Belle Hathaway’s tip for volume control
My secret for perfect top knot volume? It’s all about purposeful placement. I always position my knot by following my cheekbones upward. This creates a flattering “snatched” look that balances the volume on top.
Furthermore, dirty hair doesn’t mean you can’t treat your strands simultaneously. Instead of adding product to freshly washed hair, I apply oil before styling. This gives better control while acting as a pre-wash treatment. Therefore, you’re nurturing your hair while wearing this gorgeous updo—talk about multitasking!
Middle-Part Sleek Bun
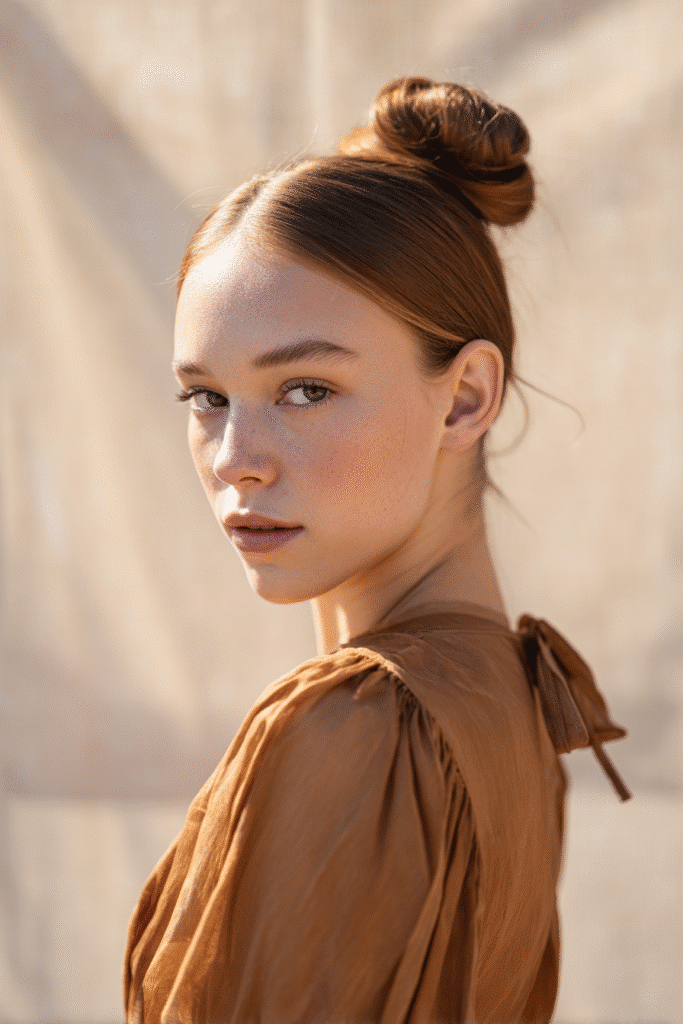
I’ve fallen head over heels for the middle-part sleek bun—it’s the ultimate face-framing style that brings symmetry and coolness to any look. This is the style I reach for when I want to showcase my facial features without spending hours in front of the mirror.
Style overview
The middle-part sleek bun begins with a clean, center part that serves as the foundation for the entire style. The perfectly straight part runs down the middle of your head, creating visual balance that elongates your face. Unlike other bun styles, this one isn’t just pulled straight back—the hair angles slightly upward, which subtly lifts your features.
This effortlessly chic style has recently taken over among fashion insiders and has become increasingly popular. What makes it so appealing is its simplicity and elegance. You can dress it up with statement earrings for formal events or keep it casual for everyday wear.
To create this look, you’ll need:
- A tail comb (or bobby pin) for creating the precise center part
- Boar-bristle brush for smoothing
- Hair ties and pins
- Styling product (oil, gel, or wax stick) for flyaways
Best hair type for middle-part sleek bun
Honestly, this style is wonderfully versatile—short or long hair, regardless of texture, can benefit from a middle part. Yet, I’ve found that slightly dirty hair holds this style better than freshly washed locks. The natural oils help tame flyaways and give your hair more grip.
For those with finer hair, this style is perfect for creating the illusion of fuller locks. By leaving a few face-framing pieces out, you can soften the look while maintaining its polished appearance.
Belle Hathaway’s tip for symmetry
My number one tip for achieving perfect symmetry? Use your facial features as your guide! I like to align the part with the center of my eyebrows and go straight back. This creates that perfectly balanced look that’s so flattering.
Another trick I’ve discovered is to pull hair upward rather than straight back when securing your ponytail. Consequently, this subtle technique lifts your face and creates a more youthful appearance. For those concerned about forehead size (I’m with you!), try styling some soft baby hairs along your hairline with an old toothbrush—it frames your face beautifully.
Side-Part Slick Back Bun
Taking the slick back bun to asymmetrical perfection, the side-part variation has become my secret weapon for adding dimension to my face. This elegant style offers a chic twist on the traditional slicked back look that works beautifully for both everyday wear and special occasions.
Style overview
The side-part slick back bun features a deep, stylish part on one side of the head, bringing balance to the face and allowing the hair to fall gracefully. Unlike the middle-part version, this asymmetrical approach creates visual interest without requiring additional styling time.
To create this look:
- Start by making a defined side part (I find using the tail of a comb gives the cleanest line)
- Gather hair into a sleek ponytail, making sure to maintain the part
- Wrap the ponytail around its base and secure with bobby pins for a neat finish
- Optional: create subtle face-framing baby hairs using a small amount of edge control and a toothbrush
You can position this bun either high at the crown for a polished look or low at the nape for a more sophisticated style. Either way, the side part remains the defining characteristic that sets this look apart.
Best hair type for side-part slick back bun
This versatile style works exceptionally well on all hair textures and face shapes. Yet, I’ve discovered that second-day hair (or even third or fourth) creates the ideal foundation, particularly if you have thin strands. The slight natural oils help your hair hold the style much better throughout the day.
For those with thicker textures, the side-part bun offers excellent control while maintaining elegance. Indeed, the style works wonderfully for 3c/4a hair types who need a quick yet sophisticated look.
Belle Hathaway’s tip for face-framing
My essential tip for maximizing the face-framing benefit of this style? Consider your face shape when deciding how deep to make your part. A deeper side part typically creates more drama and can beautifully highlight cheekbones, giving you that invisible contour and natural face lift.
Additionally, I often recommend leaving a few shorter layers out in front to soften the look while maintaining its sleekness. This subtle technique frames your face beautifully without compromising the polished esthetic of your slick back bun. Usually, I find that this works best when those face-framing pieces just barely kiss the cheekbones—creating the perfect balance of structure and softness.
Braided Slick Back Bun
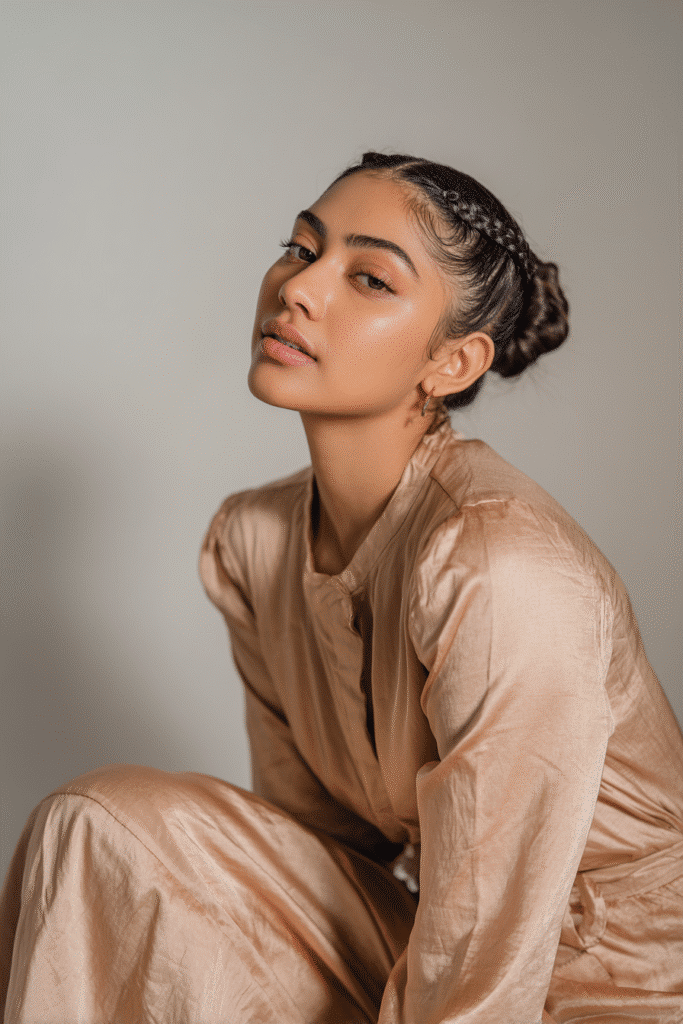
When elegance meets texture, the braided slick back bun becomes a game-changer in your hair styling repertoire. This elevated take on the traditional slick back bun combines sleekness with intricate detail, creating a style that works surprisingly well for both casual days and formal events.
Style overview
The braided slick back bun adds dimension to your typical slicked-back style by incorporating braids into the structure of the bun itself. Typically, this style involves creating a central part, smoothing your hair back, creating two low pigtails, braiding each section, and then artfully arranging the braids into a bun formation.
What makes this style stand out is how it gives your slicked back hair visual interest without sacrificing that polished appearance. You’ll need:
- Strong-hold gel or leave-in conditioner
- A boar bristle brush for smoothing
- Clear elastic bands
- Bobby pins for securing
- Optional hairspray for setting
Creating this style starts with well-brushed hair and distributed styling cream. Afterward, make a central part and section off the front pieces. The back hair is smoothed into low pigtails before braiding each section and arranging them around the base.
Best hair type for braided slick back bun
This versatile style truly shines for those with curly and coily hair. Type 3 or 4 hair provides natural texture that gives the braids beautiful definition. Generally, this hairstyle works beautifully as a staple look for any occasion when you have curly or coily locks.
For the smoothest execution, curly-haired folks should keep their hair damp throughout the process. Type 4 hair typically dries faster than other textures, ultimately making it important to keep the hair moisturized for easier maneuvering.
Belle Hathaway’s tip for texture
My secret for adding perfect texture to this style? Gently pull on the strands within each braid before arranging them. This technique creates a fuller, more voluminous braid that adds wonderful dimension to your finished look.
Plus, I’ve discovered that incorporating a leave-in conditioner mixed with water in a spray bottle beforehand ensures your hair stays adequately moisturized throughout styling. This approach creates a multitasking opportunity – your slicked back braided bun becomes both a stylish updo and a treatment for your locks!
Twisted Slick Back Bun

The twisted slick back bun absolutely captivates me with its sophisticated yet easily achievable look. This style transforms ordinary hair into an elegant statement that works for everything from casual outings to formal events.
Style overview
The twisted slick back bun elevates your typical slicked-back style by incorporating twists around the base of the bun. Unlike traditional buns, this style features sections of hair wrapped decoratively around the bun’s foundation. Oftentimes, I create this look by first establishing a solid ponytail, dividing the hair into two sections, then twisting them around each other before wrapping around the base. The key difference is how these twists create visual interest while maintaining that polished, sleek appearance.
Best hair type for twisted slick back bun
Undeniably, this style works beautifully on straight or slightly wavy hair. According to expert stylists, it performs best on hair that isn’t too thick. Second-day hair typically provides the ideal foundation—a little natural oil gives the twists better grip and staying power. For those with thinner locks, this style can actually create the illusion of more volume through the twisted structure.
Belle Hathaway’s tip for securing twists
My essential tip? Position matters tremendously. I always secure my twisted bun in the middle of my head rather than too high or low. Furthermore, I let the hair move naturally into its shape without forcing it—this prevents breakage and creates a more elegant finish.
Slick Back Bun with Hair Accessories
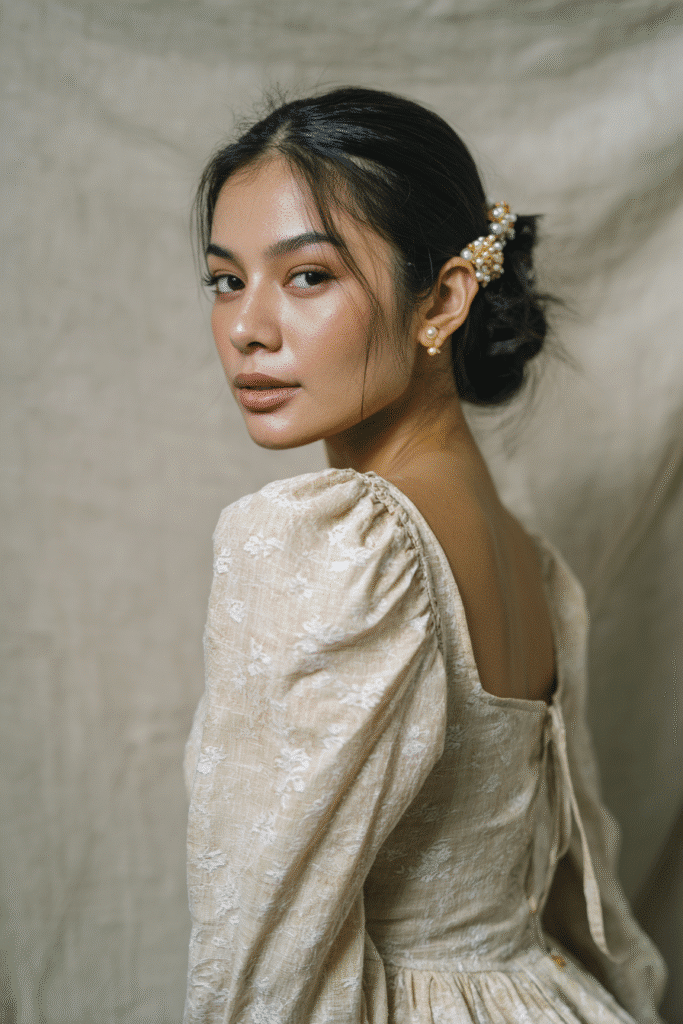
Adding accessories to a slicked back hair bun transforms it from simple to statement-making. This style has quickly become my favorite way to elevate an ordinary bun without extra styling time.
Style overview
Accessorizing a slick back bun involves selecting decorative elements that complement rather than compete with the sleek silhouette. Certainly, this approach works wonderfully for practical purposes too – taming flyaways while adding visual interest. Notably, accessories like plaid scrunchies, oversized barrettes, jaw clips, and headbands can instantly upgrade your look. For vacation-ready vibes, I love adding headscarves in riviera-inspired prints or nautical stripes that simultaneously protect color-treated hair from sun damage.
Best hair type for accessorized slick back bun
Each hair type benefits from specific accessories. Overall, those with curly hair shine with decorative headwraps and soft headbands. Straight-haired folks may prefer headbands and hair clips for added dimension. First thing to remember: thick hair handles substantial accessories like banana clips or claw clips excellently, coupled with their ability to fully contain voluminous locks. Meanwhile, those with thin hair should choose smaller versions of everything—bobby pins with decorative elements provide security without weighing down delicate strands.
Belle Hathaway’s tip for choosing accessories
My essential advice? Match the accessory to the occasion. A silk scrunchie works beautifully for elegant events yet provides gentle hold without causing breakage. Furthermore, consider accessory placement—positioning it slightly asymmetrically often creates more visual interest than perfect symmetry.
Slick Back Bun with Curtain Bangs

Struggling with fringe control while rocking a slick back bun? Enter the curtain bangs bun—my favorite solution for those days when I want structure yet softness around my face.
Style overview
Curtain bangs frame your face exactly how window curtains frame a view—softly parting in the middle with gradually longer sides that kiss your cheekbones. This style perfectly complements a sleek bun by adding dimension while maintaining that polished look. Especially in rainy weather, this combination becomes practically magical—the slicked-back portion stays frizz-proof while your bangs create a flattering frame.
Best hair type for curtain bangs bun
The beauty of this style? It flatters virtually every face shape! Heart-shaped, oval, square, and round faces all benefit from curtain bangs. Obviously, they work across multiple hair textures too. Yet, if you have curly hair, prepare to spend a bit more time styling the bang portion while keeping the bun sleek.
Belle Hathaway’s tip for blending bangs
My professional secret lies in the initial blow-dry technique. Always dry your curtain bangs forward first—never part them while wet. This creates the proper foundation. Afterward, I add a substantial amount of mousse along the hairline to secure everything. For a truly multitasking style, apply hair oil or mask instead of gel—this repairs your strands while they’re styled in that chic updo.
Low Bun with Center Part and Gel Finish
My absolute favorite version of the slicked back bun combines precision with high-gloss finish. The low bun with center part and gel finish delivers that coveted model-off-duty look with minimal effort yet maximum impact.
Style overview
This sleek style features a sharp center part with hair pulled back into a low bun position, creating that invisible contour effect many celebrities showcase. Unlike other variations, this look relies specifically on gel application throughout the hair for ultimate smoothness and shine. The key distinction lies in how the hair is gathered—pulling upward rather than downward helps create a subtle eye-lifting effect.
Best hair type for gel-finish low bun
Interestingly, this style shines on second or third-day hair when natural oils have accumulated. For those with natural curly textures (3c/4a hair), this bun offers a polished solution that can be completed in under 10 minutes. However, straight-haired folks benefit equally well from its structuring properties. Individuals with larger foreheads will find this style particularly flattering as baby hairs can be styled forward using a toothbrush dipped in gel.
Belle Hathaway’s tip for shine
My game-changing discovery? Skip the hairspray completely! Subsequently, use clear styling gel followed by a lightweight hair oil for unmatched shine without crunchiness. Typically, I apply oil in layers—first to smooth flyaways, then again after securing the bun for extra gloss. Likewise, never rush this process; taking 10-15 minutes ensures the sleekest finish.
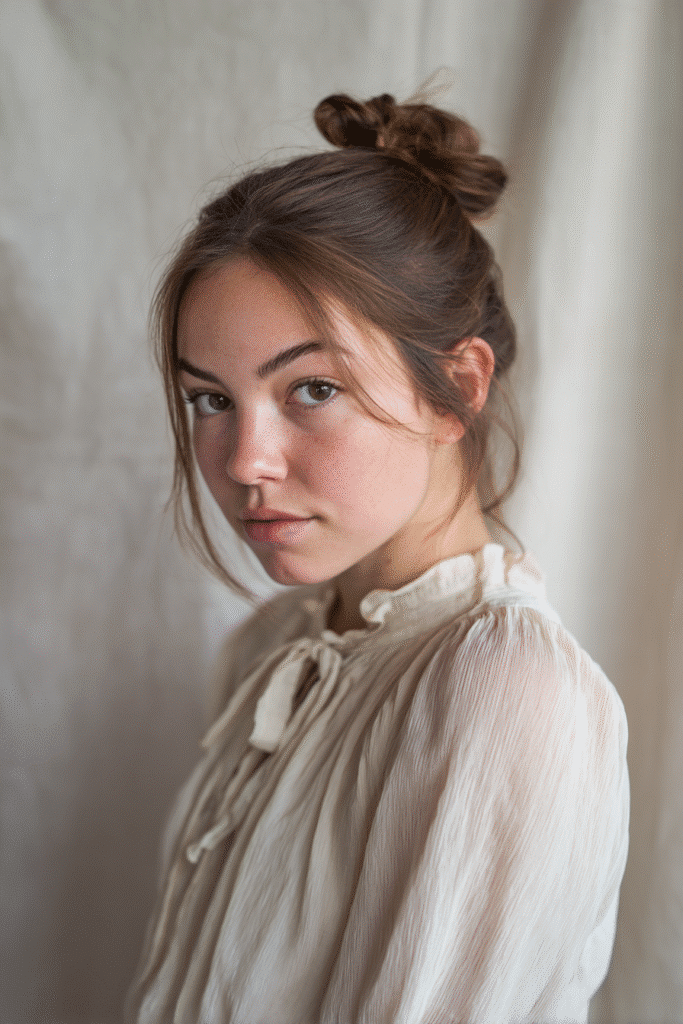
Messy Slick Back Bun
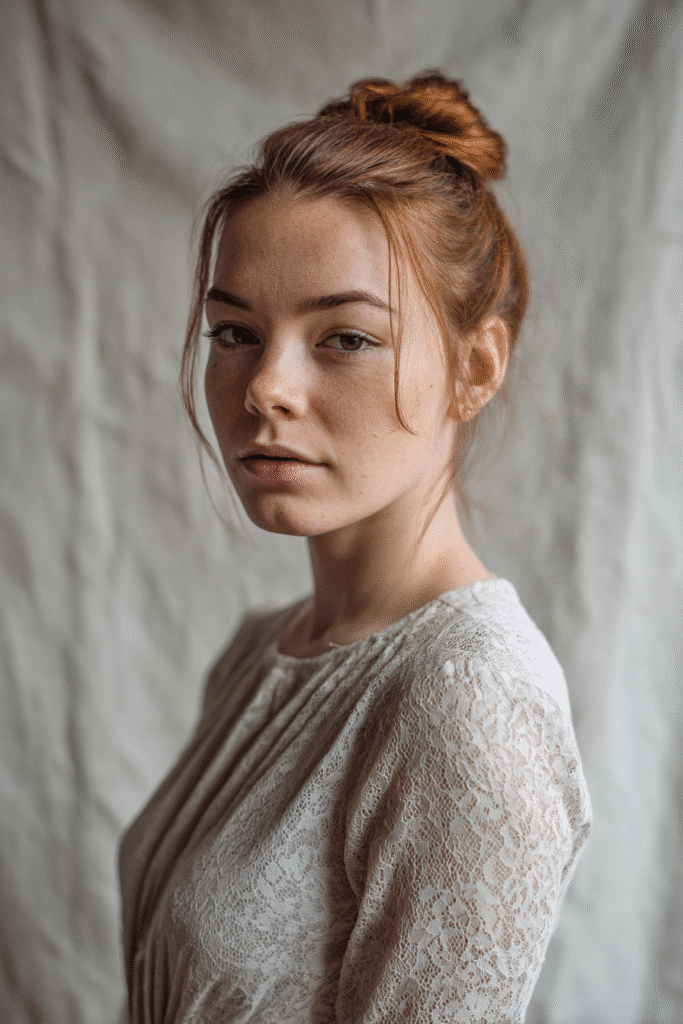
Contrary to the perfectly polished looks we’ve covered, the messy slick back bun celebrates beautiful imperfection. As someone who champions quick yet stylish solutions, I’ve found this hybrid style to be my ultimate savior on busy mornings.
Style overview
The messy slick back bun beautifully balances structure with intentional looseness. This look features sleek sides with strategically “undone” texture in the bun itself. Despite sounding paradoxical, achieving this perfectly imperfect style requires deliberate technique rather than random tousling. The sleek front creates a face-framing foundation while the textured bun adds volume and dimension. Ultimately, it’s my go-to for third-day hair, Zoom meetings, or casual outings that need a touch of effortlessness.
Best hair type for messy slick back bun
Truthfully, slightly dirty hair creates the ideal canvas for this style. Second or third-day hair provides natural grip that helps everything stay in place. For straight-haired folks, applying texturizing spray beforehand adds essential volume. Meanwhile, those with curly locks should avoid brushes completely—use fingers to detangle gently, preserving your natural texture. Wavy-haired individuals benefit from loose wrapping techniques that maintain their natural pattern when creating the bun portion.
Belle Hathaway’s tip for controlled messiness
My secret? Focus on contrast. Keep the front sections smoothed tight with oil or gel, yet deliberately loosen the actual bun. Furthermore, position your messy bun strategically—higher for tournaments or workouts when looking up frequently, lower for everyday wear. Test durability with jumping jacks before heading out; a properly secured messy bun barely moves despite its relaxed appearance.
Slick Back Bun with Wet Look
The wet look slick back bun has stolen my heart as the ultimate multitasking style that delivers both function and runway-ready glamor. This glossy updo creates that just-stepped-out-of-the-shower vibe without the actual dampness.
Style overview
Primarily characterized by its high-shine, glossy finish, the wet look bun mimics freshly showered hair through strategic product application. Typically, styling begins with damp—not soaking wet—hair, as moisture provides natural grit for easier styling. This technique works exceptionally well for creating that ballerina-inspired sleekness many runway looks showcase. Contrary to standard hair advice, starting with wet strands actually helps prevent excessive pulling that can damage your hairline.
Best hair type for wet look bun
Surprisingly, second, third, or even fourth-day hair creates the ideal foundation for this style. In fact, slightly dirty hair holds the shape better than freshly washed strands, especially for those with thin hair. Nevertheless, freshly washed hair works too—you’ll just need to compensate with additional styling products. Throughout my styling career, I’ve found that those with straight to wavy hair achieve the most authentic wet look, as the shine appears more uniform.
Belle Hathaway’s tip for product layering
My fail-proof formula? Start with a strong-hold gel base, soon followed by a lightweight hair oil. Together, these create that perfect wet sheen without the crunchy feeling. Occasionally, I’ll add a conditioning product to loosen the gel for a more wearable finish. Apply everything with your hands rather than brushes—this distributes product more evenly while maintaining that effortlessly cool vibe.
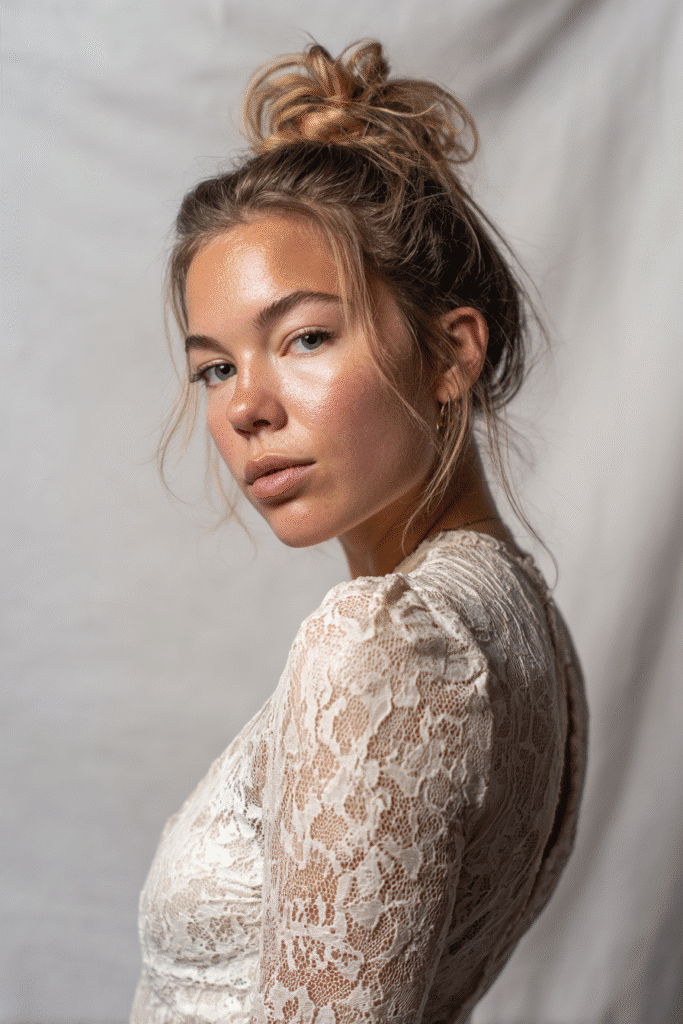
Slick Back Bun with Volume Crown
Feeling flat? The slick back bun with volume crown might be your hair’s new best friend. This elevated style combines the sophistication of a sleek bun with strategically placed height that creates drama and dimension.
Style overview
The volume crown bun focuses on creating height at the top of your head through precise teasing techniques. Typically, I section off a rectangular area slightly wider than my teasing comb at the crown area. This deliberate volume creates an elegant silhouette that elongates your face while maintaining that polished slicked-back finish. Above all, what distinguishes this style is how it creates instant height, giving the illusion of fuller, thicker hair.
Best hair type for volume crown bun
Admittedly, this style is a savior for thin hair! The teased crown paired with a low bun creates the perfect mix of volume and sophistication. For those with fine locks, this technique instantly transforms limp strands into a statement style. Naturally, slightly dirty hair holds this look better as it provides more grip when backcombing.
Belle Hathaway’s tip for teasing
My game-changing teasing technique? Gently tap the back of your section with a fine-tooth comb rather than aggressively backcombing. Hold each strand parallel to the floor and brush just the underside. Finish with texture spray for dimension and fullness. Primarily, concentrate on drying the roots with a round brush while angling your blow dryer upward for maximum lift.
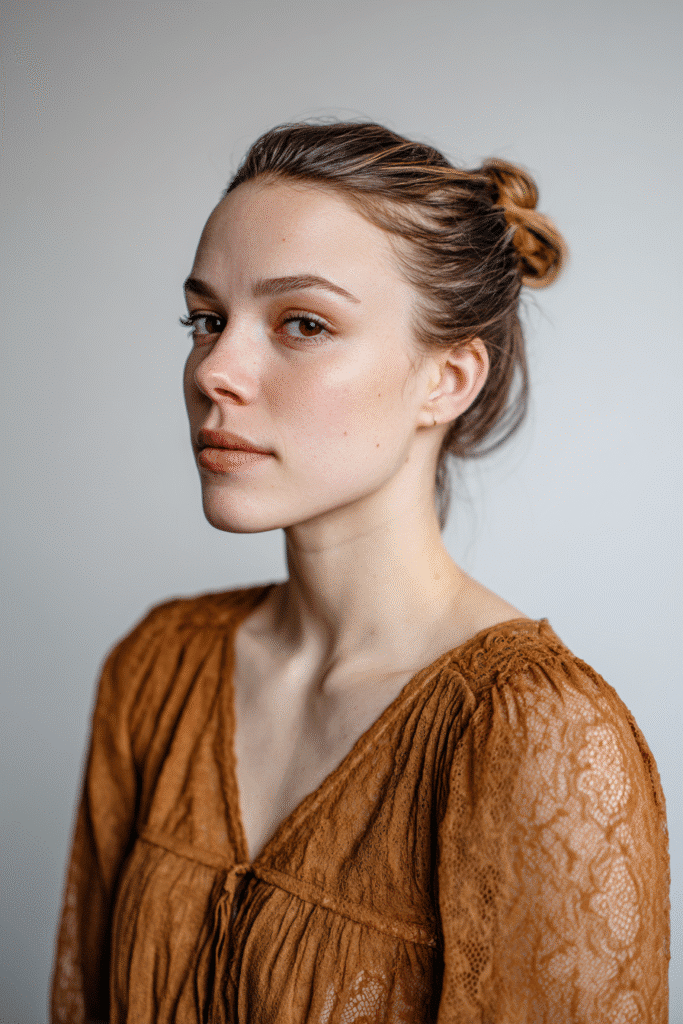
Slick Back Bun for Short Hair

Short-haired folks often ask me if they too can rock a sleek bun—my answer is always a resounding yes! Even with ear-length locks, you can achieve this polished look with the right technique.
Style overview
The short hair slick back bun creates a petite, neat updo positioned slightly higher on the back of your head to maximize available length. Bobby pins become absolute essentials for this style—they’re the unsung heroes holding everything together when dealing with layers or shorter strands. For pixie cuts growing out, this approach resembles more of a chic French twist than a traditional bun.
Best hair type for short hair bun
Second, third, or fourth-day hair works wonderfully for this style. That bit of natural grease and grit at the roots helps your shorter strands hold their position much better than freshly washed hair. Thin hair particularly benefits from this technique as the slight texture gives better grip and staying power.
Belle Hathaway’s tip for pinning
My game-changing technique? Section your hair strategically! Initially, divide your hair into two sections and create separate ponytails. This provides better control than attempting to handle all hair at once. Thereafter, secure each small section with pins angled toward each other for maximum hold. Ultimately, don’t stress about achieving perfection—as long as the top and sides appear sleek, a slightly imperfect back adds character to your style.
Slick Back Bun for Curly Hair
Curly-haired beauties, rejoice! As a curly girl myself, I’ve mastered the art of creating a slick back bun that works with—not against—our natural texture. This updo has become my ultimate time-saving solution without sacrificing style.
Style overview
The curly hair slick back bun is a staple hairstyle throughout the year, accommodating both casual and formal occasions. Admittedly, achieving this look with type 3 or 4 hair requires patience and precision. Unlike straight-haired versions, curly slick buns need extra moisture and product layering to maintain both sleekness and health.
Best hair type for curly hair bun
In my experience, type 3 hair with springy S-shaped curls benefits tremendously from this style. Yet, type 4 coily textures look equally stunning once properly prepped. For optimal results, always work with damp hair—curls become significantly more manageable when wet. Given that type 4 hair dries faster than other types, keeping it consistently moisturized throughout styling is crucial.
Belle Hathaway’s tip for curl definition
My game-changing secret? Prep with purpose! I combine water and leave-in conditioner in a spray bottle, misting generously before styling. Henceforth, I apply gel section by section—this ensures consistent smoothness throughout. To complete the look, wrap everything with a silk scarf for at least 15 minutes. Accordingly, this sets the style and preserves both shape and shine throughout your day.
Slick Back Bun with Scarf Wrap

For those days when I want both protection and style, the scarf wrap slick back bun has become my ultimate hair solution. This versatile updo elevates the traditional slicked back look with fabric that adds texture and personality.
Style overview
The scarf wrap bun combines a sleek base with a decorative head wrap that serves dual purposes—it adds visual interest while protecting your hair. You’ll need a large rectangular scarf for best results. The process involves creating your slick back bun first, then wrapping the scarf around your head, twisting the ends together before tucking them neatly underneath. As a result, this style works beautifully for both protective purposes and as a fashion statement.
Best hair type for scarf wrap bun
This style truly shines for those with type 4 natural hair seeking protection. Undoubtedly, it’s also perfect for anyone wanting to cover protective styles like braids or twists. In the meantime, those with curly textures benefit from the scarf’s ability to control frizz while maintaining a polished appearance.
Belle Hathaway’s tip for scarf placement
My game-changing advice? Tightness matters tremendously! Secure your scarf firmly enough to prevent slipping throughout the day, yet loose enough to avoid headaches. Furthermore, wearing statement earrings with this style creates balance and draws attention to your face—completing the polished yet practical look.
Slick Back Bun with Hair Treatment
The treatment bun has revolutionized my hair care routine by turning styling time into nourishing time. This brilliant hack combines beauty with functionality in ways other styles simply can’t match.
Style overview
A treatment bun is exactly what it sounds like—a slicked-back bun created using conditioning products instead of standard styling gels. In conjunction with looking polished, your hair receives deep nourishment throughout the day. Typically, I apply a hair mask through the lengths while styling, transforming an ordinary updo into a repairing treatment. What makes this style unique is its multitasking nature—conditioning your hair while maintaining that chic, sleek appearance.
Best hair type for treatment bun
This style works exceptionally well for those with coarse, dry, or damaged hair. Ordinarily, second or third-day hair provides the perfect foundation—natural oils help everything stay put. As a matter of fact, every hair type can benefit from a treatment bun provided you choose products matching your specific needs. For moisture, look for ingredients like shea butter or hyaluronic acid; for repair, try bond-building treatments.
Belle Hathaway’s tip for multitasking
My secret for maximizing this style? Layer your products strategically! Begin with a moisturizing treatment applied evenly through damp hair. Next, add a small amount of hair oil for extra shine and control. Lastly, wear the style for at least several hours—the longer the better for absorption.
Conclusion
Slicked back buns undoubtedly represent one of the most versatile and practical hairstyles in my styling arsenal. After trying countless variations, these 16 styles have proven themselves worthy additions to anyone’s hair routine, regardless of texture or length. My personal favorites include the classic low bun for professional settings and the high sleek top knot for those days when I need a natural face-lift effect.
What makes these styles truly special, above all, is their adaptability. Second or third-day hair actually works better for most of these looks – a perfect solution when you’re stretching out wash days or dealing with summer heat and humidity. The sleek esthetic paired with the practical benefits creates an unbeatable combination for everyday wear.
Throughout my styling journey, I’ve discovered that finding the right products makes all the difference. Accordingly, using oil before styling not only achieves that perfect shine but doubles as a pre-wash treatment, essentially multitasking while you look fabulous. This approach transforms ordinary styling time into beneficial hair care moments.
Texture plays a crucial role in how these styles perform. Curly-haired beauties benefit from moisture-rich preparations, while those with fine strands can create illusions of fullness through strategic placement and teasing techniques. Therefore, these slick back buns truly offer something for everyone.
My hope is that these quick 5-minute styles save you precious morning time while still making you feel put-together and confident. After all, beauty routines should enhance our lives, not complicate them. Whether you choose a classic low bun for work meetings or experiment with accessorized variations for special occasions, these sleek styles have your back – and your hair!
Your personal style journey might lead you to adapt these techniques to suit your unique needs. Trust me, once you master these quick buns, you’ll wonder how you ever lived without them. Happy styling!