
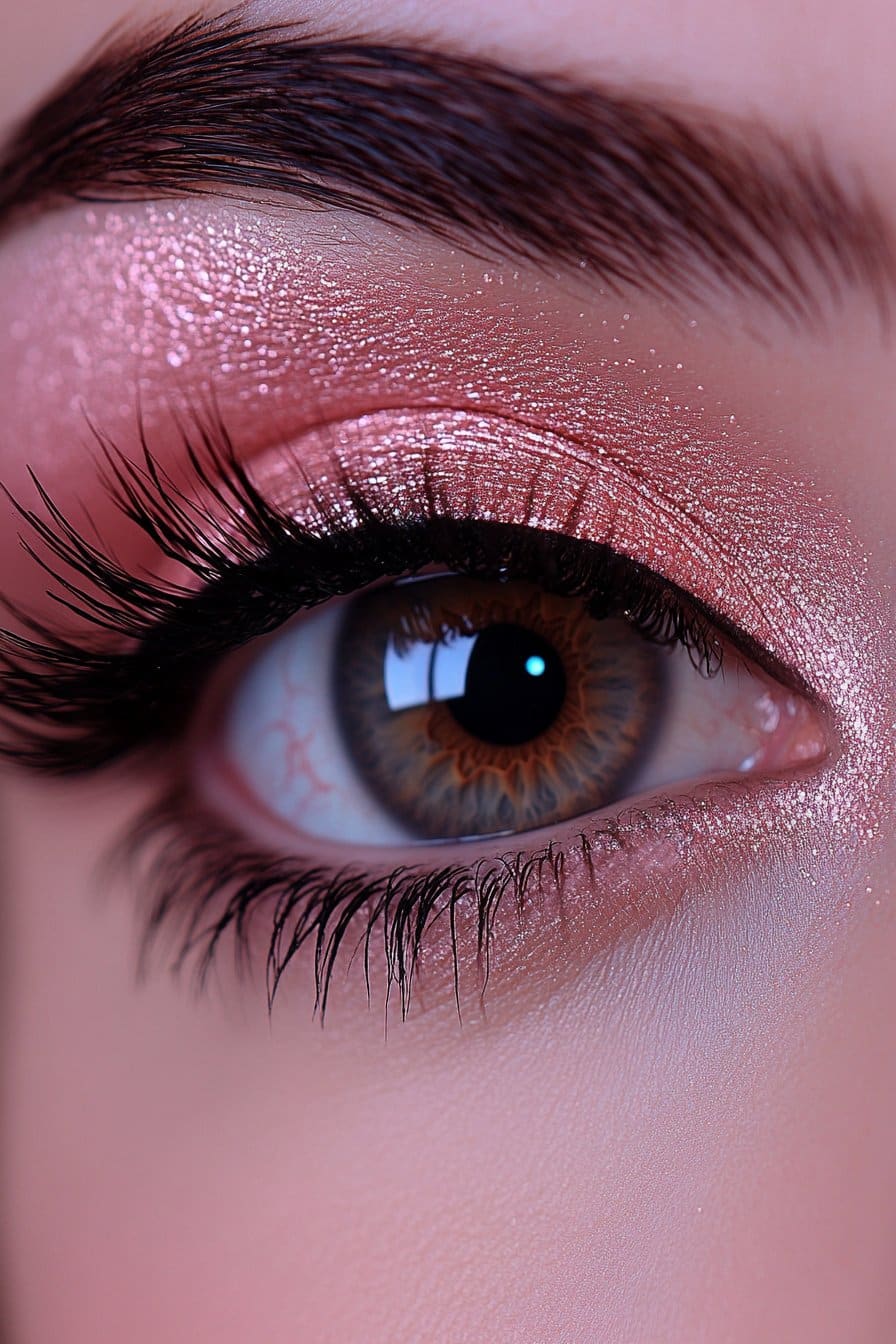
Pink smokey eye makeup looks dominate social media feeds these days. This stunning trend captures everyone’s attention, especially makeup beginners who want to try something new.
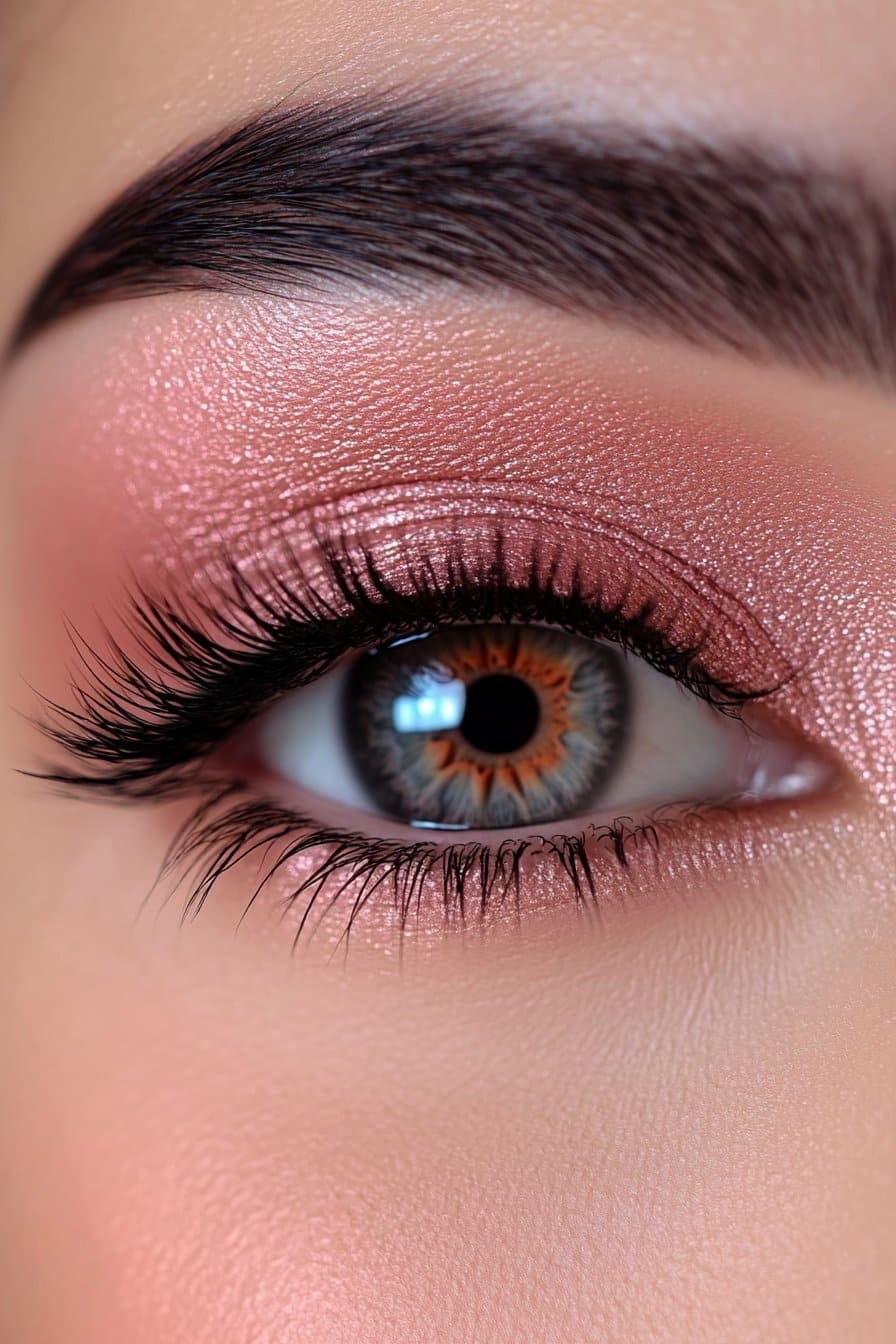
Creating the perfect smokey eye might seem daunting at first. My experience as a makeup artist shows it’s actually quite doable. The style offers something for everyone – from glamorous hot pink glitter looks to subtle rose-tinted finishes. People with gray eyes benefit most from this versatile style because it creates a beautiful contrast that makes their eyes stand out.
My work with countless clients has taught me what challenges beginners face with new techniques. This detailed guide features 17 easy-to-follow pink smokey eye tutorials. You’ll learn everything from choosing the right eyeshadow palettes to mastering simple blending techniques that help create these gorgeous looks at home.
Classic Pink Smokey Eye for Beginners

My work as a celebrity makeup artist has taught me that creating the perfect pink smokey eye starts with the right tools. The look became a fan favorite when I worked at New York Fashion Week.
Essential Tools and Products
You’ll need an eyeshadow primer to create a smooth base. A palette with at least three pink shades – light, medium, and dark is essential. You’ll also want a flat eyeshadow brush, a fluffy blending brush, and setting spray to make your look last.
Step-by-Step Application
- Prime your eyelids with a thin layer of primer
- Apply a light pink shade across the entire lid
- Blend a deeper pink into the crease using circular motions
- Add the darkest shade to the outer corner, creating depth
- Set your work with a setting spray
Common Mistakes to Avoid
My years of experience have shown me what can go wrong. The biggest problem is over-blending that can muddy your carefully crafted gradient. Beginners often struggle with eyeshadow fallout. You can prevent this by tapping excess product off your brush before application.
I learned a valuable technique during my early days at Makeup Designory – apply eye makeup before foundation. This helps you clean up any fallout without ruining your base makeup. Harsh lines between colors can make your smokey eye look unprofessional. Focus on creating smooth transitions between shades instead.
Soft Rose Gold Smokey Eye
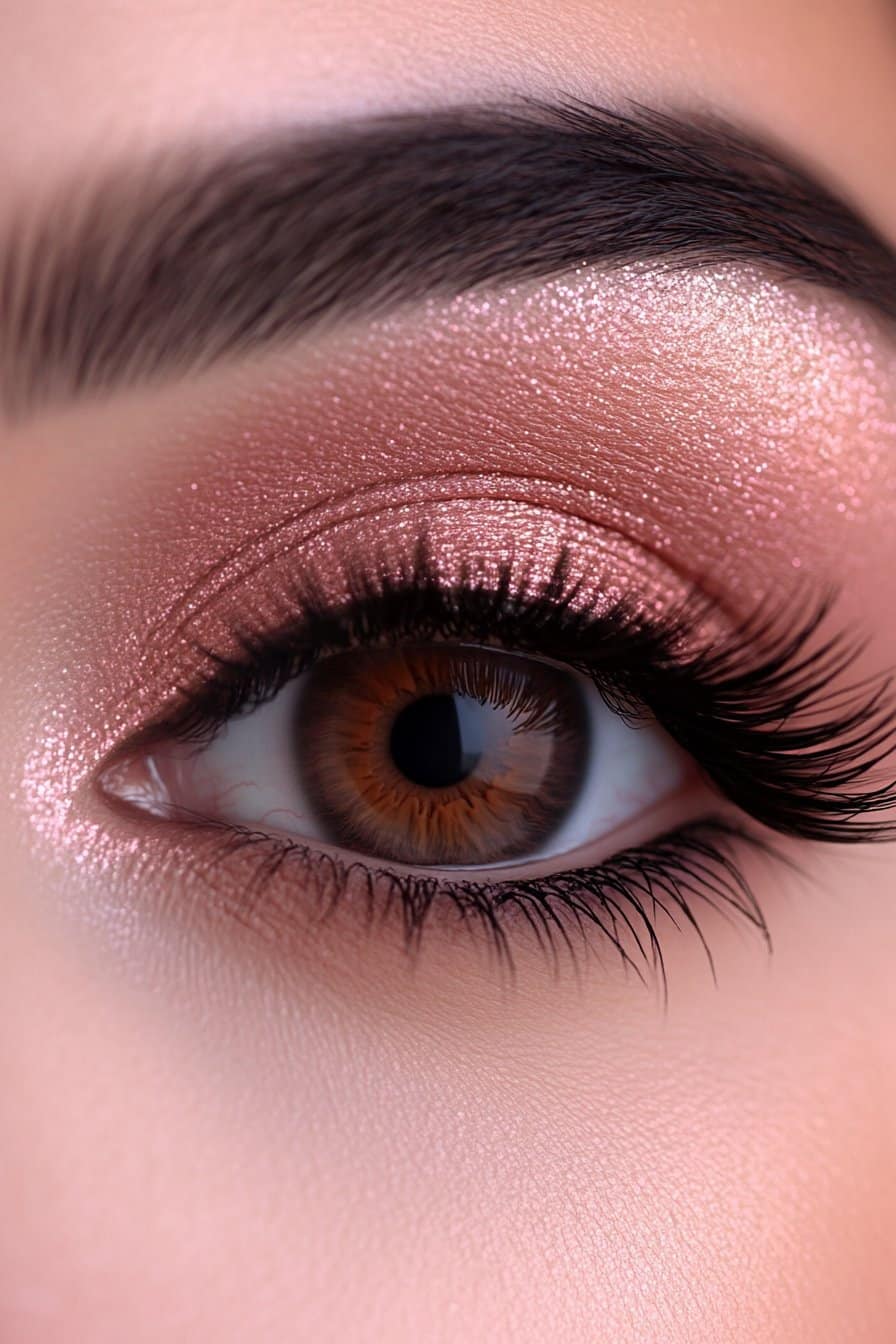
became my signature look after my breakthrough at New York Fashion Week. This versatile shade compliments every skin tone and creates a sophisticated yet romantic appearance.Rose gold eyeshadow
Product Selection
My time at Makeup Designory taught me that the right products make all the difference. Quality eyeshadow primer or concealer should be your base. Here’s what I recommend to create the perfect rose gold look:
- A cream-to-powder formula gives better sparkle payoff
- A metallic rose gold shade works best for the lid
- A matte brown or plum adds depth
Application Technique
The right application technique is vital to achieve this look. After working with countless clients, I’ve developed a simple method that works every time:
- Apply primer on the lid
- Sweep a light brown shadow through the crease
- Pack rose gold shimmer on the center of the lid
- Blend a deeper plum shade into the outer corner
- Highlight the inner corner with champagne shimmer
Blending Tips
My work in Los Angeles showed me that blending can make or break a rose gold smokey eye. A fluffy brush with circular motions creates seamless transitions between colors. Start with minimal product and build intensity gradually. Many people over-blend their eyeshadow, which makes the rose gold lose its distinct shimmer.
Daytime Pink Smokey Look

My work with clients at my Los Angeles studio showed me that a daytime pink smokey eye needs perfect balance between glamor and subtlety.
Choosing the Right Shade
Muted pink tones that match your natural coloring work best for daytime looks. My experience at Makeup Designory helped me find that light mauve pinks look beautiful on fair skin. Deeper rose shades work better to boost medium to dark complexions. Satin finishes are more wearable than intense metallics or heavy glitters.
Application Steps
The quickest way to create a daytime-appropriate smokey eye has these steps:
- Start with a thin layer of eye primer
- Sweep a neutral transition shade through the crease
- Apply a soft pink shadow across the lid
- Blend a slightly deeper pink into the outer corner
- Highlight inner corners with a pearl finish shadow
- Finish with brown mascara to soften the look
Making it Last
My time at New York Fashion Week taught me the best techniques to make daytime looks last. Cream shadow makes a great base that helps powder products stick better. You’ll get less fallout and better staying power by pressing shadows onto the lid instead of sweeping them. Daytime looks don’t always need setting spray, but a light mist can give extra staying power without looking heavy.
A trick from my work with A-list clients involves layering different textures. Start with matte shadows and build up to subtle shimmer only where needed. This approach will keep your makeup looking professional yet polished from morning meetings through evening events.
Glitter Pink Smokey Eye

A defining moment at New York Fashion Week taught me that pink glitter smokey eyes just need special attention to safety and technique.
Glitter Selection Guide
The difference between cosmetic and craft glitter is vital. , should never go near your eyes. Sparkle adds glamor, but you should use only cosmetic-grade glitter made specifically for eye makeup. My time at Makeup Designory showed me that cream-based products give better control and stick better to the skin.Craft glitter, often made of metal or glass
Application Process
Here’s how to create a stunning glitter pink smokey eye:
- Apply a vibrant pink eyeshadow across the lid with a fluffy brush
- Blend purple eyeshadow with a touch of black in the outer corner
- Use glitter primer or adhesive made specifically for eyes
- Pat glitter onto the center of the lid using fingertips
- Apply glitter to the inner corner to add extra sparkle
Safety Tips
Cosmetic-grade glitter needs careful handling. People who wear contact lenses should take extra care because glitter particles can get trapped between the lens and eye. My advice to clients is simple:
- Use eye-safe adhesive only
- Remove makeup completely with a proper eye makeup remover
- Keep glitter away from the waterline
Rinse your eyes with sterile solution or artificial tears if irritation occurs. My experience with A-list clients in Los Angeles has taught me that proper removal matters as much as application. Never rub your eyes when removing glitter makeup – you could scratch your cornea.
Natural Pink Smokey Eye

My time at Makeup Designory taught me that natural pink smokey eye looks are still the top choice for clients who want everyday glamor.
Product Recommendations
You’ll need these items for a natural finish:
- A neutral base shadow in matte finish
- Light champagne or muted pink shimmer
- Brown eyeliner instead of black for subtlety
- Cream eyeshadows in both matte and shimmer finishes
Easy Application Steps
I’ve refined this technique after working with many A-list clients. Start with an eyeshadow base or matte concealer if you have dry lids. Apply a light neutral shade across the lid. Next, blend a slightly deeper pink into the crease and focus on the outer V area.
Blending Techniques
The secret to a flawless natural pink smokey eye is proper blending. This lesson clicked during my time at New York Fashion Week. Take a dense brush near the lash line and blend upward and outward. Add dimension by dabbing shimmer only in the center of the lid with your fingertip.
My Los Angeles clients love this tip: use minimal product on the lower lashes. Heavy under-eye makeup can make you look tired. A touch of shimmer in the inner corner creates a wide-awake look.
The darker shades work best toward the crease and outer V. Working with clients of all types has shown me that this approach creates natural-looking dimension while keeping the soft, romantic appeal of pink tones.
Dramatic Pink Smokey Eye

My signature style evolved from leading makeup teams at evening runway shows, where I mastered dramatic pink smokey eyes. This bold look just needs precision and the right products to create perfect evening glamor.
Required Products
A show-stopping dramatic pink smokey eye needs these essentials:
- High-pigment pink eyeshadow palette with matte and shimmer finishes
- Long-wear gel eyeliner in black or deep brown
- Setting spray for extended wear
- Dense blending brush and pointed detail brush
Step-by-Step Guide
My experience at fashion shows helped me perfect this technique:
- Apply eyeshadow primer across the lid
- Blend deep pink shade into the crease, build intensity gradually
- Layer burgundy shadow on the outer corner, extend past the crease
- Pack vibrant pink pigment onto the center of the lid
- Line upper and lower lashlines with gel eyeliner
- Add black shadow to outer corners for extra drama
Evening Wear Tips
The secret to making this look last through evening events lies in proper preparation and setting. My A-list clients always get these tips:
- Use cream shadow as a base for powder products
- Layer different textures – start with mattes before adding shimmers
- Set with a fine mist of setting spray between layers
I found that there was a game-changing technique during my breakthrough at NYFW – using colored bases makes pink tones pop. Red carpet events call for applying eye makeup before foundation, which allows easy cleanup of fallout without compromising the base makeup.
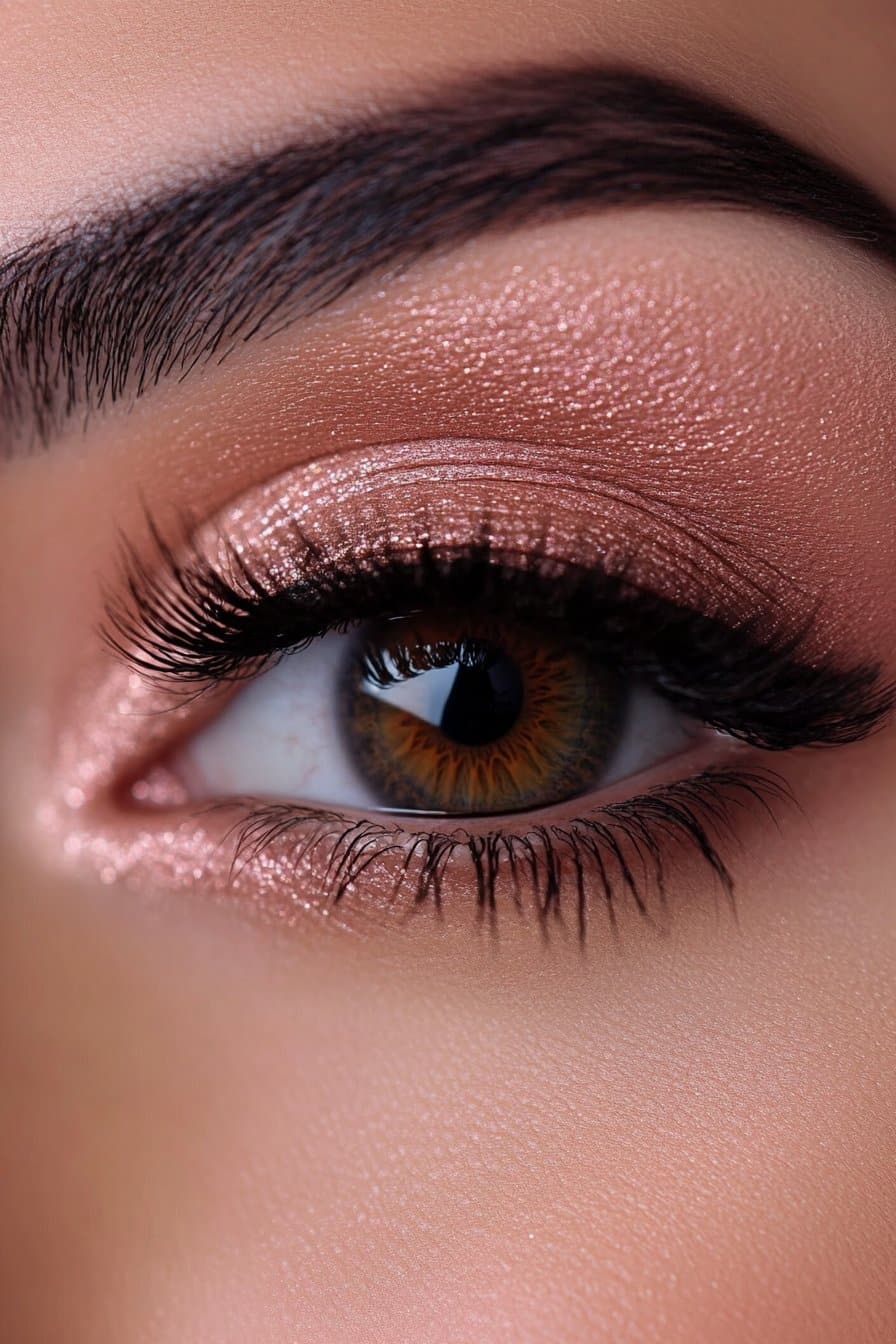
Matte Pink Smokey Eye

My work with A-list celebrities has shown that matte pink smokey eyes create sophisticated and timeless looks. Becoming skilled at this technique needs specific products and precise application methods.
Product Selection
The right matte eyeshadows make all the difference in achieving a flawless finish. My work at Los Angeles studios taught me that a thin layer of concealer or cream shadow helps matte shadows blend naturally. The perfect matte pink smokey eye requires:
- A mid-tone matte transition shade
- Deep matte pink for depth
- Light matte pink for highlighting
- Ultra-fine eye liner brush
Application Steps
Red carpet events have helped me perfect these steps:
- Prime eyelids with concealer and dust with translucent powder
- Apply neutral transition shade from lashline to crease
- Layer deep matte pink along the lash line
- Blend upward using circular motions
- Add light matte pink under brow bone
- Line eyes with gel eyeliner, extending past outer corners
Setting Techniques
Long-lasting matte eyeshadow depends on proper preparation and setting. Start with thin layers and build intensity gradually. A technique I learned during NYFW involves using setting spray between layers to extend wear time.
Matte shadows absorb light instead of reflecting it. This quality creates depth and dimension in your smokey eye look. My experience with a variety of clients shows that matte finishes photograph beautifully and remain the preferred choice for professional events.
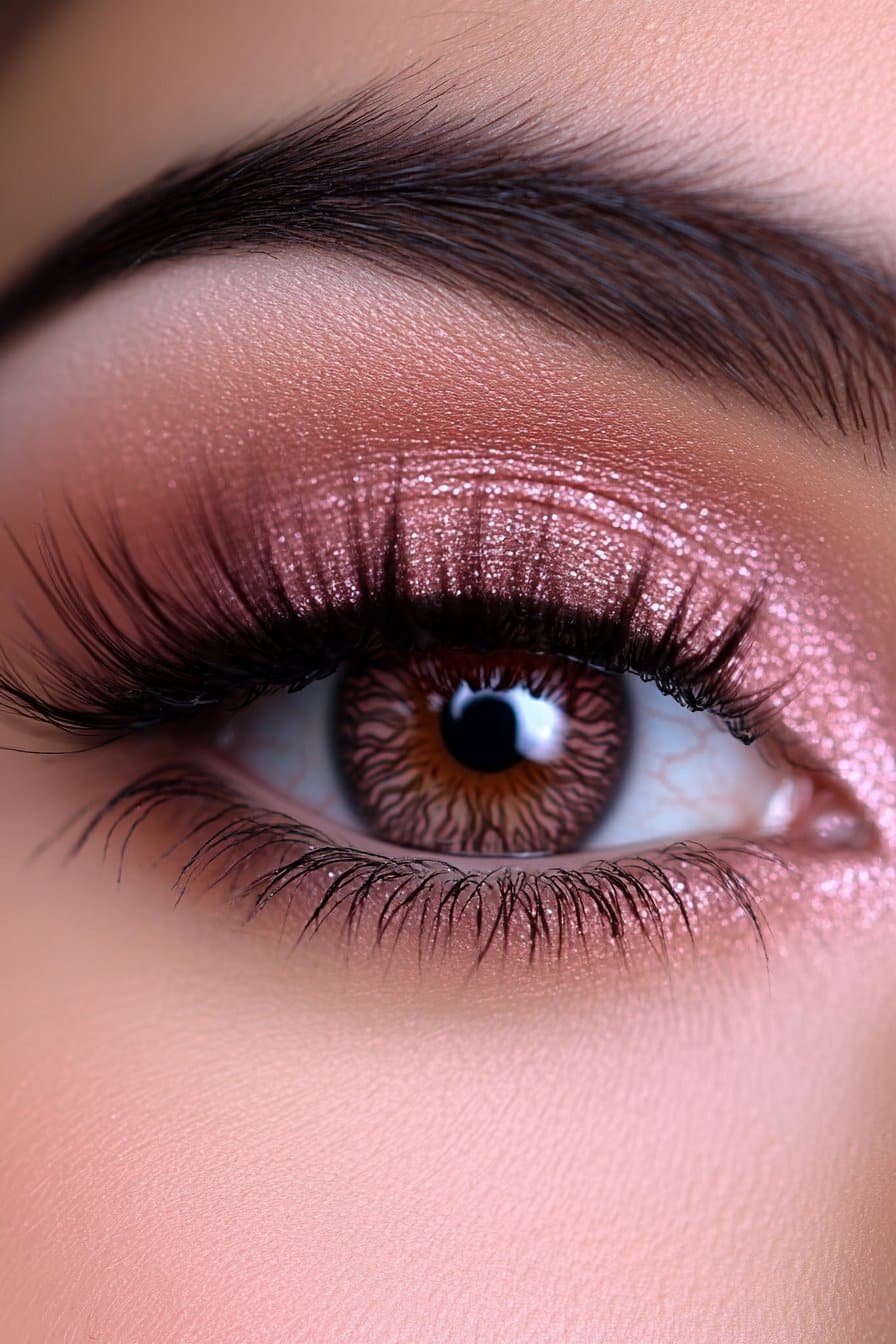
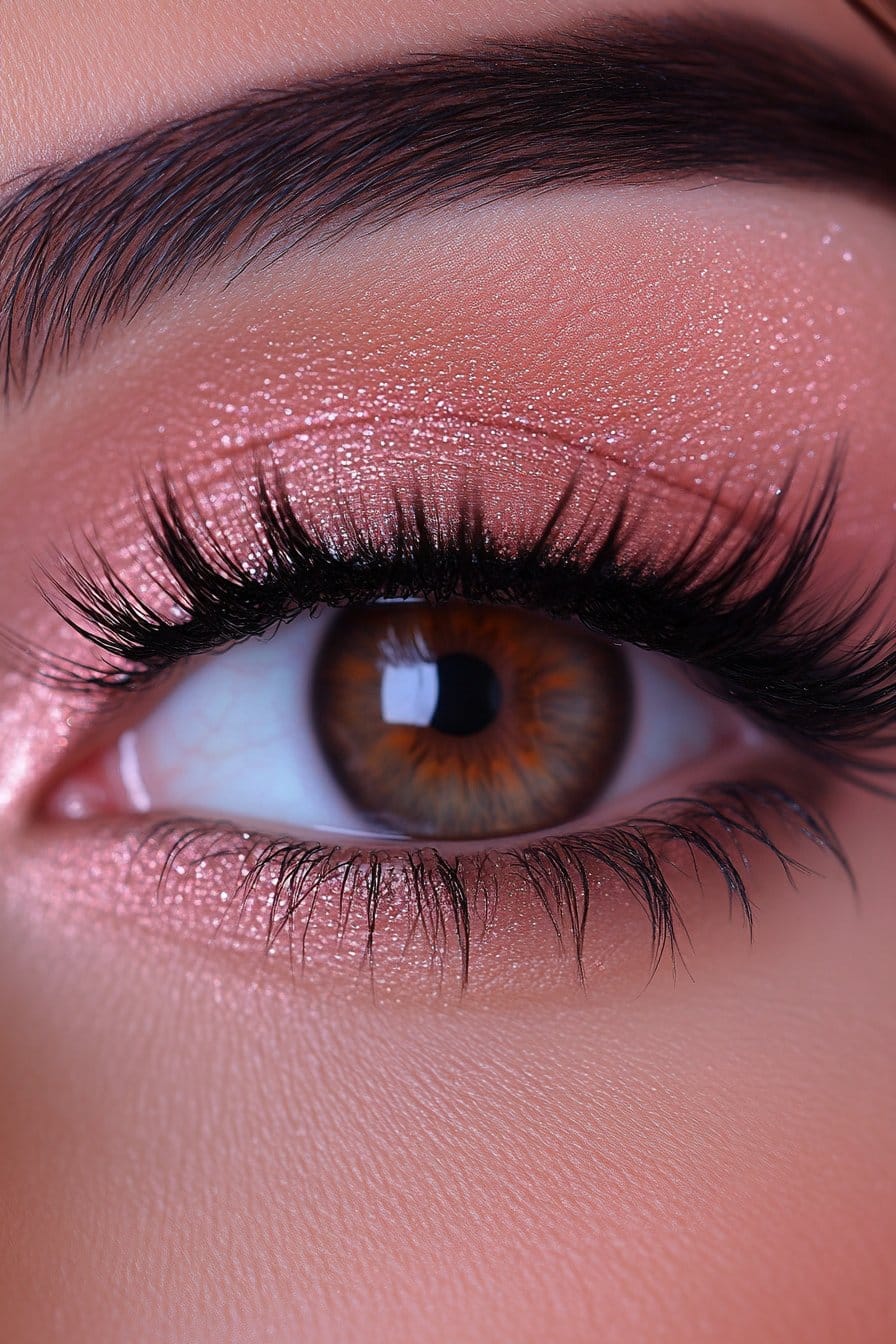
Shimmery Pink Smokey Eye

Shimmery eyeshadows became my signature style when I found their transformative magic during a breakthrough editorial shoot. My years at Makeup Designory helped me become skilled at creating stunning shimmery pink smokey eyes.
Shimmer Selection
The secret lies in picking the right shimmer texture. create enchanting, otherworldly shine. You’ll get the best results with:Pearl pigments mixed with glossy ester
- Creamy shimmery eyeshadows for easy application
- Shimmery pigments mixed with setting spray
- Pearl-finish highlighters for inner corners
Application Process
My work with A-list clients helped me develop a foolproof method. A good eyeshadow base will give you flawless eye makeup. Here’s what to do:
- Apply light eyeshadow with a blender brush across the lid
- Tap shimmery shadow onto the mobile lid up to the crease
- Mix shimmer pigments with setting spray for better adherence
- Apply shimmer to the center of eyelids using fingertips
- Blend edges for a smooth finish
Long-lasting Tips
Leading makeup teams at fashion shows taught me that proper preparation makes shimmer last longer. You should use glitter primer or adhesive made for shimmer products. Your brush needs a spritz of setting spray before applying shimmer shadows.
My work with celebrities led me to develop a technique of layering different textures. This method helps hide any blending imperfections, making it perfect for beginners. The dimensional effect creates beautiful depth that photographs well under any lighting.
Pink Smokey Eye for Hooded Eyes

I became skilled at creating pink smokey eyes for hooded lids after working with clients in a variety of settings at my Los Angeles studio. My understanding of hooded eyes’ unique challenges led me to develop techniques that will give a flawless look that doesn’t vanish behind the fold.
Technique Adjustments
The secret lies in applying eyeshadow while your eyes are open. This is a vital technique to see exactly where the shadow appears when your eyes are relaxed. I always suggest creating your own crease slightly above the natural fold. I found a breakthrough technique that involves blending shadows upward and outward. This creates the illusion of larger, wider eyes.
Product Recommendations
My work with A-list clients taught me to start with a gripping eyeshadow primer. This prevents creasing from lid folds. Here’s what I recommend for hooded eyes:
- Lighter-colored matte shadows for the lid
- Neutral tones for gradual building
- Long-wearing gel eyeliner
Common Challenges
The biggest problem with hooded eyes is that you retain visible makeup throughout the day. I learned that dark shadows near the fold make eyes appear smaller, so it’s best to avoid them. When applying eyeliner, I tell my clients never to stretch their eyelids. This can lead to uneven wings.
My time at New York Fashion Week helped me perfect a technique of creating a tiny wing line and connecting it to your lashes’ top. This approach will give your artistic work visibility even with hooded lids. A pop of light eyeshadow in the inner corners lifts heavier lids’ appearance beautifully.
Pink Smokey Eye for Monolids

My approach to creating pink smokey eyes changed when I found effective techniques for monolid eye makeup. We worked with clients of all backgrounds and developed methods that boost the unique beauty of monolid eyes.
Specialized Techniques
The secret to monolid makeup lies in rather than horizontal layering. You’ll get the best results by applying colors vertically from the lash line upward. Your eyes should stay relaxed during makeup application since stretching the lid can make it uneven.vertical application
Product Selection
Testing various products over the last several years showed that certain formulations work better for monolids. Waterproof and long-wearing products are crucial since monolids transfer makeup more easily. Here’s what works best:
- Tackier eye primers that lock down shadow
- Cream-to-powder eyeshadows for better adherence
- Waterproof gel eyeliners for lasting definition
Tips and Tricks
I’ve become skilled at using smaller, denser brushes for precise application. Sometimes mixing brightening concealer with primer creates a smoother base. The most flattering finish comes from concentrating darker shades at the lash line and blending upward. This creates depth without overwhelming the lid space.
My time at Makeup Designory taught me that setting your work with translucent powder above the brows prevents transfer where pores tend to be oiliest. Your natural eye shape should shine through while your artistry stays put all day.
Pink Smokey Eye for Deep-Set Eyes
My early days at Makeup Designory taught me how challenging deep-set eyes can be. Traditional smokey eye techniques made them look more sunken. Working with clients in a variety of settings helped me create specialized methods that improve rather than overwhelm deep-set eyes.
Adaptation Techniques
The secret to creating stunning pink smokey eyes for deep-set eyes depends on strategic color placement. The right technique requires keeping the lid area lighter and focusing darker shades above the crease. Working with A-list clients led me to an interesting approach – using light-reflecting products on the center of the lid brings eyes forward.
Product Choices
The right products make all the difference before applying any shadow. Here’s what you need:
- Eye primer or concealer in ochre tones
- Light-reflecting pink shadows for the lid
- Matte transition shades for the brow bone
- Cream-based products for better control
Application Steps
Red carpet events helped me perfect this technique for deep-set eyes:
- Prime the lid with concealer and blend with a brush
- Apply pencil along the lash line, thicker at outer corner
- Blend dark brown shadow to smudge harsh lines
- Work medium brown from lash line to outer crease
- Use taupe brown on the brow bone to minimize prominence
- Pat light pink shimmer in the center lid area
Success comes from bringing forward the sunken areas while creating depth where needed. My experience at Los Angeles studios shows this technique works exceptionally well for photographs and special events.
5-Minute Pink Smokey Eye
Time management became a vital part of my career after I started working with celebrities who needed stunning looks in minutes. My experience at Los Angeles studios helped me become skilled at creating a flawless pink smokey eye in just 5 minutes.
Quick Application Steps
To create a stunning look quickly, follow these steps:
- Prime eyelids with concealer, blend quickly with fingertips
- Apply cream eyeshadow stick in neutral pink from lashline to crease
- Smudge dark pink along upper lashline with a pencil brush
- Blend edges upward with a fluffy brush
- Add shimmer to inner corners for brightness
- Finish with two coats of mascara
Product Selection
We focused on choosing products that work quickly. My breakthrough experience at Fashion Week taught me to recommend:
- Dual-ended pencils with smudger
- Cream-to-powder formulas
- Waterproof eyeshadow sticks
- Transfer-proof liners
Time-saving Tips
The quickest way to apply makeup involves smart techniques. My work with A-list clients showed that cream products eliminate the need for multiple brushes. A game-changing tip is to apply eye makeup before foundation so you can quickly clean up any fallout.
Your eyes should stay relaxed during application to maximize efficiency. Using your fingertip to blend cream shadows creates warmth that helps products merge naturally into the skin.
Pink Smokey Eye for Work
Creating office-appropriate pink smokey eyes depends on understanding workplace dynamics. My years of consulting for corporate clients have taught me that successful workplace makeup boosts professionalism without becoming a distraction.
Professional Look Guide
Office lighting changes how makeup appears, which makes shimmery products look more subtle. You should keep the smokey effect minimal in corporate environments and focus on matte finishes and neutral undertones. The goal is to create depth without overwhelming the eye area.
Product Selection
A polished office look needs:
- Neutral-toned eye primer
- Matte dusty pink shadows
- Brown gel eyeliner (avoid black)
- Setting spray for longevity
Application Steps
My executive clients have taught me that quick, lasting application matters most. Start with cream shadow in dusty mauve from lashline to crease. The edges need to be blended really well for a smooth finish. Brown gel eyeliner works best when applied thin and close to lashes.
I developed a technique while working with corporate leaders that uses brown shadow to soften the liner’s edge. This adds dimension without looking overdone. You can layer shadow over liner before it sets for extra staying power.
My work in a variety of professional settings shows that subtle makeup often receives positive feedback about looking polished and prepared. Note that workplace makeup should boost your natural features while you maintain a professional image.
Pink Smokey Eye for Special Events
Special events just need flawless makeup that stays perfect through hours of photography, dancing, and celebration. My work as a celebrity makeup artist with A-list clients has helped me perfect techniques to create stunning pink smokey eyes that last through the most challenging occasions.
Long-lasting Products
We selected the right products that are the foundations of event makeup. My unique experience at red carpet events shows that waterproof formulations and setting products are non-negotiable. My must-have product lineup has:
A to refresh makeup throughout the event. The best results come from using both cream and powder products – cream for longevity and powder for touch-ups. A quality eye primer prevents creasing and extends wear time substantially.hydrating setting spray
Application Process
Beautiful event makeup comes from proper preparation and layering. Start the prep with exfoliation and a moisture mask one week before the event. The day of application:
- Apply primer and let it set completely
- Layer cream shadows as your base
- Set with matching powder shadows
- Let makeup settle for one hour before final touches
Take photos with both phone and flash cameras to check how your look photographs under different lighting conditions.
Touch-up Tips
The most perfectly applied makeup might need refreshing during long events. My emergency touch-up kit always has:
- Blotting sheets for oil control
- Pressed powder for quick fixes
- Cotton swabs for precise corrections
- A travel-size setting spray
My work with celebrities helped me develop a technique that uses setting spray between powder applications to prevent caking. This method will give a fresh pink smokey eye throughout the event without looking heavy or overdone.
Pink Smokey Eye with Winged Liner
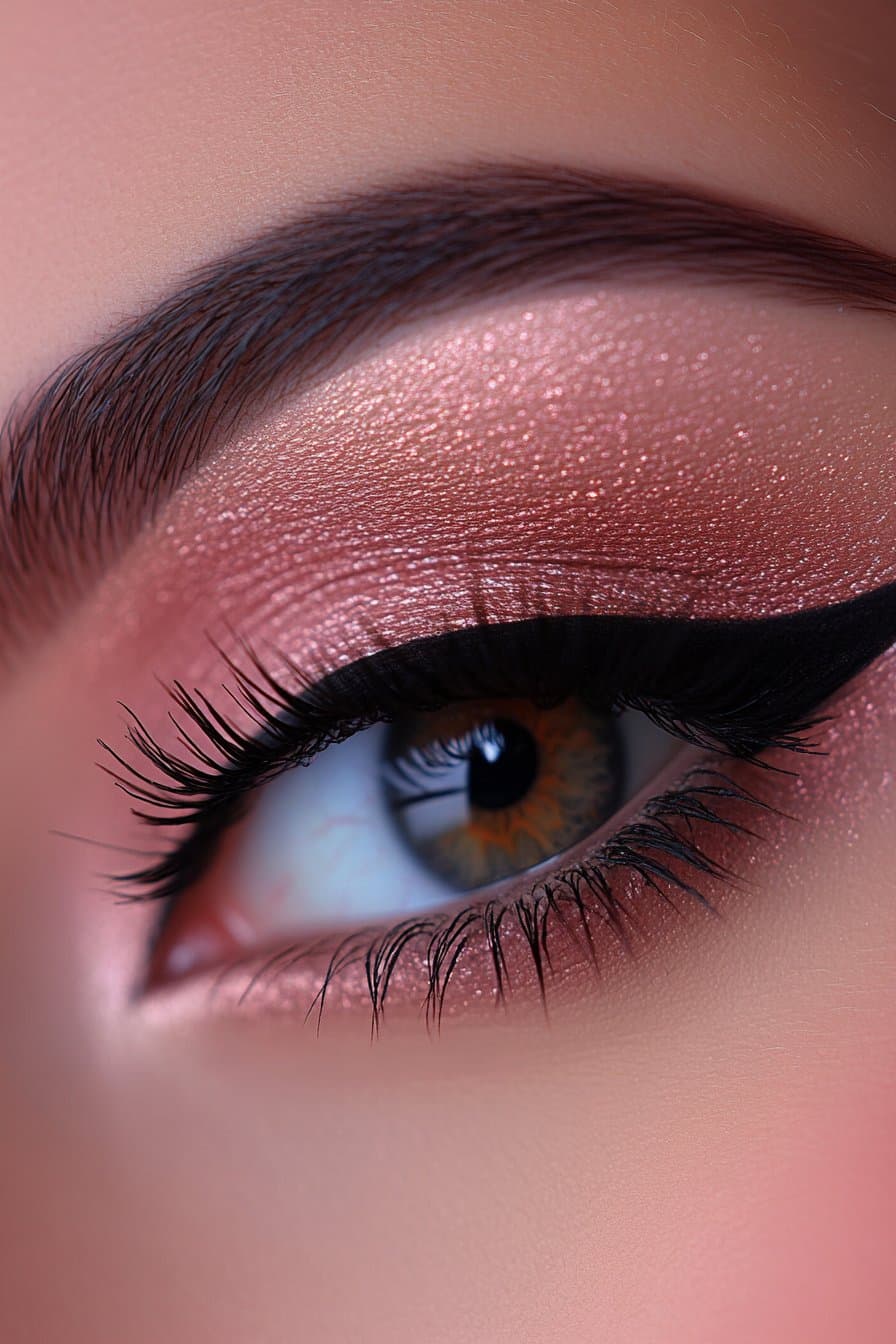
My love for creating perfect winged liners started after I became skilled at countless looks backstage at New York Fashion Week. Years of practice and trying new techniques helped me find that pink smokey eyes paired with winged liner create an unforgettable look.
Liner Selection
The right eyeliner makes all the difference in getting a flawless wing. A is a great way to get better control and pigmentation. Black eyeshadow applied with a small flat brush creates a softer, more diffused line. Having both options in your kit lets you create different effects easily.gel liner for beginners
Step-by-Step Guide
Let me share my foolproof method that I’ve refined over the years:
- Start with your pink smokey eye base
- Map out the wing shape using light strokes
- Begin the wing at the outer corner, extending inward
- Fill in the inner area gradually, keeping close to lash line
- Blend the edges with a small clean brush for a smooth finish
- Layer dark pink eyeshadow in the crease to add dimension
Take your time with each step. My clients know that rushing through wing application results in uneven lines.
Troubleshooting
Even the best makeup artists struggle with winged liner sometimes. My work with clients in a variety of settings has taught me that tape makes an excellent guide for symmetrical wings. A quick fix for smudged liner involves dipping an angled brush in makeup remover. For hooded eyes, create the wing with relaxed eyes to ensure proper placement.
Working with A-list celebrities taught me to use concealer to sharpen the wing’s edge. This trick fixes mistakes and creates sharp, camera-ready definition.
Pink Smokey Eye for Mature Eyes
My decades of experience working with mature clients has taught me a lot about creating stunning pink smokey eyes. You need to understand how aging affects our eyelids. I’ve worked with countless celebrities over 50, and the right approach makes all the difference.
Age-appropriate Products
The right products that complement mature skin are vital. Here’s what I recommend:
- Hydrating eye primers for dry lids
- Matte cream shadows without shimmer
- Light to medium hydrating foundations
- Waterproof gel eyeliners for watery eyes
Application Techniques
Diffusion is a vital part of working with mature eyes. Apply a small amount of primer with your fingers or a brush. Blend shadows in circular motions to keep the lid area and above the crease smooth.
I found a great technique while working with A-list clients – use retinol every other day on crow’s feet to soften the area. The perfect smokey effect comes from applying the lightest shade of pink across the lid, then adding medium tones in the socket line.
Anti-aging Tips
Mature eyes need specific preparation steps compared to younger clients. Start with an eye check to avoid potential irritation. Primer isn’t optional – it prevents creasing and ensures your makeup stays put.
The secret lies in proper hydration and smart product choices. My time at Los Angeles studios has shown that heavy matte foundations make makeup look cakey and settle into fine lines. Full eyebrows help balance stronger eye makeup, so don’t forget to fill them in.
Waterproof Pink Smokey Eye

My time in Los Angeles, filled with pool parties and summer events, led me to create waterproof pink smokey eye techniques. I worked with A-list clients and learned to create looks that stand up to water, sweat, and humidity while keeping the style intact.
Product Selection
The right products will give a flawless waterproof pink smokey eye. Here’s what I rely on:
- Waterproof eye primer or cream shadow base
- Long-wearing cream-to-powder shadows
- Waterproof gel eyeliner
- Smudge-proof setting spray
Application Steps
You need precision and layering to get this look right. Start with a thin layer of waterproof primer on the lid. A cream shadow base creates a water-resistant foundation that helps powder products stick better.
Layer different textures to get the best results – creams first, then powders. This approach builds intensity and makes the look last longer. To cite an instance, see how setting eyeliner with matching powder shadow right away stops it from transferring.
Setting Techniques
The way you set your makeup determines how long your waterproof look stays put. I found a technique while working with celebrities that uses setting spray between layers. This creates several barriers against moisture and keeps the look fresh.
I came up with a game-changing technique at red carpet events by mixing waterproof mixing medium with powder shadows. This turns any shadow into a water-resistant formula that keeps its color intensity and blends beautifully.
Conclusion
Pink smokey eyes have been a timeless favorite among my A-list clients throughout my career as a celebrity makeup artist. My experience from Makeup Designory to leading teams at New York Fashion Week has shown that this versatile look suits everyone – from office workers to red carpet celebrities.
Every technique I share comes from hands-on work with clients of all types. You can become skilled at creating the classic pink smokey eye with practice. Start with simple techniques and gradually try more advanced methods to build your confidence.
I had my breakthrough when I realized that adapting these looks for different eye shapes and occasions doesn’t need complicated methods. Understanding your unique features and selecting the right products makes all the difference.
Pink smokey eyes celebrate individual beauty and offer endless creative possibilities. Note that makeup skills improve with practice, so don’t worry if your first attempts aren’t perfect. The 5-minute version works great for everyday wear, and you can explore more dramatic options as your skills grow.
My time at Los Angeles studios has taught me that exceptional makeup skills come from understanding both technique and individual beauty. These 17 variations show how pink smokey eyes work beautifully for all eye shapes, ages, and occasions. This makes them an essential skill for every makeup enthusiast.