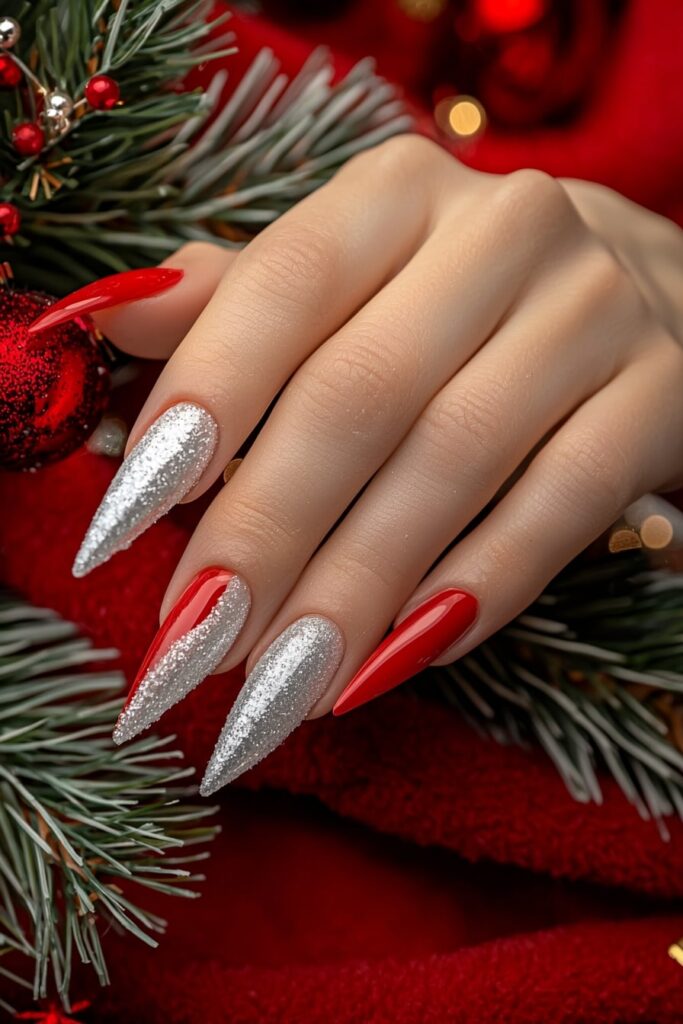
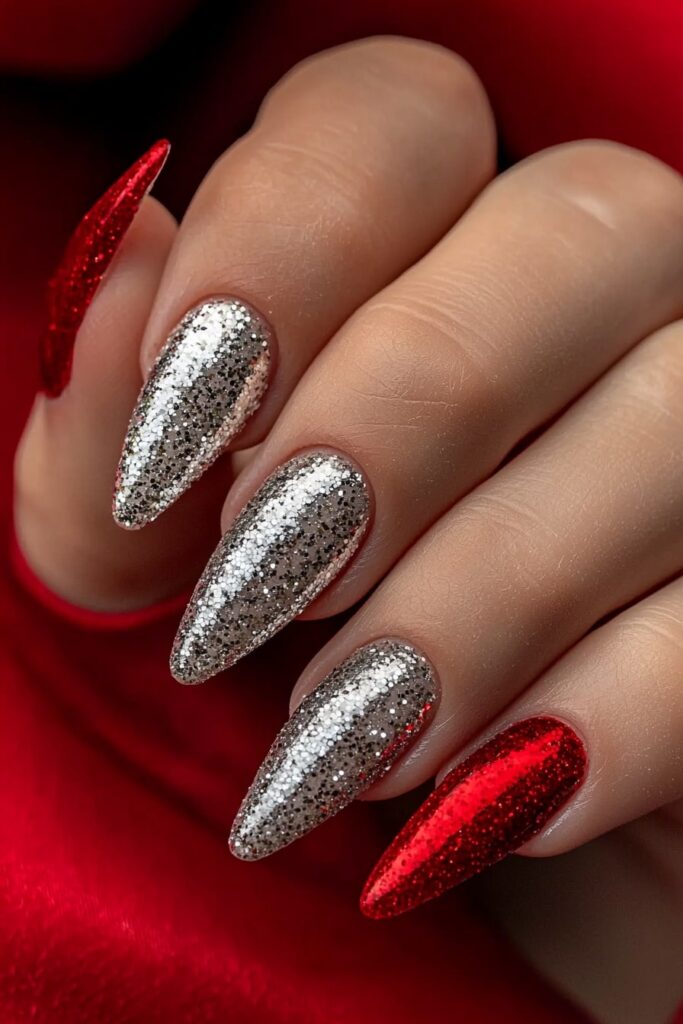
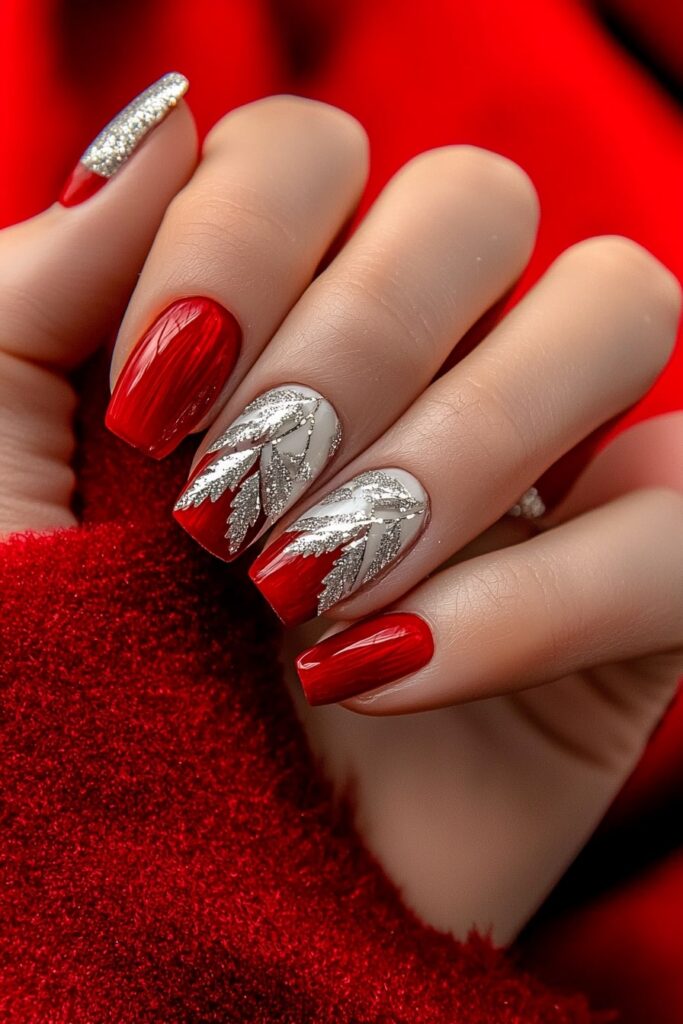
My experience as a professional nail artist has shown that subtle Christmas nail designs create the perfect balance between festive spirit and everyday elegance. Celebrity makeup artist Belle Hathaway and I discovered that holiday beauty doesn’t need to be overwhelming to create a lasting effect. Our sophisticated Christmas nail designs capture the season’s magic while keeping a refined esthetic.
Our collection of simple Christmas nails features everything from delicate snowflakes to understated glitter nails. These 22 designs showcase minimalist patterns and soft shimmer effects that prove holiday nail art can be both festive and professional. Belle’s and my years of client work have helped us perfect each look with carefully chosen color combinations and subtle details that celebrate the season with style.
Minimalist Snowflake Nails

My experience with Belle Hathaway and her celebrity clients taught me a valuable lesson – simplicity speaks volumes. The minimalist snowflake nail designs we create have become a hit with clients who want Christmas nail art that makes an elegant statement quietly.
Minimalist Snowflake Nails Design
Partial snowflakes with negative space create the most stunning nail art. The design’s beauty comes from delicate snowflake fragments that seem to float across your nail’s surface. This artistic approach delivers an Instagram-worthy look that stays sophisticated and elegant.
Minimalist Snowflake Nails Color Palette
These winter-inspired combinations create simple and elegant Christmas nails:
- Dreamy purple with silver accents
- Classic white on transparent base
- Soft blue with subtle glitter
- Golden snowflakes on nude base
- Navy blue with pink highlights
Minimalist Snowflake Nails Application Tips
Creating perfect snowflakes depends on mastering the dot-and-drag technique. The process starts with making symmetrical dots using a dotting tool. A fine brush helps drag out the snowflake points before the gel cures. Belle showed me how to sprinkle glitter over wet gel that creates a subtle sparkle and catches light beautifully.
My years of experience have taught me that patience and symmetry lead to successful snowflake designs. The best approach is to use lighter pressure while making the original dots. Adding more product works better than removing excess.
Neutral Winter Wonderland

Belle Hathaway and I recently created our signature “neutral winter wonderland” design during a styling session. This subtle Christmas nail design has gained popularity with our clients. They love how it naturally fits both office settings and holiday celebrations.
Neutral Winter Wonderland Inspiration
The softest winter moments have sparked my creativity – delicate morning frost and misty coffee shop windows. Belle and I have crafted this perfect look that blends winter frost’s sparkle with warm neutral tones. Our design reflects a cozy December morning’s essence while it keeps its sophisticated elegance.
Neutral Winter Wonderland Color Scheme
Our thoughtfully selected neutral palette has these elegant shades:
- Creamy cappuccino base
- Soft taupe for transitions
- Pearl white accents
- Champagne shimmer details
- Matte beige undertones
Neutral Winter Wonderland Techniques
Creating this stunning look depends on the layering technique. A sheer nude base serves as the foundation before adding depth with fine glitter particles. My mentor Belle showed me how to apply shimmer in delicate layers and let each layer dry. The perfect finish comes from blending glossy and matte topcoats that create dimension. This advanced method stuck with me after collaborating with Belle during a winter editorial shoot in New York.
Frosted French Tips
I’ve been experimenting with a fresh take on French tips that has become a hit in my studio recently. A photoshoot with Belle Hathaway led us to find that adding a frosted finish to classic French tips creates the perfect subtle Christmas nail design.
Frosted French Tips Style
This fresh take on the classic French manicure adds a shimmering ice effect. The design showcases a delicate white tip with a frosty finish. A dreamy winter-inspired look blends sophistication with seasonal charm.
Frosted French Tips Colors
These winter-inspired combinations create stunning French manicures:
- Pearl white tips with a marshmallow base
- Crystal shimmer on sheer nude
- Polaroid glitter confetti accent tips
- Semi-transparent white with chrome glaze
Frosted French Tips Tutorial
Belle and I developed this simple technique that works every time:
- Start with clean, dry nails and apply your base coat
- Use Pink Perfector as your base color
- Create a jagged French tip using Snow Me White and a striping brush
- Apply Pearl Harbor shade over the white with a slightly larger brush
- Seal with a glossy top coat to get that perfect frosted finish
This versatile design works well for different occasions. You can wear it to the office or dress it up for holiday celebrations. Belle’s advice to our clients is simple – the best Christmas nail designs naturally transition into the new year.
Soft Glitter Gradient Nails
Belle Hathaway and I found a perfect holiday nail design during our studio experiments. Glitter gradient nails make an excellent choice for subtle Christmas looks. Our clients love this technique when they need something festive yet professional.
Soft Glitter Gradient Nails Look
This design’s magic comes from its adaptability. A gradual shift from sparkle to solid creates an elegant effect that works beautifully at office parties and formal events. Belle and I have developed a technique that creates a perfect fade from bold glitter to gentle, subtle hues.
Soft Glitter Gradient Nails Products
These items will help you create the perfect gradient:
- A dark base color (forest green and navy create stunning results)
- Fine gold or silver glitter polish
- Paper towels to master the absorption method
- A specialized glitter application brush
- High-quality top coat
Soft Glitter Gradient Nails How-To
Over the last several years, I’ve discovered a foolproof method that works every time. The process starts with a base color – I prefer a deep forest green that’s almost black. Here’s my signature trick: press the brush against a paper towel for 5 seconds before applying the glitter polish. This simple step absorbs excess clear base and helps you control glitter placement better. The final step requires you to start at the tips and work downward. Remember to reduce pressure gradually to create that perfect fade effect.
Winter Nude with Gold Accent

Belle Hathaway and I worked together on a holiday magazine shoot. We found that nude and gold combinations create perfect subtle Christmas nail designs. This elegant pairing has become our clients’ most requested look that brings sophistication and holiday charm to the festive season.
Winter Nude with Gold Accent Design
Geometric patterns blend perfectly with nude bases. Clean lines and balanced negative space allow the design to breathe naturally. My mentor Belle showed me how to place minimal gold accents with purpose – a delicate stripe here and a tiny triangle there – which creates an elegant yet festive look.
Winter Nude with Gold Accent Shades
These stunning combinations create the perfect winter nude and gold palette:
- Beige-pink base complemented by champagne gold accents
- Warm ivory enhanced with metallic gold details
- Soft taupe beautifully merged with rose gold elements
- Matte nude balanced by glossy gold geometric shapes
Winter Nude with Gold Accent Application
This stunning look depends on the layering technique. A flawless nude base creates the perfect foundation. The gold details need a fine-tipped brush that helps create precise patterns. Belle taught me a clever trick – apply a matte top coat first and then add the gold elements. This method adds beautiful dimension while making the metallic details stand out against the neutral background.
Snowy White Ombre Nails

A winter bridal shoot with Belle Hathaway led to creating one of our most requested subtle Christmas nail designs. The snowy white ombre effect perfectly mirrors winter’s first snowfall and keeps its sophisticated appeal.
Snowy White Ombre Nails Concept
I found the true magic of this design in how it captures the essence of freshly fallen snow. A gradient transition from pure white to a milky finish adds depth and dimension that reflects light beautifully. Belle and I have seen this style shine especially when it comes to winter weddings and holiday formal events.
Snowy White Ombre Nails Color Selection
These combinations create the perfect snowy ombre effect:
- Bon Bon (USD 11.00) as the base shade
- Paper Snow (USD 11.00) for the gradient
- Fine silver glitter for accent nails
- Crystal clear top coat for depth
Snowy White Ombre Nails Technique
Creating this stunning look depends on proper layering technique. My process starts with breaking down the white powder until it becomes fine and smooth. The real magic happens when I press firmly at the tips and ease up my pressure toward the center. A valuable tip I learned from Belle shows that curing each layer will give a perfect tacky surface to blend smoothly. Sometimes I add extra depth to the design by gently dusting fine silver glitter over the gradient.
Delicate Holly Leaf Design

My collaboration with Belle Hathaway on a holiday collection led to this delicate holly leaf design. The design captures Christmas spirit beautifully while staying sophisticated. The best part about this piece is its blend of traditional holiday elements with a modern and subtle twist.
Delicate Holly Leaf Design Inspiration
Simplicity creates the most elegant holly designs. Belle’s suggestion to use a sheer backdrop made the holly leaves appear to float naturally on the nail. Vintage Christmas cards sparked this design concept, which we modernized by adding subtle base tones and dimensional details.
Delicate Holly Leaf Design Colors
This festive yet refined look requires:
- Evergreen Dream for the base leaves
- Darker green shade creates depth and shadows
- Light green blended with white to emphasize details
- Mulled Wine for the berries
- Optional black adds fine outlining
Delicate Holly Leaf Design Tutorial
My collaboration with Belle helped me develop a proven technique that works every time. The design begins with a sheer white or nude base coat. Thin stems serve as guides for the pattern. The leaf shapes emerge from medium green polish, while darker shades create depth at the bottom. A lighter green mix brightens the top portions. Red berries dotted onto the design create an instant festive touch. The leaves can be outlined with a fine black line to add extra dimension, but this detail remains optional based on your style preference.
Rose Gold Christmas Sparkle

Rose gold’s elegance has engaged my clients consistently. Belle Hathaway’s suggestion to include it in our holiday collection proved to be a brilliant move. Our team has refined this sophisticated festive nail design through numerous celebrity appointments.
Rose Gold Christmas Sparkle Look
I’ve found that subtle Christmas nail designs work best with the layering technique. The process builds thin layers of rose gold shimmer on a neutral base. This lets the metallic warmth shine through naturally and creates a sophisticated sparkle that catches light beautifully.
Rose Gold Christmas Sparkle Products
This signature look requires:
- Base coat with grip technology
- Rose gold glitter gel polish
- Fine shimmer powder
- High-quality brush-on nail glue
- Crystal-clear top coat
Rose Gold Christmas Sparkle Application
My controlled sparkle technique holds the secret to this stunning look. The process starts with a thin layer of rose gold gel that needs proper curing to create a smooth base. Belle showed me a game-changing tip – press the glitter into the tacky layer rather than brushing it on. This method prevents clumping and distributes glitter evenly. The final touch involves adding chrome powder to select areas, which creates beautiful dimension. Your nails will look perfect at holiday parties and still remain professional enough for the office.
Icy Blue Snowflake Tips

Belle Hathaway and I created an ethereal icy blue snowflake design during our winter editorial shoot. The design blends delicate snowflakes with chrome effects. This combination strikes a perfect balance between festive elegance and sophistication.
Icy Blue Snowflake Tips Style
Belle and I created a stunning technique that combines chrome powder effects with hand-painted snowflakes. The design showcases a beautiful gradient that transitions from clear to icy blue. Delicate white snowflakes seem to dance on the nail surface, and the design’s most captivating feature is its ability to catch light uniquely from every angle.
Icy Blue Snowflake Tips Color Palette
This winter-inspired design creates a stunning look with:
- Navy blue base for dramatic depth
- Iridescent blue chrome powder
- Crystal white for snowflakes
- Silver glitter for accent nails
- Pearl white that expresses elegance
Icy Blue Snowflake Tips How-To
A peel-off base coat makes removal simple and easy. The real transformation happens as chrome powder gets layered over the blue base. Belle showed me this amazing technique at the time of our first winter collection shoot. Delicate snowflake patterns emerge through careful application of white gel polish with a fine liner brush. Each layer needs proper curing before detail work begins. The final touch involves silver accents that get dabbed with a makeup sponge to create that perfect frosty effect.
Matte Red with Gold Line

Belle Hathaway and I discovered an elegant combination of matte red and gold during a high-profile holiday photoshoot. This color pairing has become our signature winter look. The deep wine shade offers a sophisticated twist on traditional Christmas colors.
Matte Red with Gold Line Design
I found the design’s textured sophistication captivating. A matte wine color creates a perfect canvas that complements the shimmer gold foil accent. The thin horizontal stripe adds architectural interest. This design appears intricate yet remains surprisingly simple to create.
Matte Red with Gold Line Shades
This elegant holiday look needs:
- Deep wine red with matte finish
- Metallic gold for accent lines
- Black for optional thin stripes
- Pearl shimmer for subtle dimension
Matte Red with Gold Line Technique
This stunning look depends on layering and curing done right. A peelable base coat goes first, followed by two thin layers of matte wine shade. Belle showed me how to cure each layer really well so the gold foil won’t sink into the base color. The gold line needs a steady hand – I use a fine striping brush and work my way from the cuticle outward. Everything gets sealed with a matte top coat that creates a beautiful velvet finish.
Silver Star Accent Nails

A late-night brainstorming session with Belle Hathaway turned magical when I told her about my childhood wonder of shooting stars. This cherished memory became the inspiration behind our most delicate and ethereal Christmas nail design collection.
Silver Star Accent Nails Concept
This design captures the magic of a winter night sky. Belle and I found that a dreamy pastel base makes silver stars truly shine. The design’s special quality comes from its versatility. It works perfectly for everyday wear and adds just the right touch of holiday spirit.
Silver Star Accent Nails Products
These items will help you create beautiful celestial designs:
- Fine-tipped nail art brush (3mm width)
- Metallic silver polish to create stars
- Your favorite pastel base color
- Silver glitter to add extra sparkle
- Professional top coat
Silver Star Accent Nails Tutorial
Belle and I spent countless sessions until I became skilled at the shooting star method. The process begins with a pastel base coat – soft lavender or baby blue works best. Let the base dry completely. A fine brush helps create delicate shooting stars on one or two accent nails. Success depends on pressure control, so start with a light touch and ease up while drawing the star’s tail. The design comes alive when you dot silver glitter around each star. Belle likes to call this beautiful effect a “constellation effect.”
Cozy Sweater Texture Nails

A chilly afternoon at my studio led me to find the perfect way to blend winter fashion with nail art. This cozy sweater texture design became my signature subtle Christmas nail style. Belle Hathaway’s decision to include it in her winter beauty collection made it even more special.
Cozy Sweater Texture Nails Inspiration
This design beautifully captures your favorite winter sweater’s texture on your nails. My collaboration with Belle revealed the secret behind this stunning look – it’s all about how texture and light work together. The dimensional patterns create an eye-catching 3D effect that makes your nails sparkle at holiday parties.
Cozy Sweater Texture Nails Colors
These nail colors create the perfect winter-inspired palette:
- Classic soft grays blend with crisp whites
- Deep plum burgundy adds holiday sophistication
- Warm neutrals shine with delicate champagne accents
- Rich browns sparkle with gold shimmer details
Cozy Sweater Texture Nails Application
The gel-and-powder technique creates this stunning look. A smooth base coat serves as the foundation. Next, I apply gel polish to create criss-cross patterns that resemble knit stitches. Belle’s tip helped me master each nail individually since the gel tends to spread and affect the pattern’s integrity. The design comes alive when I sprinkle clear acrylic powder over the uncured pattern. A matte top coat boosts the fabric-like appearance and completes this cozy look.
Pale Pink Candy Cane Stripes

Belle Hathaway challenged me to modernize candy cane stripes right after our holiday photoshoot showcased cozy designs. We collaborated to create a soft, feminine version of this Christmas classic. The new pattern resonates with clients who want understated holiday esthetics.
Pale Pink Candy Cane Stripes Look
A lavender pink base creates a softer, more sophisticated version of traditional candy cane stripes. The design’s delicate diagonal lines reflect light elegantly. This versatile look works well at office parties and festive gatherings.
Pale Pink Candy Cane Stripes Shades
This elegant holiday design needs:
- Pastel baby pink for the base
- Sparkle bronze-gold for main stripes
- Pink holographic polish for accent stripes
- Pinkish silver holo to add final details
Pale Pink Candy Cane Stripes How-To
A smooth coat of lavender pink serves as the perfect base to create this stunning look with the striping technique. Belle showed me how a fine striping brush creates perfect diagonal lines. My process starts with bronze-gold stripes that I enhance with pink holographic accents. Each layer needs complete drying time before the next application. A high-quality top coat applied diagonally prevents smearing and protects your design from peeling.
Soft Silver Snowfall Nails

Last winter, I discovered a magical blend of soft silver and snowfall effects while planning a celebrity wedding. Belle Hathaway’s eyes lit up when she saw how the design captured a gentle winter evening’s essence.
Soft Silver Snowfall Nails Design
I have become skilled at creating what I call the floating snowfall effect. This unique design makes delicate silver glitter cascade down the nail like gentle snow. The combination of holographic glitter and snowflake accents creates a perfect festive touch that enhances the overall look naturally.
Soft Silver Snowfall Nails Color Selection
This dreamy winter design needs these essential elements:
- Soft white base with pearl finish
- Holographic silver glitter that creates a snowfall effect
- Crystal shimmer on accent nails
- Iridescent top coat to add dimension
Soft Silver Snowfall Nails Technique
This stunning design’s beauty comes from its unique layering method. A polished white base with subtle shimmer serves as the foundation. Belle showed me how a makeup sponge application removes excess polish and creates that perfect scattered effect. Delicate snowflake patterns appear on two accent nails through fine brushwork, which maintains the design’s sophistication and balance. Select nails feature a knit-pattern texture that adds a cozy winter feel, and my clients love the final result.
Muted Christmas Tree Accent
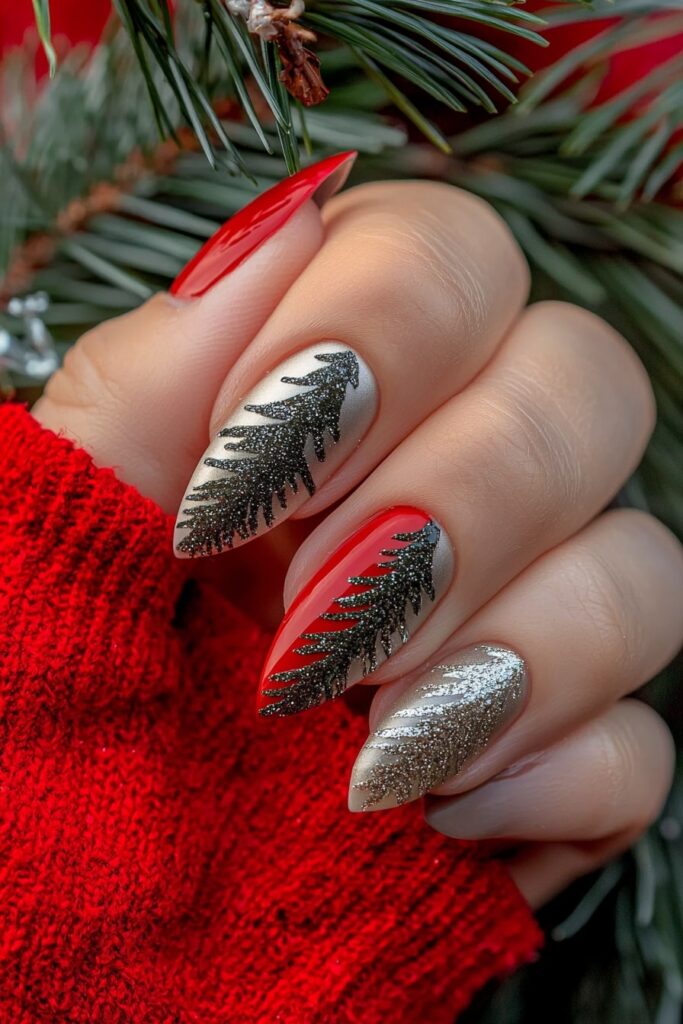
Scandinavian minimalism inspired me to work with Belle Hathaway on a fresh take on Christmas tree nail art. We found that simplifying traditional tree designs created an unexpectedly elegant effect during a winter editorial shoot I did recently.
Muted Christmas Tree Accent Inspiration
The clean girl esthetic creates magic in this design approach. Sophisticated shades replace traditional bold greens to create a subtle holiday vibe. Belle showed me how this versatile design adapts perfectly to casual gatherings and formal events alike.
Muted Christmas Tree Accent Colors
This subtle Christmas nail design creates an elegant look with sophisticated color combinations:
- Olive green for the tree outline
- Soft ivory base coat
- Muted gold for minimal decorations
- Forest green for depth
- Champagne shimmer for accents
Muted Christmas Tree Accent Tutorial
A minimalist approach creates this elegant look. My process begins with a sheer base coat that sets the foundation. Fine brushstrokes help create abstract triangle shapes across the nail. Belle taught me a great technique to add depth by applying slightly darker shades. A tiny gold star placed at the tip completes the design and adds just enough sparkle to embrace the holiday spirit.
Champagne Glitter Tips

While preparing for New Year’s Eve, Belle Hathaway and I found that there was a perfect balance between festive sparkle and sophisticated style in champagne glitter. The design has become our favorite recommendation for our clients’ subtle christmas nail designs that seamlessly transition from day to evening events.
Champagne Glitter Tips Style
My signature controlled sparkle technique creates a stunning look with champagne-colored glitter that softly dissolves from the tips. This elegant ombré effect catches light beautifully. The design works wonderfully for both holiday celebrations and workplace environments.
Champagne Glitter Tips Products
These essential items create our signature champagne glitter look:
- Light Elegance Glitter Gel in Champagne
- Clear base coat that ensures proper adhesion
- Fine-grade champagne glitter powder
- Sponge applicator that creates perfect gradient effects
- Premium top coat that delivers long-lasting shine
Champagne Glitter Tips Application
The layering method creates this stunning look. Belle showed me her technique that starts with a clear base. A makeup sponge helps apply the glitter polish and removes extra product to create that perfect fade effect. Each layer needs to be really well-cured before the next application. This keeps the glitter suspended in just the right spots. A crystal-clear top coat seals everything and makes the champagne sparkle beautifully.
Subtle Plaid Holiday Nails

My experiments with traditional holiday patterns led me to find that plaid designs had potential for a more sophisticated look. Belle Hathaway and I dedicated countless hours to perfect what we now call our “whisper plaid” technique. This subtle interpretation of the classic pattern works perfectly for the holiday season.
Subtle Plaid Holiday Nails Concept
Modern plaid designs shine best with ultra-thin lines and thoughtful color combinations. My time working with Belle revealed something special – this design’s true beauty lies in its adaptability. You can dress it up for formal occasions or keep it relaxed for daily use. The pattern creates a gentle impression that makes it ideal for anyone who wants subtle christmas nail designs.
Subtle Plaid Holiday Nails Color Palette
Create the perfect holiday plaid with these sophisticated color combinations:
- Deep burgundy base with charcoal lines
- Nude base with soft gold crosshatching
- Sage green with silver accents
- Muted red with champagne details
Subtle Plaid Holiday Nails How-To
The fine line technique creates this elegant look. A neutral base coat serves as the foundation. My thin brush creates delicate intersecting lines with precision. Belle taught me a clever dimension trick – gentle touches create accent lines while firm pressure builds primary patterns. A matte top coat completes the look and turns these simple christmas nails into something extraordinary.
Nude with Gold Foil Flakes

Between holiday appointments, I found that there was something special about gold foil flakes during my technique experiments. Belle Hathaway saw their potential immediately and we created subtle christmas nail designs that became our signature look at elegant winter events.
Nude with Gold Foil Flakes Design
I have become skilled at a technique I call controlled foil placement. This method lets delicate gold leaf pieces create abstract patterns on a nude backdrop. Belle helped me understand that true beauty emerges when we embrace imperfection. Each flake settles in its own way and creates unique designs that shimmer beautifully in the light.
Nude with Gold Foil Flakes Shades
Create this luxurious look with:
- Rich nude base polish for depth
- 24K gold leaf flakes for warmth
- Champagne gold for subtle accents
- Crystal-clear top coat for sealing
Nude with Gold Foil Flakes Technique
This stunning design relies on a precise layering method. The process begins with a perfectly cured nude base. Gold foil pieces are then placed with special adhesive gel. My colleague Belle taught me to press each flake with a rubber-tipped tool until it sits flat against the nail. The design gains depth when I create a triangle pattern near the cuticle and let the gold elements fade naturally toward the tip. A thick top coat seals everything perfectly – this particular step challenged me for months but now produces beautiful results consistently.
Frosty Silver Leaf Nails
My work on a winter editorial spread with Belle Hathaway helped me find silver leaf’s unique beauty in nail art. Traditional glitter pales in comparison to silver leaf’s ethereal effect. This distinctive material creates an almost otherworldly appearance that fits perfectly with subtle Christmas nail designs.
Frosty Silver Leaf Nails Look
I have become skilled at a technique I call the delicate frost technique. Silver leaf creates a stunning dimensional effect against a soft pink base. Belle showed me that letting the leaf’s natural texture flow creates organic patterns. These patterns catch light beautifully.
Frosty Silver Leaf Nails Products
This elegant design requires:
- Silver leaf (not foil) that creates a delicate look
- Soft pink or neutral base polish
- Special adhesive gel
- Clear top coat to seal
- Fine brush to apply precisely
Frosty Silver Leaf Nails Tutorial
The beauty emerges through the layering process. A perfectly cured base coat creates the foundation. The adhesive gel should be applied precisely to areas where silver leaf needs to stick. My colleague Belle taught me to use a special tool that presses silver leaf delicately onto the nail surface. Quick application works best while the adhesive remains tacky. The design can feature a stunning gradient effect – silver leaf concentrated at the tips naturally fades toward the cuticle to add depth.
Winter Rose Quartz Nails

One quiet evening while working on crystal-inspired designs, I found a way to capture rose quartz’s ethereal beauty in nail art. Belle Hathaway’s expertise in translucent techniques helped me perfect this subtle Christmas nail design. The design has become a favorite among our most selective clients.
Winter Rose Quartz Nails Inspiration
Creating authentic rose quartz nails requires a deep understanding of the crystal’s natural patterns. My collaboration with Belle led us to develop what we call the blooming technique. This innovative approach uses white gel polish to create delicate, organic swirls that perfectly capture the stone’s natural formations.
Winter Rose Quartz Nails Colors
These essential items create the perfect crystal effect:
- Transparent pink base gel
- Milky white for veining
- Pearl powder for dimension
- Crystal-clear top coat
- Optional rose gold accents
Winter Rose Quartz Nails Application
Beautiful rose quartz nails emerge through layering process. A thin coat of transparent pink serves as the base, and Belle’s signature technique adds white veining while the layer remains tacky. Success depends on swift movements that create organic, flowing white lines. Each layer needs careful curing that builds the mesmerizing depth of this design. The final touch involves dusting fine pearl powder over selected areas to create what Belle calls “crystal catch points” that shimmer elegantly during winter festivities.
Blush Pink Snow Accent

The combination of blush pink with delicate snow accents created an unexpectedly elegant look during the luxury spa’s holiday showcase preparations. Belle Hathaway’s immediate response showed appreciation for the design that captured both femininity and festive charm. The overall esthetic stayed clear of typical Christmas themes.
Blush Pink Snow Accent Design
The chrome-frost technique creates a shimmering blush base that serves as a perfect canvas for delicate white snowflakes. This elegant design showcases an iridescent sheen catching light beautifully. Small snowflakes and subtle dotted details add a winter charm without overpowering the overall esthetic.
Blush Pink Snow Accent Color Selection
This enchanting winter design combines delicate hues and sparkle. The perfect combination includes:
- Chrome pink polish for the base layer
- Pearlescent white for snowflakes
- Iridescent top coat for dimension
- Silver micro-glitter for accent points
Blush Pink Snow Accent How-To
This beautiful design relies on layering method. A translucent blush base serves as the foundation – Belle showed me how to build this color step by step until it reaches perfect opacity. I then take a fine-tipped brush and add delicate snowflakes to selected nails. These snowflakes should stay asymmetrical to look natural. My design’s finishing touch includes a light dusting of micro-glitter. Belle’s signature “frost points” emerge when I apply this glitter strategically. These points catch the light beautifully and bring the entire design to life.
Classic Beige with Sparkle

My glamorous awards season preparation with Belle Hathaway taught me something valuable – classic beige nails with a touch of sparkle make the most versatile holiday look. This elegant design has become our signature choice for celebrities who can move naturally between red carpet events and intimate holiday gatherings.
Classic Beige with Sparkle Style
I became skilled at creating what I call the whisper sparkle effect. The technique involves delicate glitter particles placed carefully over a beige base that creates subtle dimension. My mentor Belle showed me how to select a beige shade matching the client’s skin tone and add just enough sparkle to catch the light beautifully.
Classic Beige with Sparkle Shades
This timeless holiday look needs these essential elements:
- Broadway Beige as the base color
- Champagne-toned holographic micro-flakes
- Pearl white that expresses subtle dimension
- Crystal-clear top coat to add depth
- Matte finish option to create a modern twist
Classic Beige with Sparkle Technique
My layering approach delivers stunning results that I’ve refined through years of working with celebrity clients. The process starts with a ridge filler that creates a smooth base. Next, apply two thin coats of beige polish and use a makeup sponge to carefully dab holographic particles. A premium velvet matte top coat seals everything perfectly. My colleague Belle taught me to create “sparkle points” – strategic spots where light reflects beautifully. These subtle touches transform this christmas nail design into something truly special.
Conclusion
My experience as a nail artist has shown me how the right nail design enhances not just someone’s hands but their entire holiday mood. My work with Belle Hathaway taught me that subtle christmas nail designs are more than passing trends – they reflect personal style that suits any occasion.
The designs we created together showcase what Belle and I see as the perfect mix of festive charm and everyday elegance. Our champagne glitter tips with their soft sparkle and cozy sweater-textured nails each tell unique stories while keeping the subtle touch that makes them perfect for any holiday event.
These simple christmas nails stand out because they adapt easily. Belle’s words ring true: “The best designs are the ones that make you feel confident in any room.” You’ll feel perfectly polished at corporate holiday parties or family gatherings with these subtle takes on festive themes. My clients have shown me how these designs help them direct their way through the holiday season confidently.
The beauty of these designs comes from their flexibility – adjust the sparkle intensity or color depth based on your style preferences. Belle and I believe your nails should make you feel like your best self during this magical holiday season.