Toddler braid styles with beads have completely transformed my approach to styling my little one’s hair! I’ve spent countless hours discovering creative ways to make these adorable hairstyles both practical and beautiful for active toddlers. These charming styles aren’t just cute—they’re also perfect for protecting delicate hair during all those playground adventures.
As a mom who’s been there, I understand the daily struggle of finding braids and beads for toddlers that actually stay put. Simple toddler braid styles with beads offer that perfect balance between everyday wear and special occasion looks. I’ve found that toddler girl braid styles with beads not only protect their hair but also boost their confidence when they see their reflection. Besides, toddlers braids with beads can be sweet and practical while keeping their delicate hair protected as they run and play under the sun.
In this guide, I’ll share my favorite 15 toddler braids and beads styles that are both adorable and easy to create. From tribal-inspired designs to birthday-worthy creations, these styles are perfect for parents looking to add some fun to their little one’s look. Whether you’re a braiding novice or a seasoned pro, I’ve included options for all skill levels that will have your toddler looking picture-perfect in no time!
Middle Part Tribal Braids

Middle part tribal braids remain one of my go-to toddler braid styles with beads whenever I want to create something both eye-catching and practical. After trying countless hairstyles on my little one, these braids have earned a special place in our hair routine.
Middle Part Tribal Braids overview
The process begins with clean, detangled, and slightly blown-out hair to make parting easier. I’ve found that dividing the hair into four sections at the back creates the perfect foundation. The signature element is that single braid created along the middle of the head, which serves as the central feature enhancing the overall symmetry. From there, I add braids sequentially along each side.
For my daughter’s hair, this style takes about 40 minutes—worth every second for a look that lasts nearly two weeks! I typically start with a clear middle part, then work on creating consistent-sized braids radiating from it.
Why Middle Part Tribal Braids are popular
Beyond their stunning appearance, tribal braids connect our children to important cultural heritage. I’ve noticed how these braids offer exceptional versatility for active toddlers. Furthermore, they serve as protective styles that shield delicate hair from daily damage.
My daughter absolutely loves how the beads make gentle sounds when she moves—it’s like wearing music in her hair! Consequently, these braids have become her most requested style for school days, family outings, or anywhere she wants to feel special.
Best beads for Middle Part Tribal Braids
Through trial and error, I’ve discovered several excellent bead options:
- Silicone beads: My personal favorite! They’re softer, lighter, less noisy, and more durable than traditional acrylic beads. The 5mm diameter holes make them perfect for securing onto toddler braids.
- Acrylic beads: Lightweight and available in various fun designs.
- Wooden beads: Offer a natural look and work well for toddlers with thicker hair.
In particular, heart-shaped beads have become our signature accent—they add the perfect touch of personality. For parents concerned about safety, rest assured that properly sized beads (especially larger ones designed for younger children) eliminate choking hazards.
Essentially, middle part tribal braids with beads create that perfect balance between protective styling and adorable expression for our little ones.
Heart Beads Braids

Heart-shaped braid designs have quickly become my favorite way to add personality to toddler braid styles with beads. Since their surge in popularity in 2020, I’ve noticed how these adorable styles consistently bring smiles to both parents and children alike.
Heart Beads Braids design
Creating heart-shaped cornrows requires patience, yet the results are absolutely worth the effort. I typically start by sectioning the hair and forming a teardrop shape at the top portion of the fringe area, rounding it out at the bottom. The magic happens when you connect the braids to form the distinctive heart outline. For an extra special touch, I love filling the heart design with colorful beads. I’ve found that starting with one bead at the pointed bottom of the heart before lining them upward works best.
Heart beads themselves come in various materials and colors. My personal preference is the round loc beads that come in heart designs, solid colors, and colorful patterns. These premium-quality beads feature smooth surfaces that won’t damage delicate toddler hair.
Styling tips for Heart Beads Braids
When working with beads, I’ve learned that smaller beads are easier to manipulate, particularly when using needle and thread for placement. Moreover, using a tray that matches your bead color helps make the thread less visible, creating a cleaner look.
For beginners, don’t worry about creating many tiny braids; the beauty of heart designs often lies in their simplicity. I’ve discovered that a few larger braids can create an intricate-looking design that’s actually quite straightforward to execute.
Heart Beads Braids for special occasions
Heart bead braids transform ordinary days into special ones. They’re perfect for Valentine’s Day celebrations, birthday parties, or as adorable school styles. Additionally, these versatile styles work wonderfully for weddings (my daughter was a flower girl with heart braids!) and other formal events.
For truly memorable occasions, I’ve experimented with double heart braids and side heart designs. The heart-shaped beads can be matched with different outfits and occasions, making them suitable for school, parties, and everyday wear.
What makes these braids truly special is how they boost a toddler’s confidence. My little one always feels extra special when sporting her heart braids—the gentle sound of the beads moving as she plays adds a touch of magic to her day.
Freestyle One Ponytail with Beads

After experimenting with various styles, I’ve found that freestyle one ponytail with beads offers that perfect combination of simplicity and cuteness for busy mornings with my toddler. This versatile style has become our reliable go-to throughout 2025.
Freestyle Ponytail style explained
The freestyle ponytail involves gathering all the hair into a single ponytail, then creating multiple braids from that ponytail base. From my experience, you’ll need basic supplies including hair bands, bow clips, and optionally, pre-made braided extensions if you want added length or fullness. I typically start by thoroughly detangling my daughter’s hair—this crucial step ensures smooth braiding and prevents tears later!
For installation, I secure all her hair into a neat ponytail at her preferred height. Next, I divide the ponytail into sections (usually 4-6 depending on hair thickness) and braid each section individually. Finally, I add beads to each braid’s end, securing them with small rubber bands to prevent slipping.
Why toddlers love this look
My little one absolutely adores the gentle tinkling sound the beads make as she runs around! Beyond the fun factor, this style offers practical benefits. Firstly, it keeps hair securely out of her face during active play. Additionally, the single ponytail base makes this style much more comfortable for sleeping compared to multiple braided sections across the scalp.
This hairstyle has proven perfect for my daughter who previously refused to sit still for more elaborate styles. The ponytail portion takes just minutes, followed by braiding that can be done while she watches her favorite show.
Bead placement ideas for Freestyle Ponytail
Through trial and error, I’ve discovered several effective bead placement strategies. For everyday wear, I place 2-3 beads at the end of each braid—simple yet adorable. For special occasions, alternating bead colors creates a rainbow effect that my daughter loves showing off to friends.
Another favorite technique involves “climbing” beads where I place them at various heights along each braid rather than just at the ends. This creates delightful movement and visual interest without adding weight or discomfort.
The versatility of this style means it works equally well for school days, playground adventures, or even dressed up for birthday parties with decorative beads that match special outfits.
Goddess Braids with Beads

For my daughter’s special occasions, goddess braids with beads have become our signature look. These elegant, thicker braids create a crown-like appearance that makes any little one feel like royalty without the maintenance headache of some other styles.
Goddess Braids for toddlers
Goddess braids offer the perfect balance between beauty and practicality for active toddlers. Unlike standard braids, these slightly thicker plaits create a stunning framework that beautifully showcases colorful beads. I’ve discovered that goddess braids work wonderfully with various hair textures, making them ideal for toddlers with different hair types.
The key is keeping things comfortable—I always ensure the braids aren’t too tight around my daughter’s hairline. For beginners unfamiliar with more complex braiding, starting with simple two-strand twists provides excellent practice before attempting goddess braids. This approach has saved me countless tears (from both of us) during our hair journey!
How to maintain Goddess Braids
Proper maintenance extends the life of goddess braids significantly. I’ve learned that gentle handling is absolutely crucial—no tugging or pulling that could cause breakage or frizz. At night, a silk or satin pillowcase (or bonnet) prevents friction that would otherwise disrupt those carefully placed braids.
Hydration remains essential for healthy braids. I regularly apply water-based moisturizers directly to the scalp, gently massaging to ensure moisture reaches the innermost layers. For a quick refresh between washings, I mist the braids with lightweight essential oil sprays that revive their appearance without buildup.
Despite their durability, goddess braids typically need refreshing after 2-3 weeks. Scheduling regular touch-ups keeps everything looking neat without compromising hair health.
Bead color combinations for Goddess Braids
The beauty of goddess braids truly shines through thoughtful bead selections:
- Monochromatic magic: Using varying shades of a single color (like purple from lavender to deep plum) creates sophisticated dimension.
- Complementary colors: Pairing opposites on the color wheel—yellow/purple or blue/orange—makes beads truly pop.
- Theme-based selections: My daughter loves when I coordinate beads with holidays or her favorite storybook characters.
Soft, child-safe beads remain my top priority—typically silicone or lightweight wood that won’t cause discomfort during active play or naptime.
Minnie Mouse Inspired Braids

Discovering Minnie Mouse inspired braids has been a game-changer in my toddler hairstyling repertoire! These adorable styles perfectly blend practicality with that special Disney magic every little one deserves.
Minnie Mouse Braids concept
The charming concept behind Minnie Mouse braids centers around creating Mickey’s iconic ears using the child’s own hair. Instead of purchasing costume ears, we can craft these playful shapes through strategic braiding patterns. Typically, I achieve this look by creating two bun-shaped sections on top of the head that resemble Minnie’s signature ears.
For parents who aren’t cornrowing experts, twisting works wonderfully as an alternative technique. I’ve found that even beginners can achieve this look with some patience. The basic design involves creating a foundation of braids that support the “ear” structures, often incorporating a bow element that mimics Minnie’s classic accessory.
Naturally, many variations exist – from subtle everyday styles to elaborate designs for special occasions. What makes these braids truly special is how they transform ordinary hairstyles into character-inspired creations without requiring complex techniques.
Perfect events for Minnie Mouse Braids
These enchanting braids shine at Disney-themed birthday celebrations where they complement the overall theme perfectly. As a matter of fact, they’re ideal for any child’s birthday party, adding that special touch to make the birthday girl feel extraordinary.
Beyond birthdays, I’ve styled these braids for:
- Disney park visits – where they’re both practical and thematic
- School spirit days or costume events
- Holiday celebrations, particularly Christmas
What I appreciate most about these styles is their versatility – they work equally well for everyday wear as they do for special events. My daughter occasionally requests them for regular school days when she wants to feel extra special!
Accessories to pair with Minnie Mouse Braids
The right accessories elevate Minnie Mouse braids from cute to spectacular. Red satin bows naturally complement these styles, echoing Minnie’s classic look. For something more elaborate, consider hair clips featuring Minnie Mouse puffy icons that attach securely to braids.
Silver star snap clips and polka dot hair clips further enhance the Minnie esthetic without overwhelming the design. For customization, bobby pins with Minnie lettering offer a subtle yet personalized touch that toddlers absolutely adore.
Although beads remain essential, carefully selecting their color and placement makes all the difference – I typically use red and white beads to match Minnie’s traditional color scheme. These accessories transform simple braids into magical creations that delight both parent and child alike.
Cornrows with Beads

Cornrows have become my reliable solution for managing my toddler’s hair throughout the busy week. These classic braids offer both style and practicality that few other hairstyles can match.
Cornrows with Beads basics
Typically, I start by moisturizing my little one’s hair with a light leave-in conditioner or hair butter to nourish and protect those delicate strands. Next, I section her hair carefully before creating neat, close-to-scalp braids. For toddlers with finer hair, I’ve found that making slightly larger sections prevents tension on sensitive scalps.
The magic happens when adding beads! I place them at the ends of each cornrow using a beader tool or threader, which makes the process surprisingly simple. My daughter sits through the styling much better when I have her favorite show playing nearby.
Why Cornrows are a protective style
Indeed, cornrows are much more than just adorable – they’re functional too! These braids help minimize breakage by keeping hair secured and reducing daily manipulation. Primarily, they protect those fragile ends from constant friction against clothing and bedding.
For active toddlers who play hard, cornrows keep hair neat and tangle-free for up to two weeks when properly maintained. Subsequently, wash day becomes significantly easier without having to battle through knots and tangles.
Cornrow patterns toddlers love
Naturally, the simple straight-back cornrow pattern remains timeless and versatile for school or playdates. However, my daughter absolutely adores these creative variations:
- Zigzag cornrows that add playful personality
- Heart-shaped patterns for extra cuteness
- Simple cornrows leading to a ponytail or puff for active days
Generally, I recommend taking down cornrows after 7-10 days to give your toddler’s scalp a chance to breathe before restyling.
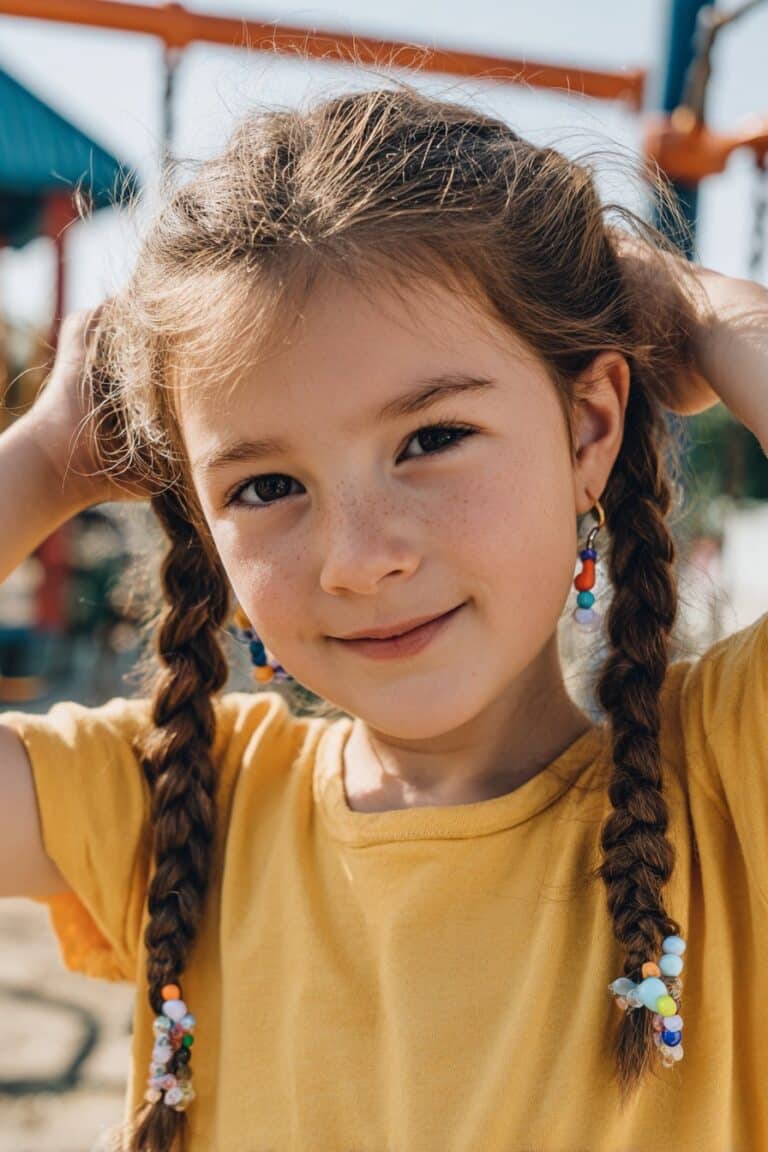
Braided Pigtails with Beads

Braided pigtails remain my family’s timeless favorite among all toddler braid styles with beads. This classic look balances simplicity with playfulness perfectly for my active little one.
Braided Pigtails style guide
Initially, I prepare by gathering essential tools: paddle brush, comb, detangler spray, and elastic hair ties. For best results, I start with slightly damp hair sprayed with detangler to remove knots. Next, I create a clean center part and divide the hair into two equal sections. After securing each section with a hair tie, I divide each pigtail into three strands and braid downward, finishing with another elastic.
For toddlers who struggle sitting still, I’ve found that putting on their favorite show dramatically improves cooperation! Alternatively, creating the style while they’re freshly bathed works wonders.
Bead types for Braided Pigtails
Naturally, bead selection impacts the overall look. Small clear plastic beads work wonderfully for everyday styles, while colorful options add personality for special occasions. Jumbo beads make bold statements—my daughter loves pink jumbo beads that create an eye-catching finish.
Occasions to wear Braided Pigtails
This versatile style transitions seamlessly between environments. For school days, braided pigtails keep hair neat during active play. Remarkably, they can become special occasion-ready with decorative beads matching outfits. My favorite styling tip: have your child sleep with braids in and remove them the next morning for beautiful waves for special events.
Back-to-School Braids

As August approaches, I find myself planning protective toddler braid styles with beads for the upcoming school year. These styles have saved us countless morning tears and rushing!
Back-to-School Braids ideas
Specifically for school days, I prefer durable styles like cornrows with colorful beads that stay neat throughout the week. Half-up half-down braids work wonderfully for younger children still adjusting to school routines. Natural plaits hairstyles offer that perfect balance between practicality and cuteness that teachers appreciate.
Simple toddler braid styles with beads
Undoubtedly, the most school-friendly styles include:
- Lemonade braids with secured beads (perfect for active playground time)
- Simple cornrow styles that remain neat even after naptime
- Low braided ponytails that don’t interfere with classroom activities
How to keep braids neat during school
Naturally, proper maintenance extends the life of school styles. I’ve learned to wrap my daughter’s hair in a silk scarf nightly, which dramatically reduces frizz and matting. Applying a light water-based moisturizer every other day keeps her scalp comfortable without product buildup.
Additionally, packing extra elastics and barrettes in her backpack helps teachers assist with quick fixes after PE or recess. Remember that protective styles should be refreshed every 2-3 weeks to prevent matting that could damage delicate hair. This schedule aligns perfectly with most school calendars!
Mixed Baby Curls with Beads

Working with my daughter’s mixed curly hair presents unique challenges that require special techniques. For mothers navigating this territory, I understand both the joys and struggles!
Mixed Baby Curls styling
Styling mixed curly hair begins with proper preparation. I typically section my daughter’s hair into 4-5 manageable parts with clips before attempting any braiding. Small sections work best as they’re easier to handle and reduce styling time. After braiding, I connect them into ponytails with beads for a look that appears intricate yet is surprisingly simple.
Beads that complement curly textures
The right beads make all the difference for curly hair. I’ve discovered that silicone beads are gentler on delicate curls compared to traditional plastic ones. Gold beads create beautiful contrast against darker hair tones. For installation, a beading tool is absolutely essential—it transforms a potentially frustrating process into something manageable. Thereafter, I secure beads by flipping hair up through the last bead and adding a rubber band.
Tips for detangling before braiding
Detangling curly hair properly is crucial! I rarely use combs, preferring to finger-detangle when her hair is wet and saturated with conditioner. Working from the ends upward prevents unnecessary breakage. For nighttime protection, I place her hair in a high “pineapple” ponytail and cover with a satin cap—this dramatically reduces morning tangles while preserving curl pattern.
Birthday Braids with Beads

Birthdays call for something extra special in the world of toddler braids and beads! Throughout my years of styling little ones’ hair, birthday celebrations have inspired some of my most creative braid designs.
Birthday Braids inspiration
Birthday braids range from gorgeous lemonade braids with colorful beads to stylish tribal designs that make any celebration memorable. Minnie Mouse inspired birthday hair has become increasingly popular, creating adorable theme-based styles perfect for the special day. Naturally, heart-shaped parts paired with vibrant braiding hair create eye-catching designs that photograph beautifully for birthday memories.
How to make them festive
Transforming regular braids into celebration-worthy styles starts with unique partitioning patterns. Typically, I create half-up half-down boho braids for a relaxed yet festive look. Alternatively, incorporating two simple braids with bright extensions adds immediate party flair. Fortunately, even three-part sections with pink jumbo beads create stunning results for birthday celebrations.
Best beads for birthday themes
Selecting the right beads dramatically enhances birthday styles:
- Theme-colored beads matching party decorations
- Heart-shaped beads for added sweetness
- Jumbo colorful beads that create visual impact
Ultimately, birthday braids give toddlers that extra confidence boost as everyone celebrates them. Considering the occasion, these styles combine protection with personality—creating hairstyles worth remembering long after the cake is gone.
Braids with Ribbons and Beads

Incorporating ribbons with beads has elevated my toddler’s braids to an entirely new level of cuteness. These eye-catching combinations create magical styles that my little girl absolutely adores.
Combining ribbons and beads
Typically, I section my daughter’s hair into three parts, creating two braids in each section before securing the ends with colorful bands. Next, I thread pink jumbo beads onto the braids for that perfect pop of color. Even with simple cornrows, adding both elements creates a charming look that holds up wonderfully during playtime.
Creative ribbon styles
My favorite technique involves the 4-strand ribbon braid, which works beautifully for both ponytails and loose styles. For special occasions, I create criss-cross ribbon hairstyles that transform ordinary braids into something spectacular. Often, I prepare everything beforehand – elastics, ribbons, combs, water – as this helps me work quickly while my daughter is distracted with toys or snacks.
Safety tips for ribbons in toddler hair
Safety remains my priority whenever using accessories. I’ve learned to:
- Keep ribbons loose enough to prevent pulling
- Never leave ribbons in during naps or bedtime
- Choose breathable, lightweight materials
Involving my toddler in choosing ribbon colors has made grooming a bonding experience that nurtures her self-expression. Even imperfect braids look absolutely adorable with ribbons and beads!
Protective Braids with Beads

Protective styling has transformed how I approach my toddler’s hair care routine. These techniques do much more than just look adorable—they’re functional solutions that support healthy hair development.
Why protective styles matter
Protective hairstyles shield delicate toddler hair from daily damage. Naturally, these styles tuck away ends and protect strands from harsh elements like sun exposure and winter cold. In reality, protective braids with beads create a barrier against friction from clothing, bedding, and even energetic playground activities. For my daughter, these styles have been crucial during seasonal transitions when her hair would otherwise become excessively dry.
Toddler braids and beads for hair health
Admittedly, while beads add charm to protective styles, balance is essential. I’ve learned not to cover the entire braid with beads as the weight can stress delicate scalps. Obviously, protective styles promote growth by reducing breakage and allowing new hair to thrive. They also lock in moisture—a significant benefit for toddlers with textured hair that tends to dry out quickly.
How long to keep protective braids
Certainly, despite their benefits, protective styles shouldn’t stay in too long. For my toddler, I remove braids after 2-3 weeks maximum, though some styles may only last 10 days before losing softness. Ultimately, watching for signs like frizzing, build-up, or scalp irritation tells me when it’s time for a change. Between styles, I always give her hair a rest period to breathe before applying a new protective style.
African-Inspired Toddler Braids

Exploring African-inspired toddler braids with my daughter has opened a fascinating window into centuries of rich cultural tradition. These timeless styles connect our little ones to a heritage that spans continents and generations.
Cultural roots of African braids
The history of African braids stretches back thousands of years, far beyond being mere hairstyles. Accordingly, in ancient African societies, braided patterns served as visual “ID cards” showing family membership, marital status, and age. Throughout different regions, braids evolved unique meanings—box braids adorned with beads in South Africa symbolized wealth and marriage readiness. Alongside their cultural significance, these styles later gained functional importance during slavery, sometimes serving as secret messaging systems between those seeking freedom.
Popular African toddler braid styles
Hereafter are traditional styles I’ve adapted for my toddler:
- Cornrows: These timeless braids appear in ancient African sculptures, showing their historical importance
- Fulani braids: From West Africa, these usually feature beads and cowrie shells
- Bantu knots: Originating with the Zulu tribe, these create protective buns perfect for active toddlers
Beads used in African traditions
Prior to modern styling, beads carried profound meanings across African cultures. Specific colors represented prosperity, spirituality, or ancestry. In West Africa, Fulani braids incorporated cowrie shells alongside beads, adding both beauty and historical significance. Forthwith, these traditions continue as we adorn our little ones’ hair with beads that honor cultural heritage.
Simple Side Braids with Beads

Side braids offer that perfect solution for those mornings when I need my toddler looking cute without spending ages on her hair. These easy styles have saved us countless times before daycare drop-offs!
How to do side braids
I start by parting my daughter’s hair just off-center. On the side with more hair, I take a thin line along the part, about two inches long, dividing it into three pieces. Then I begin braiding down the hairline, adding hair only from the front – almost like a half-French braid. The key is grabbing small half-inch sections from the front as you go. Once past the ear, I continue braiding until reaching the middle back of her head, securing with a small elastic.
Best for quick styling
Primarily, these braids shine on rushed mornings when we’re running late. This simple side style works wonderfully for both short and long hair, making it versatile for different growth stages. Whenever my toddler refuses to sit still for more complex styles, this five-minute option saves the day without sacrificing cuteness.
Beads that enhance side braids
Naturally, adding colorful beads transforms these simple braids into statement styles. Jumbo pink beads create eye-catching accents that my daughter loves showing off to her friends. Typically, I thread 2-3 beads onto each finished braid, creating a delightful sound as she moves throughout her day.
Double Bun Braids with Beads

Double bun braids quickly became a favorite in our household once I discovered how practical yet adorable they look on my little one. These styles create that perfect balance between playfulness and functionality.
Double Bun Braids explained
Creating these cute buns is remarkably straightforward. First, I section my daughter’s hair into three parts, then create two braids within each section. Next, I secure each braid with an elastic before twisting them into buns at the desired height. For extra security, I use a second elastic—one to hold the initial braid and another to wrap into the bun shape. This simple trick keeps the style intact throughout even the most active days.
Fun and playful look
What makes this style truly special is how it combines practical elements with playful charm. The buns keep flyaway hairs tightly in place even for toddlers with layers. Whenever my daughter goes swimming or plays outside, these braided buns remain perfectly intact. Plus, they create an adorable silhouette that works wonderfully for both everyday wear and special occasions.
Bead placement for double buns
For embellishment, I add pink jumbo beads at the base of each bun. Alternatively, placing “clucker-balls” (colorful ball-shaped beads) around the circumference of each bun creates a festive, party-ready look. These accents transform simple braided buns into eye-catching styles that my daughter absolutely loves showing off.
Conclusion
After exploring these 15 adorable toddler braid styles with beads, my journey through hair styling for little ones has truly transformed. These styles have saved me countless mornings of frustration while giving my daughter that perfect blend of protection and personality. My little one beams with confidence whenever she catches her reflection with colorful beads adorning her braids.
Protective styling remains the primary benefit of these braided looks. Regardless of which style you choose, these braids shield delicate strands from daily wear and tear, reducing breakage and tangling. Additionally, most styles last anywhere from 1-3 weeks depending on your child’s activity level, making morning routines significantly easier.
Choosing the right style depends on several factors. For busy school days, cornrows or simple side braids offer practical solutions that stay neat through active play. Birthday celebrations or special events call for more elaborate designs like heart-shaped patterns or Minnie Mouse-inspired creations.
My daughter particularly loves the gentle tinkling sound her beads make as she runs around. This small detail brings her such joy, turning an ordinary hairstyle into something magical for her. Watching her confidence bloom with each new style has made every minute spent learning these techniques worthwhile.
Though mastering these styles took practice, starting with simpler options built my confidence gradually. Patience definitely paid off! Each style became easier with repeated attempts, and now even the more complex designs feel manageable.
Toddler braids with beads connect our children to rich cultural traditions while offering practical benefits for everyday wear. These versatile styles have become an essential part of our hair care routine, creating beautiful moments between my daughter and me as she sits patiently (most days!) while I work through each braid. Try one of these styles today – your little one will undoubtedly love the results as much as mine does!