I still remember the moment I realized how much a hairstyle could transform not just a look, but a feeling. I was getting ready for a wedding years ago — back when I was just starting out in the beauty world — and I had absolutely no idea what to do with my hair. I tried three different styles, failed twice, and ended up with a messy bun that looked more “Sunday morning” than “elegant celebration.” I vowed that day to never let another woman feel that kind of pre-wedding-guest panic again.
That experience is honestly part of why I’m so passionate about sharing what I know. Whether you’re the maid of honor, a close friend of the couple, or a distant cousin who got the invitation last minute, finding the right updo as a wedding guest matters more than people give it credit for. Your hair is part of your entire look — it frames your face, complements your outfit, and speaks to the occasion.
So today, I’m sharing 14 of my absolute favorite updo hairstyles for wedding guests. I’ve handpicked these because they’re elegant, versatile, and actually doable. I’ve also made sure to include some truly unique and stunning cassie braid styles, because textured and braided hair deserves just as much spotlight at any wedding. Let’s get into it.
The Classic French Twist
What Is It And How It Works
The French Twist is one of those timeless updos that never goes out of style, and honestly, that’s what I love most about it. It’s a vertical roll of hair that sweeps upward along the back of the head, creating a sleek, sophisticated silhouette. There’s something about it that feels effortlessly chic — like the hairstyle equivalent of a little black dress. It works beautifully for formal and semi-formal weddings alike, and it pairs perfectly with everything from a satin gown to a floral midi dress. The structure of the twist holds the hair neatly in place while giving you that polished, elongated neck look that photographs absolutely beautifully.
Best For Formal And Black-Tie Weddings
This style is best for women with medium to long hair who want a polished, put-together look without feeling overdressed. It also works wonderfully for those who want to show off statement earrings or a beautiful neckline, since it lifts all the hair away from the face and neck entirely. If you’re attending a black-tie wedding or an elegant indoor ceremony with a formal dress code, the French Twist is your absolute best friend. It also holds up beautifully through hours of dancing, dining, and celebrating without losing its shape.
How To Make It — Tips
Start by applying a light smoothing cream or mousse to damp hair and blow dry it smooth. Once dry, gather all your hair to one side at the back and begin twisting it upward toward the crown. As you twist, tuck the ends under and secure everything with bobby pins inserted horizontally into the roll. The key is to keep the twist tight at the base and looser toward the top for a more graceful finish. Spray with a firm-hold hairspray and pull out just a few face-framing pieces at the temples if you want a softer, more romantic version. If your hair tends to be slippery, a tiny bit of dry shampoo at the roots before you start will give you so much more grip and hold.
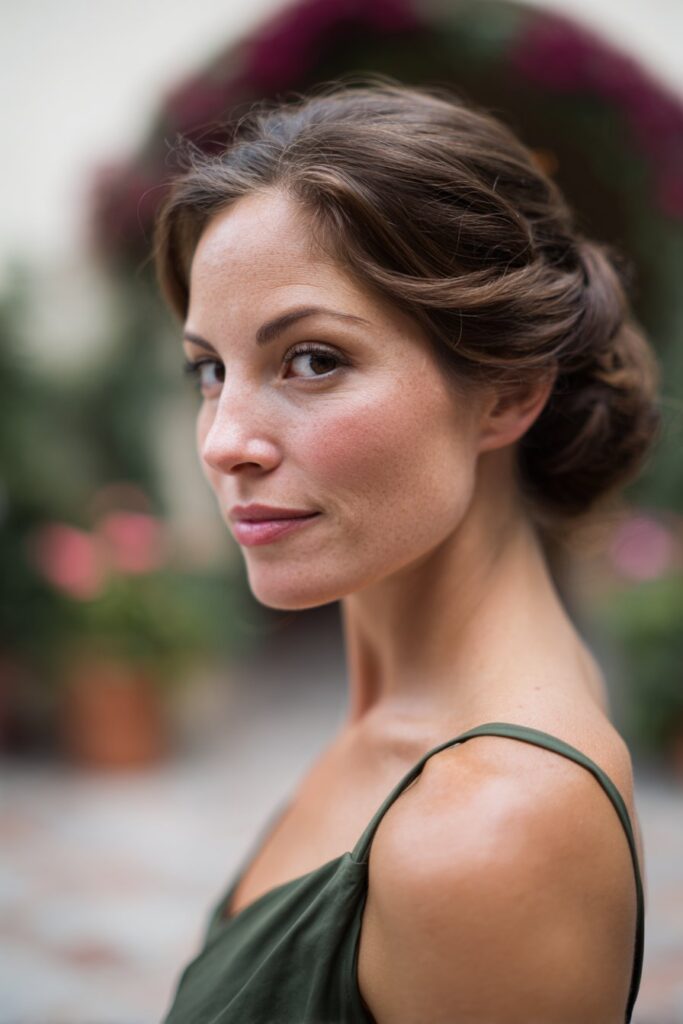
The Low Chignon Bun

What Is It And How It Works
If I had to name one updo that works for literally every type of wedding guest, the low chignon would win every single time. It’s the kind of hairstyle that looks like you spent hours on it, but once you know the trick, it comes together in under twenty minutes. A chignon is essentially a smooth, neatly-coiled bun worn at the nape of the neck. What sets it apart from a regular bun is the intentional, sculpted quality of it — the hair wraps around itself in a clean, refined way that looks both classic and modern at the same time.
Best For All Face Shapes And Wedding Themes
The low chignon is incredibly flattering for all face shapes, which is part of why I recommend it so often. It elongates round faces, softens angular ones, and adds elegance to oval faces. Whether the wedding is on a sunny beach, in a rustic barn, or inside a grand cathedral, this style fits right in. It’s also one of the most comfortable updos you can wear because the weight of the bun sits low and balanced at the back, so you won’t feel any tugging or tension at the crown after hours of wearing it.
How To Make It — Tips
Begin with clean, smoothed hair and gather it into a low ponytail at the nape of your neck. Secure it with a hair tie, then twist the ponytail tightly until it begins to coil naturally on its own. Wrap that coil around the base of the ponytail and pin it down with bobby pins tucked into the coil itself so they’re completely invisible. For a more polished finish, wrap a thin section of hair around the hair tie before you start coiling so the elastic is hidden completely. Finish with a shine spray to give it that glossy, luxurious look. If you have layers or shorter pieces, just pin them up individually and they’ll add beautiful texture to the overall bun.
Braided Crown Updo

What Is It And How It Works
There is something almost ethereal about a braided crown, and every time I create one on a client heading to a wedding, she looks in the mirror and her whole face just lights up. This style involves braiding sections of hair and wrapping them across the top of the head like a halo or crown, creating a look that feels both romantic and regal. Depending on how you braid and how loosely you pull the pieces, it can range from bohemian and soft to structured and editorial. It’s one of those styles that looks incredibly intentional without feeling stiff or overdone.
Best For Outdoor And Bohemian Weddings
The braided crown updo is absolutely perfect for outdoor ceremonies, garden parties, boho-themed weddings, and rustic celebrations. It keeps your hair completely off your face and neck, which is a genuine blessing if you’re celebrating in warm weather. It also photographs incredibly well because the braids catch the light beautifully, especially if you add a few small florals or pearl pins tucked into the braid. Women with thick or wavy hair will find this style especially forgiving and flattering.
How To Make It — Tips
Part your hair down the middle and braid each section, starting behind your ears. A Dutch braid or simple three-strand braid both work well here. Once both braids are done, bring the left braid over the top of your head toward the right side and pin it down behind your ear. Repeat with the right braid, overlapping it over the first. Tuck the ends under and pin them securely. For a softer, more romantic finish, gently tug at the outer edges of each braid to widen and loosen them before pinning. Add a small spritz of flexible hold spray and you have a look that will stay beautiful from the ceremony all the way through the last dance.
Twisted Half-Up Updo
What Is It And How It Works
Not every wedding calls for a full updo, and that is perfectly okay. Sometimes the occasion calls for something that feels a little more relaxed and playful while still being clearly elegant. The twisted half-up updo does exactly that — it takes sections of hair from either side of the head, twists them back, and joins them together at the center back, leaving the rest of the hair flowing freely below. It’s a beautifully balanced style that gives you the polished framing of an updo with the romantic movement of loose waves beneath.
Best For Semi-Formal And Daytime Weddings
This style is ideal for daytime weddings, brunch receptions, and semi-formal celebrations where a full updo might feel like too much. It’s also a wonderful choice if you’ve recently cut your hair shorter and don’t have enough length for a full updo just yet. Women with natural waves or curls will find this style especially gorgeous because the texture of the loose lower half adds so much visual interest and dimension to the overall look.
How To Make It — Tips
Start with either natural waves or add some loose curls with a one-inch barrel iron. Once your hair is ready, take a two-inch section from the right side of your head, twist it toward the back, and hold it. Do the same on the left side. Bring both twisted sections to the center back of your head, overlap them slightly, and secure with two or three bobby pins. Gently pull at the twists to loosen them so they look airy and effortless rather than tight and severe. Finish with a light-hold spray so the lower section stays bouncy and beautiful throughout the event.
Sleek High Ponytail Updo

What Is It And How It Works
I know what you might be thinking — a ponytail as an updo for a wedding? Hear me out, because when done right, a sleek high ponytail is genuinely one of the most stunning and fashion-forward looks you can wear as a wedding guest. This is not your everyday ponytail. This is a sculpted, elevated ponytail worn high at the crown of the head with a wrapped base, smooth sides, and a dramatic tail that can be straight, wavy, or curled. It’s bold, it’s modern, and it makes a statement in the best possible way.
Best For Modern And Fashion-Forward Weddings
This style shines at contemporary weddings, rooftop celebrations, city venues, and events where the dress code leans fashion-forward rather than traditionally formal. It’s also one of the best styles for women who love bold makeup, because the clean, pulled-back silhouette puts the full focus on your face and features. If you’re planning a dramatic eye or a bold lip for the event, this hairstyle is the perfect complement.
How To Make It — Tips
Apply a generous amount of edge control or slick gel to the hairline and smooth all your hair straight back toward the crown using a boar bristle brush. Secure the ponytail firmly with a strong hair tie, then wrap a small section of hair around the base to hide the elastic and pin it underneath. For extra height and drama, gently lift the ponytail at the root after securing it. Once the base is set, you can style the tail however you like — smooth and straight for a modern editorial feel, or loose curled waves for something softer. Finish the edges with a light edge gel and a soft toothbrush for that perfectly laid look.
Vintage Victory Rolls Updo

What Is It And How It Works
If you want to walk into that wedding and truly stand out in the most glamorous way possible, vintage victory rolls are calling your name. This retro-inspired style features two large, symmetrical rolls of hair on either side of the head at the front, with the remaining hair pinned up in the back. The result is bold, theatrical, and absolutely unforgettable. It’s one of those styles that makes people stop and stare in the most wonderful way, and I have had clients come back to me after events saying strangers were asking them who did their hair.
Best For Themed And Vintage-Inspired Weddings
Victory rolls are a natural choice for couples who are throwing a vintage or retro-themed wedding, but they honestly work for any occasion where you want your hair to be a true style statement. They’re also a fantastic choice for women with shorter hair, because you don’t need a lot of length to create the rolls themselves. Pair this look with a bold lip and some cat-eye liner and you will look absolutely stunning from every angle.
How To Make It — Tips
Divide the front section of your hair into two equal parts, one on each side. Take one section, comb it smooth, and roll it upward toward your scalp, tucking the ends under as you go to form a tight cylinder shape. Secure the roll with bobby pins inserted underneath so they stay hidden. Repeat on the other side, making sure both rolls are symmetrical in size and height. Pin the remaining back section into a neat chignon or pinned-up style to complete the look. A generous amount of firm-hold hairspray will keep the rolls crisp and intact throughout a long evening of celebration.
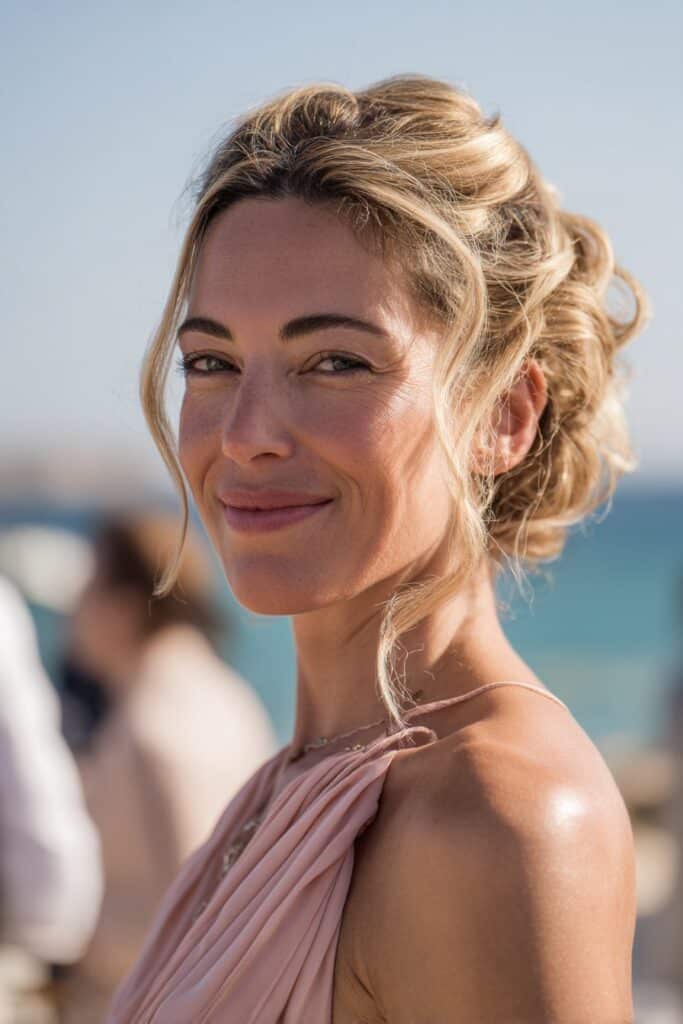
Romantic Loose Updo With Face-Framing Tendrils

What Is It And How It Works
Some of my clients come to me and say they want an updo, but they also don’t want to look too done-up. They want something that feels romantic, relaxed, and beautiful all at once. The romantic loose updo with face-framing tendrils is my answer every single time. This style gathers the bulk of the hair up into a soft, undone knot or bun at the back while intentionally leaving a few wavy or curled pieces loose around the face. It’s effortlessly beautiful in a way that looks natural even though it absolutely takes some thought and skill to put together well.
Best For Beach And Garden Weddings
This style was practically born for beach and garden weddings. The soft, undone quality of it harmonizes perfectly with natural, open-air settings where a stiff or over-styled look would feel out of place. It’s also a wonderful choice for women with fine or thin hair because the loose, airy quality of the style doesn’t put pressure on the hair the way tighter updos can. Adding a few small flowers, crystal pins, or pearl clips to the knot at the back takes this look to an entirely new level of beauty.
How To Make It — Tips
Curl your entire hair loosely with a one-and-a-quarter-inch barrel iron, then let the curls cool completely. Gently tousle them with your fingers to break them up into soft waves. Gather the main body of your hair into a loose, low knot at the back — don’t overthink it, the messier the better here — and secure it with a few pins. Pull out two or three pieces on each side of your face and encourage them to curl softly by wrapping them around your finger. Finish with a light mist of flexible hold spray to keep everything soft and touchable rather than stiff and sprayed. The goal is beautiful, not perfect.
Cassie Braid Updo With Wrapped Crown

What Is It And How It Works
Cassie braids are one of the most beautiful and culturally rich hairstyles that any woman can wear, and when styled as an updo for a wedding, they are absolutely breathtaking. Named after their distinctive look — individual braids that are often parted in unique geometric patterns and styled creatively — cassie braids offer a stunning canvas for updo creativity. The wrapped crown version takes these individual braids and sweeps them upward and across the crown of the head, wrapping them into a regal, goddess-like crown that frames the face magnificently. This style is both a celebration of culture and a masterclass in elegance.
Best For Women With Natural Textured Hair
This style is particularly stunning on women with natural, textured hair who want a protective style that also looks absolutely gorgeous for a formal occasion. It’s ideal for longer cassie braids that have enough length to wrap fully across the crown. The beauty of this style is that it requires almost no heat, protects the natural hair underneath, and lasts beautifully throughout an entire day and night of celebrating. It also photographs magnificently, especially with the right accessories added to the crown.
How To Make It — Tips
Begin with fresh or recently installed cassie braids that have enough length to work with. Part a section of braids from the front of your head and sweep them across the crown toward the opposite side, pinning them down flat with large bobby pins that match your hair color for invisibility. Take the braids from the other side and bring them to meet in the middle, tucking any loose ends under the wrapped section and securing firmly. Add a few jeweled pins, gold cuffs, or small flowers into the crown wrap for an elevated, wedding-ready finish. A light edge gel along the hairline gives that polished, intentional look that makes this style truly spectacular.
Cassie Braids Into A High Bun Updo

What Is It And How It Works
Here is another cassie braid style that I absolutely love recommending for wedding guests who want maximum impact with minimum effort on the actual wedding day. Once your cassie braids are installed, all you have to do is gather them up into a high bun and the result is magnificent. The individual braids add incredible texture and dimension to what would otherwise be a simple bun, making it look intentional, artistic, and utterly gorgeous. The high placement lifts everything upward, elongates the neck, and creates a silhouette that is both powerful and deeply feminine.
Best For Women Who Want Low Morning Maintenance
This style is an absolute dream for wedding guests who don’t want to spend hours getting ready on the day of the event. Since the braids are already installed, styling literally takes about five to ten minutes. It’s also the perfect choice for women who run warm or who are attending an outdoor summer wedding, because the high bun keeps all the hair off the neck and face entirely. Add a silk wrap, a statement hair clip, or some gold cuffs at the base of the bun and you have a look that belongs on the pages of a beauty magazine.
How To Make It — Tips
Gather all your cassie braids into a high ponytail at the crown of your head and secure with a sturdy hair tie. Wrap the braids loosely around the base in a circular motion, tucking the ends under as you go and pinning them down as needed. For a more dramatic, sculptural look, fan the braids out slightly at the top before wrapping so the bun has more volume and presence. Wrap a single braid around the hair tie to conceal it entirely. Lay your edges smooth with a light edge-control product and a soft brush, then finish with a light-hold spray to keep flyaways in check throughout the entire event.
Cassie Braid Space Buns Updo

What Is It And How It Works
I have to be honest with you — when I first started recommending cassie braid space buns for wedding guests, I got a few raised eyebrows. And then my clients showed up wearing them and absolutely stole the show every single time. Space buns are two buns worn one on each side of the head at the upper crown area, and when done with cassie braids, the effect is modern, playful, and genuinely stunning. This is not a childish style — it’s a bold, artistic, and fashion-forward choice that reads as confident and creative at any celebration.
Best For Younger Guests And Fashion-Forward Weddings
Cassie braid space buns are absolutely perfect for younger wedding guests, bridal showers, colorful themed weddings, and events where the couple themselves has a fashion-forward, creative aesthetic. They’re also a gorgeous choice for women who love making a style statement and want their hair to be as much of a conversation piece as their outfit. Pair this look with bold earrings in the space between the buns and you will look absolutely unforgettable from every direction.
How To Make It — Tips
Part your cassie braids straight down the center from the front of your hairline all the way to the nape. Gather the braids on each side into a high ponytail above each ear and secure with a hair tie. Wrap the braids around the base on each side to form two even buns, pinning and tucking as you go. For a more relaxed, modern finish, let a few shorter braids fall loose around the face and ears. Add coordinating jewelry or accessories between the buns to complete the look. Make sure both buns are roughly the same size and height before you finalize with pins so the finished style looks perfectly balanced and intentional.
Cassie Braids With Side-Swept Updo

What Is It And How It Works
The side-swept updo is one of the most classically romantic hairstyles of all time, and when executed with cassie braids, it becomes something truly extraordinary. This style gathers the braids to one side of the head — usually the lower side — and pins them into a loose, flowing arrangement that cascades beautifully toward one shoulder. The asymmetry of it is what makes it so captivating. It draws the eye, creates movement, and gives the wearer a glamorous quality that is absolutely perfect for a wedding setting.
Best For Women Wanting A Glamorous Red-Carpet Feel
This style is for the woman who wants to feel like she is walking into that wedding venue as the most glamorous version of herself. It’s particularly stunning when paired with a one-shoulder dress or a deep neckline because the hair and the neckline play off each other in the most beautiful way. Women with longer cassie braids will get the most dramatic effect from this style, but medium-length braids can create a gorgeous version of it as well with the right pinning technique.
How To Make It — Tips
Start by laying your edges neatly with an edge control product and a soft brush. Gather all your cassie braids to one side — choose whichever side feels most natural or flattering to your face — and secure them loosely with a hair tie low on that side. Twist the gathered braids gently and then pin them into a loose, flowing arrangement against the lower back of your head, letting the ends fan out slightly for a dramatic, cascading effect. Tuck any loose ends underneath and secure with pins. Place a decorative clip, jeweled pin, or silk flower at the point where the braids are gathered to anchor the look and add a touch of genuine elegance.
Waterfall Braid Updo

What Is It And How It Works
The waterfall braid is one of those styles that sounds complicated but is actually much more approachable than most people think, and the payoff in terms of beauty is enormous. It’s a partial braid that runs horizontally along one side of the head, allowing sections of hair to cascade downward through the braid like a waterfall as you work across. The unbraided sections that fall through create a stunning, layered visual effect that looks incredibly intricate and romantic. When the remaining hair is then gathered and pinned up at the back, you have a full updo that looks truly extraordinary.
Best For Women With Long Layered Hair
The waterfall braid is most spectacular on women with long, layered hair because the cascading sections have enough length to create that beautiful flowing effect through the braid. It’s particularly gorgeous for outdoor ceremonies, beach weddings, and boho celebrations where there’s a natural, organic beauty aesthetic. Adding some soft curls to the hair before braiding makes the cascading sections look even more romantic and lush throughout the entire event.
How To Make It — Tips
Start on one side at the temple and begin a three-strand braid, but instead of crossing the bottom strand up as you normally would, let it drop down and replace it with a new section of hair from above. This is what creates the waterfall effect. Continue working horizontally across the back of the head, always dropping the bottom strand and picking up a fresh section from the top. When you reach the other side, secure the braid with a clear elastic or bobby pins, then gather the remaining hair into a loose, romantic updo at the nape. Secure everything with pins and finish with a flexible hold spray to maintain that beautiful, flowing movement throughout the day.
Knotted Rope Braid Updo

What Is It And How It Works
The knotted rope braid is one of those elevated techniques that I wish more women knew about, because it creates such a unique and visually interesting texture that sets it completely apart from regular braids and buns. A rope braid is created by dividing hair into two sections and twisting each section in the same direction, then wrapping the two twisted sections around each other in the opposite direction. The result is a stunning, rope-like braid with beautiful definition and texture. When this rope braid is then coiled into an updo, the effect is sophisticated and genuinely artistic.
Best For Women Who Want Texture And Dimension
This updo is perfect for women who love texture and want their hairstyle to have real visual interest rather than a smooth, sleek finish. It works beautifully on naturally textured hair, wavy hair, and hair that has been lightly curled. It’s also a wonderful choice for women whose hair tends to lose volume in sleek styles, because the rope braid technique creates natural lift and body that keeps the style looking full and lush throughout the entire day and night.
How To Make It — Tips
Start by dividing your hair into two equal sections at the back of your head. Take the right section and twist it clockwise, then take the left section and also twist it clockwise. Now wrap the right section over the left section in a counterclockwise motion — this opposing direction is what creates that beautiful rope effect. Continue down the length of the hair, keeping the tension consistent so the rope looks even and defined. Secure the end with a small elastic, then coil the rope braid up into a bun or pinned arrangement at the back of your head. The natural texture of the rope adds gorgeous visual detail to the finished style.
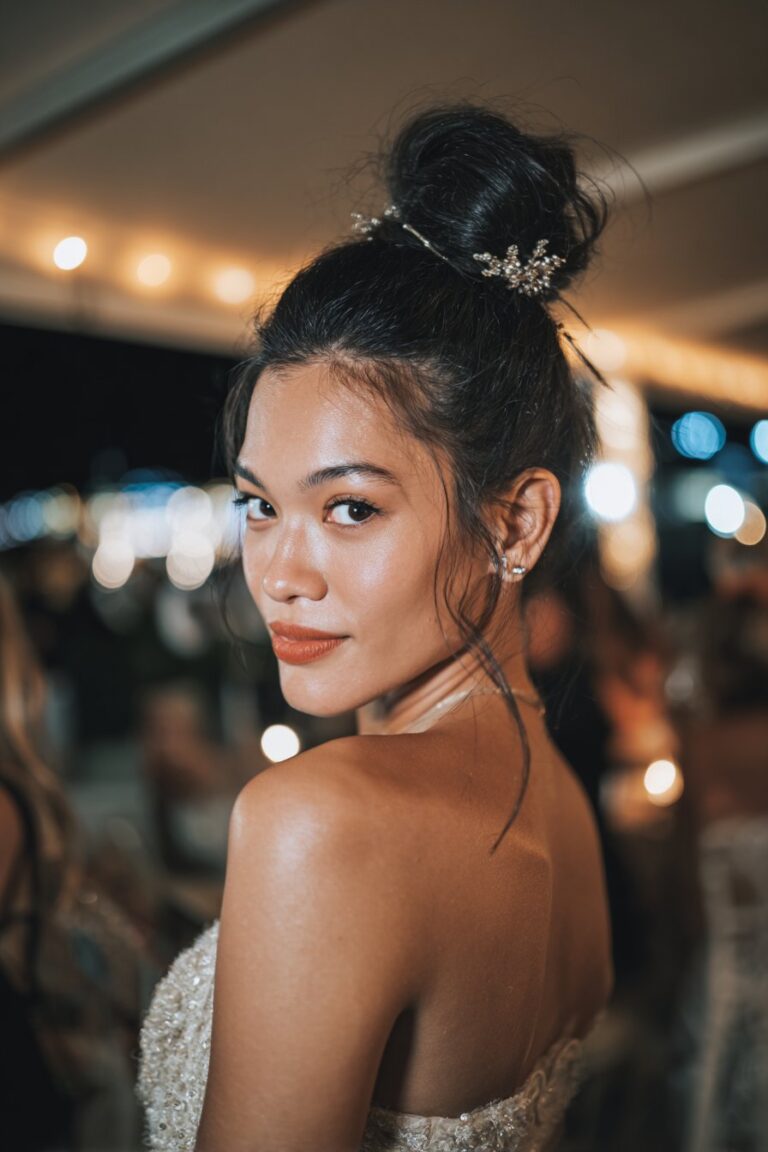
Sculptural Top Knot With Accessories

What Is It And How It Works
The sculptural top knot is my final recommendation, and I saved it for last because it is honestly one of the most versatile and easily customizable styles on this entire list. A top knot is a bun positioned high at the crown of the head, but what makes this version sculptural is the intentional shaping and styling of the bun itself. Rather than a simple coiled bun, the sculptural top knot involves deliberate folding, fanning, and shaping of the hair to create a bun that looks almost like a piece of art sitting right on top of the head. When paired with the right hair accessories — think jeweled pins, decorative combs, silk bows, or metallic clips — this style becomes truly spectacular.
Best For Women Who Love Accessorizing
This style is a dream for women who love expressing their personality through accessories. The high placement and rounded shape of the bun creates the perfect stage for showcasing beautiful hair jewelry, and the contrast between the sleek sides and the sculptural top creates a striking, fashion-editorial quality that turns heads in the best way. It works beautifully with both casual chic and formal dress codes depending on how you style the sides and choose your accessories for the day.
How To Make It — Tips
Gather your hair into a high ponytail at the crown and secure firmly with a strong hair tie. Take the ponytail and begin fanning the hair outward around the base rather than simply coiling it, shaping it into a wide, flat disc shape as you pin. The flatter and more intentional the shape, the more sculptural and modern it will look. Secure every layer with bobby pins and smooth the top surface with a boar bristle brush and a light serum for shine. Now comes the fun part — add your accessories. Arrange jeweled pins in a radiating pattern, tuck in a decorative comb on one side, or tie a silk ribbon around the base. This is where your personality truly gets to shine, and I always tell my clients to have fun with this part most of all.
Conclusion
You know, after all these years working in the beauty industry — from the early days of freelancing to sitting backstage at major fashion events, to working one-on-one with incredible women before their most important occasions — the one thing that has never changed for me is this: how you wear your hair on a special day matters. Not because beauty is about perfection or performance, but because it’s about how you feel when you look in that mirror and see yourself fully put together, fully intentional, fully yourself.
I’ve seen women cry tears of joy when the right updo comes together. I’ve watched a nervous guest walk into a salon looking unsure and walk out looking like she owned the entire room. I’ve held the hand of a client who said, “I just don’t know what to do with myself for this wedding,” and then watched her face transform when I pinned the last section of her braided crown into place. Hair does that. Hairstyling does that. And I genuinely never take that for granted.
Growing up in Savannah, I watched my mother get ready for special occasions and I was always transfixed by how the right hairstyle changed not just how she looked but how she carried herself. She stood taller. She smiled more freely. She walked into the room like she belonged there completely. That image has stayed with me through every client I’ve ever worked with, and it motivates me every single day to share everything I know about beauty with as many women as possible.
What I hope you take away from this guide is that there is absolutely an updo on this list for you. Whether you have long straight hair or beautiful natural coils, whether you’re going for sleek and sophisticated or romantic and free, whether you want to honor your roots through stunning cassie braids or channel timeless glamour with victory rolls, there is a style here that was made for you. The most important thing is to try it out before the big day, practice at least once or twice so your hands know what they’re doing, and go into that wedding feeling genuinely confident and beautiful.
And please — accessorize. A few well-placed pins, a delicate ribbon, a single fresh flower tucked into a braid — these small details elevate a hairstyle from lovely to unforgettable. They are the things people notice in photographs twenty years later. They are the things that make you feel like the most beautiful version of yourself even when the dancing starts and the night gets long and your feet are aching in those heels.
As I always say to every client who sits in my chair before a special occasion: beauty is not about hiding who you are. It’s about bringing the most radiant version of yourself forward, celebrating it fully, and sharing that light with everyone around you. Go to that wedding looking and feeling magnificent. You deserve every single moment of it.