Long hair truly offers endless possibilities when it comes to wedding hairstyles for long hair. As someone who’s styled countless brides, I’ve seen firsthand how those extra inches create the perfect canvas for everything from intricate updos to romantic flowing waves.
Fortunately, having longer locks gives you so many more options to express your personal style on your big day. Whether you’re considering classic bridal hairstyles for long hair or more modern wedding hairstyles for long hair up, each style tells a different story. I’ve found that the perfect wedding hair style for long hair isn’t just about fashion—it’s actually a reflection of your personality and love story. Not only do photographers love capturing these stunning styles, but they also know which angles and lighting will make your bride hairstyles for long hair truly shine in photos. That’s why I’ve put together this collection of gorgeous long hair bridal hairstyles to inspire your wedding day look.
Classic Hollywood Waves

Nothing says timeless elegance quite like Classic Hollywood Waves for your wedding day. Throughout my career as a stylist, I’ve created this iconic look for countless brides who want to channel that red carpet glamor.
Hollywood Waves key features
The magic of Hollywood waves lies in their smooth, structured shape that creates an unmistakably polished finish. Often called ‘Veronica Lake waves’ after the superstar who popularized them, these waves became the definition of sophisticated allure in the 1940s and 1950s.
What distinguishes these waves from other styles? Primarily, they feature large barrel curls going in the same direction, brushed out to create that soft, voluminous wave pattern. Unlike bohemian loose curls, Hollywood waves typically begin around ear level and flow down elegantly on one side. Furthermore, you can customize them with a middle or side part, and adjust how loose or tight you want them depending on your wedding vision.
Why photographers love Hollywood Waves
As someone who works closely with wedding photographers, I can tell you they adore this style! The waves frame your face beautifully, adding dimension that photographs magnificently from every angle. This versatile style complements nearly all face shapes – oval, round, square, and heart-shaped.
Photographers particularly appreciate that Hollywood waves hold their shape throughout your entire wedding day with proper styling. Consequently, you’ll look just as flawless during your reception as you did walking down the aisle – a dream for capturing those perfect moments!
Best accessories for Hollywood Waves
To complete this glamorous look, consider these stunning accessories:
- Crystal hair combs – nestled into the side of your waves to accentuate the curves while adding eye-catching sparkle
- Crystal hair vines – intertwined through your waves for a more dramatic statement
- Bridal tiaras – combining vintage glamor with princess vibes
- Jeweled headbands – framing the waves and elevating the entire look
Since Hollywood waves already create a dramatic look, I generally recommend keeping accessories somewhat minimal. A simple jeweled slide or embellished hairpiece works perfectly with the side parting that’s characteristic of this style.
Remember, this timeless bridal hairstyle for long hair offers both sophistication and staying power – the perfect combination for your special day!
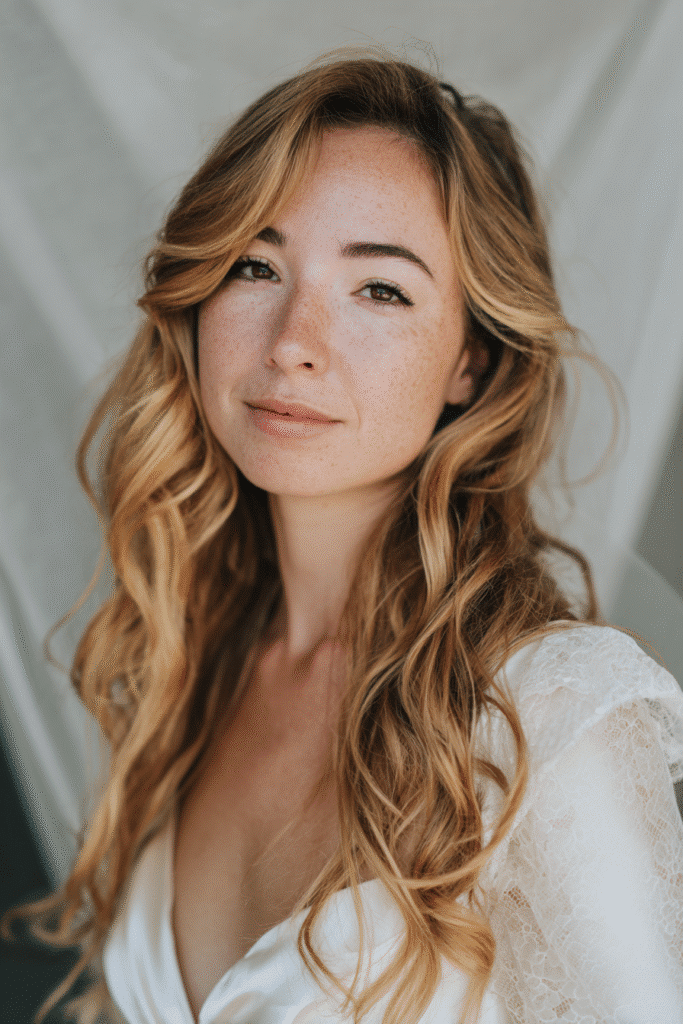
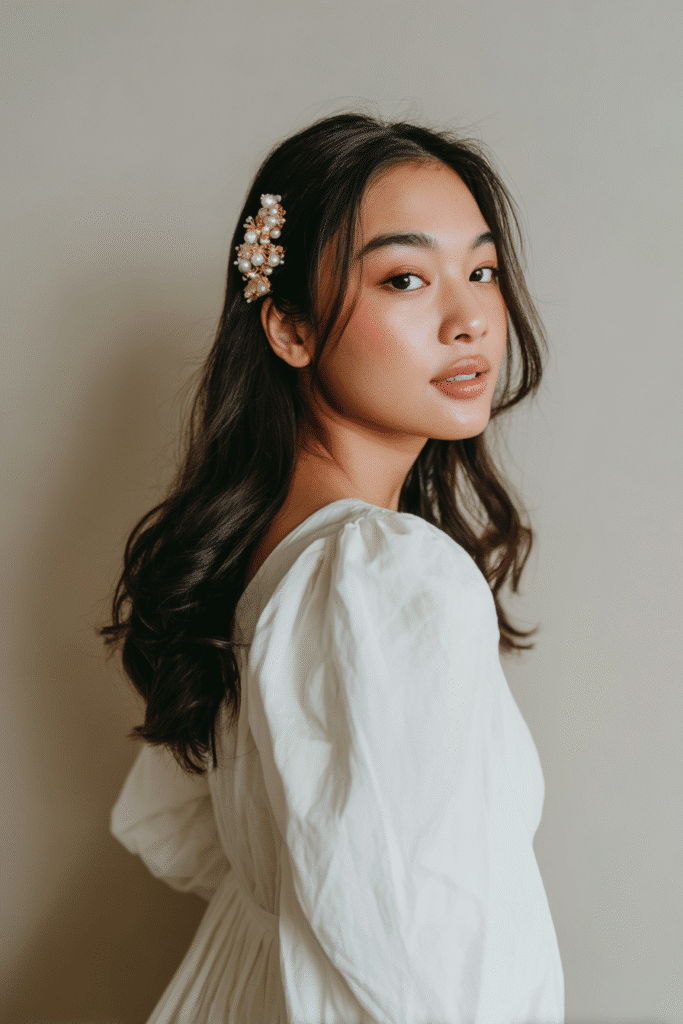
Soft Loose Curls

Soft loose curls epitomize romance and effortless elegance, making them one of my favorite wedding hairstyles for long hair. As a stylist, I’ve created this dreamy look for countless brides seeking that perfect balance of polish and natural beauty.
Soft Loose Curls styling tips
For the perfect loose curls, I always start with the right foundation. First, apply a spray gel to damp hair and blow-dry using a paddle brush for smoothness. To determine the ideal part, draw a line from your eyebrow arch diagonally back—this frames your face beautifully. Next, curl the crown area with a one-inch curling iron held vertically, then set with Velcro rollers. For the remaining hair, use a slightly smaller curling iron, wrapping one-inch sections in the same direction.
After removing the rollers, I recommend misting a boar bristle paddle brush with light-hold hairspray before gently brushing out the curls to form waves. Finally, smooth a finishing cream over strands to tame flyaways and add shine. For brides with thinner hair, chat with your stylist about extensions to add length or volume.
Soft Loose Curls for romantic themes
Naturally, loose curls complement nearly every wedding theme. For bohemian or beach ceremonies, I prefer a more tousled, fluffier finish that exudes that carefree, “I woke up like this” vibe. Additionally, garden weddings call for soft, cascading waves with perhaps a few flowers woven throughout.
Regarding accessories, loose curls pair beautifully with halos and wedding crowns for a regal look. Pearl hair pins scattered throughout create a delicate, ethereal effect that’s perfect for minimalist brides. Obviously, veils work wonderfully with this style—just ensure your stylist knows beforehand, as they’ll need extra bobby pins to secure it properly.
Belle Hathaway’s take on Soft Loose Curls
In my years styling brides, I’ve developed my own technique for creating lasting loose curls. Rather than perfectly uniform curls, I create subtle variations in curl size and direction for a more natural appearance. Meanwhile, I always leave a few face-framing tendrils regardless of whether the hair is fully down or partially pulled back.
The versatility of this style is what makes it so beloved. You can transition between looks throughout your wedding day—perhaps starting with all-down curls for the ceremony, then pulling back a small section for the reception. Remember, this timeless style photographs magnificently from every angle, capturing movement and dimension that flat styles simply can’t match.
Half-Up, Half-Down with Twists
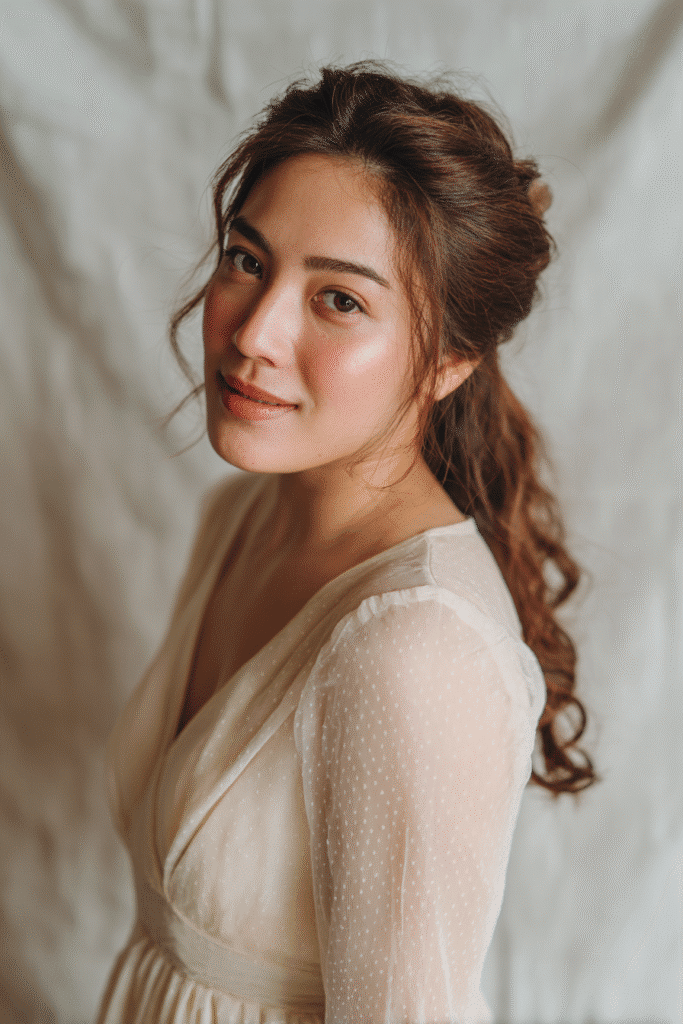
The half-up, half-down style with twists has become my signature look for brides seeking that perfect balance between sophistication and relaxed beauty. Throughout my career, I’ve found this versatile hairstyle delivers exactly what its name promises – the best of both worlds.
Half-Up style benefits
The most compelling advantage of this style is its practical versatility. Initially beloved by bohemian brides, it has evolved into a sophisticated option for various wedding themes. Indeed, this approach offers brides the elegance of an updo coupled with the romance of flowing locks.
The beauty of half-up styles lies in their staying power. From my experience, the twisted detail holds securely all day and night. This means you’ll look just as polished during your last dance as you did walking down the aisle. Moreover, the style keeps hair beautifully off your face while still showcasing your length—perfect for brides who’ve grown their hair specifically for their wedding day.
Many of my clients appreciate how easily this style transitions throughout their celebration. Some opt to have a more structured look for the ceremony, then remove a few pins for a relaxed reception style without needing a complete restyle.
Best face shapes for Half-Up styles
Through years of styling, I’ve discovered this hairstyle’s remarkable adaptability to different face shapes:
For oval faces, almost any half-up style works beautifully. I typically add soft twists or braids to highlight cheekbones, with loose curls adding a romantic touch.
With round faces, I create height at the top to visually elongate the face. Leaving soft strands around the face adds lovely dimension.
Square-faced brides benefit from styles that soften their jawline. I recommend loose curls and waves with a side twist for a softer, asymmetrical look.
For heart-shaped faces, I balance wider foreheads with narrower chins using small twists near the temples.
Accessories for Half-Up, Half-Down
The perfect accessory elevates this already stunning style. For twisted half-up styles, I recommend hair vines that accentuate the twists and curves of your hairstyle.
A bridal hair drape—made up of combs linked by pearl or crystal strands—frames this style beautifully. Simply secure the middle comb in the center of your twist.
If you’re planning to wear a veil, choose one attached to a medium-width comb (1.5-3.5 inches). Naturally, a sheer drop veil offers beautiful transparency that allows your hairstyle to shine through.
For a more subtle approach, try clustering dainty pearl pins or adding fresh flowers. These delicate touches complement without overwhelming the intricate twists in your hair.
Boho Braided Crown
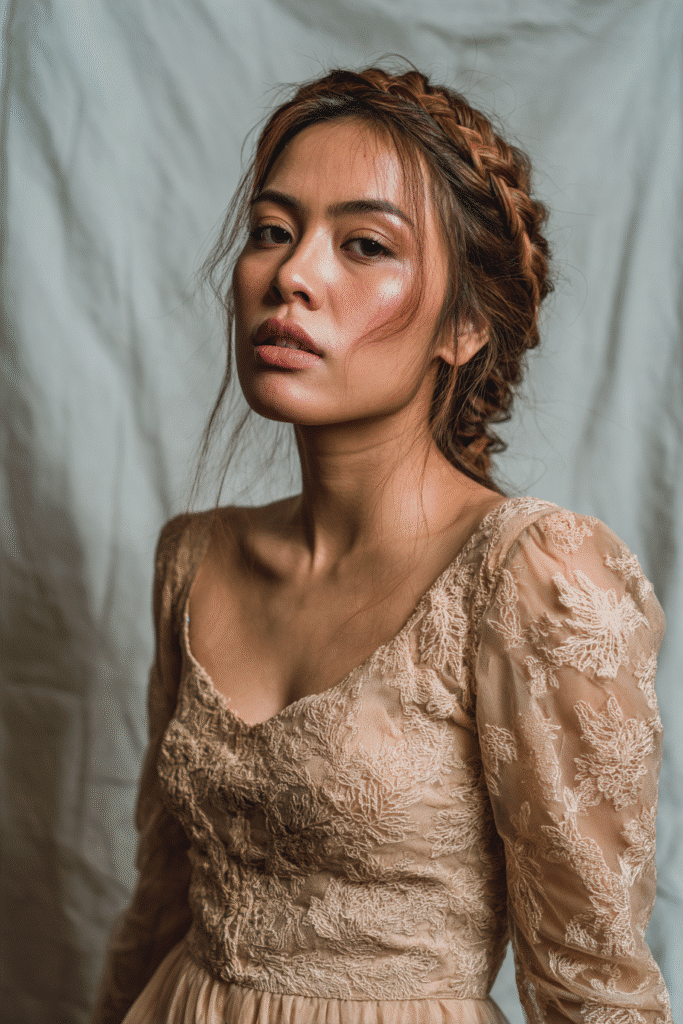
The regal and romantic boho braided crown has become my go-to recommendation for brides who want to make a statement with their wedding hairstyles for long hair. This style creates an enchanting halo effect that’s both whimsical and sophisticated.
Boho Braided Crown styling
Creating the perfect braided crown requires both technique and artistry. Essentially, I begin by parting the hair down the middle and creating two sections. Starting at the temple, I French braid each section around the head, securing with clear elastics once I reach the back. First thing to remember is to gently loosen the braids by pulling at the edges for a fuller, more relaxed look that defines this style. For brides with extra-thick hair, I use a pull-through braid technique instead, which creates more volume and texture.
To elevate this bridal hairstyle for long hair, I recommend adding:
- Delicate flowers or greenery woven throughout
- Small pearls or crystal microbeads for subtle sparkle
- Jeweled hair pins strategically placed along the crown
Ideal wedding themes for Boho Braids
Boho braided crowns pair perfectly with outdoor celebrations. With this in mind, I’ve styled countless brides for garden ceremonies, beach weddings, and rustic barn venues. The versatility of this style makes it appropriate for nearly any wedding theme that embraces a natural, relaxed esthetic.
As a matter of fact, what makes this style so special is its timeless quality. Unlike trendy styles that quickly date your wedding photos, the braided crown combines current fashion with classic appeal. Important to realize is that this hairstyle works beautifully with bohemian-inspired celebrations or traditional affairs with a modern twist.
Photographer tips for capturing braids
From collaborating with photographers, I’ve learned that braided crowns photograph magnificently from slightly elevated angles. The circular pattern creates visual interest that frames the face beautifully. Photographers typically love this bride hairstyle for long hair because it looks stunning from every direction – front, side, and back.
Natural lighting highlights the intricate texture of the braids, altogether creating dimension that flat hairstyles simply can’t match. Primarily, photographers recommend scheduling some outdoor portrait time during the “golden hour” just before sunset, when the soft light accentuates the braided details and any embellishments you’ve added.
Low Chignon with Veil
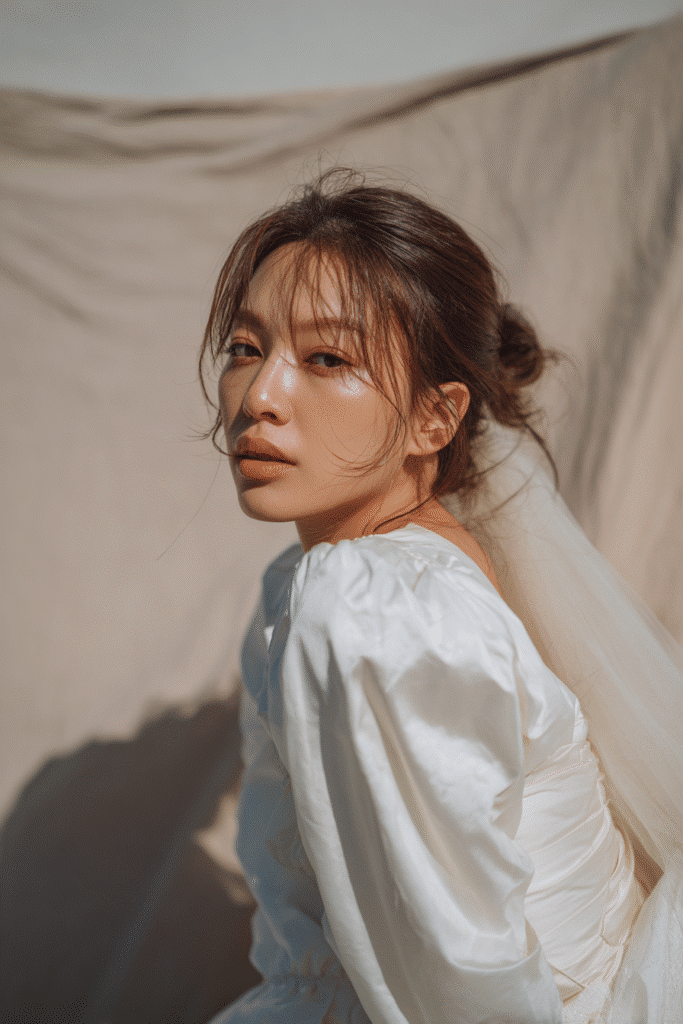
The low chignon stands as a cornerstone of bridal elegance, offering a sophisticated yet versatile option for wedding hairstyles for long hair. Throughout my career styling brides, I’ve found this refined updo creates a timeless silhouette that photographers consistently capture beautifully.
Low Chignon elegance
For formal wedding settings, the low chignon delivers unmatched sophistication. This classic style gathers your hair neatly at the nape of your neck, creating a polished look that’s both practical and refined. Naturally, texture plays a crucial role—I always apply thickening spray for fine-haired brides to ensure their chignon has sufficient volume.
What makes this style truly special is its versatility. Leaving a few strands loose around your face creates a softer, more youthful appearance while beautifully highlighting silver or highlighted tones. Even more, the low chignon works wonders for brides experiencing thinning hair—a common concern that this style elegantly addresses.
Pairing veils with Chignons
There are three distinct ways to pair your veil with a low chignon, each creating a unique esthetic. Traditionally, placing the veil on top of your bun at the crown creates a classic bridal look. This placement works exceptionally well with blusher veils and provides secure anchoring.
Alternatively, positioning your veil underneath your chignon at the nape of your neck offers a more contemporary, fashion-forward approach. This technique creates a lovely visual “gap” between your veil and a low-backed gown, yet requires more skill to execute properly.
For mantilla veils or lace-edged designs, consider placing the veil slightly forward—about 1-2 inches from the hairline—creating a beautiful halo effect that frames your face.
Belle Hathaway’s Chignon styling advice
From my years of experience, I’ve found that starting with clean hair is non-negotiable—this style showcases your roots, so freshness matters. Typically, I secure the gathered hair with a thin non-snag elastic before twisting the ponytail and wrapping it around the base to form the bun.
Instead of numerous bobby pins, I prefer using u-shaped pins for a more secure hold throughout your celebrations. Alongside this, texturizing spray provides essential grip that keeps your chignon intact during hours of dancing.
For special occasions like weddings, try my favorite variation—the wrapped chignon. Divide your hair into three sections, create the bun with the middle portion, then wrap each side strand around to conceal the hairband. This technique creates what I call “a graceful neckline perfect for showcasing elegant jewelry”.
High Voluminous Ponytail

For brides seeking a bold yet elegant statement, a high voluminous ponytail creates dramatic impact while maintaining sophistication. This eye-catching style has become increasingly popular among modern brides wanting to combine glamor with practicality.
High Ponytail for long hair
A high ponytail exudes sophistication and makes a striking statement for your wedding day. Primarily, this style works wonderfully for showcasing statement earrings or highlighting an embellished neckline. For brides with naturally long locks, this style adds height and elegantly elongates your silhouette—especially beneficial for petite brides.
In my experience, securing a ponytail that lasts through hours of dancing requires specific techniques. Wrapping a section of your own hair around the elastic creates that seamless, elegant finish photographers love. Surprisingly, even if your natural hair lacks length or thickness, extensions can transform your ponytail in minutes. Your stylist can easily integrate halo extensions, adding both volume and length—the perfect combination for a high pony that stays put regardless of how much you move.
Modern vs classic ponytail
The classic high ponytail brings timeless elegance, whereas modern interpretations offer more drama and volume. Traditionally, classic styles maintain sleek, polished finishes with minimal texturing. In contrast, today’s modern ponytails incorporate dramatic volume, teasing, and varied textures.
Above all, both styles photograph beautifully from behind, making them ideal for showcasing intricate back details on your gown. Naturally, statement earrings pair perfectly with either version, as your pulled-back hair ensures they remain visible throughout your celebration.
Best products for volume
Achieving that perfect voluminous ponytail requires specific products:
- Volumizing mousse – Apply to 40% dry hair, then dry with a round brush for flexible hold and natural movement
- Root lifting spray – Apply directly to the roots in thin sections while hair is still wet
- Volumizing powder – Use sparingly on dry hair for incredible holding power and lift
For maintaining sleekness alongside volume, I recommend a smoothing serum to keep everything polished all day and night.
Messy Bun with Hair Pins
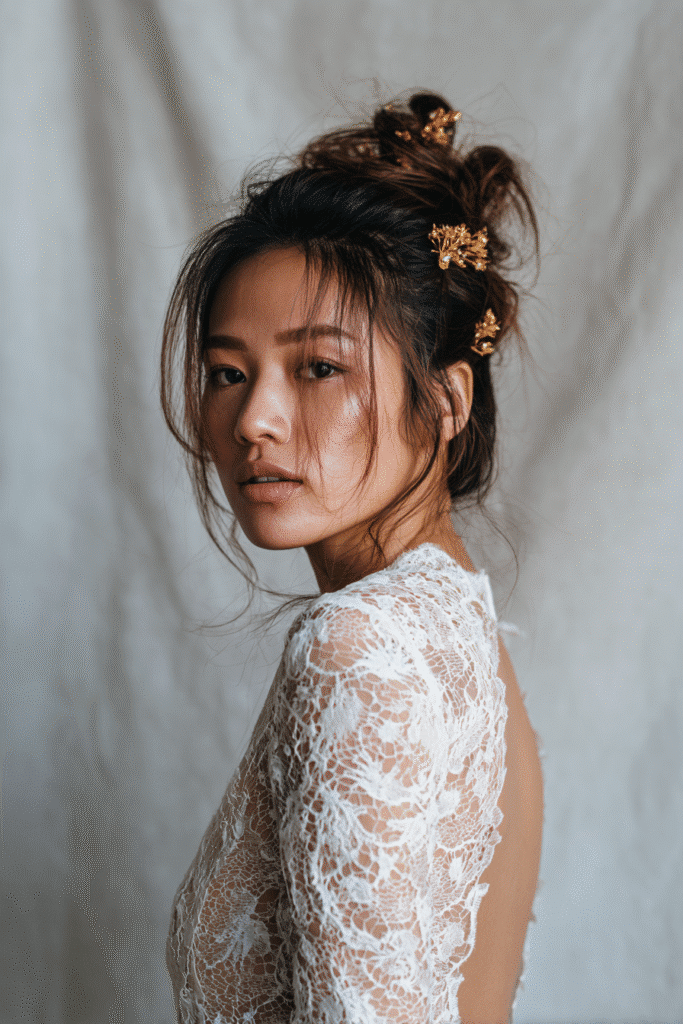
The effortlessly chic messy bun has become my favorite recommendation for brides who want that perfectly “undone” wedding hairstyle for long hair. From my experience, this versatile style strikes the ideal balance between romantic and relaxed while remaining photographer-friendly throughout your celebration.
Creating the perfect messy bun
Position is everything when crafting the perfect messy bun. A low placement creates that effortless, not-too-styled look that photographers adore. To begin, I typically gather hair into a ponytail, then pull it through a hair tie a couple times, leaving ends hanging out. For texture and hold, I always apply a light spray before styling.
The secret lies in the “pinch and pull” technique – after forming your basic bun, gently stretch small sections outward until you achieve your desired fullness. Correspondingly, coarse or layered hair typically creates better messy buns than fine, one-length hair.
Hair pin placement ideas
Strategic bobby pin placement ensures your messy bun stays put through hours of dancing. Rather than randomly inserting pins, I recommend positioning them on opposite sides of your bun, creating a crisscross pattern for maximum security. To clarify, pin both the base and outer edges of your bun, especially any twisted sections.
For brides with thicker hair, consider dividing sections into smaller pieces before pinning. Furthermore, clear elastic bands can help secure particularly stubborn sections before final bobby pin placement.
Photographer-approved angles
Photographers typically love capturing messy buns from side profiles, which showcase the dimension and texture of your style. Subsequently, adding crystal hairpins or fresh flowers creates stunning focal points that photograph beautifully from multiple angles.
According to many wedding photographers, the slightly tousled nature of a messy bun creates natural movement in photos, adding life to otherwise static images. Accordingly, leaving a few face-framing tendrils adds softness that beautifully highlights your features in close-up shots.
Sleek and Straight with Side Part
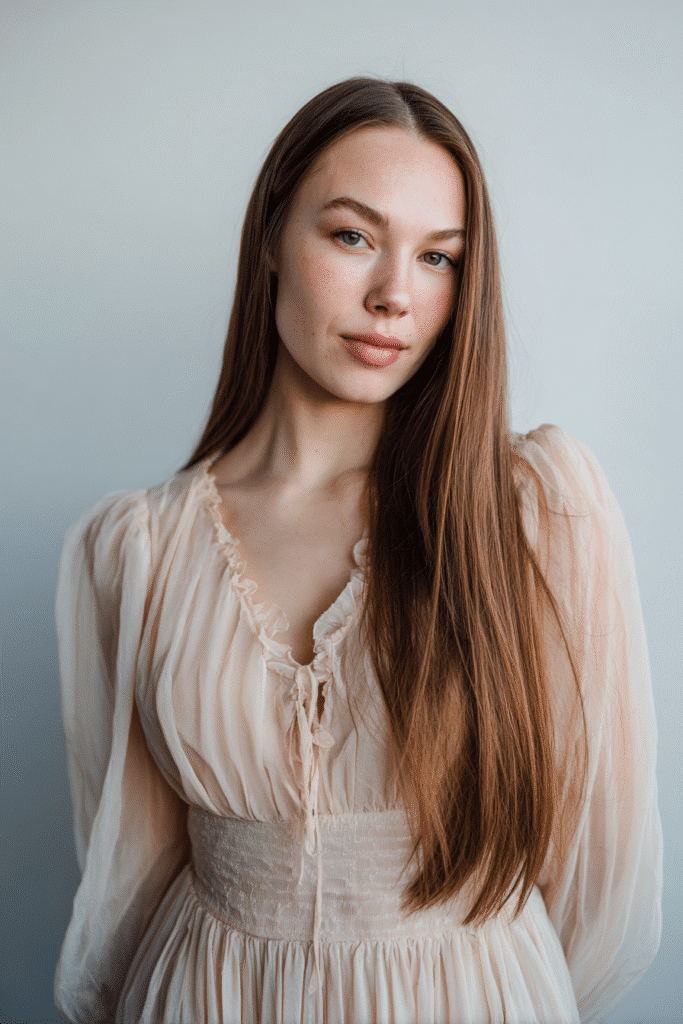
For minimalist brides seeking an effortlessly chic style, sleek straight hair with a side part delivers timeless elegance. I’ve found this sophisticated look pairs perfectly with contemporary wedding esthetics while photographing beautifully from every angle.
Sleek Straight Hair styling
Achieving this polished look requires precision and the right products. I always start with a smoothing shampoo and conditioner before applying a heat protectant to damp hair. Next, blow-dry with a paddle brush, directing hair in a downward motion. For that glass-like finish, section hair carefully and use a high-quality flat iron at a moderate temperature. Finish with a shine serum focused on mid-lengths to ends, avoiding the roots.
The side part makes all the difference in this style—creating a deep side part adds instant drama and sophistication that balances the simplicity of straight locks.
When to choose this minimalist look
This no-fuss hairstyle complements virtually any wedding theme, season, or setting. Yet it truly shines for brides with sleek sartorial choices to match. If you’re wearing a structured gown with clean lines or a chic bridal suit, this hairstyle creates a harmonious overall esthetic.
The versatility of this style allows for subtle variations—perhaps with the slightest hint of curl at the ends for softness. This creates a stylish, modern feel to your bridal look.
Belle Hathaway’s straight hair secrets
My favorite trick for maintaining this sleek style throughout your celebration is applying a lightweight anti-humidity spray as your final step. For brides concerned about flatness, I recommend a volumizing mousse at the roots before blow-drying.
Remember that simplicity often creates the biggest impact. A center part accentuates facial symmetry while a side part adds drama. Whichever you choose, this timeless style exudes confidence and sophistication that will never go out of fashion.
Beachy Mermaid Waves
Beachy mermaid waves have stolen my heart as the quintessential carefree bridal style that effortlessly captures that salt-kissed romance. In fact, these tousled waves are far more than just a hairstyle—they’re a feeling of freedom and natural beauty.
Beachy Waves for destination weddings
Loose, flowing waves perfectly complement the relaxed vibe of coastal celebrations. For destination weddings, these waves match your natural surroundings while remaining elegant. I’ve noticed photographers adore how these styles create those dreamy “hair blowing in the wind” photo opportunities that look absolutely magical at sunset. The quintessential beach bride look works with almost any hair length, though longer locks truly showcase the full mermaid effect.
Humidity-proofing tips
Destination wedding environments often mean battling humidity. To create waves that last:
- Apply detangler to wet hair first, then scrunch water into your hair to form defined curls
- Use leave-in conditioner, curl cream, and lightweight mousse for hold
- Consider air-drying to 50% before using a diffuser attachment
- Embrace humidity rather than fighting it—styles that look “slightly undone” actually improve throughout the day
Best accessories for beachy styles
For beach bridal styling, the right accessories elevate your waves. Pearl and rhinestone headbands catch sunlight beautifully. Given that many of my beach brides prefer natural elements, I often recommend delicate seashell pins, starfish accessories, or crystal combs with aqua accents that mirror the ocean palette.
Glamorous Cascading Curls
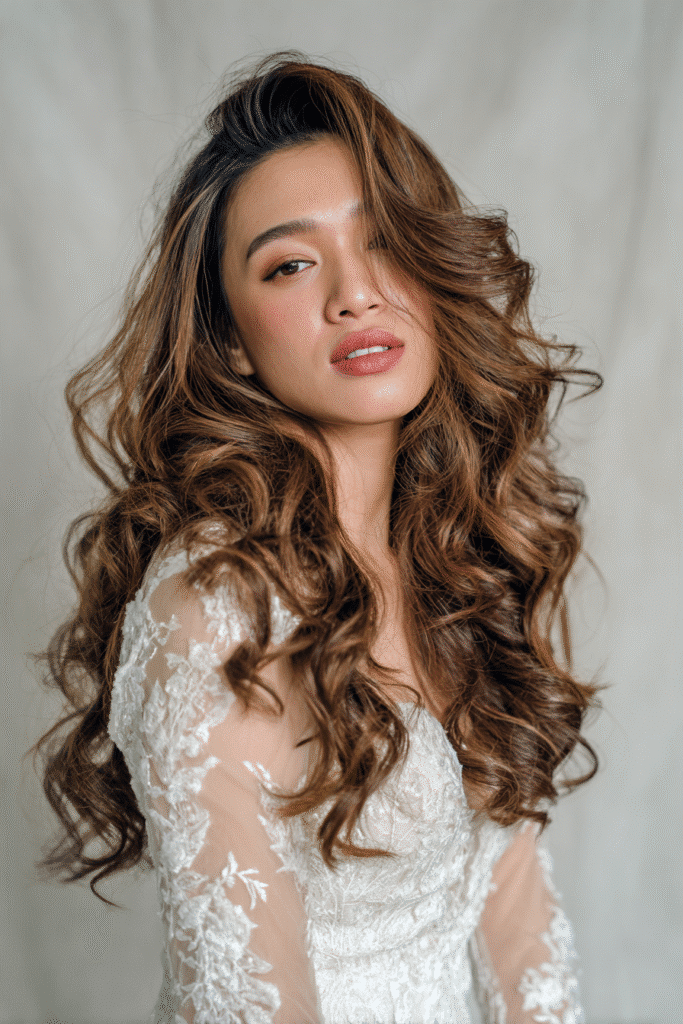
Cascading curls exude timeless romance while adding theatrical elements to bridal looks. As a stylist who’s created hundreds of wedding hairstyles for long hair, I’ve discovered that these voluminous curls truly make a statement.
Cascading Curls for drama
Cascading curls offer that perfect balance of sophistication and feminine charm. For brides wearing strapless gowns, these curls beautifully complement open necklines by flowing over the shoulders. Simultaneously, they create a natural frame for your face that photographs magnificently from all angles. I often recommend this style for brides seeking that ethereal, dreamy quality without sacrificing elegance.
How to maintain curl shape
To ensure your curls last throughout your celebration, preparation is key. Upon styling, apply lightweight products like curl creams containing argan or sweet almond oil instead of thick gels that create stiff, reflective casts under camera lights. Prior to your photo session, keep a small spray bottle with water and leave-in conditioner handy for quick refreshes.
For those stubborn face-framing pieces, try my secret technique: slightly dampen only that section, wind it around a makeup brush handle, and hold for 15-30 seconds. This quick fix transforms wonky curls into bouncy ringlets without heat damage.
Photographer framing tips
From collaborating with countless photographers, I’ve learned they adore capturing cascading curls from slightly elevated angles. Many photographers recommend “contour waves” that enhance your facial features naturally. These strategically placed curls accentuate your eyes, cheekbones, and jawline much like makeup contouring. For dramatic portraits, ask your photographer to shoot using your longest focal length—this creates beautiful compression that isolates you against softly blurred backgrounds.
Fishtail Braid with Florals
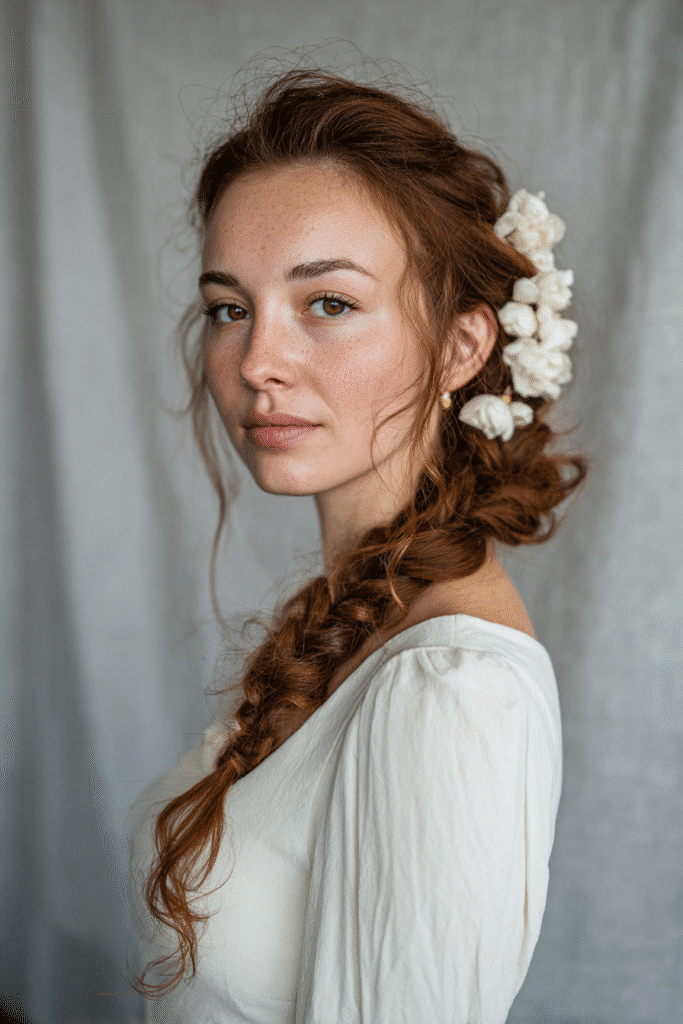
Fishtail braids have enchanted me for years with their intricate, delicate appearance that elevates any bridal look. This bohemian-inspired style creates visual interest while maintaining that effortless elegance photographers adore.
Fishtail Braid technique
The fishtail technique appears complex yet remains surprisingly achievable. I begin by dividing hair into two equal sections, then take a pencil-sized strand from the outer edge of one section and cross it over to join the opposite side. Alternating sides creates that distinctive woven pattern. For optimal results, I recommend backcombing the crown first—this creates “sticky” texture that helps secure the beginning of your braid. Typically, keeping the braid somewhat loose makes it appear thicker and allows for gentle pulling apart later. Of course, day-old hair works magnificently as it provides natural grip.
Adding flowers to braids
Regarding floral additions, smaller blooms work best as they won’t hide your intricate braid details. I usually place a single focal bloom—like a white poppy—near the top where there’s exposed hair, then incorporate delicate elements like wax flower or sweet peas throughout. Baby’s breath symbolizes everlasting love and makes a timeless choice, although jasmine, orchids, and spray roses create equally beautiful effects. Hence, consider flowers that match your bouquet or hold special meaning.
Best angles for braid shots
From a photographer’s perspective, fishtail braids photograph magnificently in linear arrangements that draw the eye along the beautiful back details of your dress. The intricate texture creates visual dimension worth capturing from multiple angles. Consider side profiles that showcase both the braid’s pattern and your facial features simultaneously.
Classic Bridal Bun with Tiara

The timeless elegance of a classic bridal bun paired with a tiara creates that perfect regal moment photographers adore capturing. This sophisticated combination never fails to make brides feel like royalty on their special day.
Bridal Bun structure
Creating the perfect bridal bun requires precision and attention to detail. For a clean, polished look, I always start with freshly washed hair—particularly important since this style showcases your roots. Typically, I secure gathered hair with a thin non-snag elastic before twisting the ponytail and wrapping it around the base. For formal celebrations, the low bun position exudes timeless class while allowing your tiara to be the focal point, especially when set forward on the head.
Choosing the right tiara
Finding your perfect tiara involves more than just esthetics—it’s about matching your comfort needs and hairstyle structure. When selecting, consider:
- Hair Type – Fine hair works best with comb-style bases for better grip, while thicker hair pairs wonderfully with banded designs
- Wedding Theme – Determine whether your celebration leans formal, bohemian, or classic
- Dress Details – Match crystal, pearl, or metallic finishes with your gown’s embellishments
Pearl tiaras bring a soft, romantic quality that complements various hairstyles, primarily classic buns.
Belle Hathaway’s royal bride tips
Through my years styling brides, I’ve discovered securing your tiara is essential for all-day comfort. Undoubtedly, sharing photos of your tiara with your hairstylist beforehand allows them to design around the accessory. I recommend wearing your tiara during your hair trial to practice insertion and test comfort. For perfect placement, position your tiara about 1-2 inches from the hairline for that beautiful halo effect framing your face. Forthwith, add hidden support using discreet bobby pins matching your hair color to anchor the tiara without affecting its appearance.
Tousled Updo with Face-Framing Strands

A tousled updo creates that perfect blend of elegance and carefree charm that many brides desire for their wedding day. In my years of styling bridal hair, I’ve found this versatile look perfectly balances sophistication with approachable beauty.
Tousled Updo styling
To begin crafting this romantic style, I prepare the hair with a light shine oil to moisturize ends and add subtle luminosity. Namely, I use zigzag partings when working with updos as this helps the style flow and blend more naturally. In the long run, working with clean sections—even for parts that will be hidden—ensures the entire style maintains a professional finish. The secret to a truly gorgeous tousled updo? Creating multiple layers and dimensions that give the impression of intricate styling without appearing overly structured.
Face-framing strand placement
For face-framing pieces, I always separate strands before starting the main updo. The ideal placement begins at cheekbone or jaw length, tapering outward for a natural effect. In the hope that the style appears effortlessly elegant, I avoid strands that are too long, as they can weigh down both the style and your face. After placing the main updo, I redefine these face-framing pieces with a curling iron for soft definition that enhances facial features.
Photographer lighting tips
For the purpose of capturing this style perfectly, photographers typically use a “hair light” positioned slightly higher than the subject. This technique adds definition to the updo’s texture and creates beautiful dimension in photos.
Side-Swept Waves with Clip
Side-swept waves offer that perfect blend of vintage glamor and modern sophistication. Throughout my career styling brides, I’ve seen firstly-hand how this elegant option frames the face beautifully while showcasing your long locks.
Side-Swept Waves styling
Creating this romantic style begins with proper preparation. For optimal results, sweep all hair over one shoulder, securing with bobby pins on the opposite side. To achieve those soft, voluminous S-shaped waves, I gently backcomb the ends after curling and set with firm-hold hairspray. Remember that your side-swept hair needs to be secured first before adding any decorative elements.
Best clips and combs
When selecting clips, consider how they’ll complement your overall look. A sparkling hair clip positioned directly above your exposed ear creates a stunning focal point. In addition to esthetics, think about your face shape—this style particularly flatters oval, heart, and square faces. Coordinate your hair accessory with other jewelry, as one ear will be fully displayed.
Photographer-approved side profiles
Photographers adore this style because it creates beautiful profile moments, highlighting statement earrings. The sweeping motion adds visual interest to portraits. For maximum impact, position your accessory where it can catch the light—this creates dimension that flat styles simply can’t match.
Full-Length Straight Ponytail
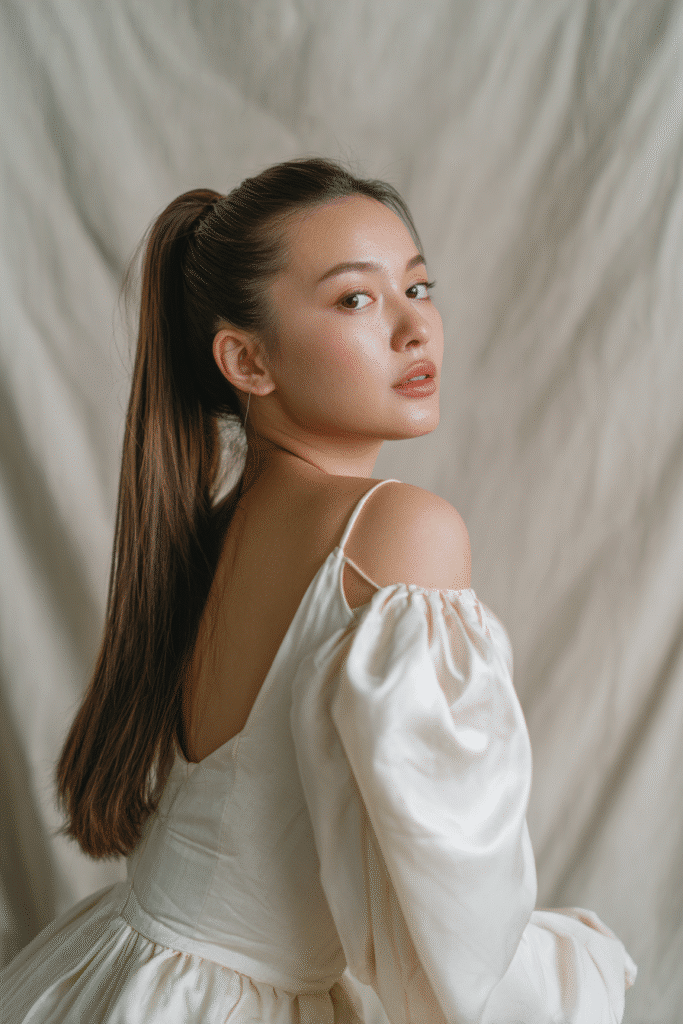
For brides with luxurious lengthy locks, a full-length straight ponytail creates a stunning contemporary statement. Undeniably, this sleek style bridges the gap between casual elegance and red-carpet glamor while allowing your facial features to take center stage.
Straight Ponytail for sleek looks
The sleek straight ponytail offers a chic, polished esthetic perfect for modern minimalist weddings. Beyond that, this style beautifully showcases your cheekbones and elongates your neck, creating that coveted “snatched” look photographers love to capture. Before styling, apply heat protectant spray to protect your strands from damage when straightening.
How to secure long ponytails
To ensure your ponytail stays flawless throughout celebrations, use double elastics for maximum security. For those with heavier hair, try creating a foundation by splitting your hair into sections before gathering into the final ponytail. Henceforth, wrap a section of your own hair around the elastic to conceal it for a seamlessly polished finish.
Belle Hathaway’s ponytail polish tips
My favorite technique involves applying a smoothing serum before gathering hair to eliminate flyaways. Most compelling evidence suggests that extensions can dramatically transform thin ponytails, adding both volume and length. Nonetheless, the key to a perfect ponytail lies in the prep—blow-drying with a round brush creates that essential sleek foundation.
Conclusion
After working with countless brides over the years, I’ve seen firsthand how these gorgeous hairstyles transform not just appearances, but confidence as well. Long hair truly offers endless possibilities for your wedding day look. Whether you prefer the timeless elegance of Hollywood waves, the bohemian charm of braided crowns, or the sleek sophistication of a classic chignon, your long locks provide the perfect canvas for expressing your personal style.
Photographers absolutely love these styles because they create dimension, movement, and visual interest in your wedding photos. Thus, your hairstyle becomes more than just a beauty choice—it’s an essential element of your wedding story, captured forever in your photographs.
Remember that the perfect wedding hairstyle should reflect both your personality and complement your dress. Throughout my career, I’ve noticed that brides feel most beautiful when their hairstyle feels authentically “them.” Additionally, consider your venue and weather conditions when making your final decision.
My best advice? Schedule a hair trial well before your wedding day. This gives you and your stylist time to perfect your chosen look and make any necessary adjustments. Bring inspiration photos to your appointment, but also stay open to suggestions from your stylist who understands how different styles work with various hair types and face shapes.
Last but certainly not least, whichever style you choose, make sure it feels comfortable enough to wear all day. Though these hairstyles look intricate, a skilled stylist will ensure they stay secure through hours of celebrating, dancing, and creating memories that will last a lifetime.
Your wedding day hairstyle is undoubtedly an important decision, but with the right inspiration and professional help, you’ll find a look that makes you feel like the most beautiful version of yourself as you walk down the aisle.