Hey there, beautiful souls! It’s Belle here, and today I’m beyond excited to share something that’s incredibly close to my heart—Infant Baby Girl Hairstyles: A Complete Guide to Styling Your Little One’s First Locks
Hey there, beautiful souls! It’s Belle here, and today I’m beyond excited to share something that’s incredibly close to my heart—styling those precious baby girl locks. You know, when I first started working with moms and their tiny tots in my early days in Savannah, I never imagined how much joy these little makeover moments would bring me. There’s something absolutely magical about enhancing a baby’s natural beauty while keeping everything gentle, safe, and age-appropriate.
I remember when my cousin had her first daughter, and she called me in a panic asking, “Belle, what do I do with all this hair?” That moment sparked my passion for creating simple, adorable hairstyles that any parent can master. Over the years, I’ve learned that baby hairstyles aren’t just about aesthetics—they’re about celebrating these fleeting moments of infancy while keeping our little ones comfortable and happy.
Today, I’m sharing sixteen of my absolute favorite infant hairstyles that I’ve perfected through years of working with the tiniest clients. These styles are gentle on delicate scalps, easy to recreate at home, and absolutely adorable. Each one holds special memories for me, whether from working with celebrity clients and their little ones, or those intimate family moments styling my own nieces and cousins. Let’s dive in!
The Classic Top Knot
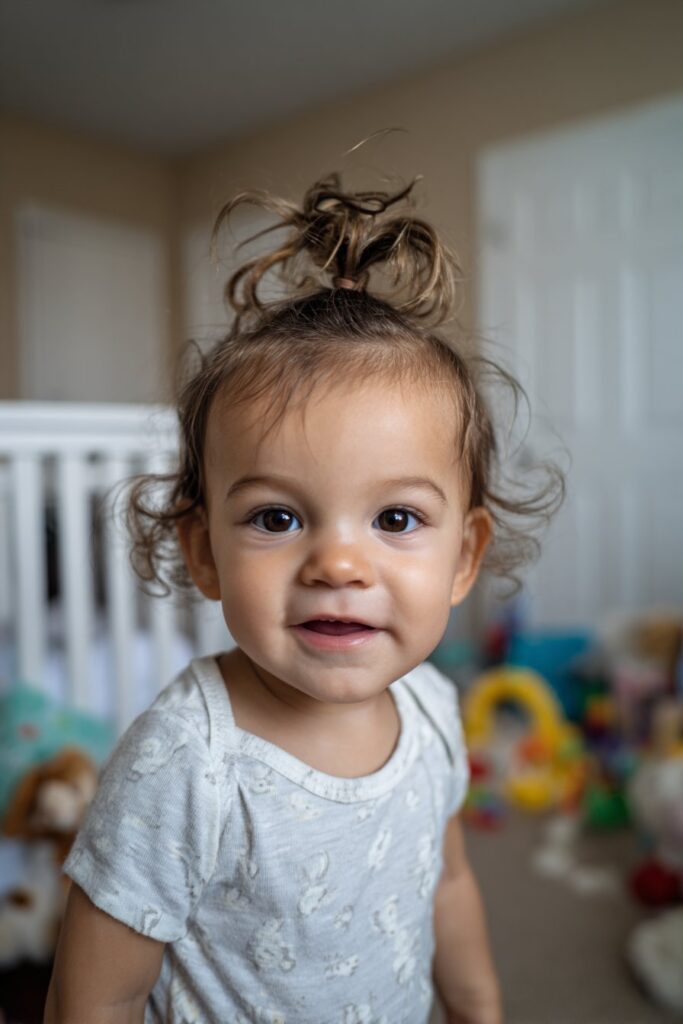
There’s a reason this style has stood the test of time, friends. The top knot is my go-to recommendation for new parents because it’s incredibly simple yet undeniably cute. I’ll never forget the first time I styled a baby with this look during a family photo shoot—the mother actually teared up because her daughter looked like a tiny ballerina.
What It Is
The top knot is essentially a small bun positioned at the crown of your baby’s head. It gathers hair away from the face while creating the most adorable silhouette that’ll make your heart melt every single time. This isn’t your typical adult bun—it’s softer, looser, and designed specifically with infant comfort in mind. The style originated from practical needs but has evolved into one of the most beloved baby hairstyles across cultures.
Best For
This style works wonderfully for babies with medium to long hair, especially those active little ones who are starting to explore their world. If your baby has enough hair to gather into a small ponytail, you’re ready for a top knot. I’ve found it particularly perfect for warmer weather when you want to keep hair off your baby’s neck and face. It’s also fantastic for crawling babies who might get hair in their eyes during their adventures. The versatility of this style means it transitions beautifully from playtime to photo time without any adjustments needed.
How to Create It
Start by gently brushing your baby’s hair upward toward the crown. Use a soft-bristled brush—I cannot stress this enough. Baby scalps are incredibly sensitive, and harsh brushing can cause discomfort. I always recommend investing in a high-quality baby brush with natural bristles. Gather the hair at the highest point of the head, securing it with a soft, fabric-covered elastic band. Never use rubber bands directly on baby hair! They can cause breakage and pull uncomfortably.
Once secured, twist the ponytail gently and wrap it around the base, creating a small bun. Secure with another soft elastic or a fabric scrunchie. The key here is gentleness—you’re not creating a ballet bun. This should be loose and comfortable. I often tell parents to imagine you’re creating a little cloud of hair rather than a tight coil. If you can slip a finger easily between the bun and the scalp, you’ve got the perfect tension.
Side-Swept Sweetness

Oh, this one makes my heart sing! The side-swept style is elegance personified, even on the tiniest head. I discovered this style accidentally one day when working with a baby who kept turning her head to one side—what started as necessity became one of my signature infant looks.
What It Is
This hairstyle involves sweeping all or most of your baby’s hair to one side of the head, creating an asymmetrical, sophisticated look that’s surprisingly simple to achieve. It’s reminiscent of classic Hollywood glamour but adapted perfectly for our littlest fashionistas. The asymmetry creates visual interest while maintaining that soft, innocent quality we love in baby styles.
Best For
Side-swept styles are perfect for babies with fine to medium hair texture. I especially love this for photo sessions or special occasions. If your little one has a beautiful outfit with details on one side, sweeping the hair to the opposite side creates perfect visual balance. This style also works wonderfully for babies who have a natural part or cowlick that wants to pull hair to one direction anyway. Working with your baby’s natural hair tendencies rather than against them always yields the best results.
How to Create It
Begin by creating a deep side part using a soft comb. Gently brush the hair to one side, following the natural direction of hair growth. Secure just above the ear with a small clip or soft elastic. For extra hold, you can use a tiny amount of baby-safe gel or simply mist with water. I’ve found that slightly damp hair holds this style better than completely dry hair.
The trick I’ve learned over the years is to work with your baby’s natural hair pattern rather than against it. If the hair wants to fall a certain way, let it guide you. You’ll achieve a more natural, comfortable result. I also recommend choosing clips that complement your baby’s outfit or eye color—those little details make all the difference in photos. Make sure the clip isn’t too heavy, as this can pull on delicate hair and cause discomfort.
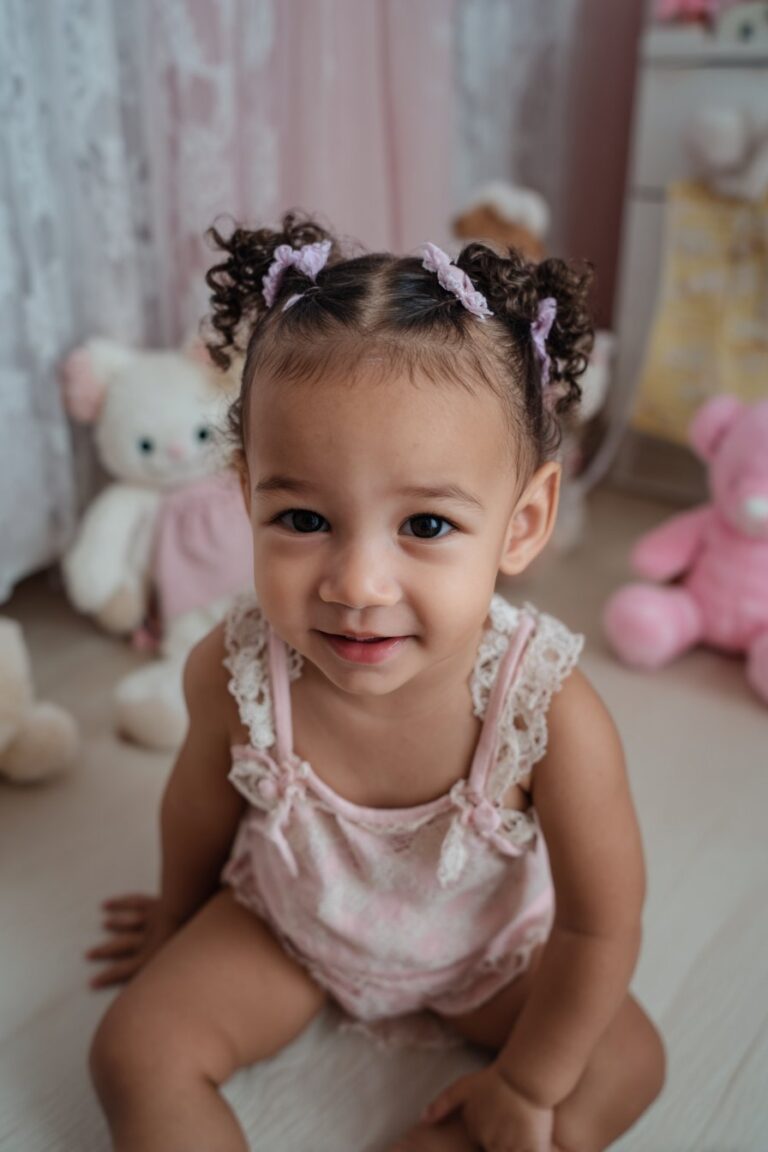
Tiny Twin Pigtails

Can we just take a moment to appreciate how absolutely precious twin pigtails look on a baby? This style never fails to bring smiles. Every time I create this look, I’m transported back to my childhood in Savannah, watching little girls play in the park with their bouncing pigtails.
What It Is
Twin pigtails are two small ponytails positioned on either side of the head. They’re playful, symmetrical, and capture that innocent sweetness that makes baby years so special. This classic style has been beloved for generations because it perfectly balances practicality with adorableness. The movement of the pigtails as baby turns her head is just endlessly charming.
Best For
This style shines on babies with enough hair length to create two small ponytails. It’s ideal for active babies because it keeps hair secure and out of their face during playtime. I love this for everyday wear—it’s practical and adorable. The twin pigtails work exceptionally well for babies who are starting to eat solid foods because it keeps hair completely away from their face and out of their meals. It’s also perfect for daycare or when grandparents are babysitting because it stays put throughout the day.
How to Create It
Create a center part from the forehead to the nape of the neck. Section the hair into two equal parts. Working on one side at a time, gather the hair at ear level and secure with a soft elastic band. Repeat on the other side, making sure both pigtails sit at the same height. Symmetry is important here for the most polished look.
Here’s a pro tip from my years of experience: use your baby’s ears as guides for placement. Positioning the pigtails just above and slightly behind each ear creates the most balanced, flattering look. And please, keep them loose! Tight hairstyles can cause discomfort and even damage delicate hair follicles. I always do a gentle tug test—if the skin around the ponytail moves when you gently pull the hair, it’s too tight. You can also add small bows or ribbons to the elastics for extra cuteness, but make sure they’re securely attached and won’t come loose.
The Delicate Headband Style

Headbands are an absolute staple in infant hairstyling, and I’ve used countless variations throughout my career. This is often the very first “hairstyle” new parents try, and it holds such a special place in my heart.
What It Is
This style uses a soft, stretchy headband to keep hair back while adding a decorative element. It’s less about manipulating the hair and more about accessorizing beautifully. The headband does all the work while your baby’s natural hair texture shines through. This is styling at its simplest and most effective.
Best For
Headband styles work for virtually any hair length, even very short baby hair. They’re perfect for babies who won’t tolerate having their hair brushed or styled extensively. I recommend this for newborns and young infants especially. It’s also wonderful for babies with very fine or sparse hair because the headband draws attention while the hair continues to grow. Many parents love this style because it requires zero hair manipulation—you simply place and go.
How to Create It
Choose a soft, stretchy headband that won’t leave marks or put pressure on your baby’s delicate head. Gently place it over the crown, positioning it about an inch back from the hairline. Adjust the hair around it, letting natural texture show. You can smooth the hair down for a sleeker look or leave it naturally textured for a softer appearance.
The beauty secret here is choosing the right headband material. I always opt for fabric-covered elastic bands without any hard embellishments that could irritate skin. The headband should sit comfortably without leaving any indentation when removed. I tell parents to check after about thirty minutes of wear—if there’s a red mark, the headband is too tight. Also, variety is wonderful here. You can have different headbands for different occasions—simple ones for everyday, floral ones for special events, and seasonal designs for holidays.
Mini Braided Crown

This style holds such a special place in my heart because it reminds me of the Southern traditions I grew up with in Savannah. Braided crowns were everywhere during my childhood, adorning little girls at church, family gatherings, and special celebrations.
What It Is
A braided crown involves creating one or two small braids that wrap around the head like a halo. It’s ethereal, delicate, and absolutely stunning. This style transforms your baby into a little angel, and I’ve seen it bring tears to many parents’ eyes. The braided crown has historical significance across many cultures, making it a beautiful way to connect your baby to heritage and tradition.
Best For
You’ll need baby hair that’s at least three to four inches long for this style. It’s gorgeous for special occasions, photographs, or when you just want your little one to look extra angelic. I particularly love this style for milestone celebrations like christenings, naming ceremonies, or first birthday parties. The braided crown photographs beautifully from every angle, making it perfect for professional photo sessions.
How to Create It
Start with slightly damp hair for easier braiding. Create a side part, then begin a loose braid near one ear. Braid gently toward the opposite side, incorporating small sections as you go. This is essentially a simplified version of a Dutch or French braid. Secure the end with a small, clear elastic. You can create one continuous braid that wraps around, or two braids that meet at the back.
My biggest advice? Keep it loose and comfortable. You’re not braiding competition hair here. The braid should be visible but not tight. Baby’s comfort always comes first, and a too-tight braid can cause unnecessary pulling on delicate hair. I recommend braiding in small sections and checking in with your baby frequently. If she seems fussy or tries to pull at the braid, loosen it immediately. You can also weave tiny flowers or ribbons through the braid for extra special occasions, creating a true crown effect.
The Natural Curly Affros

For my curly-haired babies out there, this style celebrates those beautiful natural textures! As someone who has worked extensively with diverse hair types throughout my career, I’ve learned to truly appreciate and enhance natural curl patterns.
What It Is
The curly Affros gathers curly or textured hair into one or two poufs, allowing curls to spring freely while keeping hair manageable. It’s a celebration of natural beauty and texture, showcasing those gorgeous curls in all their glory. This style protects the hair while making it the star of the show.
Best For
This is specifically designed for babies with naturally curly or coily hair textures. It protects delicate curls while showcasing their beauty. I’ve worked with so many mothers who want to embrace their baby’s natural texture, and this style does exactly that. It’s perfect for everyday wear and grows more beautiful as your baby’s curls develop and lengthen. The Affro style also works wonderfully for maintaining curl health because it minimizes manipulation.
How to Create It
Never brush curly baby hair when dry! Instead, work with damp hair, using your fingers or a wide-tooth comb. Gather hair gently at the crown or create two puffs on either side. Secure with a soft scrunchie or fabric-covered elastic, but don’t pull the hair all the way through on the final wrap—leave the ends creating a puff. This technique preserves the curl pattern while creating volume.
The secret to gorgeous curly affros is moisture. A leave-in conditioner designed for babies helps define curls and prevents frizz. And remember, curly hair is fragile, so gentle handling is absolutely essential. I always recommend applying product to damp hair, then gently scrunching to encourage curl formation. You can also use a satin or silk scrunchie to minimize friction and prevent breakage. The beauty of this style is that it looks slightly different every time you create it, reflecting the unique personality of your baby’s curls.
Wispy Side Ponytail

This asymmetrical style has such a carefree, playful vibe that I absolutely love. It reminds me of sunny afternoons and spontaneous adventures—there’s something so joyful about this look.
What It Is
A side ponytail positions all gathered hair to one side of the head, creating a casual, sweet look that’s both practical and charming. It’s less structured than many other styles, giving it a natural, effortless quality that’s perfect for babies.
Best For
Side ponytails work beautifully for babies with medium-length hair. They’re less formal than center styles, making them perfect for everyday adventures and playtime. This style is wonderful for babies who are active and mobile because it keeps hair secure without looking too done. It’s also great for one-sided sleepers—positioning the ponytail on the opposite side from where baby rests her head prevents any discomfort.
How to Create It
Brush all hair to one side, gathering it just above and behind the ear. Secure with a soft elastic, leaving the ponytail loose and bouncy. You can add a small bow or clip for extra cuteness. The key is maintaining that wispy, natural quality—don’t try to smooth every single hair into place.
What I’ve learned over the years is that placement matters enormously. Position the ponytail too high, and it can pull uncomfortably when baby lies down. Too low, and it loses its playful charm. That sweet spot just above the ear is absolutely perfect. I also love letting a few pieces frame the face naturally—those little wisps add to the carefree aesthetic. You can alternate which side you use from day to day, which is actually beneficial for preventing any stress on one particular area of the scalp.
The Bow-Enhanced Half-Up

Sometimes the simplest styles create the most impact, and this one proves it beautifully. The half-up style has been a favorite of mine since I first started styling hair, and it translates perfectly to infant styling.
What It Is
This style pulls back just the top section of hair, securing it with a bow or clip while leaving the rest flowing freely. It’s the perfect compromise between styled and natural, offering the best of both worlds. The half-up style frames the face beautifully while still showcasing hair length and texture.
Best For
Half-up styles are wonderful for babies with varying hair lengths. They keep hair out of eyes while maintaining that flowing, feminine look. I recommend this for babies who are starting to interact more with their environment. It’s particularly useful during that stage when babies are grabbing everything—having hair pulled back from the face prevents it from becoming a distraction or landing in their mouth.
How to Create It
Section off the top third of hair from ear to ear. Gently brush this section back and secure at the crown with a soft elastic. Add a bow or decorative clip at the elastic to hide it and add charm. The bow becomes the focal point, transforming this simple style into something special.
The beauty of this style lies in its versatility. You can position the half-up section higher for a more dramatic look or lower for something subtle. I typically recommend following your baby’s natural crown for the most flattering result. The bow choice also dramatically changes the vibe—a large statement bow creates a formal look, while a small simple bow keeps things casual. I love matching the bow to baby’s outfit or choosing colors that complement her eye color. This is also a great style for showing off beautiful earrings if your baby has pierced ears.
Twisted Side Accent

Twists are such an elegant alternative to braids, and they’re often easier to create on baby-fine hair. I discovered the beauty of twists early in my career when working with a baby whose hair was too fine and slippery for braiding.
What It Is
This style incorporates one or two small twists along the side of the head, securing back a section of hair while adding textural interest. Twists create beautiful dimension and visual appeal without the complexity of braiding. They’re softer and more forgiving than braids, making them perfect for infant hair.
Best For
Twisted styles work wonderfully for babies with hair that’s too short or fine for successful braiding. They’re perfect for keeping hair off the face during meals or active play. I particularly love this style for babies who are teething or going through phases where they touch their face frequently—it keeps hair secure and out of reach.
How to Create It
Take a small section of hair near the temple. Divide it into two pieces and twist them around each other, working toward the back of the head. Secure with a small clip or elastic when you reach behind the ear. The twisting motion is simple and intuitive—just keep wrapping one section over the other.
Here’s something I’ve discovered through experience: twisting is often less stressful on baby hair than braiding because it requires less tension. Work gently, and if your baby seems uncomfortable, take a break. There’s no rush—baby’s comfort is everything. You can create a single twist on one side for asymmetry, or matching twists on both sides for balance. I love adding a small decorative clip at the end of the twist to secure it and add a pop of color or sparkle.
The Tiny Braided Knots

This is one of my favorite go-to styles for babies with just enough hair to work with. It’s practical, adorable, and has such a fun, spunky vibe.
What It Is
A tiny braided knots starts at the crown and extends back, creating a mohawk-like effect that’s adorable and practical. This style is edgy without being over the top, adding personality while keeping hair controlled. It’s become increasingly popular in recent years, and I love how it looks on babies of all ages.
Best For
This style is ideal for babies with medium-length hair, particularly those with finer textures. It’s great for keeping hair tidy without creating a fully pulled-back look. The tiny top braid works well for babies with cowlicks or unusual growth patterns at the crown because it works with those natural tendencies rather than fighting against them.
How to Create It
Section off a strip of hair from the forehead to the crown, about one to two inches wide. Create a simple two-strand braid, working from front to back. Secure at the end with a small elastic, and let the sides flow naturally. You can make the braid as long as your baby’s hair allows, or stop partway for a shorter accent braid.
The trick here is keeping the braid loose and comfortable. You’re not creating tension; you’re simply guiding the hair into a pretty pattern. If baby fusses, loosen it immediately. Hairstyles should enhance joy, not create stress. I often demonstrate to parents how loose the braid should be by showing them how easily I can slide my finger underneath it. This style also looks adorable with small clips or tiny elastics spaced along the length of the braid for extra visual interest.
Double Top Knots

Double the knots means double the cuteness! This playful style always brings smiles. I remember the first time I tried this style on a baby—everyone in the studio melted at how adorable it looked.
What It Is
Two small buns positioned on top of the head create an adorable, whimsical look that’s currently very trendy. Often called “space buns” when done on older children and adults, this infant version is softer and sweeter. The double knots create a balanced, symmetrical look that’s impossibly cute.
Best For
You’ll need enough hair to create two small ponytails for this style. It’s perfect for babies with thick or longer hair and works wonderfully for special occasions or everyday cuteness. I especially love this for babies with a lot of personality—it matches their spunky spirit perfectly.
How to Create It
Create a center part, then section the front portion of hair into two parts. Create a small ponytail on each side near the top of the head. Twist each ponytail and wrap it around its base, creating two small buns. Secure with soft elastics. The key is making both knots the same size and positioning them at equal heights.
What makes this style special is the playful energy it brings. I’ve styled countless babies with double top knots for milestone photos, and they never disappoint. Just remember to position them symmetrically for the best visual effect. You can measure the distance from the center part to each knot to ensure they’re even. This style also photographs beautifully from above, making it perfect for those overhead shots that are so popular in baby photography. The double knots catch light beautifully and create wonderful shadows and dimension in photos.
Soft Pulled-Back Waves
For babies blessed with naturally wavy hair, this style enhances those beautiful textures. Wavy baby hair is such a gift, and this style showcases it perfectly.
What It Is
This low-manipulation style simply pulls back the front sections while allowing natural waves to flow freely, creating an effortlessly beautiful look. It’s minimalist styling at its finest—enhancing what’s already there without overdoing it.
Best For
Babies with naturally wavy or slightly textured hair will shine in this style. It’s perfect for showcasing natural beauty without excessive styling. I recommend this for parents who want their baby to look polished but prefer minimal intervention. It’s also wonderful for babies with sensitive scalps who don’t tolerate a lot of brushing or styling.
How to Create It
On slightly damp hair, gently pull back the sections framing the face. Secure at the back of the head with a soft clip or elastic. Allow the natural wave pattern to dry and set naturally, or gently scrunch with your hands to enhance texture. The dampness helps the waves form more defined patterns.
Throughout my career, I’ve learned that working with natural texture rather than against it creates the most beautiful, authentic results. Let your baby’s unique hair characteristics guide your styling choices. With wavy hair, less is definitely more. You can apply a tiny amount of curl-enhancing product made for babies to help define the waves, but often just water and gentle scrunching is all you need. This style looks beautiful when freshly done but also ages gracefully throughout the day as waves loosen and soften.
The Flower Crown Effect

This romantic style is absolutely perfect for those milestone moments you want to remember forever. Flower crowns have such a timeless, magical quality that makes every baby look like a fairy princess.
What It Is
Using small sections of hair and delicate accessories, this style creates the illusion of a flower crown, with hair artfully arranged and decorated. It’s more about the accessories than the actual hair manipulation, making it easier than you might think to achieve this stunning look.
Best For
This works best for special occasions and photo sessions. You’ll need baby hair that’s at least three inches long, though accessories can enhance shorter hair too. I particularly love this style for outdoor photo shoots, garden parties, and spring celebrations. The flower crown effect also works beautifully for flower girls at weddings.
How to Create It
Create a loose, low ponytail or several small sections around the head. Gently tease or fluff each section to create volume. Weave in small flower clips or a delicate floral headpiece, positioning decorations to create a crown effect. You can use real flowers for very special occasions, though I usually recommend silk flowers for better durability and safety.
The magic here is in the accessories. Choose lightweight, baby-safe decorations that won’t pull or irritate. I’ve created countless variations of this look over the years, and it never loses its enchanting quality. When selecting flowers, consider the color scheme of the outfit and the setting. Soft pastels create a dreamy, ethereal look, while bright colors add vibrancy and joy. You can also mix flowers with greenery, ribbons, or even small butterfly clips for extra whimsy.
Simple Center Part with Clips

Sometimes elegance lies in simplicity, and this style embodies that philosophy perfectly. This is my go-to recommendation for parents who want something pretty but aren’t confident in their styling abilities yet.
What It Is
A clean center part with small decorative clips on each side creates a neat, balanced look that’s sweet and classic. It’s straightforward, quick to create, and always looks polished. This style proves that you don’t need complexity to achieve beauty.
Best For
This style works for virtually any hair length or texture. It’s ideal for everyday wear and for babies who won’t tolerate extensive styling. I love recommending this to grandparents or caregivers who might be intimidated by more complex styles. It’s also perfect for those rushed mornings when you need something quick but cute.
How to Create It
Create a center part using a soft comb. Gently clip back small sections on each side, positioning clips about an inch back from the temples. Choose clips that won’t slip or pull hair. The center part should be straight and clean, extending from the forehead to the crown.
What I love about this style is its versatility. You can use matching clips for symmetry or mix and match for a playful look. Either way, it’s simple, comfortable, and adorable. The clip selection becomes the creative element here—you can coordinate with outfits, seasons, or holidays. I keep a collection of different clips organized by color and theme, making it easy to grab the perfect pair quickly. This style also works wonderfully for babies who are learning to keep clips in their hair—it’s a great starter style for building tolerance.
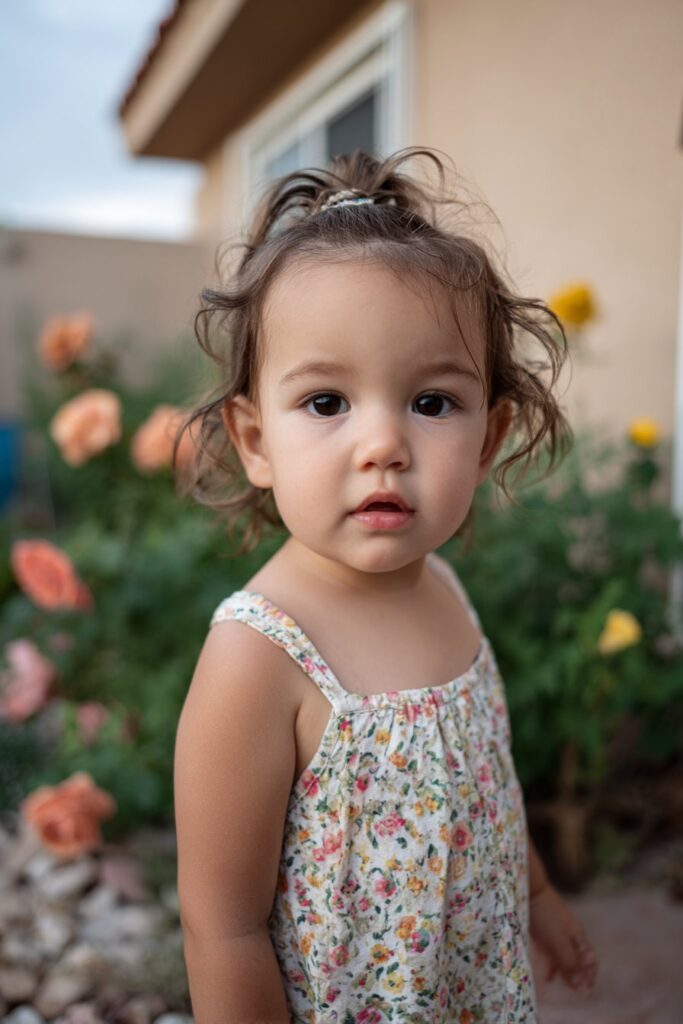
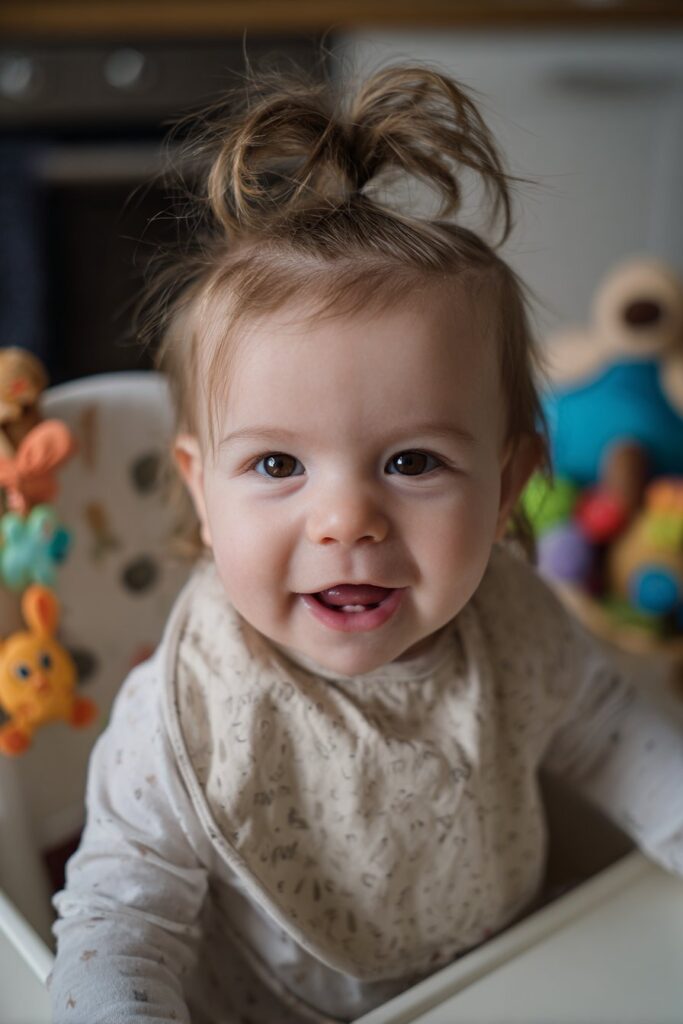
Baby Sprout Topknot
Embracing that perfectly imperfect aesthetic, this style is all about casual cuteness. In a world that often demands perfection, I love how this style celebrates natural, effortless beauty.
What It Is
A loosely gathered knot embraces texture and movement rather than polished perfection. This is the “I woke up like this” of baby hairstyles, and it’s absolutely charming. The messy topknot has a relaxed, lived-in quality that’s incredibly endearing.
Best For
Babies with enough hair to create a small ponytail will rock this style. It’s wonderful for active babies and for days when you want something quick and cute. I especially love this for playdate days or casual family outings. It keeps hair secure without looking too formal or fussy.
How to Create It
Gather hair at the knot into a loose ponytail. On the final wrap of the elastic, don’t pull the hair completely through—leave it in a loop, creating a messy bun effect. Let ends stick out naturally, and don’t worry about perfection. Some wisps falling around the face actually enhance the look.
The beauty of this style is in its carefree nature. Those little wisps and fly-aways aren’t mistakes—they’re features! I’ve learned to embrace imperfection, especially when working with baby hair. It’s all part of their precious, fleeting infancy. You can gently pull on the bun to make it fuller and messier, or leave it tighter for a more defined look. Either way, resist the urge to smooth and perfect—the charm is in the undone quality.
Lilac Lace Tiny Ties

Our final style is elegant, comfortable, and absolutely timeless. The low gathered style has been used for generations because it simply works beautifully for babies.
What It Is
Lilac Lace Tiny Ties is a soft and charming baby girl hairstyle created by parting the hair into small sections and tying them into tiny ponytails. The look is finished with lilac-colored elastics, bows, or lace accessories that add a gentle, elegant feel. It keeps delicate baby hair neat while still looking sweet and stylish.
Best For
This hairstyle is ideal for infants and toddlers with short to medium-length, fine, or soft hair. It works beautifully for everyday wear, family outings, photoshoots, and special occasions because it is lightweight, comfortable, and easy to maintain without pulling on the scalp.
How to Create It
To create Lilac Lace Tiny Ties, start by softly brushing the baby’s hair to remove any tangles. Lightly dampen the hair if needed, then part it into small, even sections using your fingers or a baby-safe comb. Secure each section into a tiny ponytail with soft, snag-free elastics. Finish the style by adding lilac bows, lace clips, or bands, and gently smooth any flyaways with a baby-friendly leave-in spray, keeping everything loose and comfortable.
Conclusion
Take photos of these hairstyles, journal about your styling experiences, save those first hair clips and bows. These become precious keepsakes, tangible reminders of this fleeting stage. I have a memory box filled with tiny accessories from styling my nieces over the years, and looking through it never fails to bring tears to my eyes.
I hope this guide has empowered you to experiment with your baby girl’s hair, to try new styles, and most importantly, to enjoy these precious moments. Whether you’re preparing for a special event or just playing around on a lazy Sunday afternoon, these hairstyles offer endless possibilities for celebrating your little one’s beauty. Each style has its own personality, its own occasion, its own special magic.
The technical skills you develop through baby hair styling also translate wonderfully as your child grows. The gentle touch, the patience, the creative eye—these serve you well through toddler years, preschool, and beyond. You’re not just learning to create cute baby hairstyles; you’re building a foundation for years of bonding through beauty rituals.
Thank you for allowing me to share my passion and experience with you. From my heart to yours, I wish you countless joyful moments styling your baby’s beautiful hair. May each gentle brush stroke and every carefully placed clip be infused with love, creating memories that last a lifetime. These are the moments that matter, the small daily acts of love that build strong, beautiful relationships.
Remember, true beauty comes from within and is reflected in our connections with others—especially the precious connection between you and your baby. These hairstyles are simply one small way to express the love, care, and celebration you feel for your little one. Every time you gently brush her hair, every time you secure a soft elastic, every time you step back and admire your work—you’re telling her she’s cherished, she’s valued, she’s loved.
Now go forth and create some magic, beautiful souls. Your baby girl is already perfect, and these hairstyles are just one way to frame that perfection. Trust yourself, be gentle, and most of all, enjoy every single moment of this incredible journey. These baby years are so brief, so precious. Embrace them fully, style that sweet baby hair with love, and create memories you’ll treasure forever.
With all my love and decades of experience poured into every word, I’m Belle, reminding you that in the world of baby beauty, love is the most important styling tool you’ll ever need. It’s love that guides your gentle hands, love that chooses the softest materials, love that knows when to persist and when to let go. Style with love, parent with love, and watch as that love reflects back to you in your baby’s beautiful, beaming face.