
Hey there, beautiful! It’s me, Belle, and today I want to talk about something that’s near and dear to my heart—side part hairstyles for long hair. You know, when I first moved to the city to pursue my dreams in makeup and beauty, I quickly realized that hair and makeup go hand-in-hand. A stunning makeup look can be completely elevated or totally diminished by your hairstyle choice. Over the years, I’ve worked on countless photoshoots, fashion shows, and special events, and I’ve seen firsthand how a simple side part can completely transform someone’s entire appearance.
There’s something so effortlessly chic about a side part. It adds dimension, creates asymmetry that’s incredibly flattering, and honestly, it just makes you look more polished. Whether you’re heading to a formal event, going on a date, or just want to feel fabulous running errands, these 14 side part hairstyles will give you all the inspiration you need.
Classic Hollywood Waves

Let me tell you about one of my absolute favorite styles—the classic Hollywood waves with a deep side part. This look reminds me of when I was working backstage at a major fashion event, and we created this stunning vintage-inspired look on one of the models. The entire room literally stopped when she walked out. There’s just something timeless and elegant about this style that never goes out of fashion.
What It Is
Hollywood waves are those gorgeous, glossy, S-shaped waves that cascade down your shoulders like liquid silk. When paired with a dramatic side part, they create an old-world glamour that’s absolutely breathtaking. Think vintage elegance meets modern sophistication. The waves are smooth, defined, and perfectly uniform, creating a look that’s both romantic and powerful.
Best For
This style works beautifully for formal events, weddings, galas, or any occasion where you want to feel like absolute royalty. It’s particularly stunning on women with medium to thick hair density because you get that luxurious, voluminous effect. If you have fine hair, don’t worry—I’ll share some tricks to make it work for you too! This look is also perfect if you have a round or heart-shaped face because the side part and cascading waves create length and angles that are super flattering.
How to Create It
First, start with clean, damp hair. I always recommend applying a heat protectant spray—this is non-negotiable for me because healthy hair is beautiful hair. Then apply a volumizing mousse from roots to ends. Blow-dry your hair using a round brush, directing the hair away from your face on the side with more hair.
After you’ve curled all your hair, let it cool completely. This is crucial! I usually work on my client’s makeup during this time. Once cooled, brush through the curls gently with a paddle brush to create those smooth S-waves. Pin the hair on the side with less hair behind your ear using bobby pins that match your hair color. Finish with a light-hold hairspray and maybe a touch of shine serum on the ends. The result? Pure Hollywood magic.
Sleek and Straight Side Part

During my early days working in the industry, I learned that sometimes the most impactful looks are the simplest ones. The sleek, straight side part is one of those styles that looks deceptively easy but makes such a strong statement. I remember creating this look for a corporate photoshoot, and the confidence it gave the woman was incredible. She told me afterward that she felt powerful and in control—that’s what I love about this style.
What It Is
This is all about silky, straight hair with a precise side part. The hair is smooth, glossy, and falls perfectly straight down your back and shoulders. There’s no volume, no texture, no waves—just pure, sleek perfection. It’s minimalist beauty at its finest, and it puts the focus entirely on your face and features.
Best For
This style is ideal for professional settings, business meetings, or when you want a clean, modern look. It works wonderfully for all face shapes, but I especially love it on women with oval or long faces because it creates width. If you have naturally straight or slightly wavy hair, this style will be easier to achieve. It’s also perfect for showcasing beautiful makeup because there’s nothing competing for attention—your face is the star of the show.
How to Create It
Begin with freshly washed hair. Apply a smoothing serum or cream while your hair is still damp—this creates a barrier against humidity and frizz. Blow-dry your hair using a paddle brush, pulling the hair taut as you dry to encourage straightness. Make sure to dry your hair in the direction you want it to fall.
Once dry, create your side part using a rat-tail comb. For this look, I prefer a less dramatic side part, positioned about an inch from center. Now comes the straightening: take a high-quality flat iron and work in small sections, running the iron slowly from root to tip. The key is to move slowly—one pass should be all you need if you’re doing it right.
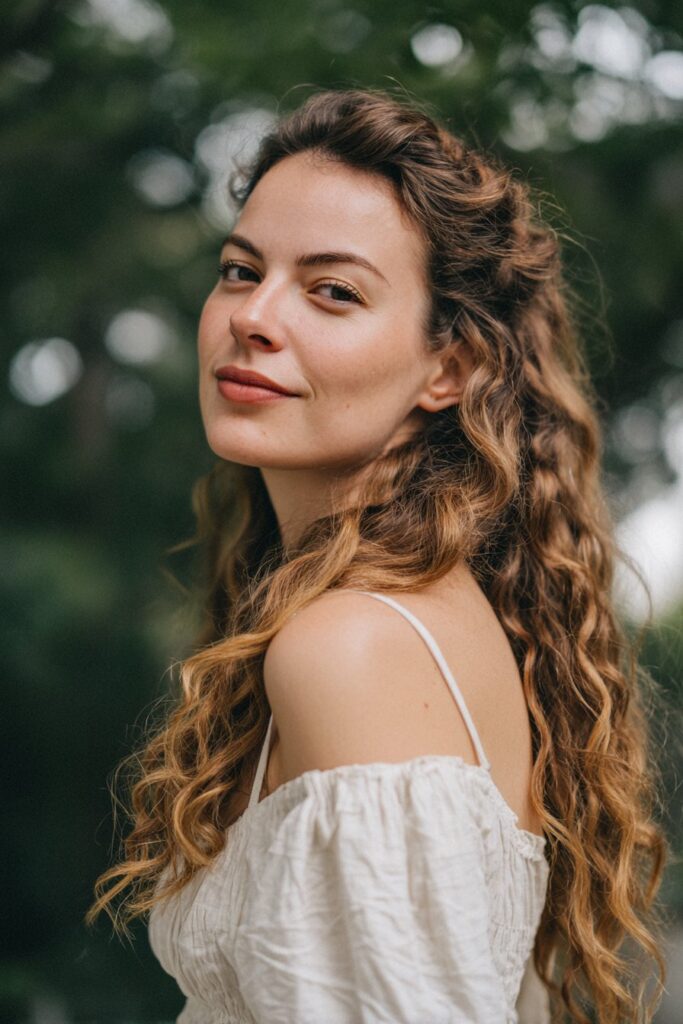
Textured Beach Waves with Side Part

Nothing says effortless beauty quite like textured beach waves. This is my go-to style when I’m off-duty and just want to feel relaxed but still put-together. I discovered this look during a vacation, walking along the beach with my rescue dog, Luna. The ocean air had given my hair this amazing tousled texture, and I thought, “Why don’t I recreate this more often?” It’s become one of my signature off-duty looks.
What It Is
Beach waves are those loose, slightly messy, textured waves that look like you just stepped off the sand after a day by the ocean. When combined with a side part, they create this beautiful, carefree vibe that’s both romantic and cool. The waves aren’t uniform or perfect—they’re organic, lived-in, and full of movement and dimension.
Best For
This style is perfect for casual outings, brunches, coffee dates, or really any time you want to look effortlessly beautiful without trying too hard. It works for all face shapes and hair textures, though it’s particularly gorgeous on women with wavy or slightly curly hair because you’re working with your natural texture. If you have fine hair, this style can actually make your hair look fuller and more voluminous.
How to Create It
Start with damp, towel-dried hair. This is one style where I actually prefer to work with hair that’s not completely clean—day-old hair has more texture and hold. Apply a sea salt spray throughout your hair, scrunching as you go. If you don’t have sea salt spray, you can make your own with water, sea salt, and a little leave-in conditioner.
Create your side part while your hair is still damp. Then, braid your hair into two or three loose braids and let it air-dry, or use a diffuser on low heat. If you’re in a hurry, you can also use a curling wand on random sections, alternating the direction of the curls and leaving the ends out for a more undone look.
Braided Side Sweep

I’ll never forget the first time I created a braided side sweep for a bride. She was so nervous about her wedding day, worried about everything being perfect. When I finished this hairstyle, she looked in the mirror and just started crying happy tears. This style has a way of making you feel romantic, feminine, and absolutely beautiful. It’s remained one of my favorite styles to create for special occasions.
What It Is
The braided side sweep combines the elegance of a side part with the intricate beauty of braiding. Essentially, you create a side part and then sweep all your hair to one side, incorporating braids along the way. The result is a hairstyle that’s both structured and soft, detailed yet romantic. It can be as simple or elaborate as you want, depending on the type of braids you incorporate.
Best For
This style shines at weddings, proms, formal dinners, or any special event where you want to make a statement. It’s particularly flattering on women with long, thick hair because you have plenty of length and volume to create impressive braids. If you have a square or angular face shape, this style is wonderful because the soft, romantic nature of the braids balances strong features. Plus, it’s practical—your hair stays out of your face all night while still looking absolutely gorgeous.
How to Create It
Begin with hair that has some texture—either naturally wavy or with some waves added with a curling iron. Create a deep side part, positioning it far over to one side. Take a section of hair from the front on the side with more hair and begin a Dutch braid (where you cross sections under instead of over), braiding along your hairline toward the back of your head.
As you braid, gradually incorporate more hair, keeping the braid loose and slightly messy for a romantic effect. Once you reach behind your ear, secure the braid with a small clear elastic. Now, gather all your hair—including the braid—and sweep it over one shoulder. You can leave it loose like this, or create additional braids throughout the length for more interest.
Voluminous Blowout with Side Part

There’s a reason why blowouts are a billion-dollar industry—they make you feel absolutely incredible! I remember when I was first starting out, I couldn’t afford regular salon blowouts, so I taught myself to do them at home. Now, I can create a salon-worthy blowout in my sleep, and I’m going to share all my secrets with you. This style is pure glamour and makes you feel like you could conquer the world.
What It Is
A voluminous blowout with a side part is all about big, bouncy, glossy hair with tons of movement and body. The hair is smooth but full of life, with the ends slightly curved under or flipped out. The side part adds dimension and creates this gorgeous cascade of volume that frames your face beautifully. It’s luxurious, polished, and incredibly versatile.
Best For
This style works for absolutely any occasion—from the office to a night out to a special event. It’s universally flattering and works well for all face shapes, though it’s particularly stunning on women with fine or medium hair who want to create the illusion of thickness and fullness. If you have naturally straight or slightly wavy hair, this style will be easier to maintain throughout the day.
How to Create It
This is all about technique and the right products. Start with freshly washed hair and apply a volumizing mousse from roots to ends while your hair is still soaking wet. Rough-dry your hair until it’s about 70% dry, then create your side part. Now here’s my secret for major volume: flip your head upside down and blast the roots with heat while scrunching, then flip back up.
Divide your hair into sections. Using a large round brush—I prefer a 2 to 3-inch barrel—take sections from the back and work your way forward. Place the round brush at the roots, direct the blow dryer downward (this closes the hair cuticle and creates shine), and pull the brush through to the ends while following with the dryer. At the ends, rotate the brush under to create that classic curved shape.
Half-Up Side Part with Loose Curls
This style holds a special place in my heart because it was one of the first updos I truly mastered. I created it for a dear friend’s engagement party, and she loved it so much that she asked me to do the same style for her wedding. It’s the perfect balance between casual and elegant, combining the beauty of loose, flowing hair with the practicality of having some hair pulled back.
What It Is
The half-up side part with loose curls features a dramatic side part with the hair styled in soft, romantic curls. The top section is pulled back and secured, while the rest cascades down in gorgeous waves. It’s a style that gives you the best of both worlds—you get to show off your beautiful long hair while keeping it out of your face. The curls add texture and movement, making it incredibly romantic and feminine.
Best For
This versatile style works beautifully for semi-formal events, outdoor weddings, graduation ceremonies, or even elevated everyday wear. It’s particularly flattering on women with heart-shaped or oval faces because pulling the hair back showcases your features while the loose curls soften the overall look. If you have thick hair, this style helps manage your volume while still looking full and luxurious. For women with fine hair, the curls create the illusion of thickness.
How to Create It
Begin by creating loose curls throughout your hair using a 1.5-inch curling wand. I like to curl away from my face and alternate the direction slightly for a more natural look. Once all your hair is curled, let it cool completely, then gently run your fingers through to soften the curls into waves.
Create a deep side part using a comb. Now, take a section of hair from the front on the heavier side, starting at your part and going back toward your crown. Also, take a section from the lighter side, going straight back. Twist these sections gently as you bring them to the back of your head, meeting at the crown. Secure with bobby pins or a small clear elastic.
Deep Side Part with Cascading Curls

I discovered the power of a deep side part during my time working fashion events. One designer specifically requested a dramatic side part for all the models in their show, and the transformation was unbelievable. It completely changed the feel of the entire presentation, adding this sultry, sophisticated element that photographs beautifully. Since then, I’ve been obsessed with deep side parts paired with cascading curls.
What It Is
This style features an extremely deep side part—we’re talking positioned way over to one side, sometimes even above the eyebrow. One side of your head has minimal hair, often slicked close to the scalp, while the other side is full of voluminous, cascading curls that flow over your shoulder. It’s dramatic, bold, and incredibly glamorous. The contrast between the sleek side and the curly side creates stunning visual interest.
Best For
This is your go-to style for making a statement at evening events, parties, photoshoots, or any occasion where you want all eyes on you. It’s particularly striking on women with thick, long hair because you need that volume to create the dramatic cascade. If you have an oval or heart-shaped face, this style is incredibly flattering as it creates asymmetry and draws attention to your eyes and cheekbones. It’s also perfect if you want to showcase statement earrings!
How to Create It
Start with completely dry hair. Create your deep side part first—position it 2 to 3 inches from your natural part, or even further if you’re feeling bold. Use a rat-tail comb to make it perfectly clean and precise. On the side with less hair, apply some smoothing gel or pomade and use a fine-toothed comb to slick it flat against your head. Bobby pin behind your ear if needed.
Now for the curls: using a 1-inch curling iron, curl all the hair on the fuller side in vertical sections, wrapping the hair around the barrel away from your face. Hold each section for about 10 to 15 seconds for lasting curls. Work in small sections for more defined, spiral curls. Once you’ve curled all your hair, let it cool.
Here’s my technique for those cascading curls: don’t brush them out. Instead, use your fingers to gently separate and arrange them. Spray each curl individually with hairspray, scrunching slightly as you go. Sweep all the curls over one shoulder for maximum drama. The key is to keep the curls defined and separated rather than blended together. This creates that gorgeous cascading waterfall effect that photographs like a dream.
Soft Side Part with Loose Ponytail
Sometimes the most elegant styles are the ones that look effortless. The soft side part with a loose ponytail is one of those styles that makes you look incredibly put-together without appearing like you tried too hard. I wear this style myself quite often when I’m running between appointments or need to transition from a day of work to an evening event. It’s chic, practical, and endlessly versatile.
What It Is
This style combines a gentle side part with a low or mid-height ponytail that’s intentionally loose and slightly messy. The hair isn’t pulled tight or sleek—instead, it has texture, volume, and a soft, romantic quality. Face-framing pieces are usually left out, and the ponytail itself often has waves or curls for added interest. It’s polished but relaxed, sophisticated but approachable.
Best For
This is perfect for transitional occasions—brunch, casual work environments, running errands but wanting to look nice, or even date nights at more casual venues. It works beautifully for all face shapes and is particularly great if you’re dealing with second or third-day hair that needs some structure but still has texture. Women with medium to long hair will find this style easiest to achieve, and it’s wonderful for active days when you need your hair secure but still want to look stylish.
How to Create It
If your hair is straight, add some loose waves first using a curling iron or by braiding damp hair and letting it dry. Create a soft side part—not too dramatic, just slightly off-center. Pull out a few face-framing pieces on both sides before you create your ponytail. These are crucial for that soft, romantic effect.
Gather your hair at the nape of your neck or slightly higher, depending on your preference. Here’s the key: don’t pull it tight. Use your fingers instead of a brush to gather the hair, allowing some looseness and texture. Secure with a hair elastic—I love using fabric-covered elastics as they’re gentler on your hair and look more polished.
Side Part with Vintage Pin Curls

I fell in love with vintage hairstyles when I was studying old films and photographs for inspiration. There’s something so romantic about the styles from decades past, and pin curls are the epitome of vintage glamour. I’ve created this look for themed events, vintage-inspired photoshoots, and even modern weddings with a classic twist. It never fails to make someone feel absolutely beautiful and timelessly elegant.
What It Is
Pin curls are small, flat curls that are pinned against the scalp while setting and then brushed out to create soft, structured waves. When paired with a side part, they create this gorgeous vintage silhouette that’s reminiscent of classic film stars. The style is polished, sophisticated, and has a wonderful sculptural quality. The curls have definition and structure while still being soft and touchable.
Best For
This style shines at vintage-themed events, retro parties, themed photoshoots, or any occasion where you want to channel old Hollywood elegance. It’s particularly stunning on women with medium to thick hair because the curls need some substance to hold their shape. If you have a round face, this style is wonderful because the side part and structured waves create length and angles. It’s also perfect if you love vintage fashion and want a hairstyle that complements your aesthetic.
How to Create It
This style requires some patience, but the results are absolutely worth it. Start with clean, damp hair. Apply a generous amount of setting lotion or mousse throughout your hair—this is essential for hold. Create a deep side part using a comb.
Once all your hair is in pin curls, let it dry completely. This can take several hours, so I often do this style the night before an event and sleep in a silk scarf. You can also sit under a hooded dryer to speed up the process. Once completely dry, carefully remove all the bobby pins. Gently brush through the curls with a soft bristle brush, brushing them in the direction you want them to fall.
The magic happens when you shape the waves with your fingers and secure them with bobby pins to create that sculptural, vintage look. You can pin waves close to your head for structure, or leave them loose for a softer effect. Finish with a strong-hold hairspray to keep everything in place. This style has serious staying power and looks absolutely stunning in photographs.
Side Part with Fishtail Braid

Fishtail braids are one of those styles that look incredibly intricate but are actually easier to create than they appear. I learned this braid technique from a fellow artist during a long day on set, and it’s become one of my favorites. There’s something so bohemian and romantic about a fishtail braid, and when you start it from a side part, it creates this beautiful asymmetrical effect that’s absolutely gorgeous.
What It Is
A fishtail braid is created by dividing hair into two sections and repeatedly taking small pieces from the outer edge of one section and crossing it over to the other section. The result is an intricate-looking braid with a beautiful, delicate texture that resembles a fish’s tail. When started from a side part and swept to one side, it creates a romantic, bohemian style that’s both elegant and relaxed.
Best For
This style is perfect for outdoor events, bohemian weddings, music festivals, casual summer gatherings, or anytime you want a romantic, laid-back vibe. It works beautifully on all hair types and lengths, though you need at least shoulder-length hair to create a proper fishtail. Women with highlighted or balayaged hair will find this style particularly striking because the braid showcases the different tones beautifully. It’s also great for active occasions because it keeps your hair secure and out of your face.
How to Create It
Start with hair that has some texture—either natural waves or texture added with a texturizing spray. Create a deep side part and sweep all your hair to one side over your shoulder. If you want a fuller, more romantic look, start by gently teasing the crown area for some volume.
Now, divide your hair into two equal sections. Take a thin piece from the outer edge of the left section and cross it over to join the right section. Then take a thin piece from the outer edge of the right section and cross it over to join the left section. Keep repeating this process, taking small pieces from the outside edges and crossing them over. The thinner your sections, the more intricate your braid will look.
Continue braiding all the way down and secure with a clear elastic. Here’s where the magic happens: gently pull on the edges of your braid to make it wider and more voluminous. This creates that romantic, slightly messy look that’s so popular. You can also pull out a few face-framing pieces before you start braiding for a softer effect. I love to pull the braid over one shoulder and secure it with bobby pins if needed. Finish with a light texturizing spray for hold and that perfect slightly-undone finish.
Asymmetrical Side Part

I discovered this style quite by accident during a photoshoot when we needed to showcase a model’s beautiful earrings. We created a dramatic asymmetrical look by tucking one side behind the ear, and the photos were absolutely stunning. Since then, I’ve used this technique countless times because it’s such a simple way to create major impact with minimal effort.
What It Is
This sleek, modern style features an asymmetrical side part with straight, glossy hair. One side is tucked behind the ear and secured, while the other side flows freely down, creating a striking asymmetrical look. It’s minimalist, sophisticated, and puts the spotlight entirely on your face and features. The contrast between the tucked side and the flowing side creates beautiful visual interest.
Best For
This style is perfect for showcasing statement earrings, highlighting your facial features, or creating a modern, editorial look. It works wonderfully for professional settings, art gallery openings, modern weddings, or anytime you want a sleek, contemporary aesthetic. Women with angular or oval face shapes will find this particularly flattering. It’s also ideal if you have one side of your face you prefer to show off, as you have full control over which side is more prominent.
How to Create It
Start with clean, straight hair. If your hair isn’t naturally straight, use a flat iron to smooth it completely. Create a deep side part, positioning it quite far to one side—about 2 to 3 inches from center. Apply a small amount of smoothing serum to add shine and control any flyaways.
On the side with less hair, smooth it back behind your ear using a bit of gel or pomade for hold. Secure with several bobby pins that match your hair color, placing them vertically behind your ear. Some people like to create a small braid on this side before tucking it for added interest, which is a beautiful variation.
The other side should fall freely and straight, creating that dramatic asymmetrical effect. For extra staying power on the tucked side, spray with strong-hold hairspray after pinning. I sometimes also use a small amount of edge control on the hairline to keep everything sleek and smooth.
Side Part with Romantic Low Bun

The romantic low bun is one of my all-time favorite styles for special occasions. I’ve created this look for countless brides, and it never fails to make them feel absolutely beautiful. There’s something so elegant and timeless about a low bun, and when you add a side part and pull some soft pieces around the face, it becomes incredibly romantic and feminine.
What It Is
This style features a soft side part with the hair gathered into a low bun at the nape of the neck. Unlike a tight, severe bun, this version is intentionally loose, soft, and slightly messy. Wispy pieces frame the face, and the bun itself has texture and dimension rather than being perfectly smooth. It’s elegant but approachable, formal but not stiff.
Best For
This is an ideal style for weddings (whether you’re the bride, bridesmaid, or guest), formal dinners, black-tie events, or any occasion where you want to look sophisticated and put-together. It works beautifully for all face shapes and is particularly lovely on women with long necks as it showcases them beautifully. If you have thick hair, you’ll create a fuller, more impressive bun. If you have fine hair, you can add a bun form or teasing for more volume.
How to Create It
Start by creating loose waves throughout your hair using a curling iron—this adds texture that makes the bun look fuller and more interesting. Create a soft side part, pulling out a few face-framing pieces on both sides before you begin. These are crucial for that romantic, soft effect.
Gather your hair at the nape of your neck, keeping it loose rather than pulling it tight. Here’s my technique for a fuller bun: before securing your ponytail, gently backcomb the hair at the crown for volume. Secure your low ponytail with an elastic, then take the ponytail and twist it loosely. Wrap the twisted hair around the base to create a bun, securing with bobby pins as you go.
The key to the romantic look is to not make it perfect. Pull on the bun slightly to loosen it and create dimension. Pull out a few small pieces to create texture. You can also gently pull on the hair at the crown to create a slight “pouf” for added volume and that soft, romantic silhouette. Spray with a medium-hold hairspray to keep it in place while maintaining movement. I love adding small flowers, delicate pins, or a vintage hair comb for special occasions.
Side Part with Mermaid Waves

Mermaid waves are absolutely magical—they’re the perfect blend of romantic and beachy, structured and free-flowing. I started creating this look after being inspired by the ocean during a trip to the coast. There’s something about those long, flowing, slightly wild waves that makes you feel like a mythical sea goddess. It’s one of my favorite styles to wear myself when I want to feel feminine and free.
What It Is
Mermaid waves are long, loose waves that start mid-shaft and flow all the way down to the ends. They’re softer than traditional curls but more defined than beach waves, creating this gorgeous, flowing texture that looks like it was created by the ocean itself. When paired with a side part, they create beautiful movement and dimension. The waves have a slight S-shape and lots of shine, giving them that ethereal, mermaid-like quality.
Best For
This style is perfect for summer events, beach weddings, music festivals, or anytime you want to channel those effortless, ocean-inspired vibes. It’s universally flattering and works for all face shapes and hair types. Women with long, thick hair will find this particularly stunning because the length and volume create maximum impact. It’s also great for showcasing hair color—those waves really show off highlights and dimension.
How to Create It
Start with clean, damp hair and apply a curl-enhancing cream or mousse. Create your side part while hair is still damp. Let your hair air dry about halfway, then begin styling. If you’re in a hurry, you can blow-dry with a diffuser on low heat, scrunching as you go.
For the waves, I like to use a flat iron technique: take a section of hair, starting about halfway down, and clamp your flat iron. Twist your wrist to create a bend in the hair, then glide down a few inches and create another bend in the opposite direction. Continue this S-motion all the way down to the ends. Work through all your hair in sections.
Once all your hair is waved, let it cool completely, then apply a sea salt spray throughout, scrunching gently to enhance the texture. Here’s my secret for that mermaid shine: apply a small amount of hair oil to the mid-lengths and ends, avoiding the roots. This creates that glossy, wet-looking finish that’s so characteristic of mermaid waves. Run your fingers through your hair to blend the waves naturally, and shake your head gently to create movement. The result should be flowing, shiny, slightly wild waves that look like you just emerged from the ocean.
Side Part with Twisted Crown Detail

The twisted crown is one of those details that elevates any hairstyle from simple to special. I love creating this look because it’s versatile enough for both casual and formal occasions, depending on how you style it. I developed my technique for this during my training days, and it’s remained a staple in my styling repertoire because it’s beautiful, practical, and works on virtually everyone.
What It Is
This style features a side part with sections of hair from the front twisted back and secured at the crown, creating a lovely crown-like detail. The rest of the hair flows freely down, either straight, wavy, or curly. The twisted sections create visual interest and keep hair out of your face while still showcasing your length. It’s elegant, feminine, and has a slightly ethereal, princess-like quality.
Best For
This versatile style works for semi-formal events, outdoor weddings, garden parties, bridal showers, or even elevated everyday wear. It’s particularly flattering on women with heart-shaped or oval faces because the twisted crown draws attention to your eyes and cheekbones. It works beautifully on all hair lengths (as long as you have enough length to twist and pin) and textures. If you want a romantic, feminine look that’s also practical for active occasions, this is perfect.
How to Create It
Start by styling the length of your hair as desired—loose curls or waves work particularly well with this style. Create a deep side part using a fine-toothed comb. Take a section of hair from the front on the heavier side of your part, starting right at the part and going back about 2 inches. Twist this section back toward the crown, securing with bobby pins.
Now take a section from the lighter side of your part, twist it back, and cross it over the first twist, creating an X-pattern at the crown. Secure with bobby pins. You can stop here for a simple look, or continue creating more twists for a more intricate crown effect. Some variations I love: you can braid the sections instead of twisting them, or you can create a waterfall effect where you drop pieces as you twist.
Conclusion
You know, after all these years working in beauty and seeing thousands of different faces and hair types, I’ve learned that there’s truly no one-size-fits-all approach to hairstyling. What makes someone feel beautiful and confident is deeply personal. That’s why I wanted to share these 14 different side part hairstyles with you—because variety is the spice of life, and you deserve options that make you feel like your best self.
When I look back on my journey from that young girl in the South watching her mother get ready, to my early days in the city learning my craft, to now sharing my knowledge with all of you, I’m reminded of why I fell in love with beauty in the first place. It’s not about perfection. It’s not about following rigid rules or trying to look like someone else. It’s about expression, creativity, and feeling empowered to show the world who you are.
These side part hairstyles are tools in your beauty toolkit. Some days you might feel like channeling old Hollywood glamour with those classic waves. Other days, you might want the effortless cool of beach waves or the romantic softness of a twisted crown. And you know what? Both are equally valid and beautiful because they’re expressions of different facets of who you are.
I encourage you to experiment with these styles. Try them out for different occasions, mix and match techniques, and don’t be afraid to make them your own. Add your personal twist—literally and figuratively. Maybe you’ll combine the sleek side with romantic curls on the other side, or perhaps you’ll add your own creative elements like accessories, braids, or unique twisting patterns.
Remember, healthy hair is the foundation of any beautiful hairstyle. I can’t stress this enough—invest in good heat protectants, deep conditioning treatments, and quality tools. Your hair is your crowning glory, and it deserves to be treated with love and care. Trust me, I’ve seen the difference it makes when someone commits to hair health. The shine, the manageability, the way it holds styles—it’s transformative.
I also want you to remember that it’s okay if a style doesn’t work perfectly the first time. Some of these techniques, like pin curls or intricate braids, take practice. I’ve had my share of hair disasters—we all have! But each attempt teaches you something new about your hair and what works for you. Be patient with yourself, enjoy the learning process, and celebrate the small victories along the way.
As you explore these side part hairstyles, I hope you’ll discover new favorites and new ways to express yourself. Maybe you’ll find that the sleek, straight side part makes you feel powerful and professional for your big presentation. Maybe the mermaid waves will become your go-to for feeling romantic and free. Or perhaps the twisted crown will be your signature style that everyone associates with you.
Thank you for joining me on this journey through these side part hairstyles. I hope these tips, techniques, and insights serve you well in your own beauty adventures. Keep experimenting, keep learning, and most importantly, keep celebrating the beautiful, unique individual that you are. Your hair is an extension of your personality and creativity—have fun with it!