As Belle Hathaway, I have had the privilege of working with so many beautiful families preparing for one of life’s most sacred and memorable milestones — a child’s First Communion. And if there is one thing I have learned over the years, it is that beauty lives in the details. The dress, the veil, the shoes — they all matter. But let me tell you, the nails? They are the finishing touch that ties the entire look together in the most elegant, personal way.
I remember the very first time I did nails for a First Communion. It was for a young girl whose mother came to me almost in tears, worried that something so small would be overlooked. We sat together, flipped through some ideas, and I created the softest, most delicate white floral design on her tiny nails. When that little girl looked down at her hands, her face lit up like the sun. That moment is why I do what I do.
First Communion nails are not just about color or polish. They are about meaning, memory, and making a child feel like the most special version of herself on one of the most important days of her life. In this article, I am sharing fourteen stunning nail styles — each one unique, thoughtful, and perfectly suited for this holy occasion. Whether you are going for something classic, something whimsical, or something with a little shimmer, there is a look here for every little girl. And the best part? I am walking you through exactly how to create each one.
Classic White French Tips
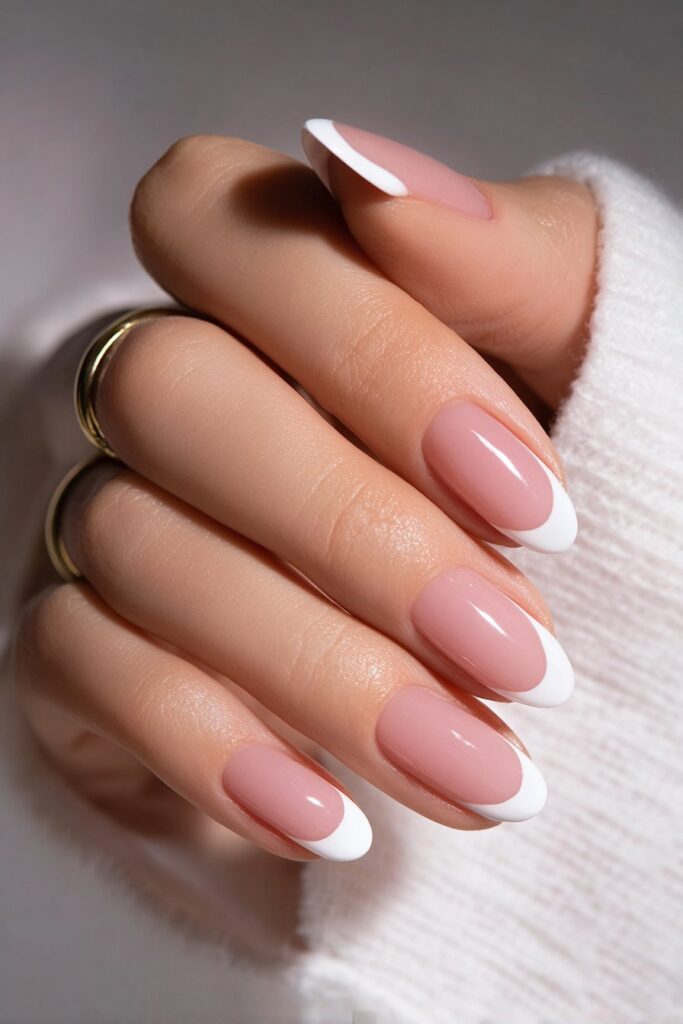
Nails: Inspiration from Classic White French Tips
When I think about First Communion, the first image that comes to my mind is always the color white — pure, simple, and timeless. White French tips are one of those nail styles that never go out of fashion, and for a good reason. They are clean, they are elegant, and they complement every skin tone. I have painted this style on so many clients over the years, and it never fails to feel just right for a sacred occasion. The classic French tip communicates grace without trying too hard, which is honestly the most beautiful kind of beauty there is. For a First Communion specifically, this style feels appropriate, refined, and genuinely lovely against a white dress and delicate accessories.
Tools needed to create the nails design
To create this look, you will need a clear or nude base coat, a bright white nail polish, a thin striping brush for precision, French tip nail guides or tape, and a glossy topcoat to seal everything in perfectly.
Step by step guide to create nails design
- Apply a clear or clean base coat and let it dry completely before moving forward.
- Place French tip guides along the edge of each nail to create a clean, even line.
- Using white nail polish and the striping brush, carefully paint across the tips, following the guide.
- Remove the guides before the polish sets, then apply a glossy topcoat for a flawless, long-lasting finish.
Delicate Pearl Accent Nails
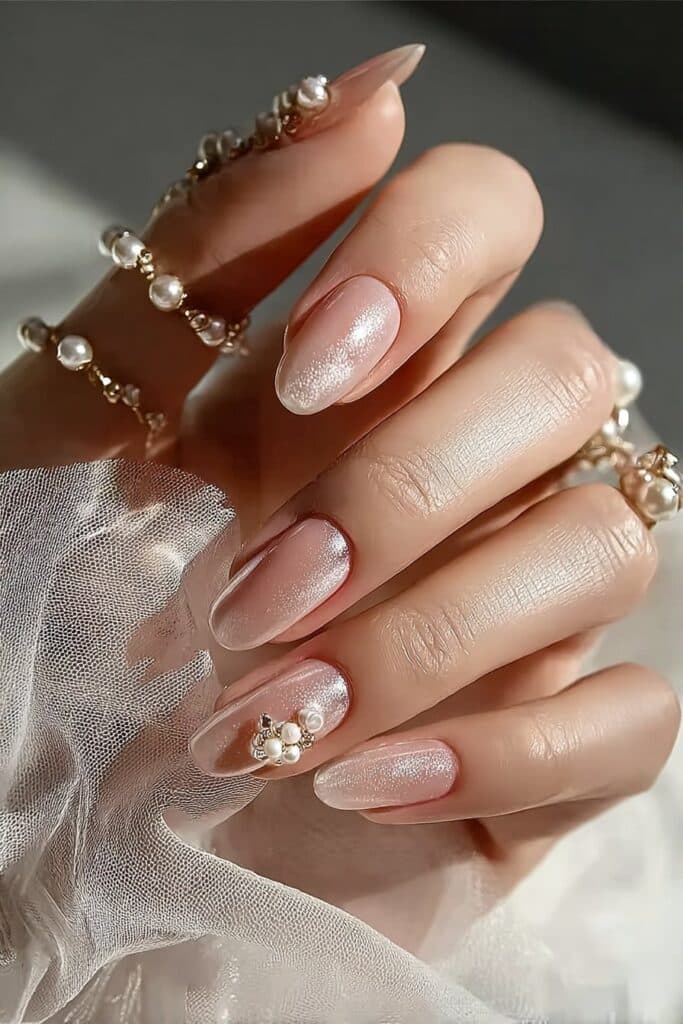
Nails: Inspiration from Delicate Pearl Accent Nails
Pearls have always represented purity, sophistication, and timeless elegance — making them a natural choice for First Communion nails. I first experimented with pearl accents during a bridal shoot, and I immediately thought, this belongs at a communion table too. The way tiny pearl beads catch the light is simply magical. For a young girl dressed in white, these nails feel like something straight out of a fairytale. They are feminine without being overdone, and they hold a symbolic meaning that feels perfectly aligned with the spiritual significance of the day.
Tools needed to create the nails design
You will need a white or sheer base polish, micro pearl nail beads, nail glue or thick topcoat to adhere the pearls, a dotting tool or tweezers for precise placement, and a clear topcoat to seal.
Step by step guide to create nails design
- Apply your white or sheer base coat and allow it to dry until slightly tacky.
- Using a dotting tool dipped in nail glue, gently pick up each micro pearl and place it along the nail tip or in a curved accent line near the base.
- Press each pearl lightly to secure it in place without shifting.
- Seal everything with a generous layer of clear topcoat, making sure to coat over each pearl for staying power.
Soft Blush Pink Ombre

Nails: Inspiration from Soft Blush Pink Ombre
Not every little girl wants pure white nails, and I completely understand that. Some girls have a gentle, romantic spirit that leans toward pink — and blush pink ombre is the most perfect expression of that spirit for a First Communion. I love this style because it feels both modern and soft at the same time. The gradient from white at the tips to blush at the base creates a dreamy, cloud-like effect that I find absolutely stunning. It works beautifully on shorter nails too, which is important when you are working with younger children.
Tools needed to create the nails design
You will need a white base polish, a soft blush pink polish, a small cosmetic sponge, a cleanup brush with acetone, and a topcoat with a satin or glossy finish.
Step by step guide to create nails design
- Start with a white base coat applied evenly across all nails and let it dry fully.
- Paint both the white and blush pink polishes side by side onto the cosmetic sponge, slightly overlapping.
- Dab the sponge gently onto each nail in a pressing motion to build the ombre gradient.
- Clean up edges with the acetone brush and seal with your chosen topcoat for a polished, seamless finish.
White Floral Lace Nails
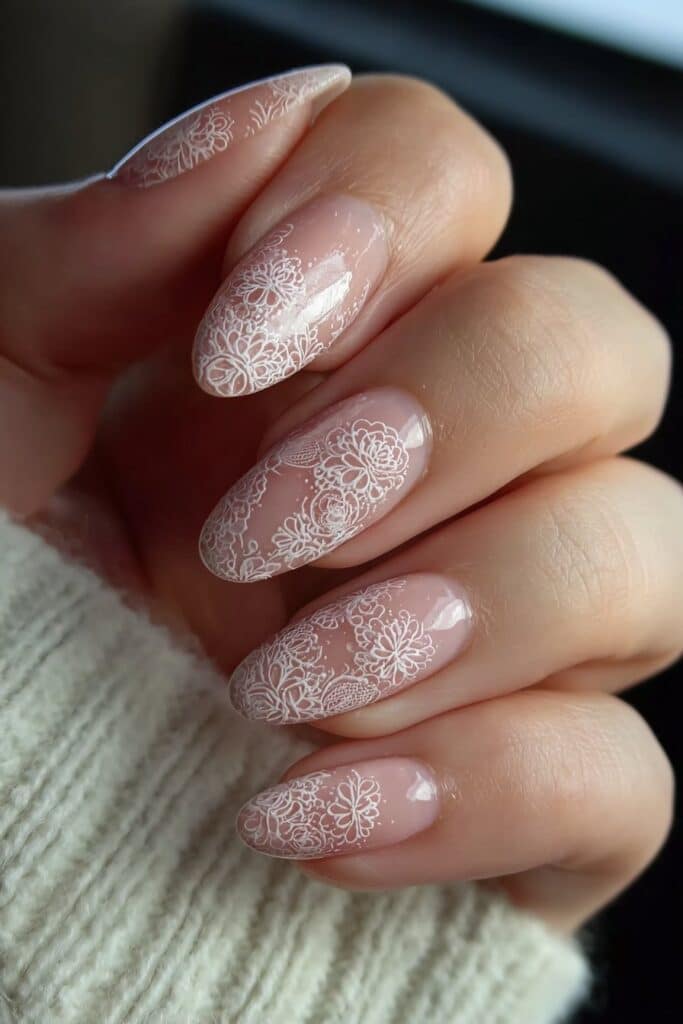
Nails: Inspiration from White Floral Lace Nails
Lace is one of the most iconic elements of a First Communion dress, and recreating that texture on nails is something I find endlessly exciting. White floral lace nails draw inspiration directly from the delicate fabrics woven into the celebration itself. I created a version of this design for a young girl whose dress had the most intricate lace sleeves, and her mother actually cried when she saw how perfectly the nails matched. That is the power of intentional beauty. The tiny hand-painted flowers and swirling lines mimic the pattern of lace in a way that is artistic, detailed, and breathtakingly special.
Tools needed to create the nails design
You will need a sheer or white base polish, a fine nail art brush, white nail art paint or gel, a dotting tool for floral centers, and a matte or glossy topcoat depending on the finish you prefer.
Step by step guide to create nails design
- Apply a sheer or white base coat and let it dry completely before beginning any nail art.
- Using the fine nail art brush loaded with white nail art paint, draw delicate loops, swirls, and small petals to mimic a lace pattern across the nail surface.
- Add tiny dots in the center of each flower shape using the dotting tool for dimension.
- Finish with either a matte topcoat for a fabric-like feel or a glossy coat for something more polished and refined.
Glittery Holy Cross Nails
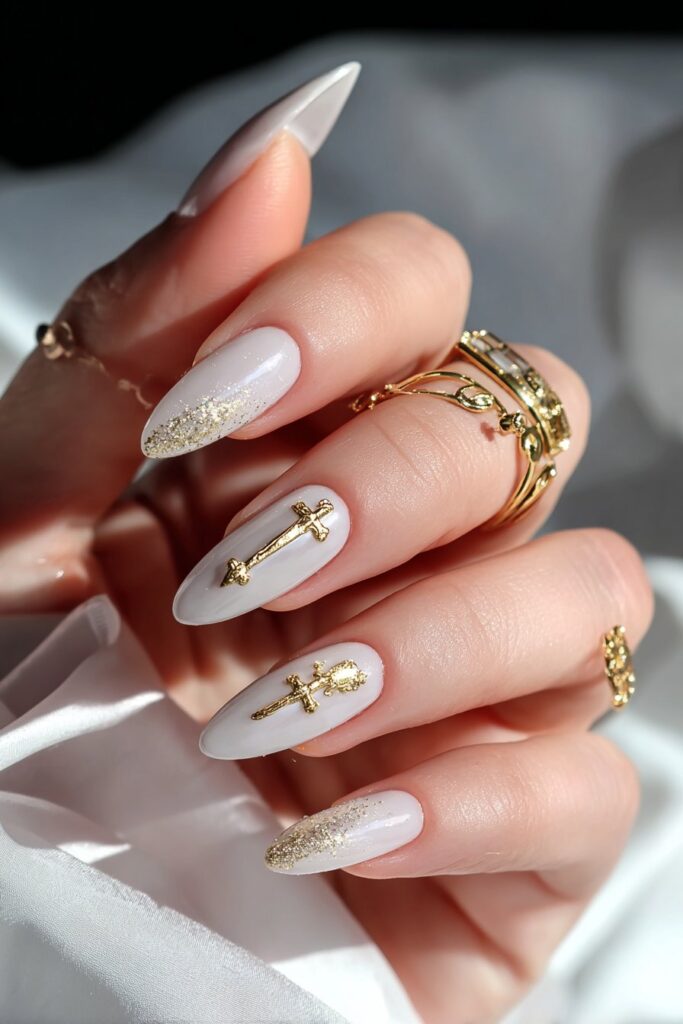
Nails: Inspiration from Glittery Holy Cross Nails
There is something so meaningful about incorporating sacred symbols into a First Communion nail design, and the cross is perhaps the most recognized symbol of this milestone. I love doing glittery cross nails because they manage to feel both spiritual and celebratory at the same time. The sparkle catches the light during the ceremony in the most beautiful way, almost like a little blessing winking from each fingertip. I have done this design in silver, gold, and even a soft rose gold — and every version has been adored.
Tools needed to create the nails design
You will need a white or nude base polish, a thin striping brush, fine glitter nail polish or loose glitter with nail glue, a dotting tool, and a strong clear topcoat to lock everything in.
Step by step guide to create nails design
- Paint the base coat in white or nude and allow it to dry completely before starting the cross detail.
- Using the striping brush dipped in glitter polish, paint a vertical and horizontal line intersecting at the center of each nail to form the cross shape.
- If using loose glitter, apply a tiny line of nail glue first, then dust the glitter carefully onto the shape.
- Seal with two layers of strong clear topcoat to prevent any glitter from lifting or flaking throughout the day.
Pastel Lavender Nails
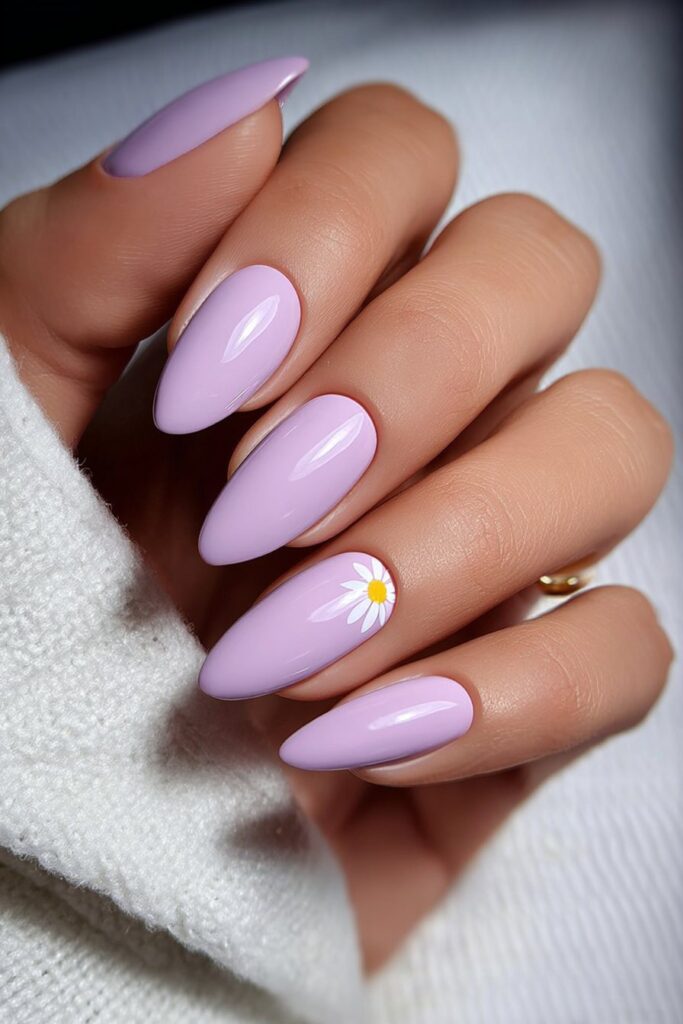
Nails: Inspiration from Pastel Lavender Nails
Lavender is a color that holds so much quiet beauty — it is soft, it is spiritual, and it carries a kind of peaceful energy that I think aligns beautifully with a First Communion. Not every family wants white or pink, and lavender is a wonderful alternative that still feels pure and appropriate for the occasion. I have always believed that giving children options and letting them express their personality is an act of love, and if a little girl is drawn to lavender, that choice should be honored and celebrated. Pastel lavender nails look absolutely stunning against white dresses and are genuinely unique on the communion circuit.
Tools needed to create the nails design
You will need a pastel lavender nail polish, a clear base coat, small white nail decals or a fine brush for optional floral accents, and a glossy topcoat to enhance the color depth.
Step by step guide to create nails design
- Apply a clear base coat and allow it to dry before moving to the color application.
- Paint two smooth, even coats of pastel lavender polish, allowing the first coat to dry before applying the second.
- If adding floral accents, use a fine brush with white paint to add tiny daisies or dots for a garden-fresh touch.
- Seal with a glossy topcoat that will deepen the lavender shade and give the nails a beautiful, luminous finish.
Rosary Bead Nail Art
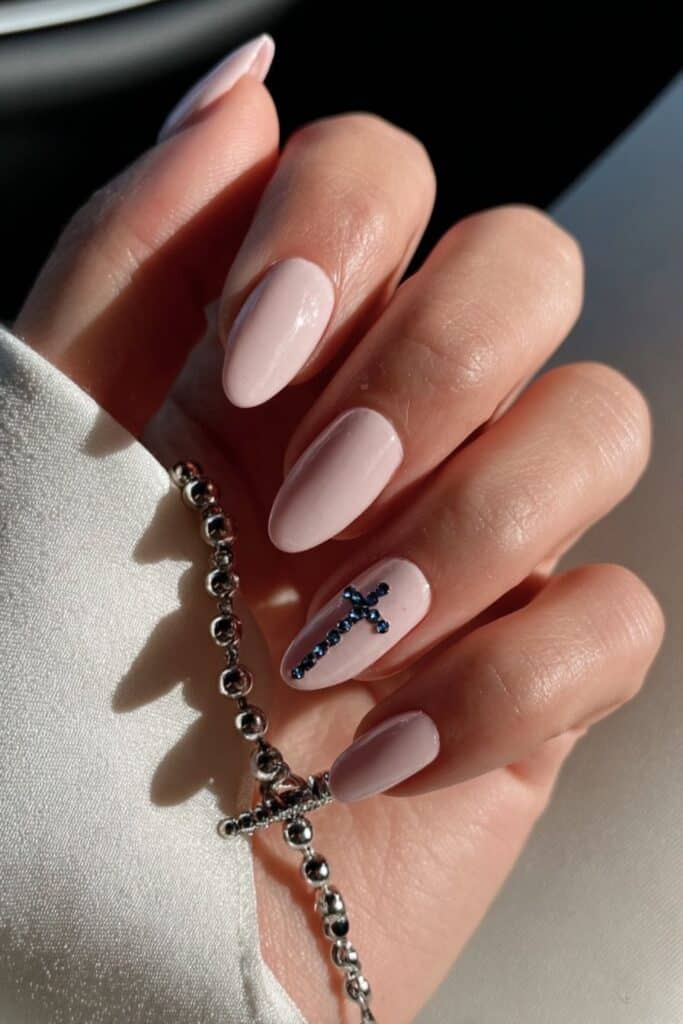
Nails: Inspiration from Rosary Bead Nail Art
One of the most personal and meaningful designs I have ever created for a First Communion is rosary bead nail art. The rosary is such a central part of this faith tradition, and seeing it interpreted on nails is something that genuinely moves me. I first did this design after a client’s mother showed me a photo of a rosary that had belonged to her grandmother — she wanted her daughter to carry that connection with her during the ceremony. The result was a series of tiny pearl-dot beads painted in a chain across the nail, with a small cross accent on one finger. I still think about that design to this day.
Tools needed to create the nails design
You will need a white or cream base polish, a dotting tool, white and gold nail art paint, a fine striping brush for the cross detail, and a clear topcoat to seal the design.
Step by step guide to create nails design
- Begin with a smooth white or cream base coat and let it dry fully before painting any details.
- Using the dotting tool, create a series of evenly spaced dots in a curved chain formation across each nail to represent the rosary beads.
- On one accent nail, use the fine striping brush to paint a delicate cross at the bottom of the bead chain.
- Apply a clear topcoat gently to avoid smearing the detail work, and let it cure completely.
Feathered Nails
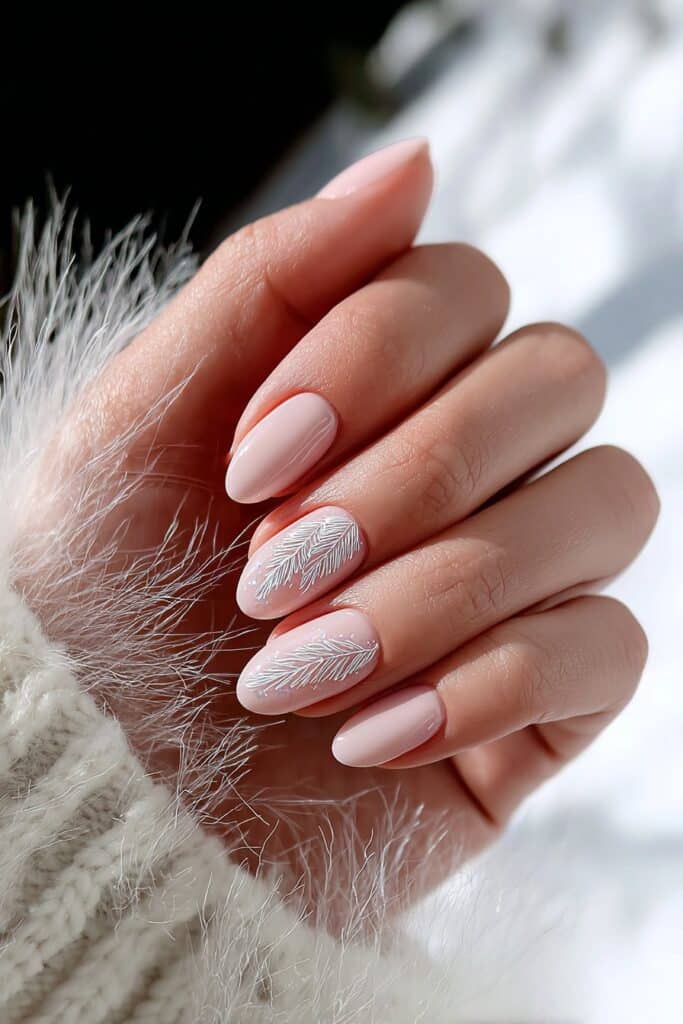
Nails: Inspiration from Feathered Nails
If I had to choose one design that feels the most magical and the real for a First Communion, it would be wing nails. There is something so poetic about placing wings on a little girl’s fingertips on a day when she is stepping closer to her faith. I developed this design after I started seeing feathery, light motifs in high fashion editorial work and thought — this translates perfectly to something sacred. The wing shapes, painted in white with fine feathery strokes, are delicate but striking. Parents always love this one because it photographs beautifully.
Tools needed to create the nails design
You will need a sheer white or pearl base coat, a fine nail art brush, white and soft grey nail art paint for feather shading, a dotting tool for small detail work, and a glossy topcoat.
Step by step guide to create nails design
- Apply your sheer pearl base coat and let it dry before beginning any wing art detail.
- Using the fine brush and white nail art paint, sketch a curved wing shape on each nail with feather-like strokes fanning outward from the center.
- Add soft grey shading along the lower edges of the feathers to give them dimension and a three-dimensional lifted appearance.
- Seal with a glossy topcoat that will make the wings appear to shimmer softly under the ceremony lights.
Olive Branch Nails

Nails: Inspiration from Olive Branch Nails
I Paired a tiny olive branch with white accent , this design takes on a whole new level of beauty and symbolism. I created this design after being inspired by stained glass artwork I had seen in a beautiful old church.The result is always elegant, artistic, and incredibly meaningful to the families who choose it.
Tools needed to create the nails design
You will need a pale blue or white base coat, a fine detail brush, white and soft green nail art paint and a clear glossy topcoat.
Step by step guide to create nails design
- Start with a pale blue or white base and allow it to dry completely before painting any figures.
- Add a tiny olive branch extending from the dove’s beak using soft green nail art paint and the fine brush tip.
- Seal with a clear glossy coat to preserve the fine details and give the design a stained-glass-inspired luminosity.
Minimalist White Dot Nails

Nails: Inspiration from Minimalist White Dot Nails
Sometimes less truly is more, and minimalist white dot nails are the perfect proof of that philosophy. I am a firm believer that restraint in design can be just as powerful as complexity, and for younger children especially, a simple and clean nail look often suits the occasion best. White dots on a sheer or nude base create a pattern that is subtle, modern, and incredibly refined. I have used this design for girls who wanted something understated but still intentionally styled, and it always earns compliments for its quiet elegance.
Tools needed to create the nails design
You will need a sheer or nude base coat, a dotting tool in two sizes for variation, white nail art paint or polish, and a matte or glossy topcoat based on the finish you prefer.
Step by step guide to create nails design
- Apply the sheer or nude base coat evenly and let it dry completely before adding any dots.
- Dip the larger dotting tool into white nail art paint and create a cluster of dots near the nail tip or scattered randomly across the surface.
- Use the smaller dotting tool to add tinier dots between the larger ones for a layered, textured dot pattern.
- Seal with your preferred topcoat — matte gives a modern, editorial finish, while glossy keeps it classic and polished.
Soft Gold Foil Nails
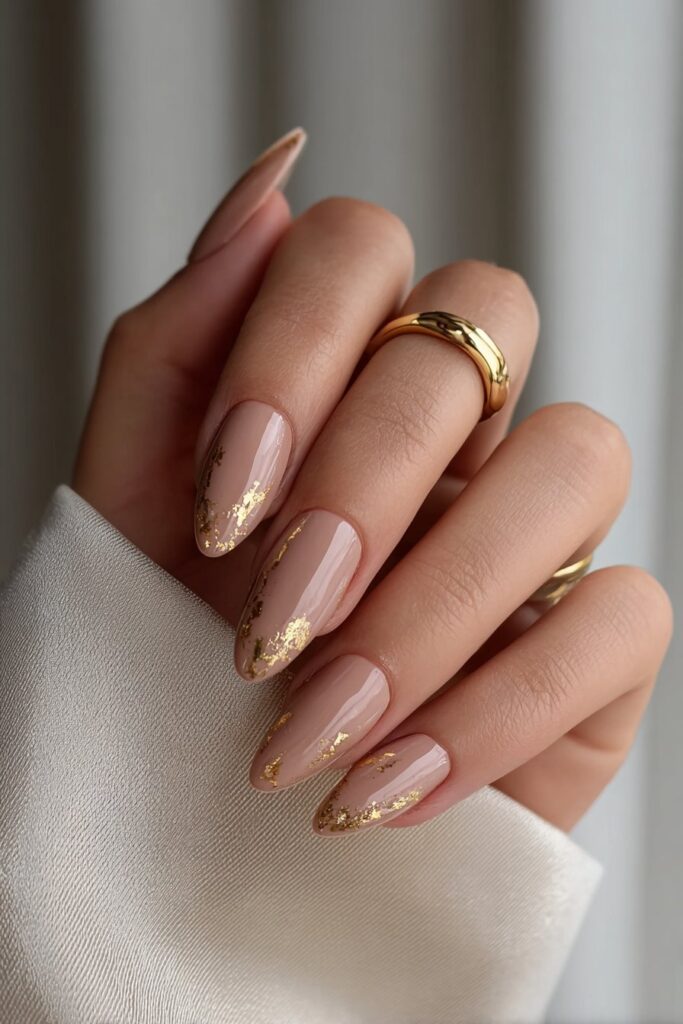
Nails: Inspiration from Soft Gold Foil Nails
Gold has long been associated with divinity, sacredness, and celebration, which is exactly why soft gold foil nails feel so perfect for a First Communion. I remember doing a gold foil accent nail for a young client whose entire look was soft white with gold details — her headband, her shoes, even a gold crucifix around her neck. The moment I pressed that first piece of gold foil onto her nail, her eyes went wide with delight. Gold foil nails are glamorous without being excessive, and when kept soft and intentional, they feel genuinely elevated for a sacred occasion.
Tools needed to create the nails design
You will need a white or nude base coat, gold nail foil sheets, a foil adhesive or sticky gel coat, tweezers or a foil transfer tool, and a strong clear topcoat to seal the foil firmly.
Step by step guide to create nails design
- Apply the base coat in white or nude and let it fully dry before beginning the foil application.
- Paint a thin layer of foil adhesive over the areas where you want the gold to appear and wait until it becomes tacky.
- Press small pieces of gold foil sheet onto the tacky adhesive, then gently peel back to reveal the transferred gold.
- Seal immediately and thoroughly with a strong clear topcoat to prevent the foil from lifting or peeling throughout the day.
Baby Blue Cloud Nails
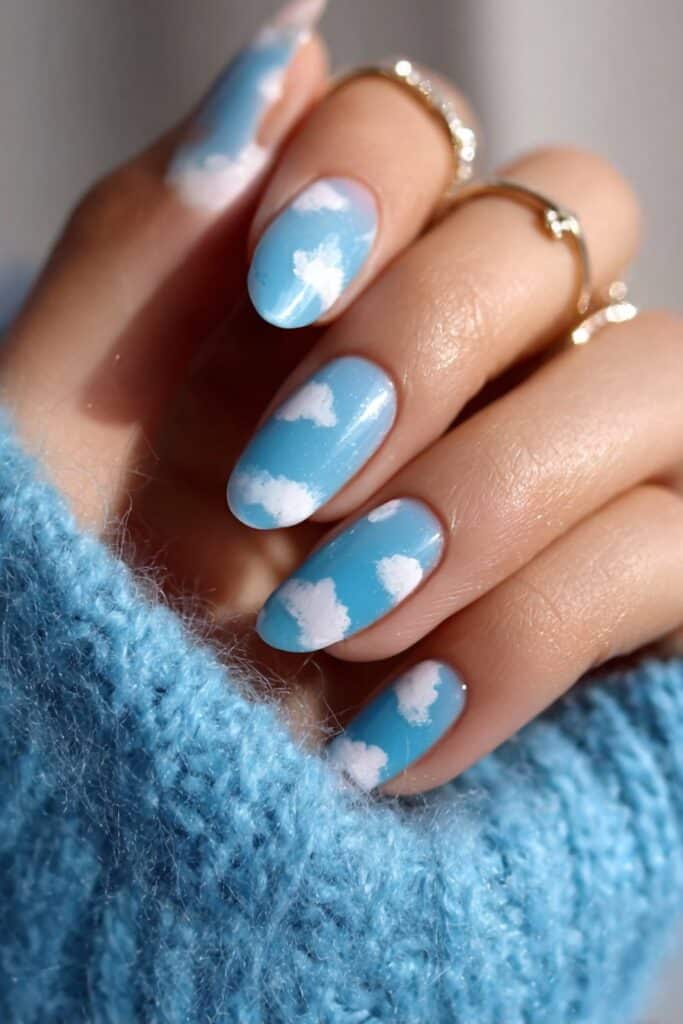
Nails: Inspiration from Baby Blue Cloud Nails
Baby blue cloud nails are one of those designs that look like they came straight from a dream, and honestly, that is exactly the energy I was going for when I first created this look. Soft, fluffy clouds painted against a pale blue sky feel heavenly — and what could be more fitting for a First Communion? This design carries a light and joyful spirit that young girls absolutely love. It is playful without being too casual, and it photographs like something out of a children’s storybook. I love pairing this look with a white dress and simple accessories for a complete, cohesive aesthetic.
Tools needed to create the nails design
You will need a pale baby blue base polish, a small thin brush or sponge, white nail art paint, a dotting tool for cloud shaping, and a glossy or satin topcoat to complete the look.
Step by step guide to create nails design
- Apply two coats of pale baby blue polish as the sky base, allowing each coat to dry before proceeding.
- Using the thin brush and white nail art paint, dab soft, rounded cloud shapes along the lower or upper portion of each nail.
- Use the dotting tool to add small additional puff shapes to the edges of each cloud for a fuller, more dimensional appearance.
- Seal with a glossy topcoat that will make the clouds appear bright and crisp against the blue sky background.
White Tulip Nails
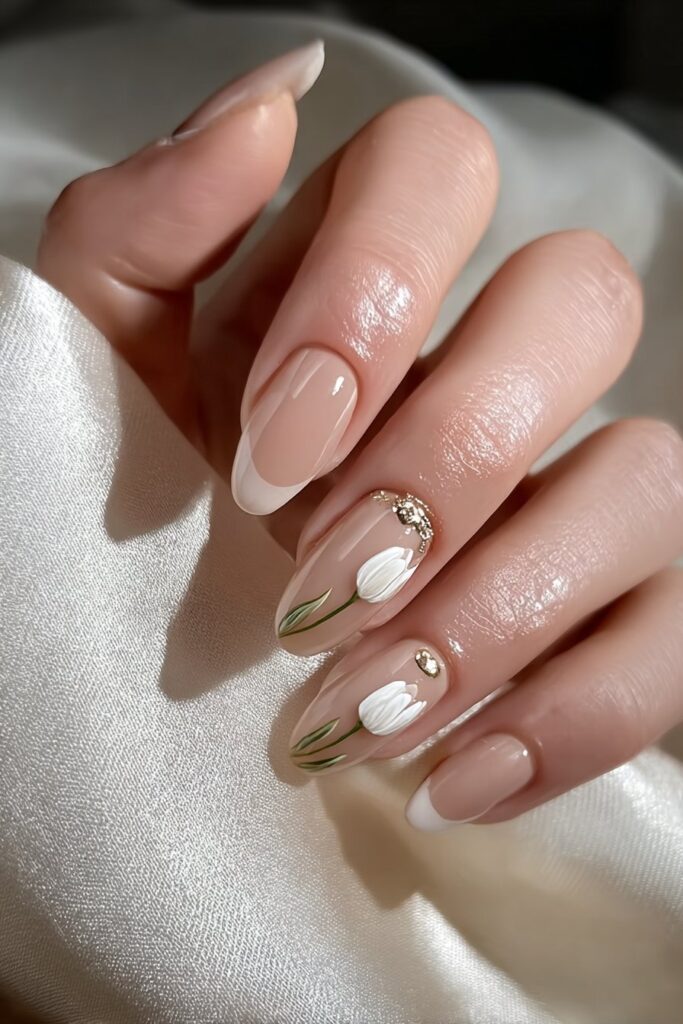
Nails: Inspiration from White Tulip Nails
Flowers have always been a part of First Communion imagery — in bouquets, in hair accessories, in church decor. So bringing them onto the nails in the form of white tulips feels like a completely natural and beautiful extension of that tradition. Tulips symbolize purity and rebirth, making them deeply fitting for this spiritual milestone. I discovered my love for tulip nail art while working on a spring-themed editorial shoot, and the moment I painted my first white tulip on a nail, I knew it belonged at a communion table. The shape is clean, recognizable, and genuinely elegant.
Tools needed to create the nails design
You will need a clear or nude base coat, white nail art paint, a fine nail art brush, soft green paint for the stem and leaves, and a clear glossy topcoat to finish.
Step by step guide to create nails design
- Apply a clear or nude base coat and allow it to dry fully before painting any floral details.
- Using white nail art paint and the fine brush, paint three overlapping oval petal shapes to form the tulip bloom at the center or tip of each nail.
- Add a thin, curved stem and two small leaf shapes in soft green nail art paint extending below the flower.
- Seal with a clear glossy topcoat to preserve the fine detail and give the flowers a fresh, vibrant appearance.
Sheer Sparkle Nails
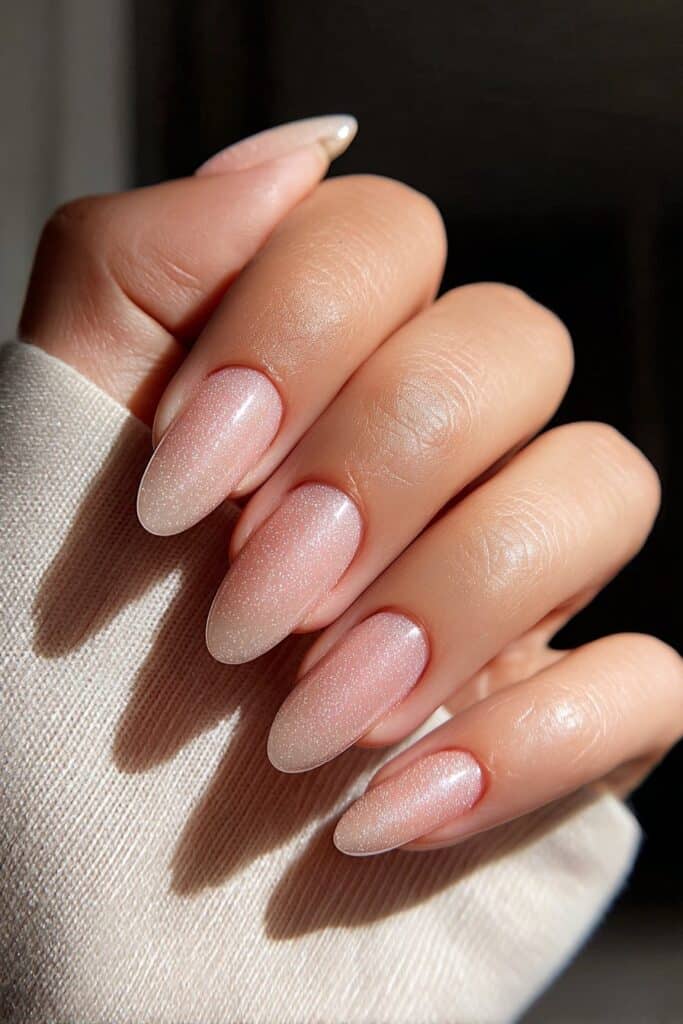
Nails: Inspiration from Sheer Sparkle Nails
My absolute final pick for First Communion nails is one that holds a very special place in my heart — sheer sparkle nails. These are the kind of nails that seem to glow from within, catching light in the most magical way during the ceremony. I have a deep love for anything that shimmers softly without screaming for attention, and sheer sparkle nails are the definition of that philosophy. They work beautifully on every nail length, every skin tone, and every personality type. Whether a girl is shy and gentle or bold and full of joy, sheer sparkle nails make her feel radiant — and that is truly what this day is all about.
Tools needed to create the nails design
You will need a sheer pink or clear glitter-infused nail polish, a clear base coat, a fine glitter powder or chunky glitter topper for the accent nail, a topcoat, and nail glue if applying any embellishments.
Step by step guide to create nails design
- Begin with a clear base coat to protect the natural nail and provide a smooth foundation for polish application.
- Apply two coats of the sheer glitter-infused polish across all nails, building shimmer gradually with each coat.
- On one or two accent nails, apply a layer of chunky glitter topper or press fine glitter powder into the wet polish for an extra-dimensional sparkle effect.
- Seal with a thick, generous topcoat to lock in all the glitter and give the nails a glass-like, luminous finish.
Conclusion
If there is one thing I want every parent and every young girl to take away from this guide, it is that First Communion nails are so much more than a beauty detail — they are a tiny, personal expression of something deeply meaningful. Whether you choose the quiet elegance of classic white French tips or the dreamy magic of baby blue clouds, each design carries the intention of honoring a sacred moment in a beautiful, heartfelt way.
As Belle Hathaway, I have been privileged enough to sit across from so many families on the eve of their most precious days and create something special just for them. I have seen how a perfect nail design can make a little girl stand taller, smile wider, and feel completely seen in her own unique beauty. That experience never gets old for me — not once.
My advice to you is simple: choose the style that speaks to your daughter’s personality, take your time with the application, and do not be afraid to add those personal touches that make it uniquely hers. Beauty is not about perfection. It is about intention, love, and the quiet confidence that comes from feeling truly beautiful in your own skin. On her First Communion day, she deserves all of that and more.
So paint those nails with love, add a little sparkle if she loves it, and enjoy every single moment of creating something magical together. Because as I always say, the most beautiful thing you can give someone is the feeling that they are enough — exactly as they are.