
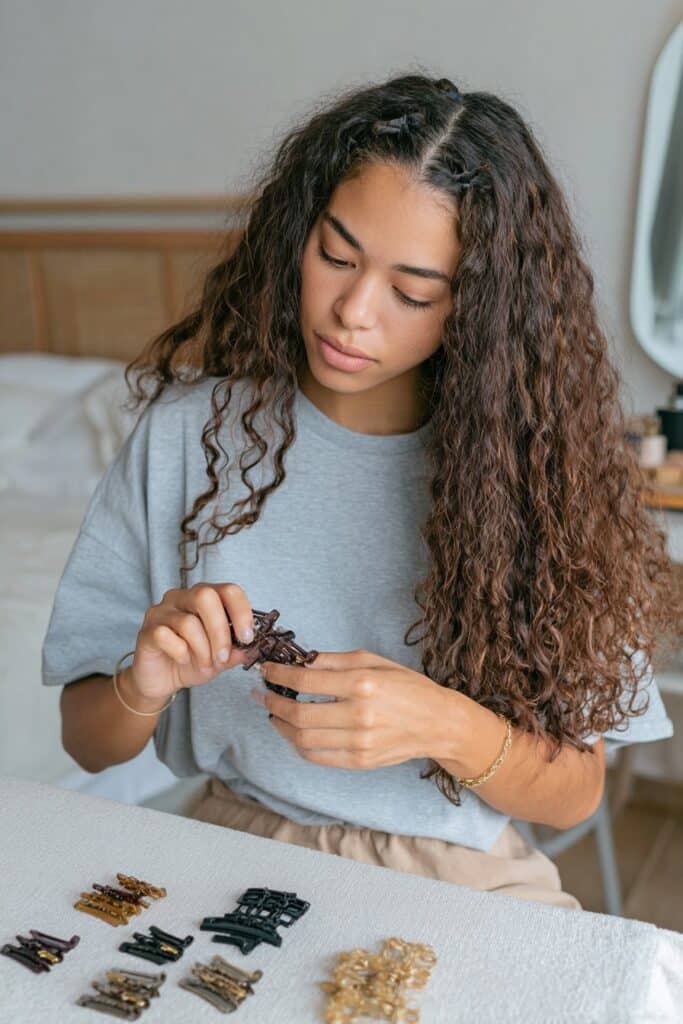
Learning how to put hair in a claw clip changed my entire morning routine, and I’m excited to share this game-changer with you.
I remember rushing between client appointments, my hair a mess, desperately needing a five-minute fix. That’s when I discovered that claw clips are the ultimate hair hack for low-effort days. The best part? Anyone can master how to use a claw clip, regardless of skill level. Whether you’re styling claw clip long hair or working with shorter lengths, the technique remains simple once you understand the basics.
In this guide, I’ll walk you through claw clip hairstyles step-by-step, show you how to put your hair in a claw clip properly, and share easy claw clip hairstyles perfect for beginners.
How to Put Your Hair in a Claw Clip Basic Technique

How to Put Your Hair in a Claw Clip: Basic Technique
During my early days as a freelance makeup artist in New York, I learned this technique out of necessity. Between back-to-back clients and photo shoots, I needed something faster than a blowout but more polished than a messy bun. This method became my go-to, and I’ve taught countless clients how to put your hair in a claw clip using this exact approach.
Step 1: Gather Your Hair Into a Ponytail
Pull your hair back toward the nape of your neck, using your fingers rather than a brush. I prefer working with second or third-day hair because it has more grip, but if you’ve just washed it, a quick spritz of dry shampoo adds texture. Position the gathered hair low, where your neck meets your head. This creates the foundation for your twist and determines where the clip will sit.
Step 2: Twist Your Hair Upward
Begin twisting the ponytail in one direction until it forms a smooth, controlled twist. I learned this the hard way: twisting too many times creates bulk that won’t stay secure. For claw clip long hair, a quarter to half twist works best. The goal is creating a neat coil without making it so tight that your scalp pulls.
Step 3: Fold the Twist Against Your Head
Lift the twist upward toward the crown of your head. Fold it over itself so it lies flat against the back of your head. This step allows the claw clip to grip the twist securely without slipping. For longer lengths, you may need to fold the ends down or tuck them under the base of the twist.
Step 4: Secure With the Claw Clip
Open your claw clip and place it over the center of the twist. Position it so the teeth hold all the hair firmly. I always check that the clip sits comfortably without pulling. The teeth should grip both the twist and the hair underneath, creating a stable hold that lasts through a full workday.
Step 5: Adjust and Perfect Your Look
Tuck in any loose ends or pull out small, face-framing pieces to soften the overall look. I pull a few strands at the crown for volume and leave some pieces around my face. This creates that effortless, undone appearance that makes claw clip hairstyles step-by-step so appealing.
Choosing the Right Claw Clip for Your Hair Type
Selecting the right claw clip makes all the difference between a style that lasts through a full workday and one that slips out within an hour. I learned this after watching clients struggle with clips that didn’t match their hair texture.
Best Claw Clips for Short and Fine Hair
Fine hair needs clips with closely spaced teeth that grip without slipping. I recommend small claw clips ranging from 1 to 2.5 inches. For clients with slippery, fine strands, double row teeth provide superior grip by distributing pressure evenly. Lightweight materials prevent the clip from weighing down delicate hair and causing breakage. Mini clips under 1 inch work beautifully for half-up styles on short hair.
Best Claw Clips for Medium Length Hair
Medium hair offers the most versatility. Clips between 2 to 3.5 inches strike the perfect balance. These accommodate various textures without feeling too heavy or too small. I use medium clips on clients who want French twists or casual updos. They provide enough grip for secure hold while remaining comfortable for all-day wear.
Best Claw Clips for Long and Thick Hair
Thick hair requires clips at least 3 inches long with wider grasp. Large clips range from 3 to 5 inches, while jumbo sizes exceed 5 inches for maximum volume. The key is finding clips with long teeth and wide spacing that prevent pulling at the scalp. Strong springs are non-negotiable for thick textures. I’ve seen clients with hair over four feet long secure entire updos with properly sized clips.
Understanding Clip Sizes and Teeth Strength
Teeth spacing between 5-8mm provides optimal grip balance. High-quality clips feature 6-8 teeth for small sizes, 9-14 for medium, and 15-20 for large clips. Cellulose acetate outperforms standard plastic in durability and flexibility. Rounded, smooth teeth prevent snagging and hair damage.
Common Mistakes to Avoid When Using a Claw Clip

I’ve watched countless clients struggle with claw clips over the years, and the mistakes I see are surprisingly consistent. After years of teaching how to put your hair in a claw clip, I’ve identified four errors that sabotage even the best styling attempts.
Using a Clip That’s Too Small for Your Hair
A clip that doesn’t match your hair volume will pop open throughout the day or leave your style feeling loose and insecure. For thick or long hair, I’ve seen plastic claw clips break under the hair’s weight. When clips are too small, they create uneven tension and won’t fully close. Equally problematic, oversized clips on fine hair feel bulky, look disproportionate, and fail to grip smaller sections properly. The clip should match your hair volume, not work against it.
Twisting Your Hair Too Many Times
Over-twisting creates a bulky mass that your clip can’t close around securely. I learned this early in my career when a client’s elaborate twist kept sliding out. One or two twists suffice for most lengths. When you twist excessively, you defeat the purpose of a low-tension accessory and create unnecessary pulling.
Clipping Wet or Damp Hair
Wet hair stretches more easily and remains vulnerable to damage. Hair is weakest when damp, making it heavier and more fragile. Clipping wet hair causes breakage at the roots and weakened strands. Dents appear more frequently when clips grip damp hair. I always tell clients to wait until their hair dries completely before securing it with any claw clip.
Placing the Clip in the Wrong Position
Positioning matters more than most people realize. Clips placed too high on the crown cause pressure and headaches, while placement too low at the nape digs uncomfortably into your neck. Clipping the same spot repeatedly leads to chronic breakage in that specific area. Rotate your placement instead of using the same position daily. The most comfortable placement follows your head’s natural curve, allowing the clip to sit flat rather than press outward.
Easy Claw Clip Hairstyles for Beginners

Once you’ve nailed the basic technique, experimenting with variations becomes fun. Over the years working with clients, I’ve seen how different styles suit different occasions and moods.
Half-Up Claw Clip Style
Take sections from both sides of your head, gather them at the back, and secure with your clip. For added texture, twist each section before clipping. This works beautifully for all hair lengths and textures, keeping hair off your face while showing off your length.
Twisted Low Bun With Claw Clip
Slick your hair back into a bun at the base of your neck, then secure the top with your claw clip. I love how the loose ends create a relaxed, off-duty vibe. Pull out a few strands around your face for softness.
Messy High Twist Style
Twist a section of hair and secure it, leaving the ends feathered out for a casual look. This style takes seconds and works perfectly for second-day hair. The undone finish makes it my favorite for everyday wear.
Side-Swept Claw Clip Look
Use a small clip to create an effortless side-sweep. This breaks up your usual routine and adds a bohemian touch to any outfit.
Simple Low Gathered Style
Loosely gather your hair at the nape and clip. This low-tension style prevents damage while looking polished enough for professional settings.
Conclusion
You now have everything you need to master claw clips and transform your rushed mornings into effortless styling moments. All things considered, claw clips saved my career during those hectic New York days, and they’ll do the same for you. Start with the basic technique, choose the right size for your hair type, and experiment with different styles. Keep practicing these simple steps, and you’ll discover your signature look in no time.
FAQs
What is the basic step-by-step process for putting hair in a claw clip?
Start by gathering your hair into a low ponytail at the nape of your neck. Twist the ponytail upward in one direction, then fold the twist against your head. Open the claw clip and position it over the center of the twist, ensuring the teeth grip both the twist and the hair underneath. Finally, adjust by tucking loose ends and pulling out face-framing pieces for a softer look.
How do I choose the right size claw clip for my hair type?
For fine or short hair, use small clips (1-2.5 inches) with closely spaced teeth. Medium-length hair works best with clips between 2-3.5 inches. If you have long or thick hair, opt for large clips (3-5 inches or larger) with wider spacing and strong springs. The clip should match your hair volume to provide secure hold without slipping or breaking.
Why does my hair keep falling out of the claw clip?
Hair slips out when the clip is too small for your hair volume, when you’ve twisted your hair too many times creating excessive bulk, or when the clip is positioned incorrectly. Make sure you’re using a properly sized clip, limiting twists to one or two rotations, and placing the clip at a comfortable position that follows your head’s natural curve.
Can I use a claw clip on wet or damp hair?
It’s best to avoid clipping wet or damp hair. Hair is weakest when wet, making it more vulnerable to breakage and damage at the roots. Wet hair is also heavier and more prone to developing dents from the clip. Always wait until your hair is completely dry before securing it with a claw clip.
What are some easy claw clip hairstyles for beginners?
Try a half-up style by gathering sections from both sides and clipping at the back, a twisted low bun secured at the nape with loose ends, a messy high twist with feathered ends, a side-swept look using a small clip, or a simple low gathered style at the nape. These styles work for various hair lengths and require minimal effort while looking polished.