
Low tension natural hairstyles have completely transformed my relationship with my hair. After years of dealing with breakage and damage, I finally realized that how we style our hair matters just as much as the products we use.
Let me be honest – I’ve been where you are. Natural hair is especially susceptible to breakage and damage during colder months when the air lacks moisture and can quickly dehydrate our strands. The constant manipulation from daily styling doesn’t help either. That’s why I’ve become such an advocate for low manipulation hairstyles. These tension-free styles take the stress off our hair by reducing pulling and tugging, allowing our precious strands to simply exist without being constantly touched.
What’s wonderful about protective styles is that they do so much more than just look good. They significantly reduce breakage by minimizing daily manipulation. Additionally, they help lock in moisture, keeping your hair hydrated longer. And if you’re trying to grow your hair? These styles support healthy hair growth by protecting your ends and maintaining moisture levels.
If you’re tired of twist-outs and wash-and-gos that require daily attention, this guide is for you. I’ve compiled 15 gentle, low tension protective hairstyles that will give both you and your hair the break you deserve in 2025. From flat twists that keep your strands tucked and secure to styles that won’t cause any tightness or stress on your scalp, I’ve got you covered.
Traditional Box Braids
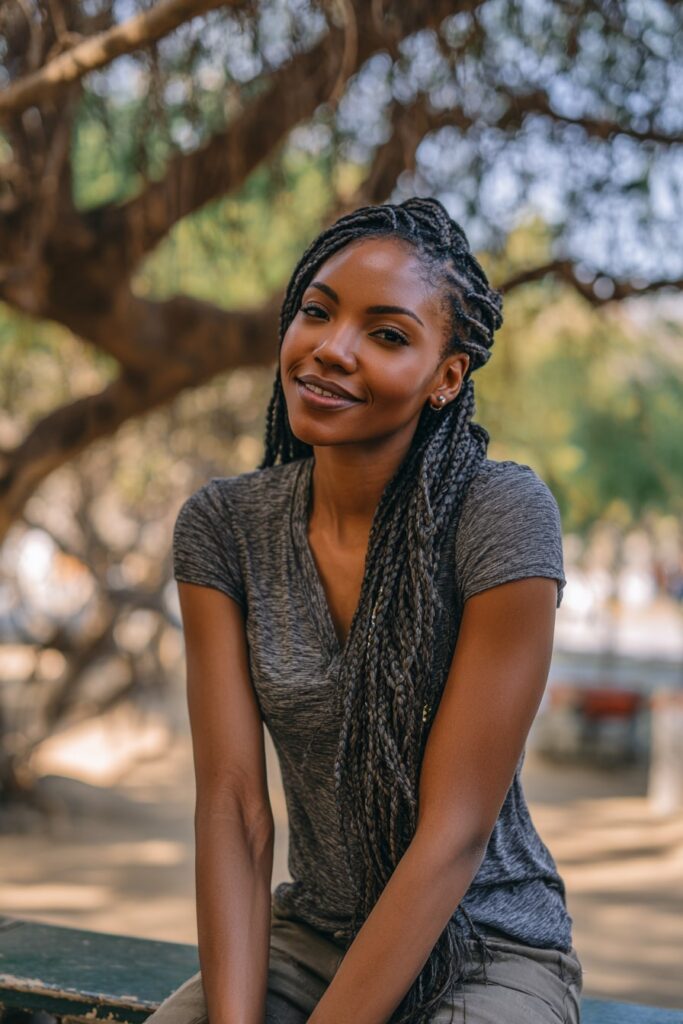
Box braids have remained my reliable protective styling option for many years. I’ve come to appreciate how they shield my natural hair while offering incredible styling versatility. These iconic braids get their name from the square-shaped partings on the scalp, creating that distinctive grid-like pattern we all recognize.
Style Overview
Traditional box braids involve dividing natural hair into equal-sized square sections, then adding extensions to create individual braids. The extensions are typically secured with a small knot at the root before braiding down to the tips. What makes these braids so popular is their remarkable adaptability – they can be worn in various lengths, thicknesses, and colors. Furthermore, once installed, they significantly reduce daily styling time, making mornings infinitely easier. The style typically lasts 6-8 weeks with proper care, providing excellent protection for natural hair underneath.
Why Traditional Box Braids are Low Tension
Contrary to popular belief, the size of box braids isn’t what determines tension – it’s all about proper installation technique. A stylist’s approach matters more than braid size when avoiding excessive tension. I always recommend knotless box braids, which look identical to traditional ones but without that small knot at the top. They’re installed using a feed-in method where braiding hair is gradually added as the stylist works, resulting in substantially less tension.
Another key factor is the ratio of synthetic to natural hair. When there’s too much synthetic hair compared to your natural strands, it weighs everything down as it grows out, creating unhealthy tension regardless of braid size. Therefore, a skilled stylist will ensure the right balance for comfort and hair health.
Belle Hathaway’s Pro Tip
I’ve learned through experience that moisture is absolutely essential with box braids. I spray my scalp and braids with a lightweight moisturizer containing tea tree oil and aloe vera every 1-2 days. This keeps both the braids and my natural hair underneath properly hydrated. Moreover, I always sleep with a silk or satin scarf to prevent frizz and extend the style’s lifespan. For those new to box braids, resist the urge to style them immediately after installation – instead, let them be for 2-3 days to allow some loosening before attempting high ponytails or buns.
Flat Twists
I discovered flat twists years ago and quickly made them a staple recommendation for clients seeking gentle styling options. This versatile technique has become my go-to whenever someone needs a break from manipulation without sacrificing style.
Style Overview
Flat twists involve twisting two strands of hair close to the scalp in a pattern similar to cornrows. Unlike regular two-strand twists that hang loose, these are created by twisting the hair flat against the scalp following a precise pattern of sections. The technique requires parting clean, moisturized hair, dividing each section into two strands, and twisting them around each other while keeping them close to the scalp. What makes flat twists truly remarkable is their versatility—they can be styled into updos, low buns, half-up half-down styles, or left loose. Even better, once you’re ready for a change, simply unravel them for a stunning twist-out with beautiful definition.
Why Flat Twists are Low Tension
Flat twists are essentially the gentler cousin of cornrows. Since they’re created with two strands rather than three (as with cornrows), they naturally apply less tension to the scalp. This makes them perfect for those with sensitive scalps or fine hair. Because they require less tension and precision than cornrows, flat twists are easier and quicker to install. The reduced pulling means less stress on your hair follicles and edges, which helps prevent traction alopecia—a common issue with tighter styles. Furthermore, the lower tension promotes overall hair health. For extremely dry hair, flat twists are a better alternative to braids precisely because they minimize tension, resulting in less breakage.
Belle Hathaway’s Pro Tip
For gorgeous, long-lasting flat twists, I always recommend starting with properly moisturized hair. Apply a lightweight leave-in conditioner before twisting to lock in hydration. Although a looser twist creates a more carefree finish, I find using a bit of foam or mousse as a “topper” provides additional hold and definition without causing buildup. Never underestimate the importance of nighttime protection—wrap your hair with silk or satin to prevent frizz. Lastly, be gentle when unraveling your twists to preserve definition, particularly if you’re transitioning to a twist-out style. This mindfulness makes all the difference between frizzy results and defined, bouncy curls.
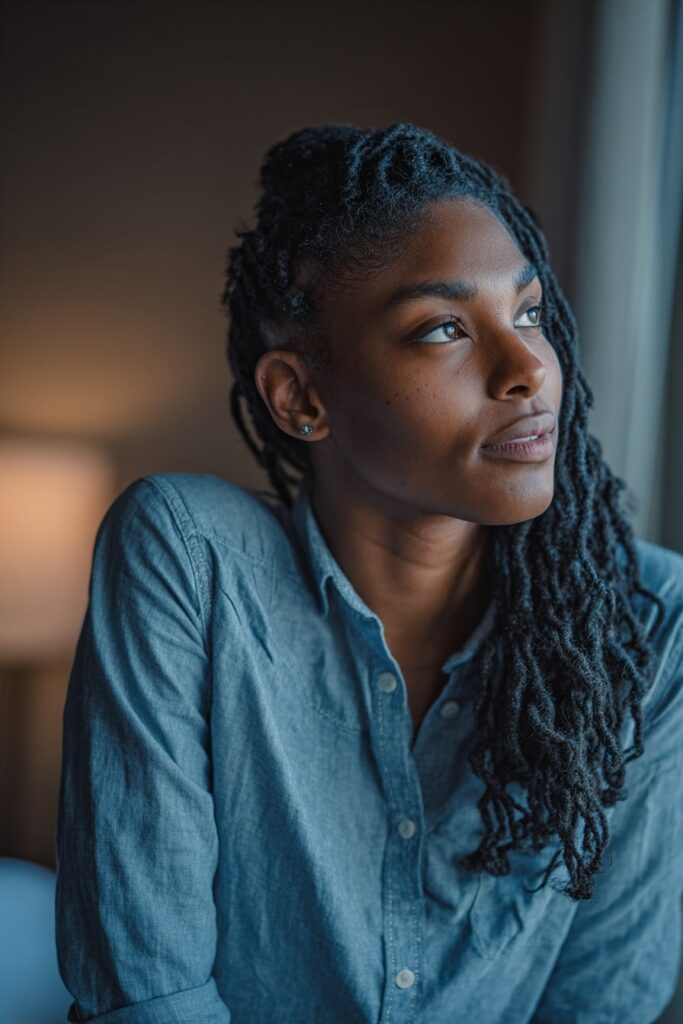
Faux Locs
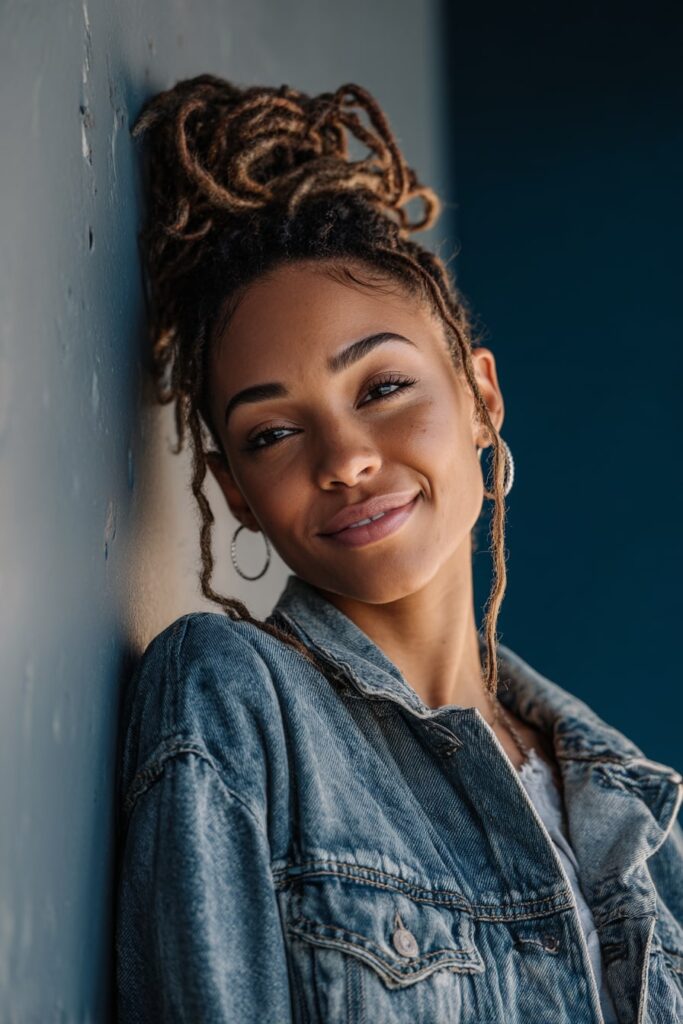
Faux locs have become my favorite recommendation for clients seeking protection without commitment. This stunning protective style offers the gorgeous look of traditional locs without the long-term commitment, making it a perfect choice for those wanting to experiment with their appearance.
Style Overview
Faux locs are a protective hairstyle that mimics the appearance of real dreadlocks using synthetic or human hair extensions. Unlike permanent locs, these are temporary and can be removed whenever you’re ready for a change. They typically last anywhere from 4 to 8 weeks, depending on your hair type and maintenance routine. There are two primary installation methods: the wrapping technique, where extensions are wrapped around braided sections of your natural hair, or the crochet method, which is significantly faster. What makes faux locs truly remarkable is their versatility – they work for any occasion from weddings to job interviews. They also come in various styles including distressed locs, goddess locs, and butterfly locs with beautiful curly ends.
Why Faux Locs are Low Tension
Contrary to popular belief, faux locs can be one of the gentlest protective styles when installed correctly. First, there’s less tension on your edges compared to many braided styles. Second, the crochet method in particular minimizes pulling on the scalp since your natural hair is either cornrowed underneath or pulled through the center of the faux loc. For those with sensitive scalps, I recommend the individual crochet method where locs are attached to individual braided sections rather than cornrows, providing even less tension. Additionally, faux locs create less stress for the wearer as they actually look better and more natural as they age, removing the pressure to maintain a “perfect” appearance.
Belle Hathaway’s Pro Tip
From my experience, the key to comfortable, healthy faux locs lies in the installation technique. I always recommend seeking a stylist who understands proper sizing – if you have thin or fine hair, jumbo locs could create excessive tension. Ask for “knotless faux locs” where the hair is gradually fed in rather than knotted at the root. For maintenance, keep your scalp moisturized with lightweight oil (jojoba works wonderfully as it mimics your natural sebum). At night, protect your style with a large satin bonnet that covers all locs. Most importantly, don’t leave them in too long – removing them after 6-8 weeks prevents tangling at the roots.
Crochet Braids
Crochet braids completely changed my approach to protective styling after discovering how much gentler they are on my scalp. As a technique rather than a specific style, these versatile extensions have become my secret weapon for clients seeking hair protection without the usual discomfort.
Style Overview
Crochet braids are hair extensions attached to cornrows using a crochet method with a latch hook, beader, or bobby pin. Unlike traditional protective styles, crochet braids refer more to the installation technique than the final look. The process begins with cornrowing your natural hair, typically straight back, creating a foundation for the extensions. Subsequently, extensions are looped through these cornrows using the crochet technique, securing them with knots. What makes this style truly remarkable is its versatility – you can achieve looks ranging from curly to straight, twisted or braided. Even better, installation typically takes only 2-3 hours, certainly faster than traditional box braids which require 5-6 hours.
Why Crochet Braids are Low Tension
The genius behind crochet braids lies in how they distribute weight across your scalp. Since your natural hair is completely tucked away underneath cornrows, the technique doesn’t add tension when done properly. Even better, you can customize the density without adding weight to your roots. For anyone concerned about excessive pulling, the cornrow-singles combo method distributes the weight of extensions across your scalp instead of concentrating it in one small section. Plus, this method typically results in less strain on your edges, minimizing breakage and thinning.
Belle Hathaway’s Pro Tip
From my experience, maintaining moisture is crucial for crochet braids. I recommend daily applications of leave-in conditioner to your cornrowed hair, immediately followed by sealing with coconut and tea tree oil. For washing, I suggest using a spray bottle with diluted shampoo on your scalp, gently massaging with your fingertips. To preserve the style, sleep with a silk scarf or bonnet nightly. Most importantly, despite their durability (4-8 weeks with proper care), don’t leave them in longer than recommended – your natural hair needs regular attention too.
Mini Twists
Mini twists remain a transformative protective style that my clients consistently request. After witnessing countless success stories with this versatile option, I’ve come to appreciate why it’s considered a cornerstone technique for natural hair care.
Style Overview
Mini twists are small two-strand twists created with your natural hair, requiring no extensions. The installation process begins with freshly washed, deep conditioned hair for the perfect foundation. I typically divide hair into manageable quarters before applying leave-in conditioner for moisture and slip. Next, small sections are twisted using the two-strand method, where you continuously cross one strand over another, creating a rope-like pattern. For a neater appearance, try braiding the roots before twisting – this game-changing technique reduces frizz at the base.
What truly sets mini twists apart is their remarkable versatility. You can wear them half-up with decorative clips for professional settings, create space buns for casual outings, or style elegant updos for special events. Indeed, this versatility makes the initial time investment worthwhile.
Why Mini Twists are Low Tension
Mini twists excel at helping retain length without stressing your scalp or strands. They’re extremely low tension, putting no stress on your scalp. Furthermore, they dramatically reduce manipulation, allowing your hair to rest and grow undisturbed. Throughout my career, I’ve noticed clients maintain length better with regular mini twist rotations.
Moreover, these twists excel at moisture retention. The twisted strands create a protective barrier that locks in hydration. This improved moisture retention enhances strand elasticity, contributing to overall hair health.
Belle Hathaway’s Pro Tip
For truly successful mini twists, I’ve learned that installation technique matters immensely. Always avoid combining hair strands from different parted sections. This keeps your twists neat plus prevents knots and matting long-term. Additionally, seal your ends with a heavy butter followed by flaxseed gel to prevent unraveling.
Regarding maintenance, moisturize regularly with a light water mist and oils. Protect your style overnight with a satin bonnet – this is non-negotiable. With proper care, mini twists typically last 2-4 weeks.
Two Strand Twists
Two strand twists hold a special place in my styling repertoire. Throughout my career, I’ve witnessed this versatile technique transform both hair health and confidence for countless clients seeking gentler alternatives.
Style Overview
Two strand twists involve dividing hair into smaller sections, then carefully twisting one strand around another to create a rope-like pattern. The beauty of this technique lies in its adaptability—it works beautifully with any hair texture from curly to coily. What truly sets this protective style apart is its multi-functionality. Wear your twists for several weeks as a primary style, unravel them for a defined twist-out, or combine them with braids or extensions for endless creative options. First time trying twists? Start with damp or semi-dry hair to prevent excessive shrinkage.
Why Two Strand Twists are Low Tension
As a low-manipulation hairstyle, two strand twists require minimal tension on the scalp. Unlike tighter styles, they put virtually no stress on your follicles. Even though they’re gentle, they effectively protect your delicate ends from friction and tugging. Beyond protection, these twists excel at moisture retention—they lock in hydration your strands crave. This improved moisture level coupled with reduced manipulation creates the perfect environment for healthy growth. Hence, many of my clients notice significant length retention after incorporating two strand twists into their regular styling rotation.
Belle Hathaway’s Pro Tip
For best results, I always recommend starting with freshly co-washed hair. Let your hair air dry slightly before styling—this works wonders for thicker textures. Always detangle gently with fingers rather than combs whenever possible to minimize breakage. At night, protect your twists with a silk or satin pillowcase. For longevity, reawaken existing products by lightly spritzing with water rather than adding more product. This prevents buildup yet maintains moisture—the key to keeping this low tension natural hairstyle looking fresh.
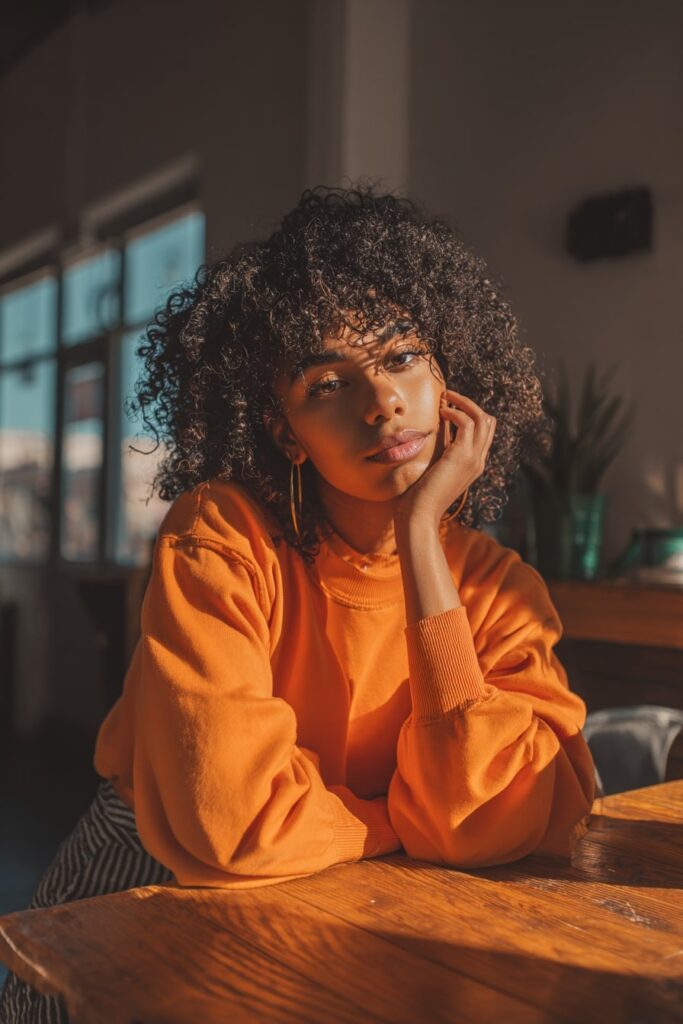
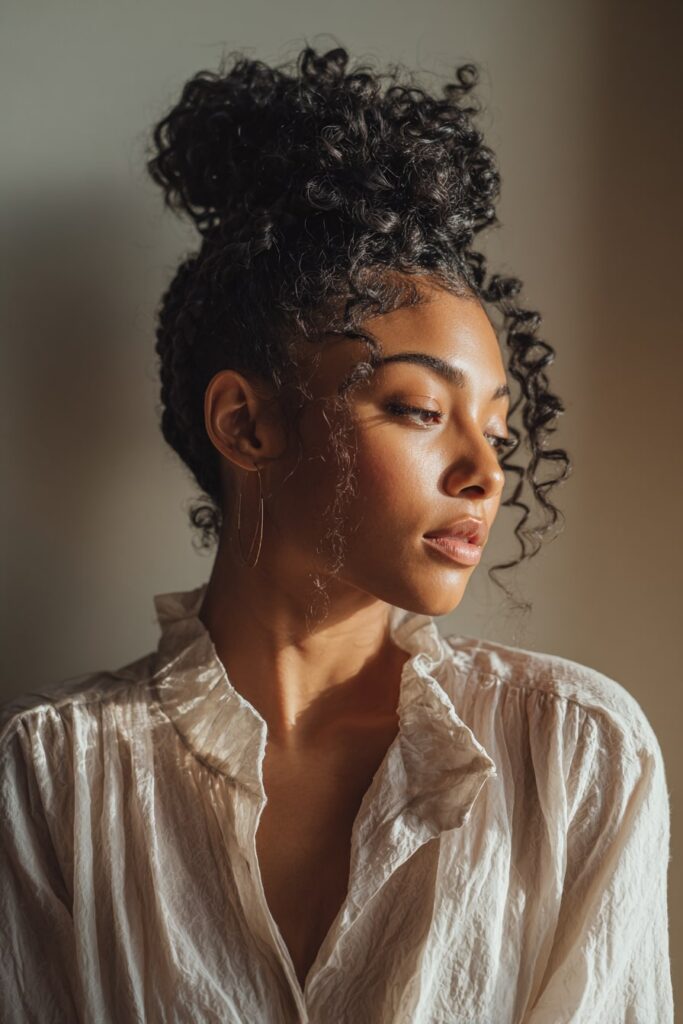
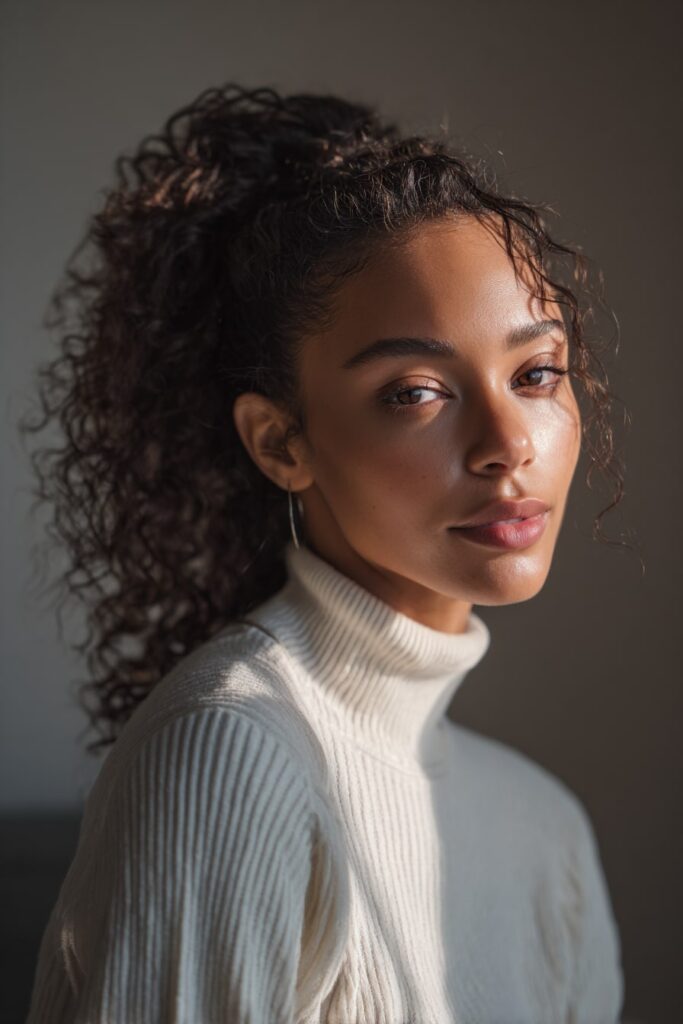
Pineapple Updo
The pineapple updo initially surprised me with its simplicity yet remarkable effectiveness. This versatile style has completely shifted how I approach both nighttime protection and daytime styling for my curly-haired clients.
Style Overview
The pineapple updo gets its playful name from resembling the crown of a pineapple fruit. Creating this style involves flipping your head forward and gathering all curls into a high ponytail at the crown. What makes this technique truly special is its dual purpose – originally designed for sleeping to prevent curl smashing, it’s now equally popular as a daytime style. Plus, it works for various hair lengths, from short to medium, as long as your hair reaches a high ponytail. For shorter curls, consider sectioning into multiple pineapples.
Why Pineapple Updo is Low Tension
This style stands out among tension-free hairstyles by keeping hair loose yet secure. For overnight wear, I recommend keeping the scrunchie relatively loose to prevent creases. The high placement naturally distributes weight evenly across the scalp. Notably, this positioning prevents pulling on edges – a common cause of breakage with tighter styles.
Belle Hathaway’s Pro Tip
From my experience with softball clients, the secret lies in proper placement. Position the pineapple directly on top rather than toward the back. For nighttime protection, always use silk or satin scrunchies. For active days, secure with extra wraps.
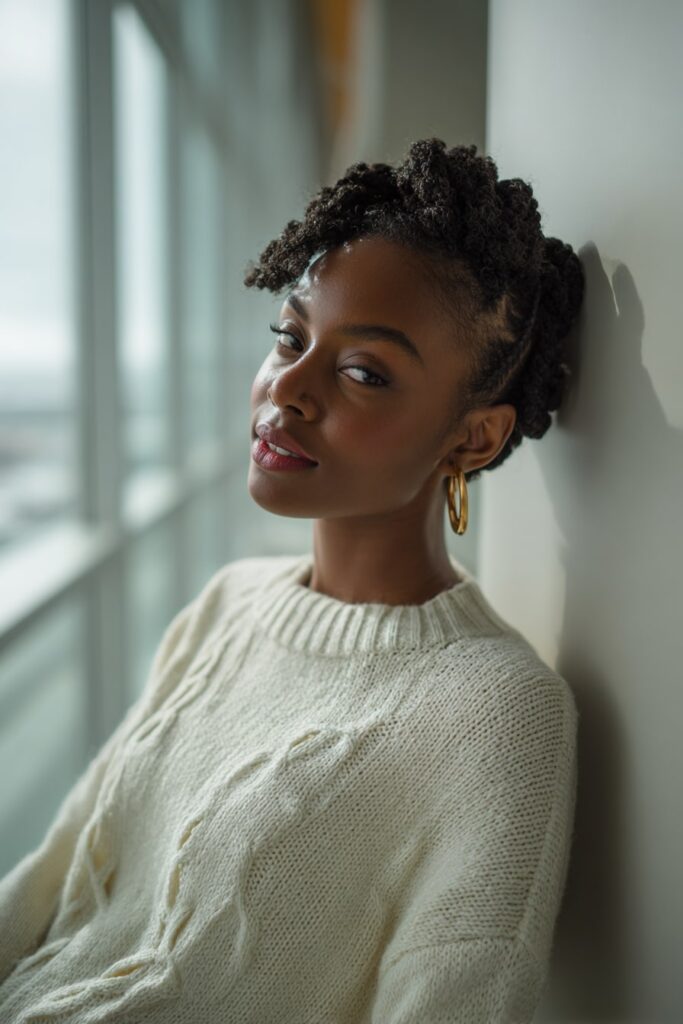
Bantu Knots
Bantu knots have been an integral part of my styling arsenal whenever clients seek both cultural connection and gentle hair protection. This ancestral style originated from the Zulu tribes of Southern Africa, evolving beyond protection into a celebration of heritage.
Style Overview
Creating Bantu knots starts with clean, detangled hair divided into precise sections using a rattail comb. The section size determines your final look—smaller sections (1/2 inch) work best for shorter hair, whereas longer hair needs larger sections (3-4 inches). After sectioning, each portion is twisted into a rope-like string, then coiled around itself with ends tucked underneath or secured with bobby pins. For stunning variations, try adding colorful beads for special occasions or creating geometric parting patterns for visual interest.
Why Bantu Knots are Low Tension
The secret behind making this style truly gentle lies in starting your twist at least an inch from the roots, immediately reducing scalp tension. Furthermore, using non-water-based products like whipped shea butter creates smoother twists without causing buildup. As a low tension protective style, Bantu knots protect delicate ends by keeping them tucked away from environmental damage.
Belle Hathaway’s Pro Tip
Throughout my career, I’ve discovered stretched dry hair consistently delivers the best results. This method prevents frizz plus ensures complete drying. Yet most importantly, never underestimate proper overnight protection—a silk bonnet prevents friction, maintaining your knots’ integrity. With appropriate maintenance, expect your Bantu knots to stay fresh up to two weeks.
Crown Braid
For years, crown braids have captivated me with their regal appearance and protective benefits. This elegant style has saved countless clients from hair damage while still allowing them to feel like royalty.
Style Overview
Crown braids create a stunning half-moon shape that resembles a tiara wrapping around your head, just above the forehead. This versatile style works beautifully across all hair types, densities, and textures. Despite looking complex, mastering crown braids simply requires basic French braiding skills. Depending on your preference, crown braids can be tight and polished or messy and bohemian. For those with fine or thinning hair, this style cleverly conceals receding hairlines.
Why Crown Braid is Low Tension
The secret to making crown braids gentle lies in proper technique. Avoiding excessive tightness preserves that desirable lived-in, boho effect. Nonetheless, this protective style effectively keeps hair secure without pulling painfully at your roots. For those with fine hair, starting with texturizing products creates better grip without requiring tight braiding.
Belle Hathaway’s Pro Tip
Throughout my styling career, I’ve found crown braid maintenance remarkably straightforward. Protect your style overnight with a silk scarf to prevent frizz. For added dimension, consider using a curling wand on any free-flowing sections. Anytime discomfort occurs, immediately loosen the braid—comfort should generally accompany this low tension protective style.
Side Swept Cornrows
Side-swept cornrows have consistently amazed me with their face-framing elegance and protective qualities. As my clients seek protective styles with personality, this asymmetrical design remains a standout option.
Style Overview
Side-swept cornrows feature braids that flow gracefully from one side of the head across to the other, creating a chic, asymmetrical look. To create this style, I start with a deep side part, dividing hair into two sections, then weave the larger section into thin, sleek braids running perpendicular to the part. The remaining hair hangs freely, adding movement and dimension. These versatile braids work beautifully for everything from professional settings to special events. Many clients request the “Lemonade Braids” variation – sleek side-swept cornrows that start small at the hairline and gradually thicken.
Why Side Swept Cornrows are Low Tension
First and foremost, side-swept cornrows can be created without excessive tightness, preserving both comfort and style. Not only do they frame your face beautifully, they maintain a clean, polished vibe without stressing your hairline. For natural hair, this style offers excellent protection plus adaptability regardless of texture. In essence, the horizontal braiding pattern distributes tension more evenly across the scalp compared to traditional vertical cornrows.
Belle Hathaway’s Pro Tip
From my experience, side-swept cornrows thrive with proper maintenance. Apply lightweight moisturizing sprays containing aloe vera or shea butter regularly. Meanwhile, nutritious oils like argan or jojoba provide deep hydration without buildup. For edge control, a small amount of gel helps sleek down baby hairs. Protect your style overnight with a silk bonnet to minimize friction and extend longevity.
Fishtail Braids

The intricate pattern of fishtail braids often intimidates my clients until I show them how surprisingly accessible this style truly is. Far from being just a complex look, fishtail braids offer both elegance and gentleness for natural hair.
Style Overview
Fishtail braids create a stunning skeletal pattern that works beautifully for all hair types. Unlike traditional three-strand braids, fishtail braids use only two sections. The technique involves taking small pieces from the outer edge of each section and crossing them over to join the opposite side. Specifically, you’ll grab a small chunk from one side and attach it to the opposite section, continuing this pattern throughout. What makes fishtail braids truly versatile is their adaptability—they work equally well in ponytails, side braids, or wrapped in elegant updos.
Why Fishtail Braids are Low Tension
Fishtail braids naturally create less tension compared to traditional braiding techniques. By working with smaller sections of hair, the weight becomes evenly distributed across the scalp. Additionally, the simple two-section approach eliminates the tight pulling often associated with more complex braiding patterns. For those with fine or silky hair, applying texturizing products beforehand provides grip without requiring excessive tightness.
Belle Hathaway’s Pro Tip
Occasionally, I recommend the “pancaking” technique—gently tugging at the sides of your completed braid to create fullness. This not only makes the braid appear more voluminous throughout the day, yet maintains its low-tension quality.
Faux Pony
Faux ponytails have revolutionized my approach to updo styling. This clever innovation allows clients to enjoy full, dramatic ponytails without sacrificing their hair health.
Style Overview
The faux pony consists of a hairpiece attached to your natural hair using a combination of clips, velcro, and hair straps for secure placement. First, your own hair is gathered into a small ponytail, then the extension wraps around it, creating a seamless blend. Consequently, even those with fine or short hair can achieve voluminous styles. These extensions are heat-resistant up to 135 degrees, making them suitable for various styling options. Obviously, the best results come from choosing extensions longer than your natural hair.
Why Faux Pony is Low Tension
The true genius of faux ponytails lies in how they eliminate the need for tight, damaging styles. Conventional high ponytails can cause receding hairlines or even traction alopecia when worn frequently. In contrast, faux ponies distribute weight evenly across the head. For maximum comfort, accessories like soft scrunchies provide gentle support without pulling.
Belle Hathaway’s Pro Tip
From my experience, proper attachment prevents discomfort. Always secure your natural hair in a small, loose bun first, as this creates a better foundation. For longevity, store your faux pony in a silk wrap between uses. Remember—with proper care, these versatile pieces can last 2+ years with regular use.
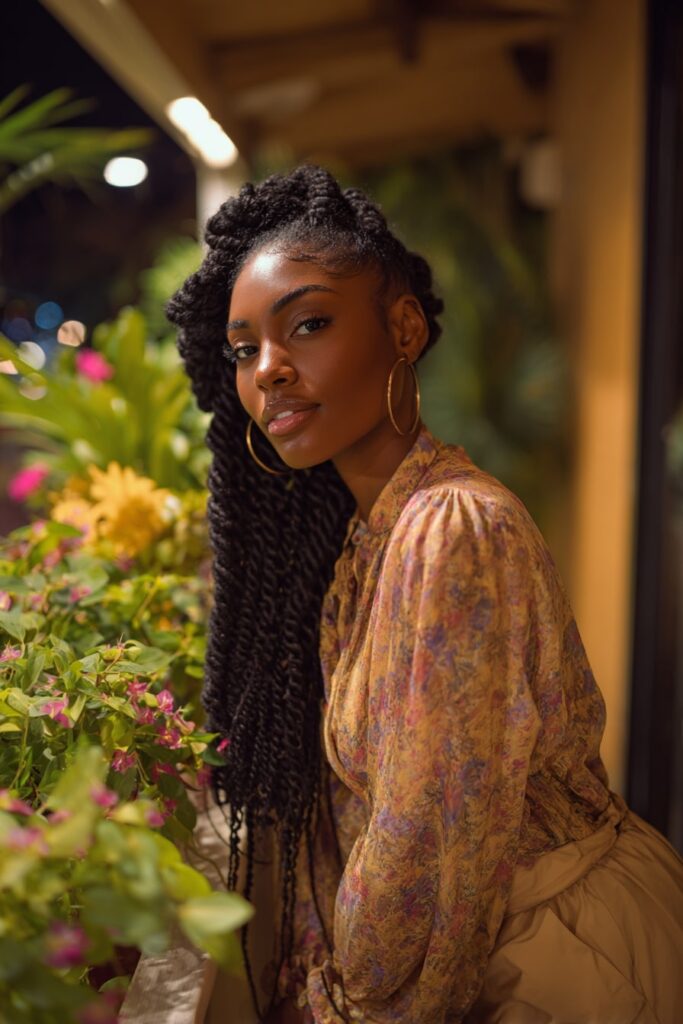
Jumbo Senegalese Twists
Jumbo Senegalese twists rescued me from a styling rut when I needed both protection and elegance. These gloriously beautiful protective twists offer a modern alternative to traditional braided styles.
Style Overview
Senegalese twists, often called “rope twists,” involve wrapping two strands of hair around each other, creating distinctive rope-like patterns. For the jumbo version, I use larger sections of hair paired with Kanekalon extensions (X-pression or Sensationnel brands work wonderfully). The technique creates sleeker, tighter appearances compared to other twisted styles. Installation typically takes just 1-2 hours—remarkably faster than traditional options. Furthermore, these twists age beautifully, often looking better over time.
Why Jumbo Senegalese Twists are Low Tension
Jumbo Senegalese twists sit more loosely on the scalp compared to box braids, providing significantly less tension. Given that only two strands are used, there’s reduced friction between the hair. Accordingly, clients with sensitive scalps find these particularly comfortable. The jumbo sizing further decreases installation time plus minimizes manipulation.
Belle Hathaway’s Pro Tip
Before installing, I always recommend rinsing the braiding hair in apple cider vinegar to remove chemical treatments, preventing scalp irritation. Sleep protection remains essential—use a silk scarf nightly. For added longevity, consider using pre-stretched hair or manually feathering the ends to minimize unraveling.
Reverse Cornrows
Reverse cornrows captured my attention when searching for innovative styles that minimize tension. This unique twist on traditional cornrows offers both visual interest and scalp comfort.
Style Overview
Reverse cornrows feature braids that flow in the opposite direction of traditional cornrows—typically starting from the nape and working upward instead of from the hairline down. The technique involves parting hair into neat semicircles, often from ear to ear, creating distinctive geometric patterns. Many clients love combining reverse cornrows with box braids for a mixed-texture look. For a polished finish, I apply eco styler gel throughout the hair to secure flyaways and create that sleek appearance.
Why Reverse Cornrows are Low Tension
The backward braiding technique naturally distributes tension more evenly across the scalp, placing minimal stress on the hairline. For clients with thinning edges or sensitive scalps, these reverse-direction braids offer a welcome alternative to forward-facing styles that pull on the hairline. This approach provides excellent protection while allowing natural hair to rest and grow without constant manipulation.
Belle Hathaway’s Pro Tip
Prior to installing reverse cornrows, I always suggest thoroughly moisturizing the scalp. Afterward, maintain edges with a soft-bristled toothbrush rather than a hard brush for gentler styling. Between washings, revitalize the style by applying light oils directly to the scalp with your fingertips.
Halo Braid
I absolutely adore the angelic elegance of halo braids—these circular plaits have saved countless clients from hair damage while creating a stunning crown-like effect around the head.
Style Overview
Halo braids consist of Dutch or French braids wrapped around the perimeter of your head, resembling an ethereal ring. The technique begins at the nape of your neck with a Dutch or French braid, gradually incorporating more hair as you work around the head in a circular motion. Once complete, the ends are tucked underneath and secured with bobby pins. Naturally, the style can be worn tighter for a sleek look or gently pulled for more volume. For added flair, consider incorporating accessories like flowers or hair jewels.
Why Halo Braid is Low Tension
The circular braiding pattern of halo braids distributes tension evenly across your scalp, unlike styles that pull in just one direction. In fact, the way tension spreads throughout makes this style comfortable for extended wear. For those with thin or fine hair, adding texture before braiding creates visual fullness without requiring tight pulling.
Belle Hathaway’s Pro Tip
For school settings, I’ve found halo braids offer remarkable structural integrity—once properly secured, they truly stay put throughout even the most active day. Above all, protect your halo braid overnight with a silk or satin scarf—this is non-negotiable for maintaining its pristine appearance.
Conclusion
These fifteen gentle hairstyles truly demonstrate how beauty doesn’t have to come with pain or damage. Throughout my years working with natural hair, I’ve watched countless clients transform their hair health simply by switching to lower tension styles.
Your natural hair deserves protection without compromise. The styles we’ve explored offer that perfect balance – they shield your strands from daily manipulation while still allowing you to express your personal style.
Many people believe protective styling means sacrificing versatility, but nothing could be further from the truth. Box braids, flat twists, faux locs – each option provides endless styling possibilities while keeping your precious strands safe from breakage.
Remember, the key to success with any protective style lies in proper installation and maintenance. Always prioritize gentle techniques over tight, picture-perfect looks. Your edges will thank you later!
Moisture remains absolutely essential regardless of which style you choose. Regular applications of lightweight oils and leave-in conditioners keep both your natural hair and protective style looking fresh.
Nighttime protection also plays a crucial role in extending the life of these styles. Silk or satin bonnets might seem like a small addition to your routine, yet they make a tremendous difference in preventing friction and preserving moisture.
My journey with natural hair has taught me that patience and gentleness yield the best results. These low-tension styles might require an initial time investment, but the payoff in hair health makes everything worthwhile.
As you experiment with these protective options, pay attention to how your hair responds. Some styles might work better for your unique texture and density than others. Trust your instincts and listen to what your hair tells you.
Healthy, thriving natural hair awaits you in 2025. Which gentle, low-tension style will you try first?