
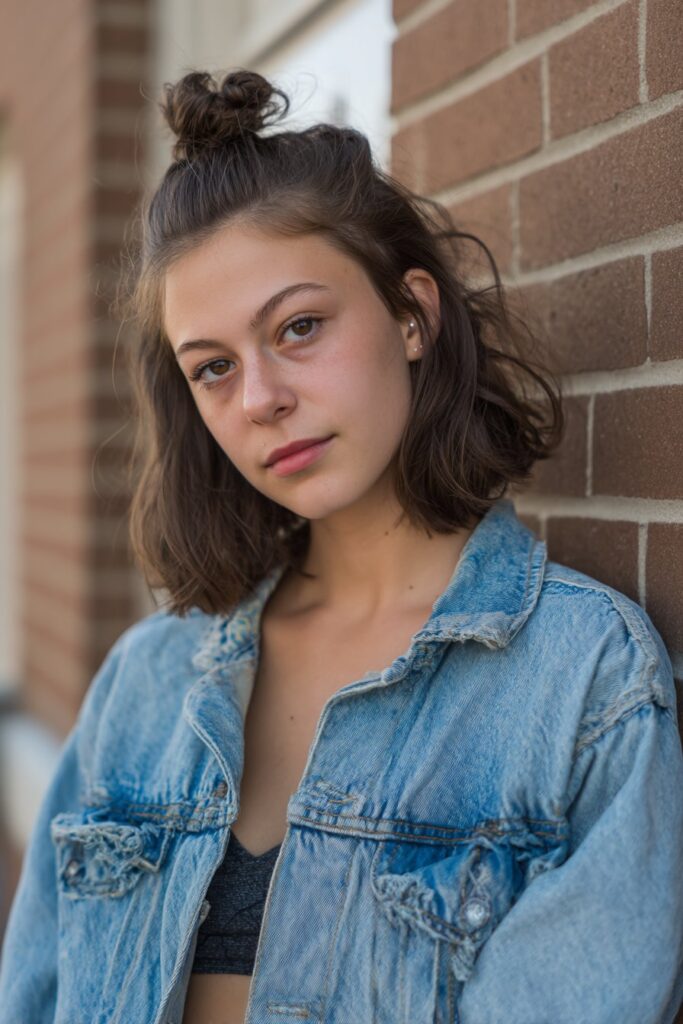
Beach hairstyles for short hair are actually one of my favorite styling challenges to tackle. I’ve discovered that beach waves work beautifully on all hair lengths and types, making them incredibly versatile even if you’re rocking a shorter cut.
As a stylist, I’ve noticed that bobs are among the most requested salon styles this year, and there’s a good reason why short hair beach styles are particularly popular during summer. Short cuts are simply easier to maintain when temperatures rise and humidity levels soar. Throughout my career, I’ve experimented with countless beachy hairstyles for short hair, from using sea salt sprays for added texture to creating waves with curling wands, straighteners, and even heatless overnight braiding techniques. Whether you’re looking for easy summer hairstyles for short hair that you can achieve by curling larger sections for a looser, more natural look, or easy beach hairstyles for short hair that incorporate volumizing products for extra bounce, I’ve got you covered. In this article, I’ll share 17 short beach hairstyles that not only look amazing but will actually stay put through all your summer adventures.
Bouncy Beach Waves for Short Hair
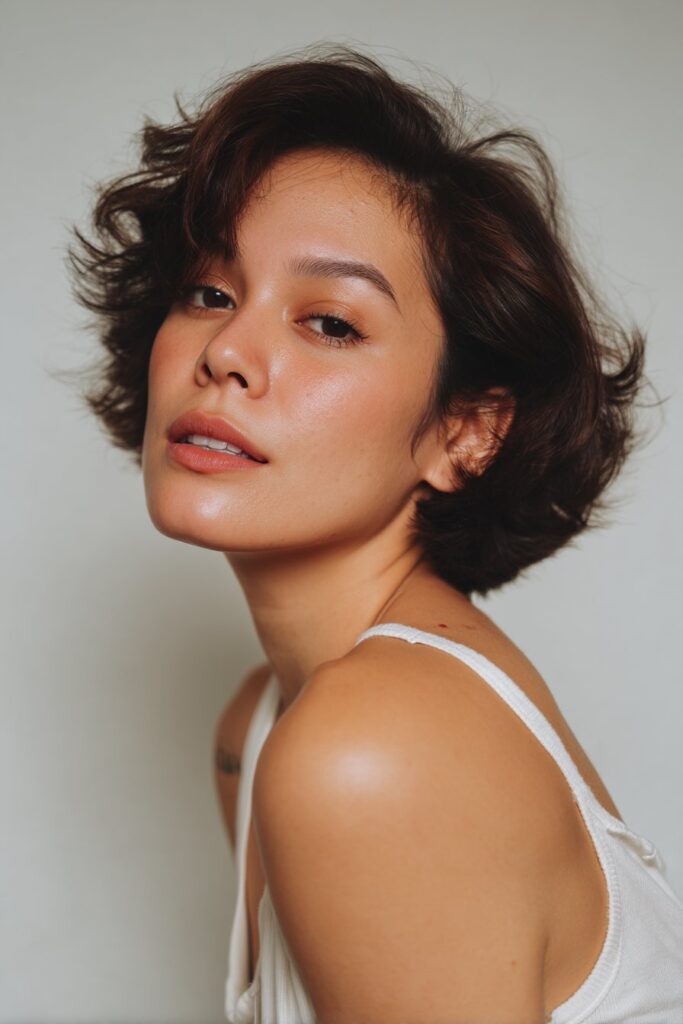
I’ve found that bouncy beach waves add incredible dimension to short hair, creating that effortless, tousled look that’s perfect for summer. After years of experimenting with different techniques, I’ve discovered some foolproof methods to achieve those perfect waves that actually stay put all day.
Bouncy beach waves technique
Surprisingly, the secret to perfect beach waves for short hair isn’t always a curling iron—it’s often a flat iron! Instead of traditional curling, I use a bending technique where I clamp the straightener near the scalp, twist it 180 degrees (not a full 360), and pull straight down at the tips. For that effortless beachy finish, I always leave the last quarter-inch of hair uncurled. This creates that perfectly undone look rather than tight, uniform curls.
Alternatively, wave wands work wonderfully for short hair. I grab small sections and clamp starting near the root, holding for a few seconds before moving down to line up with the previous wave. Meanwhile, with a curling iron, I focus on curling the middle section of each strand while leaving the ends mostly straight.
Best face shapes for bouncy waves
Bouncy waves work exceptionally well for all face shapes since you can customize the technique to highlight your best features. For round faces, I create more volume at the crown and keep waves looser around the face. Square faces benefit from softer waves that frame the jawline, whereas oval faces look stunning with waves starting at cheek level.
Tools needed for bouncy waves
For achieving perfect bouncy waves, you’ll need:
- A flat iron with beveled edges (titanium or ceramic plates, not metal)
- A 1-inch curling iron or wand (25mm for tighter waves, 32mm for looser waves)
- Heat protectant spray (absolutely essential!)
- Texturizing spray or sea salt spray
- Sectioning clips
Styling tips for bouncy waves
First, always start with dry hair that has some styling product in it. If your hair feels a bit oily, add dry shampoo before beginning. Second, section your hair into manageable parts—I typically do just two sections for speed, but three works better for precision.
Temperature matters tremendously. Fine hair needs lower heat (around 300°F), whereas thicker hair requires about 350°F. Moreover, alternate your curl directions for a more natural look—I always curl the front sections away from my face and mix up the direction for the rest.
Finally, don’t brush out your waves immediately. Let them cool completely before separating them with your fingers and finishing with texturizing spray to add that perfect beachy texture and hold.
Heatless Beach Waves with Braids

For those of us who prefer to minimize heat damage, overnight braids are my secret weapon for creating gorgeous beach waves on short hair. This technique is beginner-friendly, quick, and especially great for styling damaged or bleached strands since it requires zero heat.
How to braid for waves
After trying countless braiding styles, I’ve discovered that different braids create distinctly different wave patterns. French braids produce more defined waves with volume at the roots, whereas rope twists create beautifully loose, beachy waves with added texture. For tighter, more uniform waves, traditional three-strand braids work wonderfully, while fishtail braids create those enviable piece-y, textured waves.
For short hair, I recommend dividing your damp hair (about 75% dry) into two sections and creating either two French braids or rope twists. Remember that wherever your braid starts, your waves will start there too—so begin higher up if you want volume from the roots.
Best hair types for this method
In my experience, this heatless technique works for nearly all hair types, although results vary based on thickness and natural texture. Thicker hair typically holds waves better and longer, especially with tighter braids. However, fine hair benefits from looser braiding techniques to avoid that crimped look. Additionally, for afro-textured hair, applying a moisturizing product before braiding creates stunning definition.
Products to enhance texture
Prepping your hair with the right products makes all the difference. Before braiding, I apply a texturizing spray or lightweight mousse to damp hair. Products containing coconut oil or shea butter work beautifully for added moisture without weighing down short hair. Furthermore, leave-in conditioners minimize frizz that can occur from nighttime movement.
Overnight styling tips
Above all, ensure your braids are completely dry before unraveling—this is crucial for lasting waves. If you shower at night, towel-dry thoroughly before braiding. For maximum hold, secure braids with cloth elastics rather than rubber bands to avoid indentation. In the morning, gently unravel each braid, then run your fingers through—never brush—to separate the waves. Finally, set with a light hairspray for all-day hold, especially important for beach days.
Beach Waves with a Curling Wand

After experimenting with countless styling tools, I’ve found that a curling wand is my ultimate secret weapon for creating perfect beach waves on short hair. The lack of a clamp means more natural-looking results and fewer creases—exactly what we want for that effortless beachy style.
Curling wand technique
First and foremost, prep your dry hair with heat protectant spray. I section my hair horizontally, starting with the bottom layer and working upward. For the perfect beach waves, I take small 1-inch sections and wrap them around the wand, always leaving the last inch of hair straight. This straight end creates that coveted casual, undone look rather than perfect ringlets. For face-framing pieces, I always curl away from my face, yet for the back sections, I alternate directions. This mix of curl patterns creates that perfectly tousled, beachy finish.
Best for fine to medium hair
Curling wands work exceptionally well for fine to medium hair types because they provide better control and more lasting results. Unlike other techniques, wands allow fine hair to wrap smoothly around the barrel without flattening or losing volume. In contrast to curling irons, wands create looser, more relaxed waves—ideal for that “just left the beach” vibe that complements shorter cuts.
Recommended wand size
A 1-inch (25mm) wand is the sweet spot for short hair. Anything larger creates waves too loose to hold in shorter lengths, whereas smaller barrels produce tight curls rather than waves. The 1-inch size allows your short hair to wrap around the barrel 4-5 times, creating the perfect wavy style without looking too “done.”
Finishing products
Once your waves cool completely (crucial for longevity!), I apply texture spray from mid-lengths to ends for definition. For extra hold during summer humidity, I lightly mist with a flexible-hold hairspray. If your waves look too “perfect,” run your fingers through them or flip your head upside down and gently shake to break up the pattern. A tiny amount of hair oil on the ends prevents frizz while maintaining that effortless beachy texture.
Flat Iron Beach Waves

One tool that continuously surprises my clients is the flat iron for creating perfect beach waves. Despite its straightening reputation, a good flat iron might be the most versatile styling tool in your arsenal for short hair beach styles.
Flat iron bending method
The secret to perfect flat iron beach waves lies in the bending technique. First of all, I always start with completely dry hair that has some styling product already worked in. If your hair feels a bit oily, dry shampoo works wonders as a base. Next, I take 1-inch sections and clamp the flat iron near the roots, then twist it 180 degrees (not a full 360) toward the back of my head and away from my face. Pulling down smoothly through the ends creates that perfect bend rather than a tight curl. The key difference is that you’re bending the straightener around the hair rather than curling it—this creates those effortless, undone waves that define beachy hair.
Best for sleek finishes
In my experience, flat iron waves work exceptionally well for those seeking a sleeker, more polished beach look. Unlike other methods, the flat iron creates waves with incredible staying power—typically lasting 2-3 days with minimal touch-ups. This technique shines on fine to medium hair textures, especially bob-length cuts that need movement without excessive volume. Indeed, for those with naturally straight hair seeking definition, this method provides just enough texture without fighting your natural pattern.
Flat iron recommendations
For short beach hairstyles, look for a flat iron with beveled or rounded edges—this crucial feature prevents creases and allows smooth gliding. Most importantly, choose titanium or ceramic plates (never metal), as metal expands and contracts with heat, eventually creating tiny cracks that damage hair. A quality flat iron should have adjustable heat settings, ideally displaying actual temperatures rather than just “high” or “low” options. For fine hair, 300°F works perfectly, whereas medium to coarse textures need about 350°F.
Belle Hathaway’s personal tip
My favorite editorial trick for easy beach hairstyles for short hair? After creating your flat iron waves, flip your head upside down and spray texturizing spray at the roots. Consequently, when you flip back up, you’ll have added volume that complements the waves perfectly. Beyond that, I always leave the very ends straight—this small detail creates that authentic beach-inspired look rather than perfectly uniform curls.
Loose Beach Waves with Volume

Loose, voluminous beach waves have become my signature style for clients wanting that effortless summer look without the fuss. Through years of styling short hair, I’ve perfected techniques that create natural-looking volume that lasts all day.
Loose wave technique
Creating loose beach waves differs from traditional curling methods. First, I always prep dry hair with a lightweight styling product. The key technique is bending rather than fully curling the hair. I take 1-inch sections and alternate the direction of each curl—this is crucial for that tousled, natural finish. Always curl the front sections away from your face, but mix up the direction for the back sections. Most importantly, leave the last inch of your ends straight for that authentic beachy look.
Best for casual looks
Loose waves with volume work perfectly for everyday wear, casual brunches, and even office settings where you want to look polished yet relaxed. This versatile style suits most face shapes and looks especially gorgeous on layered cuts. For short hair beach styles, this technique creates movement without the stiffness of more structured curls, giving that coveted “I woke up like this” appearance that’s both effortless and intentional.
How to add volume
The secret to adding volume lies in your technique and product application. Start by applying dry shampoo at your roots before styling—even on clean hair! This instantly creates lift and texture. After curling, flip your head upside down and gently shake out the curls with your fingers, never a brush. For extra volume, focus on curling from the roots rather than just the mid-lengths.
Texturizing spray tips
Texturizing spray is absolutely essential for achieving long-lasting beach waves. Apply it strategically:
- Spray primarily at mid-lengths and ends
- Hold the bottle 6-8 inches away from your hair
- Scrunch upward after application to enhance waves
- Layer with sea salt spray for additional texture
Products like Aquage Sea Salt or Wella Ocean Spritz work beautifully for enhancing waves without making hair feel sticky or crunchy. For fine hair, Oribe Dry Texturizing Spray offers volume without weighing down your strands—making it perfect for easy summer hairstyles for short hair.
Mini Ponytail with Texture

Short hair ponytails have become my favorite quick fix for beach days! After styling countless clients with chin-length cuts, I’ve discovered that mini ponytails offer both style and practicality—keeping hair off your neck yet looking effortlessly chic.
Creating a mini ponytail
For short hair, the key lies in placement and sectioning. First, decide where you want your ponytail—low ponytails at the nape work exceptionally well for short styles. Begin by brushing out any tangles, gathering all your hair at the desired position. Next, secure with a small, sturdy hair tie, wrapping it several times for maximum hold. For a polished look, tighten the base by gently pulling a tiny strand from the top of your ponytail while holding the base—this creates a secure foundation without those annoying bumps.
Best for chin-length hair
Mini ponytails work wonderfully for bob-length cuts, lobe-length chops, and especially chin-length styles. Truthfully, as long as your shortest layers can reach the ponytail (or be pinned in place), you’re good to go! For layered cuts, I recommend a mid-level ponytail as shorter layers on top make high ponytails easier to achieve. Obviously, face-framing pieces left out can soften the look tremendously—I often pull a few tendrils forward for a more relaxed beach vibe.
How to add beachy texture
To create that perfect beachy texture, apply dry volume blast or texturizing spray before styling. Soon after securing your ponytail, gently tug apart both sides to tighten upwards, yet loosen the crown for volume. Second, use a sectioning comb to lift hair at the roots. This maintains security while adding that coveted lift and volume that celebrates your natural texture. For an undone look, I like messing up the pony a bit for a relaxed, textured finish.
Accessories to use
Accessories transform a simple mini pony into something special! Commonly, I recommend:
- Small, sturdy hair ties (preferably without metal)
- Bobby pins for securing flyaways
- Ponytail cuffs for decorative flair
- Oversized scrunchies
- Silky bows for sophisticated touches
- Decorative clips for keeping baby hairs in place
These little additions make your beach-ready mini ponytail both functional and fashionable.
Braided Tendrils
Braided tendrils have quickly become my go-to beach hairstyle for short hair clients seeking that perfect boho-meets-warrior elegance. This Y2K-inspired trend offers both style and practicality, keeping face-framing pieces secure while letting the rest of your short hair shine.
How to create tendrils
Creating braided tendrils starts with sectioning your hair properly. First, part your hair down the middle and separate two small sections (about an inch wide) framing your face. At first, I recommend securing the rest of your hair back temporarily to keep it out of the way. For the classic three-strand braid, divide each section into three equal parts, then cross the front piece over the middle, followed by the back piece over the new middle section. Continue this pattern until you reach your desired length. For short hair, these face-framing braids work beautifully even with chin-length bobs—simply pull forward hair from about an inch behind your hairline if your front pieces are too short.
Best for festival looks
These micro-braids truly shine at summer festivals, beaches, and outdoor concerts. The beauty of braided tendrils lies in their versatility—they effortlessly transition from day to night, casual to dressed-up. In fact, I’ve styled countless clients with this look for music festivals, as it perfectly combines function (keeping hair off your face while dancing) with that coveted boho esthetic. The style pairs wonderfully with natural makeup and oversized sunglasses for a complete festival vibe.
Products to hold braids
For long-lasting braided tendrils, the right products make all the difference:
- Lightweight gel or pomade applied to damp sections before braiding
- Curl-enhancing leave-in conditioner for added texture
- Small, clear elastics for securing the ends (or leave them loose for a more undone look)
- Braiding gel containing argan or jojoba oil for nourishment and hold
Styling longevity tips
To ensure your braided tendrils stay put throughout beach activities, certainly start with freshly washed, thoroughly dried hair—this creates the perfect foundation. For maximum hold, apply a small amount of gel before braiding rather than after. Likewise, keeping the braids relatively tight at the roots helps them withstand humidity and movement. To refresh this style on day two, lightly mist with sea salt spray and scrunch upward for added texture without redoing the braids completely.
Silky Scarf Wrap

Scarves have saved my short hair beach days countless times! As someone who loves both style and hair protection, I’ve discovered that a silky scarf wrap offers the perfect solution for those days when you want to look chic while shielding your locks from sun damage.
How to tie a scarf
The triangle fold has proven most effective for short hair beach styles. To begin with, take your scarf and fold it diagonally into a large triangle. Next, hold the long ends and place the folded edge on your forehead. Afterward, bring the ends to the nape of your neck and tie them securely. For a stylish twist, I prefer wearing mine slightly off to one side with the pointed end tucked into the knot. Accordingly, this prevents the scarf from blowing around in beach winds.
Best scarf materials
Not all scarf materials perform equally at the beach! Throughout my styling career, I’ve tested numerous fabrics:
- Silk: Extremely porous and won’t pull moisture from your hair like cotton does. Silk retains your hair’s natural hydration and reduces breakage.
- Cotton: Soft, breathable, and highly absorbent—perfect for hot days. Cotton scarves come in endless prints and are easy to tie.
- Linen: The most breathable option derived from flax fibers. Linen creates constant airflow and reflects heat, making it an excellent shade blocker for beach days.
UV protection benefits
A headscarf does more than just look cute—it creates a physical barrier between your hair and harmful UVA+B rays. Hence, it protects your color-treated hair from unwanted damage and discoloration, preventing that yellowing effect on bleached hair. Additionally, scarves reduce the need for constant washing and styling, giving you more time to enjoy your beach day.
Belle Hathaway’s summer go-to
My favorite beach accessory is a silk-blend scarf in vibrant prints. I’ve abandoned baseball hats completely for the more elegant look of a headscarf. For this reason, I always pack several in my beach bag—they double as belts with denim shorts or can be tied around the waist as stylish cover-ups. One pro tip I share with clients: secure silk scarves with bobby pins for all-day hold, as they can slip more easily than cotton ones.
Ocean Hair Clips for Short Hair

Ocean-themed hair clips have become my newest obsession for beach days with short hair! These whimsical accessories not only add a fun touch to any beach look but also solve the practical problem of keeping hair off your face when you’re enjoying the waves.
How to use ocean clips
Securing ocean clips in short hair requires a specific technique. Initially, I gather a small section of hair—typically from above the ear or at the temple area. Next, I open the clip fully, slide it underneath the section, and close it gently. For shorter bobs, I find that placing clips at a slight angle rather than straight across creates better hold. These decorative clips work wonderfully for pulling back those pesky side pieces that always seem to escape during beach activities.
Best clip types
The market is flooded with adorable ocean-themed options that perform beautifully in short hair:
- Sea animal designs: Jellyfish, whales, turtles, and octopus clips with legs that help secure hair
- Shell-inspired clips: Natural or acrylic shell clips measuring about 3-4 inches
- Wave-shaped clips: Blue ocean wave designs perfect for ponytail holders
Naturally, I prefer acrylic material for beach days as it’s lightweight yet sturdy enough to hold short strands securely. The ideal size ranges from 3.5-4 inches, offering generous space without overwhelming shorter cuts.
Styling for bangs
Bangs and beaches typically don’t mix well—therefore, ocean clips become absolute lifesavers! For curtain bangs, I sweep each side back symmetrically with matching clips. Subsequently, for full fringe, I twist the bangs backward before securing with a clip at the crown. This technique keeps hair off your face while creating volume at the roots—perfect for those struggling with bangs at the beach.
Beach-to-bar transition
These versatile clips effortlessly transform your daytime beach look into evening-ready style. After swimming, I rinse my hair with fresh water, apply leave-in conditioner, then secure damp strands with decorative ocean clips for an instant polished look. Alternatively, creating a deep side part secured with a starfish clip instantly elevates your style from casual beach day to sophisticated dinner outfit. These ocean-inspired accessories are perfect for everyday use—whether swimming, applying makeup, or heading to beach parties.
Short Braids with Side Part
Cornrows and side-parted braids have long been my reliable solution for beach days when you need a style that truly withstands humidity and ocean spray. Throughout my career, I’ve found these protective styles perfect for both functionality and fashion on short hair.
Braiding technique
For short beach hairstyles, I typically create a series of cornrows or Dutch braids flowing from a side part. Start with damp hair (about 75% dry) as it provides better grip for short strands. Divide each section into three equal parts and create Dutch braids by crossing strands under the middle piece rather than over. This technique creates raised braids that stand out beautifully on short hair. For those with very short hair, use a small amount of gel or jam on your fingertips to improve grip—it makes a world of difference when working with shorter lengths.
Best for natural hair
Side-parted braids work exceptionally well on natural hair textures, from loose curls to tight coils. This style naturally protects your strands from salt water damage yet provides excellent scalp ventilation during hot beach days. Furthermore, these protective styles limit sun exposure to your hair, preventing color fading and moisture loss. On natural hair, these braids also help maintain moisture levels even in humid beach environments.
How to part and section
Create your side part using the tail end of a rat-tail comb, starting at your forehead and continuing straight back. For the cleanest lines, apply a small amount of gel along your parting before sectioning. Take your time with parting—this foundation determines how professional your finished style looks. Typically, I divide the hair into manageable sections using clips, working from bottom to top in horizontal rows. Each row should be parallel to maintain symmetry throughout the style.
Humidity protection tips
To protect your braided style from beach humidity, prep with anti-frizz shampoo and leave-in conditioner beforehand. Upon finishing your braids, apply a light oil (like argan or jojoba) to smooth any flyaways. Finish with flexible-hold hairspray for all-day security without stiffness. These simple steps ensure your short braided style remains intact regardless of humidity levels.
Low Sleek Bun
Nothing says elegantly effortless quite like a sleek low bun for beach days. After testing this style on countless clients with shorter hair, I’ve refined a technique that creates a polished look yet withstands ocean breezes remarkably well.
Creating a sleek bun
For the perfect sleek bun, I start with second or third-day hair which provides natural grip and texture. Begin by brushing your hair thoroughly with a soft bristle brush (Mason Pearson brushes are my favorite) and gather it into a low ponytail at the nape of your neck. Notably, positioning your ponytail slightly lower than eye level creates the most flattering bun shape. After securing with a hair tie, apply a small amount of gel or wax along the surface to smooth any flyaways. Next, twist your ponytail while wrapping it around the base, using your pointer finger to hold the center in place. Secure with bobby pins and a second hair tie if needed.
Best for bob-length hair
Low sleek buns work beautifully for bob-length cuts specifically because they can capture even shorter layers that might escape higher styles. Throughout my styling career, I’ve found this style particularly flattering for those growing out pixie cuts or sporting chin-length bobs. As a result of the low placement, even short layers reach the gathering point easily. Given that the style pulls hair tightly back, it also creates a naturally sculpted look that accentuates cheekbones and jawlines.
Products for sleek finish
Primarily, I recommend using a combination of products for maximum hold and shine. A lightweight hair gel like Garnier Pure Clean provides excellent hold without stiffness or product buildup. For those pesky flyaways, nothing beats a wax stick – TIGI Bed Head Wax Stick is a game-changer for taming baby hairs and creating that perfectly sleek finish. After all, the right products should provide hold without making your hair look greasy or stiff. Pomades offer a high-shine finish that’s perfect for more formal beach events.
Quick styling tips
For an ultra-sleek finish, use a toothbrush sprayed with hairspray to tame any remaining flyaways. Specifically, this works wonders along the hairline. Using a hair bungee instead of traditional elastics provides much tighter hold without breakage. In addition to your regular routine, applying anti-humidity spray before and after styling helps maintain sleekness even in beach humidity. Ultimately, avoid creating too much tension along your hairline to prevent breakage and thinning – sleek doesn’t have to mean damaging.
Wet-Look Pixie Cut

The wet-look pixie cut has completely transformed my approach to beach styling for ultra-short hair. This sophisticated yet sultry style strikes the perfect balance between elegance and effortlessness while requiring minimal maintenance at the beach.
How to achieve wet look
For the perfect wet look, I always start with damp hair rather than soaking wet strands. If your hair is too wet, the styling products won’t hold properly. After stepping out of the shower, I let my hair air dry until it’s about 75% dry. Next, I apply gel generously throughout my hair, working from roots to lengths. The key is being liberal with product—more gel equals a wetter appearance and longer-lasting hold. I then brush my hair back using either a boar-bristle brush for a sleeker finish or a fine-toothed comb for more texture and separation. Finally, I set everything with a strong-hold spray to lock the look in place.
Best for pixie cuts
The wet look works exceptionally well on pixie cuts because shorter hair naturally holds styling products better without becoming weighed down. On account of their versatility, pixie cuts can be styled in different wet-look variations—slicked back for elegance, textured for edginess, or with visible comb lines for a more structured appearance. Simultaneously, this style helps tame unruly growth phases between cuts, making it perfect for beach days when humidity might otherwise cause chaos.
Products for shine
To achieve that perfect glossy finish, these products have become my must-haves:
- Lightweight hair gel: Provides the wet appearance without crunchiness
- Pomade: Delivers high shine when mixed with gel (essential to avoid crunchiness)
- Frizz-fighting cream: Smooths flyaways after gel application
- Shine spray or serum: Adds that final glossy finish
- Flexible-hold hairspray: Sets everything without stiffness
Evidently, using pomade without hair cream leaves hair crunchy, so I always mix them together for the perfect consistency.
Red carpet inspiration
The wet-look pixie has graced countless award shows and formal events. Many notable personalities showcase this sophisticated style with their own unique twist. Some keep it sleek and refined, while others opt for more texture and separation. Primarily, what makes this style so versatile is how it can be adapted from a daytime beach look to evening elegance with just a touch more product and shine.
Tousled Bob with Sea Spray

When it comes to bob-length hair at the beach, nothing creates that effortless texture quite like a quality sea salt spray. This styling method has become my signature for clients who want that “just left the ocean” look without actually getting their hair wet.
Tousled wave technique
The magic of creating perfect tousled waves on a bob starts with the right foundation. Firstly, I apply sea salt spray to slightly damp hair (about 75% dry). Next, I scrunch the product upward from ends to roots, focusing on mid-lengths where most of the texture should live. Typically, I divide hair into 2-3 sections and twist each away from the face before scrunching. The key difference between this and other wave techniques is allowing the salt to do most of the work rather than relying heavily on heat tools.
Best for shoulder-length bobs
This technique works exceptionally well on shoulder-length bobs because the weight of longer hair helps the waves form naturally without excessive volume at the roots. In essence, the bob length provides the perfect canvas—long enough to hold waves, yet short enough that the hair doesn’t get weighed down. This method particularly shines on cuts with subtle layers that give the waves dimension and movement.
Sea spray application
For optimal results, application technique matters tremendously:
- On damp hair: Spray from mid-lengths to ends, scrunch, then either air-dry or diffuse for extra volume
- On dry hair: Spray from mid-lengths to ends, scrunch, and let the salt crystallize for instant texture
To avoid that dreaded crunchiness, I mix my sea salt spray with a tiny drop of leave-in conditioner or hair oil. Coupled with proper application, this creates texture without the drying effects that pure salt can have.
Belle Hathaway’s editorial trick
My favorite styling secret? After applying sea spray to damp hair, I create two loose buns at the nape of my neck and let them air dry completely. In the long run, this technique creates the most natural-looking waves that actually stay put all day at the beach. For this purpose, I secure each bun with silk scrunchies rather than elastic bands to prevent dents in the finished waves.
Half-Up, Half-Down Bun
The half-up, half-down bun has quickly become my clients’ most requested beach style for short hair. This versatile look combines the best of both worlds—keeping hair off your face yet showcasing your length and texture. It’s elegant, elevated, and surprisingly easy to create from the comfort of your home.
How to section hair
To create this beachy style, I start by separating my hair into two horizontal sections. Using a sectioning comb with a long tail, I pull out the top portion of hair, typically from the temples upward. For the cleanest look, I section from ear to ear across the crown, yet avoid taking too much hair—the key is balance between the top and bottom sections. After gathering the top section, I spray it with a finishing spray like TRESemmé’s Dry Texture Finishing Spray to give it grip. This technique works exceptionally well on second or third-day hair when your roots naturally have more texture.
Best for layered cuts
Throughout my styling career, I’ve noticed this style works brilliantly on layered short cuts, primarily bob-length hair with some face-framing pieces. The beauty of the half-up bun for layered hair is how it captures those shorter layers that might normally escape other updos. Additionally, this style helps tame awkward growing-out phases, making it perfect for those transitioning from pixie cuts to longer styles. Generally, leaving the sides down creates a softer frame around your face.
Adding braids or twists
Adding a simple braid to your half-up style can make it look professionally done. I often incorporate two mini French braids starting at the temples, braiding backward before wrapping them around the bun. Another option is creating a small twist at the crown before forming your bun. These additions create beautiful texture and visual interest that elevate a basic half-up style to something extraordinary.
Style hold tips
For all-day hold at the beach, proper securing techniques are essential. Extra-large hair pins work better than traditional bobby pins for anchoring the bun securely. Oftentimes, I spray my pins with dry shampoo before insertion to prevent slipping. The finishing touch is always a medium-hold hairspray that controls flyaways without creating stiffness. For extra humidity protection, I apply a small amount of anti-frizz gel to the front sections. My husband jokingly calls this my “sassy bun” because it gives me an extra confidence boost—and he’s absolutely right!
Double Dutch Buns

Double Dutch buns have transformed my beach hairstyle game completely! This fun, functional style keeps short hair secure during active beach days while still looking absolutely adorable.
Braiding and bun technique
Creating Double Dutch buns begins with properly sectioning your hair. First, I part my hair down the middle, extending from the front hairline all the way to the nape. After securing one side temporarily with a clip, I take a small diagonal section at the front and divide it into three equal parts. The magic of Dutch braiding is crossing each section under the middle rather than over. I gradually add small sections of hair while braiding diagonally toward the crown. Once I reach the nape, I secure with a clear elastic and repeat on the other side.
For the bun portion, I gently pull apart the braid (called “pancaking”) to create fullness. Then, I wrap the end around the elastic, forming a small bun and secure with mini bobby pins. This technique works brilliantly for short hair—even chin-length cuts can achieve this style!
Best for active days
Double Dutch buns truly shine during active beach days. Unlike looser styles, these braided buns stay put through swimming, surfing, and beach volleyball. Yet they’re versatile enough to transition from sporty to boho depending on how you style them. I especially love how they keep hair completely off my face and neck when temperatures soar.
Tools needed
To create perfect Double Dutch buns, you’ll need:
- Sectioning clips or duck bills for clean partings
- Clear elastic bands that won’t show
- Mini bobby pins for securing buns
- Texturizing spray for grip and hold
Style variation ideas
Depending on my mood, I alternate between neat, polished buns for elegant beach dinners and deliberately messy, pancaked braids for casual beach days. Occasionally, I’ll create a half-up version with just the top section braided into buns. Furthermore, adding small accessories like flower pins transforms this practical style into something truly special for beach weddings or sunset parties.
Boho-Inspired Beachy Curls
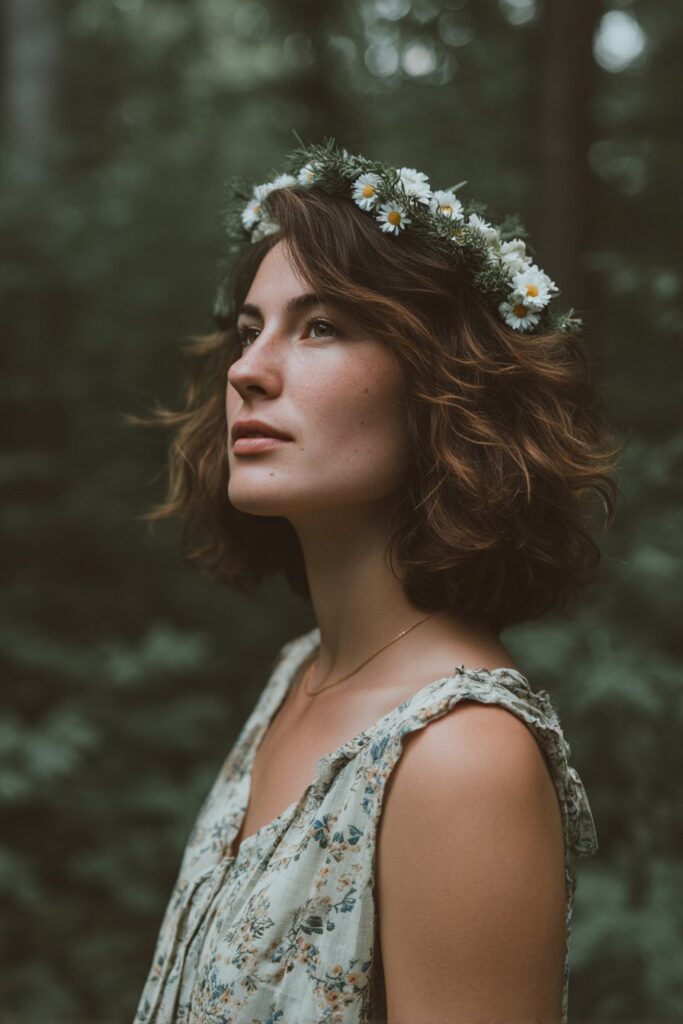
The boho flower look has become my signature beach style for clients wanting that effortless free-spirited vibe. This romantic yet casual style combines textured waves with delicate floral accents—perfect for those wanting something beyond basic beach waves.
Creating boho curls
In my experience, the secret to authentic boho curls lies in their imperfection. I start with a 1-inch flat iron, clamping near the roots and twisting 180 degrees toward the back of my head. Unlike traditional curls, I deliberately leave the ends straight for that undone boho feel. As a matter of fact, the key difference is bending rather than curling—this creates those relaxed, lived-in waves that define the bohemian esthetic. After curling, I gently run my fingers through to break up any too-perfect sections.
Best for ombre or balayage
Boho waves showcase dimensional hair colors beautifully, making them ideal for ombre or balayage. The free-flowing nature of these waves creates movement that highlights color transitions naturally. To that end, I recommend this style for clients with color treatments, as the varied light reflection across the waves makes even subtle color differences pop dramatically.
Using flower pins
Fresh or artificial flowers transform basic waves into true bohemian art. For short hair beach styles, I recommend:
- Small wildflowers (daisies, baby’s breath) tucked behind the ear
- Peony-shaped pins (up to 11cm diameter) with dual clip/pin backing
- Mini flower clusters scattered throughout waves
- Flower-shaped beads threaded onto thin braids
These delicate accents should look naturally placed rather than overly arranged.
Festival styling tips
For festival-ready boho waves that last all day, preparation is essential. I always spray TRESemmé’s Wave Creation Sea Foam on damp hair before scrunching with a blow dryer. Occasionally, I’ll add small braids among the waves for extra texture and staying power. In this case, a light misting of flexible-hold hairspray keeps everything secure without stiffness. For a full boho experience, leave hair slightly messier than you’d typically prefer—this effortless esthetic is the hallmark of authentic beach-inspired boho style.
Conclusion
After exploring these 17 easy beach hairstyles for short hair, you’ve certainly discovered that having shorter locks doesn’t limit your styling options—it actually expands them! Throughout my years as a stylist, I’ve watched clients transform from feeling restricted by their short cuts to embracing the incredible versatility these styles offer.
What makes these beach-ready styles particularly special is how they balance form and function. Bouncy waves, braided tendrils, and low sleek buns not only look stunning but also withstand ocean breezes, humidity, and active beach days. Additionally, protective options like silky scarves and ocean-themed clips provide both style and hair health benefits, shielding your strands from damaging UV rays and salt water.
The beauty of short hair beach styles lies in their adaptability. Most require minimal tools and products—just a quality sea salt spray, texturizing product, and perhaps a flat iron or curling wand. Furthermore, many styles like heatless overnight braids and half-up buns can be achieved without heat styling, keeping your hair healthier during summer months.
My clients often tell me their favorite aspect of these styles is the confidence boost they provide. Nothing feels better than walking onto the beach knowing your hair looks amazing and will stay that way through swimming, volleyball, or sunset cocktails.
Remember that practice makes perfect with any new styling technique. The first attempt might not look salon-perfect, but each try brings improvement. Your hair also has unique characteristics that might make certain styles work better than others—embrace this uniqueness rather than fighting against it!
Though these styles certainly look impressive, they’re designed to be achievable by anyone. The techniques we’ve explored work wonderfully on various hair types, textures, and lengths—from growing-out pixie cuts to shoulder-grazing bobs.
Short hair truly shines during beach season. While longer styles often fall flat or frizz dramatically in humidity, shorter cuts maintain their shape and bounce. Undoubtedly, the right beach-ready style can transform your entire summer experience, eliminating styling stress and letting you focus on making memories instead of fixing your hair.
Which beach hairstyle will you try first? Trust me—once you master these techniques, you’ll never look at your short hair as limiting again. Instead, you’ll see it as the versatile, stylish asset it truly is!