
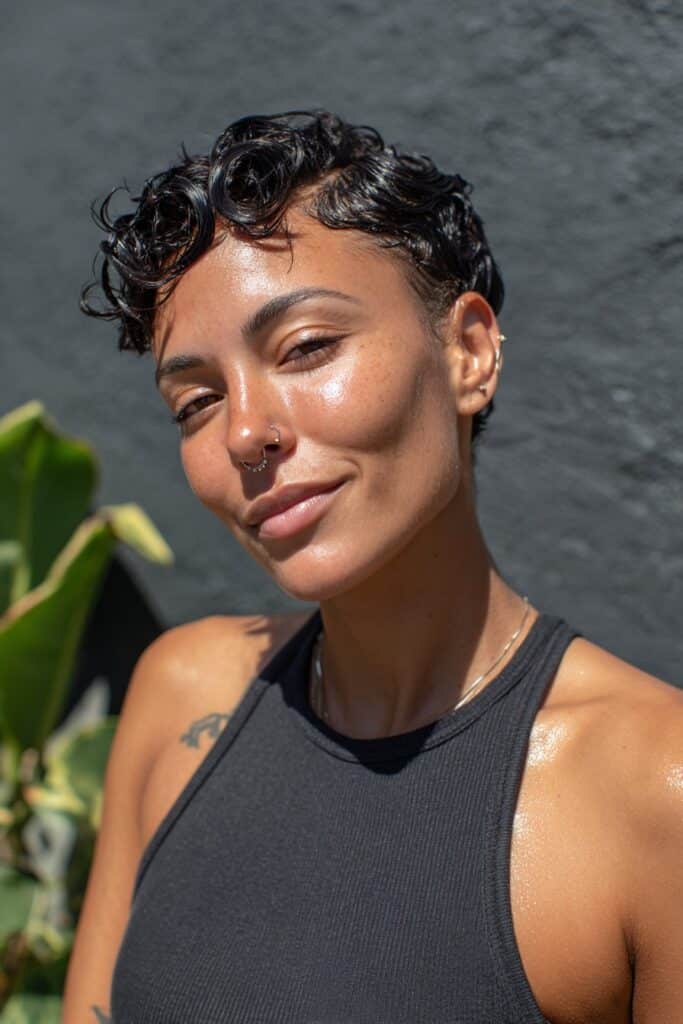
Finger waves on short pixie cuts have made one of the most stunning comebacks in modern hair styling, and I am absolutely here for it. I remember the first time I truly fell in love with this look — it was during a backstage session at a fashion showcase where one of my clients walked out with this perfectly sculpted, glistening wave pattern pressed into her pixie cut, and the entire room turned. That moment reminded me why I got into beauty in the first place. There is something about the marriage of vintage glamour and contemporary edge that makes finger waves on pixie cuts so endlessly captivating.
If you have been on the fence about trying this style, I want to take you through thirteen of the most beautiful, creative, and wearable variations of finger waves on short pixie hair. Each one offers something a little different — whether you are drawn to sleek sophistication, bold texture, or effortless chic. Let me walk you through each style the way I would explain it to a client sitting in my chair.
Classic Hollywood Finger Wave Pixie

There is a reason the classic Hollywood finger wave has never truly gone out of style. Even when trends shift and new techniques emerge, this look keeps finding its way back onto runways, red carpets, and editorial spreads. On a pixie cut, it becomes something truly special because the shortness of the hair amplifies every single curve and ridge in the wave pattern.
What It Is And How The Style Works
The classic Hollywood finger wave pixie is exactly what its name suggests — a short pixie cut styled with deep, defined S-shaped waves that run horizontally across the head. The waves are typically close to the scalp, smooth, and incredibly shiny. The finished look evokes old-world glamour while feeling modern and intentional. This style works by using a combination of setting lotion, a fine-tooth comb, and clips to mold the hair into alternating ridges and valleys that hold their shape as the hair dries. The effect is structured, polished, and deeply elegant.
Best For Straight And Fine Hair Types
This particular variation works beautifully for people with naturally straight or fine hair because the smoothness of the strands makes it easier to achieve those crisp, clean ridges without the waves competing with texture. Fine hair tends to lay flat and accept product very readily, which means the wave pattern holds longer and looks more defined. If you have fine hair and have always felt like your hair lacks drama or presence, this style will completely change how you see your strands. It creates volume through structure rather than through puffiness.
How To Create The Look At Home
Start with freshly washed, slightly damp hair and apply a generous amount of wave setting lotion or mousse from roots to ends. Using a fine-tooth comb, begin at the front hairline and push the hair gently to one side to create the first ridge. Place a finger along that ridge and use the comb to push the next section in the opposite direction to create the second ridge. Secure each ridge with pintail clips as you work your way around the head. Sit under a hooded dryer or allow hair to air dry completely before removing clips. Finish with a light-hold shine spray.
Sleek Side-Swept Finger Wave Pixie

One of my all-time favorite styles to create on clients with angular face shapes is the sleek side-swept finger wave pixie. It has this effortlessly cool energy — like the person wearing it simply woke up looking this put-together, even though a fair amount of artistry went into making it happen.
What It Is And How The Style Works
This style features finger waves that are swept dramatically to one side, creating an asymmetrical silhouette that is both bold and graceful. The waves begin at the part line and flow in one unified direction across the top of the head, while the sides are kept either closely cut or tapered for contrast. The sweep creates the illusion of movement even when the hair is completely still, which is part of what makes it so visually striking. It works by directing the wave pattern laterally rather than in a centered formation, giving the whole style a sense of intentional drama.
Best For Oval And Heart-Shaped Faces
The side-swept direction of the waves is particularly flattering for oval and heart-shaped faces because it draws the eye horizontally and balances the proportions of the face beautifully. If your forehead is naturally wider, the sweeping movement of the waves softens that width and creates visual harmony. Oval faces tend to look stunning in almost any style, but the side-swept wave adds a level of sophistication that really elevates the cut. I have styled countless clients with these face shapes in this look and the transformation is consistently remarkable.
Tips For Achieving A Perfect Side Sweep
The key to nailing the side sweep is establishing a clean, deliberate part before you begin setting the waves. Use a rat-tail comb to create a deep side part, then apply your setting product and begin molding the waves so they all flow in the same direction from that part. Work in sections no wider than an inch at a time to maintain control. Once the waves are set and clipped, allow the hair to dry fully before touching anything — patience is everything here. After removing clips, use your fingertips to lightly define any ridges that need refreshing.
Textured Finger Wave Pixie With Natural Curl

When I started working more intentionally with clients who have natural curls and coils, I quickly realized that finger waves on naturally textured hair create something entirely different from the sleek Hollywood version — and honestly, it is just as breathtaking, if not more so.
What It Is And How The Style Works
The textured finger wave pixie celebrates natural curl or coil patterns by incorporating them into the wave structure rather than smoothing them out. The waves in this style have visible texture, movement, and personality. Instead of a glassy, smooth finish, the ridges carry the natural curl of the hair, creating a more organic and three-dimensional wave pattern. This style works by using a curl-defining cream or gel to first enhance the natural texture, then gently molding the curls into wave formations using fingers and a wide-tooth comb before setting with clips.
Best For Natural Curly And Coily Hair
This style was made for naturally curly and coily hair types — Type 3 and Type 4 specifically. If you have been told that finger waves are not possible on your hair texture, I want you to let go of that belief right now. Your natural texture does not limit you; it actually gives this style a richness and depth that straight hair simply cannot replicate. The coils create extra dimension within each wave ridge, making the overall style look incredibly lush and full even on the shortest pixie cuts.
How To Set Waves On Natural Texture
Apply a generous amount of curl-defining gel or setting lotion to damp hair. Section the hair into small horizontal rows and use your fingers to guide each section into a wave shape, pushing ridges forward and back alternately. Secure each row with duckbill clips and allow the hair to dry completely — do not rush this step. Once dry, gently remove clips and use your fingertips (never a comb) to lightly separate the waves. Finish with a light oil or shine serum to enhance the natural sheen of the curls.
Bold Color Finger Wave Pixie

Color and finger waves are a combination that I genuinely believe more people should be exploring. I had a client come in once asking for something she described as “art you can wear on your head,” and we landed on a bold color finger wave pixie that made her cry happy tears. That experience has stayed with me.
What It Is And How The Style Works
The bold color finger wave pixie combines a vividly colored pixie cut — think deep burgundy, platinum, copper, or even a vivid jewel tone — with the structured elegance of finger waves. The color becomes part of the style’s visual storytelling, with each wave catching light differently based on the shade chosen. This style works because color adds an extra dimension to the wave pattern, making ridges and valleys even more visible and dramatic. The contrast between the colored hair and the sculpted wave formation creates a look that is simultaneously artistic and wearable.
Best For Those Who Love Making A Statement
If you are someone who uses your appearance as a form of self-expression and you gravitate toward bold choices, this style was essentially made for you. It works on all face shapes and hair textures, provided the coloring process is done properly and the hair is kept in good condition. The bolder the color, the more the wave pattern pops. I would particularly recommend deep wine tones and rich copper shades for people trying this for the first time, as those colors tend to complement a wide range of skin tones while still reading as daring.
Tips For Maintaining Color And Wave Definition
Color-treated hair requires consistent moisture to maintain its integrity, so always use a hydrating shampoo and conditioner designed for color-treated strands. When resetting your waves between salon visits, use a heat-protectant spray before applying any direct heat from a blow dryer. Refresh wave definition with a small amount of pomade or wave cream, working it through dry hair and re-clipping any ridges that have fallen. Touch up your color at the roots as recommended by your stylist to keep the bold tone looking intentional rather than grown-out.
Finger Wave Pixie With Tapered Sides

The finger wave pixie with tapered sides is the style I reach for when a client tells me she wants something that feels polished for the boardroom but still has enough personality for a night out. It is that good.
What It Is And How The Style Works
This style features beautifully sculpted finger waves on the top and crown of the head while the sides are tapered or faded close to the scalp. The contrast between the detailed wave work on top and the clean, close-cut sides creates a modern, architectural silhouette. The taper can be blended gradually for a softer effect or cut sharply for a more graphic look. This style works because the tapered sides frame the wave pattern like a gallery frames a painting — the simplicity of the sides makes the artistry of the waves the undeniable focal point.
Best For Those Who Want A Modern Edge
This variation is perfect for anyone who loves the classic appeal of finger waves but wants a distinctly contemporary feel. The taper brings the style into the present moment and makes it feel fresh rather than purely retro. It is also incredibly practical — the closely cut sides are low-maintenance and grow out gracefully, which means you have more time between cuts while still looking intentional and styled. I especially love this look on clients who describe their personal style as “effortlessly cool.”
How To Style The Waves On Tapered Hair
Because the sides are tapered, all of your styling effort goes into the top and crown sections. Apply your wave setting product only to those areas, keeping the tapered sides clean and close. Use a fine-tooth comb to establish your ridges starting from the hairline, then work back toward the crown. The shorter hair on top of a tapered cut means the waves will be slightly more compressed, which actually makes the ridges look incredibly defined and sharp. Set with clips and dry thoroughly before removing.
Finger Wave Pixie With Pin Curls

Combining finger waves with pin curls at the nape or crown is one of those styling choices that feels distinctly vintage and yet somehow always looks fresh. I discovered this combination during a period when I was doing a lot of research into historical beauty techniques, and I immediately knew I had to bring it into my modern work.
What It Is And How The Style Works
This style blends finger waves across the top and sides of the head with small, spiral pin curls placed at the nape of the neck or around the crown. The pin curls add a soft, romantic element to the structured rigidity of the waves, creating a beautiful tension between two different styling techniques. It works by setting the waves first in the main body of the hair, then rolling small sections of hair around a finger or pin curl rod at the perimeter to create the curled sections. The result is layered, detailed, and deeply feminine.
Best For Romantic And Vintage-Inspired Looks
If you love vintage aesthetics — think old Hollywood glamour, 1920s flapper energy, or 1940s wartime chic — this style will feel like it was pulled directly from your imagination. It is particularly stunning for special occasions like weddings, galas, or formal events where you want to look truly unforgettable. I have created this look for numerous clients heading into important events, and the response is always the same — absolute delight. The pin curls add a softness that makes the overall style feel approachable rather than severe.
Tips For Making Pin Curls Last
To make pin curls hold throughout an entire event, work with hair that has been freshly set with a firm-hold setting lotion. Roll each pin curl tightly and secure it flat against the head with a bobby pin pushed through the center of the curl. After all curls are set, sit under a hooded dryer until completely dry. When releasing the curls, do so gently and avoid pulling or stretching them. A light mist of hairspray over the finished style will help lock everything in place without making the curls feel stiff.
Finger Wave Pixie With Defined Part

Sometimes the smallest details make the biggest difference in a hairstyle, and nothing illustrates that better than a deeply defined part within a finger wave pixie. I always tell my clients that the part is the architecture of the style — get it right, and everything else falls into place beautifully.
What It Is And How The Style Works
This style uses a sharply defined side or center part as the starting point for the entire wave pattern, with the waves radiating outward from the part in a deliberate, symmetrical or asymmetrical formation. The part itself becomes a design element — clean, precise, and intentional. It works by using a rat-tail comb to create a perfectly straight part, then setting waves on each side of the part that mirror or contrast each other depending on the desired effect. The clarity of the part gives the style a graphic quality that reads as extremely polished.
Best For Structured And Polished Aesthetics
This variation is ideal for anyone who gravitates toward clean lines, structured silhouettes, and a put-together appearance. It translates beautifully from professional environments into evening settings and requires very little adjustment to move between contexts. People with naturally sleek or fine hair will find it easiest to achieve a crisp part, but with the right products, it is achievable on almost any hair type. The defined part also makes the face appear more symmetrical, which is a wonderful bonus.
How To Create A Razor-Sharp Part
Use the pointed end of a rat-tail comb to trace your part line from front to back, applying light pressure to the scalp to ensure the line is clean and even. If your hair tends to resist staying on one side of the part, apply a small amount of pomade along the part line using your fingertip before you begin setting the waves. This will train the hair to stay in place and prevent the part from migrating as the style dries. Refresh the part each time you reset the style using the same technique.
Glossy Wet-Look Finger Wave Pixie
There is a certain kind of editorial magic that happens when finger waves are styled to look perpetually wet and glistening — like the model just stepped off a yacht or walked through a summer rainstorm and somehow looks more stunning for it. This is one of my signature looks.
What It Is And How The Style Works
The glossy wet-look finger wave pixie achieves its distinctive high-shine finish through the strategic use of gel, pomade, and shine-enhancing products that give the hair a permanently damp, lacquered appearance. The waves in this style are deeply sculpted and extremely close to the scalp, and the finish is mirror-smooth and reflective. This style works by layering products — starting with a wave gel at the root level and finishing with a high-shine pomade or gloss serum over the top — to achieve that liquid-like surface. The look is bold, avant-garde, and undeniably eye-catching.
Best For Editorial And Fashion-Forward Moments
This style belongs on a magazine cover, a fashion runway, or at any event where you want to be the most visually compelling person in the room. It is not a subtle look — it is intentional, dramatic, and completely unforgettable. I would recommend it for anyone who works in a creative field or who simply loves using their appearance as a form of art. It also photographs beautifully, making it a favorite for content creators and anyone who wants their look to translate powerfully on camera.
How To Achieve The Perfect Wet Finish
Apply a generous amount of strong-hold gel to damp hair, then use a fine-tooth comb to set your wave pattern. Once waves are clipped and dried, apply a thin layer of high-shine pomade or serum over the entire styled surface using your fingertips, working in the direction of the wave. Add a final mist of shine spray to amplify the gloss. The key to maintaining this look throughout the day is to avoid touching the hair — fingerprints will disrupt the smooth surface and create dull patches.
Finger Wave Pixie With Baby Hairs Laid

If there is one styling element that immediately communicates both attention to detail and cultural pride, it is impeccably laid baby hairs alongside finger waves. This combination carries so much beauty heritage with it, and I absolutely love incorporating it into modern looks.
What It Is And How The Style Works
This style pairs finger waves with deliberately styled baby hairs along the hairline — those fine, delicate strands at the forehead and temples that are swirled, swooped, or laid into decorative patterns using edge control and a soft brush. The baby hairs become an extension of the styling, adding an intricate, detailed frame around the face that enhances the entire look. Together, the waves and baby hairs create a cohesive style where every single strand has been considered and placed with intention.
Best For Celebrating Natural Hair Texture And Heritage
This style honors a long and beautiful tradition of hair artistry that has deep roots in Black hair culture and style. If you have fine, textured baby hairs along your hairline, this style gives you an opportunity to celebrate rather than conceal them. It works beautifully on all pixie cut lengths and pairs particularly well with naturally textured or relaxed hair. Wearing this style is a way of honoring the generations of stylists and individuals who elevated baby hair styling into the art form it is today.
Tips For Laying Baby Hairs Cleanly And Creatively
Use a firm-hold edge control product and a soft boar-bristle brush for the most precise results. Apply a small amount of edge control to your hairline and use the brush to swirl, curl, or sweep the baby hairs into your desired pattern. Popular designs include small swirls, swooping curves, and lightning bolt shapes. Work slowly and deliberately — rushing this step will result in smearing rather than definition. Once laid, allow the edge control to dry completely before adding any finishing products over the top.
Asymmetrical Finger Wave Pixie

Asymmetry in hairstyling is something I have always been drawn to because it introduces an element of the unexpected — a quality I believe every truly memorable look should have. The asymmetrical finger wave pixie is one of the most artistically interesting variations in this entire category.
What It Is And How The Style Works
An asymmetrical finger wave pixie features waves that are notably different on each side of the head — one side might carry three deep, dramatic waves while the other side is tapered close to the scalp, or the wave pattern might begin much higher on one side than the other. The asymmetry is deliberate and intentional, creating a silhouette that challenges traditional notions of balance while still feeling completely cohesive. This style works because the eye is naturally drawn to points of contrast, and the asymmetry ensures that the style constantly feels dynamic and interesting from every angle.
Best For Creative And Avant-Garde Personalities
If you identify as someone who approaches personal style as a creative outlet and you are never satisfied with what you consider “ordinary,” this style will resonate deeply with you. It takes confidence to wear, but the payoff is a look that is genuinely one-of-a-kind. Fashion-forward individuals, artists, musicians, and anyone who thrives on self-expression tend to gravitate toward asymmetrical styles. I always tell clients considering this look: the goal is not to look different for its own sake, but to look like the most fully realized version of yourself.
How To Plan Your Asymmetrical Design
Before sitting down to style, spend a moment looking at your face shape and considering which side you want to carry the fuller wave pattern. Generally, having the fuller, wavier side opposite your stronger or more prominent facial feature creates the most flattering balance. Sketch out your intended wave placement if that helps you visualize it. When setting the waves, begin on the fuller side to establish the dominant element of the style, then complete the tapered or simpler side in relationship to what you have already created.
Finger Wave Pixie With Low Fade

The combination of finger waves with a low fade is where street style meets high fashion, and the result is consistently spectacular. This is one of those cuts that looks equally at home in a luxury salon and a barbershop, which tells you everything about its versatility.
What It Is And How The Style Works
A low fade starts very close to the scalp at the nape and sides and gradually blends into longer hair as it moves toward the top of the head, where the finger waves are set. The transition from the faded perimeter to the sculpted wave pattern on top creates a seamless, clean contrast that makes both elements look even more intentional. This style works because the fade does most of the structural work for the cut, creating a shape that the waves then inhabit with texture and detail. The combination gives the overall style a very sharp, contemporary feel.
Best For Those Who Want A Barbershop-Inspired Aesthetic
Anyone who loves the precision and clean lines associated with barbershop culture will find this style deeply satisfying. It is also a wonderful option for people who want a low-maintenance cut that still reads as polished and intentional. The faded sides require very little daily styling — all of the wave work happens on top, which means your morning routine is streamlined while the result still looks fully finished. This style also grows out more gracefully than many other cuts, buying you extra time between appointments.
Tips For Blending Waves Into A Faded Cut
The most important thing to remember when creating this style is that the transition between the fade and the wave section needs to be seamless. Ask your barber or stylist to leave enough length at the very top of the fade to create a smooth connection with the waved section. When setting your waves, bring them all the way down to the point where the fade begins rather than leaving a gap. This continuity makes the style look intentional and complete rather than like two separate styles placed on the same head.
Finger Wave Pixie For Silver And Gray Hair

Gray and silver hair have had a long-overdue moment of cultural celebration, and I have been one of the loudest voices cheering this shift. When silver or gray hair is styled into finger waves on a pixie cut, the result is nothing short of magnificent.
What It Is And How The Style Works
This style uses the natural or intentional silver and gray tones of the hair as a central visual element, with the finger waves amplifying the luminosity and dimension of those tones. Gray hair reflects light differently than pigmented hair, giving finger waves on silver strands a pearlescent, almost ethereal quality. The waves look incredibly defined against the light-reflecting surface of gray hair, and the overall effect is elegant, distinguished, and powerfully beautiful. This style works because it leans into the natural qualities of the hair rather than fighting against them.
Best For Embracing Natural Hair Color With Confidence
This style is a love letter to every person who has been told to cover their gray and has instead chosen to wear it with pride. It is particularly stunning on women in their forties and beyond who want a style that honors where they are in life rather than trying to approximate a younger version of themselves. Gray and silver hair at any age deserves to be celebrated, and finger waves give it a framework that is simultaneously classic and contemporary. I have had clients come into my studio feeling self-conscious about their gray hair and leave feeling like absolute royalty after this style.
How To Enhance Silver Tones Before Styling
Before setting finger waves, use a purple or blue-toned toning shampoo and conditioner to neutralize any yellow or brassy tones in the gray hair. This will bring out the cool, luminous quality of the silver and ensure the waves look crisp and clean rather than dull. After toning, apply a deeply hydrating conditioner because gray hair tends to be more porous and benefits significantly from moisture. When styling, choose products that are free of heavy waxes, which can dull the natural sheen of gray strands.
Finger Wave Pixie With Accessories
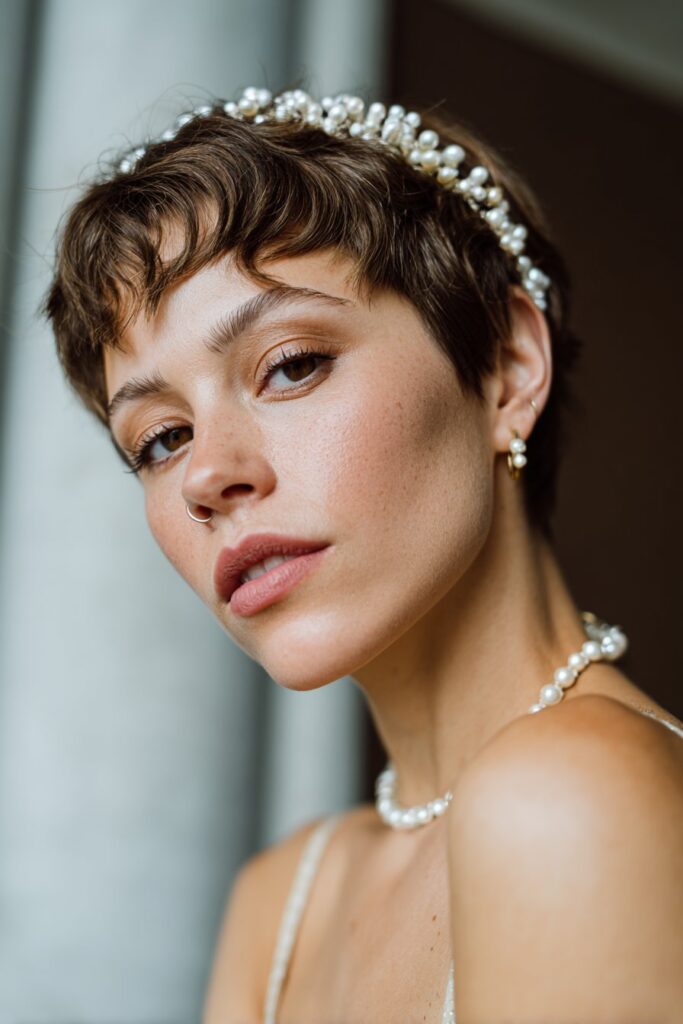
The final style in this collection is perhaps the one that brings me the most joy to create, because it combines my two greatest passions: artistry in hair styling and the transformative power of beautiful accessories. A finger wave pixie adorned with the right embellishment becomes something truly special.
What It Is And How The Style Works
This variation uses decorative accessories — pearl pins, jeweled clips, metallic headbands, floral accents, or embellished barrettes — to elevate finger waves on a pixie cut from a beautiful hairstyle into a complete aesthetic statement. The accessories can be placed along individual wave ridges to highlight the sculpted pattern, clustered at one side for an asymmetrical accent, or incorporated into the overall design as architectural elements. This style works because accessories on short hair are immediately visible and highly impactful — there is nowhere for them to hide, which means every piece you choose speaks clearly and deliberately.
Best For Special Occasions And Celebrations
If you are attending a wedding, an anniversary dinner, a graduation celebration, or any occasion where you want your style to feel elevated and intentional, this is the variation to choose. It transforms a daytime style into evening glamour with very minimal effort — the bones of the finger wave pixie are already beautiful, and the accessories simply amplify that beauty. I always recommend choosing accessories that have personal meaning when possible — a hairpin that belonged to your grandmother, a floral clip that matches your outfit, or a jeweled piece in your birthstone color.
Tips For Choosing And Placing Accessories
The most important rule when accessorizing finger waves is to place your embellishments in relationship to the wave ridges, not randomly. Place a jeweled pin along the top of a wave ridge to highlight its curve, or tuck a floral clip into the valley between two ridges to create depth. Avoid overcrowding — three well-chosen pieces will always look more intentional than ten randomly placed ones. When in doubt, choose quality over quantity and let the accessory be the supporting character rather than the star. The waves are always the lead in this particular story.
Conclusion
I have spent years behind the chair and in front of the mirror studying what makes a hairstyle truly transformative, and finger waves on short pixie cuts continue to be one of the most versatile, expressive, and enduringly beautiful options available. What I love most about this category of styles is how democratic they are — there is a version of the finger wave pixie for every personality, every hair texture, every face shape, and every occasion.
The thirteen styles we explored together today represent just a fraction of what is possible when you combine the sculptural artistry of finger waves with the bold, confident spirit of a pixie cut. From the sleek Hollywood classic to the silver-haired goddess variation, from the bold color statement to the intimately detailed baby hair edition, each style carries its own unique energy while sharing a common thread: intention.
I believe that the most beautiful hairstyle you can wear is one that feels like a true extension of who you are. Makeup and hair are not about conforming to anyone else’s standard of beauty — they are about amplifying the qualities that already make you extraordinary. Whether you walk into a salon with this article in hand or you use it as inspiration to experiment at home, I hope you find a version of the finger wave pixie that makes you feel exactly the way you deserve to feel: confident, creative, and completely yourself.
As I always say, beauty is not about perfection — it is about the courage to express yourself fully, and a gorgeous set of finger waves on a bold little pixie cut is one of the most beautiful ways to do exactly that. I cannot wait to see how you make this style your own.