
If there is one thing I have learned after years of working behind the makeup chair and styling chair, it is that prom is one of those once-in-a-lifetime nights that deserves an equally unforgettable look. I have had the privilege of preparing so many young women for their big night, and every single time, the hairstyle conversation is the one that brings the most excitement and, honestly, the most nervousness too. I completely understand it. Your hair frames everything — your dress, your makeup, your confidence — and getting it right matters deeply.
Now, when most people think of prom hair, big voluminous curls or towering updos might come to mind first. But let me tell you something I tell every client who walks into my space: low bun hairstyles are having a serious moment, and for good reason. They are elegant, they are timeless, they are versatile, and they work for just about every hair type, face shape, and dress style imaginable. A beautifully executed low bun has a way of making you look effortlessly polished without looking like you tried too hard — and that balance is everything.
I have put together sixteen of my absolute favorite low bun prom hairstyles that I personally love creating and recommending. Each one is different, each one has its own character, and I promise you, there is something here for every single one of you. Let us dive in.
Classic Sleek Low Bun
What Is The Classic Sleek Low Bun
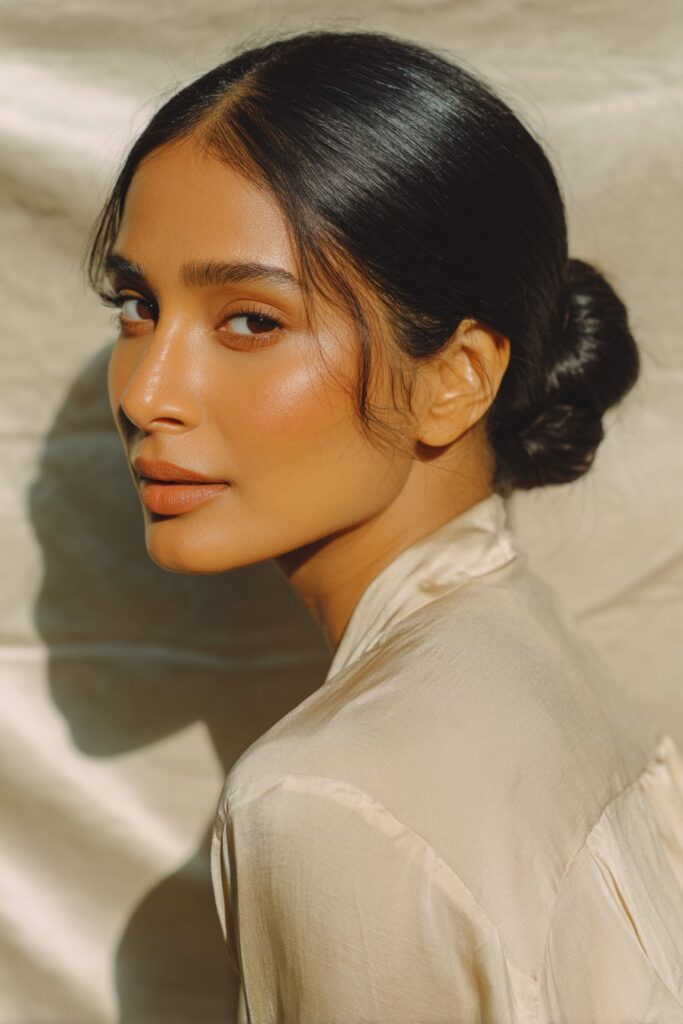
The classic sleek low bun is the style that never goes out of fashion. Think smooth, polished, and perfectly refined — every strand is intentionally placed and lying flat, creating a bun that sits right at the nape of the neck and radiates pure sophistication. I have styled this look on so many clients, and it never fails to turn heads. The beauty of this bun is in its simplicity. There are no complicated techniques, no excessive accessories, just clean lines and a timeless silhouette that lets your natural beauty and your outfit take center stage. When I first did this style back in my early career days, I realized immediately how powerfully a sleek bun could transform someone. It pulls the focus to the face, elongates the neck, and gives the overall look a quality that feels high fashion without being overdone.
Who Benefits Most From This Style
The classic sleek low bun genuinely works for almost everyone, which is part of why I adore it. However, it is particularly flattering for those with oval, heart-shaped, or long face shapes because pulling the hair back neatly draws attention upward and highlights the bone structure beautifully. If you have fine or medium-textured hair, this style is particularly ideal for you because the hair lies flat naturally and holds the sleek aesthetic with less effort. I also recommend this look for anyone wearing a heavily embellished or statement gown — the clean bun allows the dress to be the star without the hair competing for attention.
Tips To Achieve A Flawless Sleek Finish
The secret to a truly polished sleek bun is preparation. Start by blow-drying your hair completely straight and smooth. Apply a smoothing serum or cream before drying to tame any frizz. Once dry, use a fine-tooth comb to gather all the hair at the nape of your neck, pulling it tight but not so tight it becomes uncomfortable. Secure it into a low ponytail first, then twist or wrap the length around the base and pin it neatly. Finish with a generous mist of shine spray and a firm-hold hairspray to lock everything in place. A clean toothbrush dipped lightly in hairspray can help tame any baby hairs along the hairline for that ultra-polished result.
Braided Wrap Low Bun
What Is The Braided Wrap Low Bun
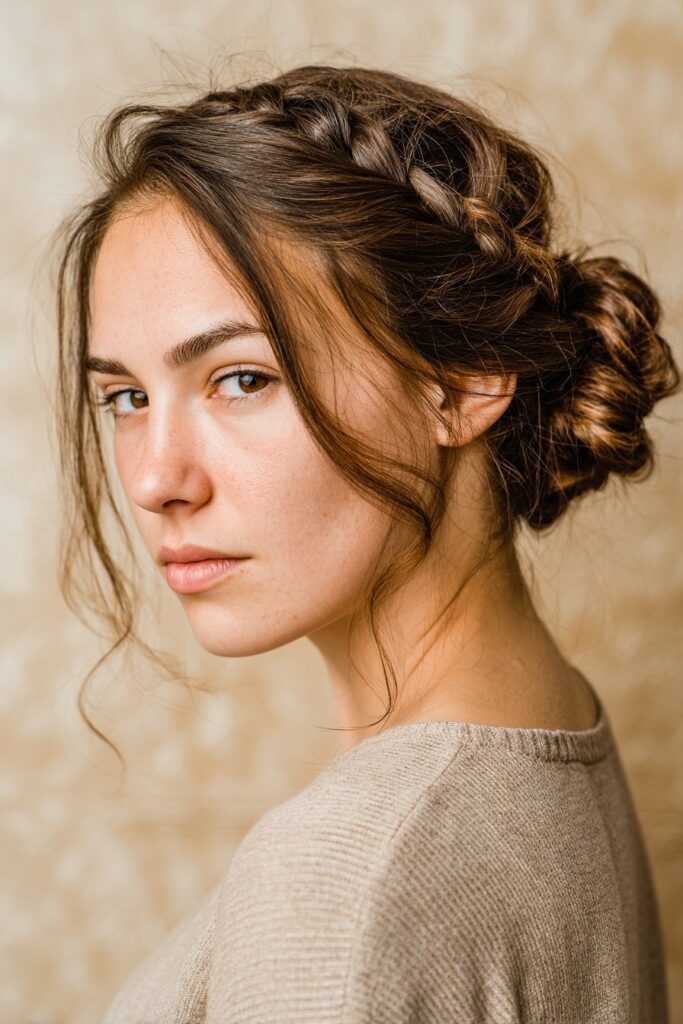
The braided wrap low bun is one of those styles that I genuinely get excited about every single time I create it. It combines the elegance of a low bun with the intricate beauty of braiding, resulting in something that looks incredibly detailed and artful. Essentially, a braid — whether a classic three-strand, Dutch, or French braid — is woven from the front or the side and then wrapped around the bun at the nape of the neck, acting almost like a crown or a decorative band. The braid adds texture, dimension, and visual interest that transforms a simple bun into something truly special. It is one of those styles that people look at and immediately say, “How did she do that?” and I love that reaction.
Best Hair Types For This Braided Look
This style works beautifully on medium to thick hair because the braid has more volume and shows up with greater definition. However, with the right technique and a few texture-building products, it can absolutely work on finer hair too. I have created this look on all different hair textures, and the key is always in the preparation. If you have wavy or naturally textured hair, you are at a slight advantage because the braids will grip better and hold longer throughout the night. Those with color-treated or highlighted hair will find that the braided wrap low bun shows off the dimension and tonal variation in their color beautifully, catching the light in the most stunning way.
How To Create The Braided Wrap Effect
Begin by loosely braiding a section of hair from one side of your head, starting near the temple. Keep the braid relaxed rather than tight for a more romantic, prom-appropriate feel. Secure the rest of your hair into a low bun at the nape of your neck. Now bring the braid across and wrap it around the base of the bun, pinning it securely underneath. You can repeat this on the other side for a more symmetrical look, or keep it to one side for something asymmetrical and modern. Finish with pins hidden neatly inside the bun and a spritz of flexible hold spray to keep everything together without making it stiff.
Romantic Messy Low Bun
What Is The Romantic Messy Low Bun
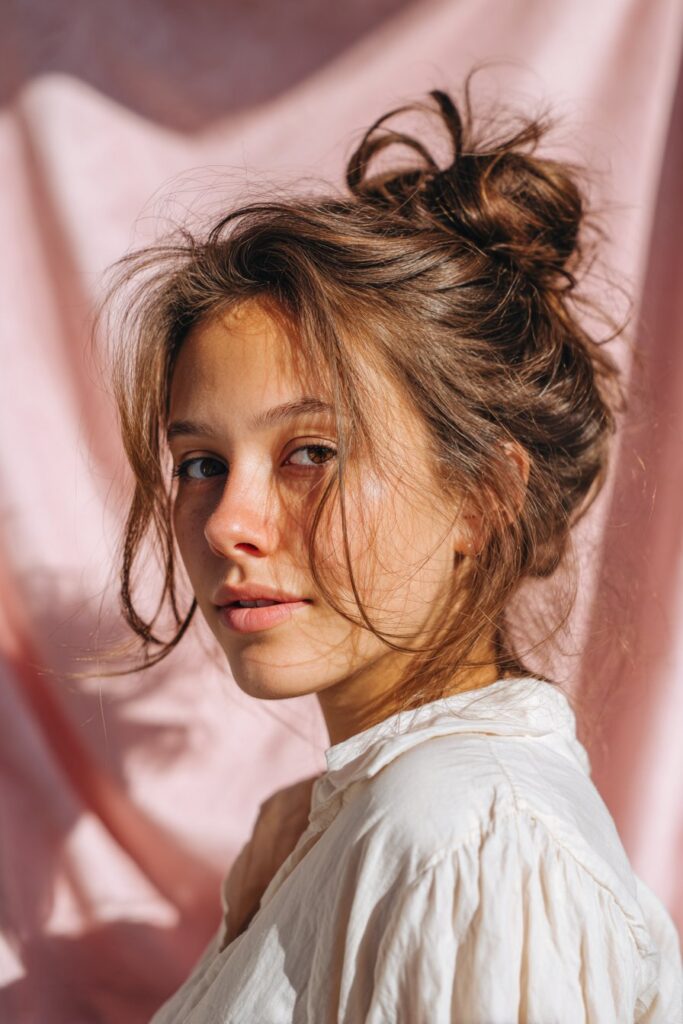
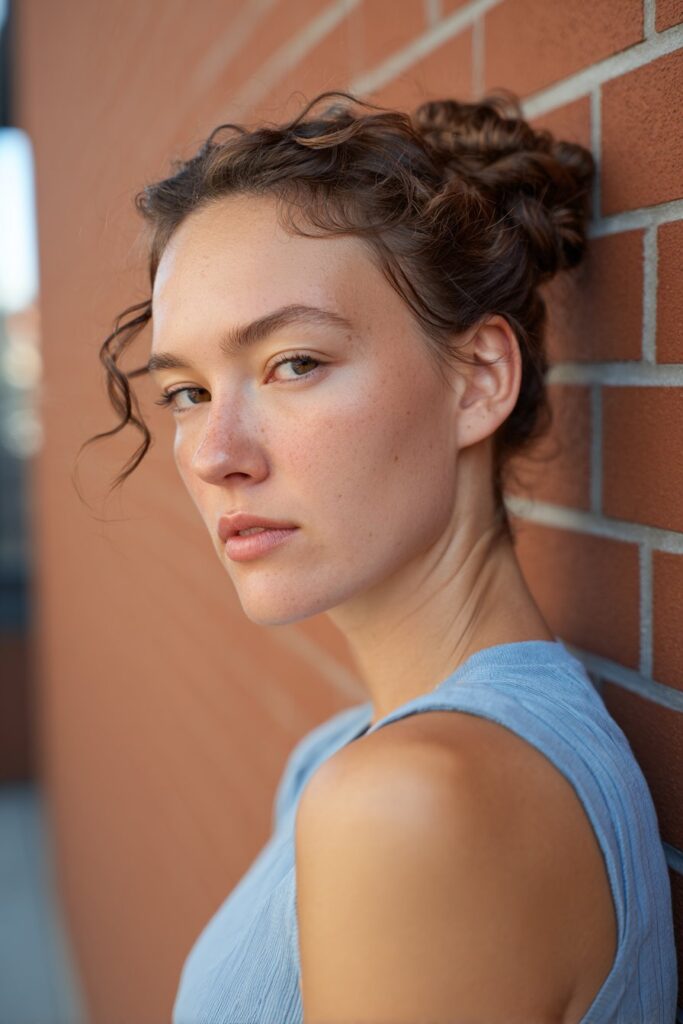
Oh, this one holds a very special place in my heart. The romantic messy low bun is the style I reach for whenever a client tells me she wants to look effortlessly beautiful — like she just rolled out of bed looking perfect, which we all know takes actual effort and skill to achieve. This bun has soft, intentional looseness to it. There are face-framing tendrils, a slightly undone texture, and a gentle fullness to the bun itself that makes it feel dreamy and romantic rather than polished and structured. I first fell in love with this aesthetic during an editorial shoot early in my career, and I have been incorporating it into prom and event styling ever since because it translates so beautifully in photographs.
Who This Style Looks Most Stunning On
The romantic messy low bun is genuinely one of the most universally flattering styles I know. The loose tendrils that frame the face soften angular jawlines and complement round faces beautifully by adding height and movement. It works especially well on those with naturally wavy or curly hair because the texture lends itself naturally to that effortless feel. If you have a boho-inspired, floral, or ethereal prom dress, this bun will complement your look in the most harmonious way. I also love this style for anyone who feels a bit uncomfortable with super tight, structured hairstyles — it feels free and easy while still looking absolutely stunning.
Techniques To Perfect The Effortless Messy Look
The trick with a messy bun that looks intentionally undone rather than accidentally sloppy is all in the details. Start by adding some texture spray or sea salt spray to your hair before you begin styling. Gather your hair loosely at the nape and twist it into a bun, deliberately pulling pieces out as you go to create that relaxed, unstructured shape. Pull a few face-framing pieces out at the front and curl them lightly with a small-barrel curling iron for that romantic tendril effect. Once the bun is pinned, gently pancake and loosen sections to create fullness. A light-hold hairspray will set everything without stiffening the movement.
Fishtail Braid Low Bun

What Is The Fishtail Braid Low Bun
The fishtail braid low bun is one of those hairstyles that makes people stop and stare. It has this incredible woven texture that is visually complex and almost hypnotic in its detail, and yet it is more achievable than it looks once you get the rhythm of the fishtail technique down. The style involves creating a fishtail braid through most of the hair and then coiling or tucking that braid into a bun at the nape of the neck. The result is a hairstyle that is intricate, artistic, and genuinely unlike what most people show up to prom wearing — and standing out in the best possible way is always a goal I encourage.
Hair Types That Shine With This Style
Medium to thick hair is where the fishtail braid low bun truly thrives because the braid shows up with incredible definition and texture. However, I want to encourage anyone with any hair type to try this because with the right products, you can make it work. For finer hair, a volumizing mousse applied before braiding adds grip and body. For naturally curly hair, stretching the curls slightly before braiding creates a more defined fishtail pattern. The wonderful thing about this style is that once it is coiled into the bun, any slight imperfections in the braid itself are partially concealed, which means even beginners can achieve something beautiful.
Steps And Tips For A Stunning Fishtail Bun
Divide your hair into two equal sections at the nape of your neck. Take a small piece from the outer edge of the right section and cross it over to join the left section. Repeat on the other side, alternating continuously. Keep each piece small for a finer, more detailed braid. Work your way down until you have a few inches left, then secure with an elastic. Gently pull on the edges of the braid to make it fuller and more textured — this is called pancaking, and it makes a dramatic difference. Then coil the braid into a bun and pin it securely. The finished result is nothing short of breathtaking.
Pearl-Adorned Low Bun

What Is The Pearl-Adorned Low Bun
The pearl-adorned low bun is the style I pull out whenever a client is going for that vintage-glamour, old Hollywood-inspired look, and it never misses. This is a smooth or lightly textured low bun that is decorated with pearl pins, pearl clips, or a scattering of small pearl accessories woven throughout the bun or placed along the hairline. Pearls have this incredible ability to elevate any hairstyle instantly — they add a sense of luxury and refinement that feels timeless and incredibly chic. I remember styling this look for a client attending a very formal event, and the moment those pearl pins were placed, the entire aesthetic transformed into something genuinely cinematic. It is one of my personal favorites.
Best Occasions And Looks For Pearl-Adorned Buns
This style pairs exceptionally well with formal, elegant prom gowns — think satin, silk, or lace. It is ideal for someone who wants to evoke that classic, graceful beauty aesthetic without going overly trendy or experimental. Pearl accessories work beautifully in blonde, brunette, and dark hair alike, though the contrast is particularly striking in darker hair. I love this style on those with a romantic or vintage personal style, and it works across all face shapes. If your dress features pearl or crystal embellishments, echoing those details in your hairstyle creates a beautifully cohesive look from head to toe.
How To Add Pearls To Your Low Bun
Create your base low bun first — either sleek and smooth or softly textured, depending on your preference. Once the bun is pinned and secure, begin placing your pearl accessories. You can scatter individual pearl pins throughout the bun for a starlit effect, or place a cluster of them at the base of the bun for a more deliberate, styled look. Pearl headbands or half-moon clips can also be placed at the front for a polished finishing touch. The key is not to overcrowd — less is more with pearl styling. A few well-placed pieces will always look more elegant than an excessive number crammed together.
Side-Swept Low Bun
What Is The Side-Swept Low Bun
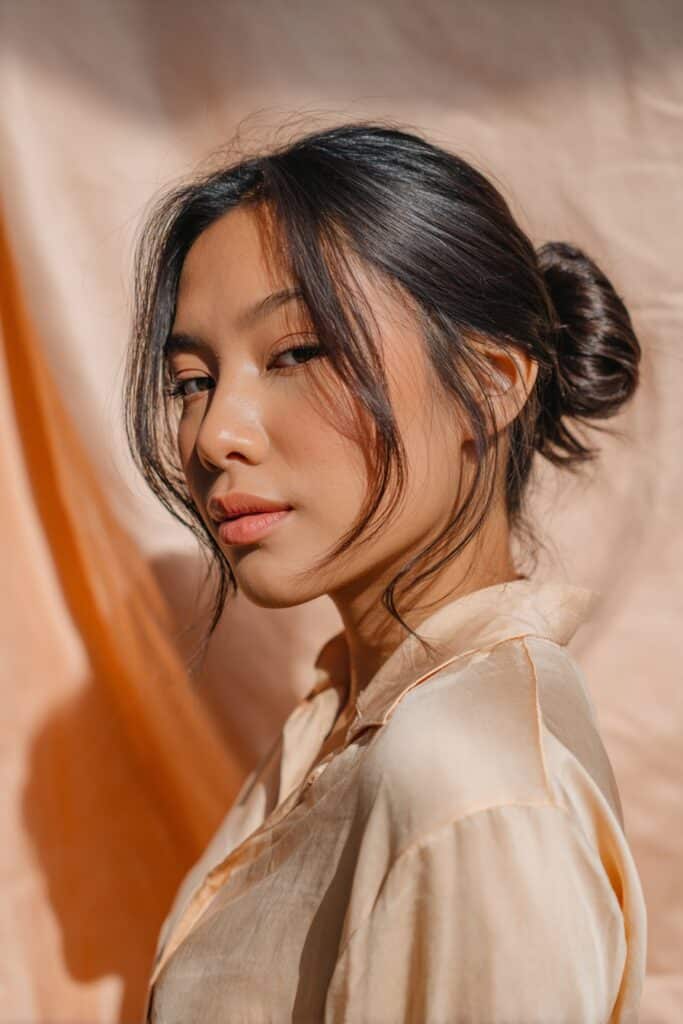
The side-swept low bun is one of those styles that adds an immediate element of sophistication and asymmetrical intrigue to your look. Instead of sitting squarely at the center of the nape, the bun is positioned to one side — usually slightly behind one ear — with the hair swept smoothly across the back of the head in that direction. This creates a diagonal line and a beautiful sense of movement that the centered bun simply does not have. I love the drama of a well-done side-swept low bun. It is a style that photographs exceptionally well because of that asymmetry, and it draws the eye in a way that feels both deliberate and effortless.
Face Shapes That Love This Asymmetric Style
The side-swept low bun is a gift for those with round or square face shapes because the diagonal sweep and off-center placement create an elongating, slimming effect. It breaks up symmetry in a way that adds visual interest and makes the facial features stand out more distinctly. That said, I have done this style on every face shape imaginable and the key is always in where exactly you position the bun. Slightly higher placement behind the ear gives a lifted effect, while a lower position creates something more romantic and relaxed. This style also works wonderfully for one-shoulder or asymmetrical neckline gowns because it visually echoes the dress’s own asymmetry.
Creating The Perfect Side-Swept Effect
Sweep all of your hair to your desired side, gathering it low and to the back of your head, slightly behind the ear on that side. Secure it with an elastic and then wrap or twist the length into a bun shape, pinning it neatly. The front section of hair should lie smoothly across the head — use a fine-tooth comb and a smoothing product to keep this area sleek. If you want a more romantic version, allow a few soft strands to fall loose at the front on the other side. Finish with hairspray and a shine spray to make the whole look glow beautifully.
Twisted Knot Low Bun
What Is The Twisted Knot Low Bun
The twisted knot low bun is a style with effortless cool — it has a casual elegance to it that feels modern and fresh without being overdone. The technique involves taking sections of hair, twisting them tightly, and then knotting them together before tucking and pinning everything into a neat bun at the nape. The result is a bun that has beautiful rope-like texture running through it, visible from different angles, and a slightly undone quality that feels intentional rather than messy. I particularly love this style for clients who want something different from the typical smooth or braided bun but do not want to go too far into complicated territory.
Who Should Try The Twisted Knot Look
This style is incredibly versatile and looks stunning on practically everyone, but I find it particularly suits those with medium-length to long hair, as you need enough length to work the twists and create a satisfying knot. It is also a wonderful option for those with naturally wavy or thick hair because the texture of the twists shows up beautifully in these hair types. Style-wise, the twisted knot low bun pairs wonderfully with boho-inspired, floral, or even minimalist modern gowns. It has a certain organic quality to it that feels fresh and creative without crossing into overly casual territory.
Tips For Mastering The Twisted Knot Technique
Divide your hair into two or three sections depending on its thickness. Take each section and twist it tightly from root to end, then wrap the sections around each other to form a knotted shape before securing and pinning. The secret to making this look intentional rather than random is consistency in how tightly you twist each section. Too loose and it looks undone; too tight and it loses that effortless texture. A medium grip gives the best result. Pull gently on the knot once formed to give it a little volume and roundness, then pin everything securely. A mist of light hold spray will keep it beautifully in place all evening.
Half-Up Low Bun

What Is The Half-Up Low Bun
The half-up low bun is for anyone who wants the elegance of an updo but cannot bear to part with their flowing hair. This style takes the top half or top section of the hair and gathers it into a low bun at the back of the head, while the rest of the hair falls freely below — whether in waves, curls, or straight. It is genuinely one of the most flattering and feminine styles I know, and I have styled it countless times on clients who love that combination of structured and free-flowing. There is something deeply romantic about this hairstyle. It frames the face beautifully with the upper section and then lets the rest of the hair cascade in whatever natural texture it has.
Why This Style Works For So Many People
The half-up low bun is one of those styles that flatters across the board, which is why I recommend it so often. It is particularly beautiful for those who have gorgeous natural waves or curls they want to show off while still having some kind of updo element for a prom-appropriate feel. If you are wearing a gown with a beautiful open back or detailed back embellishment, this style allows you to show that off while still looking elegantly styled at the top. Face shape wise, it works well for everyone because the loose lower section softens the look and prevents it from feeling too severe or structured.
How To Build Your Half-Up Low Bun
Separate the top section of your hair from ear to ear and clip the lower portion away temporarily. Work with the top section, gathering it into a low ponytail at the back of your head, ideally sitting right where the head curves. Twist or wrap the ponytail into a small neat bun and pin it securely. Release the lower section of hair and style it however you prefer — curls look particularly stunning with this look. For extra polish, curl a few face-framing pieces at the front. The contrast between the neat bun at the top and the free-flowing hair below creates a beautifully balanced look that photographs magnificently.
Floral-Embellished Low Bun

What Is The Floral-Embellished Low Bun
The floral-embellished low bun is pure magic — I say that as someone who has created hundreds of different hairstyles over the years, and floral embellishments never stop being one of the most breathtaking things you can add to a prom look. This is essentially any style of low bun — sleek, messy, braided, twisted — that has flowers woven into or placed around it. Whether you use fresh flowers for a real garden-fairy effect or high-quality silk flowers for something that will last perfectly all night, the result is always stunning. I have had clients cry happy tears when they see this style completed, and that reaction never gets old for me.
When And Who This Style Suits Best
The floral low bun is absolutely made for garden parties, outdoor proms, or any event with a romantic or nature-inspired theme. It suits every face shape, every skin tone, and every hair color. That said, it is particularly dramatic and striking on darker hair where the flowers stand out in beautiful contrast. Fresh baby’s breath gives a delicate, ethereal quality, while fuller blooms like roses or peonies create something more bold and statement-making. This style pairs beautifully with floral gowns — playing into a nature theme — or alternatively with simple, solid-colored dresses where the floral hair becomes the main decorative element.
Ways To Incorporate Flowers Into Your Bun
Create your base bun first and make sure it is fully secured. If using fresh flowers, cut the stems very short and insert them directly into the bun, pushing the stem in alongside a bobby pin for extra security. For silk flowers, many come with small clips or wire stems that can be woven into the bun easily. Scatter them throughout the bun for a whimsical, garden effect, or cluster them at one side for something more curated and editorial. A few small blooms placed along the hairline or tucked behind the ear add a beautiful finishing detail. Keep the rest of your styling simple so the flowers remain the focal point.
Textured Boho Low Bun

What Is The Textured Boho Low Bun
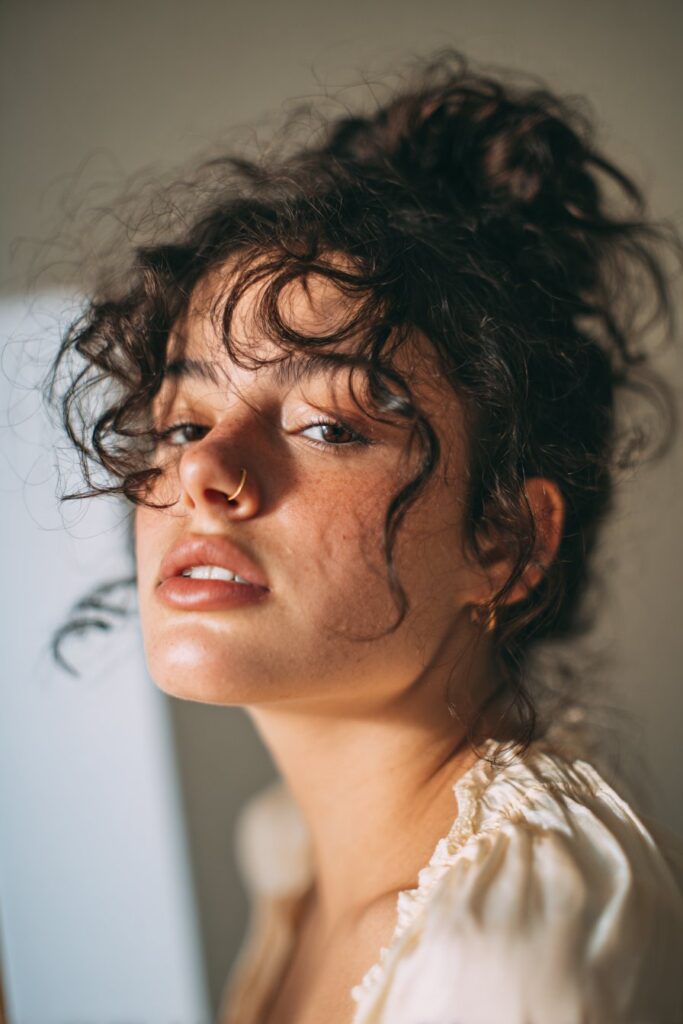
The textured boho low bun is my go-to recommendation for the free-spirited, artistic, unconventional prom-goer who wants to look beautiful on her own terms. This style is all about relaxed, organic texture — think undone waves, gently pulled-apart sections, visible pins that are decorative rather than hidden, and a bun that has an artful messiness rather than a precise shape. It feels like something you might see at an outdoor music festival or a bohemian wedding, and when executed thoughtfully, it is genuinely one of the most beautiful and unique things you can do with your hair for prom. I love creating this look because it has such a strong personality.
Perfect Pairings And Face Shapes For This Look
The textured boho low bun works exceptionally well with flowing, maxi-length gowns, wrap dresses, or any dress with earthy tones, floral prints, or natural fabrics. In terms of face shapes, it is particularly flattering for heart-shaped and oval faces because the organic texture and loose pieces around the face create a soft, balanced framing. Those with naturally curly or coily hair will find this style feels especially aligned with their natural texture, as embracing rather than fighting the natural pattern is central to the boho aesthetic. I encourage this style often for clients who want something that feels authentically like them rather than something borrowed from a trend.
Building The Boho Texture From Scratch
Begin by creating waves or loose curls throughout your hair using a large-barrel curling iron, then gently brush through them with your fingers or a wide-tooth comb to create that beautifully undone texture. Apply a texturizing or sea salt spray throughout for added grip and grit. Loosely gather the hair at the nape of your neck and twist it into a relaxed bun — do not worry about making it perfectly round or smooth. Pull pieces out at the front for face-framing effect, and gently loosen sections of the bun to create an organic, full shape. Decorative pins or hairpins with small jewel details are perfect finishing touches for this look.
Chignon Low Bun

What Is The Classic Chignon
The chignon is the original low bun — a French term for this elegant style that has been around for centuries and yet feels completely current and appropriate for any formal occasion, including prom. A true chignon is smooth, structured, and sits neatly at the nape of the neck. It differs from a standard bun in that the hair is folded and tucked rather than twisted and wrapped, giving it a flatter, more refined shape that is distinctly graceful. I adore the chignon because it is one of those styles where the craftsmanship and care are immediately apparent. When done well, it has an almost sculptural quality that elevates any look to a genuinely elevated level.
Why The Chignon Is A Prom Favorite
The chignon’s elegance comes from its simplicity. It draws zero attention away from your face, your makeup, or your dress — instead, it acts as a beautiful, refined backdrop that pulls everything together. This is why I particularly recommend it for anyone wearing a very formal or heavily embellished gown. It is also an excellent choice for anyone who wants their makeup or jewelry to be the true focal point of the evening. The chignon works beautifully on most face shapes and is especially sophisticated on those with longer, slender necklines. It photographs timeless — images of a chignon from ten years ago look just as beautiful and current today, and that longevity matters.
How To Create An Elegant Chignon
Begin with clean, fully blow-dried hair that is smooth from root to end. Gather all the hair at the nape of your neck and fold it upward on itself, creating a flat, smooth fold rather than a rounded bun shape. Tuck the ends underneath the fold and pin everything securely with multiple pins to ensure the shape holds. Smooth any bumps or flyaways with a fine-tooth comb and a small amount of pomade or wax. The chignon should sit flat and close to the head — any volume or looseness works against its signature clean aesthetic. Finish with a light-hold hairspray and a silk scarf or a simple decorative pin for a refined finishing touch.
Knotted Rope Low Bun

What Is The Knotted Rope Bun
The knotted rope low bun is one of those styles that looks incredibly complicated and impressive but is actually more straightforward than it appears once you know the technique. It involves creating two twisted rope-like sections of hair and then knotting them together at the nape before continuing to intertwine them into a bun shape. The visual result is a hairstyle with beautiful, defined rope texture that has a sculptural, architectural quality to it. I love creating this style because it has such a strong visual impact — it is detailed and intricate looking without requiring the time of a full braided style, and it holds up beautifully throughout a long prom night.
Hair Lengths And Types That Work Best
The knotted rope low bun truly shines on longer hair — ideally shoulder length and beyond — because you need enough length to work through the knotting and still have material left to form the bun at the end. Thick hair creates an especially impressive result because the rope sections are full and defined. Medium hair works very well too. Fine hair can achieve this style with the help of a texturizing spray applied before styling, which adds grip and prevents the twists from slipping. I have done this style on both straight and wavy hair with excellent results, though wavy hair tends to hold the shape slightly longer through the evening.
Creating The Rope Knot Effect Step By Step
Divide all your hair into two equal sections at the nape of your neck. Twist each section individually in the same direction — let us say clockwise — until the twist is tight and defined. Then wrap the two twisted sections around each other in the opposite direction — counterclockwise — which creates the rope effect. Continue wrapping them around each other and begin to coil them into a bun shape at the nape, pinning as you go. The coiling of the rope around itself forms the bun naturally. Secure with plenty of pins and finish with a firm-hold spray. The texture of the finished bun is genuinely beautiful and unlike anything a simple twist or braid can achieve.
Ribbon-Wrapped Low Bun
What Is The Ribbon-Wrapped Low Bun
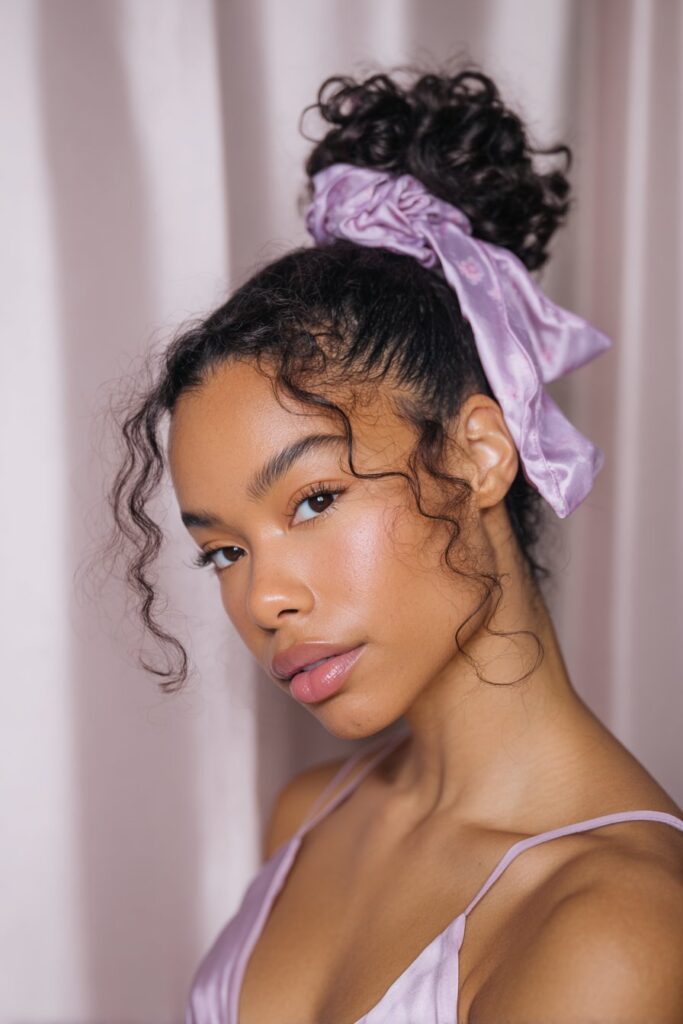
The ribbon-wrapped low bun is one of those styles that I started recommending more and more as hair accessories became a major trend, and I have to say — it is one of the most charming and distinctive looks I have ever created for prom clients. This is simply a smooth or lightly textured low bun that has a ribbon — satin, silk, velvet, or organza — woven through it or wrapped around it as a decorative element. The ribbon adds color, texture, and a playful yet elegant touch that feels both fashion-forward and romantic. Depending on the ribbon you choose, this style can lean anywhere from soft and feminine to bold and editorial.
Matching Ribbons To Your Overall Look
The ribbon you choose makes an enormous difference in the final aesthetic. A satin ivory or blush ribbon gives a soft, bridal-adjacent quality that is perfect for romantic, fairytale-inspired gowns. A velvet ribbon in a deep jewel tone — emerald, burgundy, navy — adds drama and richness that pairs beautifully with formal, floor-length gowns. A sheer organza ribbon creates something dreamy and ethereal. I always encourage my clients to match or complement their ribbon color to an element of their dress — the embellishments, the lining, or even the color of their shoes. This creates a beautifully intentional, pulled-together look from head to toe.
How To Weave The Ribbon Through Your Bun
Create your base low bun first and ensure it is fully pinned and secure. Take your chosen ribbon and begin at one end of the bun, tucking the ribbon underneath and bringing it over the top of the bun in a weaving motion, crossing over and under sections of the bun as you go. You can also wrap the ribbon around the base of the bun like a band before tying it in a bow at the back or to the side. A small bow tucked at the nape or placed to the side adds a finishing detail that is genuinely lovely. Secure the ribbon ends with a small, discreet pin to make sure it stays in place all night.
Vintage Finger Wave Low Bun

What Is The Vintage Finger Wave Low Bun
The vintage finger wave low bun is for the prom-goer who has always felt drawn to old Hollywood glamour — the kind of beauty that feels cinematic, intentional, and deeply elegant. This style combines the sculptural, undulating waves of classic finger wave styling along the front and sides of the head with a smooth, refined low bun at the nape. The combination creates something that is genuinely breathtaking in its sophistication. I adore this style because it is so visually rich — the waves have incredible depth and shape, and paired with the simplicity of the low bun, the overall look has a balance of decoration and restraint that is very haute couture.
When This Style Makes The Biggest Impact
The vintage finger wave low bun makes the biggest impact at formal, black-tie-level events — it is a statement style that demands a certain level of occasion to truly shine, and prom is absolutely that occasion. It pairs beautifully with sleek, column gowns, bias-cut satin dresses, or anything with a retro-inspired silhouette. Accessories-wise, long drop earrings or pearl studs complement this look impeccably. In terms of hair type, this style is most easily achieved on straight or slightly wavy hair, though with the right products and technique, it can be adapted for other textures. The dramatic wave pattern tends to be most visible and defined on dark or richly colored hair.
Technique Tips For Creating Finger Waves
Finger waves require a setting lotion applied to damp hair and a fine-tooth comb to sculpt each wave manually while the hair is still wet. Working in sections from the face backward, press each wave shape into the hair with your fingers and a comb, then clip with finger wave clips and allow to dry completely under a hooded dryer or naturally. Once dry, remove the clips carefully and smooth over the waves lightly with your palm and a finishing spray. Gather the back hair into a smooth low bun, blending it seamlessly with the waved sections. The entire front and sides remain sculpted in waves while the bun anchors everything at the back.
Double Twisted Low Bun

What Is The Double Twisted Low Bun
The double twisted low bun is a style I love for its clever architectural quality — it features two distinct twisted sections that meet at the nape to form a single bun, creating a visible division or parting effect through the center of the back of the head that is incredibly stylish and eye-catching. From the front, it looks like a clean, classic low bun, but from the back — which is what people see most of the evening — the double twist detail is beautifully visible and unexpected. It is one of those styles that rewards you with compliments from people who see you from behind at the event, which, trust me, happens more than you think.
Why This Style Stands Out At Prom
At prom, the back of your hairstyle matters just as much as the front because you spend so much of the evening being seen from behind — dancing, walking, sitting. The double twisted low bun gives you something genuinely beautiful and interesting to show from that angle, which most standard buns simply do not. This style works particularly well on those with thicker hair because the twist sections have more volume and presence. It pairs well with backless or low-back gowns because the structured detail at the nape frames the back of the dress beautifully without distracting from it. It is a style that is always well-received.
Step-By-Step Guide To The Double Twist Bun
Divide all of your hair into two equal sections from the center parting at the back of your head. Twist each section individually in the same direction, twisting from the root all the way down. Then bring both twisted sections together at the nape of your neck and wrap them around each other once before coiling them both together into a bun. Pin securely. The initial wrap of the two sections around each other is what creates that visible division effect across the back of the head. Smooth the surface of each twist with a soft bristle brush before forming the bun so the twist surfaces are neat and clearly defined. Finish with hairspray to hold the shape throughout the evening.
Curly Tendrils Low Bun
What Is The Curly Tendrils Low Bun
The curly tendrils low bun is one of the most romantic, feminine hairstyles I have ever created, and it holds such a special place in everything I do as a beauty artist. This style features a low bun at the nape — typically smooth or lightly textured — surrounded by loose, deliberately curled tendrils that fall around the face, at the temples, behind the ears, and sometimes down the back of the neck. These tendrils act like a soft, natural frame for the face, adding movement, romance, and a beautiful lightness to what might otherwise be a more structured style. I have seen this look bring out a radiance in people that is genuinely emotional to witness.
The Most Flattering Applications Of This Style
The curly tendrils low bun is one of the most face-flattering hairstyles I can think of, and it works across all face shapes — the soft curls soften angular faces, add dimension to flatter faces, and frame heart-shaped or oval faces with particular grace. It is an ideal style for those with naturally curly or wavy hair because working with your texture rather than against it makes the tendrils more effortless and authentic. For those with straight hair, a small-barrel curling iron creates gorgeous defined tendrils quite easily. This style pairs with everything — formal gowns, floral dresses, minimalist designs — because the tendrils add that organic romantic element that complements any aesthetic.
Tips For Perfect Curly Tendrils That Last All Night
The secret to tendrils that stay curled beautifully all evening is in the curl technique and products used. Section out the pieces you intend to leave as tendrils before pulling the rest of the hair into the bun. Once the bun is complete, take each tendril section and curl it around a small-barrel iron, holding for eight to ten seconds. Release and allow to cool completely before touching — this is crucial for the curl setting properly. Once cool, very gently loosen each curl with a single finger for that soft, natural look rather than a tight ringlet. Apply a small amount of curl-defining cream to each tendril and finish with a light-hold flexible spray rather than a firm one, so the curls retain their movement and softness throughout the night.
Conclusion
I want to close this the way I close every conversation I have with someone sitting in my chair before a big night: with honesty, warmth, and genuine excitement for what is ahead of you.
Prom is one of those nights you will remember and look back on for the rest of your life. The photographs you take, the memories you make, the way you felt when you looked in the mirror before walking out the door — all of it matters. And your hairstyle is a part of that story. It is not just decoration; it is an expression of who you are at this moment in your life.
I have walked you through sixteen different low bun hairstyles in this article, and every single one of them comes from a place of real passion and experience. I have seen these styles transform how people carry themselves. There is something about getting your hair just right that makes you stand taller, smile wider, and walk into a room with a confidence that is utterly infectious.
My deepest advice to you is this: choose the style that feels like you. Not the style that feels like what you think you should wear, or what someone else told you would look best. The hairstyle that aligns with your personality, your dress, and your own sense of beauty is always the one that photographs the most beautifully, because it is the one you will feel most naturally confident wearing.
Whatever you choose — sleek and sophisticated, romantic and loose, intricately braided, or adorned with flowers — know that you are already beautiful. The bun, the pins, the accessories — they are simply there to amplify what is already yours.
Go have the most extraordinary night. You deserve every moment of it. And as I always say, beauty is not about perfection. It is about confidence, creativity, and feeling empowered to express yourself however you choose.