
After discovering I had traction alopecia, I quickly learned that low tension curly hairstyles were my only salvation from further hair damage. Like many of you, I’d been unwittingly sabotaging my hairline with styles that pulled too tightly at my already fragile edges.
Fortunately, protective hairstyles exist that tuck your hair away while keeping it free from manipulation. These gentle styling options work wonderfully for all curl patterns, from loose waves to tight coils. Furthermore, low tension hairstyles for natural hair help minimize stress on your strands while still looking effortlessly chic. I’ve personally found that no tension hairstyles are especially crucial when you’re busy – these are my go-to styles as a perpetually rushed person, and they’re significantly healthier for your hair than those damaging slick-back styles.
If you’re tired of sacrificing your hair health for style, you’re in the right place. I’ve compiled 16 gentle approaches that work with your natural texture rather than fighting against it. These hairstyles for loose curly hair not only look amazing but also protect your beautiful curls from breakage and stress. Let’s explore options that minimize stress and tension on the hair while keeping you looking fabulous!
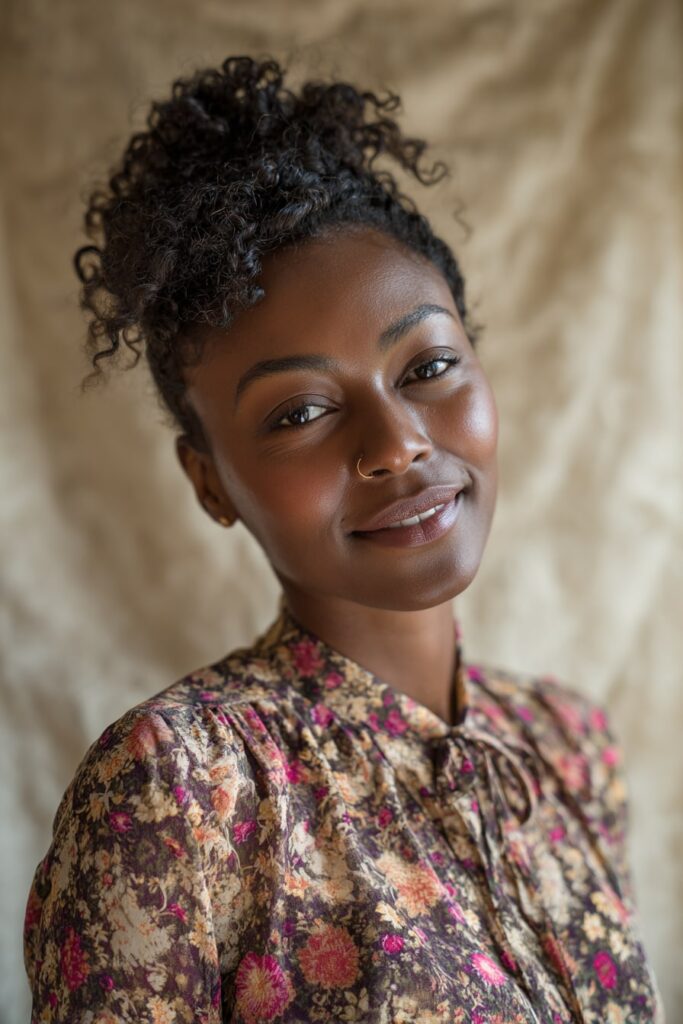
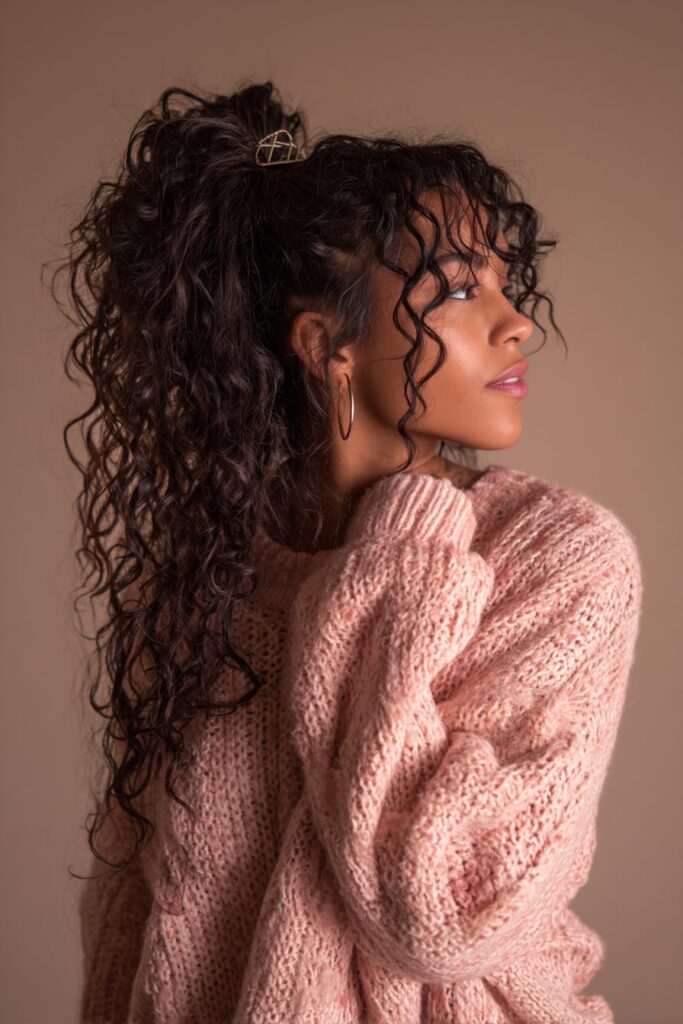
The Pineapple
The pineapple method has become my nighttime hair savior since discovering its gentle yet effective approach to curl preservation. This protective style gets its quirky name from how your curls resemble the crown of a pineapple when gathered atop your head.
The Pineapple hairstyle benefits
The pineapple isn’t just cute—it’s remarkably functional. By loosely gathering curls on top of your head, you prevent the friction that causes frizz and breakage when tossing and turning at night. Essentially, this method keeps your curls from being smashed or tugged on while you sleep, preserving their shape and definition.
Moreover, the pineapple method saves precious morning time. Instead of completely restyling my hair daily, I simply take down my pineapple and gently shake out my curls. This technique has become invaluable for maintaining my wash day work without stressing my hairline.
How to do The Pineapple
Creating this low tension hairstyle is refreshingly simple:
- Flip your head forward so hair falls in front of your face
- Gently gather your curls at the top of your head
- Secure with a silk or satin scrunchie, wrapping just once to avoid creases
- Keep the tension extremely loose—this is crucial for preventing damage
- For additional protection, sleep on a silk or satin pillowcase
In the morning, carefully remove the scrunchie and gently tousle your curls. For areas needing refreshment, I lightly spritz with water mixed with leave-in conditioner.
The Pineapple for loose curly hair
Those of us with loose curl patterns may notice our curls stretch more easily, making proper pineappling technique particularly important. I’ve found that securing my pineapple slightly looser than most recommendations works best for my texture.
For loose curly hair, the pineapple creates a beautiful worn-in look with added volume that’s often better than first-day hair. Consequently, I sometimes deliberately pineapple my hair during the day for a voluminous, effortlessly chic style.
This versatile technique works on various hair lengths, though your hair must reach high ponytail length. For shorter cuts, multiple mini-pineapples can provide similar benefits—I’ll cover that style later.
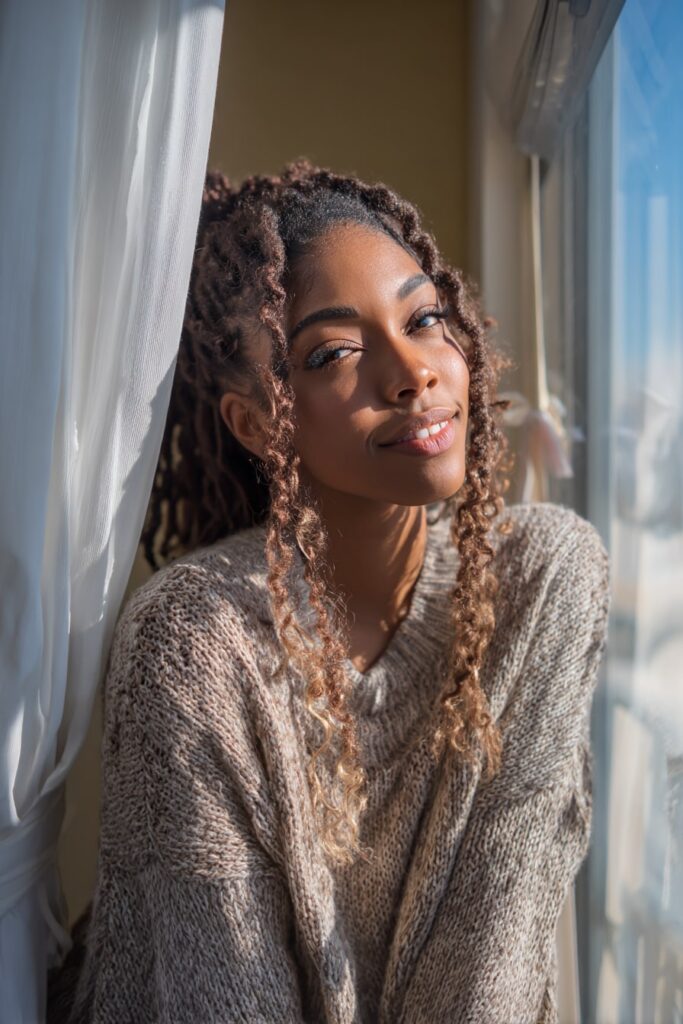
Two-Strand Twists
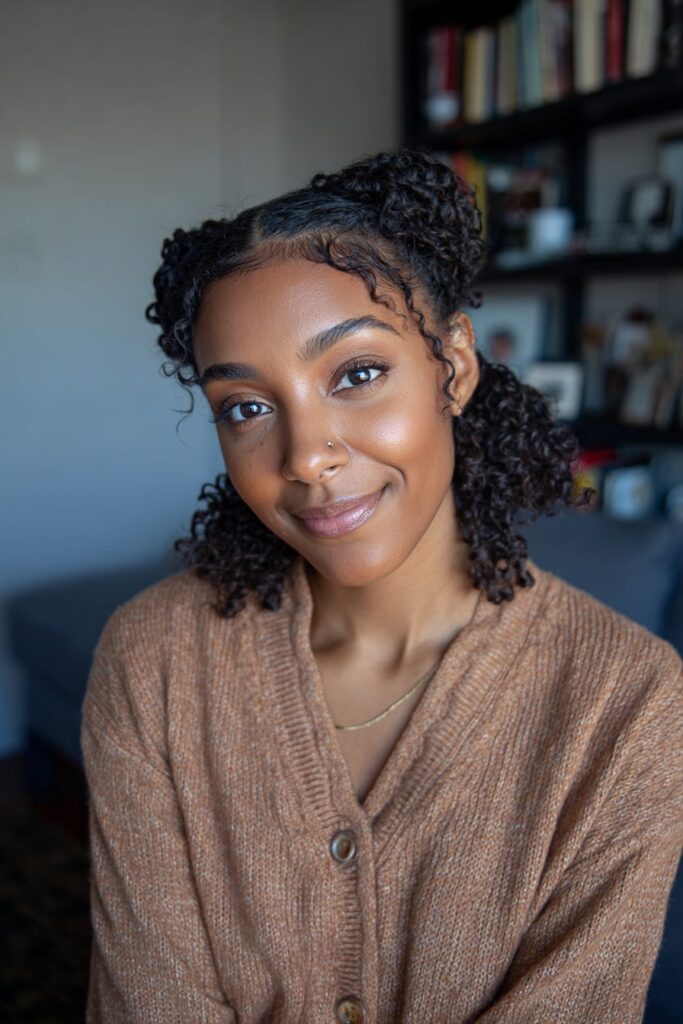
For years, two-strand twists have been my reliable go-to whenever my curls need a break. Unlike other protective styles, these twists offer both versatility and gentle protection that works wonderfully for all curl types.
Two-Strand Twists explained
Two-strand twists are created by dividing hair into sections and carefully twisting one piece around another until you reach the ends. The result is a beautiful, effortlessly cool style that works with any hair texture from loose curls to tight coils. I love how this style can be worn for several weeks, giving my hair much-needed rest from daily manipulation.
What makes this style stand out is its adaptability—you can create twists in various sizes depending on your preference. I’ve found that smaller twists create more definition while larger ones provide greater volume. Additionally, they can be styled in numerous ways from elegant updos to casual half-up looks.
Why Two-Strand Twists are low tension
Two-strand twists truly shine as a low-manipulation hairstyle that requires minimal tension on the scalp. Unlike cornrows or tight ponytails, properly installed twists distribute weight evenly across the hair shaft.
The health benefits are remarkable. First, they function as a protective style that shields delicate ends from exposure to friction and environmental stressors. Second, twisting actually helps lock in moisture, allowing your strands to retain hydration longer. Indeed, my hair always feels healthier after wearing twists for a week or two.
Furthermore, they promote healthy hair growth by minimizing breakage. According to many naturals, wearing twists at least once weekly improves length retention noticeably.
How to style Two-Strand Twists
Creating this gentle style requires patience but minimal technical skill:
- Begin with clean, thoroughly detangled hair—I prefer starting on damp hair
- Apply leave-in conditioner and a styling cream for moisture and hold
- Section hair based on desired twist size (smaller sections = smaller twists)
- Divide each section into two equal pieces
- Twist one strand over the other repeatedly until reaching the ends
- Avoid manipulating the twists until completely dry to prevent frizz
For maintenance, I refresh my twists with a light hydrating mist every few days. This simple care routine keeps my curls protected without sacrificing style.
Loose Low Ponytail

When my hair needs a break but I still want to look polished, the loose low ponytail becomes my everyday savior. This effortlessly chic style has transformed how I approach gentle hair care without sacrificing style.
Loose Low Ponytail benefits
The loose low ponytail stands out as a truly gentle option because it places significantly less pressure on your scalp compared to higher styles. In fact, wearing your hair in a low ponytail minimizes the tension that typically leads to more severe damage.
What makes this style particularly valuable is its versatility—it works beautifully on any hair type, whether curly, silky, short, medium, or long. Even more impressive, it keeps hair secured without the dreaded “ponytail headache” that tighter styles often cause.
The practical benefits are equally compelling. This style keeps hair out of your face during work or exercise, helping you concentrate without distractions. Plus, it’s perfect for any season, making it a year-round option for those seeking both style and protection.
How to create a Loose Low Ponytail
Creating this gentle style requires minimal effort:
- Start with textured hair—either day-old curls or freshly styled waves
- Gently gather hair at the nape of your neck
- Secure with a silk scrunchie, wrapping only once or twice to minimize tension
- Pull slightly at the ponytail base to loosen and create volume
- Leave a few face-framing pieces for a softer look
For added protection, avoid elastic bands with metal components as they can cause breakage. Opt instead for silk scrunchies or soft hair ties that won’t damage your strands.
Loose Low Ponytail for natural hair
My natural-textured clients often wonder how to achieve this style without excessive tension. The key lies in sectioning. By dividing your hair into manageable sections before styling, you’ll create an effortlessly smooth finish without straining your edges.
For maximum volume on natural hair, I recommend slightly loosening the crown area after securing your ponytail. This creates that beautiful, rounded look while maintaining the protective benefits. Coupled with a silk scrunchie, this approach provides both style and protection.
Ultimately, this versatile style works wonderfully as a “bad hair day” solution or as an elegant option for special occasions—proving that gentle styling never requires sacrificing beauty.
The Crown Braid
I’ve always admired the elegance of crown braids, making them a staple in my styling routine whenever I need something that looks intricate yet feels comfortable. This timeless hairstyle has become one of my favorite low tension options for my curly locks.
What is The Crown Braid
The crown braid is essentially a braid that follows the circumference of your head, creating a beautiful halo-like effect. Primarily, it consists of a Dutch braid (or sometimes two braids) wrapped around your head like a natural tiara. The style works wonderfully on all hair types and textures, including various curl patterns.
What makes this style stand out is its versatility – it can be styled loosely for a boho vibe or more structured for formal occasions. I typically wear my crown braid at least once weekly, as it provides both protection and style without compromising either.
Why The Crown Braid minimizes tension
Unlike many updos that pull tightly at the roots, a properly executed crown braid distributes tension evenly around your head. This balanced distribution is exactly why it’s perfect for those of us seeking low tension hairstyles for natural hair.
The braid itself acts as a protective style, shielding your hair from environmental stressors while minimizing daily manipulation. Throughout my experience with crown braids, I’ve noticed they rarely cause headaches or scalp discomfort that often accompanies tighter styles.
Surprisingly, this style can actually help reduce breakage by keeping your strands secured without excess pulling. Whenever my edges need a break, I turn to this gentle alternative that still looks polished.
How to do The Crown Braid
Creating this elegant style requires some practice, yet remains accessible:
- Start with detangled hair, applying leave-in conditioner to add grip
- Part your hair as preferred (middle or side)
- Begin a Dutch braid near your part, crossing strands under the middle
- Add hair from the top as you braid, following your hairline
- Continue braiding around your head, maintaining consistent tension
- Once you reach your starting point, secure the end with an elastic
- Tuck the tail under the beginning of the braid, pinning it discreetly
- Gently pull at the edges of your braid to create fullness
For those with layers, simply stretch and tuck any flyaways. Afterward, smooth any frizz with a small amount of leave-in conditioner applied to your hands.
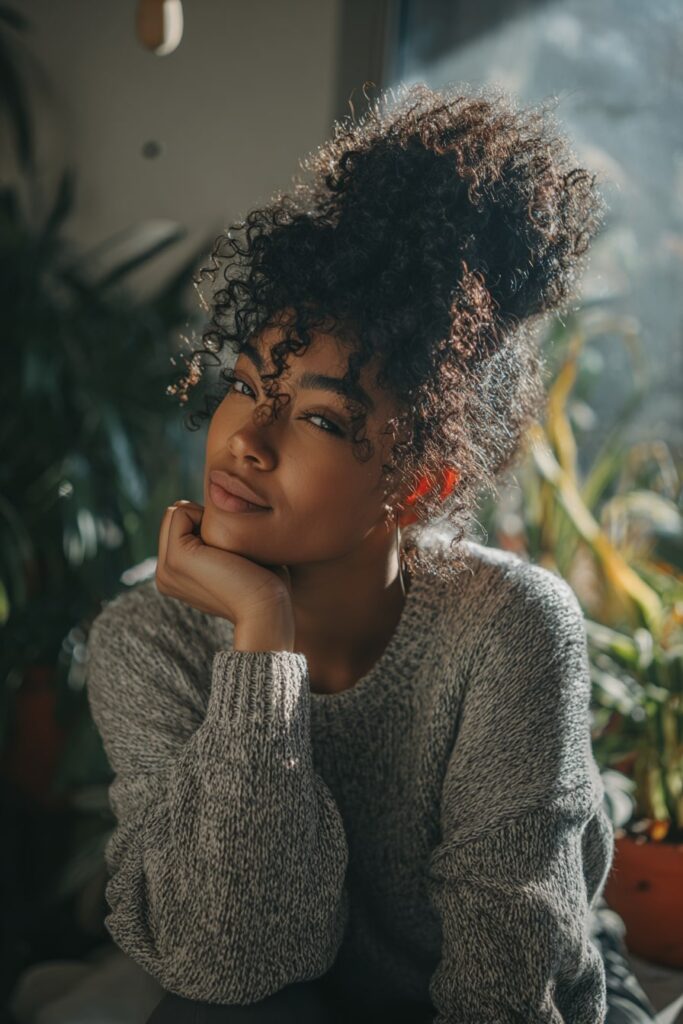
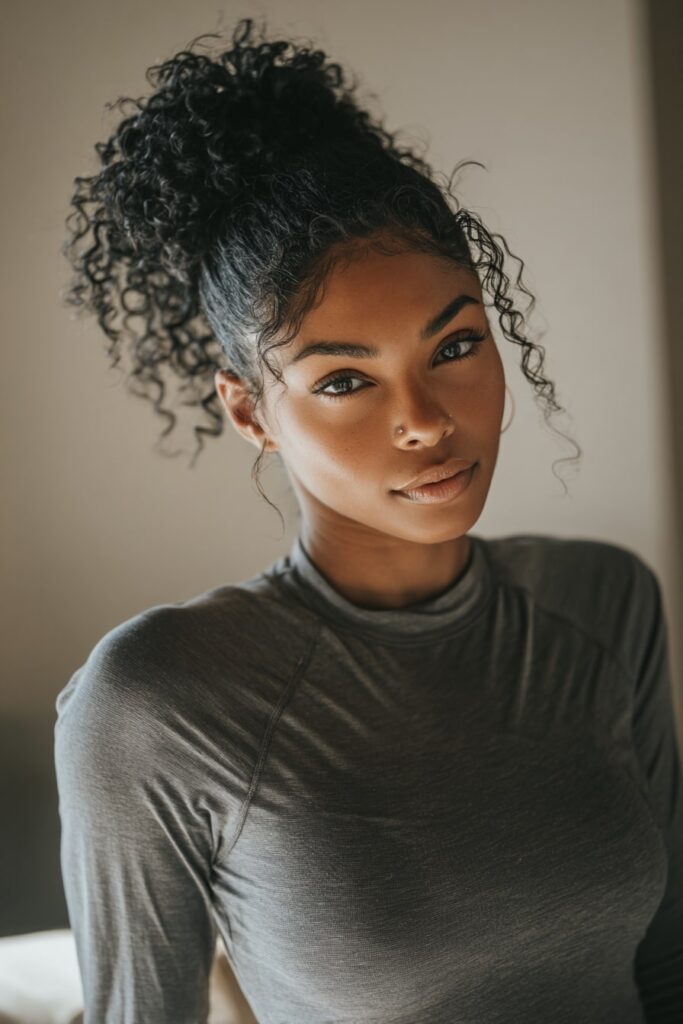
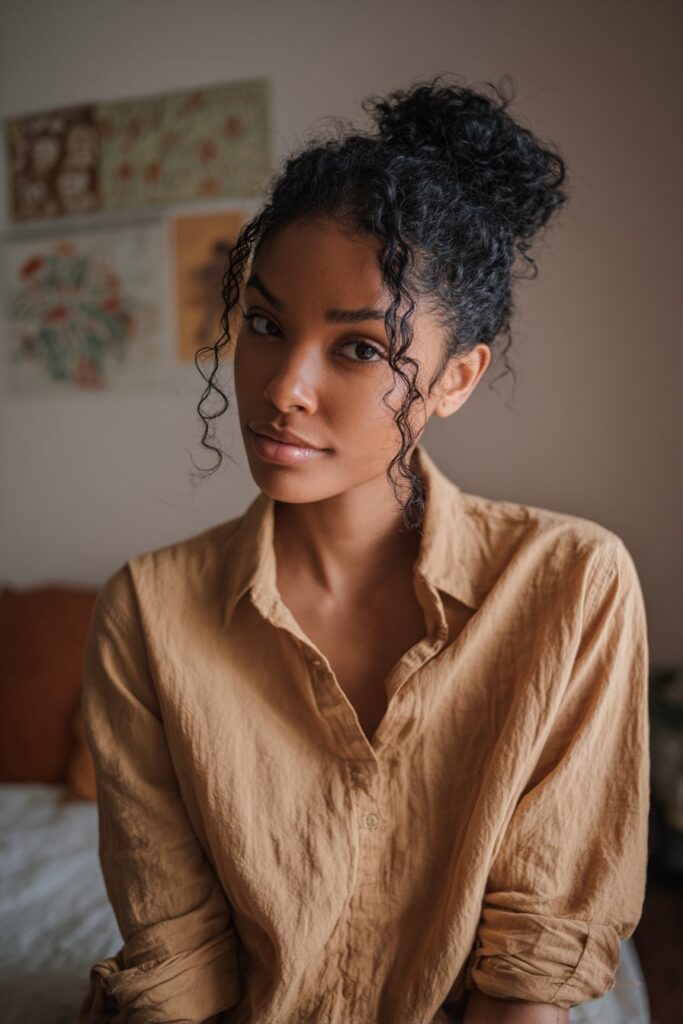
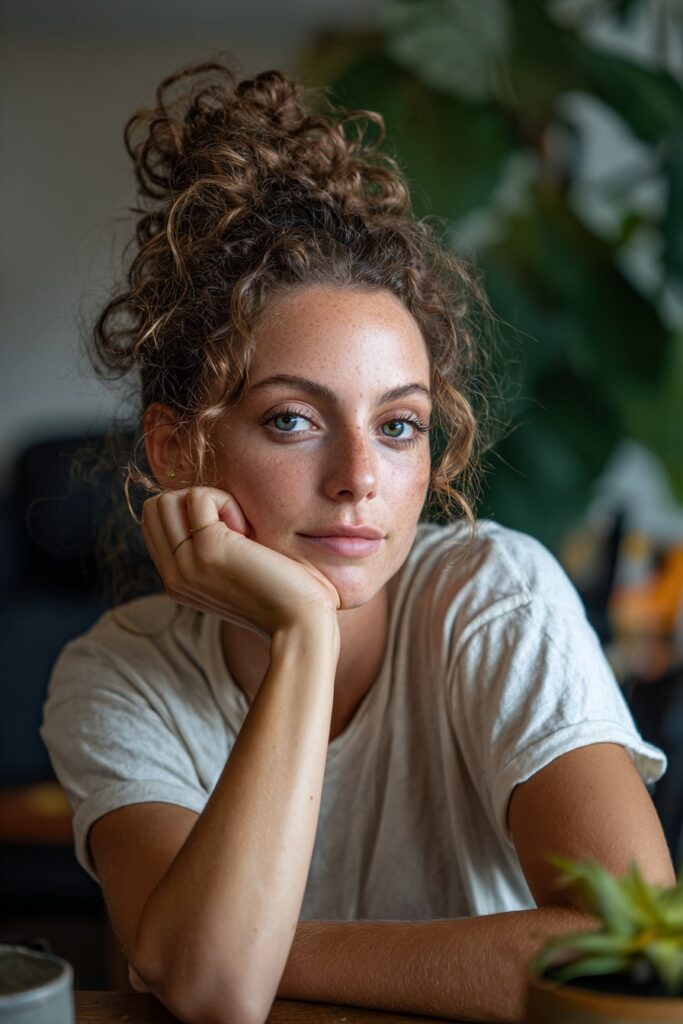
The High Bun
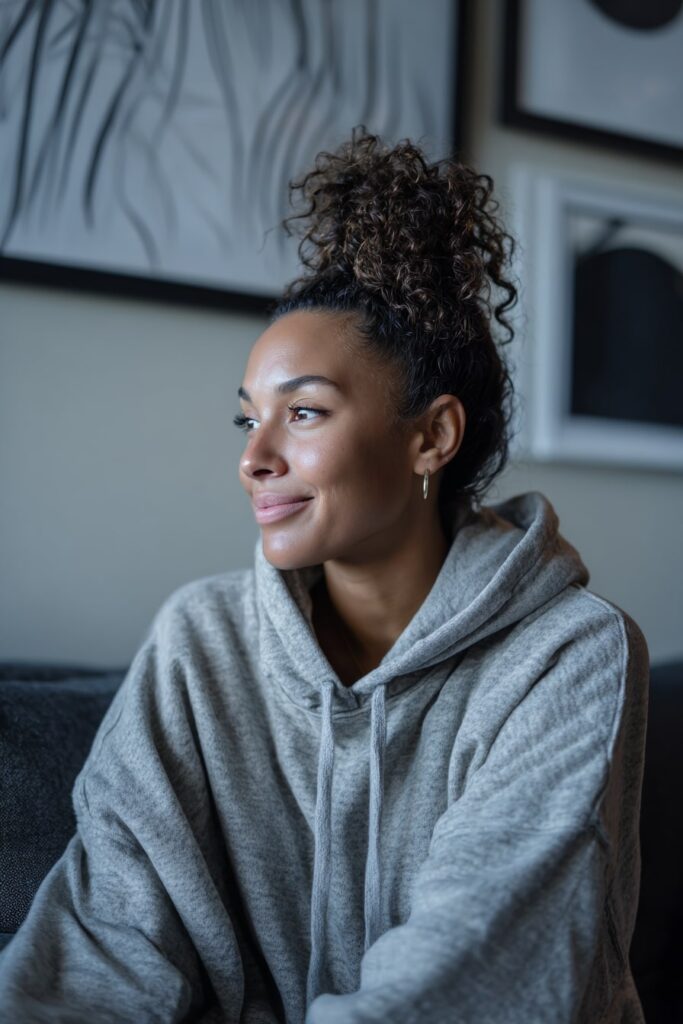
The high bun remains my favorite go-to style on busy mornings when I need both protection and polish for my curls. This versatile updo works beautifully for all curl types while keeping tension minimal.
High Bun for curly hair
My curly clients love high buns primarily because they showcase volume naturally. The height creates a flattering silhouette, and best of all, this style actually works better on “day 2 hair” since the added texture provides grip. Placing your curls atop your head prevents crushing your pattern while sleeping, making it perfect for extending your wash day.
How to do a gentle High Bun
Creating a tension-free high bun requires careful attention:
- Begin with detangled hair, adding dry shampoo to roots for volume
- Flip your head forward, gathering hair where you want the bun positioned
- Create a loose ponytail using a silk scrunchie (much gentler than elastics)
- Wrap the scrunchie twice, leaving ends partially pulled through on final wrap
- Gently twist sections of your ponytail (2-6 depending on thickness)
- Wrap each twist around the base, alternating directions for balance
- Secure with bobby pins, pushing inward toward the center
- Loosen by gently pulling at edges for a fuller appearance
High Bun styling tips
For maximum gentleness, always start with the ponytail looser than you think necessary. Subsequently, pull small sections at the crown for volume without tension. Remarkably, bobby pins crossed underneath provide security without tightness.
For those with longer layers, leave a few face-framing pieces out. Finally, mist with light hairspray for flyaways without weighing down your curls. Ultimately, this style should feel comfortable—if you feel pulling, it’s too tight!
The Top Knot
Many people confuse top knots with high buns, yet these styles offer distinctly different benefits for those seeking gentle styling options. As someone who’s experienced traction alopecia firsthand, I’ve become passionate about mastering tension-free versions of popular styles.
Top Knot vs High Bun
Although seemingly similar, these styles have key differences. The top knot sits directly on the crown of your head, whereas a high bun typically sits further back. Notably, the top knot often has a more casual, slightly messier appearance that works beautifully with natural texture. For those with curly hair, top knots actually showcase your volume rather than trying to contain it.
Overall, I find top knots require less manipulation than high buns, making them ideal for minimizing stress on your scalp and edges.
How to do a Top Knot
Creating a gentle top knot that won’t damage your curls is straightforward:
- Gather your hair into a high ponytail using fingertips rather than brushes
- Secure with a soft hair elastic or bungee without pulling too tight
- For voluminous curls, loosely twist your ponytail and wrap it around the base
- Pin in place with bobby pins, pushing toward the center
- Gently loosen by pulling at the crown for a natural, tension-free look
Always remember that if your scalp feels tight or painful, your top knot is too severe. Henceforth, prioritize comfort over sleekness.
Top Knot for moisture retention
The top knot naturally helps curly hair retain moisture by keeping ends tucked away from environmental stressors. This protective positioning is specifically beneficial between wash days when you’re trying to extend your style.
I personally apply a lightweight leave-in conditioner before creating my top knot, which helps refresh curls while they’re protected in this style. The elevated position also prevents flattening, preserving both curl pattern and moisture levels simultaneously.
French Braids

French braids have completely transformed my approach to protective styling for curly hair. This classic technique provides both elegance and protection while requiring minimal tension on delicate edges.
French Braids for curly hair
Throughout my natural hair journey, I’ve found French braids adapt beautifully to textured hair. Unlike traditional styles, these braids work with your natural curl pattern rather than fighting against it. Typically, I apply a curl-defining cream beforehand to enhance definition while braiding. This versatile style works on various curl types, creating a sleek yet comfortable look that lasts for days.
Why French Braids are protective
French braids excel as a protective style primarily because they tuck your natural texture away, helping prevent breakage from environmental factors. Importantly, this style limits harmful exposure to sun and heat damage while keeping hair moisturized. Beyond that, proper French braiding distributes tension evenly, avoiding stress on any single area of your scalp.
How to do French Braids
Creating gentle French braids on curly hair requires patience:
- Start with detangled hair (slightly damp works best)
- Section off the area you’ll braid first
- Create three equal portions to begin a normal braid
- Before each cross, add a small piece of hair to the section being moved to the center
- Pull each piece firmly but not tightly
- Continue until reaching the nape of your neck
- Finish with a regular three-strand braid
For beginners, practicing on someone else’s hair helps master the technique.
Dutch Braids
Among all protective styles, Dutch braids stand out as my favorite for creating eye-catching volume without causing tension. These inside-out braids have completely changed how I style my curls on days I need both protection and drama.
Dutch Braids vs French Braids
The primary difference between these styles lies in the crossing technique. With Dutch braids, you cross hair strands underneath rather than over, creating a stunning 3D effect with the braid sitting on top of your hair. This reverse technique makes Dutch braids appear more prominent and textured – perfect for showcasing volume.
How to do Dutch Braids
Creating gentle Dutch braids requires practice:
- Start with detangled, slightly damp hair
- Section your hair as desired (typically center-parted)
- Divide a small section into three equal parts
- Begin crossing strands under the middle section
- Add more hair to each section before crossing under
- Maintain consistent tension without pulling
- Secure with a clear elastic once complete
Dutch Braids for volume
The beauty of Dutch braids for curly hair lies in their “pancaking” potential. After completing your braid, gently pull at the edges to create fuller, more voluminous sections. Practically speaking, this technique works exceptionally well for textured hair, as it celebrates rather than suppresses your natural volume.
Loose Plait
The nighttime styling struggles were real until I discovered loose plaits as my bedtime hair solution. This simple yet effective style has completely changed how I protect my curls overnight.
Loose Plait for minimal stress
Loose plaits stand out as one of the gentlest styling options available for curly hair. The beauty of this style lies in its even distribution of weight throughout the head, eliminating excessive pulling at any single point. Given that the hair isn’t pulled tightly, this technique significantly reduces tension on your scalp and strands. Forthwith, loose plaits have become my go-to whenever my edges need a break from manipulation.
How to do a Loose Plait
Creating this gentle style requires minimal effort:
- Begin with dry, slightly textured hair (second-day curls work perfectly)
- Gently gather your hair to one side over your shoulder
- Divide into three even sections
- Braid using the standard three-strand technique, keeping tension minimal
- Secure with a soft elastic at the end
- Gently pull at the “elbows” of the braid to loosen and flatten it (known as “pancaking”)
Loose Plait for bedtime
Inasmuch as overnight protection goes, loose plaits reign supreme. Prior to discovering this method, I tried countless options—bandanas, silk pillowcases, scarves—yet still woke to a “start all over” situation each morning. The loose plait keeps everything contained without creating tension, preventing the dreaded frizzy halo effect by morning.
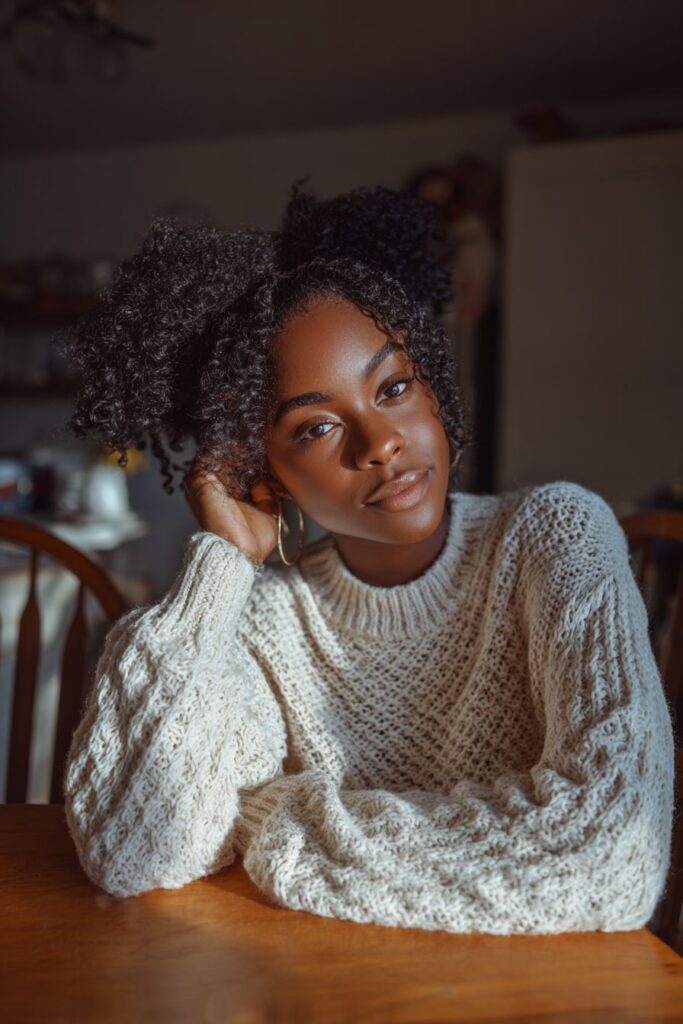
Multiple Pineapples

After discovering the traditional pineapple method didn’t work for my shorter curls, I stumbled upon multiple pineapples—a game-changing adaptation that revolutionized my nighttime routine.
What are Multiple Pineapples
Multiple pineapples (affectionately called “pineapplettes” by many curly girls) are simply smaller versions of the traditional pineapple method divided across your head. In this case, instead of creating one large pineapple at your crown, you’ll create several mini ones throughout your hair. This technique brilliantly solves the common problem faced by those of us with shorter curls that won’t all reach into a single gathering.
How to do Multiple Pineapples
Creating this gentle protective style is straightforward:
- Divide your hair into 2-5 sections depending on your length and thickness
- Gather each section loosely at its root
- Secure with silk or satin scrunchies—never rubber bands!
- Ensure each mini pineapple feels comfortable without pulling
- Cover with a satin bonnet for additional protection
The key lies in keeping tension minimal throughout the process. Your scalp shouldn’t feel tight or uncomfortable at any point.
Best for short curly hair
This technique works exceptionally well for shorter styles that might resemble Halle Berry’s pixie cut. Primarily, it prevents the dreaded “flat top” effect that often happens with shorter curly styles after sleeping. One client with stubborn neck-length curls told me her twist-outs now last 3-4 days thanks to this method! In essence, multiple pineapples help maintain definition throughout all your shorter layers while protecting against frizz and breakage.
Twisted Space Buns
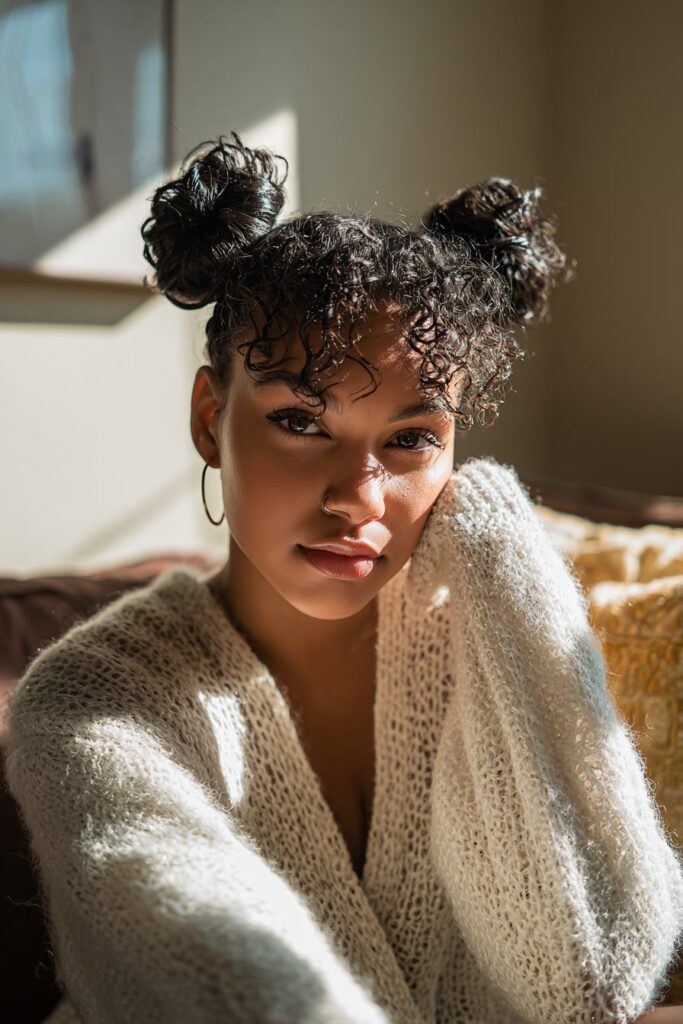
Twisted space buns became my playful salvation after seeking fun yet gentle styling options for my curls. This dual-bun hairstyle offers both personality and protection in one adorable package.
Twisted Space Buns explained
Twisted space buns are essentially two buns positioned on either side of your head, creating a fun, slightly messy updo. Generally speaking, this style works magnificently for second or third-day curls when your hair has natural texture and grip. What makes this style special is its versatility—it can be worn high for a playful look or lower for a more sophisticated vibe.
How to do Twisted Space Buns
Creating gentle twisted space buns requires minimal effort:
- Part hair down the middle, creating two equal sections
- Form two high ponytails on each side using soft scrunchies
- Twist each ponytail away from your face
- Wrap each twist around its base, forming loose buns
- Secure with bobby pins, crossing them underneath for stability
- Gently pull at the edges to loosen and create volume
Twisted Space Buns for volume
The magic of this style lies in how it showcases volume without tension. Hence, I always “fan out” each bun after securing it, making my hair appear thicker. For maximum volume without stress, leave the ends of your curls poking out—embrace that beautiful mess!
Half-Up with Claw Clip
My claw clip collection has saved me countless times from the damage of traditional hair ties. For curly-haired folks seeking gentle styling alternatives, these Y2K throwbacks offer both function and fashion.
Why Claw Clips are gentle
Claw clips stand out from other hair accessories primarily because they don’t pull or dent your strands. This makes them significantly gentler on delicate curls. Undoubtedly, their wide-toothed design distributes tension evenly, preventing the stress concentrated at a single point that causes breakage with elastics. They’re particularly ideal for thick, heavy hair that needs secure styling without compromise.
How to do Half-Up Claw Clip
Creating this low-tension style requires minimal effort:
- Section hair from the top of your ears to mid-crown
- Tease gathered section at the roots for volume
- Twist hair at the back of your head
- Secure with bobby pins where you want the clip positioned
- Place claw clip over the pinned area
For curly hair, use clips with wider teeth to accommodate your texture.
Belle Hathaway’s go-to style
Naturally, I reach for this style on day three hair after applying dry shampoo to refresh my roots. What I love most about half-up claw clip styles is their versatility—they keep hair from my face alongside showcasing my natural texture. Perfect for busy mornings yet polished enough for important meetings!
Wash-and-Go

The wash-and-go has become my lifeline on those hectic mornings when I need my curls looking fabulous without much fuss. Despite its simple-sounding name, this style requires careful technique to master.
What is a Wash-and-Go
A wash-and-go is exactly what it sounds like—washing your hair and styling it immediately without heat tools. Technically, it’s washing, conditioning, applying styling products, then letting your natural curl pattern shine. This technique works for all curl types but requires tailoring to your specific texture.
How to do a Wash-and-Go
First, cleanse with a sulfate-free shampoo—clean hair is crucial for definition. Next, apply a moisture-rich conditioner, detangling as you go. After rinsing, apply styling products while hair is soaking wet—this is key for minimizing frizz.
For product application, I follow the LOC method:
- Leave-in conditioner for hydration
- Oil to seal moisture (optional)
- Cream or gel for definition
Remember—no touching until completely dry! Touching wet curls creates frizz.
Wash-and-Go for natural curls
For my natural curls, preserving definition overnight is essential. I use the pineapple method, securing my hair with a silk scrunchie and sleeping on a satin pillowcase. Ordinarily, this style lasts 3-5 days with proper maintenance.
Braid-Out
I struggled with finding the perfect definition for my curls until I mastered the braid-out technique. This versatile style not only enhances my natural texture but also provides a gentle alternative to high-tension styles.
Braid-Out vs Twist-Out
Initially, I was confused about the difference between these popular techniques. Braid-outs involve three strands of hair intertwined together, whereas twist-outs use only two strands twisted around each other. The results differ dramatically—braid-outs create tighter, more defined curls with a “Z” pattern, while twist-outs produce looser, springier curls.
Braid-outs offer superior curl definition and stretch hair without heat, typically lasting 3-7 days. However, they take longer to unravel and require more time to dry completely. For my hair type, braid-outs provide better definition, yet twist-outs give me more length.
How to do a Braid-Out
- Begin with freshly shampooed, conditioned hair
- Apply leave-in conditioner followed by curl cream or butter
- Section hair based on desired definition (smaller sections = tighter pattern)
- Braid each section starting close to the roots
- Twirl ends around fingers to establish uniform pattern
- Allow to dry completely (overnight or under a dryer)
- Apply oil to hands before unraveling to minimize frizz
- Separate gently for volume, starting from ends
Braid-Out for definition
As a result of much experimentation, I’ve found moisture plus gel creates the best definition. Simply braiding tightly (without causing pain) produces cleaner curl patterns. For maximum definition that lasts, I leave my braids in for at least 24 hours. My secret trick? Properly dry braids make all the difference—never unravel damp hair!
Twist-Out
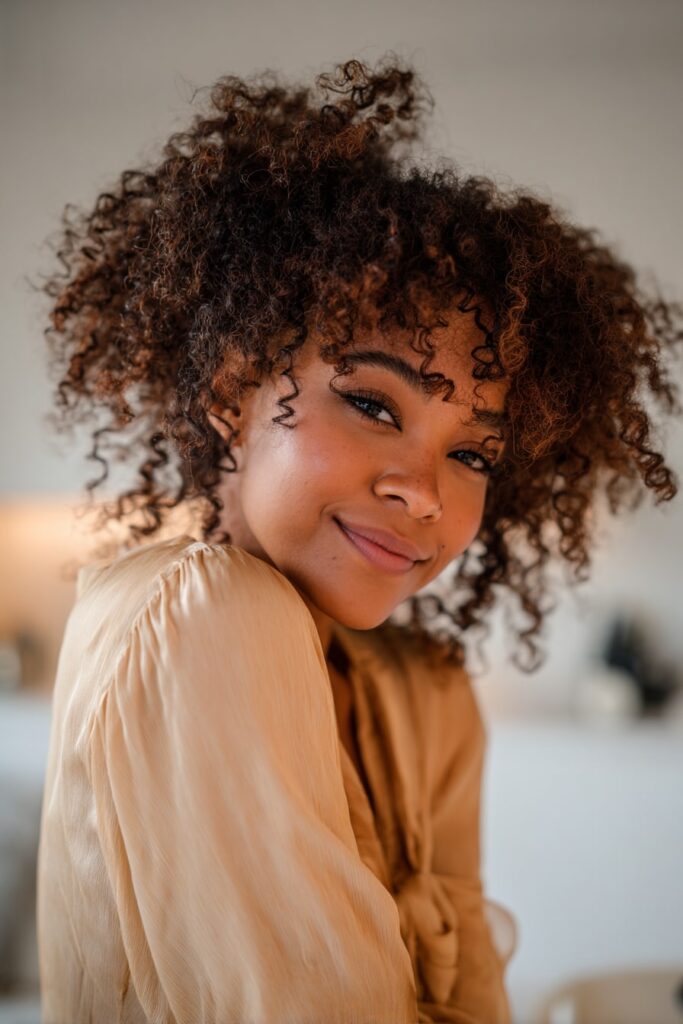
The twist-out changed my entire hair journey after years of damaging styles. This versatile technique creates beautiful defined curls while giving your edges and scalp a much-needed break.
Twist-Out for soft curls
The twist-out magically transforms natural hair patterns by creating soft, crinkled spirals after unraveling. Due to its gentle nature, this style promotes healthy hair growth while making hair appear fuller. What makes twist-outs exceptional is how they work beautifully on all curl types, from loose waves to tight coils.
How to do a Twist-Out
First thing to remember: start with freshly washed, conditioned hair. Then:
- Apply leave-in conditioner to damp hair
- Divide into manageable sections (smaller sections = tighter curls)
- Apply curl cream or gel to each section
- Create two-strand twists from root to tip
- Let dry completely (this is crucial for definition)
- Apply oil to fingertips before unraveling
- Gently unravel from ends to roots
- Separate for desired fullness
Twist-Out for low tension
To put it differently, twist-outs are essentially protective styles that don’t require pulling or tension. The beauty of this technique is how it helps retain moisture while keeping manipulation minimal. Oftentimes, I refresh my twist-out with light oil and minimal retwisting rather than starting over—preserving both my style and edges simultaneously.
Claw Clip Updo
For versatile styling that puts minimal pressure on my scalp, the claw clip updo has become my ultimate hair solution. This elegant style works beautifully for both casual days and special occasions while keeping my curls protected.
Claw Clip Updo benefits
Claw clip updos offer remarkable advantages for curly hair. In particular, they distribute tension evenly with their broadly spaced teeth, eliminating the need for tight pulling that causes damage. As I’ve discovered through years of styling, these clips are perfect for thick, heavy hair that needs secure styling without compromising health. Above all, claw clips don’t leave those annoying dents in your hair that elastics typically create.
How to do a Claw Clip Updo
Creating a sophisticated updo is refreshingly simple:
- Gather hair at the nape of your neck as if creating a low ponytail
- Twist upward, forming a French twist motion
- Secure the twist with your claw clip
- For extra volume, gently loosen sections at the crown
- Let some ends cascade out for a softer effect
For curly hair, opt for clips with wider teeth to accommodate texture without snagging.
Belle Hathaway’s styling tip
My favorite technique involves creating a topsy tail first—splitting the section above a low ponytail, then flipping the ponytail through. This creates magnificent security that prevents the style from loosening throughout the day. Certainly a game-changer for those with slippery curls! The best part? This style protects my curl pattern while keeping hair off my neck during summer months.
Conclusion
After discovering these gentle styling options, my relationship with my curls completely changed. Saying goodbye to tight ponytails and slicked-back buns saved my edges while actually enhancing my natural texture. Throughout my journey with traction alopecia, these low-tension styles became my hair’s salvation.
My personal favorites remain the claw clip styles and loose plaits – both take less than five minutes yet protect my curls beautifully. Undoubtedly, the pineapple method (single or multiple) has extended my wash days beyond what I thought possible.
Remember that healthy hair doesn’t mean sacrificing style. Actually, these gentler approaches often create more volume and definition than their high-tension counterparts. The key lies in working with your natural pattern rather than fighting against it.
Most importantly, listen to your scalp. Any style that causes pain, headaches, or visible tension simply isn’t worth the damage. Your hairline deserves protection, especially if you’ve already experienced thinning edges.
These sixteen hairstyles offer something for every occasion – from quick morning styles to elegant evening looks. Essentially, they prove we can nurture our curls while still expressing ourselves through versatile styling.
Start incorporating these gentler approaches today. Your future self (and edges) will thank you for prioritizing hair health without compromising on beauty. After all, our curls deserve both protection and celebration.