
If there’s one hairstyle that has consistently stolen my heart throughout my entire career as a makeup artist and beauty educator, it’s the messy low bun. I know, I know — you might be thinking, “Belle, isn’t it just a bun you threw together in a hurry?” And honestly? Sometimes, yes. But that’s exactly what makes it so magical. The messy low bun is the rare kind of hairstyle that looks like you put in zero effort while actually being one of the most versatile, flattering, and downright stunning styles you can wear. Whether I’m prepping a client backstage for a big shoot or running out the door on a Saturday morning with Luna tugging at her leash, the messy low bun is my go-to, my safety net, and my secret weapon all wrapped into one.
Over the years, I’ve worked with all kinds of hair — fine, thick, curly, straight, short, long, and everything in between — and I can tell you with full confidence that there is a messy low bun for every single person reading this. The beauty of this style isn’t in perfection. It’s in personality. It’s in that little piece of hair that escapes and frames your face just right, or that loose tendril that says, “I’m effortlessly put together.” That’s the energy I want to bring to you today.
In this article, I’m breaking down 13 of my absolute favorite messy low bun hairstyles — the ones I’ve used on clients, recreated for editorial shoots, and personally worn on days when I needed to feel beautiful without spending an hour in front of the mirror. For each style, I’m walking you through what it is, who it works best for, and exactly how to recreate it at home with tips I’ve gathered from years of professional experience. Let’s get into it.
Classic Effortless Bun
What This Timeless Style Actually Is
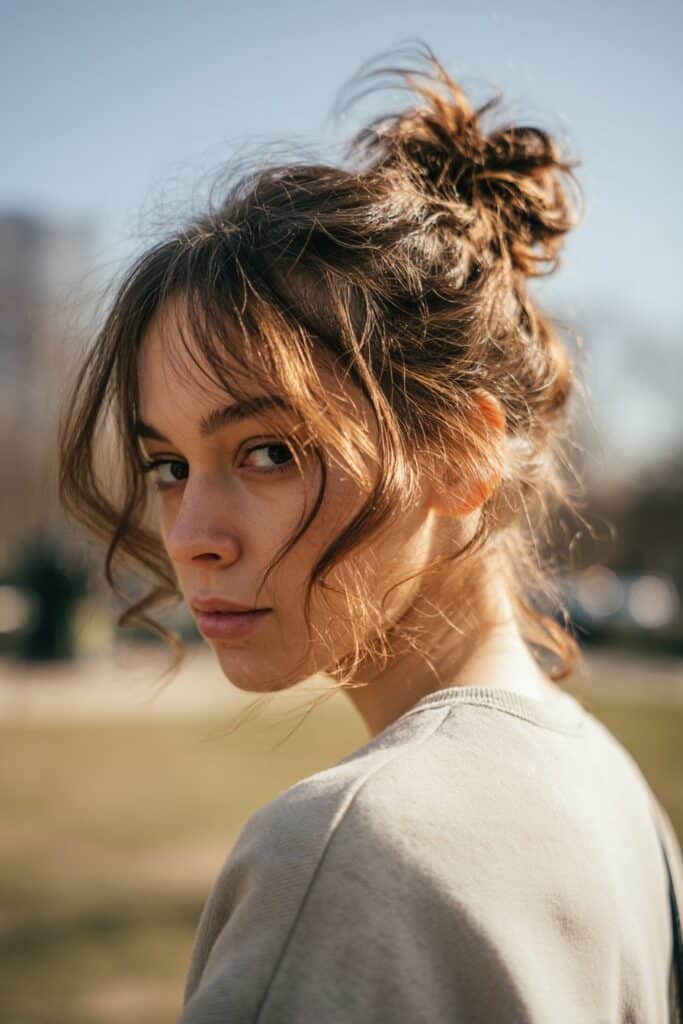
The classic effortless low bun is the original, the blueprint, the style that started it all. It sits right at the nape of the neck, low and centered, with pieces that are intentionally loose and undone. Think of it as the hairstyle equivalent of a white button-down shirt — simple, classic, and somehow always right for the occasion. When I first started doing hair and makeup in New York, this was the style I kept coming back to because it worked for editorial, it worked for red carpet, and it worked for the woman running errands on a Tuesday. It has a quiet confidence to it that I’ve always admired. The messiness here isn’t random — it’s intentional. Flyaways are encouraged. Loose sections around the face are a feature, not a flaw. The bun itself has soft volume and doesn’t sit perfectly round, and that’s what gives it its charm.
Who Benefits Most From This Relaxed Gathered Look
The classic messy low bun is truly a universal style, but I’ve found it especially flattering on people with oval, heart, and long face shapes. The low placement of the bun adds a sense of balance to longer faces, while the loose pieces framing the face soften angular jawlines beautifully. If you have medium to long hair — roughly from shoulder length and beyond — this style will feel like it was made for you. It also works incredibly well for people with naturally straight or slightly wavy hair, since the texture tends to hold the loose, undone look without needing too much product. That said, I’ve created this look on fine hair with the help of some dry shampoo and a little backcombing, and it turned out just as stunning. This is also the perfect style for someone who is new to messy buns because it’s forgiving and doesn’t require technical precision.
How To Create It With Expert Techniques
Start by applying a small amount of texturizing spray or dry shampoo throughout your hair — this gives you grip and that lived-in texture that makes the style feel authentic rather than forced. Gather your hair loosely at the nape of your neck, letting a few pieces fall naturally around your face and temples. Don’t pull it too tight; you want the ponytail to already feel a little relaxed before you even start the bun. Twist the gathered hair loosely and wrap it around the base in an imperfect loop, securing it with a hair tie and a few bobby pins. Here’s my professional tip: once the bun is secured, use your fingertips to gently pull at the bun itself, expanding it slightly and letting it look fuller and more relaxed. Pull a few small sections out around the hairline. Finish with a light-hold flexible hairspray to keep things in place without killing the movement.
Twisted Rope Bun

Understanding The Rope Twist Bun Technique
The twisted rope low bun is one of those styles that looks incredibly intricate and detailed but is actually surprisingly straightforward once you understand the mechanics. The idea is to take two sections of hair, twist them in opposite directions, and then wrap them around each other to create a rope-like effect before coiling them into a bun at the nape. The result is a bun with beautiful visual texture — you can see the twists winding through it — and it has a slightly more polished edge than a completely unstructured bun while still maintaining that gorgeous undone quality. I love this style for editorial work because it photographs beautifully. The texture catches the light in a really dynamic way, and when a few pieces escape the twist, they add just the right amount of romantic softness.
Best Hair Types And Occasions For This Twisted Creation
The twisted rope low bun thrives on hair that has a little natural grip — think wavy, lightly textured, or hair that’s been given some texture through product or heat styling. Completely silky, freshly washed straight hair can make the twists slip a bit, so if that’s your hair type, work with day-old hair or add some texturizing spray first. This style is particularly magical on medium to thick hair because the twists become more defined and the bun has more substance. In terms of occasions, the twisted rope low bun lives in that beautiful middle ground between casual and elevated — it’s perfect for a work presentation, a dinner date, a garden party, or even a more relaxed wedding guest look. I’ve used this style on clients who wanted something that felt intentional and thoughtful without looking overly formal.
Tips For Perfecting Your Rope Twist Bun At Home
Begin by dividing your hair into two equal sections at the back. Take each section and twist it tightly in one direction — let’s say both sections twist to the right. Once you’ve twisted them, wrap the two sections around each other in the opposite direction, like you’re wringing out a cloth. This is the rope effect. When you get close to the ends, secure the rope twist loosely with a hair tie, then coil the twisted rope into a bun at the nape of your neck, tucking the ends under and securing with bobby pins. Now here’s the key step I always do: gently pull the sides of the twist apart slightly with your fingers to loosen and expand the texture. This transforms it from neat and structured to beautifully messy and dimensional. Finish by pulling a few face-framing pieces free and misting with a flexible hold spray.
Braided Messy Bun

What Makes The Braided Bun So Special
The braided messy low bun is the hairstyle I reach for when I want to add a layer of detail and artistry without spending a lot of time. It incorporates a braid — typically a simple three-strand braid — that either wraps around the bun, feeds into the bun, or starts at the crown and leads down into the bun at the nape. The braid provides structure and visual interest while the messiness of the bun itself keeps the whole look from feeling too stiff or old-fashioned. I became obsessed with this style during a period when I was doing a lot of bohemian-inspired editorial shoots, and it became a signature look I kept reimagining in new ways. There’s something about the combination of the woven pattern of a braid with the undone softness of a messy bun that feels simultaneously artistic and free-spirited.
Who Should Try This Boho Braided Style
This style is a dream for people with thick or medium hair because the braid has more visual presence and the bun has more body. That said, I’ve done beautiful versions of this on finer hair by gently stretching and loosening the braid to make it appear fuller. In terms of face shapes, the braided low bun is especially flattering on round faces because the braid draws the eye vertically and the low bun adds length without adding width. It’s also a great choice for people who love a bohemian or romantic aesthetic — the braid adds that handcrafted, artisanal quality that feels both personal and expressive. I recommend this style for outdoor events, music festivals, casual brunch dates, or any occasion where you want your hair to feel like it tells a little story.
Step-By-Step Guide To Nailing This Woven Look
Start by creating a simple three-strand braid on one side of your head, beginning at the temple or slightly behind the ear. Keep the braid loose as you go — you don’t want it tight and neat, you want it to feel relaxed and slightly imperfect. Secure it temporarily at the ends. Gather the rest of your hair at the nape and loosely twist it into a bun, incorporating the braid as it wraps around or feeds into the base of the bun. Secure everything with bobby pins, hiding the ends of the braid inside or underneath the bun. Once it’s secured, gently pull the braid apart horizontally to make it appear wider and more textured — this is called “pancaking” the braid, and it’s one of my most-used tricks in the salon. Pull a few loose strands around the face and tuck a small decorative pin or clip into the braid if you want an extra touch of elegance.
Textured Undone Bun

Defining The Textured Undone Aesthetic
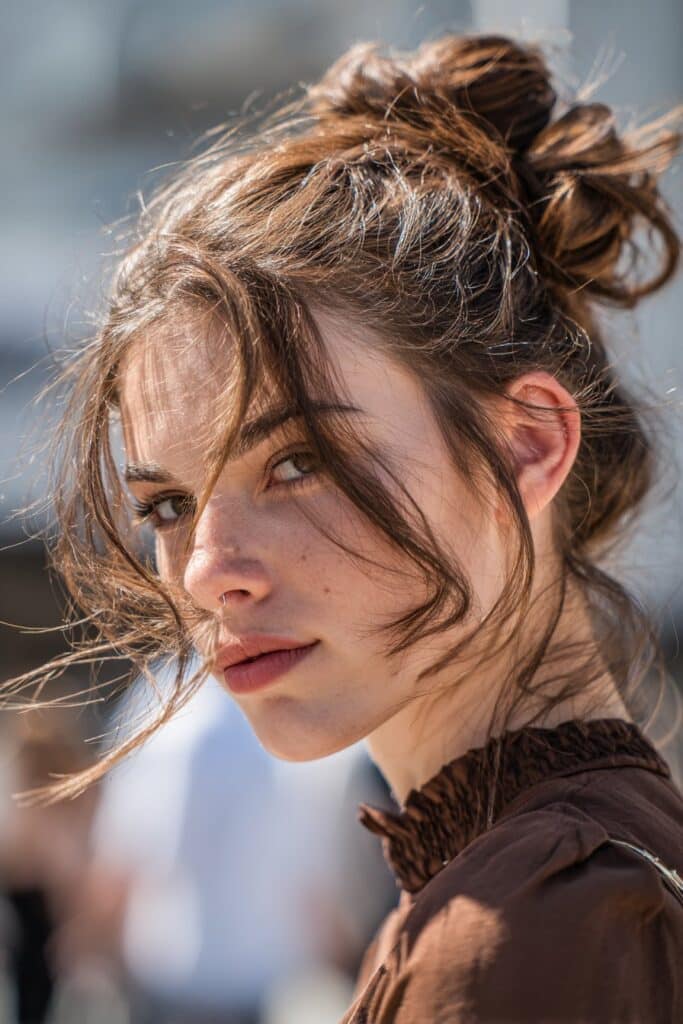
The textured undone low bun is my personal everyday hero — the style I wear more than any other in my real life. It’s characterized by an intentionally rough, high-volume texture throughout the bun and the hair leading into it. Where other messy buns have specific structural elements like twists or braids, this one leans fully into chaos and makes it look intentional through strategic use of texture. The key is that every part of the hair — from root to bun — feels dimensional and lived-in. There’s volume at the crown, texture along the lengths, and the bun itself looks like it could fall apart at any moment but somehow holds together perfectly. I think of it as the hairstyle equivalent of effortless cool — the kind of look that makes people ask, “Did you do something different with your hair today?”
Hair Textures And Lifestyles That Love This Style
If you have naturally curly, coily, or wavy hair, this style was practically designed for you. Your natural texture does most of the work, and all you have to do is enhance and guide it. But I’ve created stunning textured undone buns on straight hair too — the secret is using a curling wand to add loose, irregular waves before gathering everything into the bun, and making sure not to brush it out afterward. In terms of lifestyle, this style is perfect for the busy, on-the-go person who doesn’t have an hour for hair. It’s also ideal for people who hate fussing with perfect lines and symmetry — because this style rewards you for being imprecise. I especially love it for creative professionals, artists, educators, and anyone who wants their hair to feel expressive and free.
How To Build Maximum Texture Into Your Bun
Prep is everything with this style. Work dry shampoo or a volumizing powder through your roots and mid-lengths before you do anything else — this is the foundation of your texture. If your hair is naturally straight, use a curling wand to create loose, irregular waves, wrapping sections in different directions so they don’t all fall the same way. Then, instead of brushing your hair back smoothly, use your fingers to gather it at the nape, scrunching and roughing up the texture as you go. Form the bun loosely and secure it with a hair tie — don’t wrap the tie too many times, you want the bun to have some give. Add bobby pins to secure any sections that feel like they’re falling, but don’t over-pin. The bun should look like it’s barely holding on. Mist the whole thing with a sea salt spray for added grit and texture. Done.
Romantic Loose Bun

The Essence Of The Romantic Low Bun Style
If the textured undone bun is casual and cool, the romantic loose low bun is soft and ethereal. This is the style I create most often for intimate celebrations and special evenings — it has a dreamy, delicate quality that feels like it belongs in a garden at golden hour. The romantic low bun is characterized by soft, flowing pieces around the face, a bun that appears almost cloud-like in its looseness, and an overall feeling of gentle movement. Nothing is sharp or geometric. Everything flows and curves. I like to think of this as the style you wear when you want your hair to feel like poetry — soft, expressive, and a little bit breathtaking.
Occasions And Face Shapes That Shine With This Dreamy Look
The romantic loose low bun is the perfect choice for weddings — whether you’re the bride, the maid of honor, or a guest who wants to look absolutely beautiful without overshadowing the couple. It’s also wonderful for anniversary dinners, engagement photos, graduation ceremonies, or any event that carries emotional weight and deserves a hairstyle that matches. In terms of face shapes, this style is particularly stunning on square and rectangular face shapes because the softness of the loose pieces and the gentle curves of the bun create contrast with more angular features. People with naturally fine, silky hair tend to love this style because the looseness of the bun means that even fine hair can look lush and full.
Creating Dreamy Softness In Your Romantic Bun
Use a large-barrel curling iron or wand to create soft, romantic waves throughout your hair before gathering it. These waves don’t need to be uniform — in fact, the more naturally varied they are, the better. Gather your hair loosely at the nape, allowing generous amounts of hair to fall free around your face, temples, and ears. Use your fingers to loosely coil the gathered hair into a bun, letting it sit low and slightly off to one side if you like. Secure with a hair tie and then remove the tie partially — just one loop — so the bun loosens slightly and gains that cloud-like quality. Pin just enough to keep it from completely falling. Gently pull and expand the bun with your fingertips. Use a fine-tooth comb or just your fingers to frame your face with soft, curving pieces. Mist with a shine spray for that luminous, romantic finish.
Half-Up Messy Bun

Breaking Down This Hybrid Favorite
The half-up messy low bun is the best of both worlds — you get the elegance and face-framing effect of wearing your hair down, combined with the neat, polished quality of a low bun. The top half of the hair is gathered and twisted into a low bun at the back of the crown, while the bottom half flows freely. It’s a hybrid style that I think of as incredibly chic and modern — it has a cool, contemporary energy that feels fresh and current without being trendy in a way that dates quickly. I first started using this style heavily when clients would come in wanting something between fully up and completely down, and it became one of the most requested looks in my kit.
Who Gains The Most From This Balanced Approach
The half-up messy low bun is genuinely flattering on almost everyone, but I find it especially wonderful on people with long hair who don’t want to lose the visual impact of their length. It shows off beautiful length while still feeling polished and intentional. It’s also a great style for people with naturally voluminous hair who find that wearing everything up can look overwhelming or top-heavy — keeping the bottom half down helps balance the overall silhouette. In terms of occasions, this style works beautifully for daytime events, casual professional settings, weekend outings, and anywhere you want to look put-together without going full formal.
Mastering The Half-Up Technique With Ease
Separate the top half of your hair from the bottom — use your ears as a guide and take everything from the top of the ears up. Clip the bottom section away temporarily. Take the top section and gather it at the center back, roughly at the crown or slightly behind it. Twist it loosely and wrap it into a small bun, securing with a hair tie and bobby pins. The key here is to keep the bun small and imperfect — it shouldn’t be a big, dramatic structure, just a soft little knot. Release the bottom half and let it fall naturally. Now go back to the bun and gently pull it apart to add volume and messiness. Frame your face with a couple of loose pieces from the top section. If your bottom hair is straight, add a few waves with a curling iron for cohesion and polish.
Side-Swept Messy Bun
What Sets The Side Bun Apart
The side-swept messy low bun is the style I reach for when I want something with a little drama and asymmetry. Instead of sitting centered at the nape, this bun lives low on one side — just above or behind the ear, or even lower near the jaw — creating a striking, off-center look that feels both glamorous and relaxed. The side placement changes the entire geometry of the style, adding a sense of movement and dimension that a centered bun simply can’t replicate. I love how it creates this beautiful line from the opposite temple sweeping down to the bun, and how the asymmetry makes the whole look feel intentional and editorial. It’s the kind of hairstyle that looks like a decision, and I love that energy.
Face Shapes And Styling Moments Perfect For Side Buns
The side-swept low bun is particularly wonderful for people with round face shapes because the off-center placement and the diagonal line it creates adds a lengthening effect. It’s also a great choice for people who have more hair on one side or who naturally part their hair strongly to one side — leaning into that natural inclination makes the style feel effortless. I adore this style for evening events, date nights, gallery openings, and creative gatherings where you want your look to feel artistic and considered. It’s also a favorite of mine for people who want to try something different from their usual centered styles without completely reinventing their routine.
Placing And Pinning Your Side Bun Perfectly
Sweep all of your hair gently to one side using your fingers — not a brush, because you want texture, not smoothness. Gather everything at a low point on that side, just above or behind the ear. Loosely twist and coil the gathered hair into a bun, letting it sit naturally against the side of your head. Secure with a hair tie and plenty of bobby pins — side buns need more anchoring than centered ones because gravity works differently. Once secured, pull the bun apart gently to add volume and shape, and allow a few pieces to escape from the opposite side of your head near the hairline. These face-framing pieces on the non-bun side are essential because they create balance and prevent the style from feeling too one-sided. Finish with a medium-hold spray to keep everything in its beautiful, intentionally imperfect place.
Boho Messy Bun
Capturing The Spirit Of The Bohemian Bun
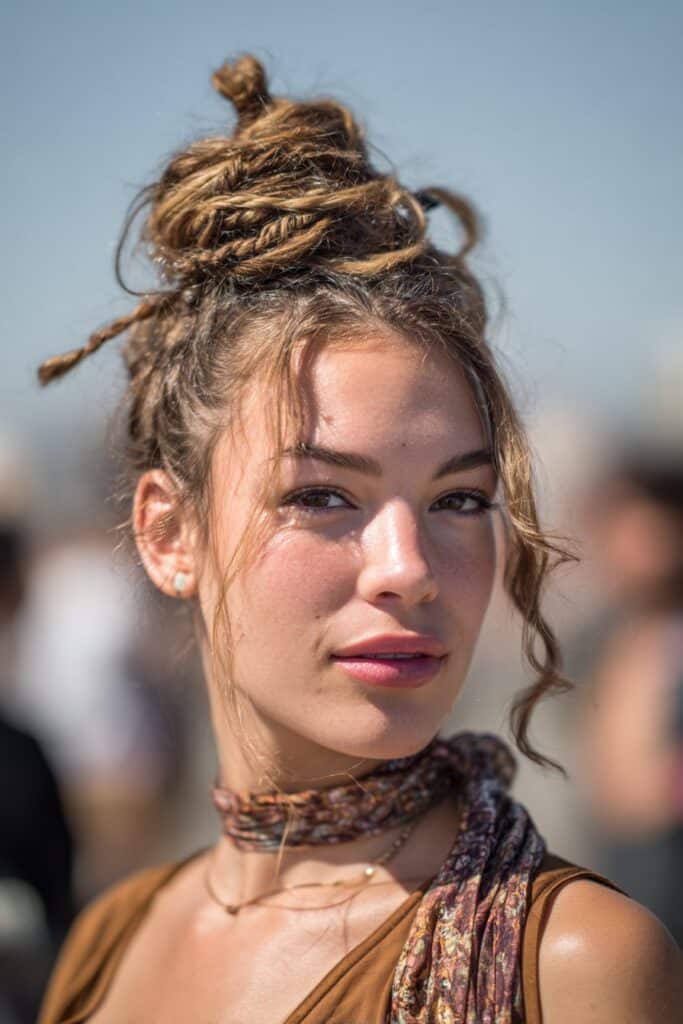
If there’s one style that embodies everything I love about hair as a form of self-expression, it’s the boho messy low bun. This style is all about freedom, layering, and a connection to a more artistic, nature-inspired aesthetic. The boho low bun typically incorporates multiple texture elements — loose waves or curls, braided sections, possibly woven-in ribbon or decorative elements — all gathered into a relaxed, organic bun at the nape. It doesn’t follow rules. It’s the hairstyle equivalent of wearing a vintage dress with sneakers, or mixing bold jewelry with a simple outfit. There’s a joyful, eclectic energy to it that I find deeply inspiring. Every time I create a boho bun, it feels like a small act of artistic expression.
Living The Boho Lifestyle Through This Free-Spirited Style
The boho messy low bun is the natural partner for people who describe their personal style as eclectic, free-spirited, artistic, or nature-loving. If you’re drawn to flowing fabrics, natural materials, earthy tones, and personal adornment — this hairstyle is a physical extension of that identity. It works on all hair types but especially shines on wavy and curly hair where the natural texture adds authenticity to the boho aesthetic. I love to suggest this style for outdoor weddings, music festivals, art fairs, yoga retreats, and any occasion that celebrates creativity and individuality. Even in more formal settings, a beautifully done boho bun can feel entirely appropriate when it’s thoughtfully put together.
Building A Truly Boho-Inspired Bun From Scratch
Start with waves — either natural or created with a large-barrel wand. Add a thin braid on one or both sides of your head, starting from the temple and working toward the back. Leave most of your hair loose and wavy, gathering everything together at the nape without trying to smooth or tame any of the texture. When you form the bun, incorporate the braids by wrapping them around the outside. Secure loosely. Now for the fun part: personalize it. Tuck small dried flowers into the bun, wrap a thin ribbon around the base, or add a decorative pin. The accessories are what transform a messy bun into a boho bun. Let plenty of waves and curls escape around your face and neck. The more natural and abundant the texture around the bun, the more authentically boho the result.
Sleek-To-Messy Bun

The Art Of Controlled Contrast In This Sophisticated Style
The sleek-to-messy low bun is one of my favorite styles to create because it plays with deliberate contrast — and contrast, in makeup and hair, is one of the most powerful tools we have. The front and top sections of the hair are sleek and smooth, laid flat and close to the head with gel or pomade, while the bun at the nape is intentionally loose, full, and messy. The juxtaposition of these two opposing textures creates a look that is simultaneously polished and relaxed, structured and free. It’s a style that shows sophistication and personality at the same time. I first created this look for a high-fashion editorial shoot and immediately knew it needed to cross over into everyday wearability — and it absolutely has.
When And For Whom This Contrasting Look Works Best
The sleek-to-messy bun is a wonderful choice for people who want something that works in professional environments without sacrificing personality. The sleek front portion reads as polished and put-together, while the messy bun at the back is the wink of individuality. It’s also a great option for special occasions where you want to look elegant but not stiff — think galas, professional dinners, or important meetings where first impressions matter. I especially love this style on people with thick hair because the contrast between the slicked-down front and the voluminous back bun is really striking. It also works beautifully on people with natural hair who want to create a styled, editorial look.
How To Achieve The Perfect Sleek-To-Messy Transition
Apply a strong-hold gel or edge control product to the front sections of your hair — everything from the hairline back to the crown. Use a fine-tooth comb or a soft brush to lay these sections absolutely flat against the head, creating that signature sleekness. Smooth the hair back toward the nape without gathering any loose pieces at the front. At the nape, collect all the hair and do the opposite of everything you just did — pull, fluff, and rough it up before loosely twisting it into a messy bun. Secure it with a hair tie and bobby pins, but don’t smooth anything. The messier and more voluminous the bun, the stronger the contrast. Use a toothbrush or edge brush to perfect any edges at the hairline. Finish with a light mist on the bun only — the front should stay sleek and undisturbed.
Curly Messy Bun

Celebrating Natural Curl With This Gorgeous Gathered Style
As someone who has worked with all hair types throughout my career, I have such deep admiration for natural curls, and the curly messy low bun is a style that truly celebrates curl in all its glory. This style gathers natural curls into a low bun at the nape while allowing the inherent volume and texture of curly hair to create the “messiness” organically — no products or tools needed to fake the texture because it’s already there. The result is a bun that looks lush, bouncy, and full, with curls spiraling and peeking out from every angle. It’s joyful and vibrant and incredibly beautiful, and I’ve found that people with curly hair absolutely fall in love with this style because it works with their natural texture rather than fighting it.
Why Curly Hair Thrives In This Low Gathered Style
People with naturally curly or coily hair often struggle with styles that require smoothing or straightening because those processes can be damaging and time-consuming. The curly messy low bun requires neither — in fact, the more you embrace the natural movement and volume of your curls, the better this style looks. It works on all curl patterns, from loose waves to tight coils, and it scales beautifully with hair length. Shoulder-length curly hair creates a compact, bouncy bun while longer curly hair creates a more dramatic, full-looking style. I love recommending this to curly-haired clients who want a quick, beautiful look for a dinner out, a casual day at the office, or even a creative professional setting.
Techniques For Enhancing Your Natural Curl In A Low Bun
Wash and condition your hair with your usual curly hair routine and apply your favorite leave-in conditioner and curl-defining cream while the hair is still damp. Allow your curls to air dry or diffuse — do not brush them out at any point. Once dry, scrunch your curls gently to revive any that have clumped together. Gather your curls at the nape using your fingers, working gently to avoid disturbing the curl pattern. Loosely wrap a hair tie around the gathered curls — don’t pull it too tight or you’ll create a pulled, flat look at the roots. Allow the curls of the bun to spring and expand naturally. Tuck a few loose curls back into the bun if they’re completely falling out, but leave most of the escapees alone — they add to the beauty of this style. A little curl-refreshing spray on the face-framing pieces will keep them looking defined.
Wispy Face-Framing Bun

Why The Wispy Bun Deserves Its Own Spotlight
The wispy face-framing low bun is perhaps the most delicate and feminine of all the styles on this list. The defining feature of this style isn’t the bun itself — it’s everything that falls outside of it. Thin, wispy tendrils are deliberately left out around the face, temples, and nape, creating a soft, almost painterly effect that frames the face beautifully. The bun is typically compact and sits low, acting almost as an anchor for all the loose, flowing pieces surrounding it. I am absolutely in love with this style for the way it catches light and creates movement — when you turn your head, those wispy pieces float and dance in a way that feels incredibly alive and luminous.
The Perfect Face Shapes And Hair Types For Delicate Wisps
The wispy low bun is especially flattering for people with oval and heart-shaped faces, as the tendrils draw attention to the cheekbones and delicate features in a really beautiful way. It’s also a wonderful style for people who want to soften a stronger jaw or forehead, as the wisps create visual softness around the face. In terms of hair type, this style is most naturally achieved on fine or medium hair where individual strands are light enough to move and float freely. Thick hair can achieve this look too, but you’ll want to deliberately pull very thin sections free rather than thicker chunks. This is one of my favorite styles for portrait photography because the tendrils add so much visual poetry and dimension to the overall look.
Pulling And Styling Those Perfect Wispy Pieces
Begin by creating your low bun as you normally would — gather your hair, twist it, and secure it at the nape. Now comes the art of the wisp. Using the tip of a bobby pin or a thin rat-tail comb, pull extremely thin sections of hair free from around your hairline — at the temples, in front of the ears, along the nape, and possibly a few from the top of the head. These sections should be barely-there thin — the thinner the better. Once you’ve pulled them free, wrap each piece gently around your finger once to encourage it to curl slightly, or use a curling iron on a very small section setting to give each wisp a gentle bend. The slight curve is important — perfectly straight wisps can look accidental, while curved wisps look intentional and soft. Set with a light mist of flexible hold spray to encourage them to hold their delicate shape throughout the day.
Knotted Messy Bun

Understanding The Knotted Bun Construction
The knotted messy low bun is one of those styles that looks incredibly complex but is built on a beautifully simple mechanical principle: instead of twisting the hair into a spiral and wrapping it, you tie it into an actual knot — like the first step of tying a shoelace — and tuck the ends under and into the bun to create a rounded, multi-directional structure. The knotted bun has a beautiful, organic shape that differs from the typical round spiral bun. It’s slightly more three-dimensional and has interesting angles and folds that catch the light in a really unique way. I discovered this construction during an experimental phase of my career when I was deliberately trying to find new structural approaches to familiar styles, and I’ve used it in editorial work many times since.
Best Hair Lengths And Textures For The Knotted Style
The knotted low bun works best on medium to long hair — you need enough length to actually tie the knot and still have ends to tuck away. Hair that’s at least past the shoulders is ideal. In terms of texture, this style is most naturally beautiful on wavy or lightly textured hair where the strands have enough grip to hold the knot securely without slipping. Completely silky straight hair might need a little texturizing product to keep the knot from loosening over time. This is a great style for more adventurous or experimental dressers who want their hair to feel like a design statement — it has a slightly architectural quality that I think pairs beautifully with structured clothing and bold makeup.
Building A Knotted Bun That Holds All Day
Apply texturizing spray or dry shampoo throughout your hair and gather everything at the nape in a low ponytail. Secure loosely with a hair tie. Now split the ponytail into two equal sections. Cross the right section over the left, then bring the right section up and through the loop — this is a simple overhand knot. Slide the knot down to sit against your head at the nape, and then begin working with the resulting loop and tails to create the bun. Tuck the tails into the loop and underneath the knot, securing with bobby pins as you go. The knot itself becomes the central structure, and you build the bun outward from it. Gently expand the overall structure with your fingertips and let a few pieces escape around the face for the messy element. Secure with pins and finish with a medium-hold spray.
Double Twisted Bun

The Architecture Of A Double Twist Structure
The double twisted low bun is one of the most visually interesting styles in my messy bun repertoire, and I save it for moments when I really want hair to be the statement of an entire look. The construction involves splitting the hair into two sections from a center parting, twisting each section individually in opposite directions, and then bringing the two twisted sections together at the nape to merge into a single low bun. When done well, the merging of the two twists creates a beautiful central seam along the back of the head — like a river meeting the sea — and the resulting bun has an interesting, almost sculptural texture from the combined twists. It’s a style that rewards a second glance.
Who Should Experiment With This Advanced Twisted Look
I recommend the double twisted low bun for people who are comfortable with basic twisting and are ready to try something more dynamic and visually compelling. It’s a great style for those with naturally thick or voluminous hair, as the twists have more presence and the resulting bun has more substance. Medium to long hair is required for the twists to have room to develop before being gathered into the bun. This style reads as particularly artistic and considered, making it wonderful for creative professionals, events with an artistic or cultural theme, or any occasion where you want your entire aesthetic — from makeup to hair to clothing — to feel like a unified, intentional statement.
Step-By-Step Process For The Double Twist Technique
Part your hair down the center from front to nape. Clip one side away and work with one section at a time. Take the first section and twist it consistently in one direction all the way from the crown down to the ends — let’s say clockwise. Hold it secure. Release the second section and twist it in the opposite direction — counterclockwise — from crown to ends. Bring both twisted sections together at the nape, letting them naturally wrap around each other as they meet. This merging is where the magic happens. Secure the point where they meet with a hair tie, then coil the combined ends into a loose, messy bun and secure with bobby pins. Gently expand and loosen the overall structure, pulling the twists slightly apart to add dimension. Let a few pieces escape around the face and set with a flexible hold spray.
Conclusion
As I sit here reflecting on all thirteen of these beautiful, expressive styles, I’m reminded of something I’ve always believed deeply: hair is one of the most personal and powerful forms of self-expression we have. It’s the first thing we reach for in the morning before the day has had a chance to define us, and it’s one of the last things we check before we walk out the door. The messy low bun, in all its wonderful variations, speaks a language that I think is incredibly important right now — a language of effortless confidence, of beauty that doesn’t require perfection, of self-expression that is joyful rather than stressful.
Throughout my years working with clients from all walks of life, doing hair backstage at fashion events, traveling to sets and studios, and teaching workshops for women discovering their beauty for the first time, I’ve come to understand that the greatest hair secret isn’t a product or a technique — it’s permission. Permission to try something new. Permission to embrace the pieces that fall out. Permission to wear your hair in a way that feels like you rather than like a magazine ideal.
The messy low bun is, at its core, a style built entirely on that philosophy. There is no wrong way to do a messy bun. There is no perfect version to aspire to. There’s only your version, shaped by your hair’s natural tendencies, your personal aesthetic, your mood on any given morning, and the story you want your appearance to tell that day.
I want you to take these thirteen styles and play with them. Try the romantic loose bun when you want to feel soft and dreamy. Reach for the sleek-to-messy version when you want to feel powerful and sharp. Let the boho bun out when you need to feel free. Give the wispy, face-framing style a try when you want the world to see your face at its most beautiful. None of these require professional training or expensive tools — they require only time, curiosity, and a willingness to embrace imperfection as an art form.
One of the things I always say in my workshops is that confidence is the best accessory — and it’s the only one that truly goes with everything. A messy low bun worn with genuine confidence will always look better than a perfectly sculpted updo worn with uncertainty. Trust your instincts. Trust your hands. Trust your reflection.
My hope is that at least one of these thirteen styles has sparked something in you — excitement, curiosity, or even just a small “I could try that.” Because that’s where beauty begins: not in the perfect technique or the right product, but in the moment you decide to reach for something new and claim it as your own. Go find your messy bun. It’s waiting for you.