
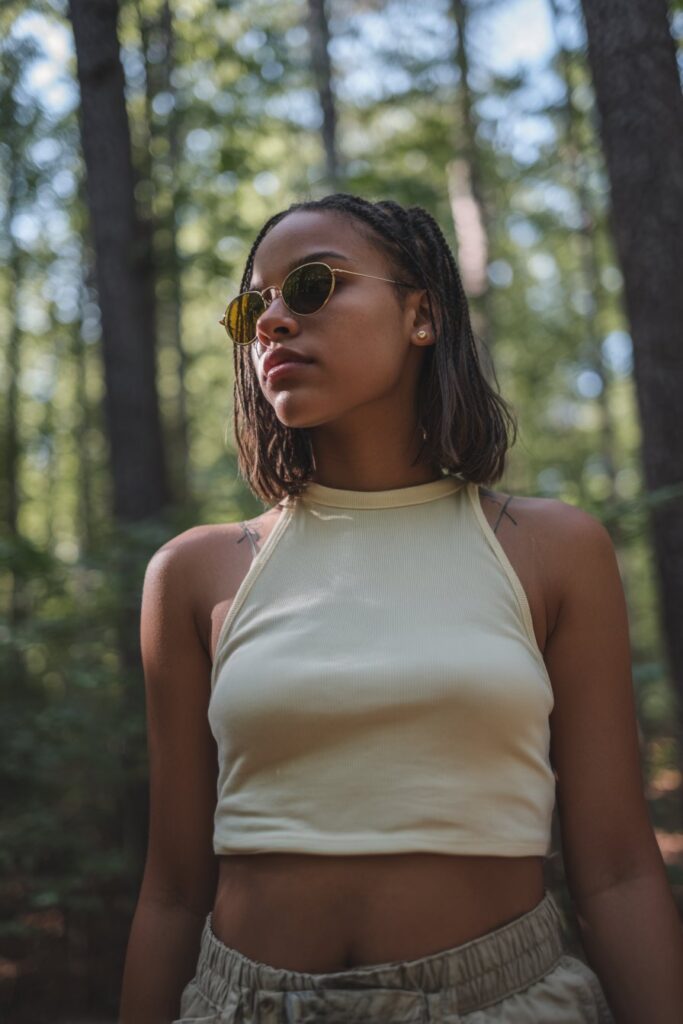
Summer hairstyles for medium hair have truly saved my sanity during those hot, sticky months when the last thing I want is hair clinging to my neck. I’ve discovered that medium-length styles offer the perfect balance – all the versatility of longer locks without the heavy maintenance.
If you’re looking for easy summer hairstyles for medium hair, you’re in for a treat. From the neck-freeing French bob to effortlessly chic beachy waves, there are countless options that take minutes to create. As someone who values both style and practicality, I’ve fallen in love with medium length summer hairstyles that can be quickly transformed from casual to formal. The messy bun, for instance, has become my go-to for summer events – it’s deceptively simple yet undeniably chic. Additionally, I’ve found that accessories like scarves and clips can elevate simple summer hairstyles for medium hair while keeping everything manageable in the heat.
That’s why I’ve put together this collection of 17 cute summer hairstyles for medium hair that will keep you looking fabulous without spending hours in front of the mirror. Whether you’re heading to the beach or a summer wedding, these medium hair summer hairstyles have got you covered!
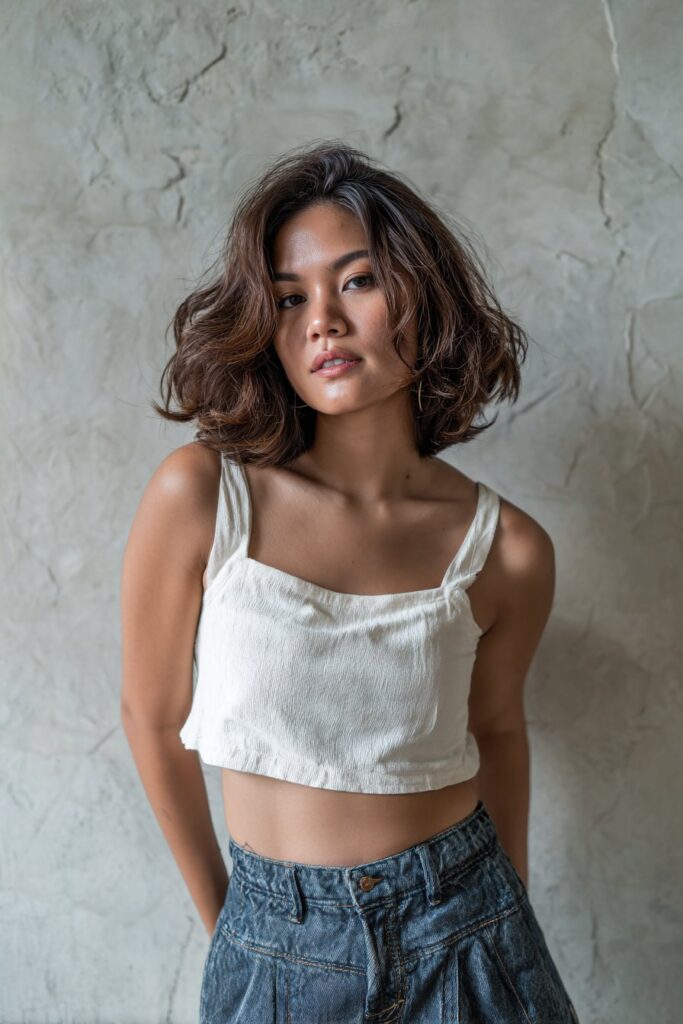
French Bob
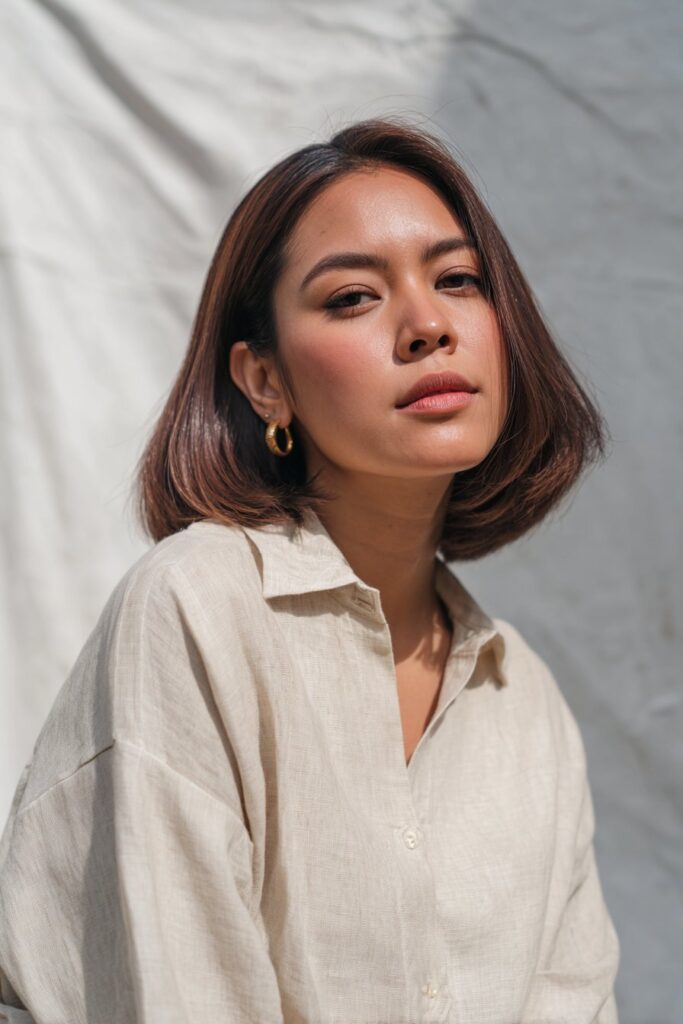
The French bob has become my absolute favorite medium hair summer hairstyle. This chic, jaw-length cut brings that effortless Parisian vibe while keeping me cool during scorching summer days. Whenever I style my French bob, I’m reminded of those classic French films—there’s something undeniably sophisticated about this timeless look.
French Bob styling tips
Styling a French bob is remarkably simple, which makes it perfect for those busy summer mornings. I’ve found that it actually looks best with minimal effort—a true wash-and-go style. For a sleek finish, I use a round brush while blow-drying to smooth the hair and gently curl the ends under. On more casual days, I simply apply a texturizing spray to damp hair and let it air-dry. This creates that coveted tousled look that French women have mastered.
Additionally, second-day hair often works better for achieving that perfectly undone French bob appearance. I’ll use a small amount of dry shampoo at the roots, then add a lightweight oil through the mid-lengths and ends for healthy-looking shine.
Why French Bob works for summer
The French bob is particularly well-suited for summer primarily because it keeps hair off your neck and shoulders. Furthermore, this style embraces natural texture rather than fighting it—a huge benefit when humidity strikes!
What I love most about the French bob for summer is its versatility. You can dress it up with accessories like hair clips or headbands for added personality, or keep it simple for beach days. Moreover, the cut’s length—typically hitting just at or slightly above the jawline—flatters the face while remaining practical.
French Bob for medium hair
On medium hair, the French bob creates an illusion of volume and texture, especially for those with finer strands. I’ve noticed that when cut correctly, it adds body to my hair without requiring tons of product or styling time.
The style works beautifully across different hair types. For straight hair, the clean lines of the bob create a sophisticated silhouette. Meanwhile, those with wavy or curly medium hair can embrace their natural texture for an even more authentic French-inspired look.
What makes this style truly special for medium hair is its adaptability—you can switch between polished and casual depending on your mood or the occasion, all while maintaining that effortless summer chic that medium length summer hairstyles are known for.
Twisted Braid

Twisted braids have become my secret weapon for managing medium hair throughout the sweltering summer months. Unlike traditional braids, twisted braids create an elegant rope-like pattern that looks intricate yet requires minimal skill. I’ve fallen in love with this versatile style because it works across different hair textures while keeping me cool and composed.
Twisted Braid technique
Creating a twisted braid is surprisingly straightforward. I begin by splitting my hair into two equal sections. The key technique involves twisting both sections in the same direction (typically clockwise) and then crossing them in the opposite direction. Essentially, if I twist both strands to the right, I’ll cross the right strand over the left so they switch places. This opposite-direction crossing is what locks the twist in place.
For medium hair, I’ve found this simple process works best:
- Split your hair into two equal sections
- Twist both sections clockwise several times until tight
- Cross the right section over the left (switching their positions)
- Repeat steps 2-3 until you reach the ends
- Secure with a small elastic
To create a more elaborate style, I occasionally add new sections of hair as I go, similar to a French braid technique. This creates a beautiful twisted crown effect that keeps every strand secured.
Twisted Braid for hot weather
The twisted braid has saved me countless times during scorching summer days. Unlike loose styles, this braid keeps hair completely off my neck and shoulders, consequently providing instant relief from the heat.
What makes this style perfect for summer is how it embraces texture rather than fighting it. On humid days when my medium hair typically rebels, the twisted braid actually looks better with a bit of natural texture. Plus, the tight twisting action helps control frizz without requiring heavy products.
Since discovering this technique, I’ve worn twisted braids for everything from beach days to outdoor weddings. The style remains intact despite sweat and humidity, making it ideal for all-day summer activities.
Twisted Braid styling time
Perhaps the most compelling reason I recommend twisted braids for medium hair is the remarkably quick styling time. Generally, I can complete a basic twisted braid in under five minutes. Once you’ve mastered the technique, this becomes one of the fastest yet most polished summer hairstyles possible.
For those with medium hair like mine, the styling process is even quicker because there’s less length to manage. I typically spend about two minutes on the actual twisting and perhaps another minute securing the ends and adjusting the overall look.
The styling efficiency makes twisted braids perfect for busy summer mornings when I’d rather spend time outdoors than in front of the mirror. Simply put, these braids deliver maximum style impact with minimal time investment.
Summer Bandana Style

Bandanas have completely changed my approach to medium hair summer styling. These versatile squares of fabric offer both protection and style, making them my go-to accessory when temperatures soar. I’ve discovered that bandanas work remarkably well with medium-length hair—they keep strands off my face while adding an instant personality boost to even the simplest styles.
How to tie a summer bandana
I’ve experimented with several bandana tying methods, but these three techniques work best for medium hair in summer:
- Classic Triangle Fold: Start with a flat bandana and fold it into a triangle. Place the folded edge along your hairline, then tie the two ends underneath your hair at the nape of your neck. This style keeps hair completely off your face while protecting your scalp.
- Rolled Headband: Fold your bandana into a triangle, then roll it from the folded edge toward the point, creating a band about 2 inches wide. Place it under your hair and tie it on top for a retro look, or tie it at the bottom for a more modern style.
- Half-Up Accent: Fold your bandana hamburger-style for a shorter, thicker band. Then secure your hair in a half-up style and wrap the bandana around the base, tying it into a small knot to add color and texture.
Bandana for scalp protection
Living in a sunny climate has taught me that bandanas provide excellent protection for my scalp and hair. Simply wearing a bandana on your head, wrapped and tied at the back, creates a physical barrier against harmful UV rays.
For maximum cooling on those scorching days, I’ll often wet my bandana with cool water before wearing it. This simple trick provides instant relief and helps regulate my body temperature. Additionally, bandanas shield my hair from excessive sun exposure that can lead to dryness and color fading.
Bandana with medium hair
Medium-length hair presents the perfect canvas for bandana styles. Unlike shorter cuts where bandanas might overwhelm, or longer styles where they can get lost, medium hair strikes the ideal balance.
I find bandanas particularly useful on second-day hair when my medium-length strands need a refresh. They’re also perfect for beach days—I can pull my hair into a low messy bun and wrap a bandana around it for an instantly elevated look that stays put all day.
What I love most about bandanas with my medium hair is their versatility. I can match them to my outfit, my mood, or the occasion, instantly transforming a basic hairstyle into something that looks deliberately stylish yet required minimal effort.
Stick Straight Blunt Bob

I’ve fallen in love with the stick straight blunt bob as my go-to summer style for medium hair. This sharp, crisp cut brings both elegance and practicality to hot days, keeping me cool while looking polished. The clean lines and sleek finish make this style particularly striking when the sun hits it just right.
Blunt Bob maintenance
Maintaining a blunt bob requires some dedication, yet the results are absolutely worth it. I schedule trims every 4-6 weeks to preserve that sharp, crisp bottom line that makes this style so distinctive. This regular maintenance helps prevent separation and keeps the cut looking dense and full.
For daily care, I’ve found that blunt bobs need more frequent washing than longer styles, typically every other day. This prevents the greasiness that can quickly affect shorter cuts. After washing, I always use a conditioner to prevent dryness, followed by a heat protectant like Fekkai Clean Stylers Prime Mist on damp hair.
To combat flyaways and humidity (summer’s greatest enemies!), I apply a small amount of Moroccanoil or Verb’s Ghost Oil from root to end. For my second-day hair, I simply wrap it in a silk scarf overnight – a trick that keeps everything perfectly in place by morning.
Blunt Bob summer benefits
The blunt bob truly shines during summer – it’s perfectly easygoing when temperatures soar. Unlike longer styles that stick to your neck, this cut offers immediate relief from the heat.
I appreciate how versatile this style is for all summer activities. It transitions seamlessly from beach days to evening events with minimal styling adjustments. Plus, the blunt cut creates an illusion of thickness and volume that holds up well even in humidity.
Certainly, one of the greatest summer advantages is the bob’s low-maintenance nature. As Nigella Miller, celebrity hairstylist, confirms: “It’s so hot, and the last thing you want to do is worry about your hair”.
Blunt Bob styling tools
Styling my blunt bob effectively requires specific tools. First, I always use a wide-nozzle hair dryer with a round brush (about 1.5 inches in diameter) to create volume at the roots. For that perfectly sleek finish, a quality flat iron is essential – I heat mine to around 320 degrees, allowing it to fully acclimate before use.
For added volume, I occasionally use a teasing brush at the crown, followed by a light mist of hairspray. To avoid dreaded creases, flat setting clips (never shark or duckbill clips) are critical when setting this style.
Finally, I finish with products specifically designed for bobs – texture sprays for casual days or lightweight oils for a sleeker look. These products help maintain the sharp lines that make the blunt bob such a statement summer style.
Flower Claw Clip Updo
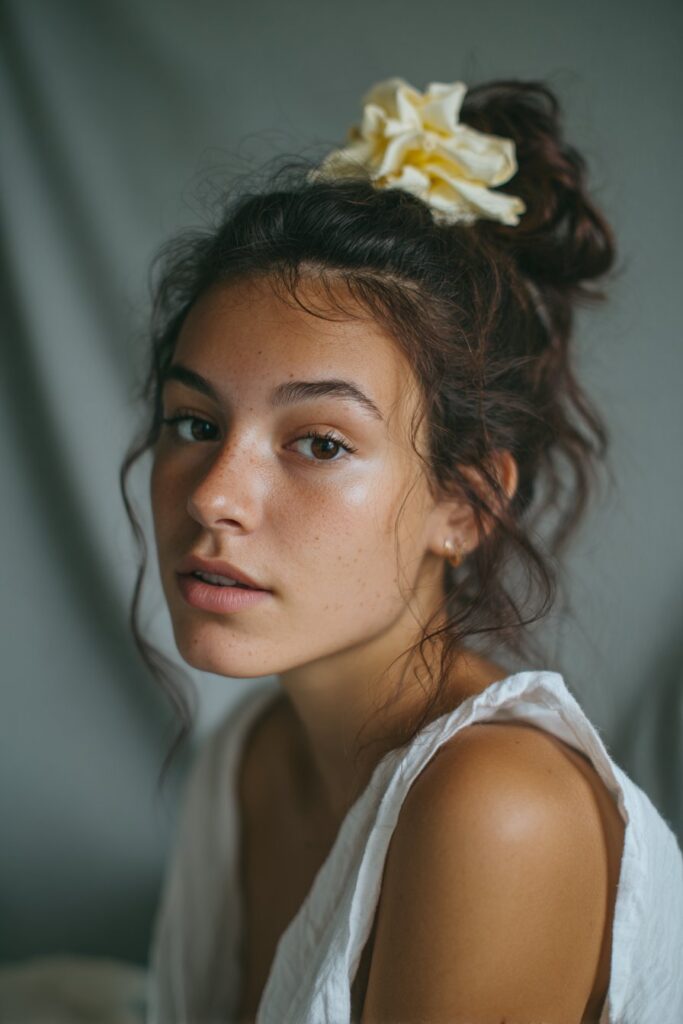
Flower claw clips have completely transformed my medium hair styling routine this summer. These charming accessories combine form and function, securing my hair while adding a touch of whimsy. The floral designs offer that perfect balance of playfulness and sophistication that works for virtually any summer occasion.
Using flower clips creatively
I’ve discovered numerous ways to incorporate flower claw clips into my medium-length hairstyles. One of my favorite techniques involves creating a standard braid first, then placing the flower clip either at the top for security or at the bottom for decoration. Alternatively, I’ll twist my hair into a bun and secure it with the flower clip for an instant summer-ready look.
For more visual impact, I sometimes use two flower clips together – one black and one colorful – to create a more detailed, eye-catching style. This works wonderfully for medium hair as it adds dimension without overwhelming the style. Undoubtedly, the most versatile approach is using the clip in a half-up, half-down style, which keeps hair off my face while showing off the flower design.
Flower clip for quick updos
The beauty of flower claw clips for medium hair lies in their efficiency. Most styles take me literally 10 seconds to create, making them perfect for busy summer mornings. The clips work remarkably well for those “greasy hair days” too – simply twist hair up and clip it in place for an instantly polished look.
One of my go-to quick styles involves creating a twisted ponytail by flipping my ponytail through itself, then securing the flower clip underneath. This technique creates a detailed-looking style that’s actually incredibly simple. Subsequently, for an even faster option, I’ll twist my hair into a simple bun, tuck in the loose end, and secure with the flower clip.
Best occasions for flower clip styles
Flower claw clips adapt beautifully to numerous summer settings. They’re ideal for beach days when I want hair completely off my neck but still want to look put together. Likewise, they work perfectly for park outings, summer walks, or casual get-togethers.
What makes these clips truly special is their ability to elevate everyday looks. I’ve worn mine for everything from casual coffee dates to outdoor summer parties. The designs are delicate enough for more formal occasions yet practical enough for daily wear. Indeed, they’re perfectly suited for medium hair, as the clips can securely hold this length while the flower design remains clearly visible, creating that effortless summer style we all crave.
Grown-Up Pigtails

Pigtails have undergone a sophisticated transformation in recent years, evolving from a childhood staple into a trendy summer hairstyle for adults with medium hair. I was initially hesitant to try this look, fearing it might appear too juvenile, but after experimenting with various techniques, I’m now convinced that pigtails can be both chic and practical for the summer months.
How to make pigtails look mature
The secret to creating adult-appropriate pigtails lies in their placement and styling. Low pigtails positioned at the nape of the neck instantly create a more sophisticated look compared to high ones. I’ve found that sleek, ultra-smooth pigtails with a side part offer a modern twist that feels distinctly grown-up.
For an elevated appearance, I often incorporate these key techniques:
- Create textured pigtails by adding volume at the roots first
- Opt for a deep side part instead of a severe middle one
- Add wrapped sections of hair around the elastics to conceal them
- Incorporate small braids or twists for additional visual interest
As fashion expert Tina Fey notes, pigtails have traditionally been considered unprofessional, yet many workplaces are now embracing more creative hairstyles.
Grown-up pigtails for beach days
Throughout the hot summer months, I’ve discovered pigtails are incredibly practical for beach days. They keep hair off my neck while preventing those uncomfortable sweat-induced tangles. Firstly, I create Dutch braided pigtails that start at my hairline and continue downward, offering maximum humidity protection.
Furthermore, bubble pigtails have become my go-to beach style – they’re eye-catching yet functional for medium length hair. The segmented nature of this style creates interesting texture while ensuring my hair stays put despite ocean breezes.
Styling tools for pigtails
Having the right tools makes all the difference when creating grown-up pigtails. I primarily rely on clear elastics for a seamless look, combined with texturizing spray to add volume and grip. A tail comb helps create precise parts, therefore ensuring symmetrical pigtails.
For beachy texture, sea salt spray applied before styling enhances the casual-chic effect. Alternatively, I use dry shampoo at the roots not only for volume but also for better grip when creating sleek styles. Gold hair accessories can instantly elevate basic pigtails into something special, as can colorful ribbons woven through braided pigtails for a festival-ready appearance.
Low Twisted Buns

Low twisted buns have become a daily staple in my medium hair rotation, offering that perfect combination of elegance and practicality for summer. This versatile style keeps hair completely off my neck and shoulders, plus remains intact despite humidity and heat.
Creating low twisted buns
The beauty of low twisted buns lies in their simplicity. I’ve mastered several techniques that work wonderfully with medium hair:
- Start by pulling your hair into a low ponytail at the nape of your neck
- On the third wrap of your hair tie, only pull hair one-third of the way through to form a tiny bun
- Split the remaining hair into two halves
- Twist these halves and wrap them around the hair tie, completely covering it
- Secure with a single bobby pin at the base of your ponytail
Alternatively, try dividing your ponytail into two sections and twisting them around each other before wrapping around the base. For extra security, I use bobby pins by placing the opening towards my scalp, pushing down, and sliding into the knot.
Low buns for medium hair
Medium-length hair provides the ideal canvas for low twisted buns. Neither too short to work with nor too heavy to hold up, medium hair naturally forms perfect-sized buns. Accordingly, this style creates an illusion of volume, particularly beneficial for those with finer strands.
What makes this style exceptional for medium hair is its adaptability—I can wear it sleek for formal events or messier for casual days. Naturally, second-day hair works wonderfully, making it my go-to for those no-wash summer days.
Low bun styling time
Perhaps the most compelling reason I recommend low twisted buns is their efficiency. I can create a polished bun in under three minutes, start to finish. Evidently, this makes it perfect for busy summer mornings or quick transformations before evening events.
For medium hair, the process is even quicker as there’s less length to manage. Hence, I typically spend about two minutes on the actual twisting and perhaps another minute securing and adjusting the overall look. The style lasts all day without a single hair falling out of place.
Slicked Back Look
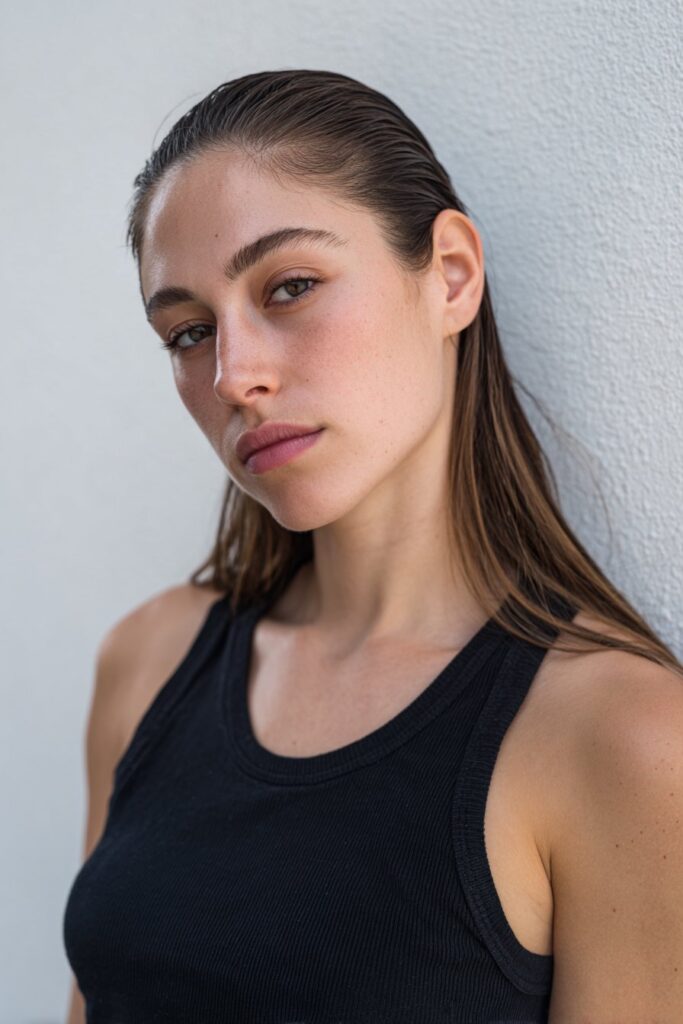
The slicked-back look has saved me countless times when I need a quick, polished hairstyle that beats the summer heat. This versatile style has evolved from the traditional corporate appearance to a more relaxed, modern interpretation that works beautifully on medium-length hair.
Slicked back hair for summer
On scorching summer days, slicked-back hair offers immediate relief by keeping strands completely away from your face and neck. Naturally, this style is particularly valuable during those humid months when frizz threatens to take over. In fact, the slicked-back style actually embraces the natural oils in your hair, making it perfect for those no-wash days at the beach or pool.
What I appreciate most about this look is its adaptability. You can create a wet-look finish for evening events or opt for a more casual-cool, less shiny finish for daytime activities. Above all, this style transitions effortlessly from beach days to summer soirées with minimal adjustment.
Products for slicked back style
The secret to a successful slicked-back style lies in choosing the right product for your desired finish:
- For high shine: Pomade creates that modern sleek look without the old-school greasiness
- For medium hold with light shine: Hair paste gives you “touchable” hair that can be restyled later
- For natural finish: Hair cream provides control while making it appear as if there’s no product at all
To begin with, I apply styling product to damp hair, starting from the back and working toward the roots. For medium hair, I find lightweight products like paste work best, giving the right amount of control without weighing hair down. As a finishing touch, a light layer of hairspray keeps everything in place throughout those hot summer days.
Slicked back for medium length
Medium-length hair creates the perfect canvas for slicked-back styles. With this length, I can achieve volume at the crown while maintaining that sleek finish along the sides.
To create this look on medium hair, I start by blow-drying my hair away from my face, then dividing it into sections (usually four works well). I apply product from roots to ends in each section, then use a fine-tooth comb to smooth everything back. In the meantime, I pay extra attention to my natural part, combing in the opposite direction first to prevent that mid-day split.
This simple yet sophisticated style has become one of my favorite easy summer hairstyles for medium hair, requiring minimal effort while delivering maximum impact.
Beachy Hair Waves
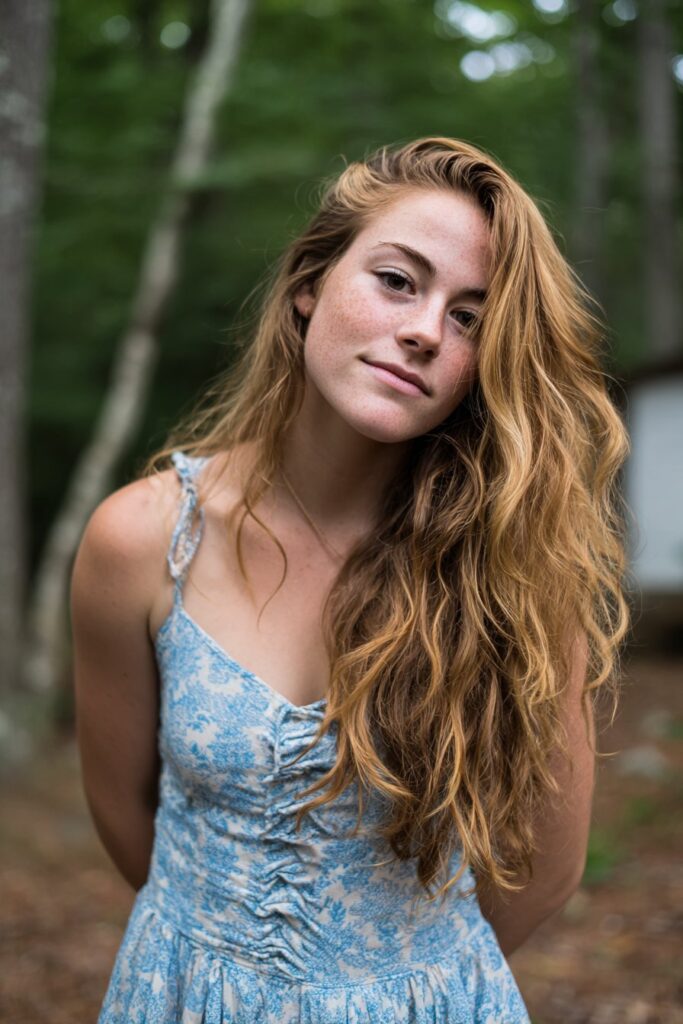
Nothing says summer quite like those perfectly tousled beachy waves. As a medium-hair enthusiast, I’ve tried countless methods to achieve that effortless, just-left-the-ocean look without actually having to take a dip.
Creating beachy waves
The magic of beachy waves lies in their seemingly effortless appearance that actually requires some technique. For the most natural-looking waves, I start with slightly damp hair and divide it into 1-inch sections. When using a curling iron, the key trick is leaving the bottom quarter-inch of hair out of the curl. This straight end creates that casual, undone effect that defines true beach waves.
Alternatively, for a heat-free method, I divide my damp hair into four loose braids and let them air-dry. Once dry, I gently unravel them and run my fingers through to break up the pattern. Occasionally, I’ll twist my hair into two low buns while damp, which creates perfect waves upon drying.
Sea salt spray for beachy hair
Sea salt spray has become the MVP in my summer styling arsenal. Essentially, these sprays mimic the wave-defining abilities of actual salt water but with added benefits. A quality sea salt spray adds texture, enhances natural waves, and provides volume boost for flat hair.
I typically apply sea salt spray to damp hair before styling, focusing on mid-lengths to ends. For maximum effectiveness with medium hair, I’ll scrunch the product upward toward my roots. Interestingly, many newer formulations contain hydrating ingredients like aloe vera or glycerin alongside the salt, preventing the dryness that traditional salt can cause.
Beachy waves for medium hair
Medium-length hair provides the perfect canvas for beachy waves – not too short to limit styling options yet not too long to lose volume. For my medium hair, I’ve found that alternating the direction of curls (some toward my face, others away) creates the most natural-looking waves.
A game-changer technique involves pulling hair into a ponytail first, then curling just the tied section. This approach helps me create consistent waves that begin at ear-level – a signature characteristic of authentic beach waves.
Ultimately, embracing a bit of frizz and imperfection is what makes beachy waves on medium hair look so effortlessly chic. These waves have become my go-to simple summer hairstyle, requiring minimal effort yet delivering maximum summer vibes.
90s Blowout
The iconic 90s blowout has made a triumphant comeback as one of my favorite medium hair summer styles. This voluminous, bouncy look offers that perfect balance of polish and playfulness that works remarkably well on medium-length locks.
Tools for 90s blowout
Creating the perfect 90s blowout requires a few essential tools. At the core, you’ll need a quality blow dryer with a nozzle attachment to direct airflow precisely where you want it. This focused heat helps create that root-centric volume that defines the 90s look. A ceramic-coated round brush is another must-have – I opt for a medium-sized barrel (approximately 1.5-2 inches) which works ideally for medium hair. The size of your brush matters; smaller brushes create more volume, while larger ones produce smoother styles with gentle waves.
Beyond these basics, I’ve found that volumizing products make all the difference. A heat-protecting spray or gel applied to damp hair not only shields your strands but also adds instant volume and texture. To finish, a light-hold hairspray helps maintain bounce without weighing down your style.
Volume tips for medium hair
Medium hair provides the perfect canvas for a 90s blowout. To maximize volume, I start by applying a root-lifting spray before blow-drying, focusing the product directly at my roots. Naturally, blow-drying upside down for a few minutes helps create immediate lift.
The “C section” technique works wonderfully on medium hair – place your brush a third of the way up your hair shaft in a C-shape toward the root, then wrap ends around the brush. This concentrates volume exactly where you want it – at the roots rather than just curled ends.
90s blowout for summer events
The 90s blowout transitions beautifully from casual daytime outings to evening summer events. Typically, I’ll create a bouncier version for special occasions by setting sections with velcro rollers after blow-drying. For a longer-lasting summer style, I allow each section to cool completely before releasing it.
Interestingly, this style actually holds up well in summer humidity when finished with the right products. A light mist of anti-humidity spray helps maintain that smooth, voluminous look throughout even the warmest days.
Butterfly Clip Fun
Butterfly clips transport me back to the 90s while offering practical styling solutions for my medium-length hair. These nostalgic accessories have resurfaced on social media feeds everywhere, and I’ve rediscovered their charm for creating quick summer styles.
Butterfly clip placement
The strategic placement of butterfly clips can transform even the simplest medium hairstyles. I’ve found that butterfly clips work beautifully as functional accessories to pull hair back while adding whimsical detail. For face-framing styles, I place clips along my hairline to highlight facial features and keep strands from sticking to my skin on hot days.
My favorite placement technique involves creating what I call a “butterfly crown” – I section off small squares of hair around my crown, brush them smooth, and secure each with a clip, creating a row of butterflies that catches the sunlight beautifully. As a result, I get both style and function in one easy look.
Festival-ready butterfly styles
For summer festivals, butterfly clips let me embrace boldness and creativity. I love creating half-up, half-down styles with a mod podge of clips scattered throughout for a playful, textured effect. To clarify, this isn’t just random placement – I strategically arrange clips to create dimension while keeping hair off my face.
For a more intriguing festival look, I incorporate butterfly clips along braided sections. To that end, I create two simple braids, then add colorful clips throughout to hold flyaways and add visual interest. Equally important is the “butterfly bubble” style – I section hair into small ponytails and place clips where the elastic bands are, creating a structured yet whimsical effect.
Butterfly clips for medium hair
Medium hair provides the perfect canvas for butterfly clip styling. By comparison to longer styles where clips can get lost, or shorter styles where they might overwhelm, medium hair strikes the ideal balance. My medium-length strands allow butterfly clips to be visible while still having enough hair to create interesting textures.
For thick medium hair, I select larger butterfly clips with strong gripping power. In addition to holding power, I consider clip size based on my styling goals – smaller clips create delicate accents while larger ones make bold statements.
Tight Top Knot
When temperatures soar, my ultimate rescue hairstyle for medium hair is the tight top knot. This versatile style has saved me during countless heat waves, keeping every strand securely off my face and neck while looking polished and intentional.
Creating a tight top knot
Creating the perfect tight top knot on medium hair requires just a few simple steps. First, I gather my hair into a high ponytail, occasionally pulling out small sections beside my ears for a softer look. A scrunchie works beautifully as a base, providing extra volume underneath the bun. After securing the ponytail, I split my hair into two sections, give them a gentle twist, then wrap them around the scrunchie until I’ve formed a neat knot.
For my fine or thin hair, I’ve discovered that teasing the ponytail before wrapping creates essential volume. Fortunately, securing with bobby pins is key—I typically need 3-4 pins placed strategically around the bun. Of course, a final step I never skip is gently pulling the bun outward to create a fuller appearance.
Top knot for hot days
On hot summer days, the tight top knot truly shines as one of the most practical medium hair summer hairstyles. Naturally, this style continues to maintain its popularity because it keeps hair completely off your face and neck, providing immediate relief from the heat.
What makes the top knot perfect for summer is its versatility—it works for poolside meetups, evening cocktails, or running errands. At times, I’ll even wet my hair first on extremely hot days for an extra cooling effect. The style remains intact despite humidity, making it my reliable choice for all-day summer activities.
Top knot with bangs
Pairing a tight top knot with bangs creates a beautiful frame for your face. I often pull out face-framing pieces or leave my bangs loose for a softer appearance. Alternatively, for a cleaner look, I’ll slick my bangs back into the knot. For shorter bangs, bobby pins placed discretely can incorporate them into the style without awkward bumps.
Half Up Hairstyle
Half-up hairstyles have revolutionized my summer hair routine, offering that elusive balance between practicality and style. This versatile look allows me to enjoy the freedom of wearing my hair down while keeping strands away from my face—perfect for those sticky summer days.
Half up for face-lifting effect
I’ve discovered that strategic half-up styling creates an instant face-lifting effect that’s better than any filter. The key technique involves taking sections from just above my ears and pulling them tightly back. Typically, I use a comb for sleek lines, creating tension as I secure the style. For maximum lifting power, I position the half-up section slightly higher on my head.
One trick that works wonders: after securing my half-up style, I gently pull the hair at my crown for additional height and face-framing magic. Obviously, this technique works even better when I add a slight tease at the roots before styling.
Accessories for half up styles
Half-up styles truly shine when paired with the right accessories. Currently, my collection includes:
- Clear elastics for invisible hold
- Decorative claw clips that add instant elegance
- Velvet scrunchies for texture and interest
- Floral pins for summer garden vibes
- Embellished barrettes that elevate casual looks
Whenever I want to transform my look from day to night, I simply swap my casual clip for something with sparkle or pearls. Admittedly, rabbit ear scrunchies have become my signature accessory—they add playful volume while securing hair perfectly.
Half up for medium hair
Medium hair provides the ideal canvas for half-up styles—long enough to create interest yet short enough to maintain volume. Naturally, this length holds styles better than longer hair, which can often pull and flatten.
For summer occasions, I’ve found that leaving face-framing pieces free creates a softer look while still keeping most hair off my face. Alternatively, incorporating small braids into the half-up section adds texture and interest without requiring much additional styling time.
Baby Braids
Baby braids have captured my heart as the perfect solution for those days when I want a subtle yet stylish touch to my medium hair. These tiny face-framing braids offer that perfect blend of nostalgia and modern chic—ideal for adding character to summer styles without much effort.
How to do baby braids
Creating baby braids is remarkably straightforward. Typically, I start by making a clean middle part about an inch from my hairline. Next, I section off two diagonal triangular pieces of hair (roughly an inch wide) from the part to the front of my hairline. This precise sectioning creates that signature face-framing effect.
The braiding itself is simple—I create a basic three-strand braid on each section, starting close to the root. Naturally, I work the braid downward, keeping tension consistent for a neat finish. For those with layers or curly hair, a small amount of hair wax helps keep everything smooth. Once I reach the ends, I secure each braid with a tiny elastic band.
Baby braids as accessories
What makes baby braids truly versatile is their ability to function as accessories themselves. Occasionally, I’ll incorporate small beads or colorful elastics for added personality. These tiny braids work beautifully with hair worn both up or down—complementing ponytails, buns, or loose waves equally well.
For those days when I’m pressed for time, clip-in baby braids have become my secret weapon. These ready-made accessories attach easily and provide instant style without the braiding effort.
Baby braids for summer
Baby braids shine brightest during summer months. Given that they require no hot tools, they’re perfect for those scorching days when the last thought on my mind is using heat styling. Furthermore, these mini braids effectively keep hair off my face—a blessing during sweaty summer activities.
Their true magic lies in versatility across hair textures. Whether my medium hair is feeling straight, wavy, or curly on any given day, baby braids adapt perfectly. Simultaneously, they provide that bohemian summer vibe that pairs wonderfully with everything from casual beach outfits to more dressed-up summer evening looks.
Ribbon Braids
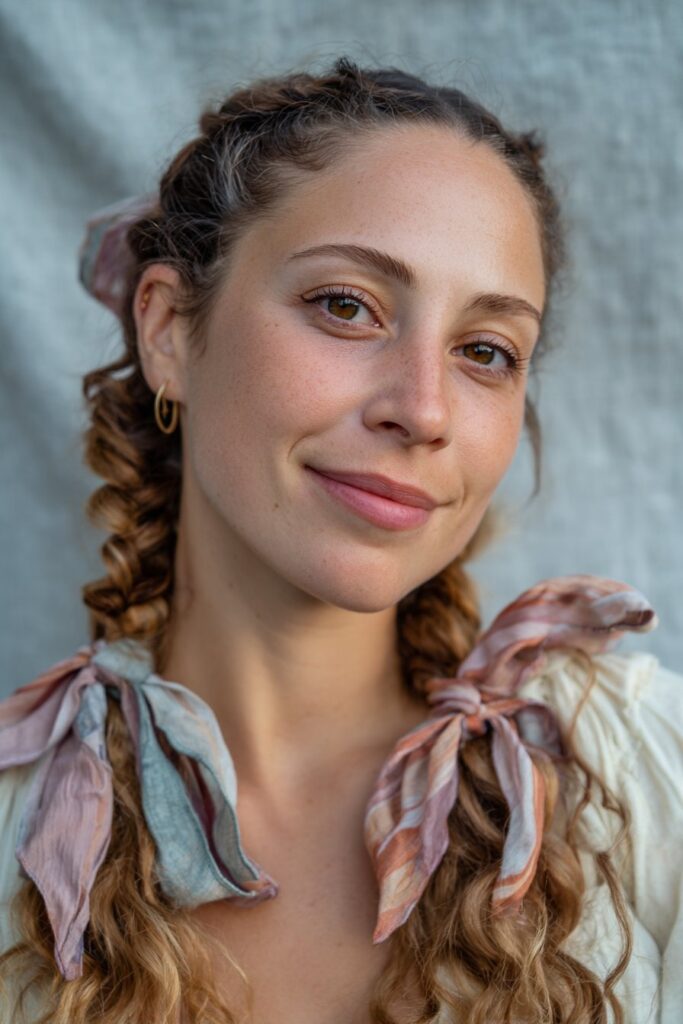
Ribbon braids have totally brightened up my medium hair styling routine this summer. This charming technique adds color and dimension to traditional braids, creating eye-catching styles that keep hair secure while looking absolutely beautiful.
Braiding with ribbons
Incorporating ribbons into braids is surprisingly straightforward. Typically, I start by selecting a ribbon slightly longer than my hair length. For a basic ribbon braid, I secure my hair in a side ponytail, then tie the ribbon around the elastic, leaving one end loose. As I create a three-strand braid, I weave the ribbon through as my middle strand, ensuring it stays aligned with that section throughout.
Alternatively, for a more intricate look, I’ve mastered the four-strand ribbon braid. After creating a high ponytail, I divide my hair into three equal pieces and add the ribbon to the second strand. Starting from the right, I go over the next strand and under the ribbon, then take the far left strand and go under the adjacent strand and over the ribbon. This creates a beautiful pattern where the ribbon shows prominently.
Choosing ribbon colors
The beauty of ribbon braids lies in their customization potential. I’ve found that selecting colors that complement my outfit creates a cohesive look—try using holiday colors like red or green for festive occasions. For summer festivals, vibrant colors add that perfect bohemian touch.
Width matters tremendously—1/8 inch ribbons work beautifully for subtle accents, while wider ribbons create bolder statements. Personally, I love using satin ribbons for a sleek finish or sheer ribbons for a more delicate appearance.
Ribbon braids for events
Ribbon braids shine at summer events where you want something special yet practical. For music festivals, I often create space buns with colorful ribbons woven through for extra flair. These styles effectively keep my medium hair off my neck while looking intentionally styled.
For beach days, ribbon braids withstand humidity better than most styles. Uniquely, they can transition from casual to elegant—simply changing ribbon color or texture completely transforms the look.
Scarf-Wrapped Ponytail
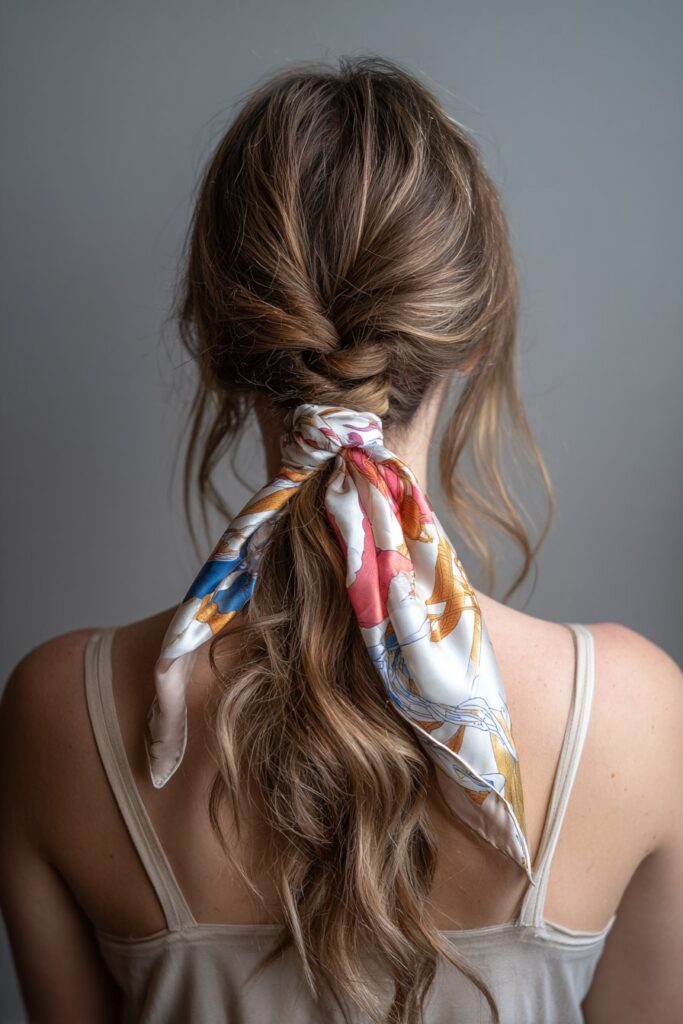
Scarf-wrapped ponytails have completely elevated my summer hair game, offering that perfect blend of practicality and style for medium-length locks. This versatile accessory not only keeps my hair secure but adds instant elegance to an otherwise basic ponytail.
How to wrap a scarf
Creating a scarf-wrapped ponytail is remarkably straightforward. I typically start by pulling my hair into a low ponytail – though this technique works equally well with mid or high positions. Next, I fold my square scarf in half like a triangle, which creates the perfect shape for wrapping. After positioning the ponytail through my elastic, I feed the scarf through from underneath until approximately half appears on each side.
For a classic look, I simply tie the scarf into a knot on top of the ponytail, allowing the ends to hang down alongside my hair. Alternatively, for shorter medium hair, I crisscross the ends underneath the ponytail and repeat for extra security. A small bobby pin hidden beneath can provide additional hold on particularly active days.
Scarf styles for ponytails
The beauty of scarf ponytails lies in their versatility. My favorite style involves tying a single knot around the ponytail base, leaving both ends long beside my hair for a carefree summer look. For more structure, I occasionally wrap the scarf multiple times, crossing front and back while alternating sides until just small pieces remain, then finishing with a bolo knot like a man’s tie.
At times, I create “bunny ears” by threading the scarf through my ponytail, ensuring the tail ends hang underneath, then bringing them up above to tie at the top. This playful style works beautifully for beach days or casual outings.
Scarf ponytail for medium hair
Medium-length hair provides the perfect canvas for scarf ponytails. Unlike shorter cuts where scarves might overwhelm, or longer styles where they get lost, medium hair creates ideal proportions. Notably, this style instantly transforms second or third-day hair into something that looks intentionally polished.
On humid summer days, this technique keeps my medium hair secure while adding that pop of color that elevates my entire look. As a bonus, silk scarves reduce friction, preventing breakage while adding instant sophistication to medium hair summer styles.
Ghost Layered Hair
Ghost layers have become my secret weapon for adding invisible dimension to my medium hair this summer. This ingenious cutting technique creates movement and texture without sacrificing length—perfect for those of us who want volume without obvious layers.
What is ghost layering
Ghost layering is a cutting technique created by hairstylist Ramòn Garcia that adds subtle, practically undetectable layers within the hair. Uniquely, these layers are hidden beneath the top section, creating the illusion of a one-length haircut. As one stylist explains, “Ghost layers are basically layers in a haircut that you can’t actually see”.
The technique involves lifting normal sections and weaving rather than cutting in one hard line. Typically, the stylist will twist that section and slide scissors through or chop into the weave section. This method creates a look that appears one-length at first glance but contains light layers within the hair—they remain invisible until movement reveals them.
Ghost layers for volume
Ghost layers excel at creating volume and movement without sacrificing length or thickness. Remarkably, these hidden layers “release weight so hair can have more fluid movement when styled”. The shorter, thinned-out pieces delicately “push out” the top layer of hair, adding fullness in a less noticeable way than classic layers.
Throughout summer, I’ve noticed my medium-length hair maintains better body with ghost layers. The technique works by:
- Removing just enough weight to allow hair to move freely
- Creating subtle movement beneath the surface
- Maintaining blunt ends for a thicker appearance
- Adding lift at the roots without obvious layering
Ghost layers for thin medium hair
For those of us with fine or thin medium hair, ghost layers are absolutely transformative. Fortunately, they add movement and volume without thinning out the hair. Unlike traditional layering which can make fine hair appear stringy at the ends, ghost layers preserve thickness while adding dimension.
Ideally suited for medium hair that feels flat or lifeless, this technique has become increasingly popular among those seeking volume without sacrificing density. “Ghost layers are a big hit with my clients that have thinner hair and want a soft, seamless blend,” notes one expert. Necessarily, the ends remain blunt, creating a clean line that enhances thickness throughout the hair.
Conclusion
Summer truly transforms our relationship with our hair. After experimenting with these 17 hairstyles throughout countless beach days, backyard barbecues, and evening soirées, I’ve found medium hair offers unmatched versatility during the hottest months.
The beauty of these styles lies in their simplicity. Whether you have five minutes before rushing out the door or thirty minutes to prepare for a special event, options like the French bob or twisted braids adapt perfectly to your time constraints. Most importantly, each style serves the essential summer purpose of keeping hair off your neck while looking intentionally polished.
What makes medium hair so perfect for summer styling? The length provides enough substance to create interesting textures without the weight and heat of longer styles. Ghost layers add movement, butterfly clips bring playfulness, and bandanas offer both style and sun protection – all working harmoniously with medium-length locks.
Accessories undoubtedly elevate these simple styles. A colorful scarf transforms a basic ponytail into something special, while ribbon braids add that perfect pop of color for summer celebrations. These small additions make a tremendous difference with minimal effort.
My personal favorites change depending on the occasion. The slicked-back look has saved me during countless humid days, while beachy waves remain my go-to for casual gatherings. The 90s blowout, though requiring slightly more effort, creates that perfect bouncy finish for special summer evenings.
Though styling might seem overwhelming initially, the beauty of these options lies in their adaptability. You can start with simpler styles like the half-up look or baby braids, then gradually experiment with more intricate options as your confidence grows.
These summer hairstyles have completely changed my relationship with my medium hair during hot weather. Rather than dreading the seasonal humidity and heat, I now see summer as the perfect opportunity to showcase versatility and creativity. After all, the best summer hair combines both style and function – keeping you cool while looking effortlessly chic.
Which summer style will you try first?