
Dance competition hairstyles can make or break your performance—I’ve learned this lesson the hard way! After years of bobby pins flying mid-routine and spending countless backstage hours fixing fallen buns, I’m thrilled to share what actually works.
Since 2022, we’ve seen classic ballet buns and high ponytails dominate the competition scene, and these timeless styles are certainly continuing strong into 2025. As dancers, we know that keeping hair secured is about more than just looking polished—it’s about maintaining visibility during technical movements and complementing our costumes. From easy dance competition hairstyles like French braids to more elaborate dance competition hairstyles with braids like crown and halo styles, there are options for every routine. I’ve personally tested these looks on dancers with all hair lengths and found that dance competition hairstyles for long hair require special attention to stay secure through jumps and turns. However, with the right techniques, even the most elaborate competition dance hairstyles can withstand an entire day of performances.
In this article, I’ll walk you through 15 stunning dance buns and styles that not only look beautiful but also stay perfectly in place—even through that triple pirouette sequence! Plus, I’ll share my personal backstage tricks that have saved countless performances over the years.
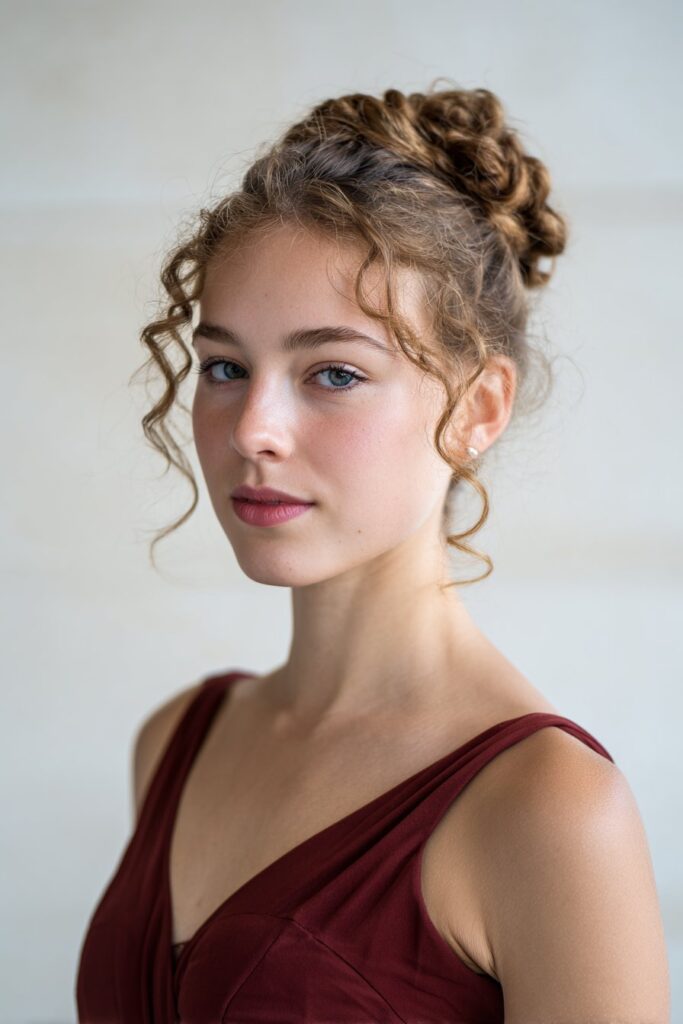
Classic Ballet Bun
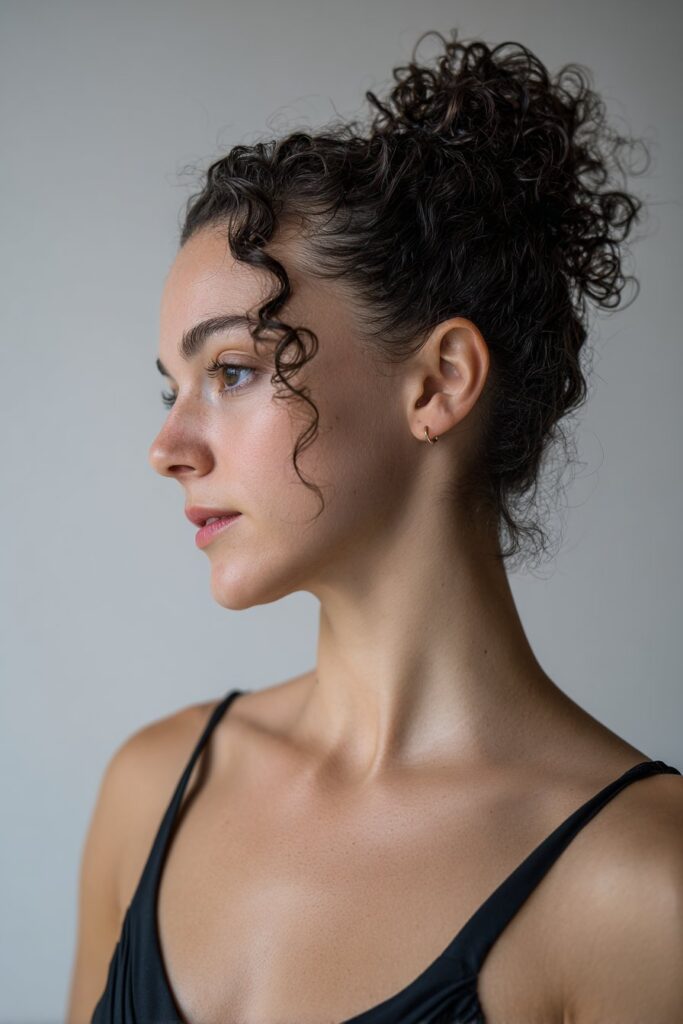
The Classic Ballet Bun remains the gold standard for dance competition hairstyles after all these years—primarily because it’s both elegant and incredibly functional. When I first started competing, I struggled with keeping my hair in place until a senior dancer showed me the proper technique.
Classic Ballet Bun styling tips
Creating a perfect ballet bun begins with the right foundation. First, gather these essentials:
- Strong elastics with rubber grips
- U-shaped pins (not bobby pins)
- Hair net matching your hair color
- Tail comb for sectioning
- Boar bristle brush for smoothing
- Gel spray or light hairspray
Start by brushing your hair thoroughly to remove tangles. Furthermore, slightly damp hair (not freshly washed) provides better grip. Position your ponytail at the crown where there’s a slightly flat section of your skull—this creates an elegant line that elongates your neck while dancing. Twist your ponytail into a tight rope, then wrap it around the elastic in the direction you twisted.
Unlike a casual topknot, the classic ballet bun requires methodical pinning. Insert U-shaped pins downward into the bun, then direct them under and back up to secure the shape. For thicker hair, I recommend splitting your ponytail into two sections before wrapping to avoid the dreaded “doorknob” effect.
Why the Classic Ballet Bun stays secure
The secret to a competition-worthy ballet bun that survives jumps and turns lies in its structural integrity. Essentially, the combination of a tight base ponytail, proper twisting technique, and strategic pinning creates a foundation that withstands movement. The hair net is particularly crucial—it distributes tension evenly while containing all hair strands.
What many dancers overlook is the importance of pin placement. Pins should grab hair from the bun, then anchor into the base near your scalp in a clock-like pattern (12, 3, 6, and 9 o’clock positions).
Belle Hathaway’s backstage bun trick
My competition day secret? I double-net my buns. After creating my initial bun with one hair net, I spray lightly with hairspray, smooth any flyaways with a boar bristle brush, then add a second hair net. This creates an almost impenetrable seal that’s saved me during countless performances.
Another personal trick: I slightly dampen the hairline area with water before applying gel spray—this prevents the crunchy look while maintaining security. Your bun should feel like an extension of your head, not a heavy attachment that shifts during movement.
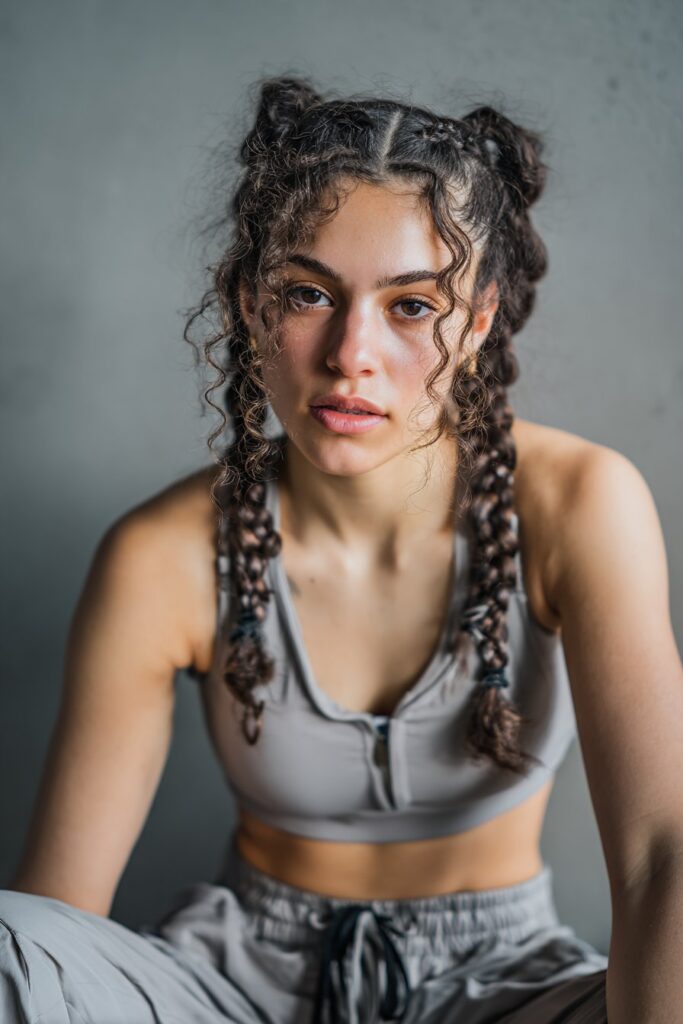
Braided Ballet Bun
The Braided Ballet Bun elevates the traditional ballet bun by adding texture and visual interest—making it one of my absolute favorite dance competition hairstyles for performances where both security and style matter equally.
How to create a Braided Ballet Bun
For the basic braided bun, I start with clean, slightly damp hair which helps maintain the style throughout a long competition day. Here’s my foolproof method:
- Gather all your hair into a high ponytail, securing it firmly with a strong elastic
- Divide the ponytail into two equal sections
- Braid each section separately—I prefer standard three-strand braids for beginners
- Secure the ends of both braids with small elastics (preferably matching your hair color)
- Wrap one braid around the base of your ponytail, pinning as you go
- Wrap the second braid in the opposite direction, tucking the end under
- Secure with additional pins, placing them strategically around the bun
Alternatively, I sometimes create a center part, braid two sections from the roots, then twist and pin them into a bun. This approach distributes tension more evenly across the scalp, reducing breakage along the hairline—a game-changer for those long competition seasons.
Best occasions for Braided Ballet Buns
The braided ballet bun truly shines in romantic or lyrical performances where adding character to your appearance enhances storytelling. Despite its elaborate look, this style remains competition-appropriate for nearly all dance styles.
I’ve found this style especially valuable for dancers with longer, thicker hair who struggle with traditional buns feeling too heavy or pulling excessively. The braided structure distributes weight more evenly around the head, making it comfortable even through multiple performances.
Moreover, this style transitions beautifully from daytime competitions to evening galas or showcases—I’ve slept in mine and refreshed it easily the next morning.
Belle’s favorite braid accessories
My competition kit always includes these essentials:
- Small, clear or dark-colored elastics that disappear into my hair
- Extra-long U-shaped pins for securing thicker braided sections
- A travel-sized conditioning spray to fight tangles (crucial for refreshing braids between performances)
- A fine-tooth tail comb for clean partings and smoothing flyaways
The most game-changing accessory? Spray hairspray directly onto braids before wrapping them—this texture-building trick prevents slipping and keeps every strand locked in place throughout your routine.
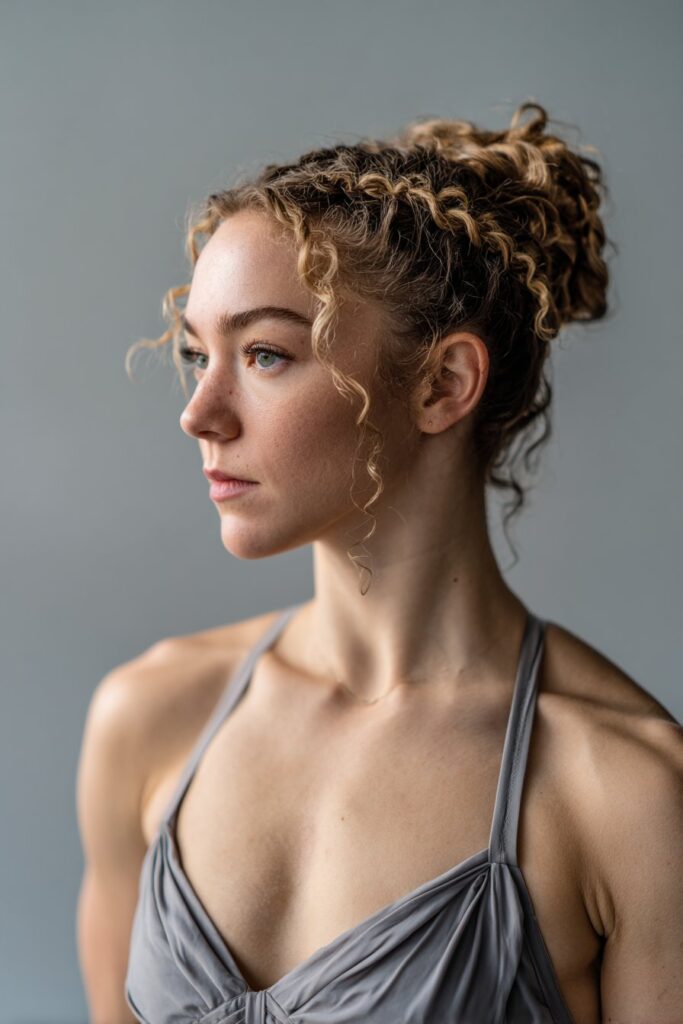
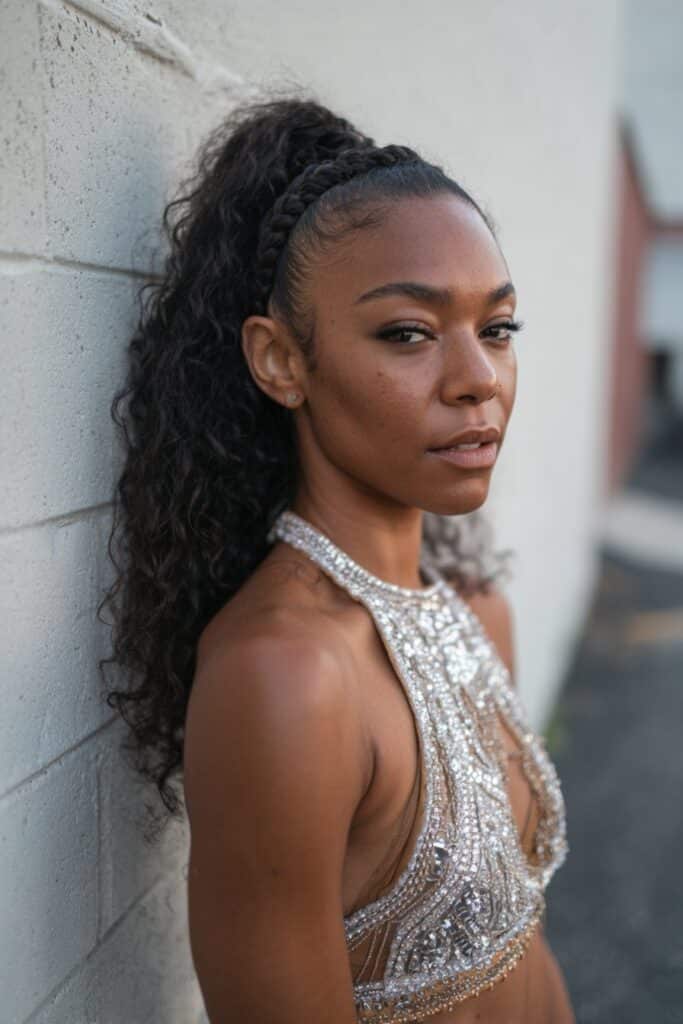
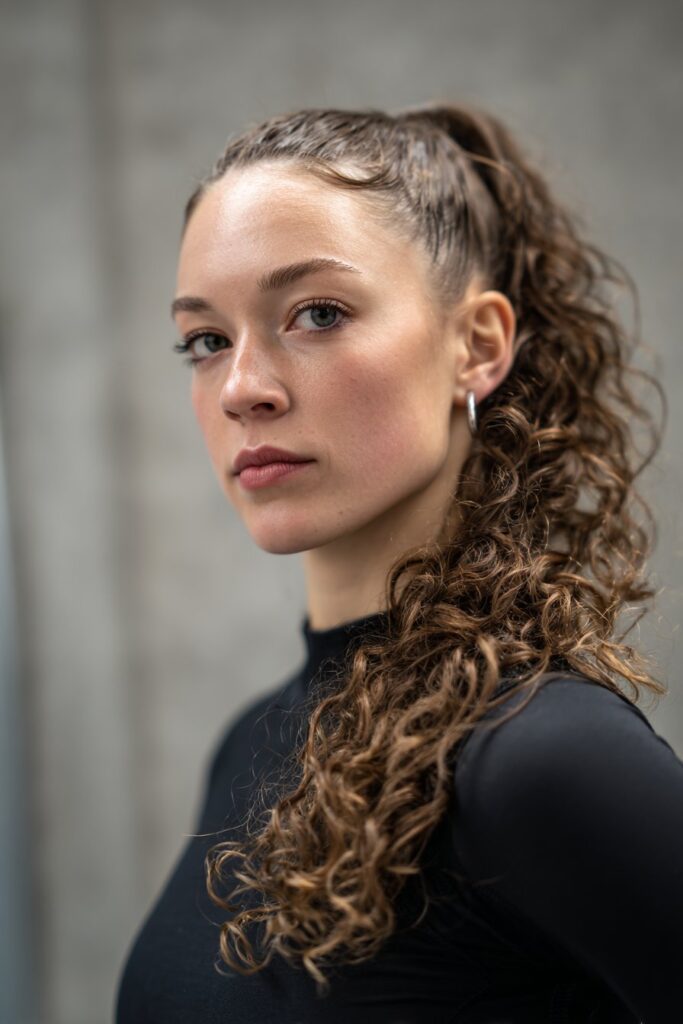
High Sleek Ponytail
For modern dance styles that demand both movement and precision, a High Sleek Ponytail offers the perfect combination of security and sleekness. This style has become my go-to recommendation whenever dancers need their face fully visible during technically demanding routines.
High Sleek Ponytail for modern routines
The high sleek ponytail excels specifically for jazz, hip-hop, and contemporary performances where hair needs to enhance rather than distract from movement. I’ve found this style particularly effective for routines with head isolations and sharp movements—the ponytail accentuates each motion like an extension of your body.
Plus, unlike buns, a sleek ponytail allows for dramatic hair movements that can emphasize dynamic choreography. The height of your ponytail matters tremendously; ideally, it should create a diagonal line from your chin when viewed from the side, creating that perfect competition-ready silhouette.
How to secure a High Sleek Ponytail
Creating a competition-worthy high ponytail requires precision:
- Begin with clean, detangled hair (slightly damp works best)
- Apply a small amount of gel or water around the hairline and base
- Brush hair upward using a bristle brush, creating tension as you go
- Smooth the sides carefully with a fine-tooth comb
- Secure with at least two strong hair elastics (matching your hair color)
- Spray hairspray liberally around the base and smooth again
The foundation of a truly secure ponytail lies in creating maximum tension as you brush upward. Initially, I recommend using a wide-tooth comb to remove tangles, subsequently switching to a fine-tooth comb for smoothing. For thicker hair, dividing into two separate ponytails and then combining them creates extraordinary security.
Belle’s Pro Tip for flyaways
My competition secret? A toothbrush! I spray a clean toothbrush lightly with hairspray and gently brush down any stubborn flyaways, focusing primarily on the hairline and nape areas. This technique tames even the most rebellious baby hairs without creating that crunchy, over-sprayed look.
For dancers with textured or frizzy hair, I recommend applying a tiny amount of leave-in conditioner or hair oil before styling, then layering gel over it. Accordingly, this creates a sleek base while maintaining shine—a judge-pleasing combination.
Remember that a truly perfect high ponytail shouldn’t bounce or shift during your routine. If you can secure it firmly enough to feel like an extension of your head rather than an attachment, you’ve mastered this essential competition hairstyle.
Braided High Ponytail
Taking a classic high ponytail to the next level with braiding creates my favorite style for jazz and contemporary dance competitions—stylish yet incredibly practical for those fast-paced, dynamic routines.
Steps to braid a high ponytail
The perfect braided high ponytail starts with strong foundations. Here’s my step-by-step approach:
- Pull all your hair into a high ponytail positioned at the crown of your head
- Secure with a strong elastic band, making sure the sides are smooth
- Split your ponytail into three equal sections
- Cross the left section over the middle, then right over the new middle
- Continue this pattern until you reach the end of your hair
- Secure with another elastic that matches your hair color
- Gently pull on the edges of your braid to add volume and texture
For dancers with thicker hair, I recommend adding a small amount of styling gel or spray wax to your fingers as you braid. This creates just enough grip to keep strands from slipping out during energetic sequences.
Why it works for energetic routines
The braided high ponytail truly shines during high-energy performances where your hair needs to move yet remain completely secure. In fact, this style accentuates movement during modern dance competition routines, acting like an exclamation point that emphasizes your choreography.
What makes this style particularly effective is how it combines the youthful, fun energy of a high ponytail with the security of a braid. The braid prevents tangling that might occur with loose hair while still allowing for that satisfying hair movement judges love to see in contemporary and jazz performances.
Primarily, I recommend this style for routines with lots of jumps and turns—the braid’s structure maintains its shape without pulling or loosening even through the most demanding choreography.
Belle’s favorite hair ties
Through years of competition experience, I’ve learned that the right accessories make all the difference:
My must-haves include strong black elastics with rubber grips that prevent slipping. These everyday items (available at most stores) outperform fancy boutique options every time.
For a finishing touch that coordinates with costumes, I love using colored ribbon ties that wrap around the base of the ponytail. These add a polished look while providing extra security.
Nevertheless, the most important thing isn’t brand but strength—your elastic should be tight enough to feel secure without causing headaches after hours of wear.
French Braid

French braids have become my ultimate secret weapon for dance competitions where elegance meets functionality—striking that perfect balance between sophistication and security that judges notice immediately.
French Braid for elegance
Throughout my competition career, I’ve found French braids truly versatile for almost any dance style. They work beautifully for classical pieces yet feel equally appropriate for contemporary routines. What makes them so special is how they create clean lines while keeping every strand secure.
The French braid essentially elevates a regular three-strand braid by incorporating additional hair as you go. This technique distributes tension evenly across the scalp, making it remarkably comfortable even during all-day competitions.
I’ve noticed judges appreciate how French braids frame the face without hiding it—allowing them to see your expressions fully. For classical performances especially, this hairstyle creates a timeless, polished appearance that complements traditional choreography. Meanwhile, for contemporary or lyrical pieces, French braids offer that perfect balance between control and artistic expression.
How to keep it tight all day
The biggest challenge with French braids at competitions is preventing loosening, especially at the nape of the neck. My foolproof technique involves having the dancer look down when I reach the halfway point. This simple adjustment maintains tension exactly where braids typically loosen.
For those stubborn baby hairs or layered ends that escape, I always keep bobby pins matching your hair color in my emergency kit. Discreetly tuck any flyaways for that perfectly polished competition look.
Additionally, slightly dirty hair holds braids significantly better than freshly washed strands. Whenever possible, I recommend braiding day-old hair—the natural oils provide grip that keeps everything in place through multiple performances.
Belle’s go-to braid gel
For my competition toolkit, nothing beats a lightweight braid gel applied to damp hair before styling. I use just enough to coat my fingers, working it through from roots to ends. This creates grip without heaviness or crunchiness.
Alternatively, a texturizing powder works wonders for dancers with fine hair—sprinkle it sparingly along the part line and work through with fingertips before braiding. This creates instant grip so your braid won’t slip even during the most vigorous routines.
For finishing, I mist a flexible-hold hairspray onto a clean toothbrush, then gently brush any flyaways into submission. This technique gives you that sleek competition-ready look without the helmet-head effect of heavy products.
Double Dutch Braids
Double Dutch braids offer that perfect combination of wow-factor and functionality—ideal for dance competitions where you need a style that stays put through multiple performances yet looks intricate enough to impress judges.
Creating symmetrical Dutch braids
Unlike French braids where strands cross over, Dutch braids create that striking raised look because strands cross under. Here’s my foolproof method for creating perfectly symmetrical Dutch braids:
- Part your hair down the middle all the way to the nape of your neck, creating two even sections
- Clip one side away while working on the other
- Take a section at the front and divide into three equal strands
- Begin crossing strands under rather than over—this is the key difference
- Add hair from both sides as you braid downward, always crossing under the middle
- Keep tension consistent throughout to prevent bagginess
- Secure with an elastic that matches your hair color
The most challenging part? Keeping the second braid identical to the first! Hence, I always check positioning in a mirror to ensure symmetry. Throughout competitions, I’ve found slightly damp hair works best for grip and control.
Why Dutch braids are great for long hair
Throughout years of competition experience, I’ve discovered Dutch braids work exceptionally well for dancers with long hair. Primarily, they distribute weight evenly across the head, preventing that heavy pulling sensation during all-day events.
Dutch braids also create a practical solution for dancers with layers or different hair lengths. The under-crossing technique naturally captures shorter pieces that might escape in other styles, making them ideal for dancers growing out bangs or layers.
Additionally, these braids transition beautifully into other styles—you can twist them into buns for classical performances or leave them as pigtails for more contemporary routines.
Belle’s tip for volume
My signature technique for competition-ready Dutch braids? “Pancaking!” After completing both braids, I gently tug on the outer edges of each section to create fullness. The key is pulling from the middle out, one small section at a time, rather than yanking on the same piece repeatedly.
For maximum volume, I often take breaks during braiding—creating about 6 inches, then stopping to pull apart before continuing. This technique ensures consistent volume throughout rather than just at the top.
For dancers with fine or silky hair, I recommend adding texturizing powder or dry shampoo before braiding. This creates immediate grip that helps your pancaked braids maintain their fullness throughout multiple performances.
Snake Braid
The Snake Braid captivates me every time I use it for dance competitions—looking intricate yet requiring surprisingly little technique. This eye-catching style has saved many performances where I needed something special without spending hours on styling.
What is a Snake Braid?
Despite its complex appearance, a snake braid is remarkably straightforward to create. Essentially, it’s a regular braid that’s been manipulated to create a snake-like pattern along the hair. To create one:
- Start with a standard three-strand braid
- After completing the braid, hold the middle strand firmly
- Use your other hand to push the braid upward toward the scalp
- Gently adjust the compressed braid to reveal the snake-like pattern
Although it looks like it would require advanced weaving skills, this style takes barely more time than a standard braid. I often call it a “push braid” instead—the name better describes how it’s actually created.
Best for lyrical or romantic routines
Snake braids work beautifully for dance competition hairstyles during slower-tempo performances. Primarily, I recommend them for lyrical or romantic routines where elegance matters but you don’t want hair whipping across your face.
What makes this style ideal for these performances is how it manages to look both elegant and relaxed simultaneously. For many of my dancers performing emotional pieces, the snake braid creates the perfect esthetic without distracting from facial expressions.
The most popular variation involves creating two smaller snake braids from each temple, joining them together at the back while wearing the rest of your hair down. This half-up approach balances security with the free-flowing movement judges love in romantic choreography.
How Belle adds sparkle to this look
My secret for competition-ready snake braids? I never pull them too tight! Allowing a slight droop creates that perfect relaxed elegance. For performances, I secure the ends with clear elastics that disappear against any hair color.
To elevate this dance competition hairstyle with braids for important showcases, I like adding subtle sparkle. Small rhinestone pins placed strategically along the curves of the braid catch stage lighting beautifully without overwhelming the overall look.
Notably, I find that slightly angling snake braids backward creates a more flattering frame around the face—preventing that odd bumpy appearance that straight-across braids sometimes create.
Crown Braid
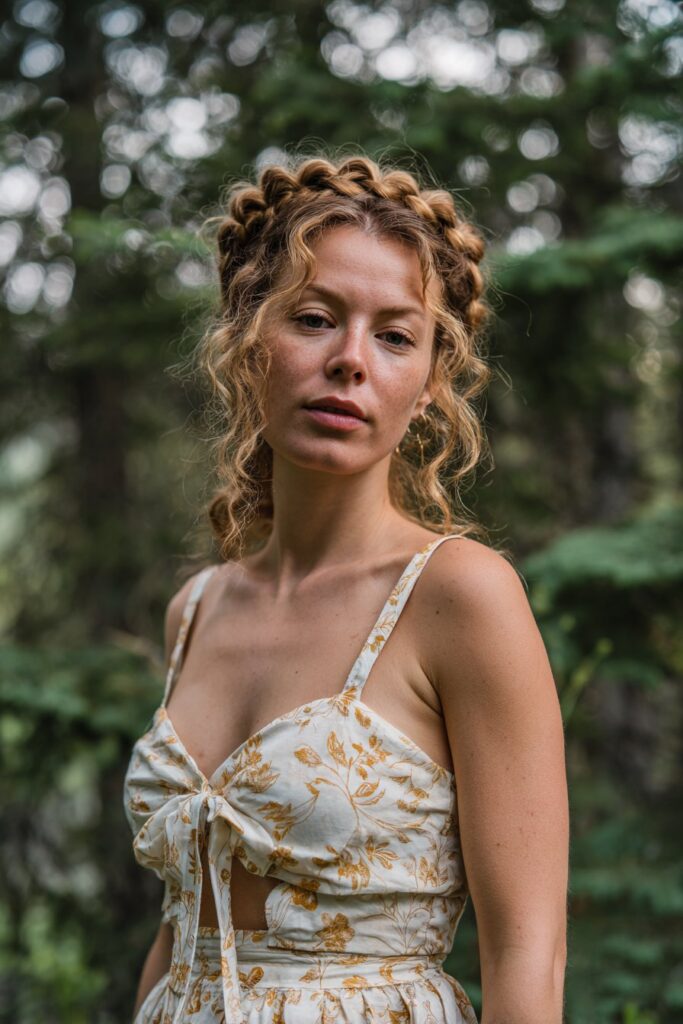
The regal elegance of a Crown Braid makes it my secret weapon for classical performances where sophistication matters as much as security. Indeed, this halo-like style elevates any dance costume while keeping hair completely out of your face throughout intense routines.
How to wrap a Crown Braid
Creating this intricate-looking style requires patience but isn’t as complex as it appears:
- Begin with a deep side part and pick up a section of hair near the part
- Split this section into three equal strands and start a Dutch braid (crossing strands under instead of over)
- As you braid around your head, add hair only from above the braid, keeping the style clean and tight
- Continue braiding while angling around your head like a halo
- Once you reach the opposite ear, incorporate all remaining hair
- Finish braiding normally while maintaining the angle around your head
- Secure with a small clear elastic, then wrap the loose end across your head alongside the beginning of the braid
- Pin the ends discreetly behind the Dutch braid using bobby pins
For maximum security, I recommend tugging gently on the edges of the braid for added volume—this creates a fuller look while distributing tension more evenly.
Why it’s perfect for classical performances
Crown braids excel in classical performances primarily because they create a clean, polished appearance judges appreciate. This style frames your face beautifully without hiding your expressions—crucial for ballet and other traditional forms where appearance scores matter.
The structured nature of crown braids makes them particularly great for cheer, gymnastics, ballet, and other sports due to their tight braiding technique. Furthermore, they distribute weight evenly around your head, preventing that uncomfortable pulling sensation during long competition days.
Many dancers don’t realize crown braids actually help maintain proper head positioning during turns and balances—the even weight distribution serves as a subtle reminder of alignment.
Belle’s accessory picks
My competition toolkit for crown braids always includes:
Small clear elastics that disappear against any hair color, sturdy bobby pins in matching shades, and a lightweight hairspray applied before creating the braid for extra grip. Consequently, the style stays secure through even the most vigorous routines.
For special performances, I love adding delicate floral pins along the crown—these catch stage lighting beautifully without overwhelming the classic look. Above all, ensure any accessories are thoroughly secured, as loose decorations during performance can be disastrous!
Halo Braid

Halo braids remain my ultimate go-to for dance competitions where I need a show-stopping yet practical style. First and foremost, these elegant wrap-around braids create that ethereal, regal effect judges notice immediately.
Difference between Crown and Halo Braid
Many dancers confuse these similar styles, given that both create a braided effect around the head. To clarify:
- Crown braids typically start with a deep side part, following the natural hairline across the forehead and wrapping around only the upper portion of the head
- Halo braids completely encircle the head like an actual halo, usually sitting lower on the head
The most significant difference lies in their starting point and positioning. Crown braids often incorporate hair only from above the braid, whereas halo braids generally use all your hair in one continuous braid that wraps fully around your head. In addition, halo braids can be styled as either a single wrap-around for elegant simplicity or a double wrap-around for more intricate appearances.
How to secure a Halo Braid
Creating a competition-worthy halo braid requires precision:
- Start with day-old hair rather than freshly washed for better grip
- Divide chosen section into three strands for traditional braiding
- Begin Dutch-braiding (crossing under rather than over) around your head
- Maintain consistent tension throughout to prevent loosening
- Continue braiding until you’ve encircled your entire head
- For competition security, use an invisible stitch with needle and thread rather than pins
The most challenging part occurs at the back of the head—I often find myself braiding backwards and blindly! For long-lasting security, I tuck the end piece carefully and secure it before connecting both ends of the braid.
Belle’s favorite halo braid moment
My most memorable halo braid moment came during a lyrical competition where I needed something both elegant and completely secure. To add subtle dimension, I gently pulled sections of the braid outward after completing it—creating that soft, lived-in texture judges loved. The style lasted through three performances, proving its remarkable staying power!
For competitions with costume changes, halo braids offer exceptional versatility—they transition beautifully between classical and contemporary pieces without needing complete restyling.
Pull-Through Braid
Pull-through braids aren’t actually braids at all—a styling secret that makes them perfect for dance competitions. This illusion-based technique creates stunning volume while providing the security dancers need throughout long competition days.
Step-by-step Pull-Through Braid
Creating this eye-catching style requires just elastics and patience:
- Start with a small ponytail at the crown of your head
- Secure a second ponytail about an inch below the first
- Split your top ponytail into two equal sections
- Pull the second ponytail up through the middle of those sections
- Create a third ponytail incorporating the split sections from the first
- Continue this pattern until you reach the nape of your neck
- For the remaining length, place elastics every few inches
- Split each section, pull the next section through, and secure
Throughout my competition career, I’ve found this technique works on virtually any hair texture—whether fine or thick. Plus, it holds layers exceptionally well, making it ideal for dancers growing out shorter cuts.
Why it looks like a mohawk
The distinctive mohawk appearance comes from the central placement of ponytails coupled with the volume created when you pull each section apart. For dancers, this creates a striking profile that judges immediately notice.
Many dancers have told me they love how this style creates dramatic height without requiring teasing or backcombing. The mohawk effect comes primarily from the vertical line of ponytails positioned down the center of the head.
Furthermore, this style photographs beautifully from all angles—an important consideration for competition documentation and team photos.
Belle’s tip for fluffing
My game-changing secret for spectacular pull-through braids? Texturizing powder! I dust a small amount directly onto each section before gently pulling the loops outward. This creates massive volume without weakening the structure.
The key is pulling systematically—start from the bottom and work upward, tugging gradually at the edges of each section. I personally call this “pancaking” the braid. Thereafter, you’ll achieve those big, fluffy sections that catch stage lighting perfectly.
Prior to competitions, I’ve found that practicing this style at least once helps perfect your fluffing technique. Even better, this style can last multiple performances with minimal touch-ups—just carry a travel-size texturizing spray for quick refreshes.
Low Twisted Bun
The elegance of a Low Twisted Bun makes it my reliable choice for lengthy ballet performances where neck positioning matters most. First and foremost, this style offers a perfect balance of security without adding unnecessary weight or tension.
How to create a Low Twisted Bun
Creating this essential ballet style requires precision and the right technique:
- Begin by brushing your hair thoroughly, removing all tangles
- Section your hair by clipping the front sections forward and out of your way
- Create a clean middle part (unless your instructor specifies otherwise)
- Position your ponytail approximately 1-2 inches above where your hairline ends at the neck
- Take a section from behind each ear and twist inward toward the center
- Secure both twisted sections together into a ponytail base
- Loop your ponytail through the base to create a twisted effect
- Secure with pins, placing them strategically around the bun
- Wrap a hairnet over the bun for flyaway control
- Finish with a light mist of hairspray
For dancers with thicker hair, I recommend dividing your ponytail into two sections, twisting each separately, and coiling in opposite directions around the hair tie. In contrast to higher-positioned buns, keeping the twisted bun low requires careful attention to placement—too low and you’ll restrict neck movement.
Why it’s ideal for ballet
The low twisted bun provides unique advantages for ballet performances. Unlike higher buns, this positioning helps manage head-weight without requiring extra posture discipline. For this reason, dancers with longer, heavier hair often prefer this style.
Additionally, many dancers with naturally long necklines choose low buns to create balanced proportions. In my experience coaching younger dancers, those still developing head control find the low positioning helps them maintain proper alignment during turns and extensions.
Belle’s favorite bun pins
My competition kit always includes three types of pins for foolproof low buns:
Two-inch hairpins work perfectly for most dancers, whereas those with thicker hair benefit from longer three-inch versions. U-shaped hairpins with crimped waves provide significantly stronger hold than standard bobby pins—crucial for maintaining shape through multiple performances.
For securing flyaways, I use smaller bobby pins around the edges after applying a light gel spray. Alternatively, a fine-tooth tail comb helps smooth any bumps before final pinning. Remember that the right pins make all the difference between a bun that lasts all day and one that requires constant touch-ups.
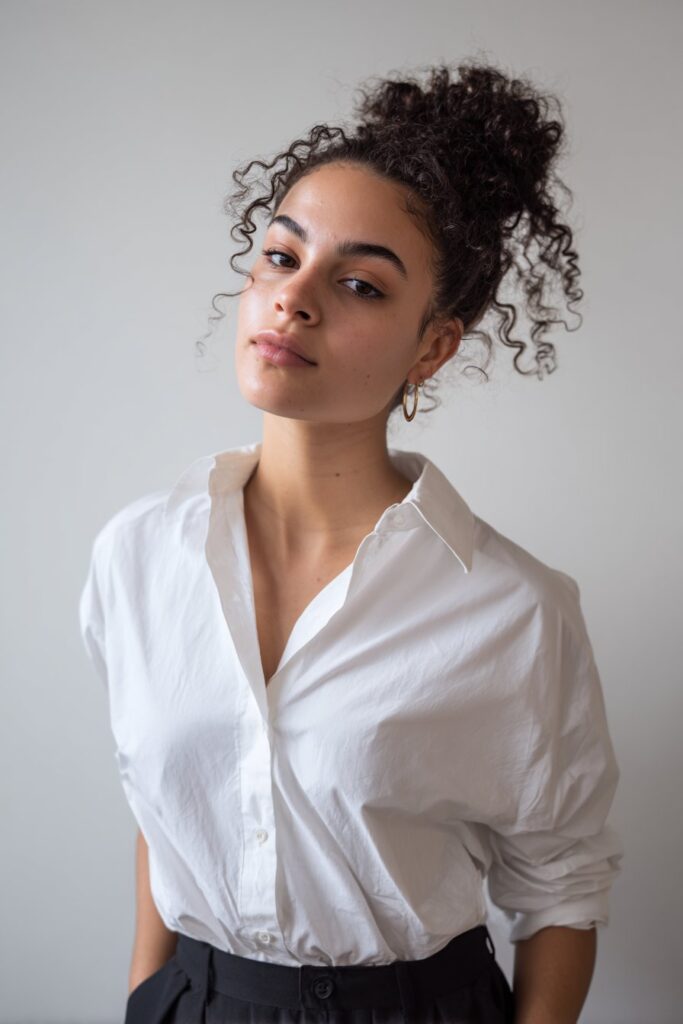
Top Knot Bun
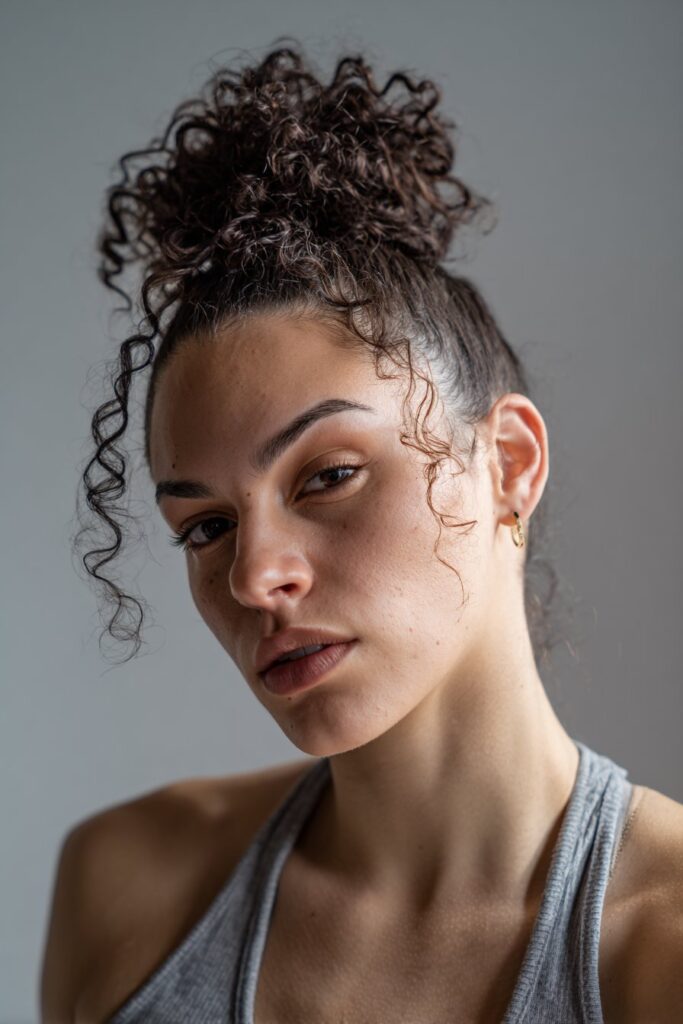
Bursting with energy and attitude, the Top Knot Bun perfectly complements the sharp movements and dynamic style of jazz and hip-hop routines. I discovered this versatile style early in my competition days, and it’s remained a staple in my hairstyling arsenal ever since.
Creating a Top Knot for jazz or hip-hop
For starters, the positioning of your top knot is crucial—it should create a diagonal line from your chin to the crown of your head when viewed from the side. This placement elongates your neck while maximizing visual impact during performances. Here’s my foolproof method:
- Flip your head upside down and gather all hair at the crown
- Create a secure ponytail base with a strong elastic
- Split thicker hair into two sections for better control
- Twist each section before wrapping around the base
- Secure with U-shaped pins, inserting straight in then redirecting
My secret for fuller-looking top knots? Don’t be afraid to use fake hairpieces! Even professionals use them. Simply add the hairpiece as you create your bun or twist it into your real hair at the ponytail stage. A cheap piece from any beauty supply store works perfectly.
How to keep it from bouncing
The key difference between a casual top knot and a competition-worthy version lies in the security. Primarily, your top knot should feel like part of your head, not a heavy attachment that shifts during movement.
To prevent bouncing during energetic routines, I recommend:
- Creating tension as you form the ponytail base
- Using multiple securing techniques (elastics plus pins)
- Flattening the hair along the outside of the ponytail holder
- Tucking any loose ends under with additional pins
- Having your dancer shake their head vigorously as a test
Belle’s styling spray pick
My competition kit always includes Belle’s Hair Peppermint Moisturizing Spray—a 100% natural formula that provides hold without stiffness. Naturally, the lightweight formula moisturizes without adding weight, making styling easy while preventing flyaways. The refreshing peppermint sensation also soothes the scalp, reducing post-shampoo itching that can distract during performances.
Of course, for extra security on competition days, I apply the spray in layers—first to dampen hair slightly before styling, then again after completing the top knot to lock everything in place.
Half-Up Braided Style
Half-up styles have rescued countless dance routines throughout my career—combining the freedom of loose hair with the security of braids creates that perfect middle ground for contemporary performances.
How to combine braids with loose hair
Creating this versatile style begins with proper sectioning. First and foremost, I separate the top portion of hair from ear to ear across the crown. For thicker hair, I use regular French braids rather than Dutch braids, as they lie flatter against the head. The key technique involves creating two separate braids from each temple that meet at the back:
- Braid each side section individually, securing with clear elastics
- Connect both braids at the back, twisting them into each other
- Secure with crossed bobby pins—the first pin going one direction, the second crossing over it for maximum hold
What makes this style special is how I can adjust the looseness. For formal competitions, I keep the braids tight; for contemporary pieces, I gently pull the edges for texture and volume.
Best for contemporary routines
Half-up braided styles shine in contemporary routines where emotional expression is paramount. The loose hair provides that coveted movement quality judges look for, while the braided sections keep hair securely away from your face.
Naturally, this balanced approach works exceptionally well for routines involving floor work or dramatic head movements. The braided sections stay put while the loose hair emphasizes your choreography. Plus, unlike fully secured styles, this look transitions beautifully from stage to awards ceremonies without needing complete restyling.
Belle’s favorite half-up look
My signature half-up style incorporates teasing at the crown before braiding. This creates impressive volume that photographs beautifully under stage lighting. To ensure this look lasts through multiple performances, I always:
- Apply texturizing powder to clean hair before styling
- Use day-old hair whenever possible for better grip
- Finish with a light flexible-hold hairspray rather than heavy products
In my experience, the half-up braided style has been my most versatile competition hairstyle—elegant enough for classical pieces yet relaxed enough for contemporary works.
Bubble Ponytail
Playful yet polished, the Bubble Ponytail brings whimsical flair to dance competitions while maintaining remarkable security. As someone who’s styled hundreds of dancers, I’ve found this eye-catching option perfect for those wanting something different from traditional buns or braids.
How to make a Bubble Ponytail
Creating this fun style requires minimal supplies but delivers maximum impact:
- Begin with a high, secure ponytail positioned at your crown
- Apply a small amount of gel or texturizing spray for grip
- Place a second elastic about 2 inches below your first one
- Gently pull the hair between elastics outward to create your first “bubble”
- Continue adding elastics down the length of your ponytail
- Pull each section carefully to form evenly-sized bubbles
- Secure any flyaways with hairspray and a clean toothbrush
First of all, slightly dirty hair works better than freshly washed for this style. For dancers with thick hair, I recommend teasing each section before pulling it outward—this creates more dramatic volume in each bubble.
Why it’s fun and secure
In reality, the bubble ponytail offers several advantages for competitions. The multiple elastics distribute tension throughout your hair, preventing that painful pulling sensation during long performance days. Furthermore, each bubble section supports the ones around it, creating a structurally sound style that withstands jumps and turns.
I’ve watched countless dancers shine in contemporary and jazz routines with this style—the bubbles accentuate movement beautifully while staying perfectly in place. For younger dancers especially, this style feels playful yet looks polished enough for serious competitions.
Belle’s tip for bubble spacing
My signature technique involves strategic spacing between elastics. Immediately after creating your base ponytail, I recommend placing elastics slightly closer together near your head (about 1.5 inches apart), then gradually increasing distance (to about 2-3 inches) as you move downward.
To perfect each bubble, always pull outward from all directions—top, bottom, and sides. On the whole, this creates that beautifully rounded shape judges notice. For extra security, wrap small sections of hair around each elastic to hide them completely.
Slicked Back Bun with Part
The elegant center-part slick bun has saved countless performances for my dancers facing intense competition days. Undoubtedly, this sophisticated style strikes the perfect balance between traditional technique and modern polish that judges instantly recognize.
Creating a center-part slick bun
The secret to a flawless center-part slick bun starts with proper preparation. First and foremost, work with hair that isn’t squeaky clean—day-old hair provides natural grip that fresh hair lacks. Here’s my foolproof method:
- Begin with a clean center part using a tail comb from forehead to nape
- Apply gel liberally throughout the hair—it should look almost wet
- Comb downward toward the ears then back rather than straight back to avoid an “egg-head” appearance
- Eliminate every bump using a fine-tooth comb rather than a brush
- Gather hair into a low ponytail, positioning it with enough room for the bun
- Twist the ponytail while simultaneously wrapping it around the base
- Secure with U-shaped bun pins rather than bobby pins
- Add a hair net in your color, wrapping it around the bun multiple times
For dancers with flyaways, I recommend spraying hairspray directly onto a clean toothbrush and gently brushing those stubborn baby hairs into submission.
Why it scores high in appearance
Center-part slick buns consistently impress judges primarily because they create clean lines that complement facial structure. In particular, this style demonstrates respect for traditional dance forms while providing complete visibility of facial expressions.
The positioning matters tremendously—keeping the bun low enough to create a beautiful line from the nape up through the crown. Additionally, this placement allows judges to see proper head alignment during technical elements.
Belle’s favorite gel combo
My competition emergency kit always includes Garnier’s Pure Clean hair gel—lightweight yet providing remarkable hold that lasts all day. For stubborn flyaways, I layer a small amount of R+Co’s Wall Street Strong Hold Gel, which contains nourishing ingredients like Vitamin A and glycerine that prevent the dreaded crunchy, flaky finish.
The application technique matters as much as the products themselves. I apply gel in layers—first to slick the hair back, then a second light application after securing the bun. Occasionally, for extra security during particularly energetic routines, I’ll finish with a light mist of flexible-hold hairspray applied from a distance to prevent stiffness.
Conclusion
After years of backstage hair emergencies and mid-routine fixes, I’ve learned that the perfect dance competition hairstyle combines both security and style. Throughout this article, we’ve explored options ranging from classic ballet buns to trendy bubble ponytails—each serving specific performance needs while ensuring your hair stays flawlessly in place.
Finding your perfect competition hairstyle depends on several factors. First, consider your dance style—classical ballet typically demands sleek buns, whereas contemporary allows for more creative options like half-up braided styles. Second, think about your hair type and length—thicker hair may require additional pinning techniques, while fine hair benefits from texturizing products for added grip.
My personal experience has taught me that preparation makes all the difference. Therefore, I always recommend practicing your competition style at least once before the big day. This trial run helps identify potential weak spots and ensures you’ll have enough time for adjustments.
Remember that stage lighting magnifies every detail, so precision matters tremendously. Even though achieving that perfect competition-ready look might take extra time initially, the confidence you’ll feel knowing your hair will stay put through every leap and turn is absolutely worth it!
Most importantly, the right hairstyle should enhance your performance rather than distract from it. A secure style allows you to focus completely on your dancing without worrying about flyaways or shifting pins.
Whether you choose a sleek French braid or an elaborate crown bun, these tested techniques will help you shine on stage. Undoubtedly, your perfect competition hairstyle awaits among these options—ready to complement your costume, showcase your technique, and help you dance with complete confidence.
Which of these competition hairstyles will you try for your next performance? My emergency kit with clear elastics, matching bobby pins, and trusty hairspray stands ready—just as yours should too